- Visit the FDU Office 365 Portal using any web browser
- Sign in to the FDU Single-Sign-On (SSO) page using your FDU NetID credentials
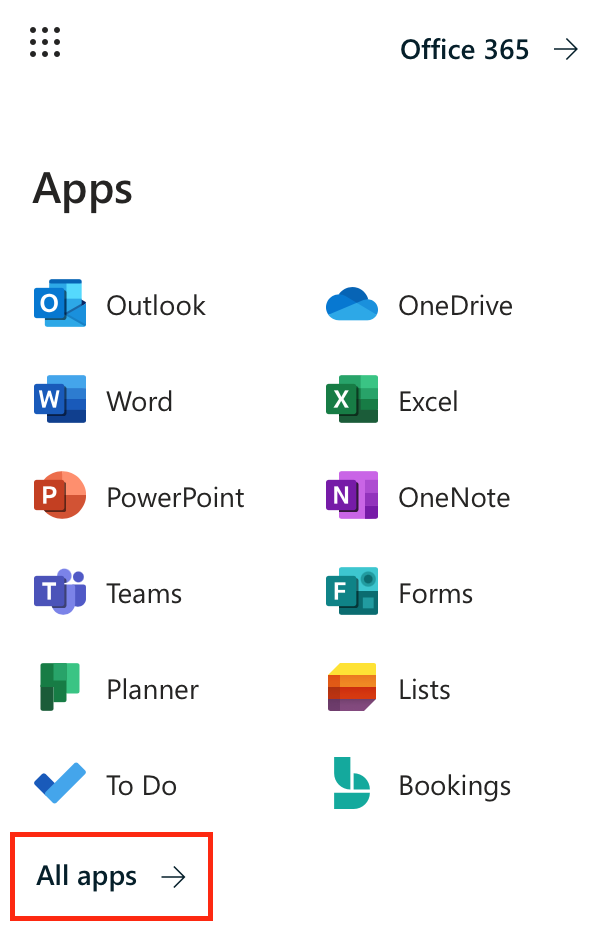
- In the upper left corner, click the dotted square and select All Apps
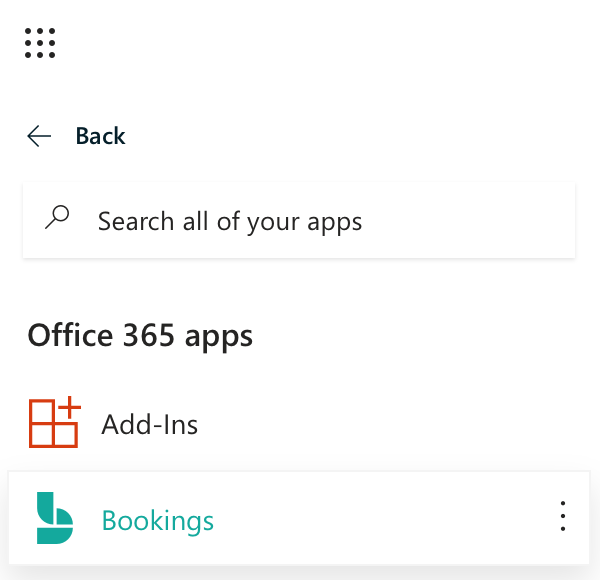
- In the All Apps menu, choose Bookings
- Microsoft Bookings will open. Click the Get it Now button to begin

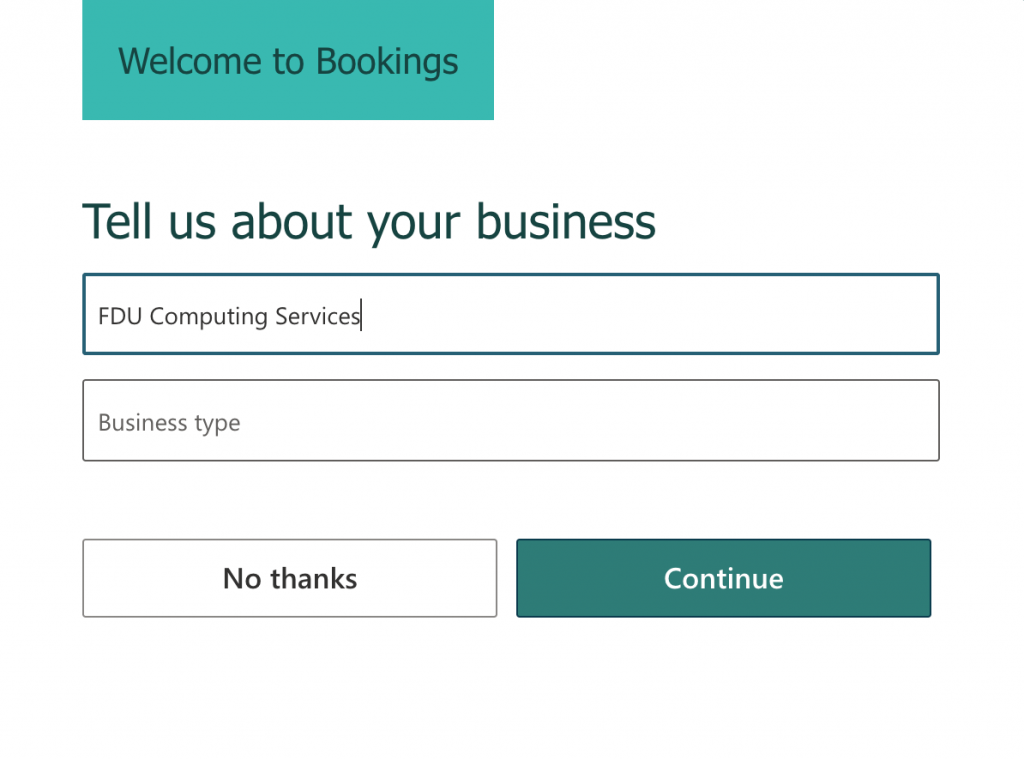
- The next page will ask for two pieces of information: Business name and Business type. Enter your Department name or your First and Last Name. Click Continue
Note
Designating a Business Type is not required to be able to Continue.
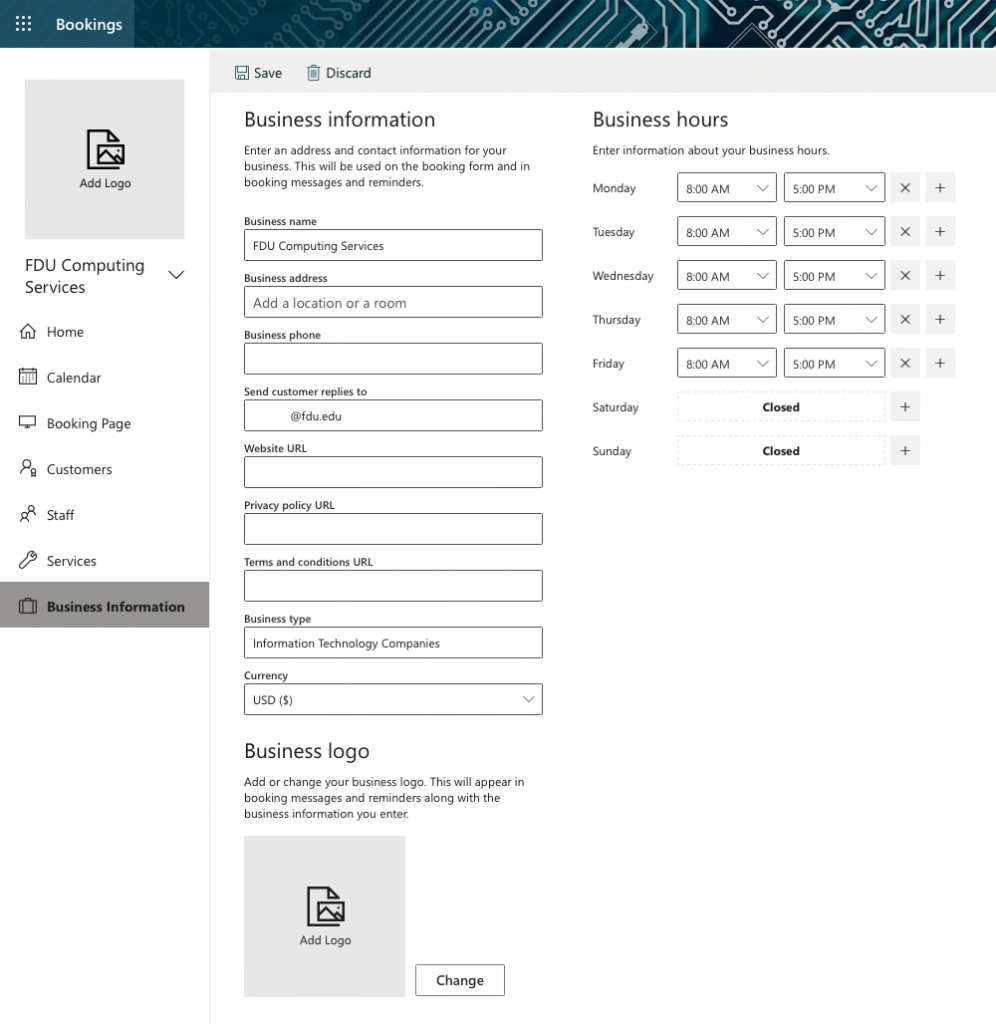
- Once your Bookings page loads, the first section you should complete is Business Information. Click Business Information in the left menu

- On the Business Information page, you can enter your business or department address, other contact information, upload a business logo, and set up your business hours
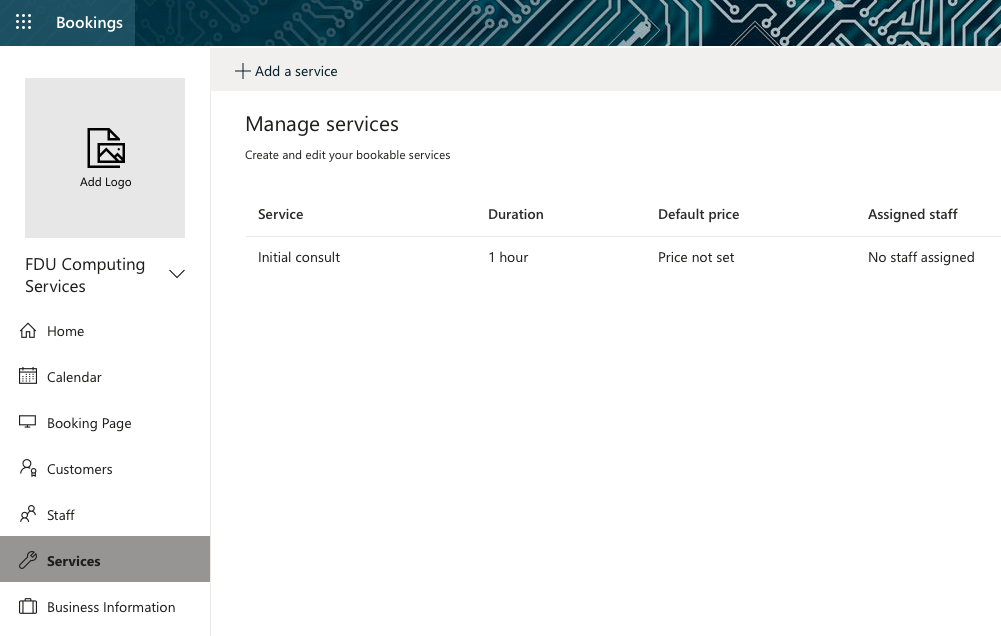
- Next, set up your service offerings. Click Services from the left menu
Note
By default, Microsoft Bookings will add a service called “Initial Consult.” You can click the pencil next to this service and make it your own, OR you can add a new service by clicking Add a service at the top of the screen.
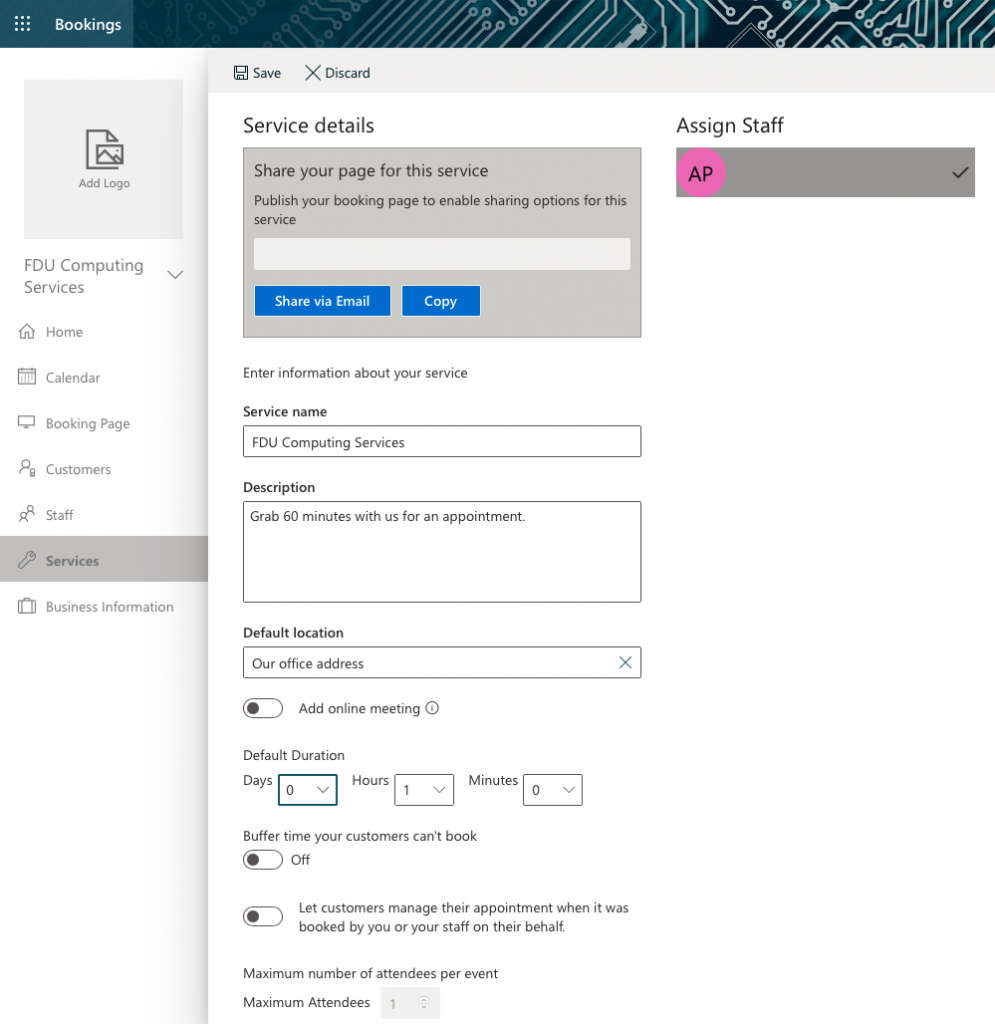
- Once you’re on the service-editing page, enter your service details, including name, description, and location. When you start typing an address in the default location, suggested locations will populate. Below are explanations for the other fields on the service-editing screen:
- Duration: You can enter how long you want the duration to last in days, hours, minutes, and set a buffer time when customers cannot book.
- Reminders: You can have the system send customers email reminders before their scheduled appointment. Click the pencil to edit the text.
- Leave Publishing options checked.
- Online Scheduling Options: This is where you can manage the settings for when customers can book services.
- You can choose to use the default scheduling policy by leaving the option checked, OR
- You can manage the settings for your scheduling policy by unchecking the option. If you choose this option, we recommend setting the Minimum lead time to 24 and the maximum lead time to 30 days.
- Don’t forget to click Save at the top of the Service details page
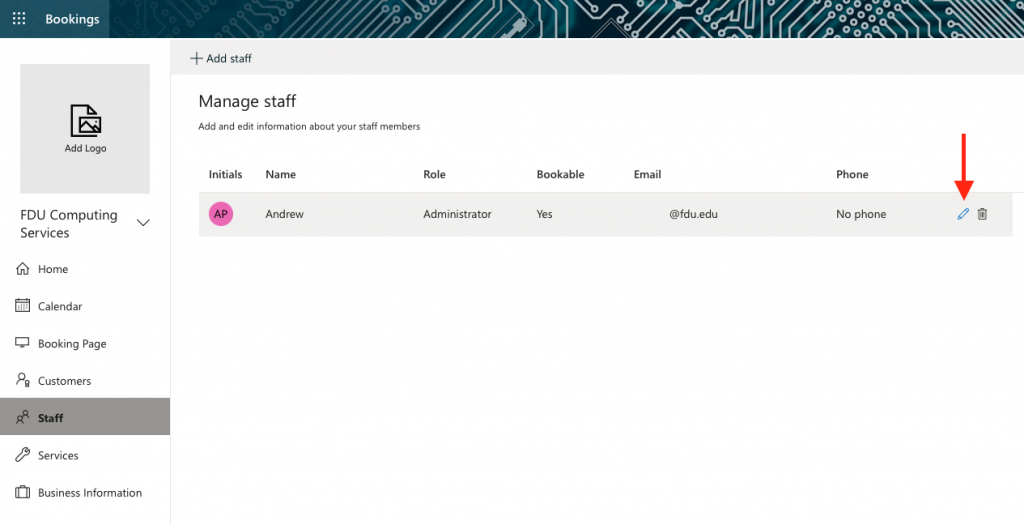
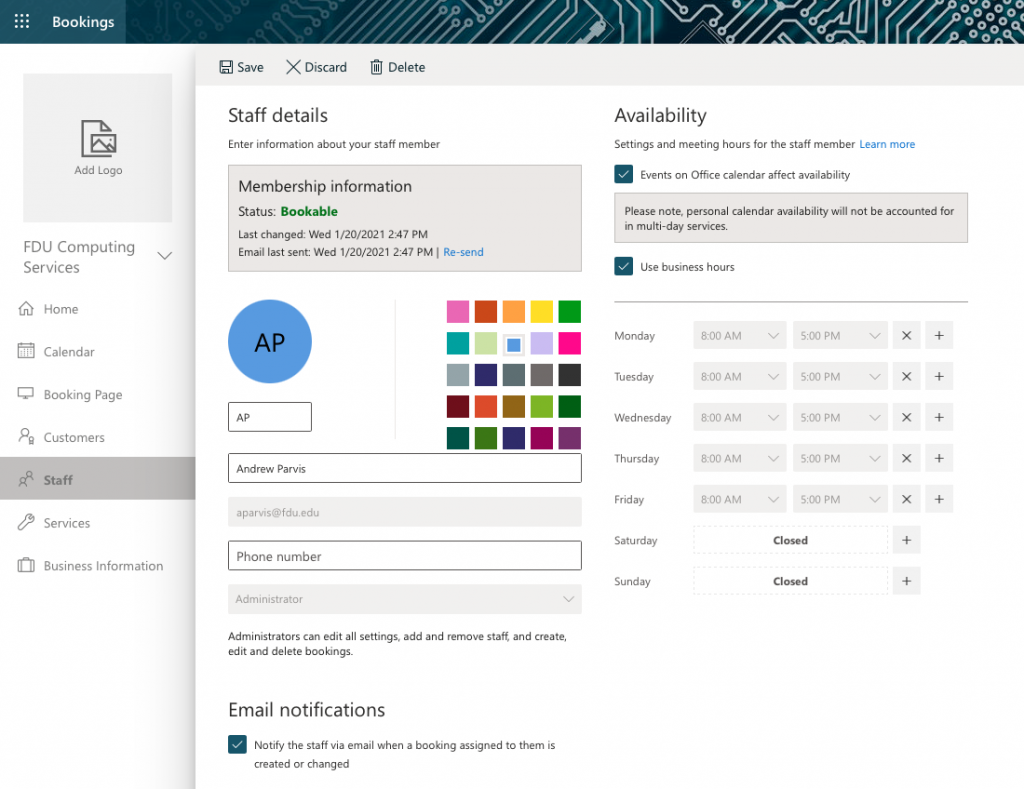
- Next, click Staff from the left menu. Click the pencil next to your name to edit your information. Also, you may add any staff or faculty members in your department by clicking the + Add staff button
- On this page, you can add information about yourself, including your office or department phone number and whether to receive email notifications (we recommend keeping this option checked). Click Save when finished
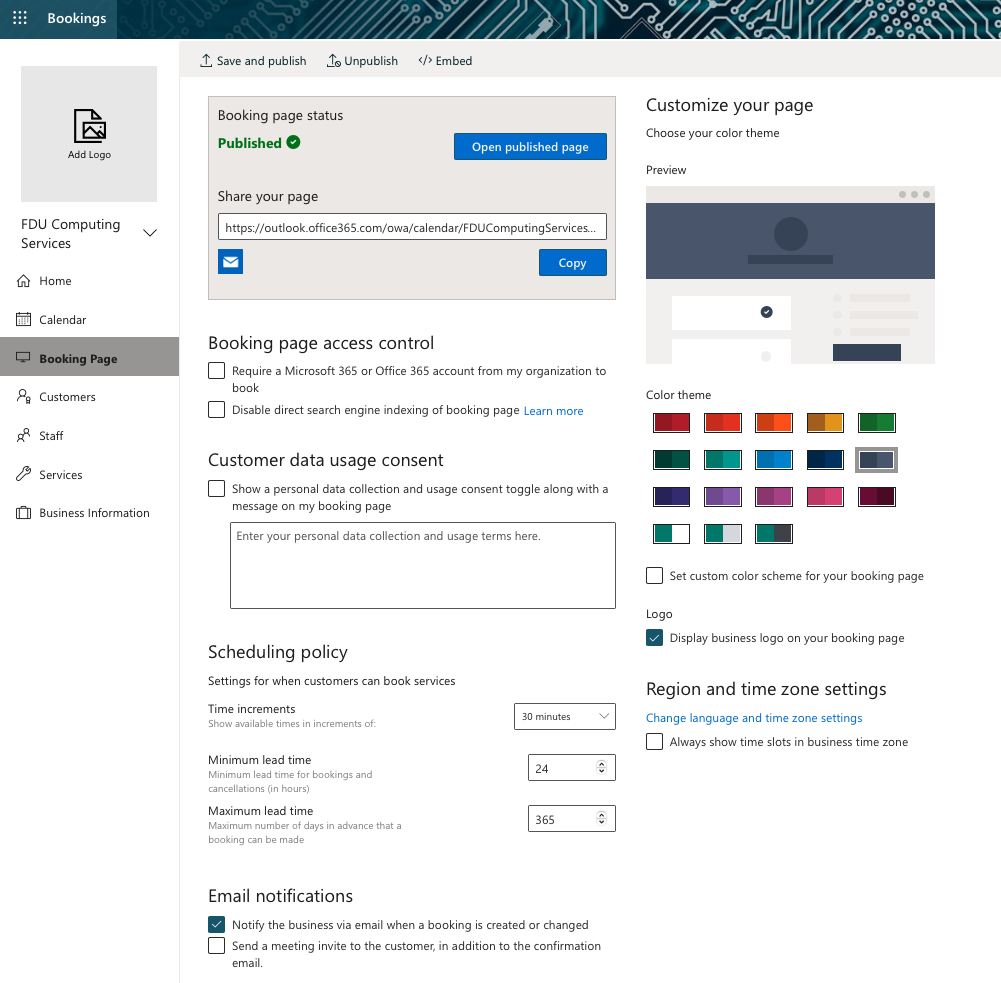
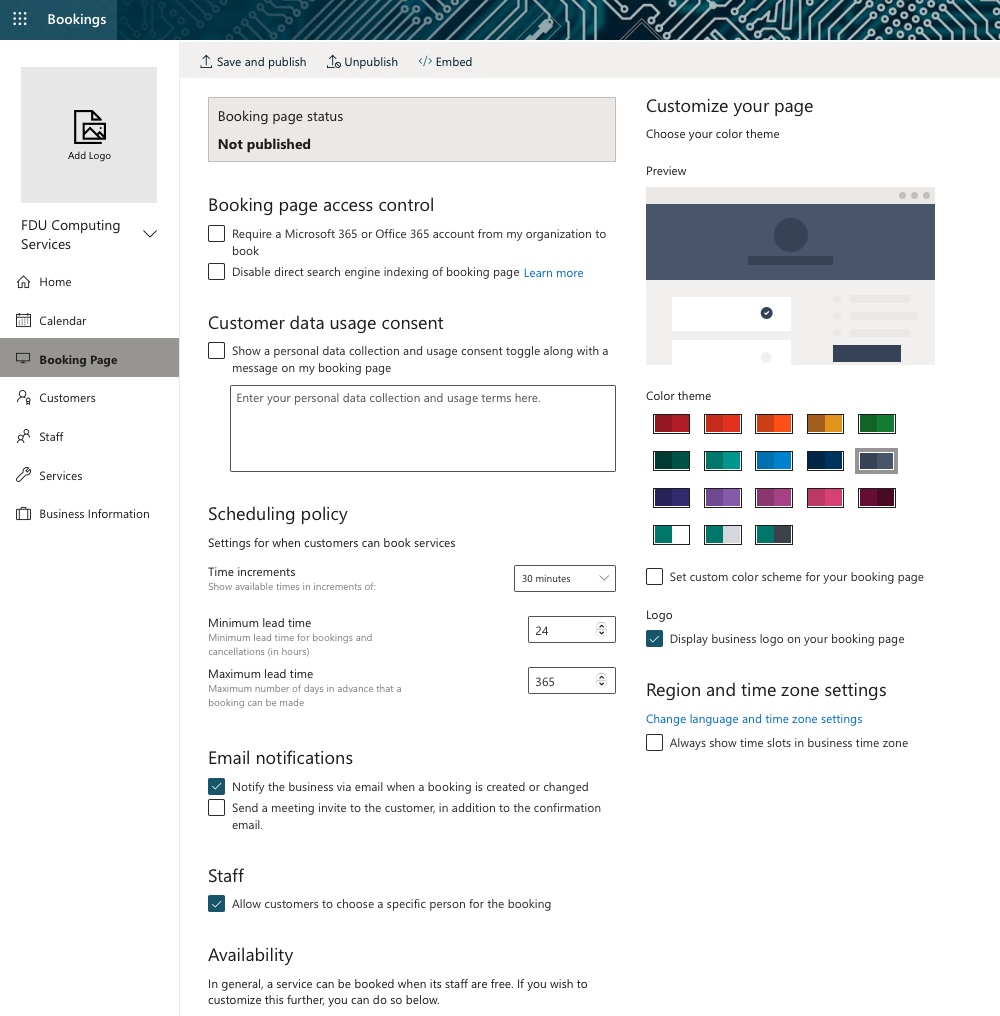
- Next, select Booking page from the left navigation pane.
- Booking page Status: Since this is the first time you are setting up your Bookings page, your status is set to Not published. Once you finish customizing your page and clicking Save, the status will change to Published.
- Customer data usage consent (optional): Where you can customize a message for your visitors to consent to your site collecting their personal data.
- Scheduling Policy: Where you can set site-wide scheduling policies. We recommend the following settings:
- Minimum lead time: 24
- Maximum lead time: 30
- Email Notifications: Notifies you when an appointment is made.
- Staff: You can allow customers to choose who they want to meet with. However, you can uncheck this option if you do not have any staff.
- Customize your page: Choose a color theme for your bookings page.
- Lastly, click Save and Publish
- Once you click Save and publish, your Bookings site is now live! You can view your published page by clicking Open published page and share your page with others by copying the link
