Management Information Systems operates to provide the University community with technical support for, and assistance in, all administrative functions using various software applications. We disseminate timely and accurate information to the University community, serving campuses both local and abroad as well as user maintenance and reporting capability by working closely with system end-users to define, design, and implement solutions to help realize our common goal to provide excellence in the achievement of a global education.
COLLEAGUE uses single sign-on protocol for users to login. The login or user ID consists of the first part of the FDU NetID up until the @ sign in the NetID.
For instance, if your NetID webmail address is john.q.public@fdu.edu your COLLEAGUE login ID would be “john.q.public“
The password would be the exact same one that you use with your FDU NetID.
Revised: May 1, 2025 Last Revised: February 1, 2024 Prior Revision: February 1, 2024
1. POLICY STATEMENT
FDU has implemented the FDU Alert system to expand and enhance its emergency notification methods. In the event of an emergency, FDU Alert may be used to provide pertinent information and instructions to FDU students, faculty and staff through voice, text messaging and/or E-mail. FDU Alert uses a mass notification system that sends emergency messages instantly and simultaneously to registered mobile phones, wireless devices and E-mail addresses.
Reason For Policy
This policy establishes the proper use and testing of the FDU Alert Emergency Notification System (FDU Alert).
Who Should Read This Policy
Members of the University Community including Students, Faculty, Staff, as well as all other individuals who have been registered to receive FDU Alert emergency notifications.
Website Address For This Policy
The website for this policy as well as other related FDU Alert information can be found at the following URL or by clicking on Web Shortcuts on the top right of the FDU Homepage.
These definitions apply to these terms as they are used in this policy.
Emergency
A sudden unforeseen crisis, usually involving danger, which requires immediate action.
FDU Alert System
The University’s emergency notification system is designed to alert, warn and inform registered members of the University Community of what to do in case of an emergency, a disaster, a crisis or any other situation that affects the FDU community. For example, receiving these alerts and messages could keep you from driving to campus only to find that a power failure has closed the campus.
FDU Alert Authorizer
Individual who has the authority to assess an emergency and activate the FDU Alert Emergency Notification System; this individual is authorized to contact an authorized Sender.
FDU Alert Sender
Individual who has been trained and is authorized to facilitate the actual sending of an Emergency Notification message.
Crisis
An unstable event or situation of extreme danger or difficulty, which is often sudden or unexpected, that disrupts the normal operations of the institution or its educational mission and threatens the well-being of personnel, property, financial resources and/or the reputation of the institution.
Timely Warning
Refers to the need to provide timely notification to the University Community after it is determined there is a credible threat to campus persons or property or when information is considered vital to the University community.
SMS
Refers to the Text Messaging method of FDU Alert delivery.
FDU Alert Spokesperson
An individual may be identified to respond to, and act as University spokesperson, to inquiries by students, faculty, staff, parents and others about an FDU Alert. Inquiries may be forwarded to the FDU Alert Spokesperson via the special call forwarding alert hotline.
3. OVERVIEW
Any time that an emergency situation arises, either on campus or in the immediate area of the campus, that in the judgment of an FDU Alert Authorizer poses an ongoing or continuing threat to the campus community, a campus “Timely Warning” will be issued. This warning may be issued through the FDU Alert system by one, all, or a combination of the following delivery methods.
Voice mail or telephone notification
E-mail
Posted on the University website
Posted notices
Public address announcements
Direct contact with individuals
Whenever possible, the FDU Alert Authorizer will consult with the University Director or Associate Director of Public Safety or another Authorizer prior to using FDU Alert messaging capabilities.
In an emergency, and upon activation by Authorizers and Senders, FDU Alert will send notifications to registered individuals at one, some, or all of the following registered points of delivery.
Work Phone
FDU E-mail
Cell Phone
SMS (Text Message)
Alternate E-mail
Home Phone
Parent/Significant Other E-mail
Parent/Significant Other Phone
Parent/Significant Other SMS (Text Message)
Parent/Significant Other Cell Phone
To provide the safest possible environment for students, faculty, staff, and visitors to FDU campuses, the University will strive to provide timely, reliable notifications by all possible means in the event of emergency. Generally, an emergency is any incident that involves the possibility of death, serious injury, or the threat of death or serious injury to people, or to University facilities, materials or property.
Fairleigh Dickinson University uses a variety of methods to provide emergency and safety information, including mass notification systems, web pages, door-to-door assistance from on-site staff and Residence Hall assistants, over-the-air broadcasts, and a consolidated communications system. Collectively, these capabilities are called “FDU-Alert“.*
The communication system permits broadcast messages to be sent quickly as voice calls to office, local home, or cell phones, and as text messages to cell phones or University and external E-mail accounts. This system will be used to announce and provide guidance in an emergency or crisis and to communicate relevant critical updates.
If an emergency occurs near but not on an FDU campus, and in other situations in which emergency responders determine and report that no apparent or imminent threat to that campus exists, an advisory may be posted on informational web sites, E-mails, or text messages only. In these cases, you may not receive an emergency notification directly to your phone.
University administration or individual campuses may, as an authorizer deems appropriate, use the communications system for other urgent messages related to administration or operation, such as campus closings due to adverse weather, unusual situations, or utility outages.
*More information about these services, as well as current emergency status or preparedness information for FDU, is planned for availability on the University’s emergency preparedness website once established.
4. POLICY
Proper Use of FDU Alert
FDU Alert is offered not to replace but to augment existing emergency notification methods, which include: University-wide broadcast E-mails, online updates via web and coordinated use of public media outlets, fire alarms, public address systems, and signs.
Any time that a serious situation arises either on campus or in the immediate area of the campus that in the judgment of the University Director or Associate Director of Public Safety, and whenever possible, in consultation with other members of the UEMT as applicable, poses an ongoing or continuing threat to the campus community, a campus “Timely Warning” will be issued. This warning may be issued through the FDU Alert system, voice mail or telephone notification, E-mail, posted on the University website, posted notices, public address announcements, and direct contact with individuals.
If, in the opinion of the local law enforcement authority, a message would hinder the police response or investigation and the local law enforcement authority has requested that we not send out a message, no message may be sent without the specific authorization of the President, or FDU legal counsel.
Limited Use of FDU Alert
Although the use of other emergency notification method(s) will be determined on a case-by-case basis, FDU Alert should only be used in the following situations:
an imminent threat of physical danger to the campus community;
a campus closure; and
certain Campus Crime Alerts as determined by Public Safety;
off-campus events that could impact health, safety, life or access to a campus.
The above situations can include but are not limited to ongoing criminal incidents, fires, chemical leaks, pandemics, campus-wide utility failures (such as gas, electrical, or water), and extreme weather conditions that result in a campus closure (e.g. snow/ice storms) or pose an imminent threat of physical danger to the campus community (e.g. tornado within close proximity to campus).
FDU Alert Authorizers
Only the people in the following positions have the authority to activate the FDU Alert emergency message system and author an appropriate message:
President of the University
University Provost & Senior Vice President for Academic Affairs
Senior Vice President for Finance & Administration
Campus Executives
Deputy Campus Executive, Metropolitan Campus
Associate Vice President for Communications
Executive Director of Communications and News
Director of Public Safety, Florham Campus
Assistant Director, Public Safety, Florham Campus
Director of Public Safety, Metropolitan Campus
Campus Investigator, Public Safety, Metropolitan Campus
Campus Executive, Vancouver Campus
Business Manager, Vancouver Campus
FDU Alert Authorizers (“Authorizers”) have the authority to activate the system without consulting other Authorizers; however, when circumstances permit, an Authorizer should consult with at least one other Authorizer before sending a message.
FDU Alert Authorizer Responsibilities
Responsibility of Creating FDU Alert Messages
Authorizers have the responsibility to write and disseminate the appropriate message to be sent by Sender. For consistency, simplicity, and to minimize confusion, whenever possible, the Authorizer should base the message on one of the sample alert messages included in the Standard Operating Procedures manual.
This responsibility carries forward to writing and disseminating subsequent messages that must be sent to keep the recipients apprised of the status of the emergency event through to the conclusion of the emergency event with the transmission of an “All Clear-Resume Normal Schedule” message.
In the event more than thirty (30) minutes has passed while an emergency event is in progress, and there is no new information to communicate, the Authorizer should write a message(s) stating that the status of the emergency event remains the same, e.g., “Investigation continues, will communicate updates as new information becomes available.”
Messages should be written to support text to speech. Minimum or preferably no use of abbreviations and acronyms should be used. All messages must include an appropriate lead-in, for example, “!!FDU Florham Emergency Alert!!,” which includes where appropriate, the campus affected. Examples of these lead-in statements are included with the sample messages in the FDU Alert Confidential Operations Manual.
Responsibility of Authorizer to Prepare Additional Information
Alert Notifications and Updates Published via the FDU Website
Detailed messages and updates regarding the FDU Alert can also be made available on the University Website. Should it be necessary or appropriate to post additional information on the FDU website, it is the responsibility of the Authorizer to work with the Vice President for Communications or designee, to prepare and post the information on the University website in a timely manner. As this information will have wide and general exposure, it is critical to ensure that the information is current, correct, adequate, and consistent with the University messaging strategy.
It is the responsibility of the Authorizer, or designee as assigned by the Authorizer and the Vice President for Communications or designee, to keep vigil over the messaging to ensure accuracy and timeliness and message removal upon event termination.
FDU Alert Spokesperson to Other Inquiries
FDU Alerts will stimulate telephone inquiries to the switchboard, Residence Life, Public Safety, Enrollment Services & other key offices. Callers should be directed to the University mailbox for announcements and updates. In the unusual event where it is determined to be necessary to have a Spokesperson available for call handling, callers will be directed to a special hotline with ultra-call forwarding setup to transfer to the FDU Alert Spokesperson.
The FDU Alert Spokesperson is an individual identified by the FDU emergency response teams to respond to inquiries by students, faculty, staff, parents, and others about an FDU Alert. Inquiries will be forwarded via the special call forwarding alert hotline.
The following are attributes for The FDU Alert Spokesperson:
Must provide contact information (and back up) to the switchboard and emergency management teams
Must be available to take calls continuously throughout the emergency*
Must be aware of the event and current activities and commentable actions
Must be media aware
Must have the power to speak to the event with autonomy and authority
*A special phone number with Remote Call Forwarding will be utilized for this purpose.
Emergency Event Status Reports on the FDU Website
The FDU Website Homepage provides an FDU Alert Icon under Web Shortcuts that links to a dedicated webpage containing information on the current status of the University’s operations. As referenced above in Section 4.3.1.3, in the event there is an emergency, the Authorizer will work with the Vice President for Communications or designee to prepare and post a message providing current information concerning the emergency event and the status of the University’s operations, which will be posted on the website.
FDU Alert Senders
FDU Alert Senders (“Senders”), upon the request of Authorizer(s), have the authority to activate the system, enter messages under the direction of the FDU Alert Authorizer(s), and initiate the send message process. All FDU Alert Senders are provided with appropriate access to the secured FDU Alert emergency notification system and necessary training.
Sender names and contact information are included in the FDU Alert Operations Manual.
FDU Alert SendersResponsibilities
Senders are required to respond to Authorizer requests to facilitate the timely activation of the FDU Alert System. Senders acknowledge that time may be of the essence and will fulfill the request or immediately notify another Sender to fulfill the request. The transfer of such transfer of control requires Authorizer and/or emergency response team acknowledgment.
FDU Alert Senders will advise the FDU Alert Authorizer(s) when the message send process has been initiated and the sender can confirm delivery of such messaging.
Message Content
Any message sent using FDU Alert should be as brief as possible and should, if appropriate, typically contain the following information:
The reason for the message;
Any response required;
Location (campus) of event;
The duration of the emergency and any relevant dates and times;
Methods to obtain further information; and
When circumstances permit, before sending a message, Authorized Senders should consult with the relevant University administrator(s) regarding message content.
While brevity and abbreviations will reduce a message size, care must be taken to ensure that all messages are brief, concise, accurate, and understandable. Sample messages are included in the FDU Alert Confidential Operations Manual.
After Message Review
After a message is sent using FDU ALERT, the Authorized Senders and the University Emergency Management Team will meet as appropriate to discuss the emergency, the results of the alert, and compliance with the FDU Alert Policy.
FDU Alert System Testing
System Wide Delivery Testing
Once every Fall and Spring semester, a live test of the FDU Alert system will be conducted. During the test, one or more messages will be transmitted to every individual registered in the system using every delivery method for each point of contact (phone, e-mail, SMS, etc.) The FDU Alert message(s) sent during the test will clearly state “THIS IS A TEST,” so that it is clear that there is no actual emergency.
FDU Alert Senders
At least once per calendar month, FDU Alert senders will test the FDU Alert system by sending themselves a test message. The message sent during this test will clearly state “THIS IS A TEST BY AUTHORIZED SENDER,” so that it is clear that there is no actual emergency
Service Provisioning
Regular Reminders to University Community to Register/Update FDU Alert Individual Database Record
The effectiveness of any alert system depends upon the accuracy of the contact information in its database. All students, faculty, and staff will therefore receive notices/reminders prior to the semester’s scheduled test to review/update their emergency contact information. Emergency contact information can be modified at any time by logging onto Self-Service.
5. EMERGENCY LEVELS AND INSTITUTIONAL MESSAGING GOVERNANCE
The following are three levels of emergencies and suggested methods of communications and notifications for each. No other use of this FDU Alert System is permitted.
Level 1 Emergency – Informational
Circumstance:
incident has occurred
incident is contained and/or well defined
continuing activity/investigation
caution conditions exists
timely follow up communications required
Examples include:
natural disaster
aircraft crash, or similar event, near campus
major structural collapse
snow closings
elevator accident
must know information – (e.g. “Because of bad weather the University will close at…” and “An electrical cable to the SUB has been damaged and electrical power will not be restored until…”)
The “Authorizer” should use the following formats: E-mail/WWW/Text Messaging/Posted Notices/Public Address Announcements. Based on the event and any unusual circumstances, voice messaging may be used at the “Authorizer’s” discretion…
Level 2 Emergency – Life and Safety Alert
Circumstance:
incident has occurred and/or is continuing
incident is contained but may be extensive
cautions exist
continuing/on-going activity/investigation
timely follow up communications required
Examples include:
bomb threat
contained/small scale explosion/fire
act of violence on campus
fire confined to an area
contained/small hazardous material spill or release
buildings without electricity, heat or water
major building flooding
The “Authorizer” should use the following formats: E-mail/WWW/Text Messaging/Posted Notices/Public Address Announcements/Direct Contact with Individuals as necessary.
Level 3 Emergency – Imminent Life or Safety Alert – Immediate Action Required
Circumstance:
incident has occurred and/or is continuing
scope of incident may be undefined
alert action required
cautions exist
continuing/On-going activity/investigation
time is of the essence follow up communications
Examples include:
evacuations
on-going violent campus demonstrations
intruder alerts
radiological incident
contained or uncontained hazmat/hazardous material spill or release
large explosion/fire
aircraft crash, or similar event, on campus
acts of terrorism
confirmed explosives devices
The “Authorizer” should use all available formats: Voice Message/Voice Mail/E-mail/WWW/Text Messaging/Posted Notices/Public Address Announcements/Direct Contact with Individuals as necessary
No other use of this FDU Alert System is permitted.
The Confidential Operations Manual is provided to all members of the University Emergency Management Team. The following information will be included in the Confidential Operations Manual.
Notification Process
FDU Alert Authorizer Contact List
FDU Alert Sender Contact List
Recipient Groups
FDU Alert Activation Options Screen
Sample Messages
Neal Sturm Vice President and CIO sturm@fdu.edu
Gail Lemaire Office of Risk Management gail_lemaire@fdu.edu
FredGPT (FDU Responsive Educational Database) is FDU’s AI solution, currently available to faculty and staff only. FredGPT features a General Assistant for daily tasks, and the FDU Assistant, a specialized assistant focused on Fairleigh Dickinson University information.
Note
FredGPT is now live and available for community use, though fine-tuning is still underway. If you encounter any issues while using either assistant, use the built-in feedback tool referenced in Section 4 instead of submitting a SAMI ticket at this time.
For additional content on leveraging AI for your daily use, please visit the FDU Center for Artificial Intelligence.
The General Assistant is designed to assist with a wide range of daily tasks including writing, research, and problem-solving. Its broad knowledge base can help navigate complex issues, create teaching materials, and refine or organize your content. You can choose between two Large Language Models (LLMs) when using any of the assistants. The General Assistant does not have internet search capabilities, so its knowledge is limited to information from before June 2024.
The FDU Assistant is designed to provide comprehensive, trustworthy, and Fairleigh Dickinson University specific information to support faculty, staff, and leadership. It draws on resources from fdu.edu and it.fdu.edu, ensuring accurate and up-to-date responses to a wide range of topics, including admissions, academic programs, financial aid, campus life, and technical resources.
With a broad range of expertise, the FDU Assistant offers direct and well-reasoned answers, aligning with enterprise-level strategies and policies at FDU.
Now that you’ve experienced the dynamic assistance of FredGPT firsthand, please remember that your feedback is essential. As you prompt, take a moment to provide feedback on the responses. Your comments will help the FredGPT team learn more detail about the effectiveness of the interactions and potentially improve future conversations.
Support Requests
Do not open a SAMI ticket based on your interactions with either assistant. Use the feedback tool featured in FredGPT.
Review the video below to learn how to share feedback.
A Large Language Model (LLM) is an artificial intelligence system trained on vast amounts of text data to generate human-like responses. FredGPT offers access to two LLMs: Llama 4 Scout and GPT-OSS.
Each LLM has its own strengths and characteristics, shaped by factors such as training data, model architecture, and fine-tuning objectives. As a result, their responses may differ, providing users with unique perspectives and performance profiles.
Llama 4 Scout – trained on diverse sources with a knowledge cutoff of December 2023.
GPT-OSS – trained on a separate corpus with a knowledge cutoff of June 2024.
Feature / Use Case
Llama 4 Scout
GPT-OSS
General Writing & Conversation
Strong conversational model, excellent for speed, brief responses, and assisting with daily tasks
Excellent for smooth, natural conversation and detailed written responses.
Reasoning & Problem Solving
Good reasoning, but sometimes less consistent on multi-step logical chains.
Very strong logical reasoning and explanation skills — ideal for analysis, summaries, and academic-style tasks.
Creativity
Also capable but tends to produce shorter or simpler creative outputs.
Excels at brainstorming, storytelling, and drafting long creative text with structure.
Image Analysis
Can analyze, describe, and interpret images. (e.g., screenshots, photos, diagrams)
Cannot interpret or analyze images.
Data-Driven Tasks
Good, but sometimes less precise formatting.
Strong at working with tables, structured text, and mock data analysis.
Best For
Visual explanations based on screenshots, assisting with daily tasks, and brief writing.
More complex writing, analysis, teaching, administrative chat, documentation, and technical summaries.
Review the video below which will show you how to toggle between offered LLMs.
Use the General Assistant for anything not tied to campus‑specific data. Switch to the FDU Assistant whenever you need information that is unique to FDU.
What kind of prompts work best?
State the desired tone (formal, friendly, concise)
Set clear boundaries (word count, “only” focus)
Use capitalization to emphasize key terms
Indicate whether you need a condensed or expanded response
Can FredGPT solve complex math problems?
FredGPT is primarily language‑focused. It can handle simple arithmetic and explain concepts, but it is less reliable for advanced calculations or symbolic math. As with all GenAI prodcuts, remember to check the output from your prompt for accuracy.
How accurate is the information from the FDU Assistant?
The FDU Assistant references fdu.edu and it.fdu.edu to generate responses, and is accurate based on the information available on those two sites.
What should I do if the response is incomplete or off‑topic?
Proofread the answer and note what’s missing
Resubmit a clarified prompt, adding constraints or examples
Use the feedback buttons (thumbs‑up/thumbs‑down) and, if desired, leave a comment so the system can improve
Is there a limit to how many prompts I can send?
There is no hard daily limit for individual users but excessive querying may be throttled to ensure fair access across the community.
How is my data handled?
Queries are processed anonymously to generate responses. No personally identifiable information is retained beyond what is required for session continuity, and all data handling complies with FDU’s privacy policies.
How can I give feedback on FredGPT’s performance?
After each response, click the thumbs‑up or thumbs‑down icon. If you choose thumbs‑down, you can add a short comment describing the issue (e.g., “Incorrect deadline,” “Tone too informal”). It is also extremely helpful when providing feedback to provide a link to the correct information. This feedback helps the development team refine both assistants.
If a student has granted you proxy access to Self-Service, you can create a proxy account and use it to view the information the student has shared with you.
Before you begin, have the Proxy User Invitation email and Invitation Code ready. You will register as a proxy, sign in, complete multifactor verification, and select the student’s profile.
Step 1: Start Proxy Registration
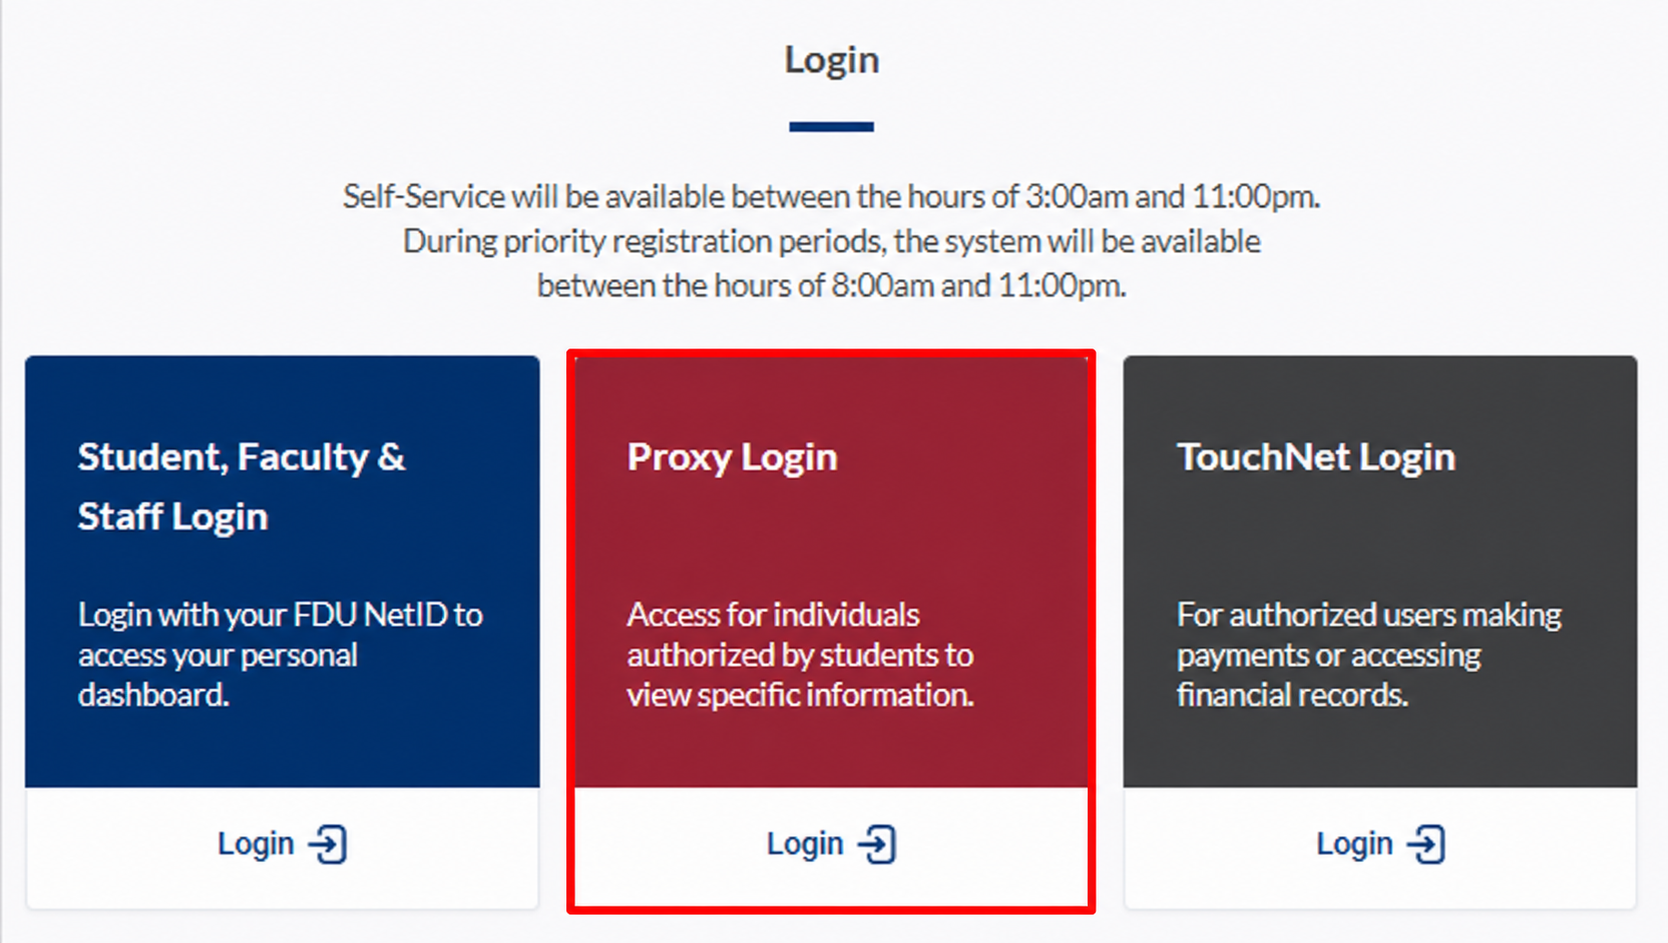
After you receive a Proxy User Invitation email, go to selfservice.fdu.edu and click “Proxy Login”
Step 2: Create Your Proxy Account
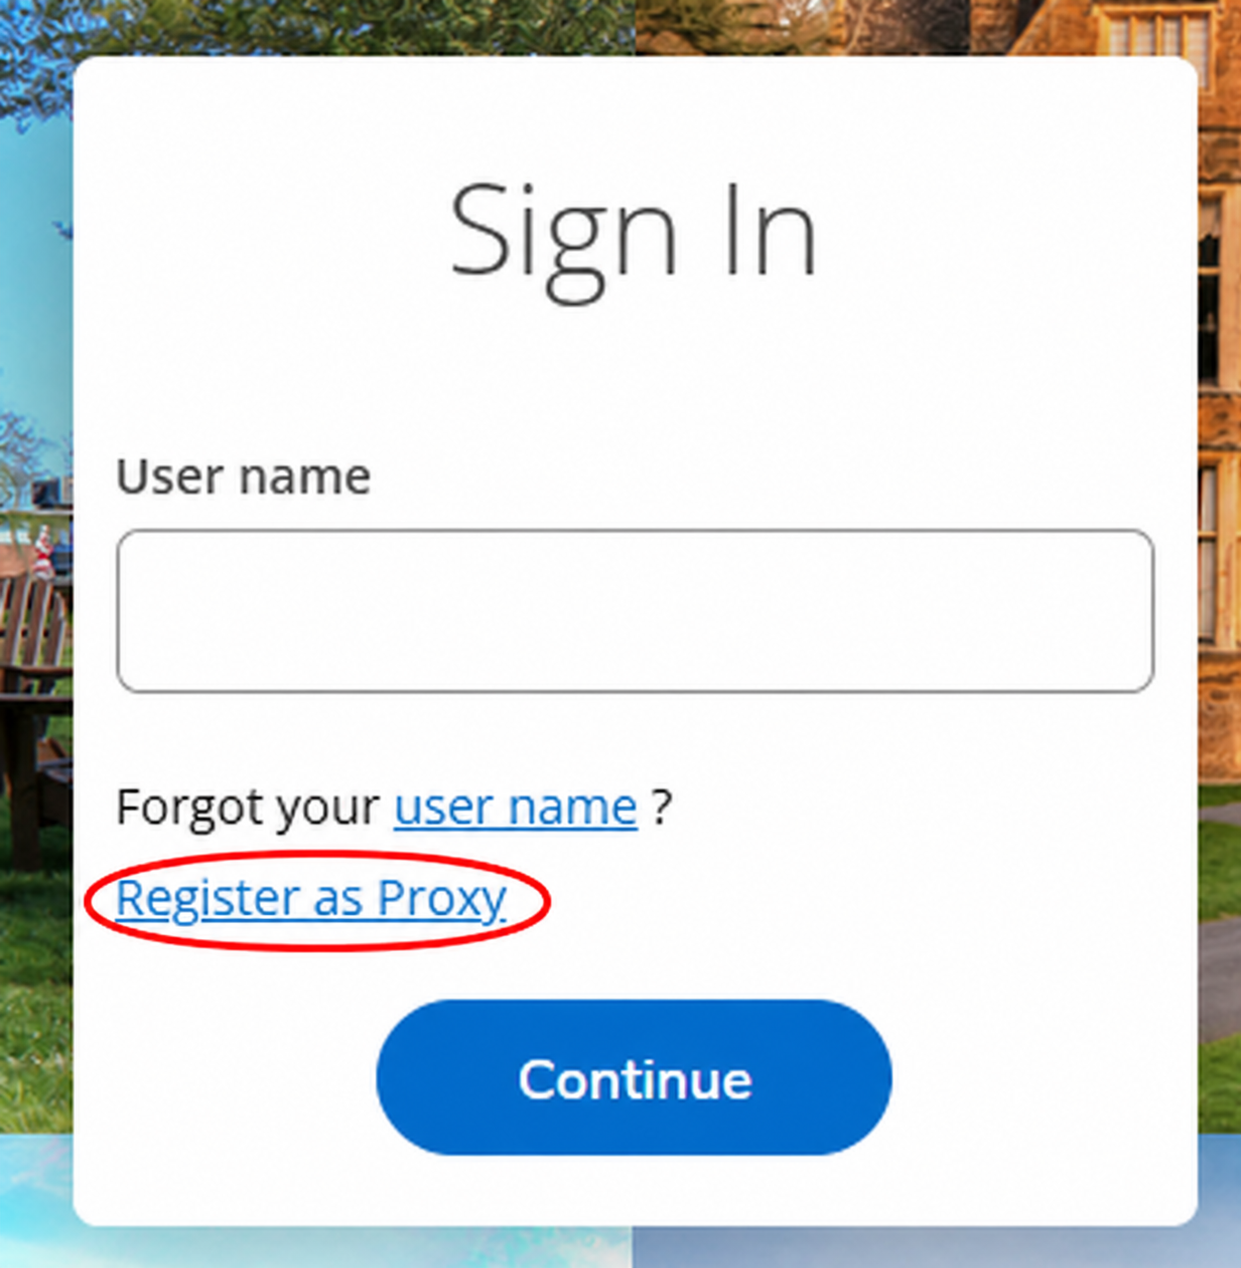
Click “Register as Proxy”
Note
If you already registered as a proxy and have an account, skip to Step 3: Sign In to Self-Service.
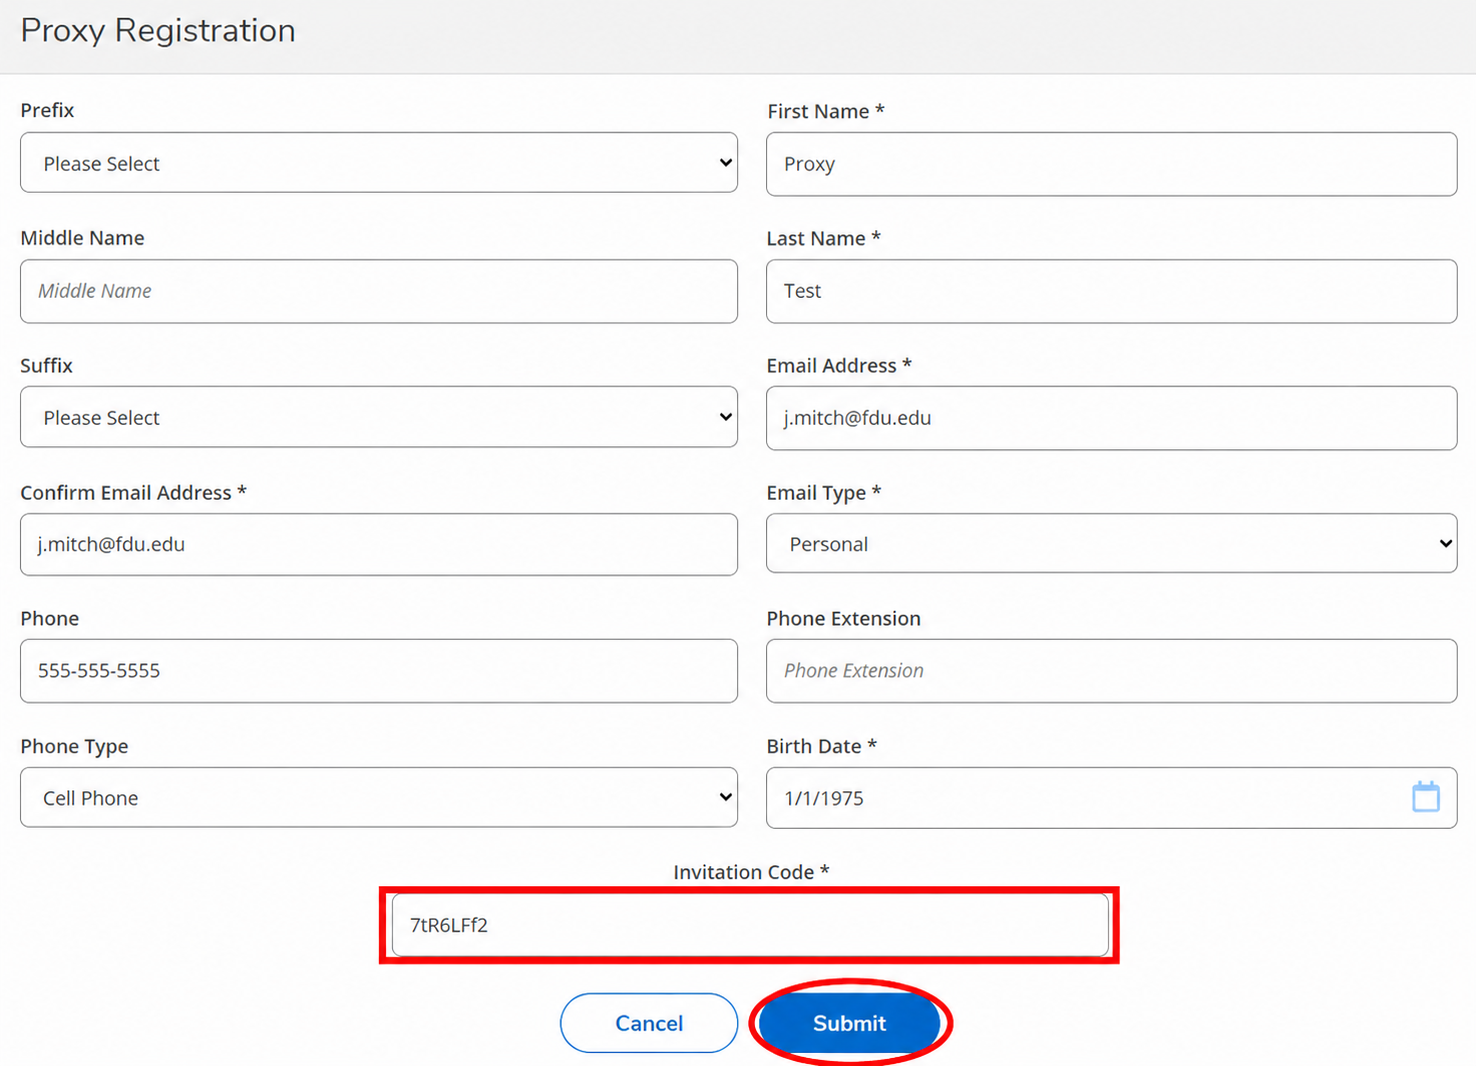
Fill in all required fields, including the Invitation Code from your email, then click “Submit”
When the registration confirmation appears, click “Okay” to return to the sign-in page.
Note
Check your email for your username and temporary password.
Step 3: Sign In to Self-Service
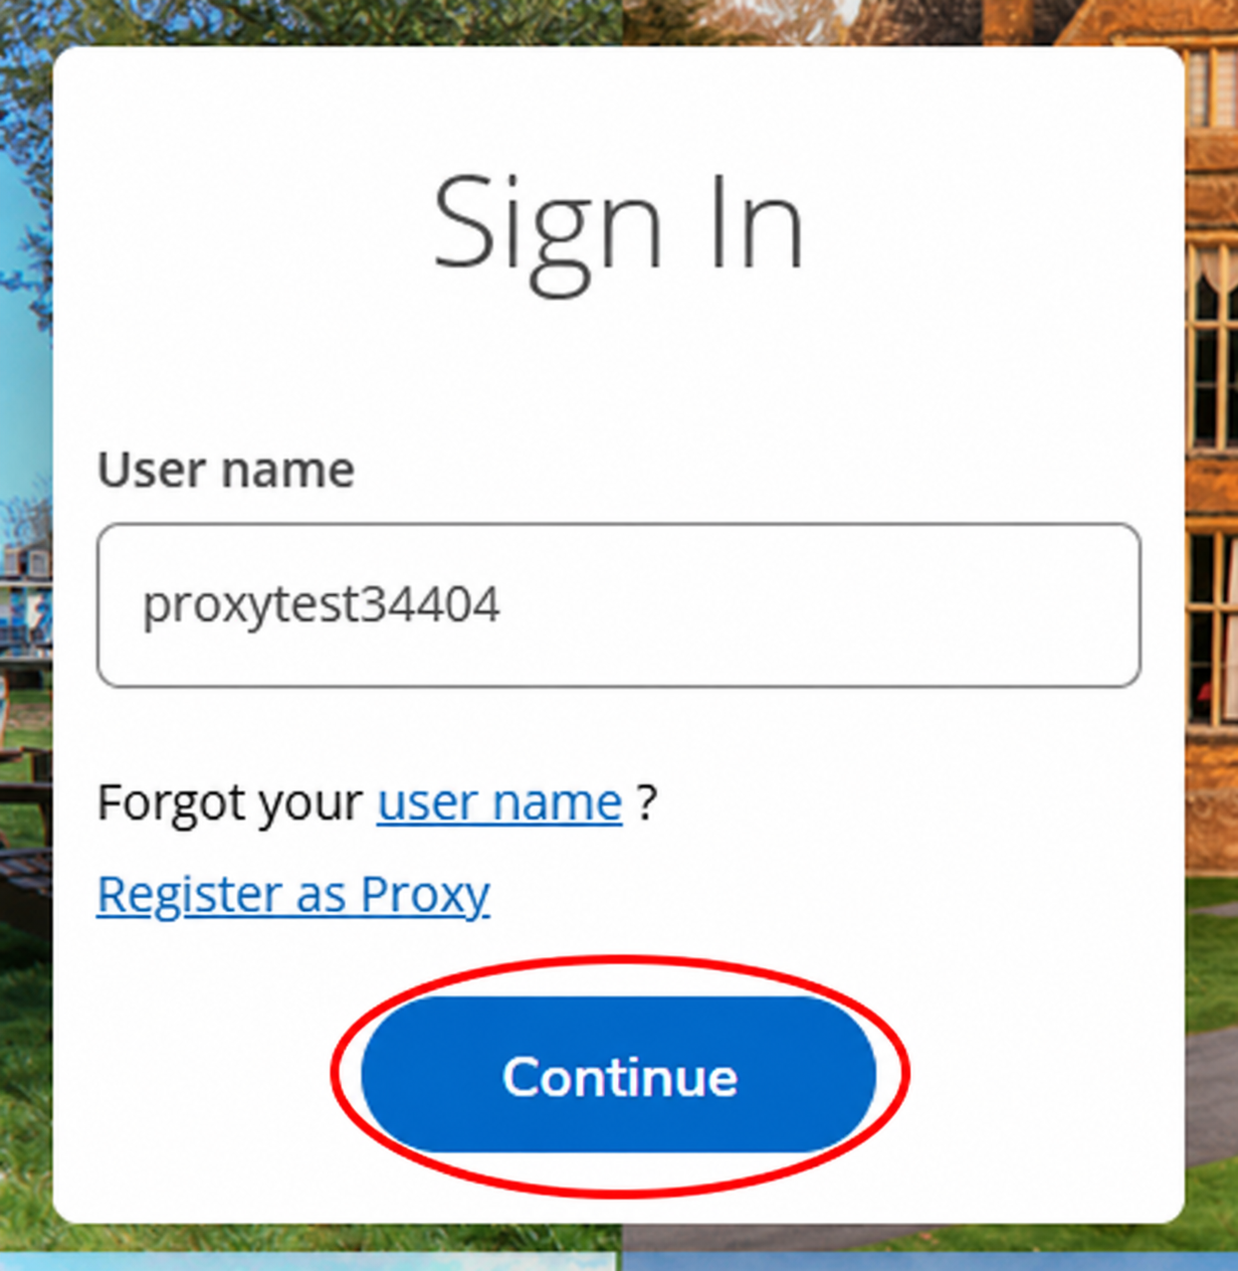
Type your username and click “Continue”
Tip
If you lost your username, click “Forgot your user name” and follow the prompts to retrieve it.
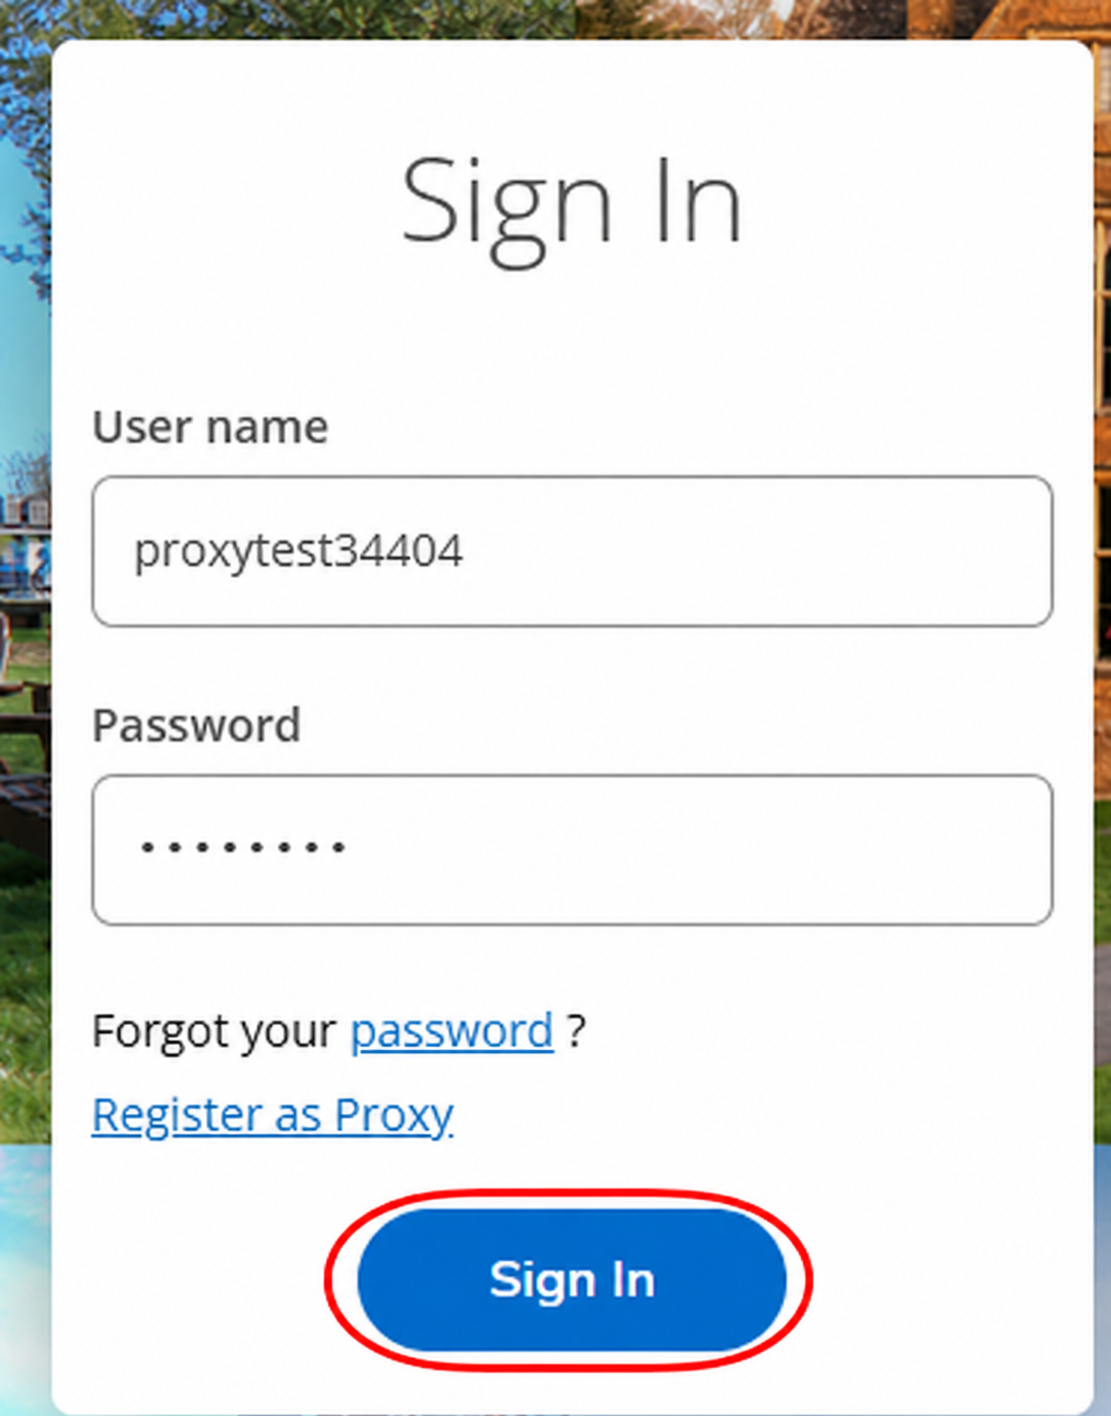
Type your password and click “Sign In”
Tip
If you do not know your password, click “Forgot your password” and follow the prompts to reset it.
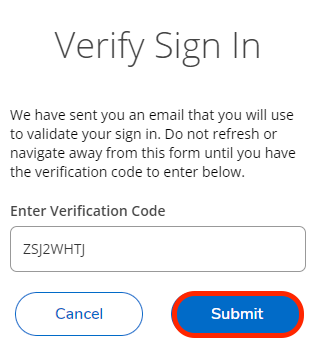
After you sign in, you will receive an email with a multifactor authentication code. Copy and paste the code into the sign-in page, then click “Submit”
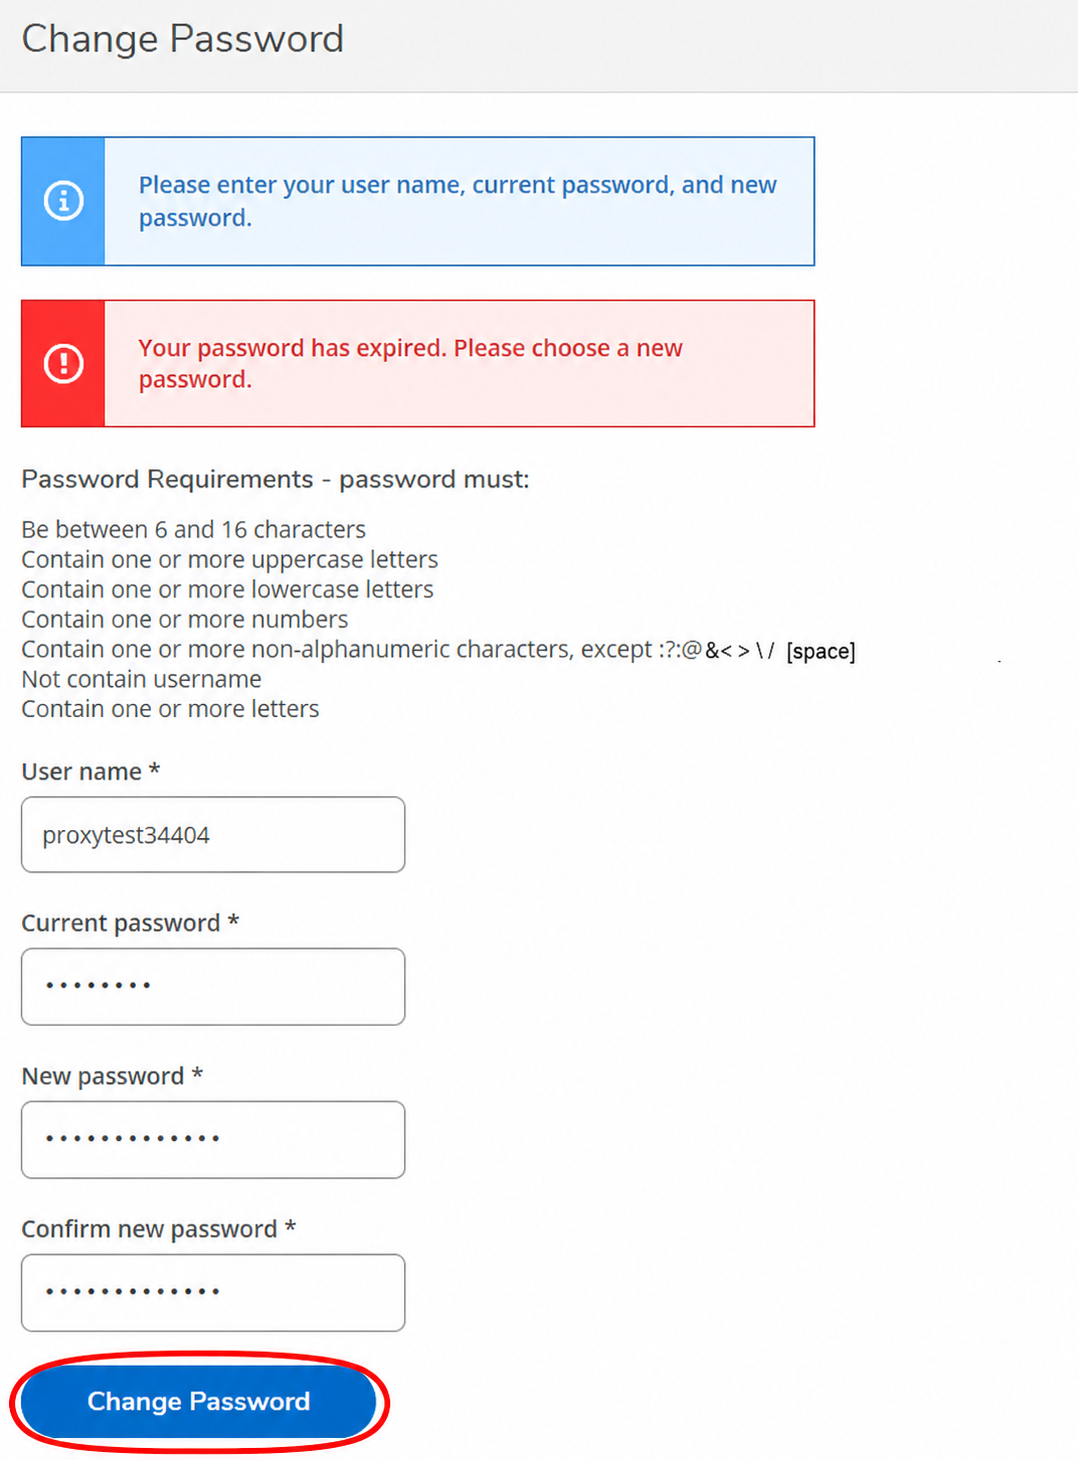
Note
If this is your first time signing in, complete the Change Password screen, then sign in again with your new password.
Step 4: View the Student’s Profile
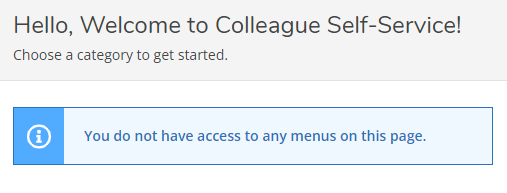
If you see the message “You do not have access to any menus on this page”, switch to the student’s profile
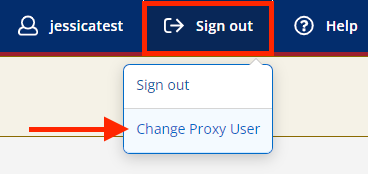
Click “Sign out” at the top of the page, then select “Change Proxy User”
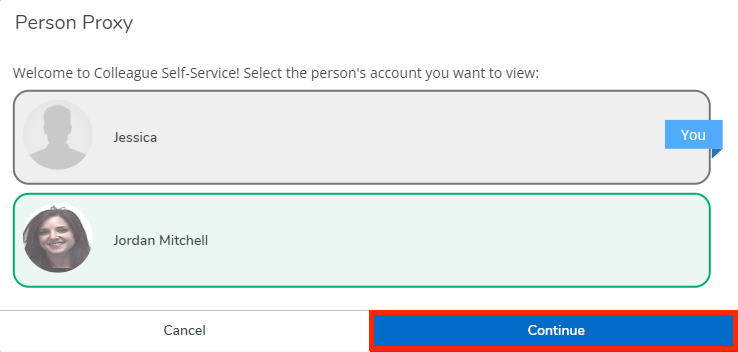
Select the student’s profile, then click “Continue”
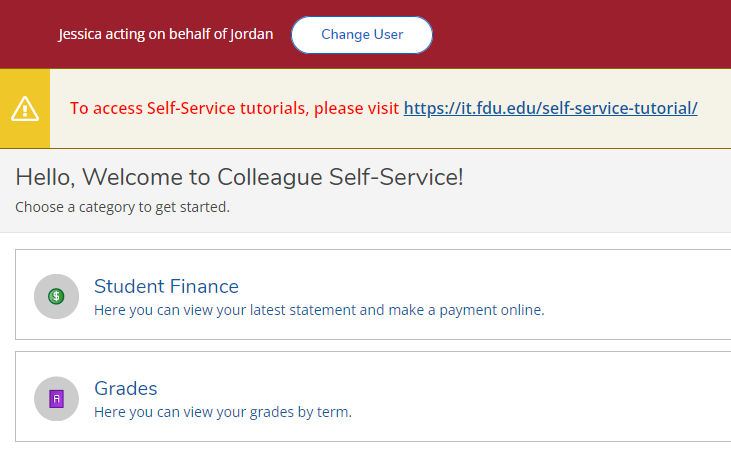
Once you are viewing the student’s profile, use the menus on the left or the tiles on the homepage to access the information they shared with you
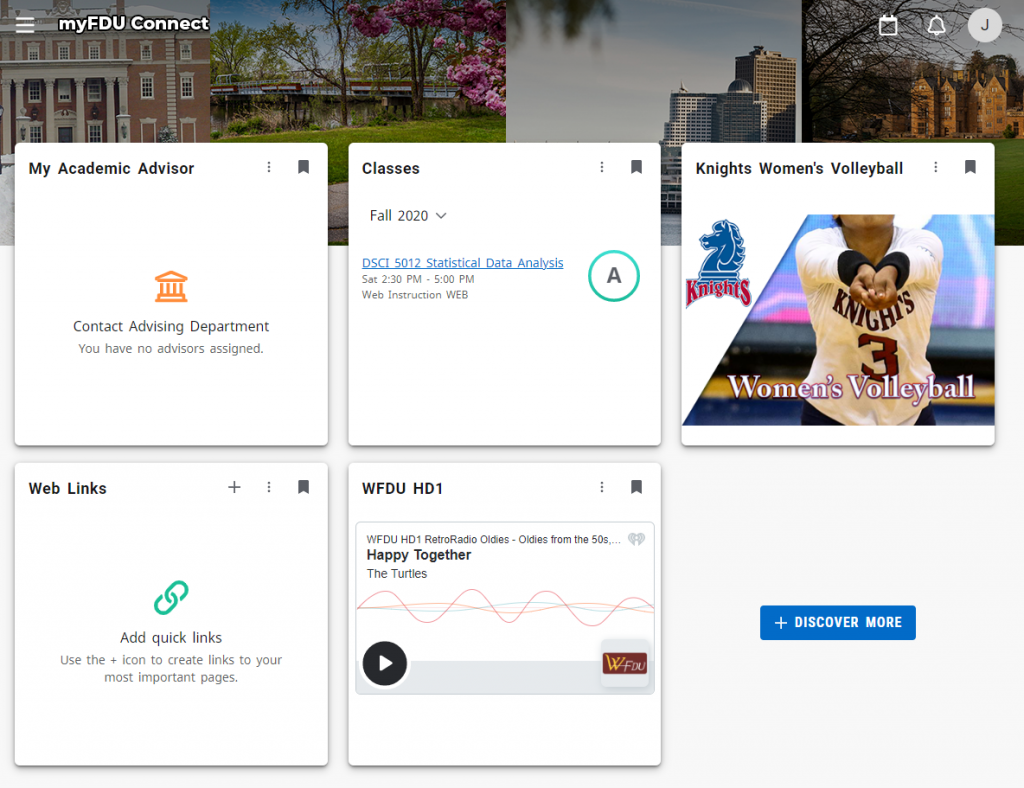
myFDU Connect is a place where Students, Faculty, and Staff can go as their single point of entry for everything FDU. The homepage consists of a dashboard full of “cards” that represent different aspects of FDU. Users can personalize their dashboard to display cards relevant to their life on campus..
How to Navigate myFDU Connect
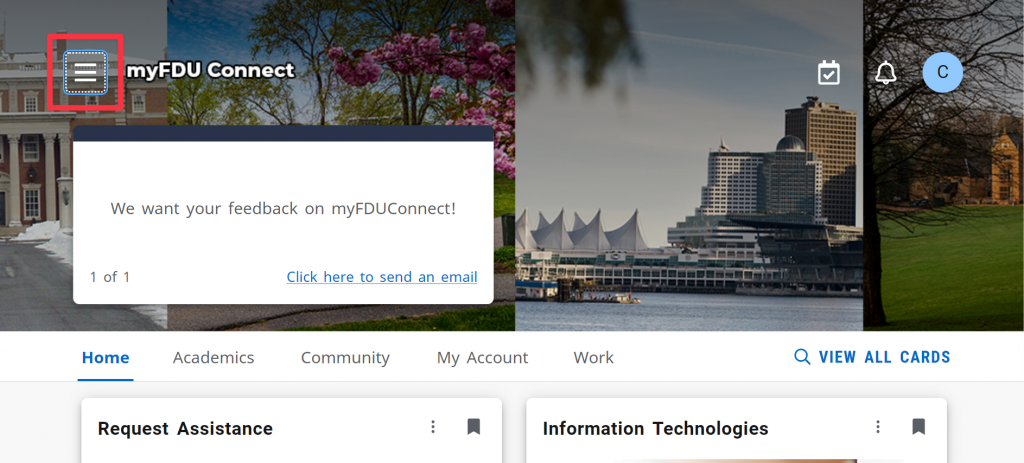
To log into myFDU Connect, you will need to visit myfduconnect.fdu.edu and login with your FDU NetID. Once logged in, you will land on your customizable homepage
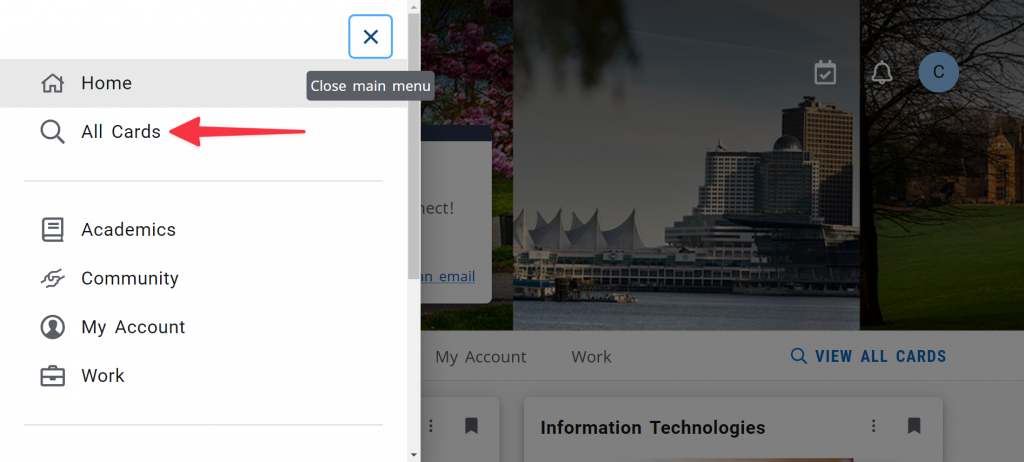
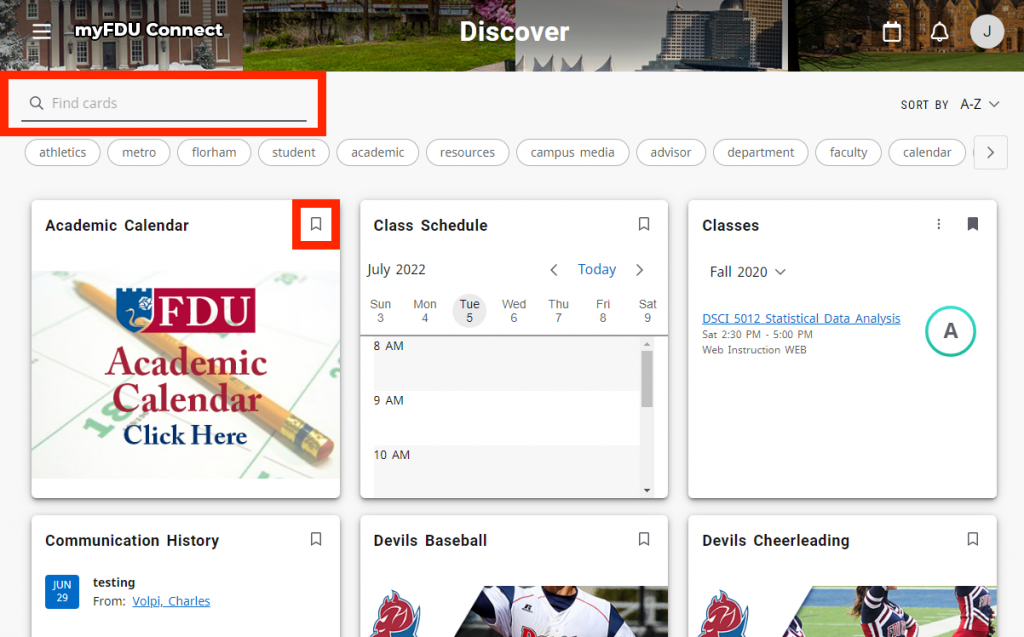
The cards you see can be added to, removed, and rearranged to your liking. To add a new card, click on the “+ Discover More” button
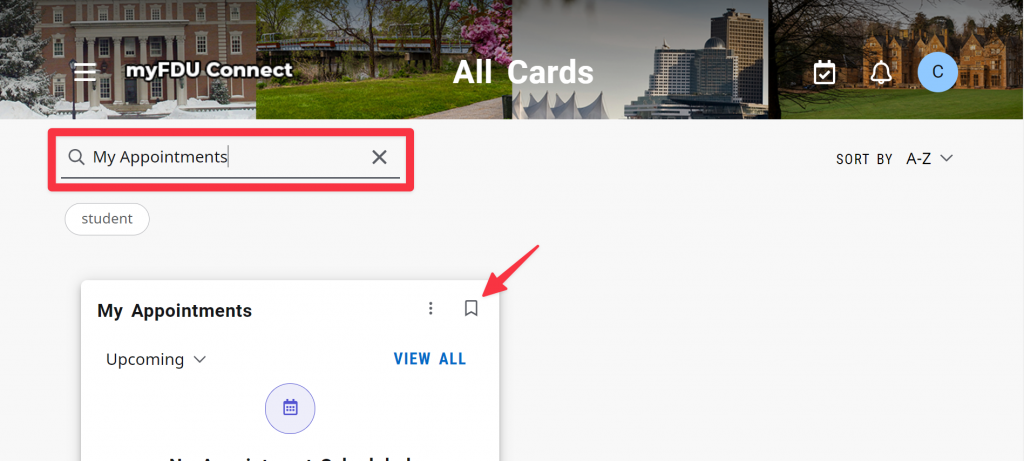
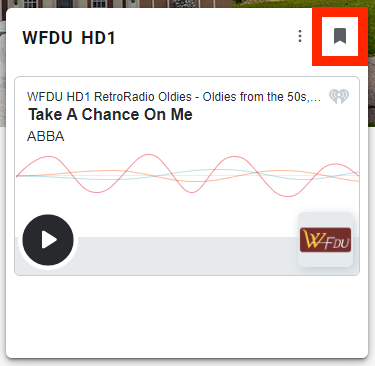
In the top left of the page, you can use the search field to find specific cards. You can also scroll through the page to see everything that is available. When you have found a card you would like to add to your homepage, click on the “save card” ribbon on the top right of the card
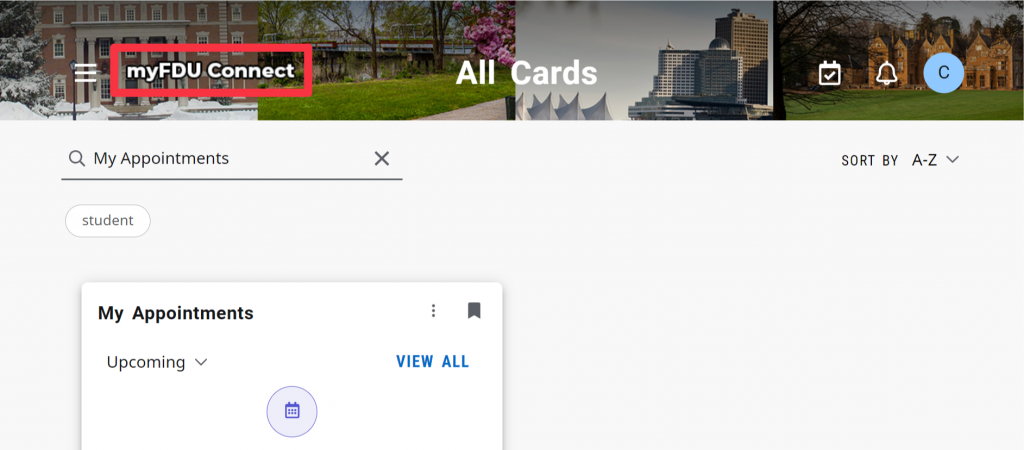
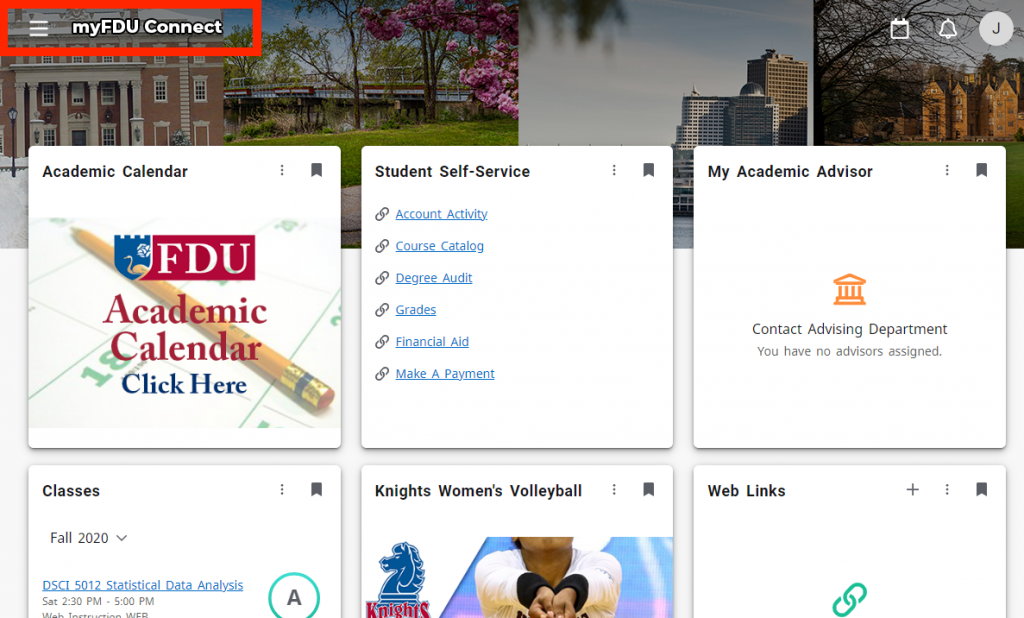
Click on “myFDU Connect” in the top left of the page to return to your homepage. You should see your new card in the first slot
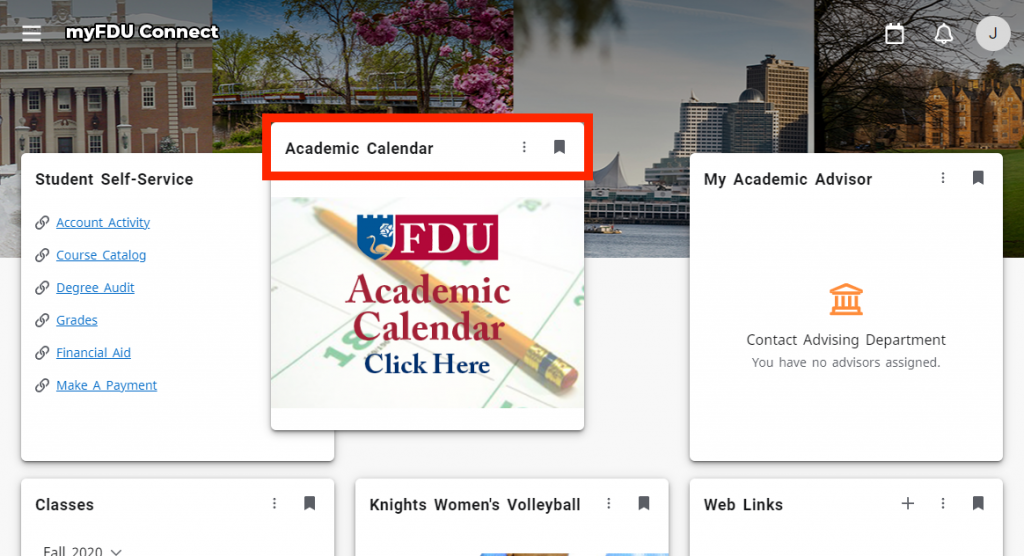
If you would like to change the order of your cards, click and hold on the top of the card and move the card to a new position
If you wish to remove a card from your homepage, click on the “remove card” ribbon on the top right
When new cards are available, you will be notified on the alarm button on the top right of the page
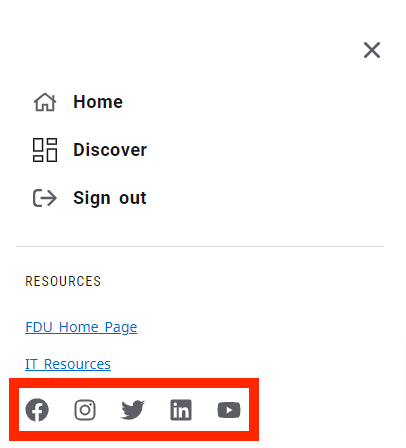
To access FDU’s social media pages, click on the hamburger menu in the top left of the page
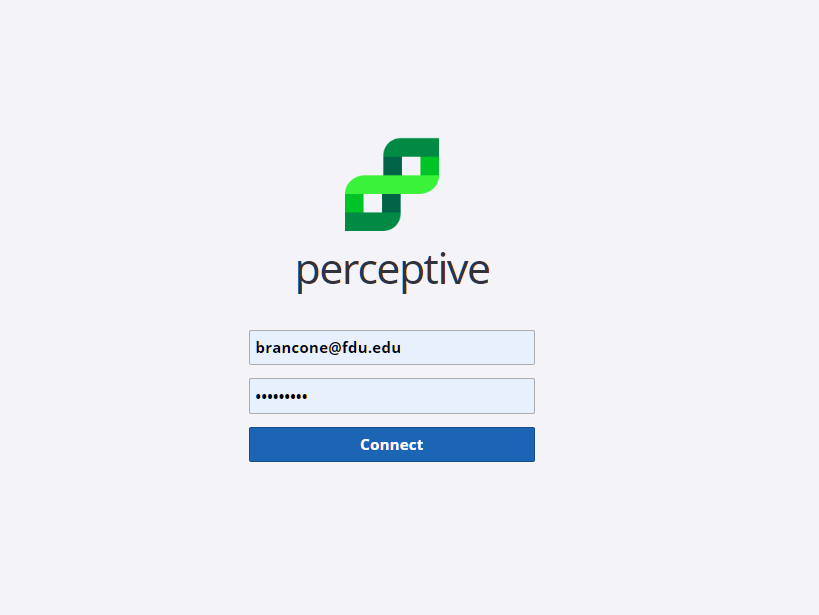
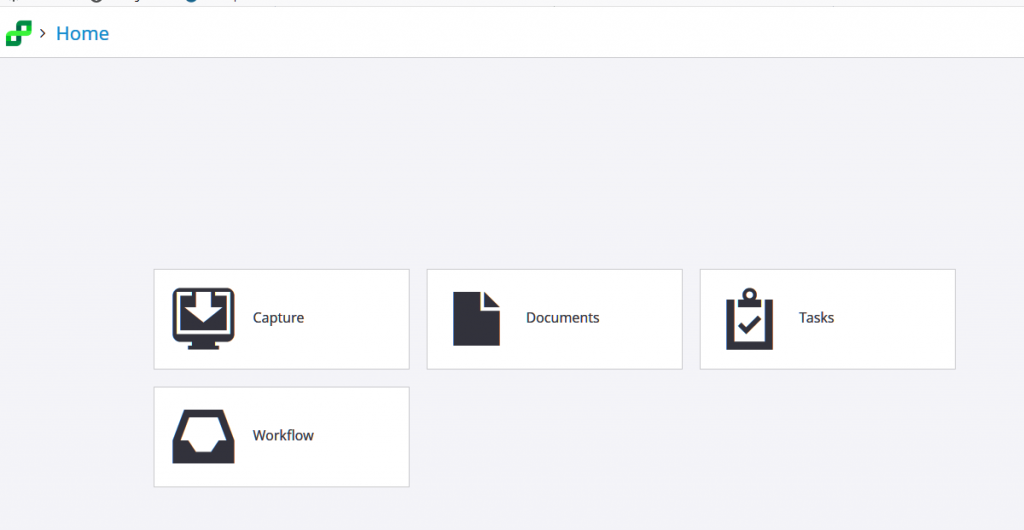
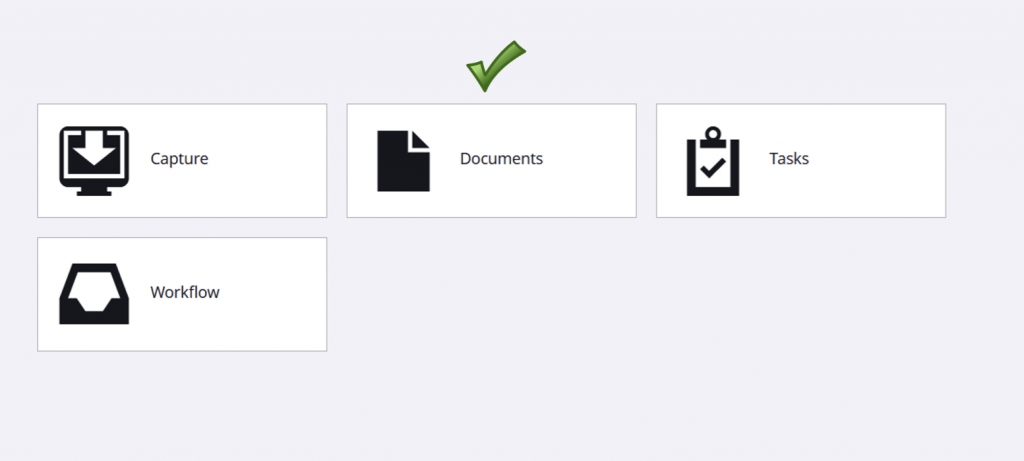
After you login, you should have a screen that looks something like this:
Capture
To capture a document to store in Perceptive, click on the Capture tab on the main Experience screen.
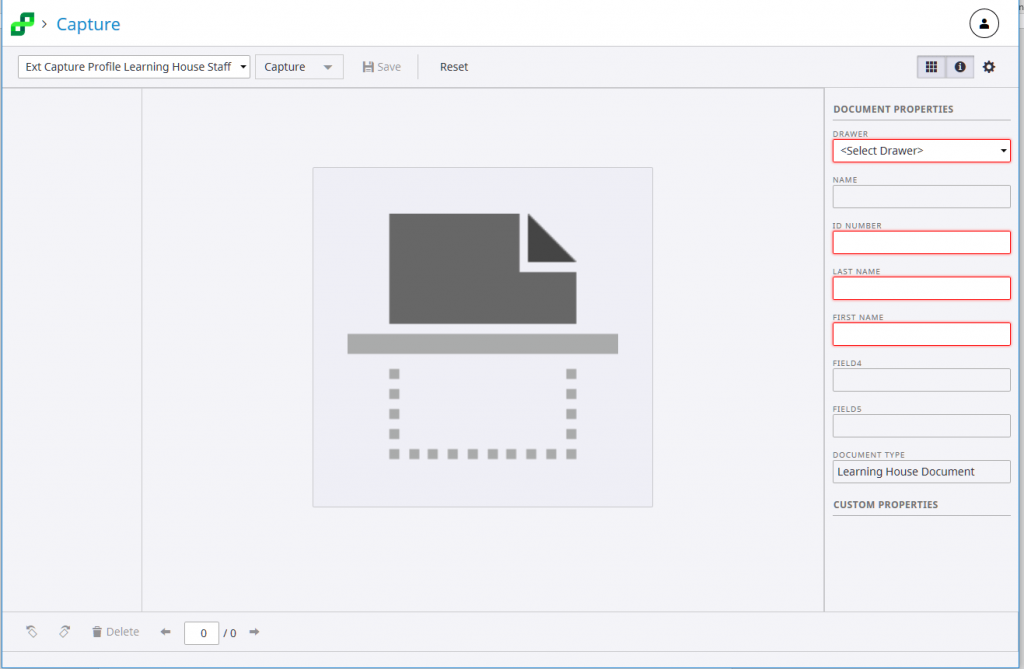
Now the Capture screen will display.
Now you will choose the appropriate Application Plan to Use
Make sure that in the box on the top left under the Perceptive logo and Capture has the correct Capture Profile you will use to store the document. In this example, the Ext Capture Profile Learning House Staff has been chosen. When chosen, the Document Properties box will appear on the right side of the screen with the appropriate field labels.
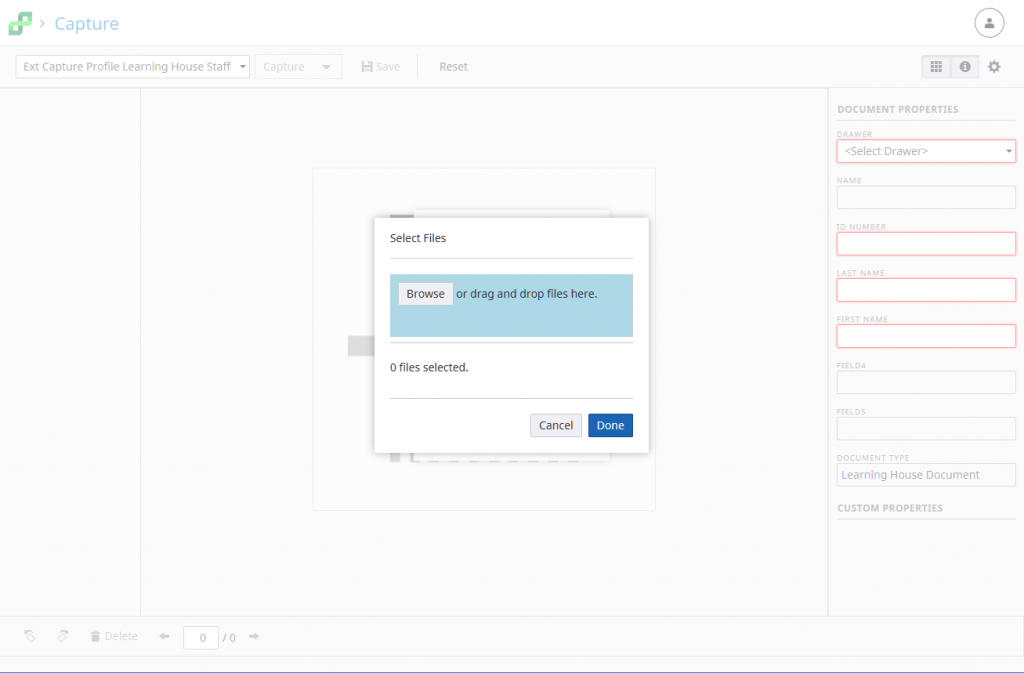
Now click on the Capture tab next to the Capture Profile that you picked. A new dialog box will appear:
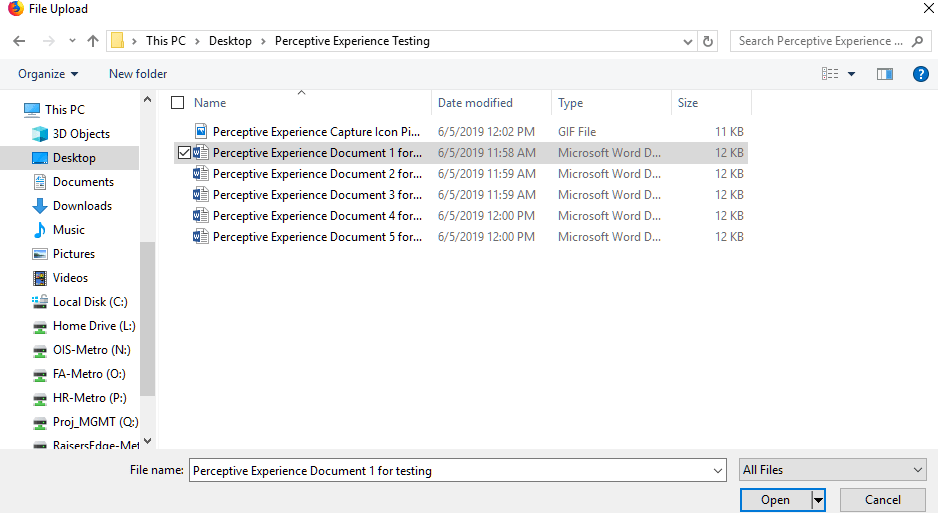
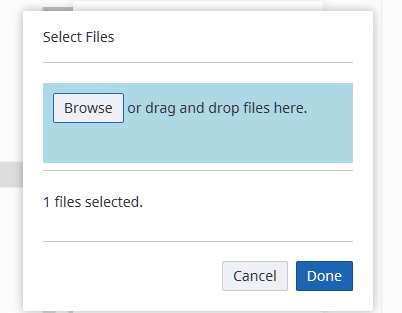
Click on the Browse tab. This will bring up File Explorer. Choose the file you want to save to Perceptive.
When you click Open, it will bring you back to the Dialog Box. There will be a pause and when the document has been selected, the message “1 file selected” will appear.
Click on the highlighted tab that says “Done”.
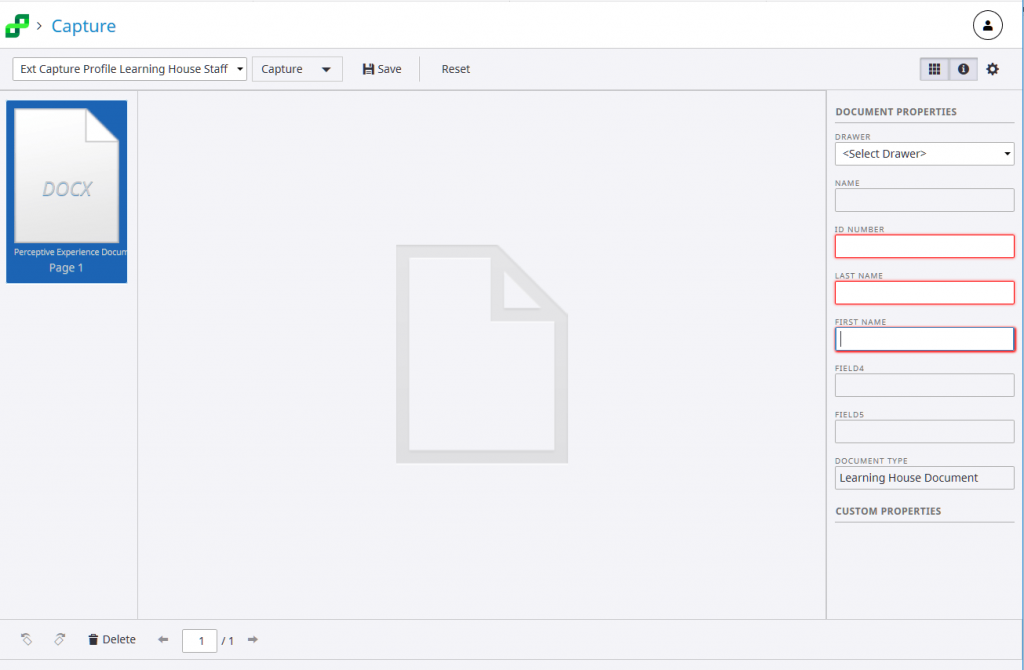
The Capture screen re-appears and the selected document will appear in a box on the left. The Document Properties box will re-appear on the right.
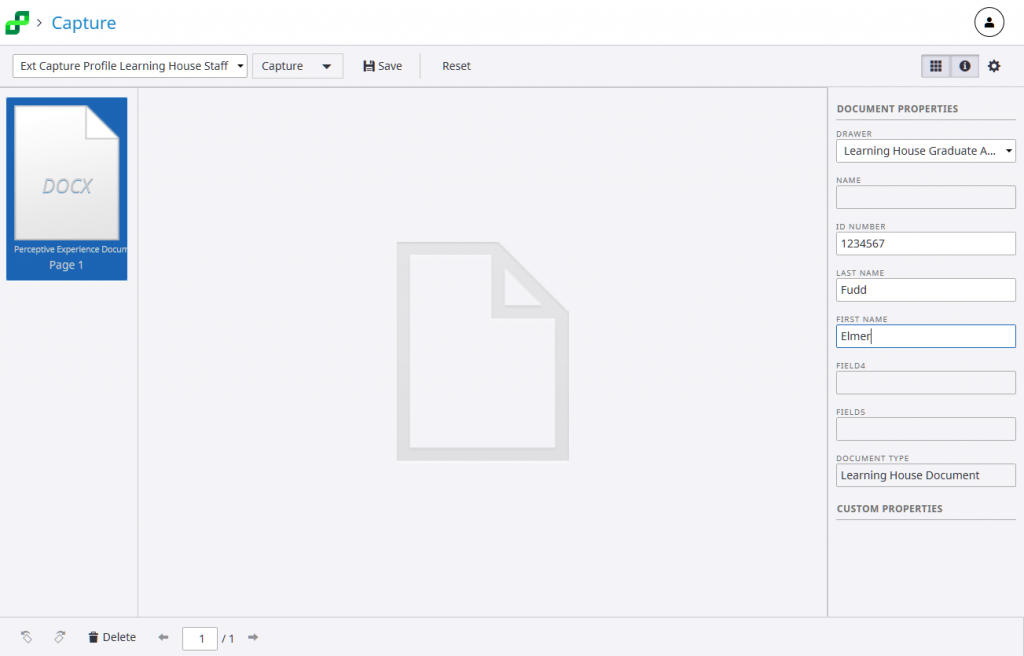
In the first field, choose the drawer in which you wish to store the document. Now fill in the remaining fields with the appropriate information.
When done filling in the data, click on the Save tab at the top middle of the screen next to the Capture drop down.
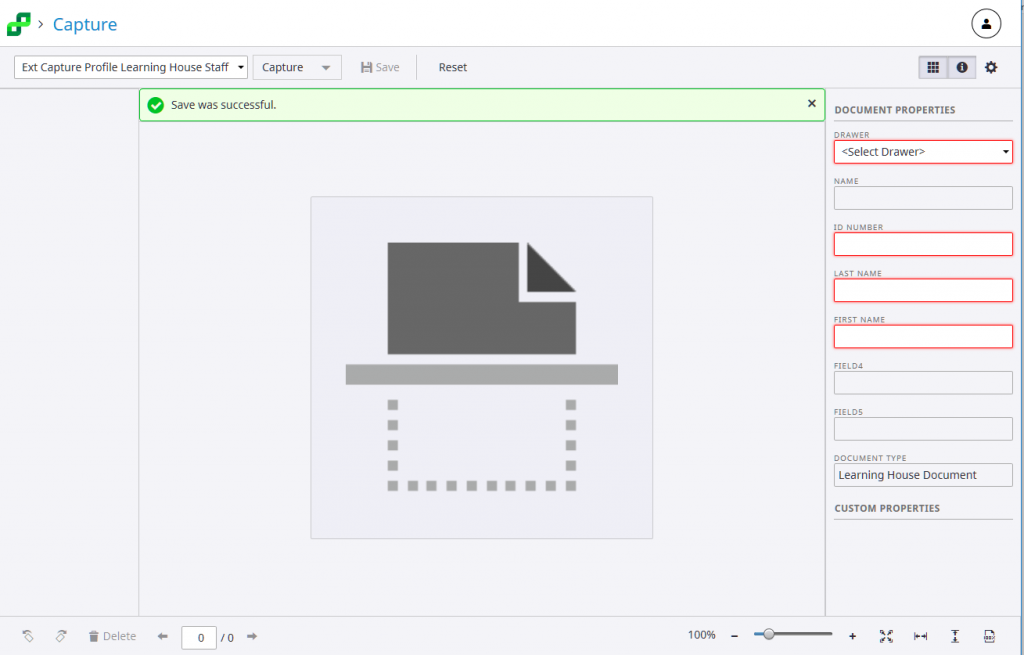
Once you click Save, the document has been stored in Perceptive and you will see a “Success” message highlighted in green:
The data that you entered will also disappear from the Document Properties box. Now you are ready to capture your next document for Perceptive going through the same steps that you just went through.
Document Search
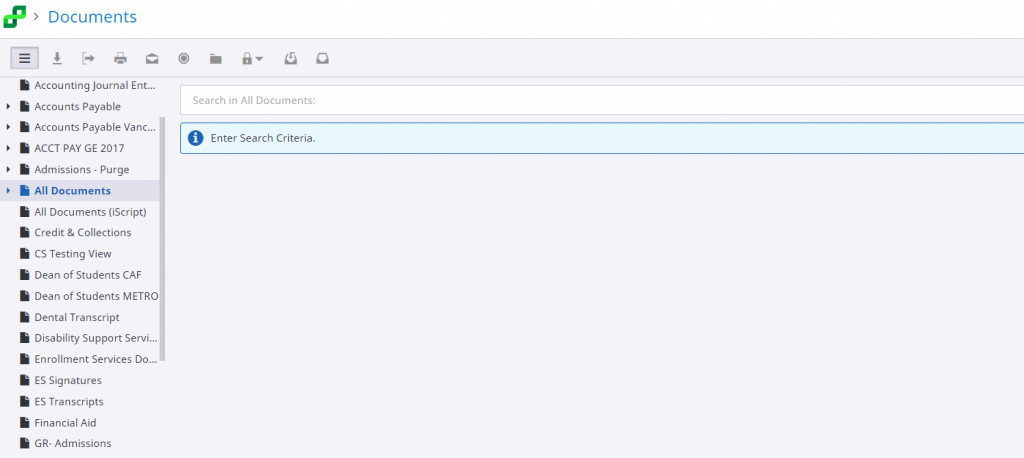
To search for a document in Perceptive Experience, click on the Documents tab on the main Experience screen.
Now the Documents Search screen will display. On the left hand side, a column labeled “Document Views” will appear showing the drawers for which you will have access. Please highlight and click on the appropriate drawer where you document resides.
Also, two boxes will appear in the middle – a white box with the words “Search inthe name of the highlighted drawer on the left”. The second blue box says Enter Search Criteria.
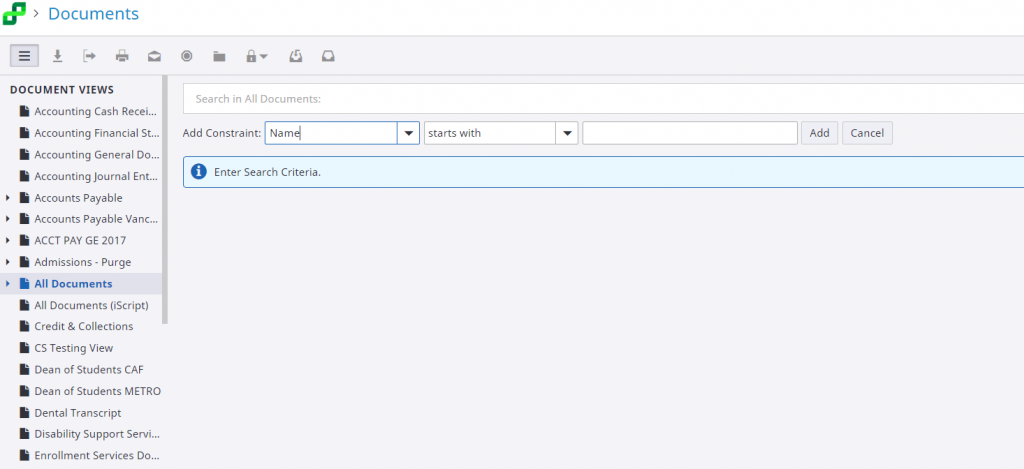
To enter search criteria, click inside the white box. A new row of boxes will appear between the two original boxes. These new boxes are the criteria and method you wish to conduct a search. The first box is labeled “Add constraint”. It is a dropdown box with a list of keys you may search on. Name will always appear as the first entry. Do not attempt to use that constraint. It is not what you think it might be. It is a parameter that we do not use. Choose the constraint or key that you wish from the drop down – usually ID number or Last Name. The second box is also a drop down box. It is for the operation that will be performed – normally you would choose “starts with” or “equal to”. The third box is where you would type in the actual value of the key you are looking for, usually the last name or ID number of the person you are searching for. There is a wild card that you can use if you are unsure about the spelling of the key or the complete ID number. The wildcard is the percent sign (%). An example would be BRAN% or %ancon% or 01234%. Also in the case of ID numbers, the leading zero is important to include. If searching for ID# 0956712 using “equal to” you must make sure that the leading zero is included.
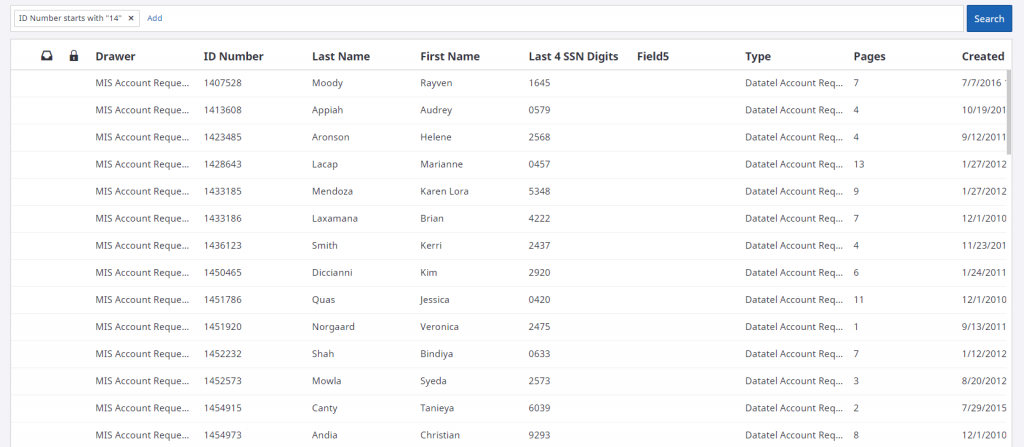
Below is an example of a search where I want to find MIS COLLEAGUE Account Requests for anyone who has an ID number beginning with “14”. I would click on the clear white box to get the three prompt boxes. I would then put in the Constraint (Key), then the operand and finally the value of what I am searching for – ID number – starts with – 14. I would then click on the Add button and that gets entered into the previously blank search box. You may add another constraint (key) if you like or just click on the blue Search button at the very right.
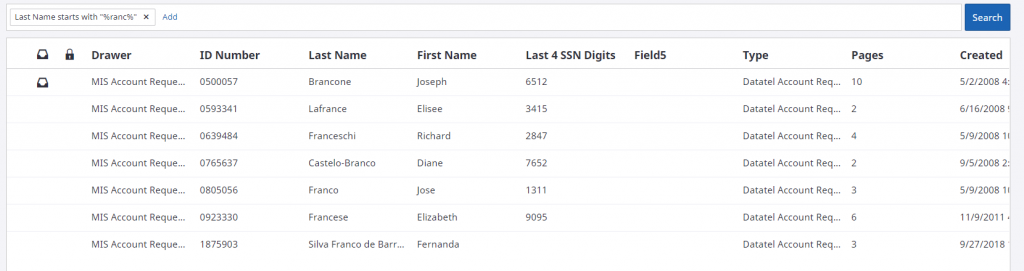
Here is another example below where I am looking for anyone in this drawer that has the string ‘ranc’ in the last name. Notice the operand and the placement of the % signs in the value field.
Self-Service is an interactive web application that enables students, faculty, and staff to view their individual information contained in FDU’s student information system. Students can use Self-Service to do things like view their financial aid, pay their bills, and register for classes. Likewise, faculty will use Self-Service to verify enrollment and enter grades.
To navigate the Tutorial, scroll down to the Index. From there you can navigate to any portion of the Tutorial by clicking on any “Part”.
What is Degree Audit? Degree Audit is an online version of your check sheet, which allows you to track your academic requirements. On Degree Audit you can see what degree requirements you’ve completed, which are in progress, and which courses you have left to complete your degree.
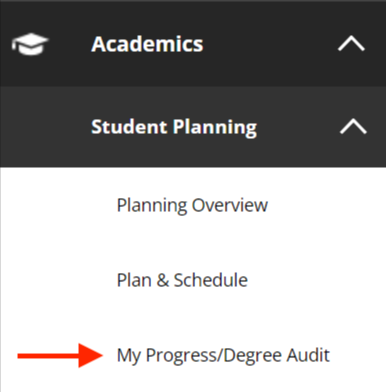
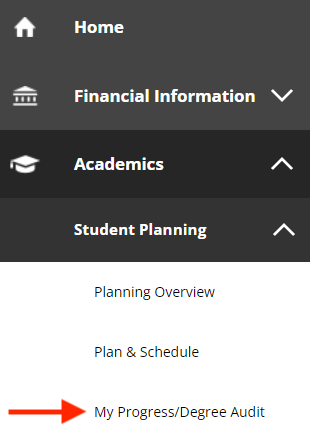
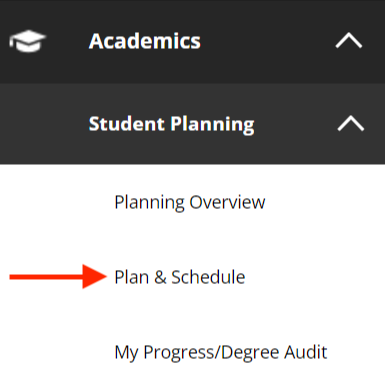
On the left-hand side of the page, you will find your menus. Click on the menu called “Academics” and then click on “Student Planning.” Navigate to “My Progress/Degree Audit”
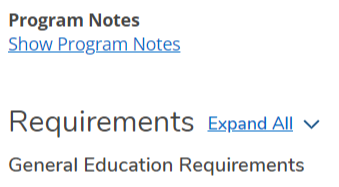
Click on “Expand All” if you’d like to see all the requirements for your degree
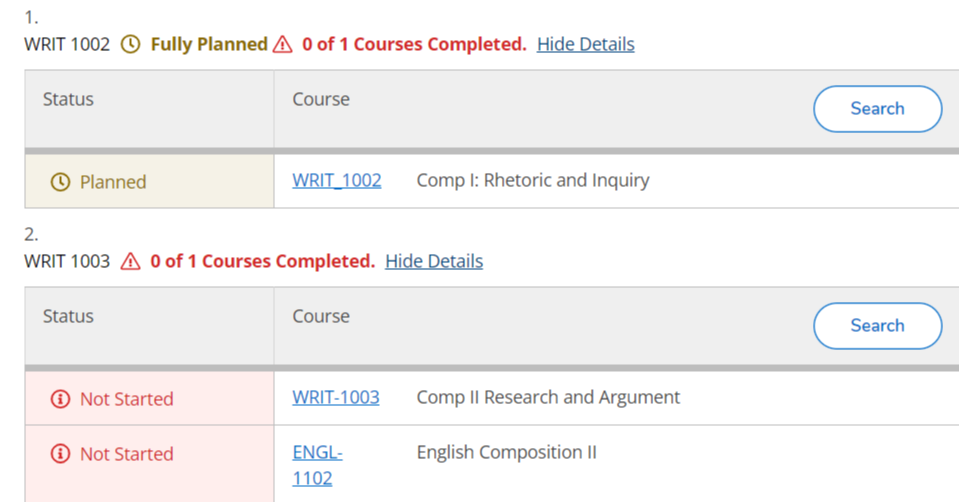
Any action you have taken towards completing each requirement will be noted in the “Status” column
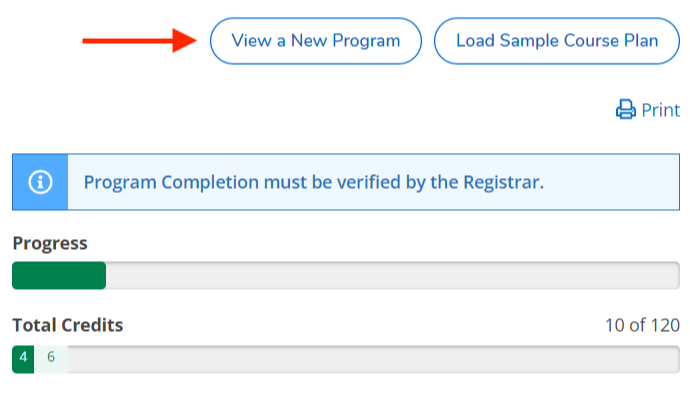
If you would like to see what it would look like if you switched to a different program, then click on “View a New Program” at the top of your Degree Audit
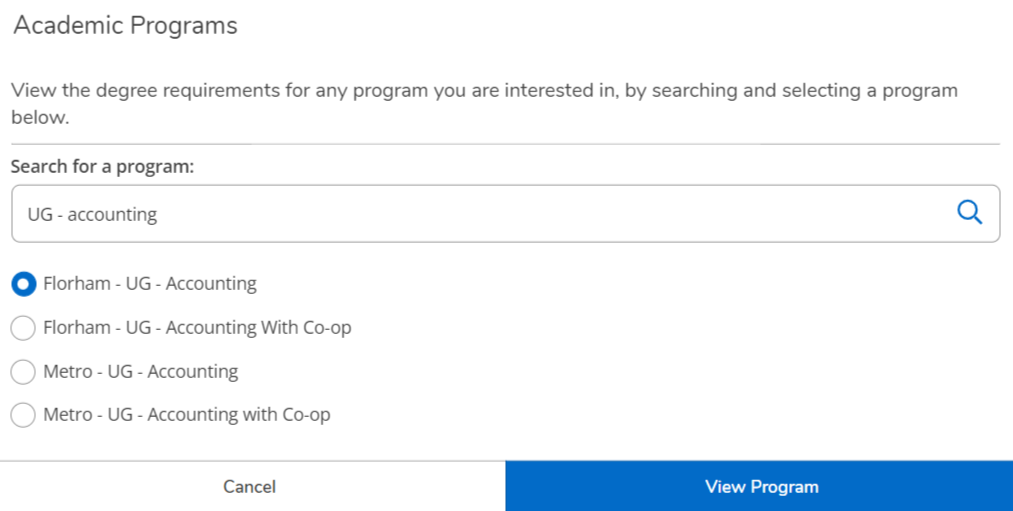
Use the search bar to find the program you are interested in. Select the program and click “View Program
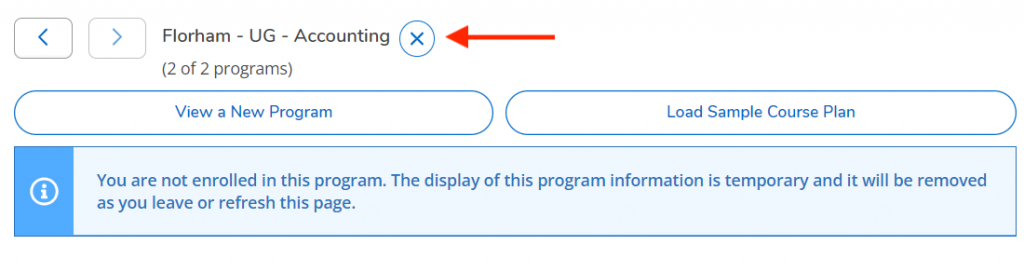
If you no longer want to view this program, click the “X” to remove it
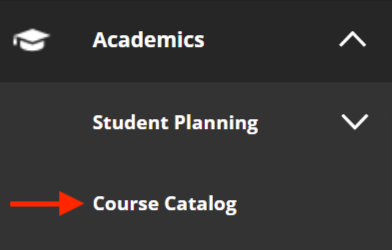
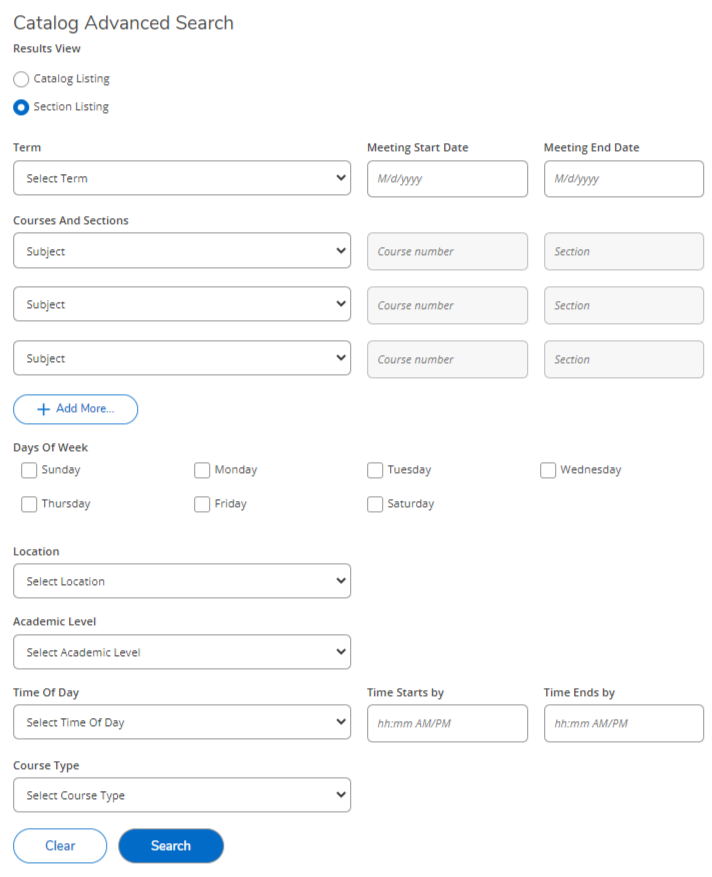
On the left-hand side of the page, you will find your menus. Click on the menu called “Academics” and navigate to the “Course Catalog”
Fill in as many fields as you’d like for your course search. It is suggested that you at least select a term and a subject. Click the blue “Search” button to get your results
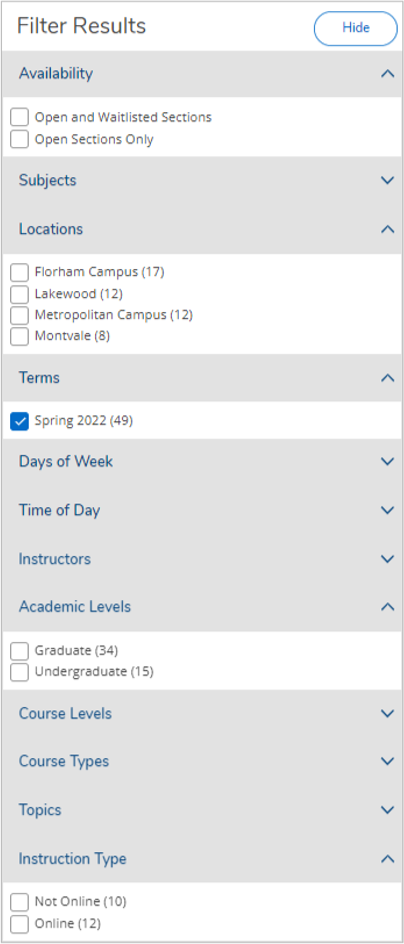
You can narrow down your results further using the filters on the left-hand side
Click on the “Hide” button to hide the filter menu and allow the results to fill your screen
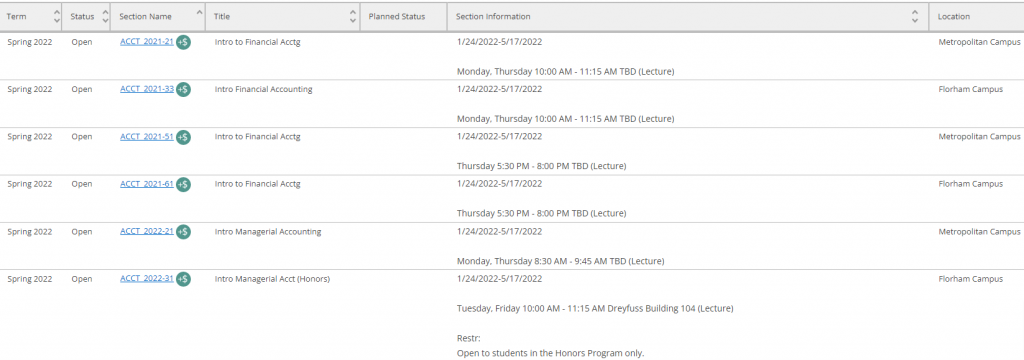
You can click on the arrows in the header row to change how the results are sorted
Note
Section notes and restrictions can be found in the “Section Information” column.
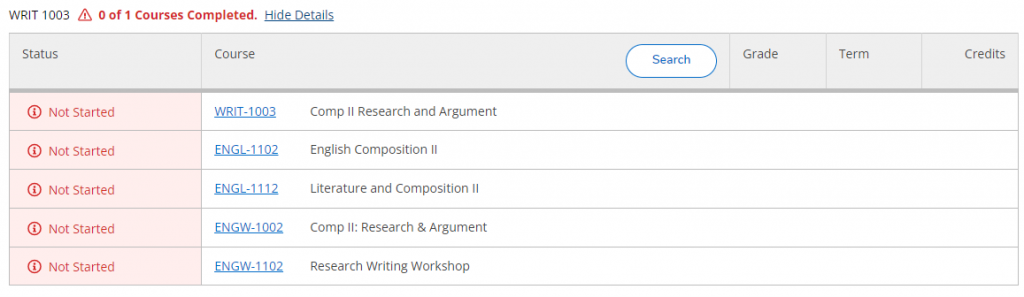
You can search for courses by using the Course Catalog or your Degree Audit page. In this article, we will use the Degree Audit page method
Go to the menu on the left, select “Academics” from the options, and expand the “Student Planning” from the dropdown. Press “My Progress/Degree Audit”
Find the requirements you are looking to fulfill. Press on the “Search” button to find sections for every course that will meet this degree requirement
Note
If you know exactly which course you are interested in, then you can click directly on that course code to view its sections.
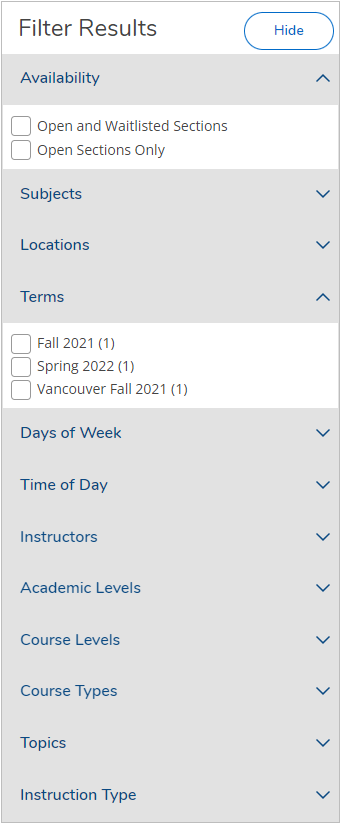
Narrow down your results using the filters on the left-hand side.
Tip
Make sure to choose the correct semester.
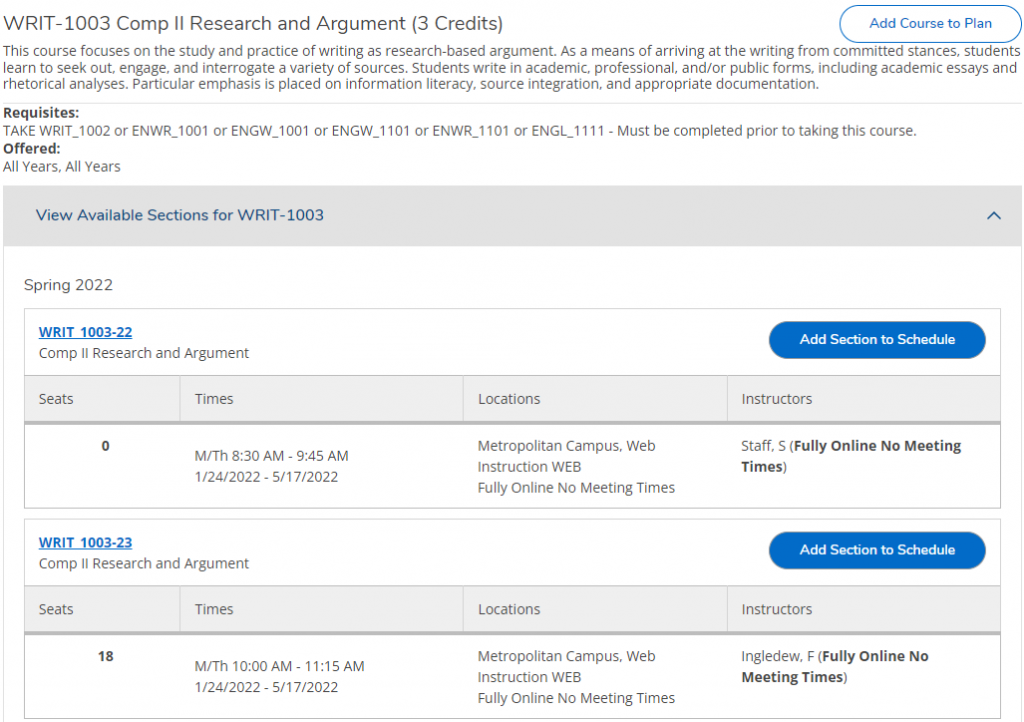
Within the results, click on the grey bar that says “View Available Sections” for the course you’d like to add to your schedule. Find a section that fits on your schedule and click “Add Section to Schedule”
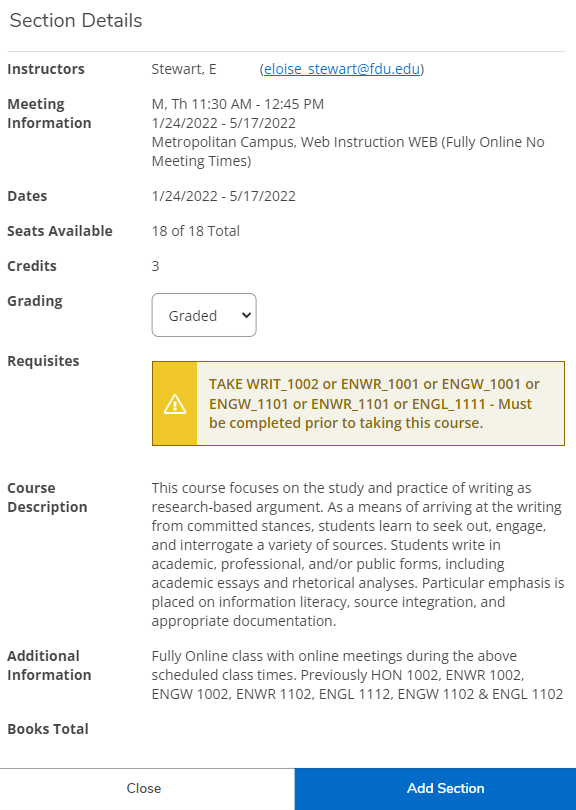
Review the Section Details that pop up. If you still wish to add this section to your schedule, then click “Add Section”
To confirm the section appears on your schedule, navigate to the “Plan & Schedule” page
To confirm the section appears on your schedule, navigate to the “Plan & Schedule” page
Tip
Sections can be removed by clicking on the “x” in the top right corner of the section.
Repeat this process to add more courses to your schedule in preparation for priority registration
Important
Planning a section does not guarantee you have a spot in that section.
On the left-hand side of the page, you will find your menus. Click on the menu called “Academics” and then click on “Student Planning.” Navigate to “Plan & Schedule
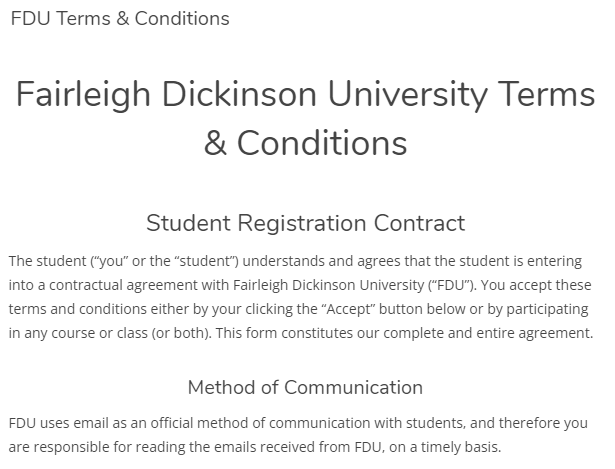
The first time you come to this page for a given semester, you will be presented with the FDU Terms and Conditions Student Registration Contract. Scroll down to agree. You only need to do this once per term
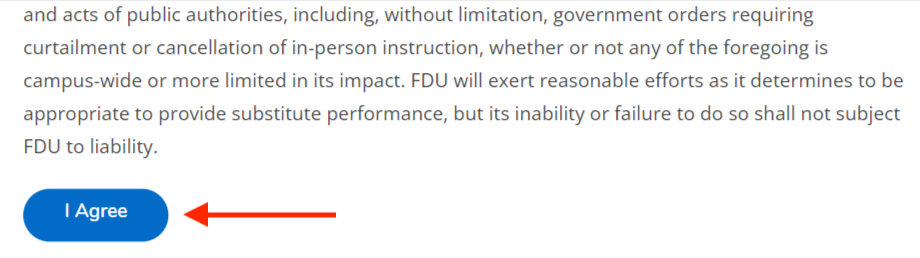
Scroll all the way down to the “I Agree” Button
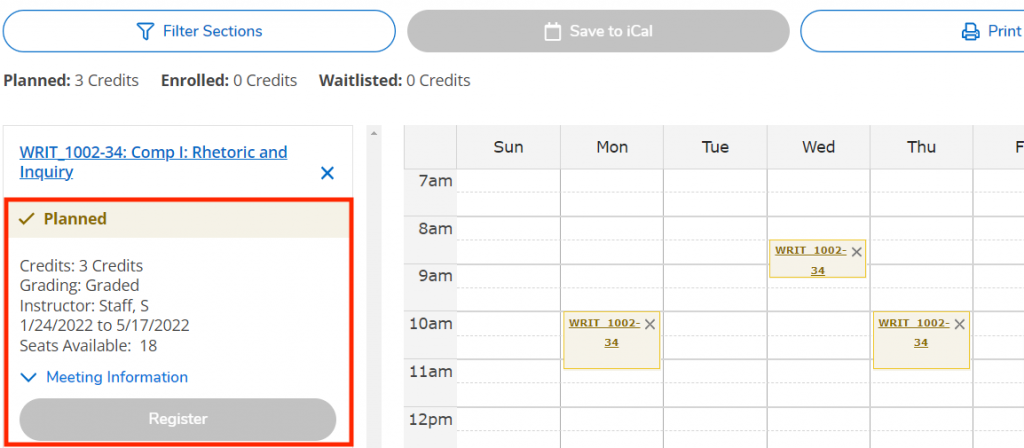
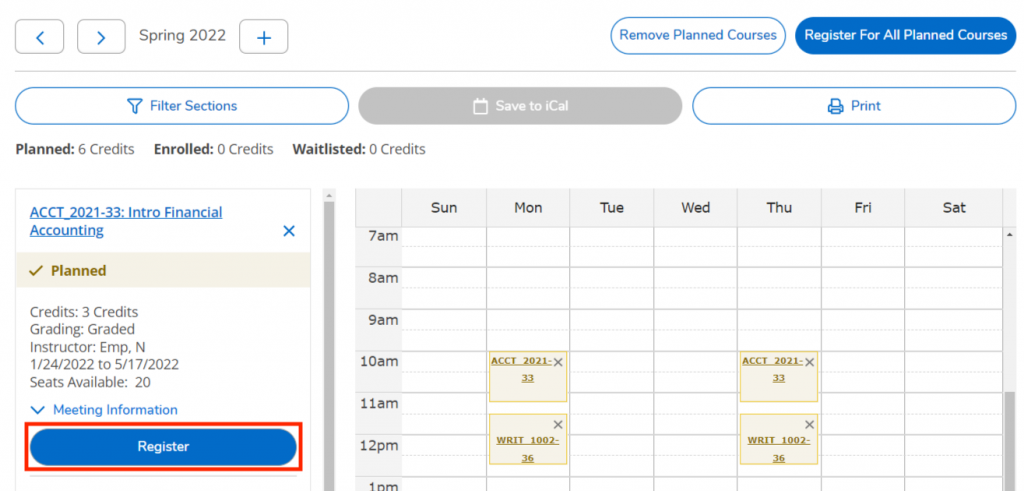
Your planned courses will appear on the Plan & Schedule page and will be color-coded in yellow. If you have not planned your courses, please review how to in Section 1 – Part 3 “How to Plan Your Schedule Using Self-Service”
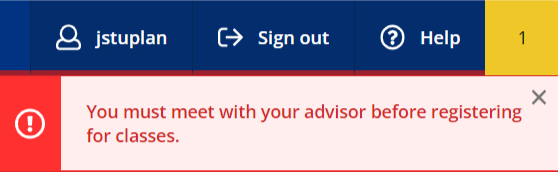
If you have any holds, then they will appear in the top right corner of the page. You will need to resolve your holds before you can register for classes
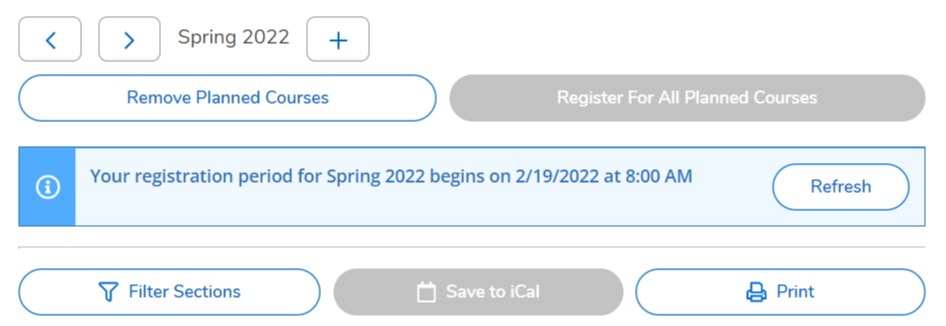
You will need to be mindful of your priority registration date. You will find a banner above your planned schedule informing you of the date and time you can register for classes
Once all holds have been resolved and your priority registration date/time has arrived, you can register for all your courses by clicking on “Register For All Planned Courses.” If you would like to register for each course one at a time, then click on “Register” within each course tile
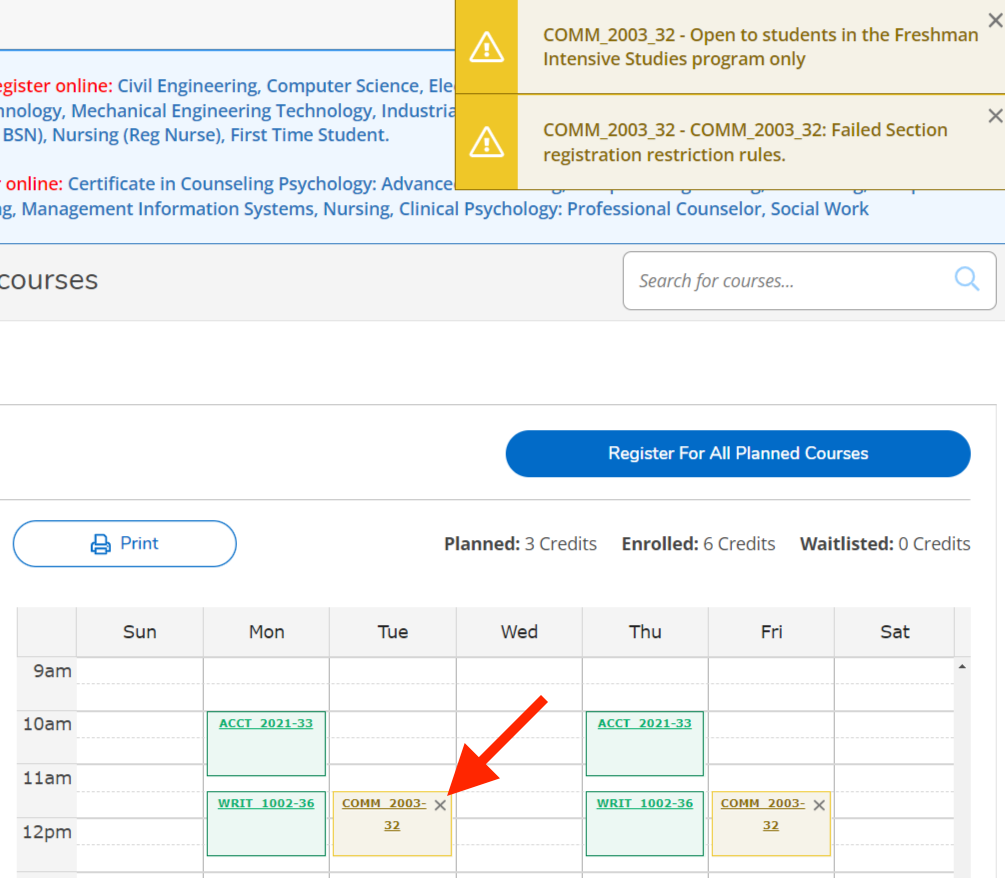
Successful registrations will turn green and say “Registered”
If you are ineligible for any of your planned sections, then the course will remain yellow and planned. You will get an alert in the top right corner explaining why you were unable to register for that section
Click “x” on the section to remove it from your schedule
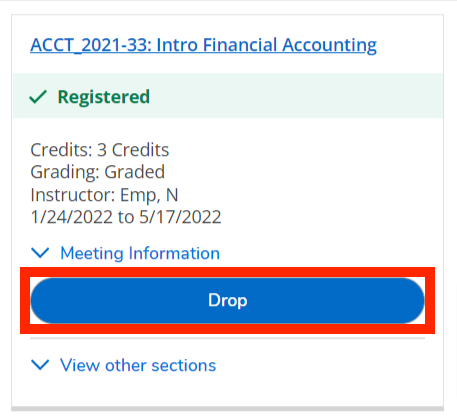
If you need to drop a course during Priority Registration or Add/Drop, then click on “Drop” within the course tile
On the left-hand side of the page, you will find your menus. Click on the menu called “Academics” and click on the “Unofficial Transcript” button
Select the transcript you wish to download by clicking on its text
Important
These documents are unofficial and do not replace official signed and sealed transcripts. To order official transcripts you must go to www.getmytranscript.org.
After clicking on the transcript text, a pdf document will download. Open this document to view your unofficial transcript.
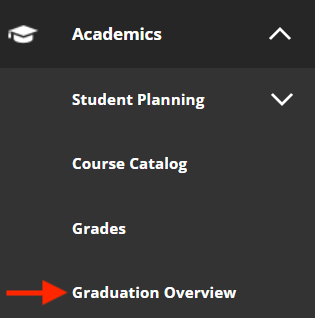
On the left-hand side of the page, you will find your menus. Select “Academics” from the side menu and then select “Graduation Overview”
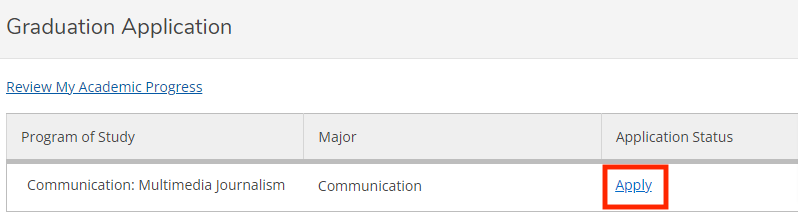
Press “Apply” next to the program from which you wish to graduate
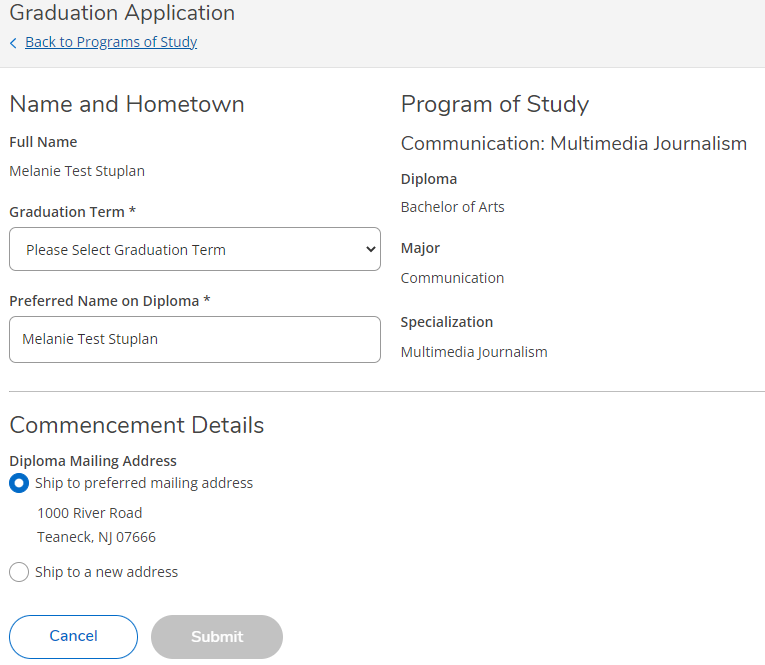
Select your “Graduation Term” and type in your “Preferred Name on Diploma.” Select the address you would like your diploma sent to. Once these fields are filled in, you must confirm everything is correct and press “Submit”
Important
Upon submitting the graduation application, students will be charged the appropriate fee in accordance with the degree they are seeking. Please do not apply more than once.
What is a course plan? A course plan is an example of the sequence of coursework you need to complete for your selected program. This will load courses onto your plan for current and future semesters. This will allow you to map out the courses you must take for your degree.
Note
Not every program has a course plan available.
On the left-hand side of the page, navigate to “Academics.” Within the “Student Planning” dropdown menu, press “My Progress/Degree Audit”
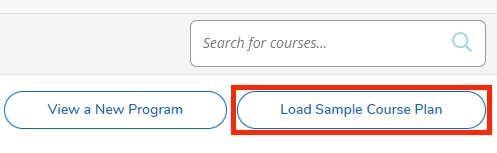
On the top right side of the page, press “Load Sample Course Plan”
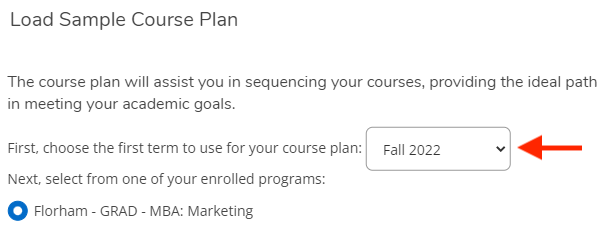
Select your first term from the drop-down menu and select your program using the first radio button
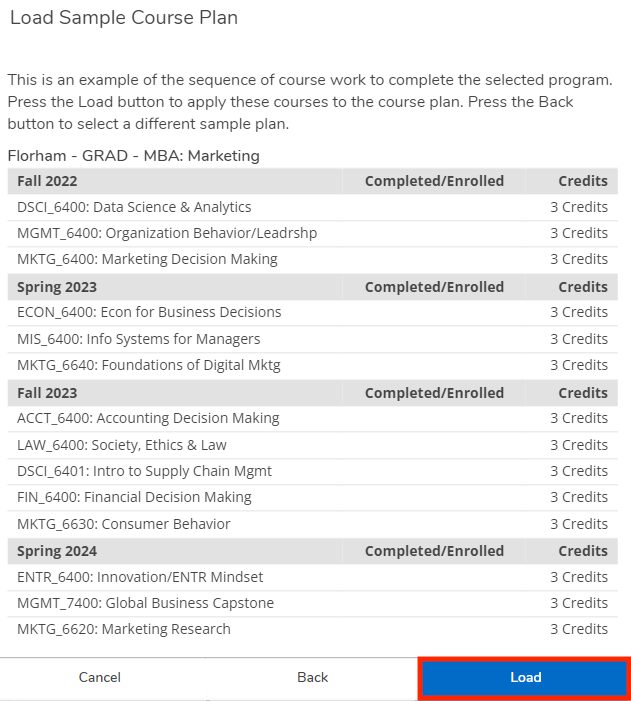
Press on “Preview Plan” at the bottom of the window
Review the sample course plan and press “Load”
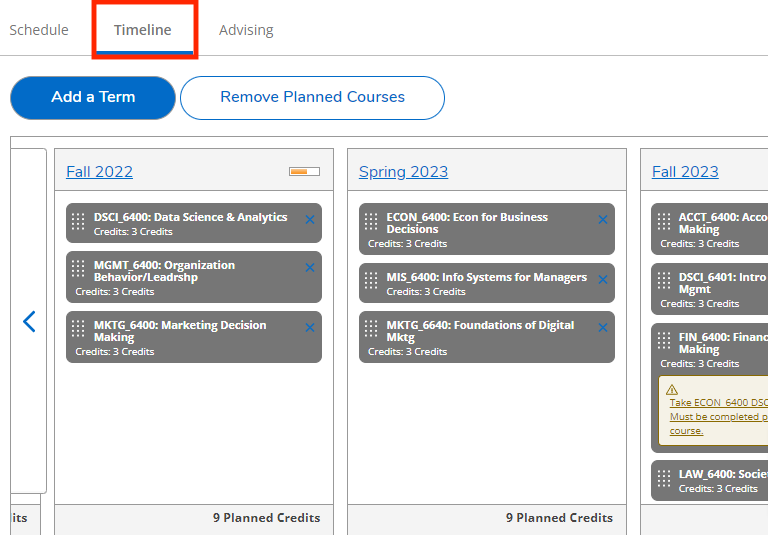
Use the Timeline tab to view the courses that were loaded onto your plan. Make any adjustments, if needed
On the left-hand side of the page, you will find your menus. Click on the menu called “Academics.” Within the “Student Planning” menu, click on “Plan & Schedule”
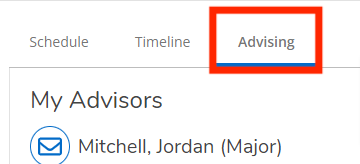
Go to the “Advising” tab. Here you will see the names of your advisors
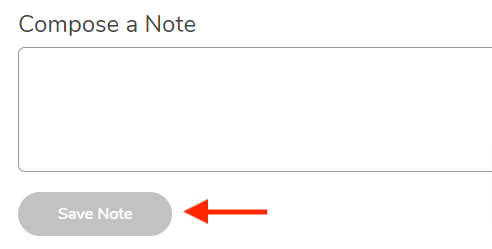
You can leave a message for your advisor by typing in the “Compose a Note” box and clicking “Save Note“
Click “Request Review” to have your advisor notified that your schedule is ready to be reviewed and approved
If a class you have planned is full and has a waitlist enabled, then follow these steps to join the waitlist. Please note that there is no guarantee that you will get a spot in the course section.
Note
Students have the option to place themselves on the waitlist to see if a seat becomes available in the course section. For a course that offers waitlisting as an option, plus-ins are no longer a standard practice; neither an advisor nor a professor can approve a plus-in for a class. All registration rules and restrictions apply to waitlisting, so you may not be able to place yourself on a waitlist if you are not eligible. If you encounter difficulties adding yourself to a waitlist due to restrictions, you should reach out to your Academic Advisor for assistance.
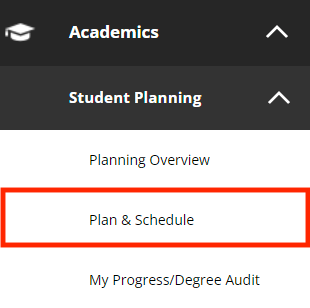
Go to the “Academics” menu, click on “Student Planning,” and navigate to “Plan & Schedule“
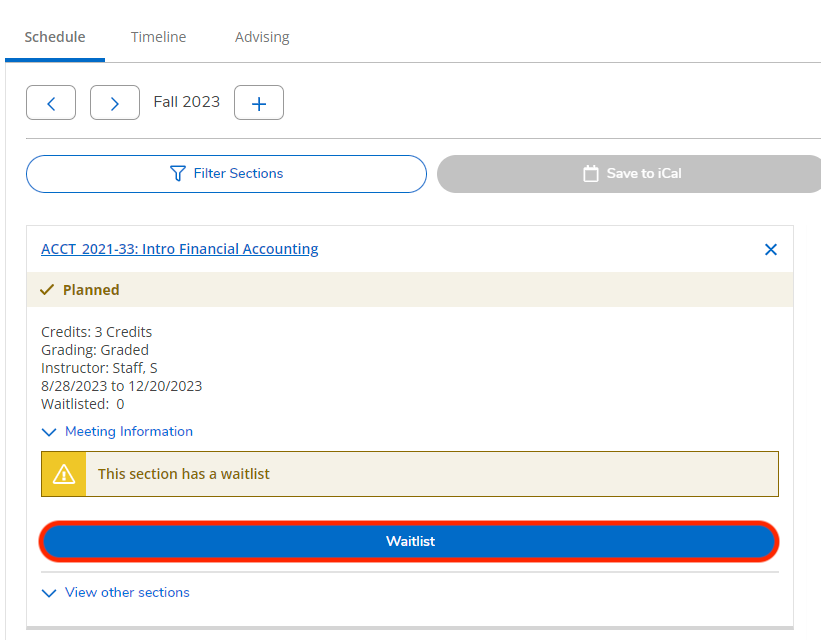
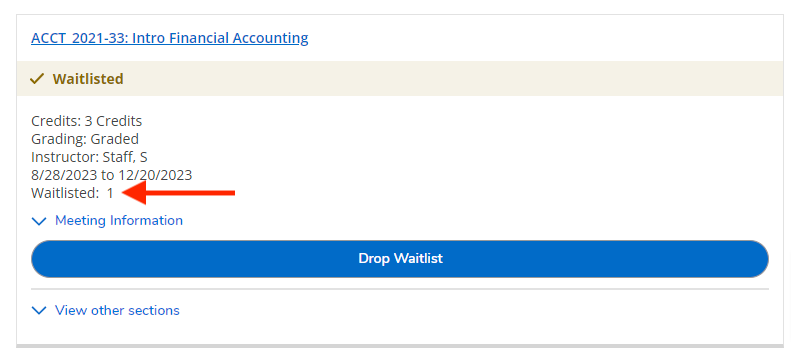
Find the section that is full. If the waitlist is active, you will see a “Waitlist” button
Once you’ve joined the waitlist, the number of waitlisted students will increase by one and you will have the option to drop off the waitlist
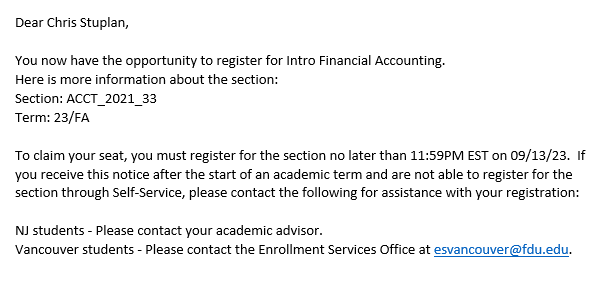
When a spot opens in the section, you will get a notification sent to your FDU email address
Note
You will only have until 11:59 PM EST on the day specified in the email to register for the section. If you do not register on time, the spot will be offered to the next person on the waitlist.
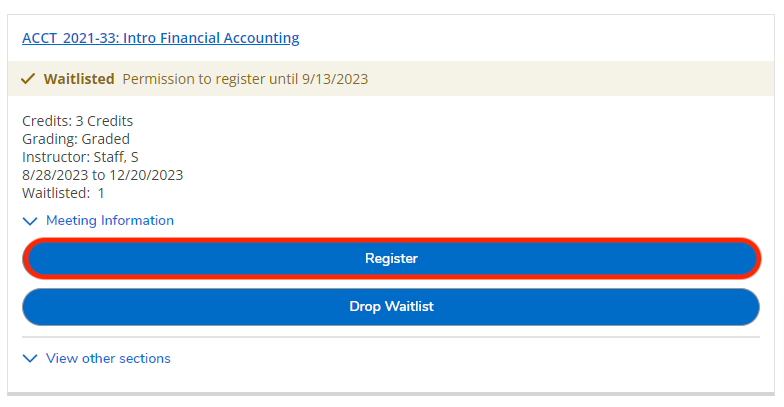
There will now be a “Register” button on the section within the Plan & Schedule page. Click on it to register for the waitlisted course
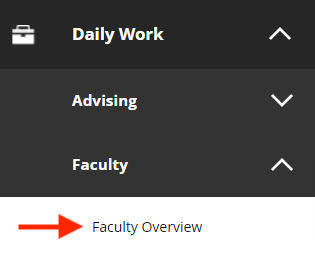
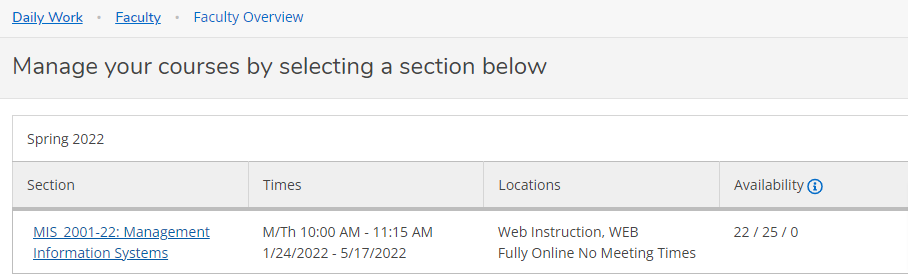
On the left-hand side of the page, you will find your menus. Click on the toolbox icon, called “Daily Work”, and navigate to the “Faculty” submenu. Within this submenu, click on “Faculty Overview”
Click on the row of the course you wish to verify the enrollment
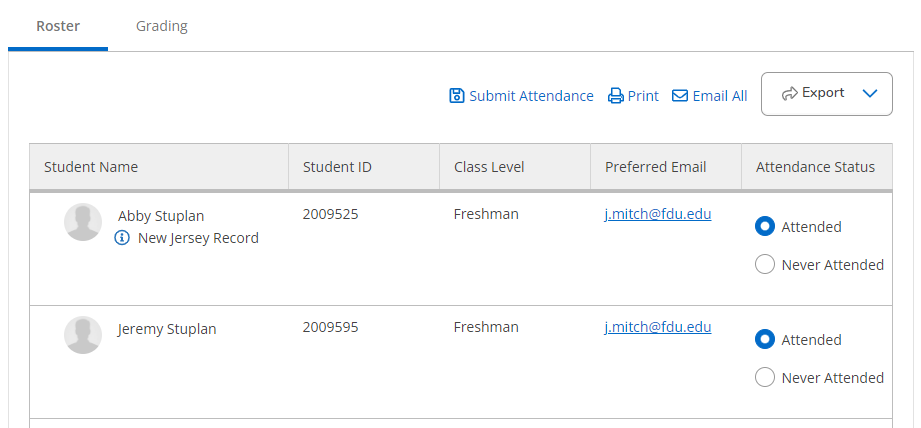
Within the “Roster” tab, you will see the list of students currently enrolled in the course. Use the radio buttons to select whether the student has “Attended” or “Never Attended”
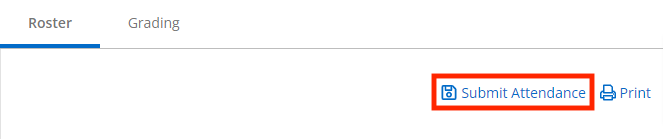
Once you have completed verifying enrollment, you must click on “Submit Attendance“
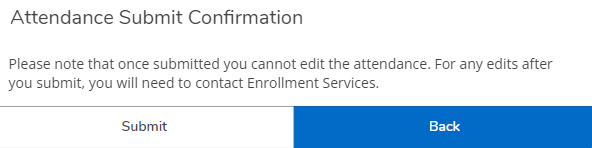
Click on “Submit” in the pop-up window to complete the process
Important
Once you’ve submitted attendance, you cannot make any changes in Self-Service. If you need to make a change, you must contact Enrollment Services: Metro Campus – esteafdu@fdu.edu AND/OR Florham Campus esmadfdu@fdu.edu.
After you’ve submitted the enrollment verification, you will see a green notification at the top of the page letting you know you were successful
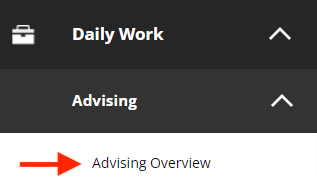
On the left-hand side of the page, you will find your menus. Click on the toolbox icon, called “Daily Work”, and navigate to the “Advising” submenu. Within this submenu, click on “Advising Overview“
Find the student you wish to advise using the prepopulated table of assigned advisees or by searching for their name or ID number in the search bar.
Note
You can search for any student, whether you are their advisor or not, by using the search bar.
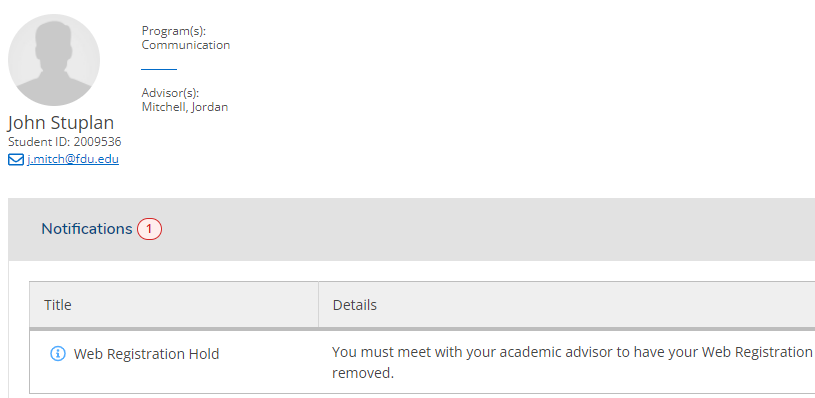
Click on the “View Details” button for the record of interest
Click on the “Notifications” bar to expand it and view any holds on the student’s account
Underneath the “Notifications” bar, you will find all the tabs you can use to gain a well-rounded view of the student’s academic progress
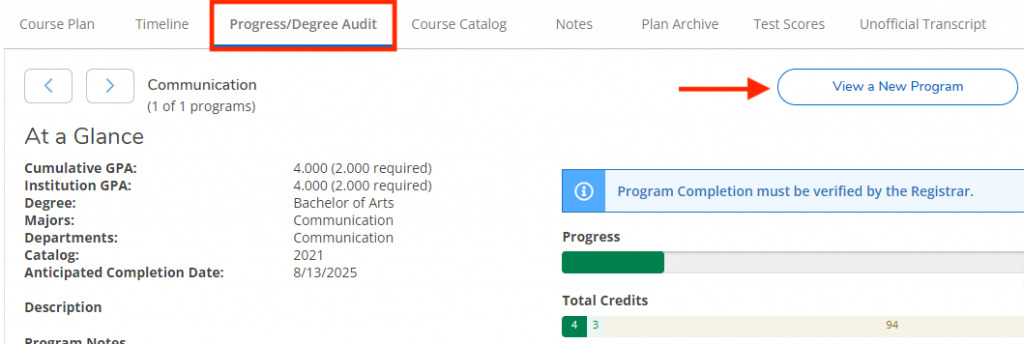
Click on “Course Plan” to view the courses the student has registered for or is planning to register for
Click on “Progress/Degree Audit” to view the student’s Degree Audit. Within this tab, you can click on “View a New Program” to see what it would look like if this student switched programs
Click on “Test Scores” to see any official test scores that have been submitted to FDU and recorded in Colleague
Click on “Grades” to view the student’s midterm and final grades broken down by semester
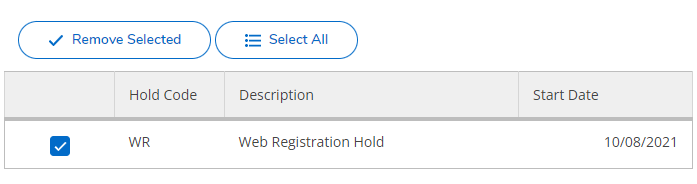
Click on “Remove Hold” to remove the web registration hold from the student’s account. You will need to select the hold you wish to remove and click on “Remove Selected”
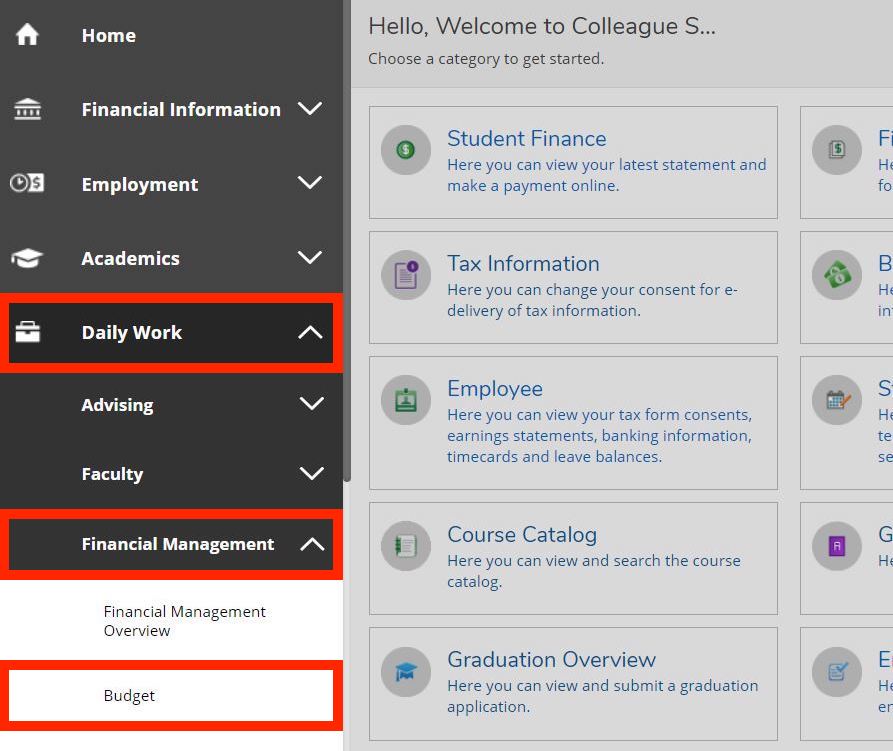
On the left-hand side of the page, you will find your menus. Click on the toolbox icon, called “Daily Work”, and navigate to the “Financial Management” sub-menu. Within this sub-menu, click on “Budget”
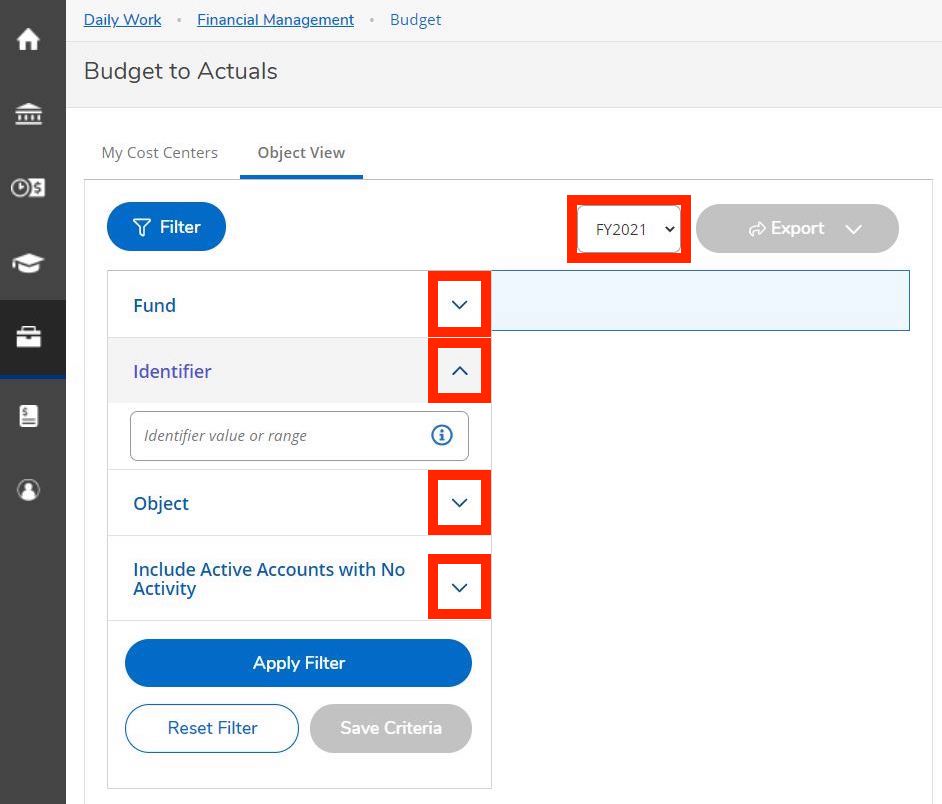
On the “Budget to Actuals” page, there will be options to filter your reports. By clicking on any of the arrows, you can expand or collapse the filter options. Once expanded, a field will appear where you can type the criteria you would like to search for. Additionally, you can change the Fiscal Year using the drop-down menu at the top of the page
Using “Identifier” as an example, you can type in your value(s) in the following ways. Hit “Enter” after each value to include in the search
Type in the individual identifier, ex: 067110
Type in the range of identifiers, ex: 067110-067115
Type in the identifiers separated by commas, ex: 067110, 067111, 067115
Click “Apply Filter” when done entering values. Your results will appear to the right of your filter menu
If you need to change your filters:
Open up the filter options by clicking on the blue “Filter” button
You can add more values by typing them into the field, hitting “Enter”, and applying the filter again
You can remove individual values by clicking on the “X” next to the value
You can start over completely by clicking “Reset Filter”
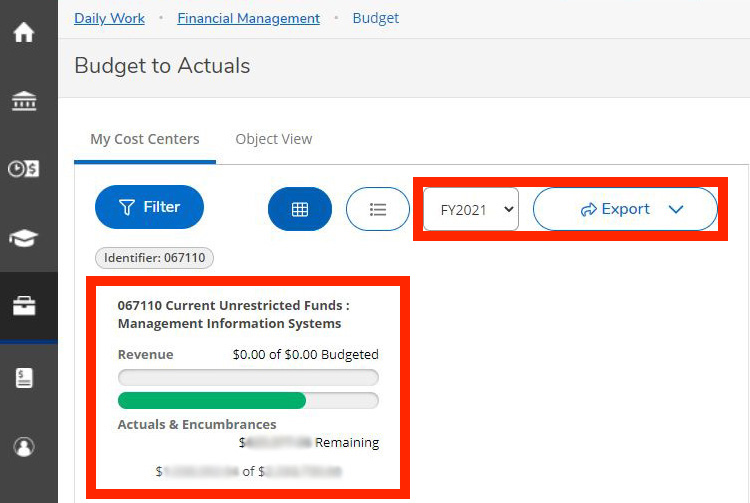
If you are satisfied with your filter options and would like to detail in on a specific budget, then click anywhere on the budget you would like to view
Click anywhere within a row to view more details. The “Financial Health” column will display a yellow alert symbol if the budget is over 85% spent
Continue to click on rows or documents to view more details. Download any page with an “Export” icon if you need to view it in Excel. You can click Back in your browser to go back a page
On the left-hand side of the page, you will find your menus. Click on the toolbox icon, called “Daily Work”, and navigate to the “Financial Management” sub-menu. Within this sub-menu, click on “Budget”
On the “Budget to Actuals” page, there will be options to filter your reports. By clicking on any of the arrows, you can expand or collapse the filter options. Once expanded, a field will appear where you can type the criteria you would like to search for. Additionally, you can change the Fiscal Year using the drop-down menu at the top of the page
Using “Identifier” as an example, you can type in your value(s) in the following ways. Hit “Enter” after each value to include in the search
Type in the individual identifier, ex: 067110
Type in the range of identifiers, ex: 067110-067115
Type in the identifiers separated by commas, ex: 067110, 067111, 067115
Click “Apply Filter” when done entering values. Your results will appear to the right of your filter menu
If you need to change your filters:
Open up the filter options by clicking on the blue “Filter” button
You can add more values by typing them into the field, hitting “Enter”, and applying the filter again
You can remove individual values by clicking on the “X” next to the value
You can start over completely by clicking “Reset Filter”
If you are satisfied with your filter options and would like to detail in on a specific budget, then click anywhere on the budget you would like to view
Click anywhere within a row to view more details. The “Financial Health” column will display a yellow alert symbol if the budget is over 85% spent
Continue to click on rows or documents to view more details. Download any page with an “Export” icon if you need to view it in Excel. You can click Back in your browser to go back a page
Note
Anytime you see the FY drop-down menu at the top of the page, you can change the FY you are viewing. Likewise, whenever you see the Export drop-down menu, you can download the information in your current view into a CSV file and open in Excel.
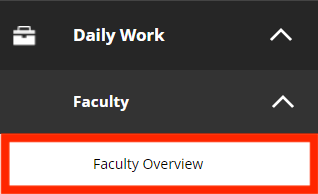
Go to the “Daily Work” menu, click on “Faculty,” and then click on “Faculty Overview“
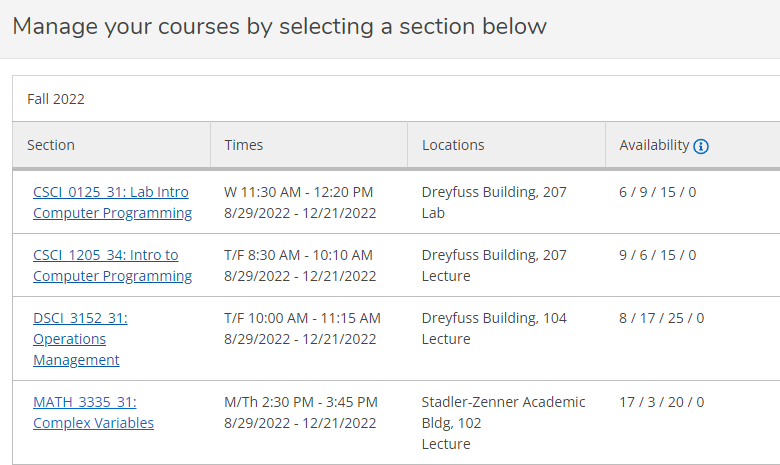
Select the course for which you need to enter midterm grades
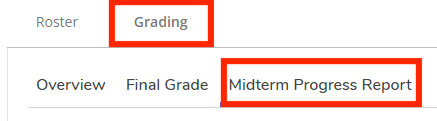
Within the “Grading” tab, select the “Midterm Progress Report” tab
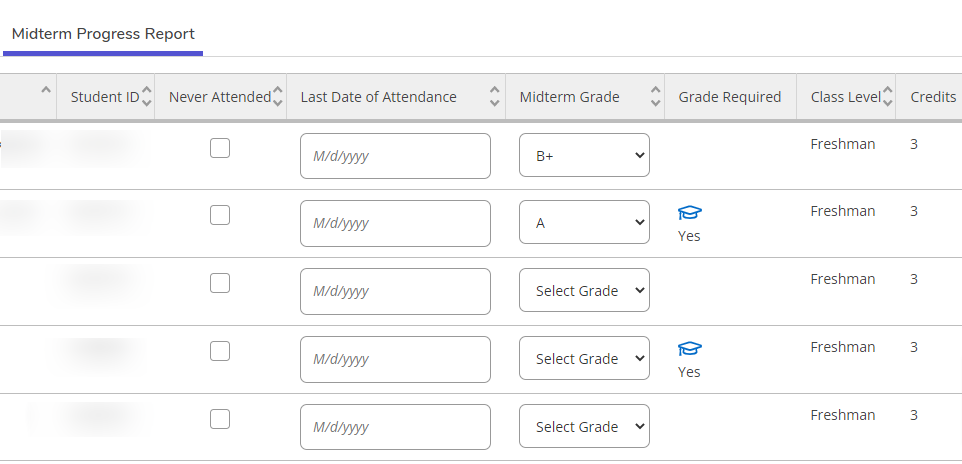
Use the drop-down menu to select the grade for each student
Note
The “Grade Required” column will indicate which students MUST be given a midterm grade.
Note
There is no Submit button for Midterm grading. Grades are automatically saved when selected from the drop-down. Midterm grades may be changed at anytime, if needed.
Go to the “Daily Work” menu, click on “Faculty,” and then click on “Faculty Overview“
Select the course for which you need to enter final grades
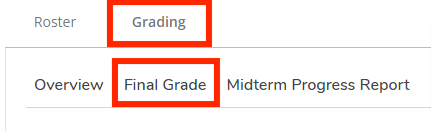
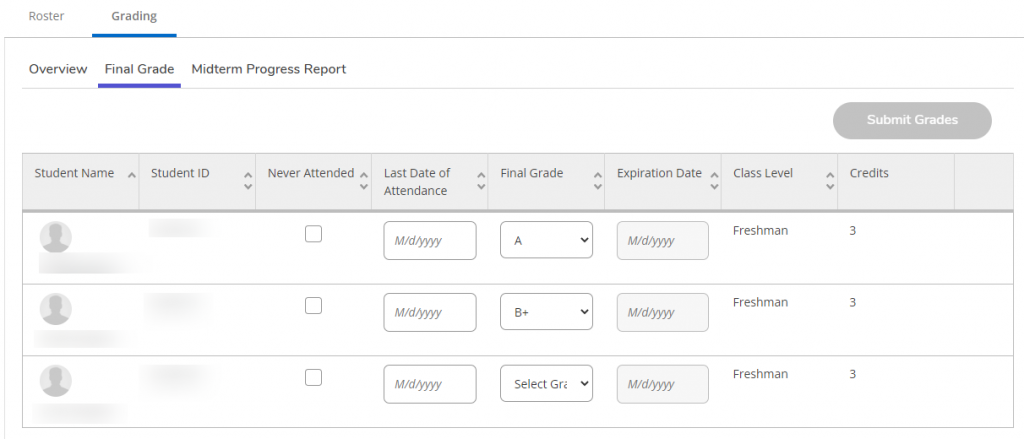
Within the “Grading” tab, select the “Final Grade” tab
Use the drop-down menu to select the grade for each student
Note
A grade must be entered for every student in order to submit grades.
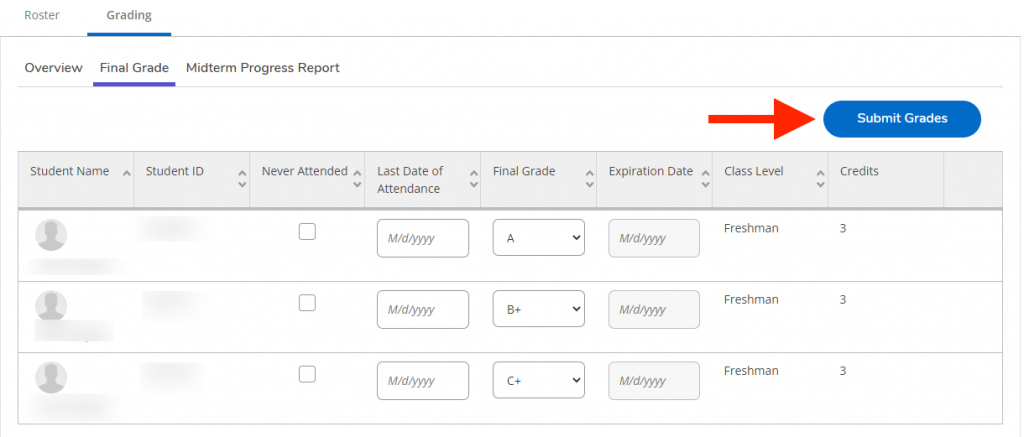
Once all grades have been entered, you must click the “Submit Grades” button to save and submit your work
Note
You have a short window where you can change grades and resubmit in Self-Service. However, once grades have been verified in Colleague, you will no longer be able to make a change in Self-Service. You will then need to go through the Change of Grade process.
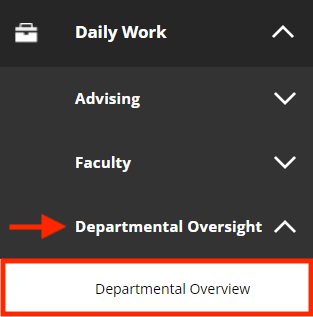
Go to the Daily Work menu and click on “Departmental Oversight“. Within this menu, click on “Departmental Overview“
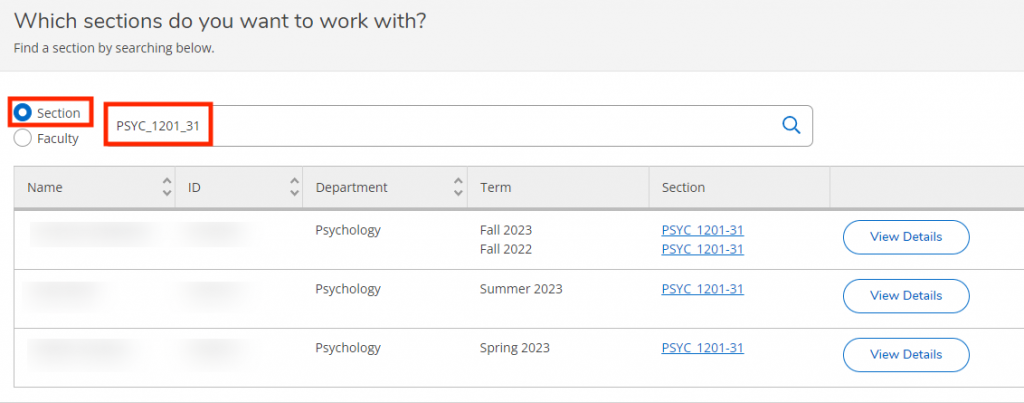
To search for a section by course code, click on the “Section“radio button. Type in the section information using the following valid formats only:
Subject Code Only – Ex: PSYC
Catalog Number – Ex: PSYC_1201
Specific Section – Ex: PSYCH_1201_31
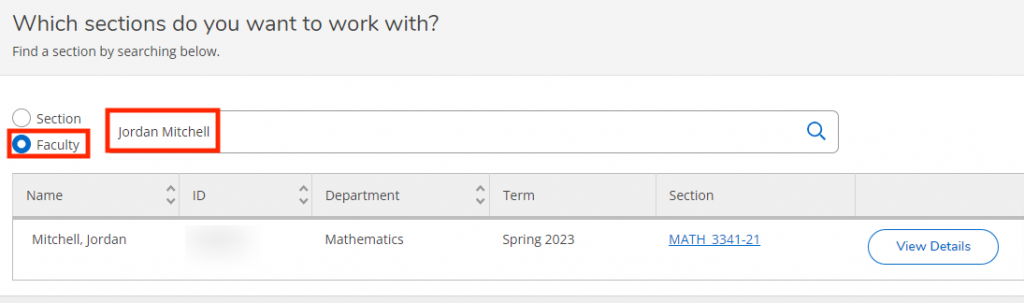
To search for all the sections being taught by a specific faculty member, click on the “Faculty” radio button. Type in the faculty member’s name using the following valid formats only:
First Name Last Name – Ex: Bob Smith
Last Name, First Name – Ex: Smith, Bob
Once you’ve found the section or faculty member you searched for, click on “View Details“
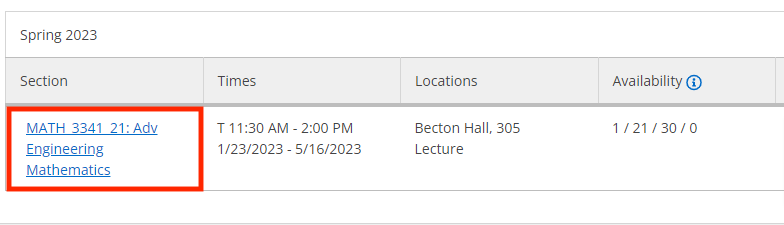
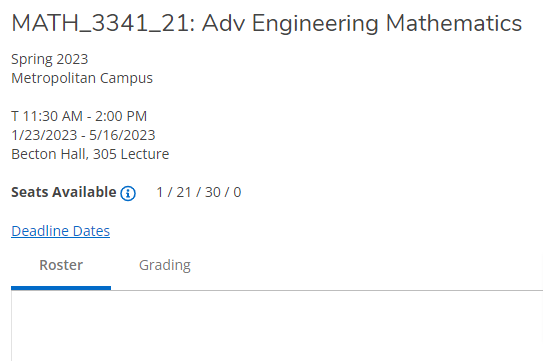
To view the Enrollment Verification or Midterm/Final grades associated with a specific section, click on the section name
Enrollment Verification can be found in the Roster tab and Midterm/Final grades can be found in the Grading tab
Note
You will not be able to submit grades on behalf of a faculty member. You can only view the grades that have been submitted.
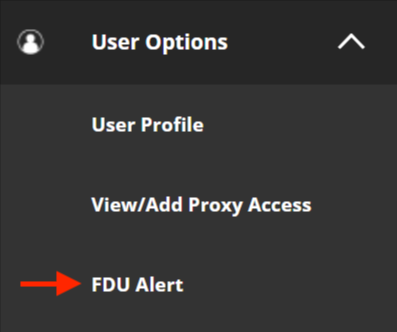
On the left-hand side of the page, you will find your menus. Click on the menu called “User Options” and then click on “FDU Alert”
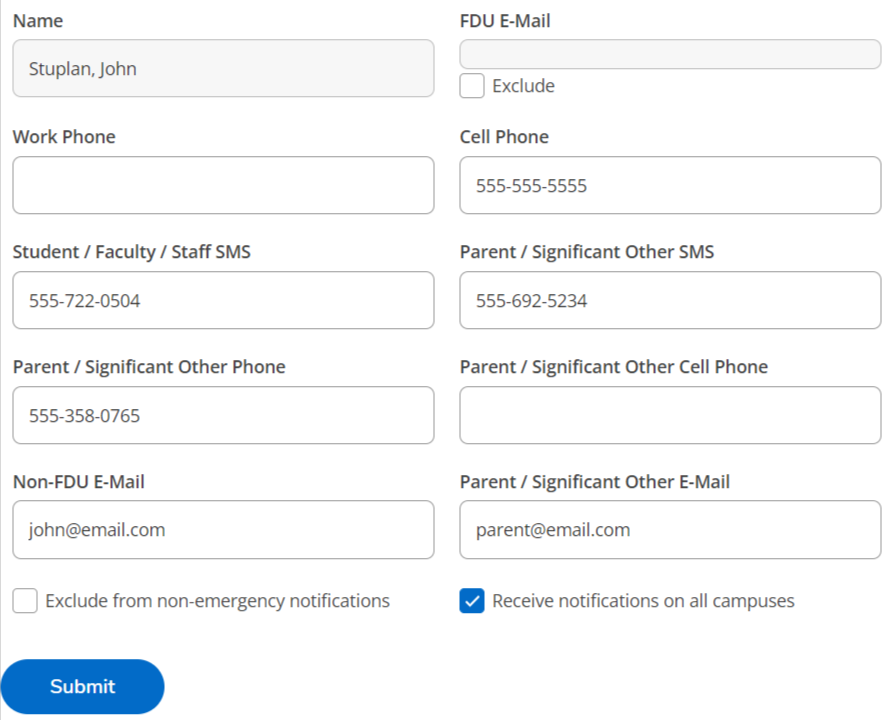
Fill in the alert information presented on the page. If information already exists in these fields, make sure the information is up to date. Click “Submit” when finished
What Is a Proxy? A proxy is a person you authorize to sign in to Self-Service and access selected student records.
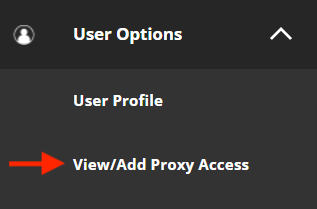
On the left-hand side of the page, you will find your menus. Click on the menu called “User Options” and then click on “View/Add Proxy Access”.
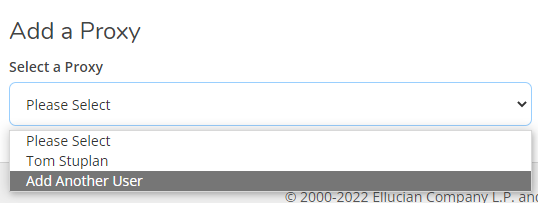
Use the drop-down to add a proxy. If you see the person’s name, select them from the list and fill in any missing information. If you do not see their name, click on “Add Another User”.
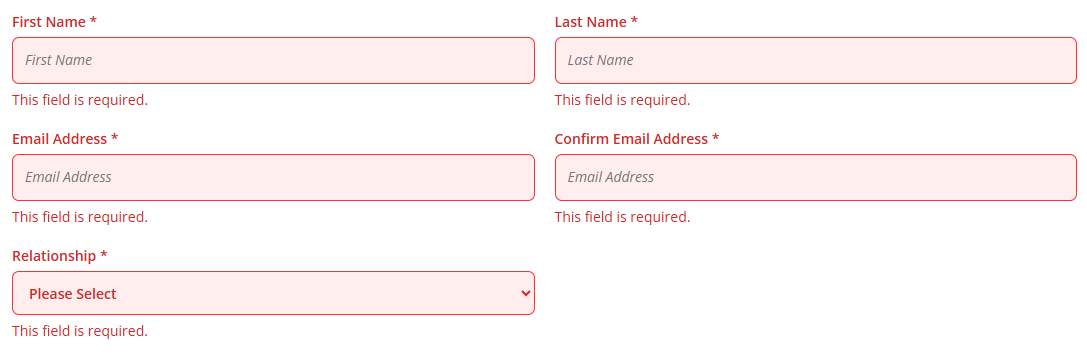
You must fill in the personal information for the proxy.
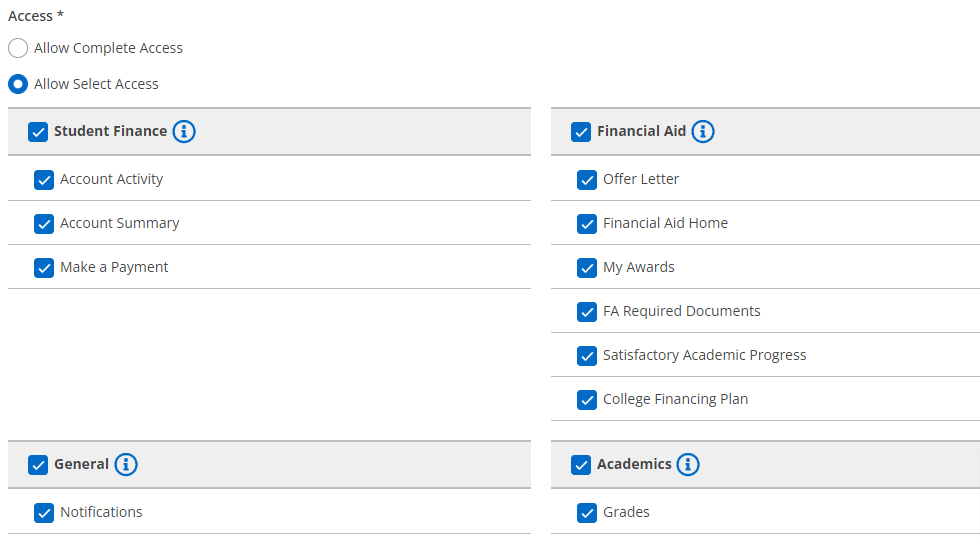
You can pick and choose what access you want to give to this proxy.
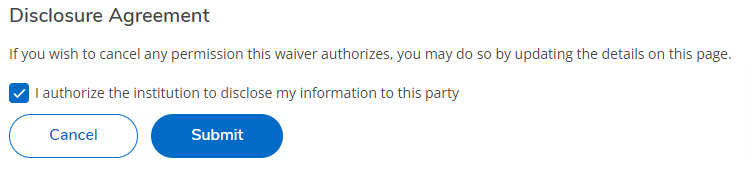
You must agree to the Disclosure Agreement and click “Submit”.
Now your proxy will be listed on the “View/Add Proxy Access” page under the “Invited Proxies” table.
Note
Proxies will receive an email any time access is granted or revoked.
If you want to change an active proxy’s access at any time, simply click on the pencil next to their row.
Add or remove access by selecting the appropriate check boxes. You can also remove all access entirely by selecting the “Remove All Access” radio button. Click “Save” to submit your changes.
Important
If you are giving a proxy access to “Make a Payment,” you must also make them an authorized user in TouchNet.
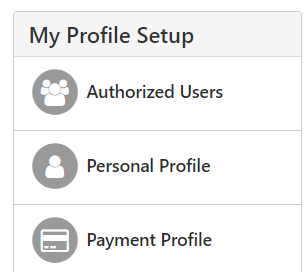
You can do this by clicking on “Payments/Payment Plans/1098-T” within the “Student Finance” menu.
Click on “Continue to the Payment Center” to navigate to TouchNet.
Click on “Authorized Users” to add your proxy as an authorized user to pay your bill. Follow the instructions to add the authorized user.
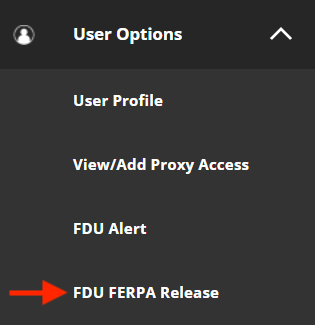
On the left-hand side of the page, you will find your menus. Click on the menu called “User Options” and then click on “FDU FERPA Release”
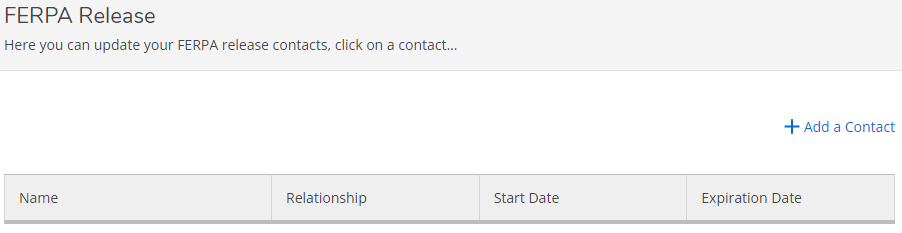
Click on “Add a Contact” to add a new contact, a person to whom you want to grant access to your information
Important
By completing the information on this page, you are authorizing administrators, staff, and faculty members of Fairleigh Dickinson University to release information pertaining to academic records, financial aid, student bill/account and disciplinary records to the contacts you have noted. This waiver remains in effect throughout your tenure as a student at the University. If you wish to cancel the permissions this waiver authorizes, you may do so by updating the details on this page. Please be advised that this waiver DOES NOT apply to services provided by Health and Counseling services. All records pertaining to medical care and psychological services remain confidential.
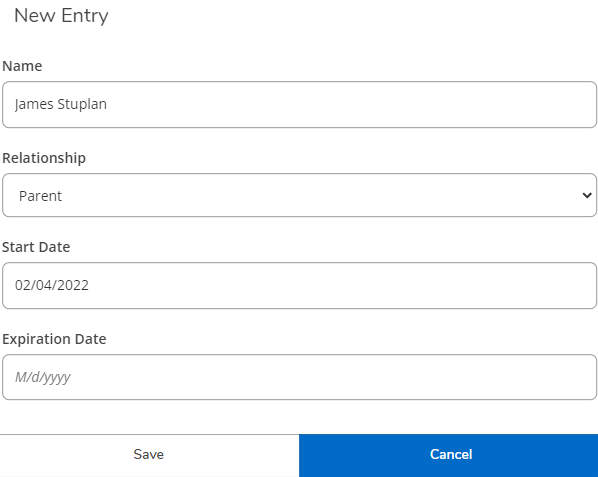
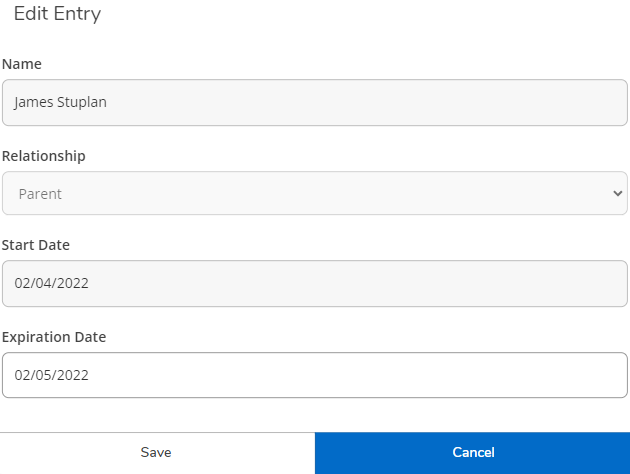
Adding a contact: Fill in the contact’s name, relationship, and the start date (the date that this will become effective). The expiration date is optional and can be changed at any point. Click “Save”
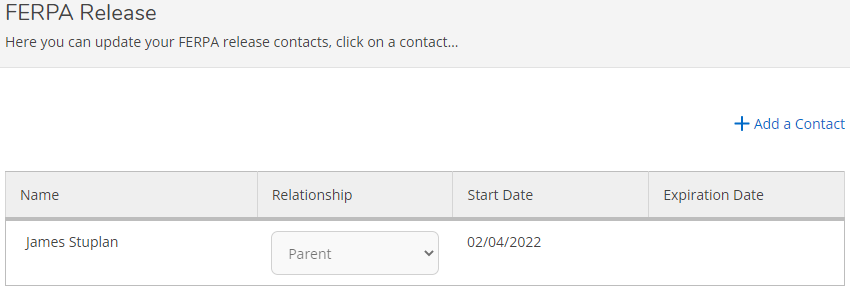
You will now see this contact listed on the FDU FERPA Release page
If you want to end the permissions of a contact, press on the row containing their name
Fill in an expiration date to end their permissions on that date. Press “Save”
Repeat the steps above to add or change your contacts
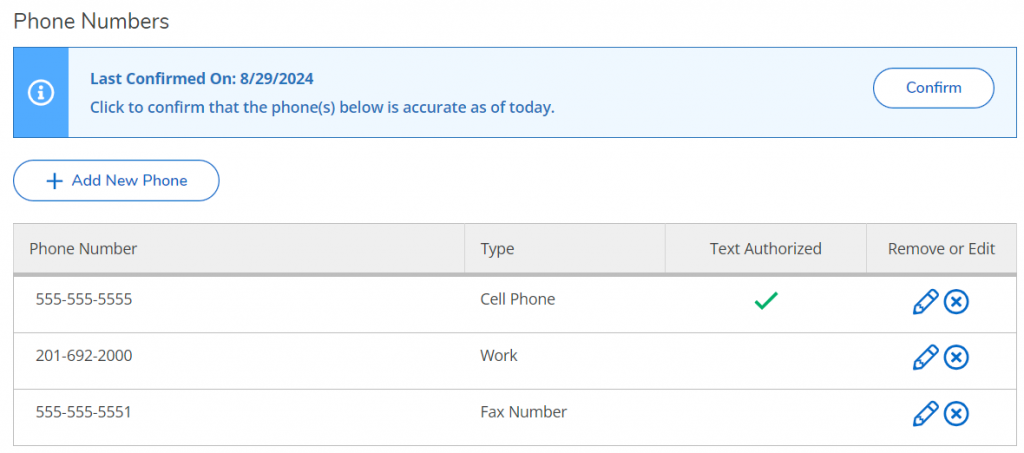
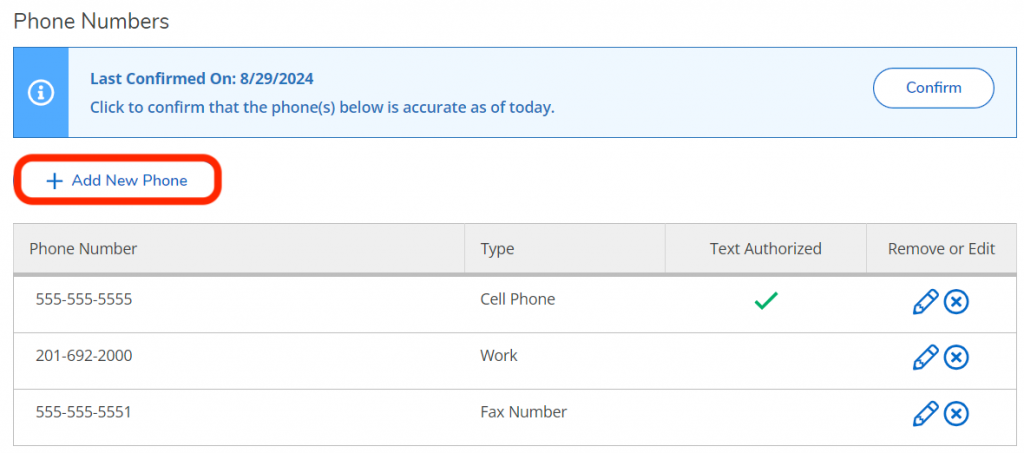
The phone numbers the University has on file to communicate with you are displayed in your User Profile in Self-Service. If the information is incorrect in any way, you can update your contact data using the steps below.
Faculty/Staff
Please note that the phone number you enter under the ‘Work’ phone type will be publicly available in the FDU Faculty/Staff directory. Ensure that the number you provide for ‘Work’ is the one you want colleagues, students, and others to use to contact you.
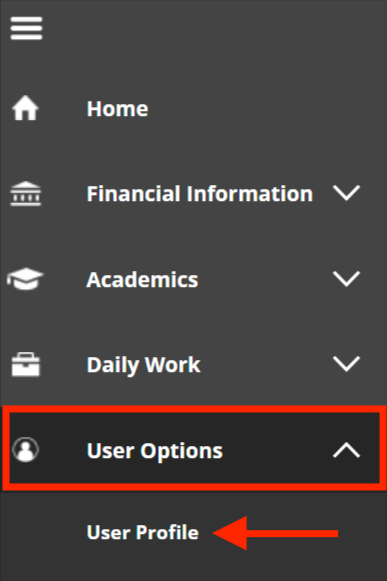
Go to the “User Options” menu and press on “User Profile”
Scroll down to the “Phone Numbers” section
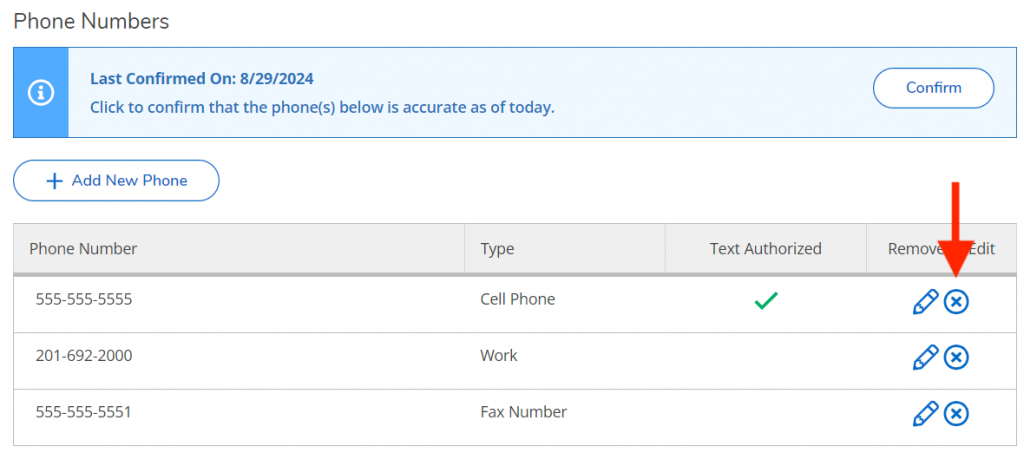
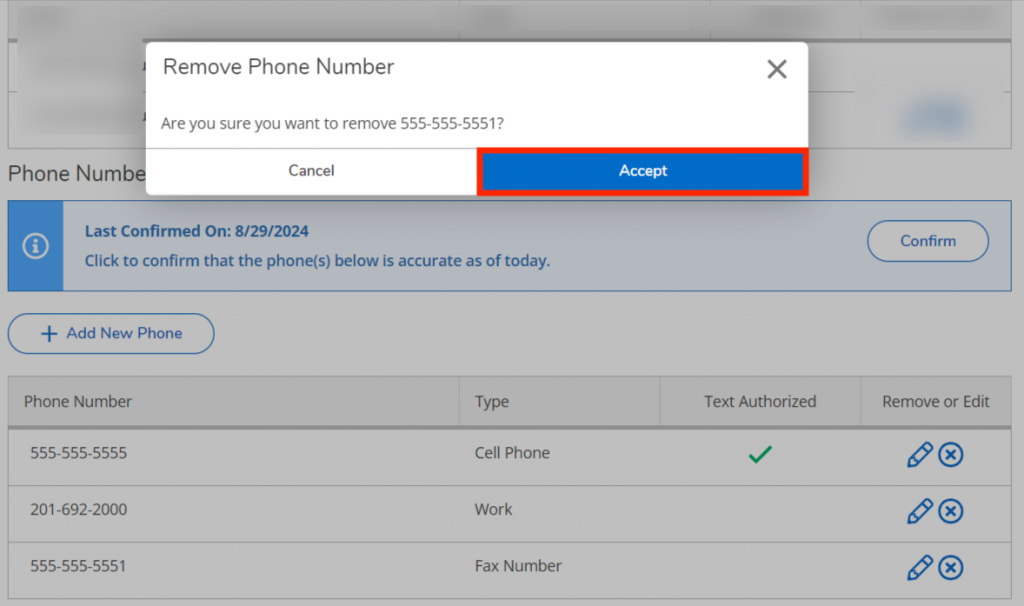
If any of the phone numbers listed are no longer yours, you can press the “X” icon in the Removeor Editcolumn to delete them. Press “Accept” to confirm the deletion
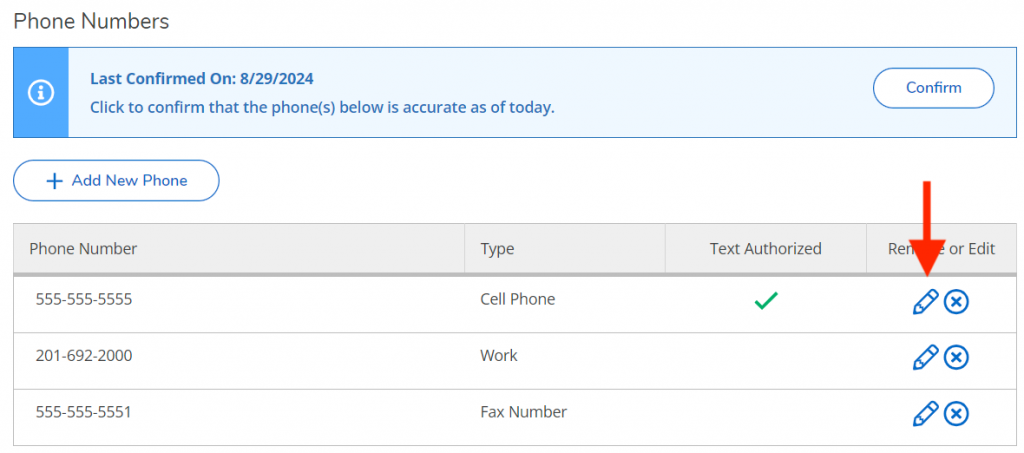
If any of the numbers listed need to be corrected or updated, press the “Pencil” icon. Change the information that appears in the pop-up window and press “Update Phone”
If you need to add a new phone number to your record, press “+ Add New Phone”. In the pop-up window, fill in the number, and extension (if applicable), type, and select if you allow this number to be texted. Then press “Add Phone”
All students, faculty, and staff can submit SoftDocs forms through FDU webpages or directly in SoftDocs Etrieve Central. Etrieve Central is a browser-based, mobile-friendly electronic forms and document management system.
When you click a link to a SoftDocs form on an FDU webpage, you may be prompted to log in using SSO to access the form. If the form is anonymous, you will not be prompted to log in.
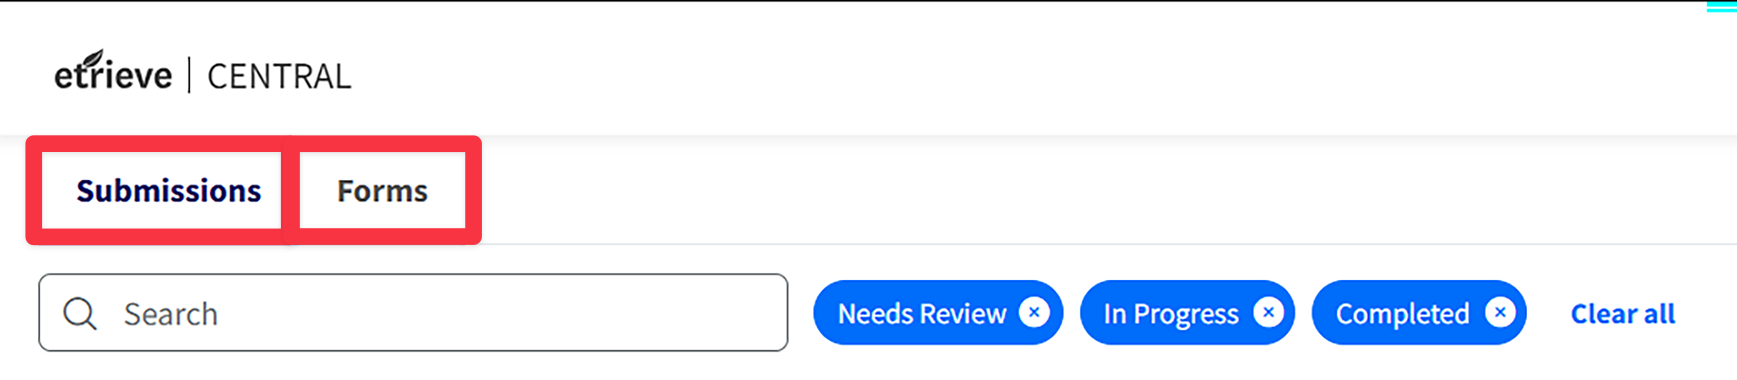
You can also log in directly to SoftDocs Etrieve Central:
In Progress: Forms you submitted, approved, or processed that are still in a workflow.
Completed: Forms you submitted, approved, or otherwise processed
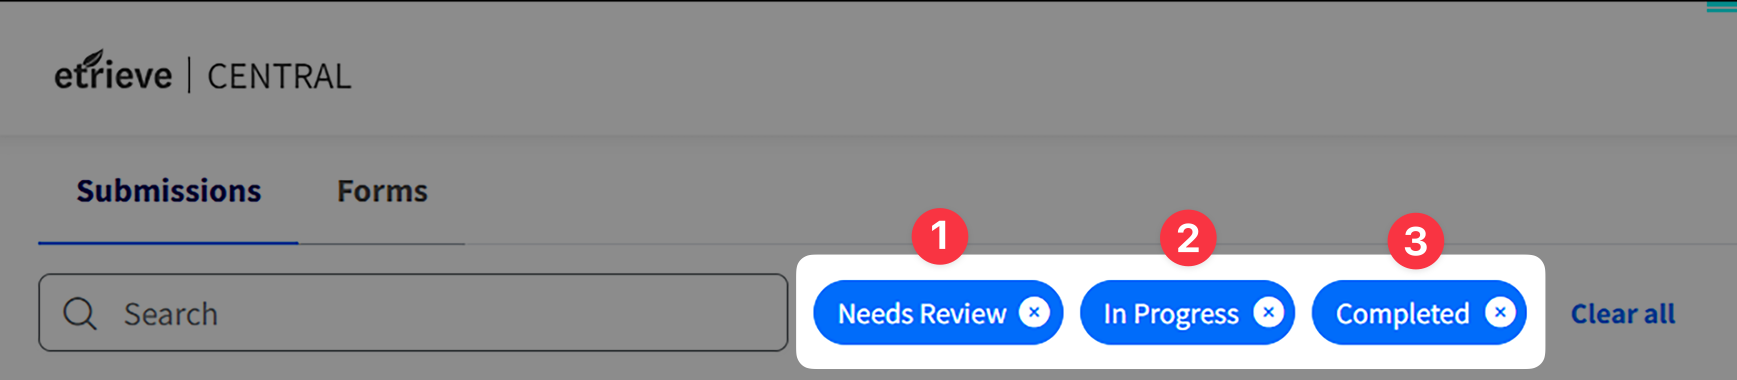
Note
If you have no forms in Needs Review, the system defaults to In Progress. If you have no forms in Needs Review or In Progress, the system defaults to Completed.
Use Search to find text that appears in the Package Name, Workflow, or Submitter columns. You can also sort and filter columns.
Package Name: Typically a dynamic value that often includes information submitted by the form initiator (for example, Form Name + Student Name + Student ID)
This value is frequently used in email notifications
Workflow: How the form is routed (often shares the name of the form)
Step: The current step where the form is sitting in the workflow (workflows often have multiple steps)
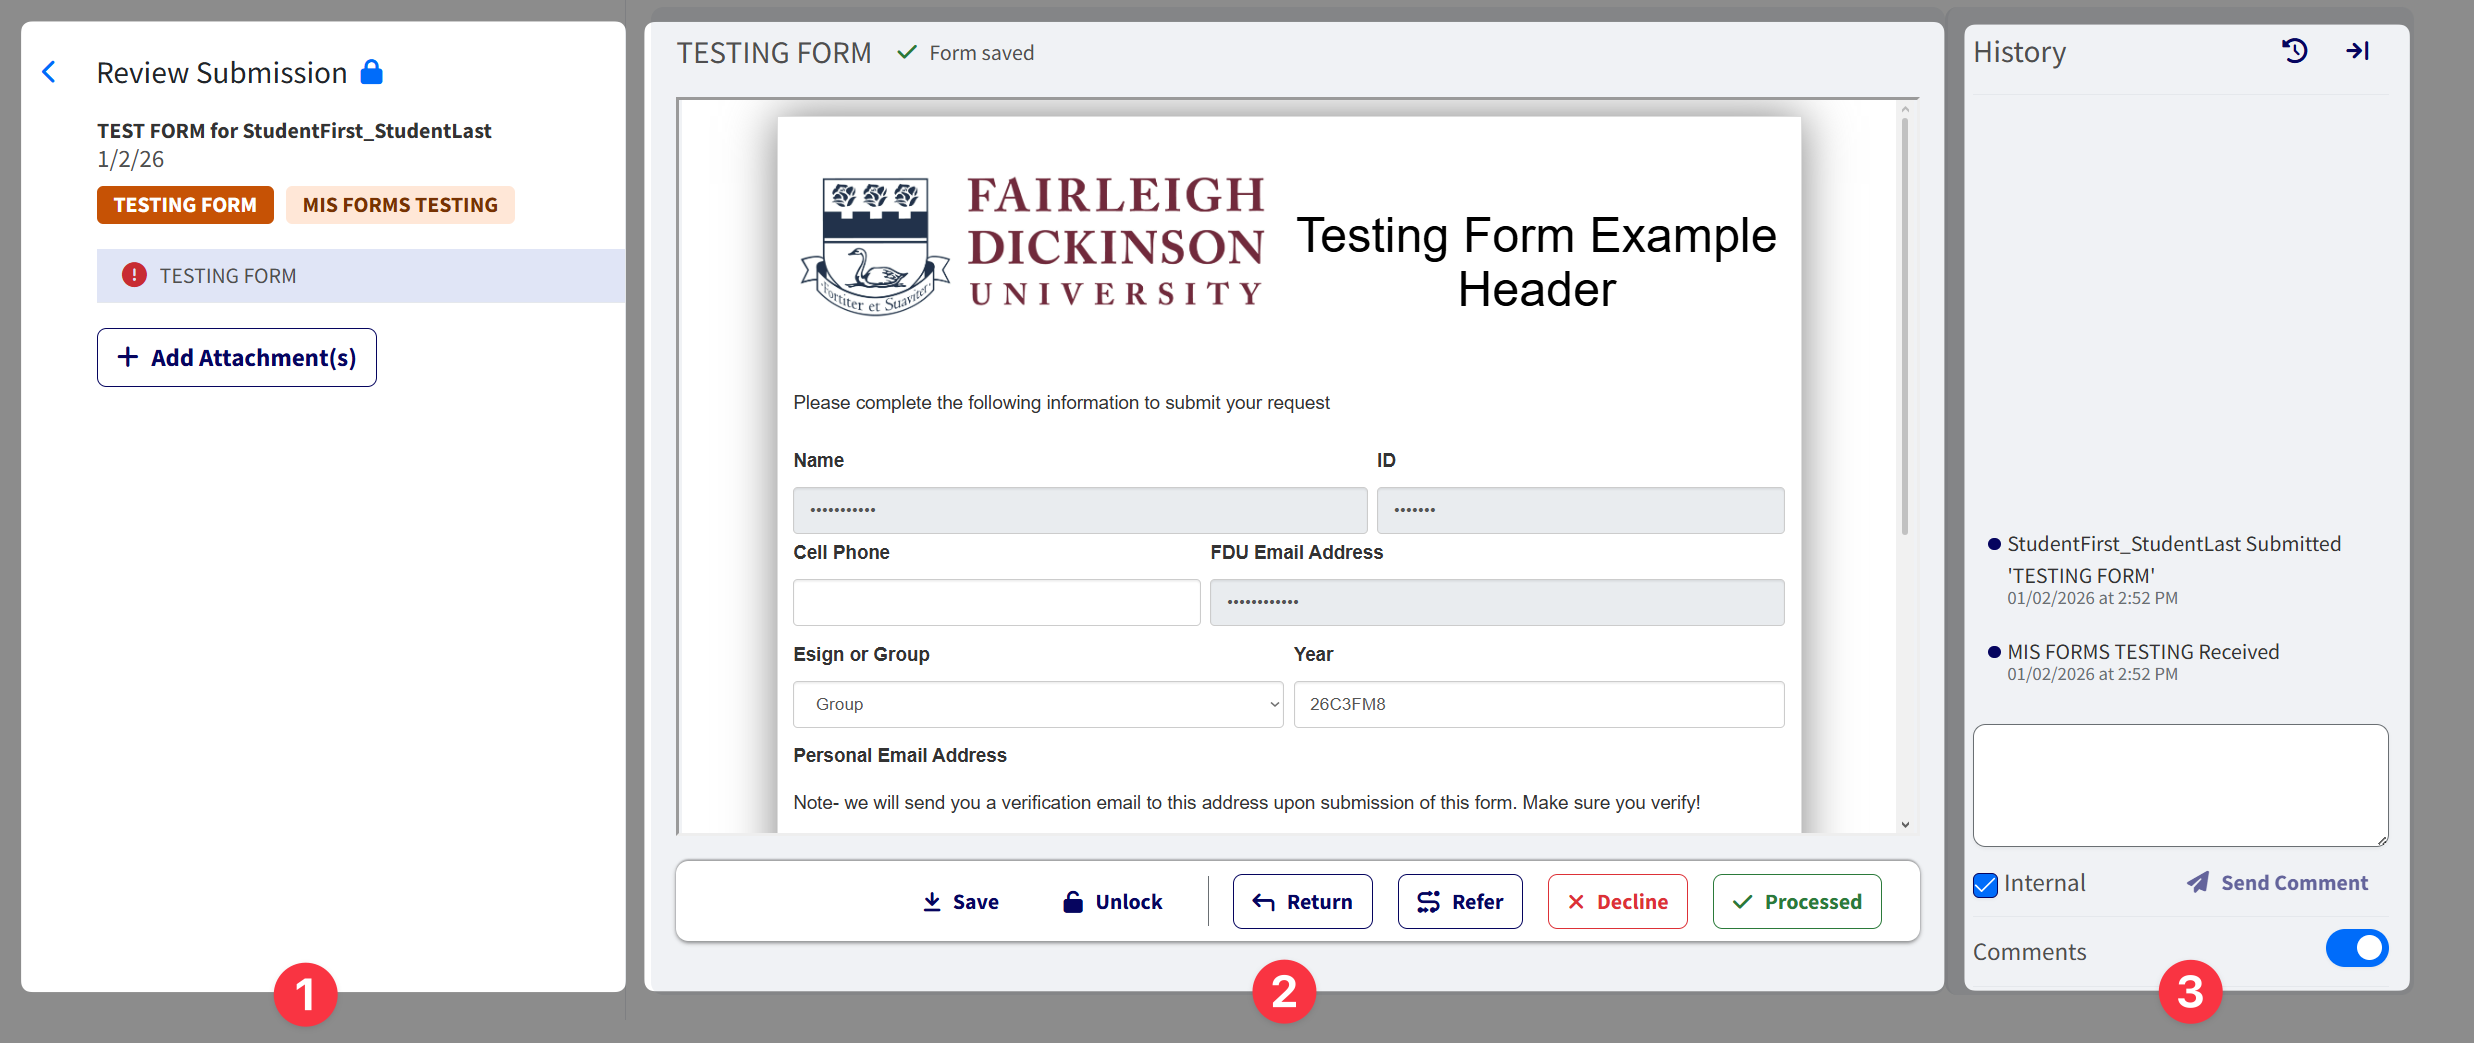
When you select a submission, the form opens in a new window with three sections:
Review Submission: Package information and attachments
Content Panel: Form content and actions (for example, Approve, Decline)
History: History, comments, and auditing
Tip
The history panel can be minimized using the minimize icon located on the top right.
The Forms Panel
Locate the form you want to submit (organized by department)
Fill out the form completely
Click “Submit”
Note
Required fields left blank are highlighted in red. You’ll also see a prompt reminding you to enter text before submitting. At the bottom of the form, you can add attachments, download, or print.
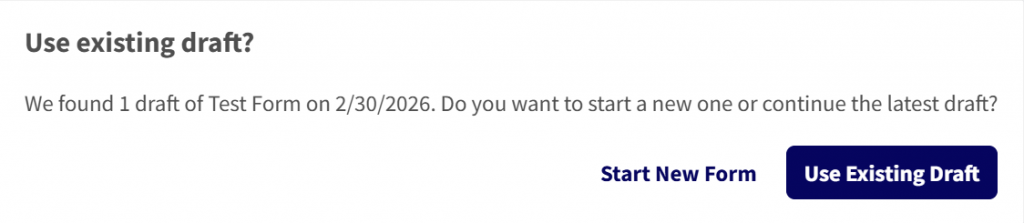
The Drafts dropdown stores incomplete forms. If you try to start a new form and already have a draft started, you’ll be reminded about your draft.
SoftDocs Approval Process
After a user submits a form, it advances to the next step in the workflow for approval.
Approvers receive an email when a form is awaiting their review.
Selecting “Needs Review” under the SubmissionsPanel also provides pending forms assigned to them individually or to their group.
Depending on the workflow, an approver can Approve, Decline, Return for correction, or Refer the form to another person.
If a form is referred, the referred party takes the place of the current reviewer in the workflow
Once the referred party approves, the workflow continues along its path
Note
Buttons are customizable, so one form may display “Processed” where another displays “Approved”.
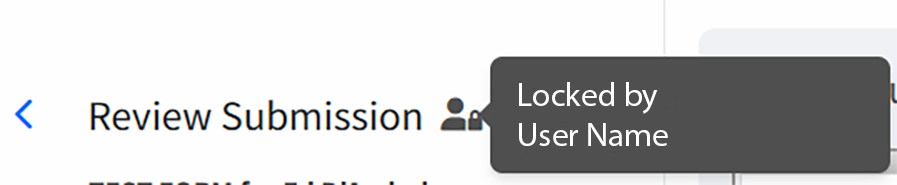
Tip
Forms can be locked or unlocked using the lock icon. You can also see who is locking the form using the same icon in the left panel.
When a form reaches the final approval step, the submitter may or may not receive an email (depending on the workflow configuration). Approved forms always appear under Submissions > Completed, for FDU SSO users, once the process is complete.
After the workflow finishes, the final document is stored in the Etrieve Content document management system. Departments that own the form can view filed documents in Etrieve Content if they have been granted access.
If access to Etrieve Content is needed, submit the SoftDocs Etrieve Account Request form. A supervisor must initiate the request. It then routes to the new Etrieve user for approval before arriving at MIS.
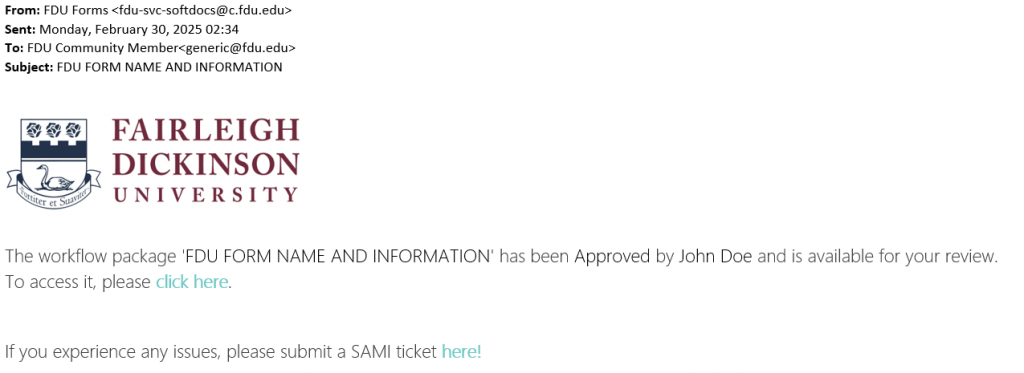
When a SoftDocs form is submitted, the first user or group in the workflow receives an email from FDU Forms (hostname: fdu-svc-softdocs@c.fdu.edu) containing a link to the SoftDocs package.
Email Notification Examples
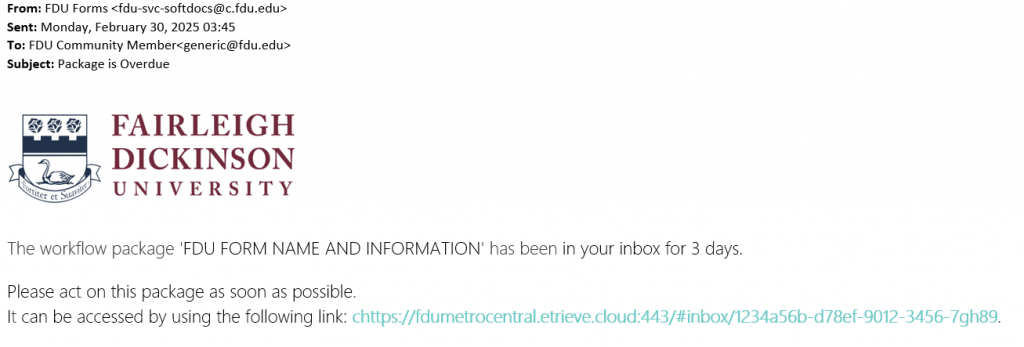
Overdue Notifications: If a package remains in a user’s inbox beyond the time limit defined in the workflow, SoftDocs sends a reminder email with the subject line “Package Overdue”.
Submission Example
Submission Example: At each step in the workflow, all assigned users or groups receive an email notification. Each notification includes the name of the previous approver.
Progress Example
Overdue Notifications
If a package remains in a user’s inbox beyond the time limit defined in the workflow, SoftDocs sends a reminder email with the subject line “Package Overdue” to prompt the user to take action.
To access Forms, you will be directed to our SAMI Support Portal where you will be asked to log in using your NETID and authenticate using Duo. Once you click “Next,” you will be forwarded to samisupport.fdu.edu in a new window or tab.


 Email
Email 

