icon

Voice Services

Voice Services provides the campus with both basic and advanced telecommunications services. They offer phone service (desk and softphone), provision mobile devices, establish voicemail, and coordinate repairs, as well as additions, moves, and changes to phone numbers for faculty and staff on both NJ campuses and the Vancouver campus.

Help Desk
background
Search Department Resources

Single Number Reach Feature

Resources for:
icon Close

The Single Number Reach (SNR) feature allows users to answer incoming calls to their extension on either their desktop IP phone or at a remote destination, such as a mobile phone. Users can pick up active calls on either the desktop phone or the remote phone without losing the connection. This enables callers to dial a single number to reach the user.

Enabling Single Number Reach

  1. Log into the Self-Care Portal
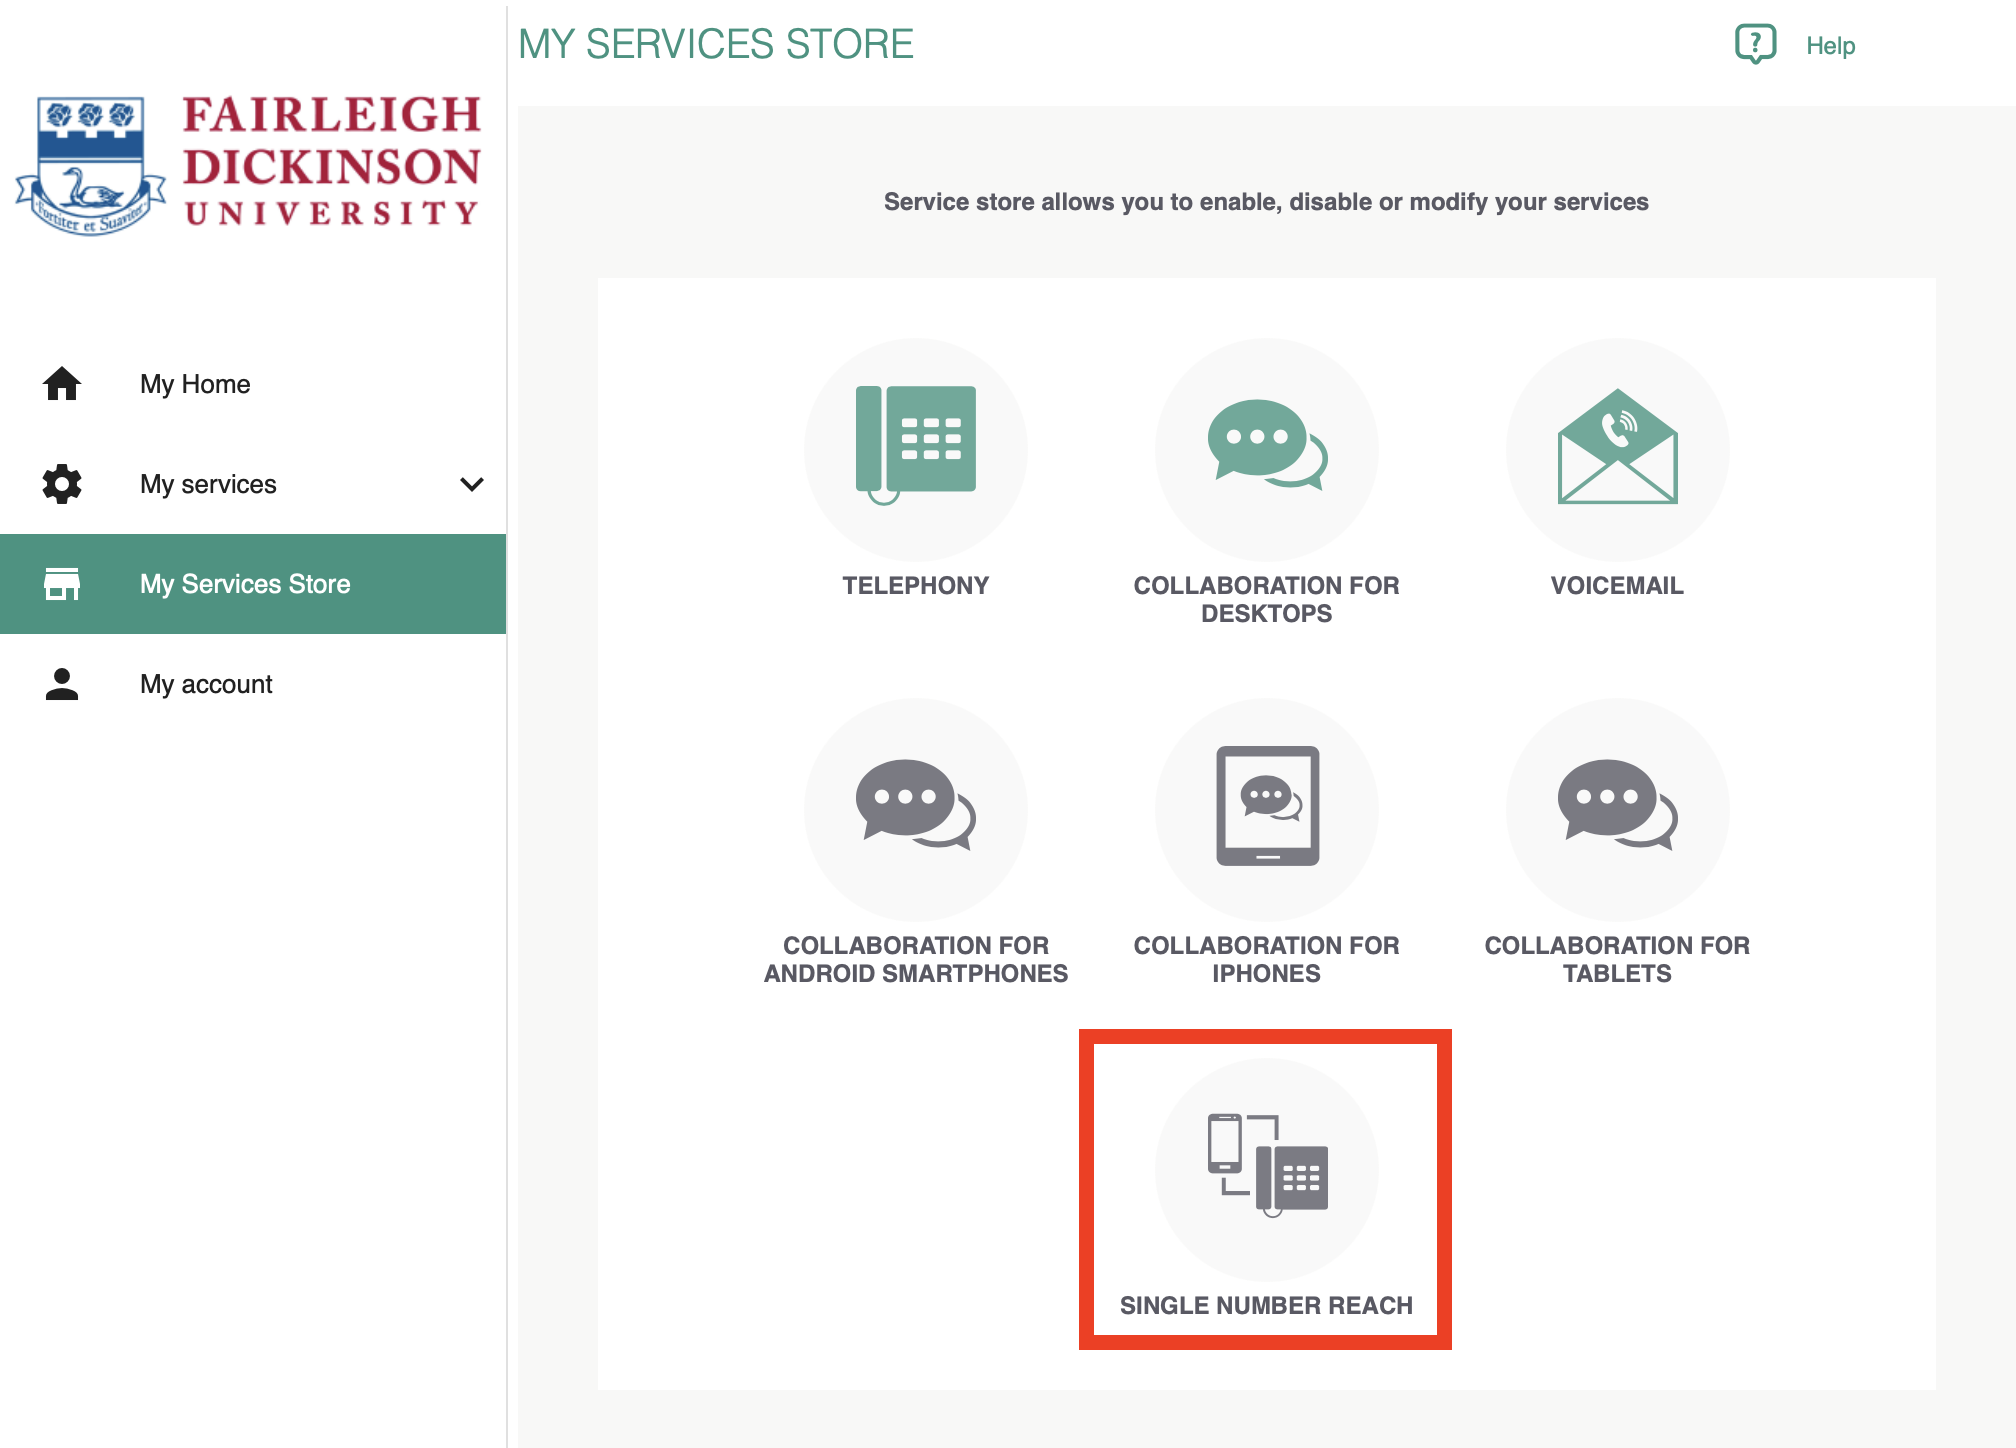
  1. Click the “My Services Store” icon
  1. Click the “Single Number Reach” Icon
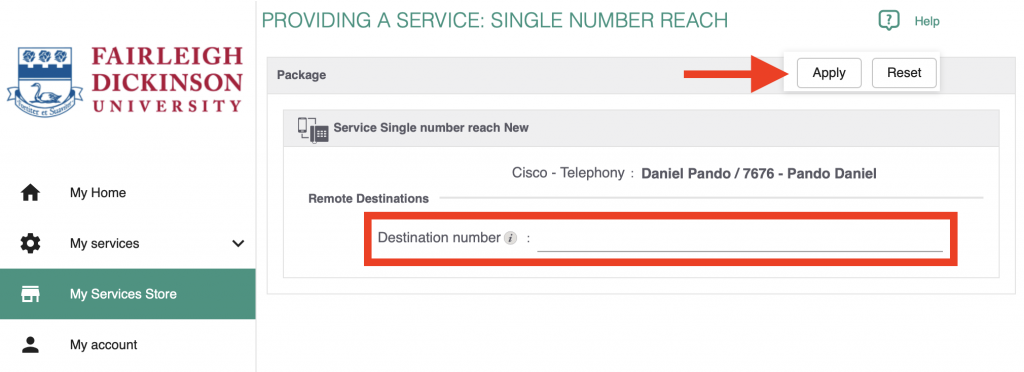
  1. Enter the Destination Number and click “Apply

Tip

After the Feature is enabled for 1 Destination, additional Destinations can also be added.

Adding Another Destination

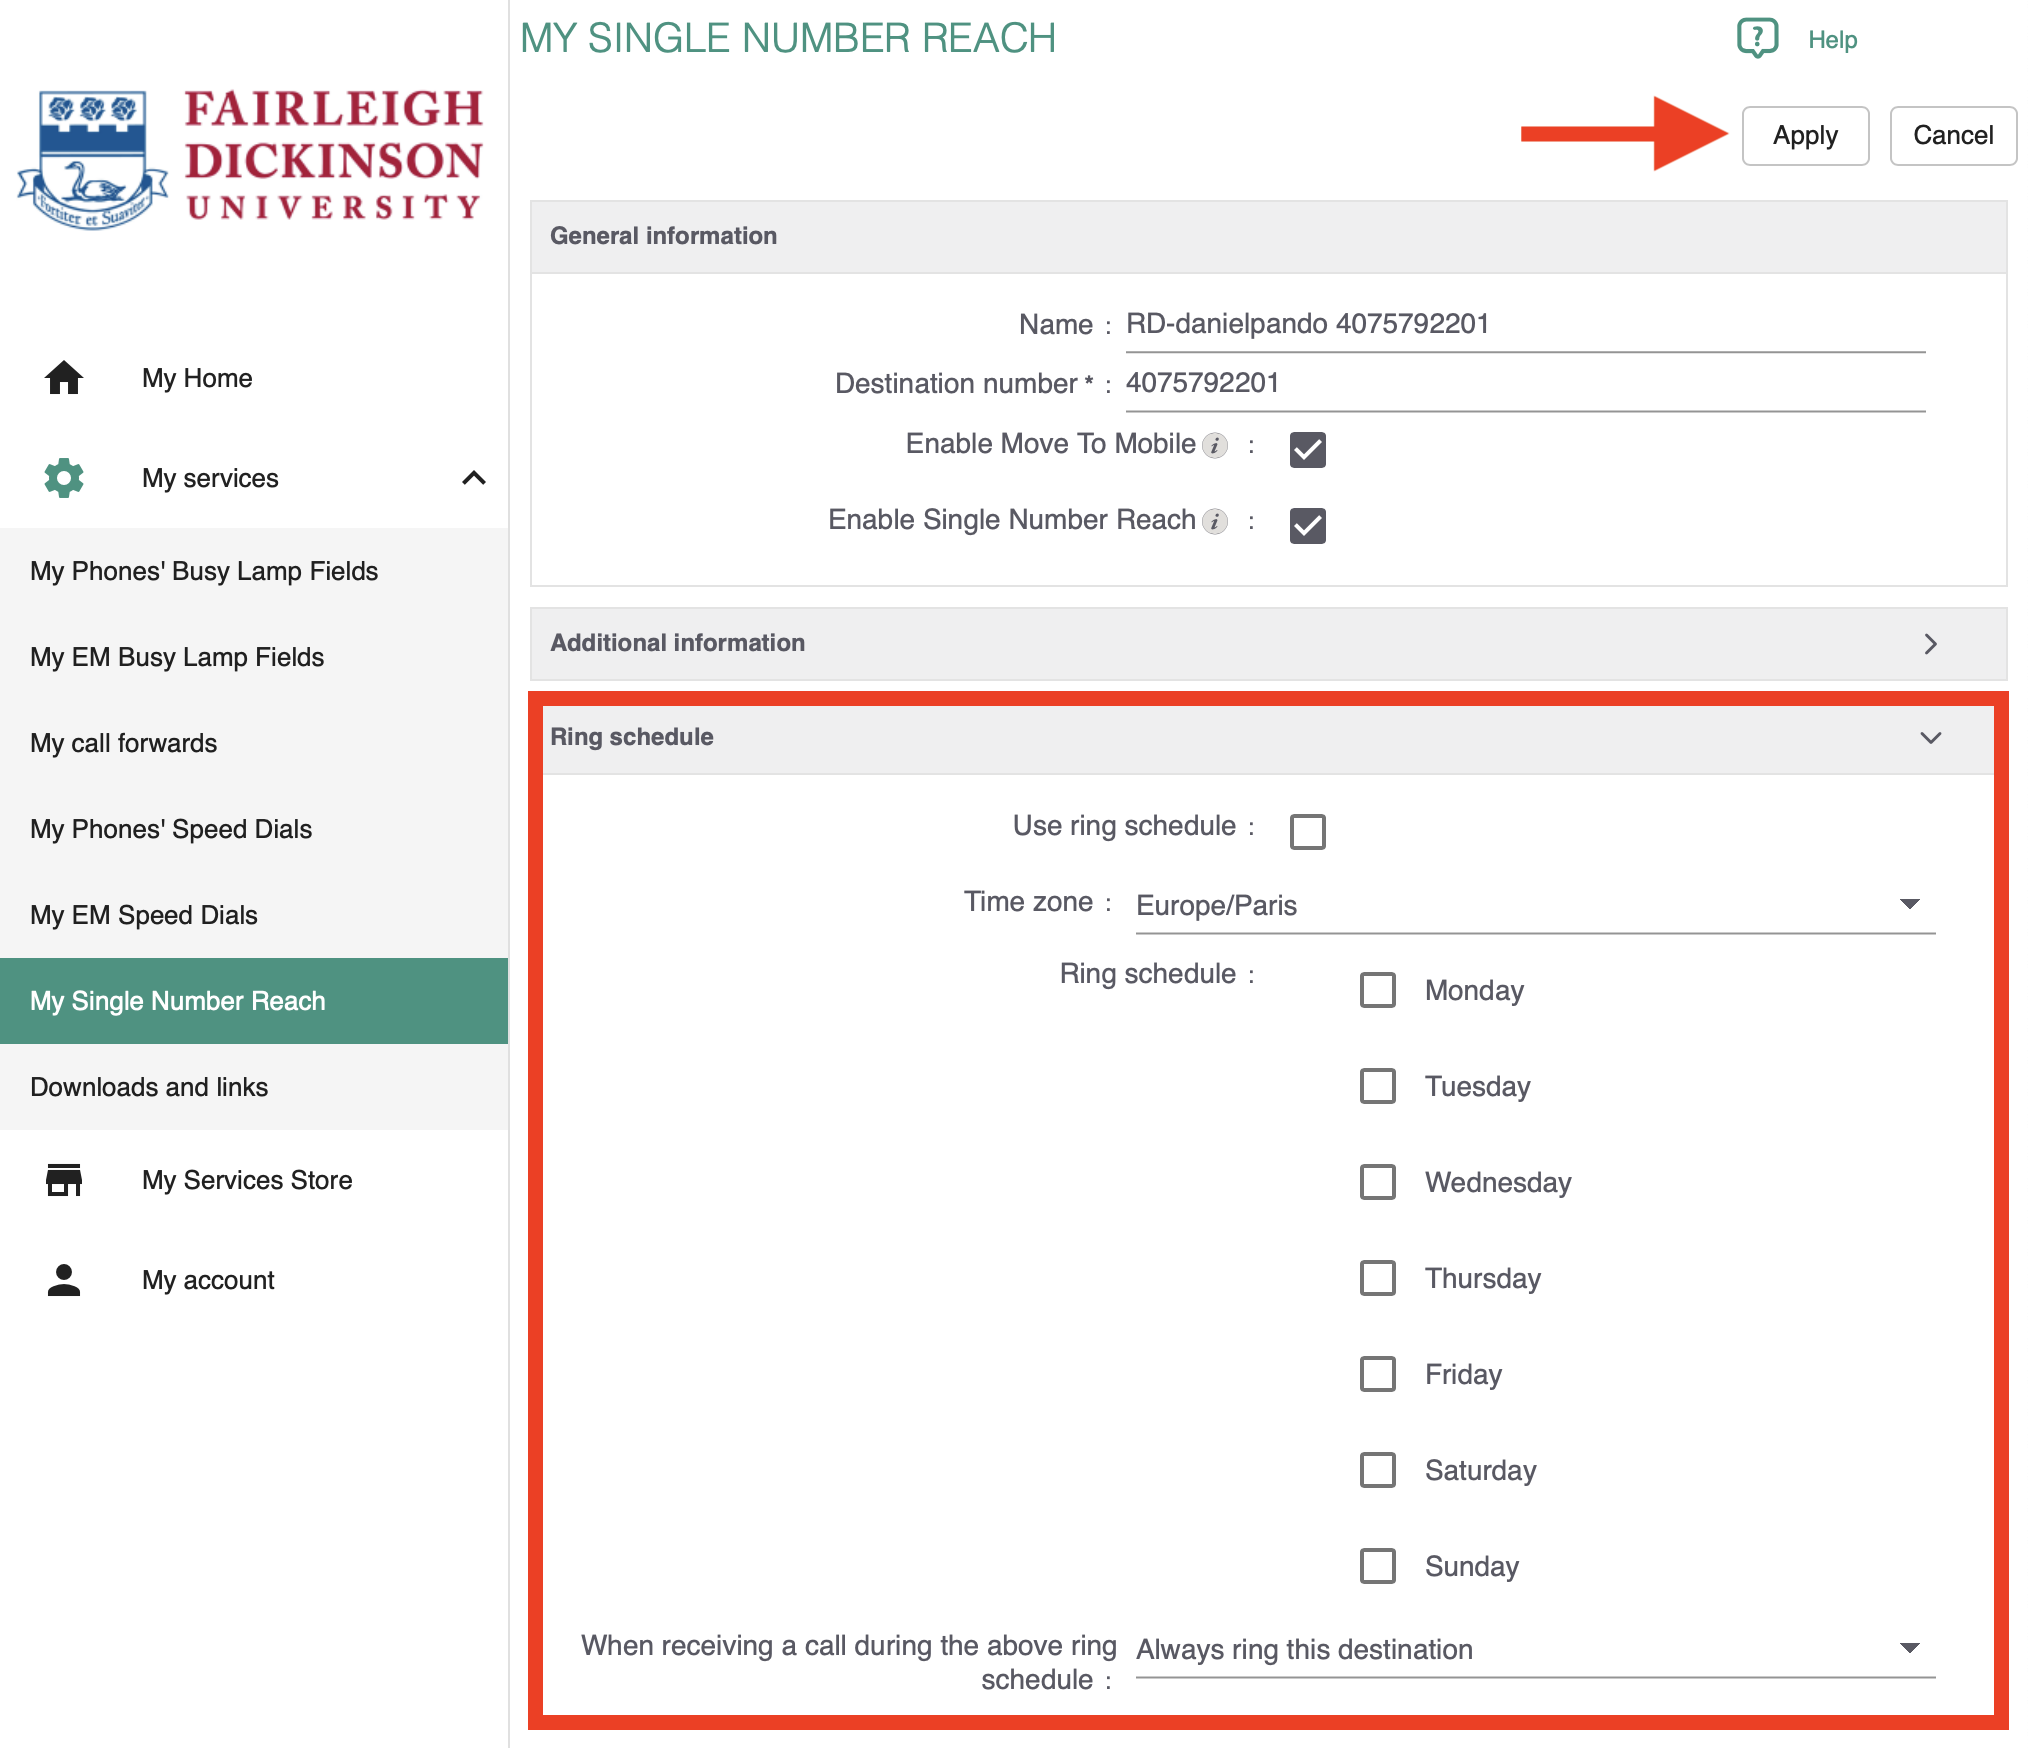
  1. Click the “My Services Store” icon from the My Home Tab
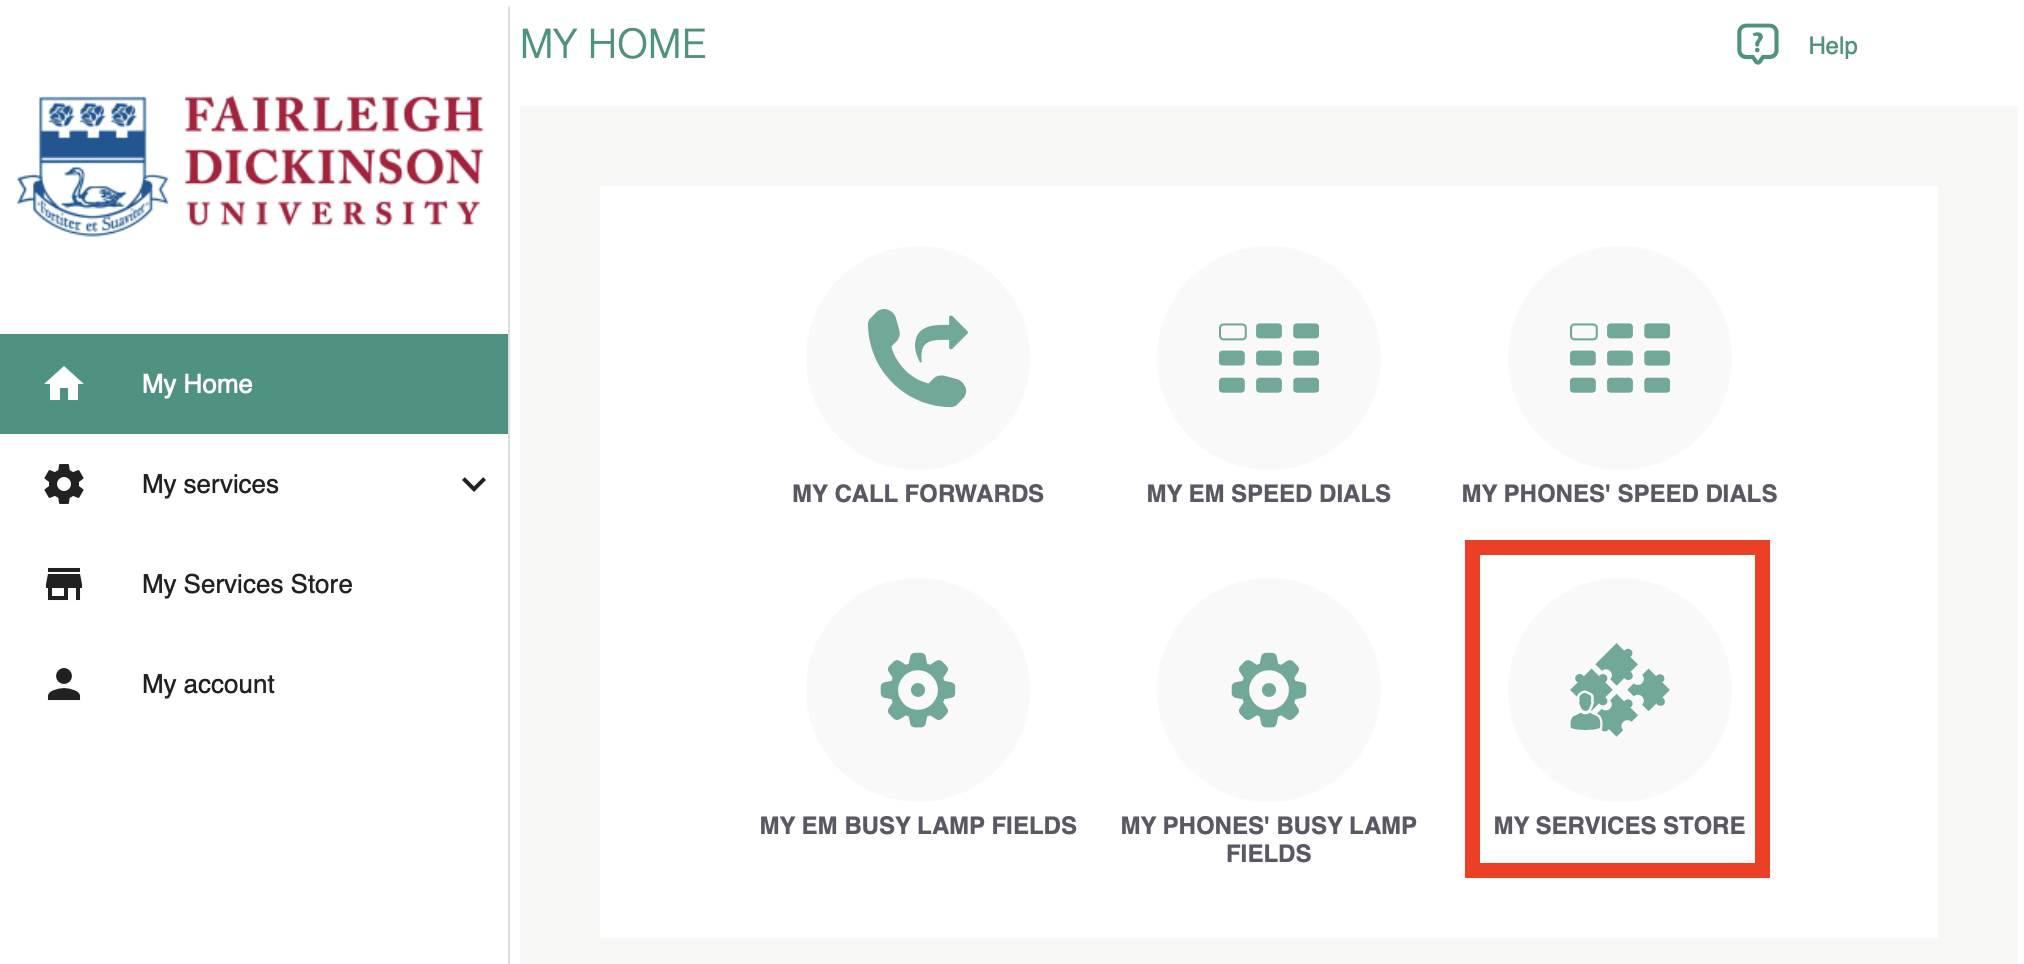
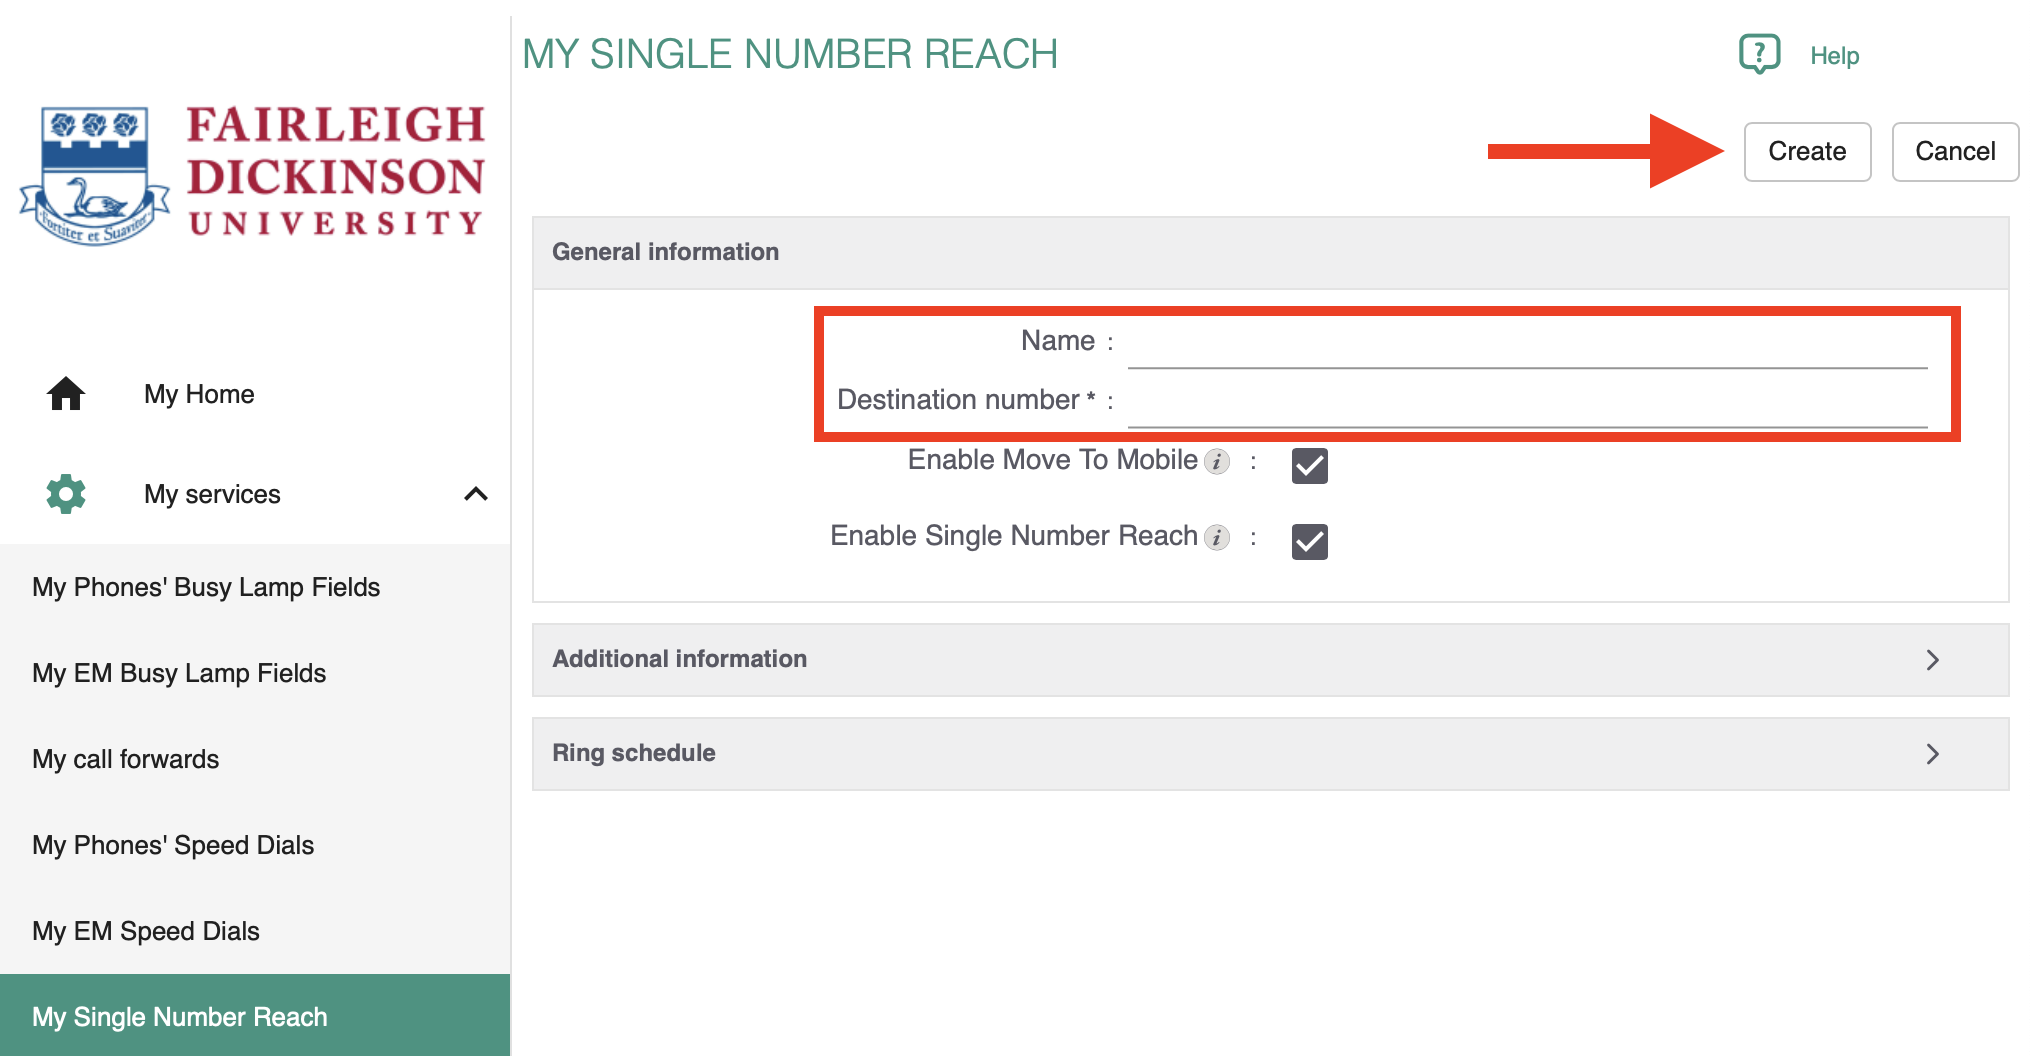
  1. Click the “+” icon to Create another Destination
  1. Enter the additional Destination (you can also give it a Name for reference) and then click “Create

Adding a Ring Schedule

A Ring Schedule can be enabled for each Destination.

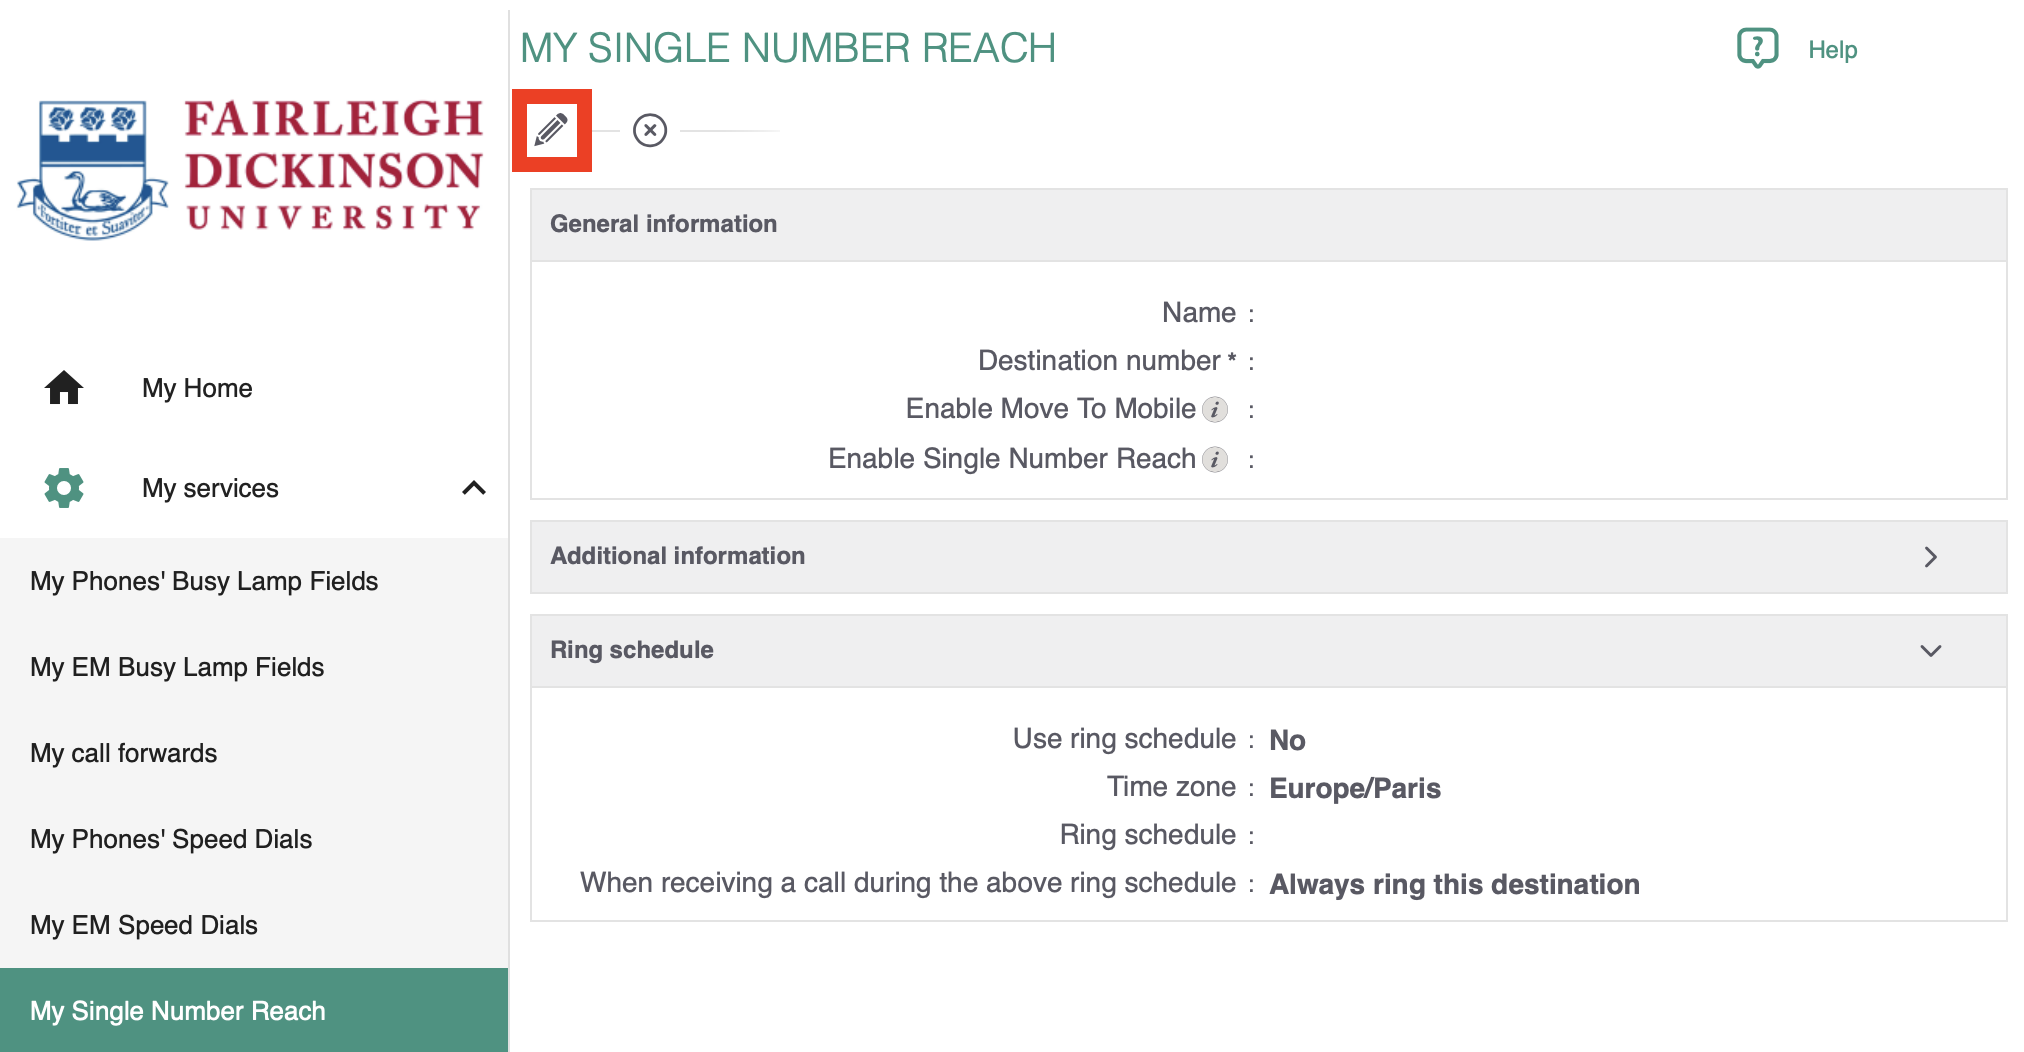
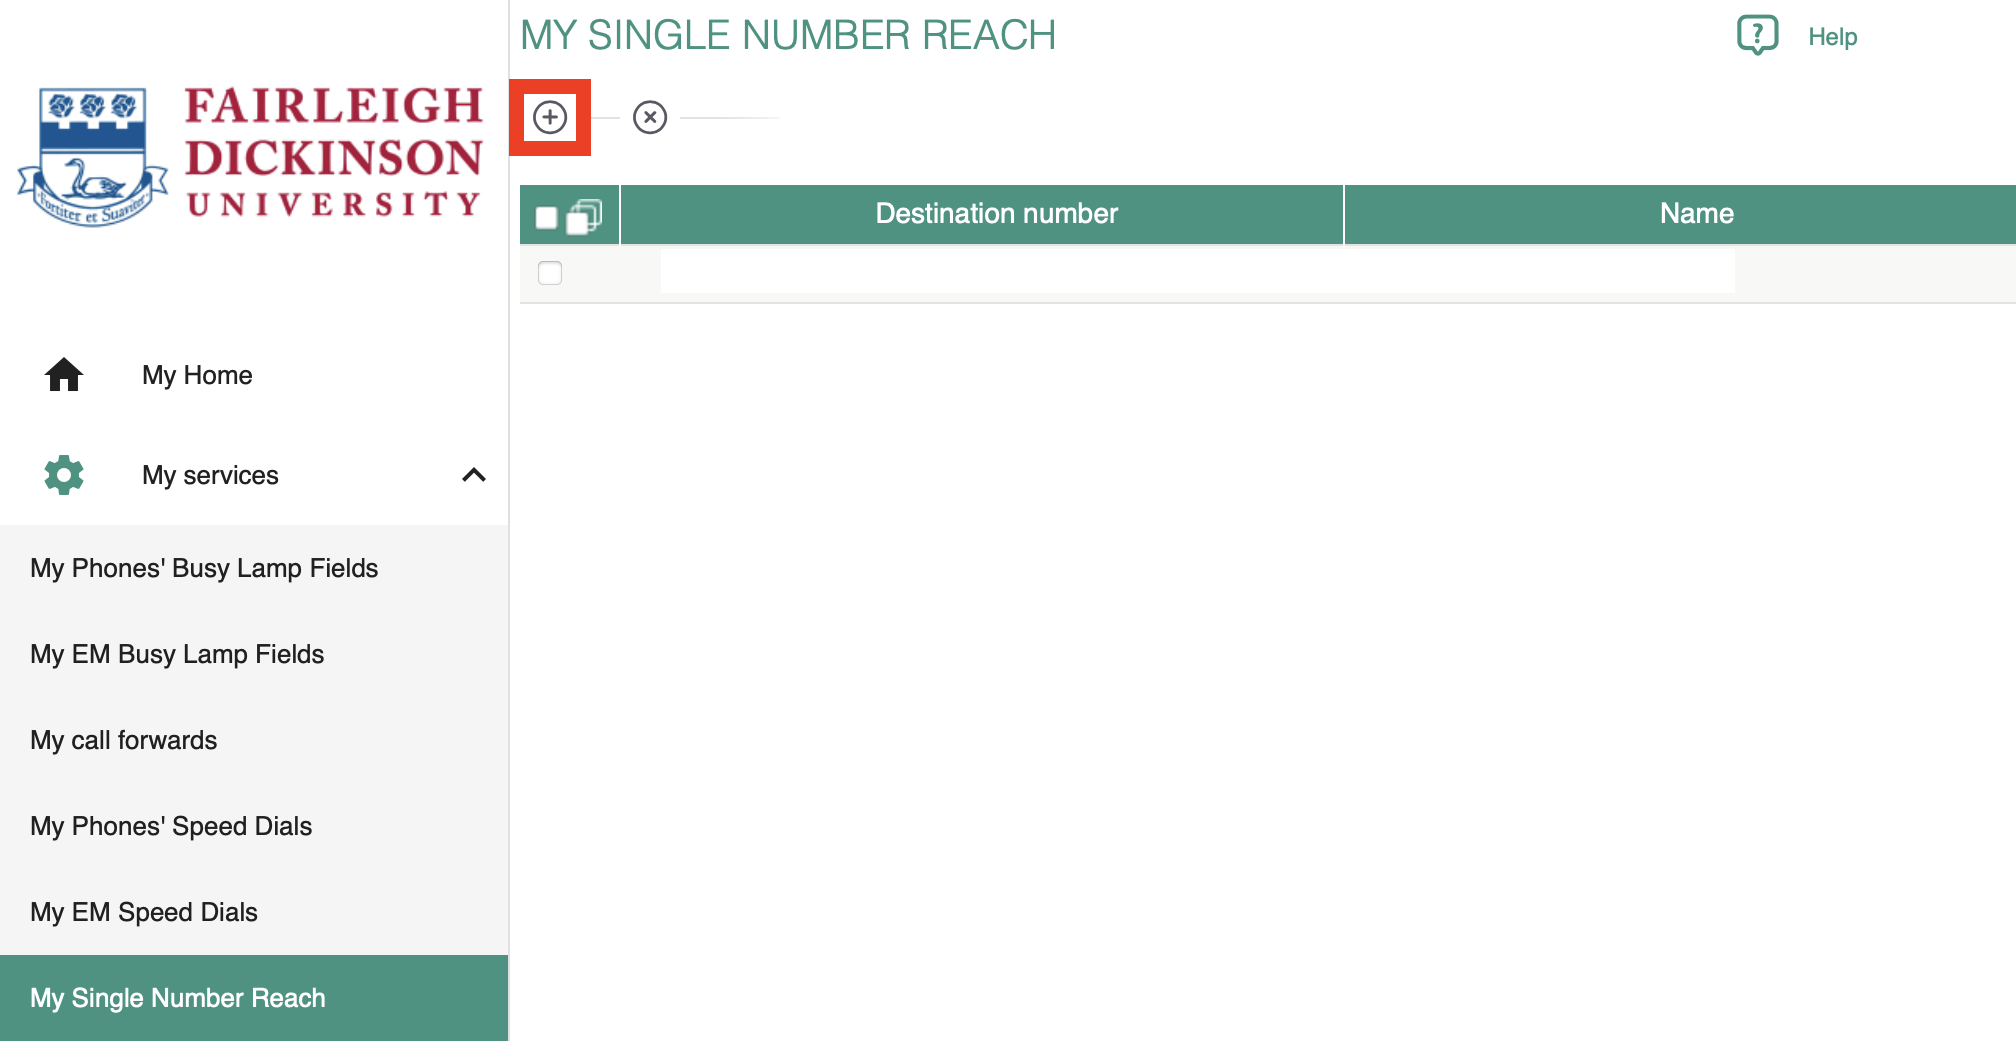
  1. From the “My Single Number Reach” section, click on the Destination Number you’d like to setup a ring schedule for
  1. Click the “Pencil” icon
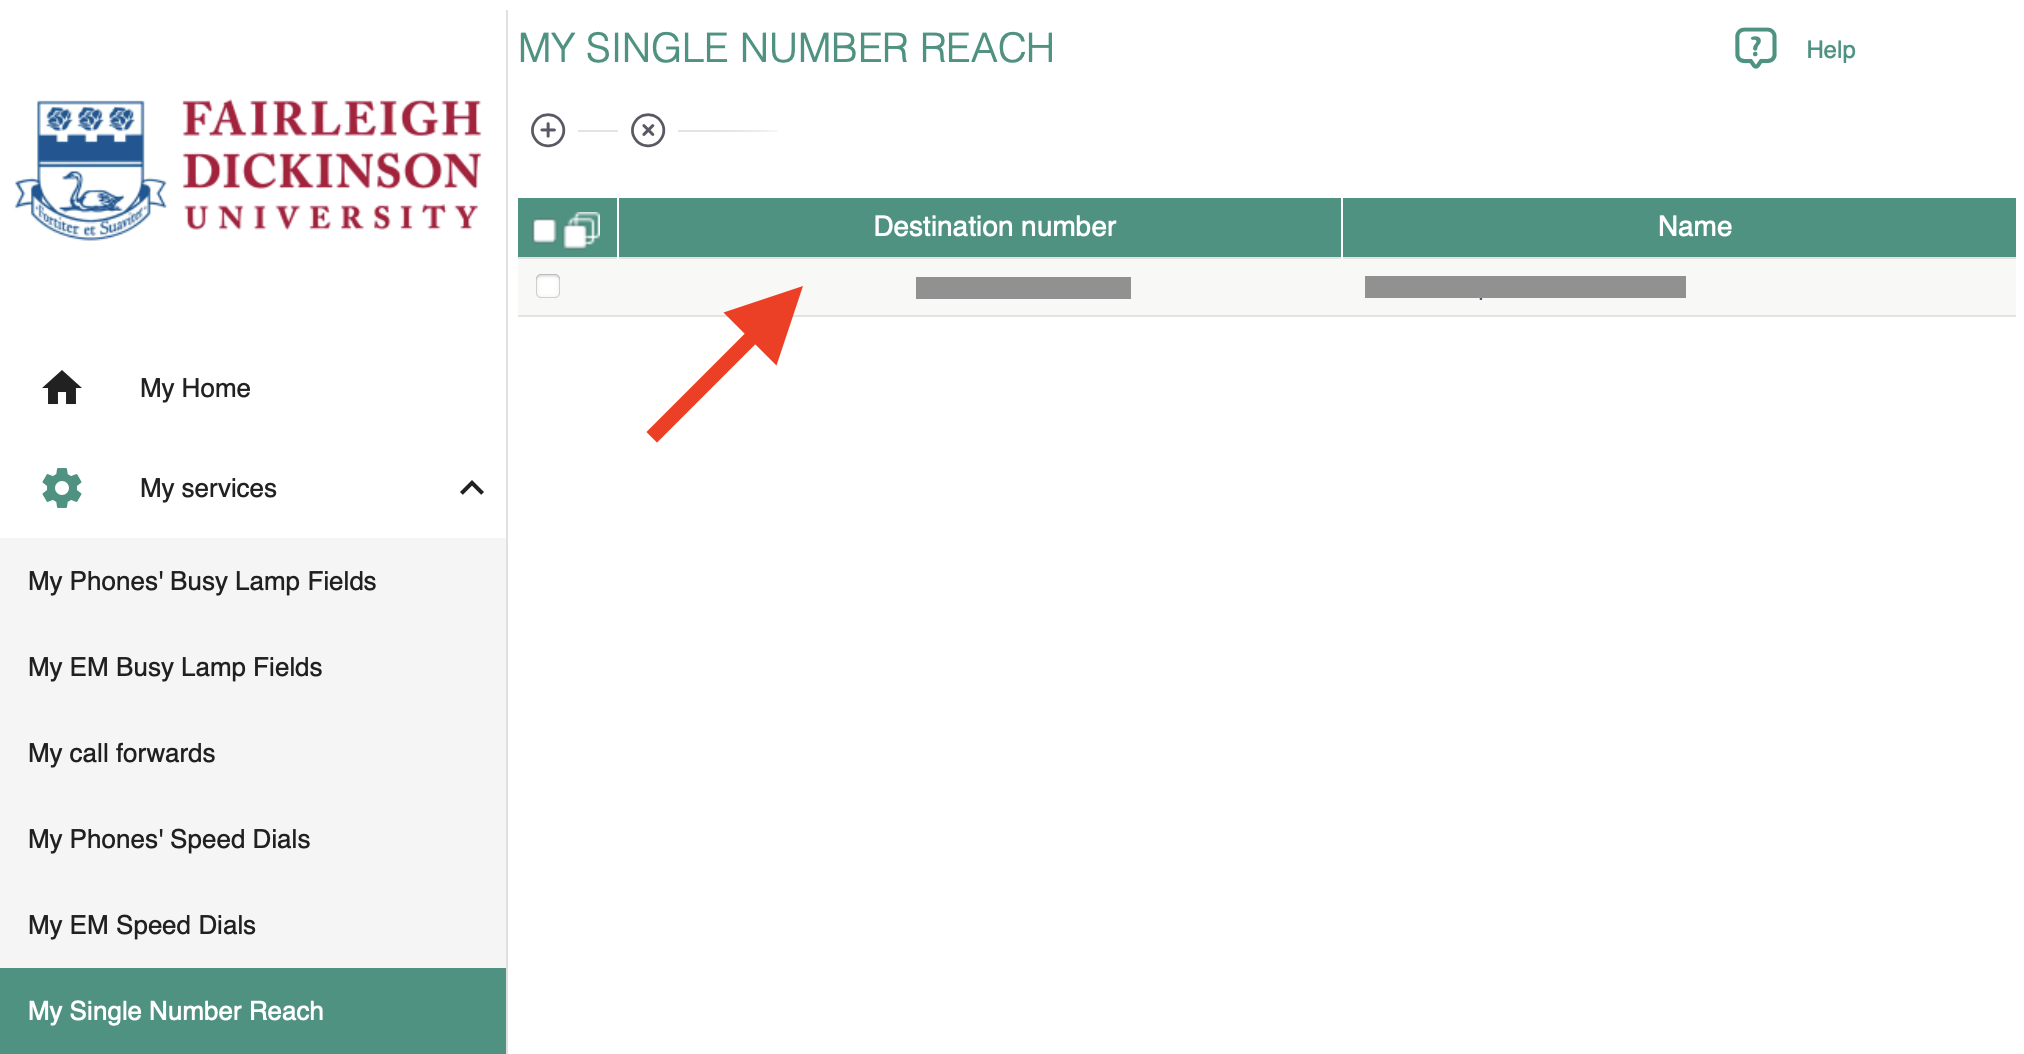
  1. Enter the options in the Ring Schedule Panel and click “Apply

Disabling Single Number Reach

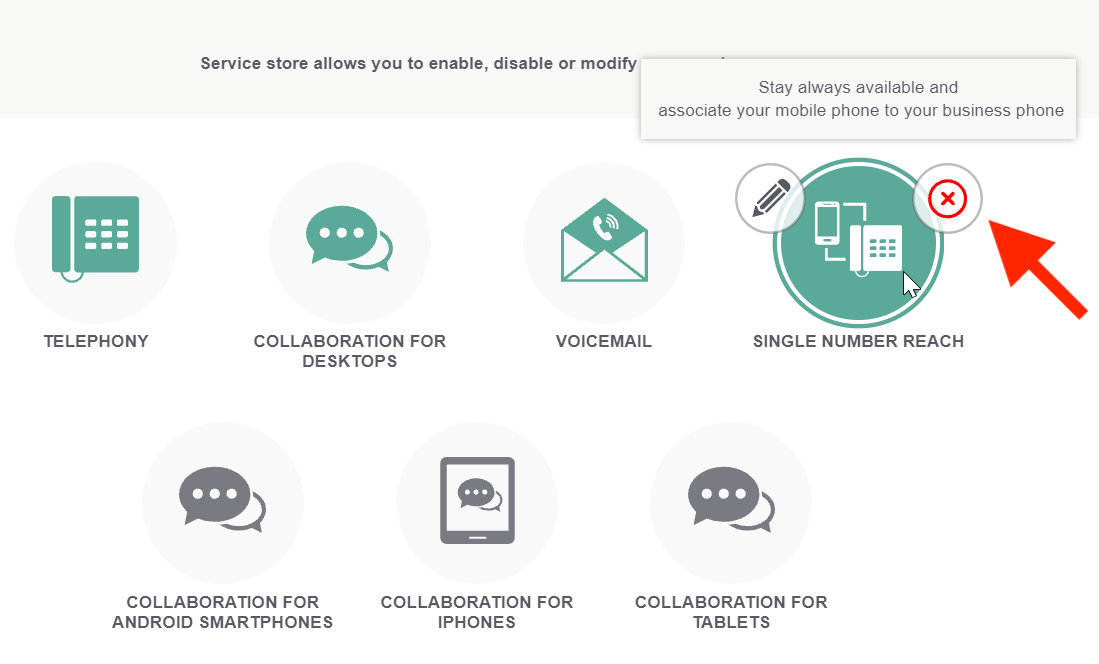
On NWN EMP Control page, hover your mouse pointer over the Single Number Reach icon and click “X” and confirm by clicking “Apply” on the next screen
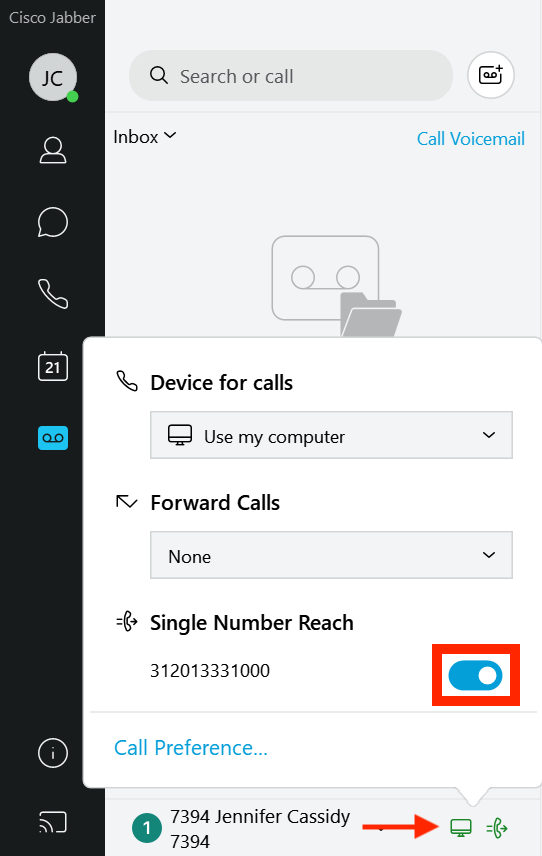
When the Single Number Reach Feature is Enabled, it can also be turned off and on through the desktop Jabber application
Last Modified:

Telephone True Up Policy

Resources for:
icon Close

Below is the policy regarding the return of Cisco Desk phones that are no longer in use.

The process, known as the “Telephone True-Up Process,” commences with a departmental request to remove currently active phones from service. The department is required to initiate the process by submitting a “True Up – Cisco Desk Phone Form” containing the necessary equipment details. Submission of this form generates a support ticket with Voice Services, initiating the removal process for the specified active phones from service.

The True Up – Cisco Desk Phone Form is accessible within the SAMI Support Portal via the link below:

True Up – Cisco Desk Phone Form

Once on the portal, navigate to Forms > Staff & Faculty > True Up – Cisco Desk Phone Form.

Warning Warning

Do not remove the phones without the help from an IT department technician.

Leave these phones in place and mark them with a Post-It Note that provides the HOST/MAC address of the phone. This ensures easy identification when a technician arrives to retrieve the device.

There are two methods to find the HOST/MAC address:

  1. Press the gear button on the phone and use the central navigation key to scroll to “Phone Information.”
  2. Alternatively, this information is also listed on the back of the phone.

The True-Up process is carried out annually, around June, coinciding with the end of the University’s Fiscal Year. The new True-Up cycle begins on July 1st with the commencement of the new Fiscal Year. Phones can be removed at any point during the year and stored until the next True-Up. However, billing for these phones continues until the end of the Fiscal Year.

Note

If you remove a phone but retain the line for services like voicemail, call forwarding, or Jabber, there is a monthly charge of $20 that will continue to be applied for these services.

Last Modified:

Using UC Softphone with Multiple Lines

Resources for:
icon Close

When multiple lines are enabled in Unified Communications (UC) Softphone, a drop down of the available lines will be displayed near the bottom of the “Contacts” windows.


To Make a Call

  1. Click on the arrow near the number displayed.
  2. Choose the line (Number) you desire to call from.
  3. Make the call as normal.

When receiving a call, the caller ID will display the line from which the call is coming from.

A call can be made or received from all the available lines.

Last Modified:
FAQ
Anthony Licandro Voice Services Manager
Hector Perez Voice Services Billing Coordinator
Jennifer Cassidy Voice Services Assistant Manager
Michael Reekie Voice Services Director
Susan Mihalarogiannis Voice Services Switchboard Specialist