Echo360 helps instructors capture and extend those moments to improve student engagement before, during and after class.
Through our technology platform, students have 24/7 access to classroom discussion, presentation materials, and the lecture itself.
Getting Started with “Echo 360 Universal Capture: Personal“
Universal Capture: Personal is a stand-alone application designed to be used by instructors on their personal computers to generate video recordings. The software enables you to create video recording across multiple computing platforms via a unified interface. That means instructors can record and share video on Mac and Windows computers, inside or outside of the classroom, with an identical user experience on each device.
For those faculty members who do not yet have an Echo 360 account, it is necessary for you to login to Webcampus first. Therefore, please follow the directions below in order for you to have access to Echo360 environment. Once you have completed these steps via webcampus, thereafter users will be able to login directly to echo360.fdu.edu with their FDU NetID credentials.
Note
For those who already have an account in Echo360 please go to Step 13.
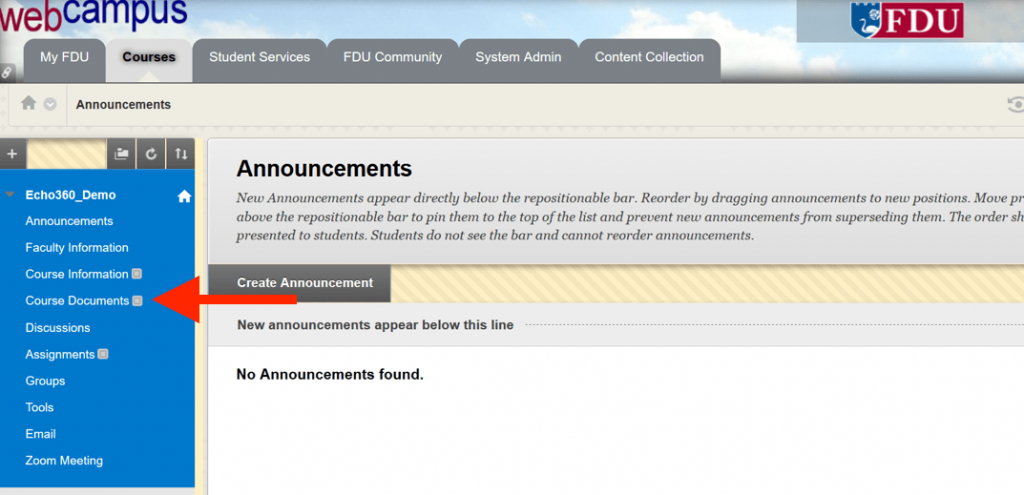
- Login to Webcampus using your FDU NetID
- Click on “Your Course“
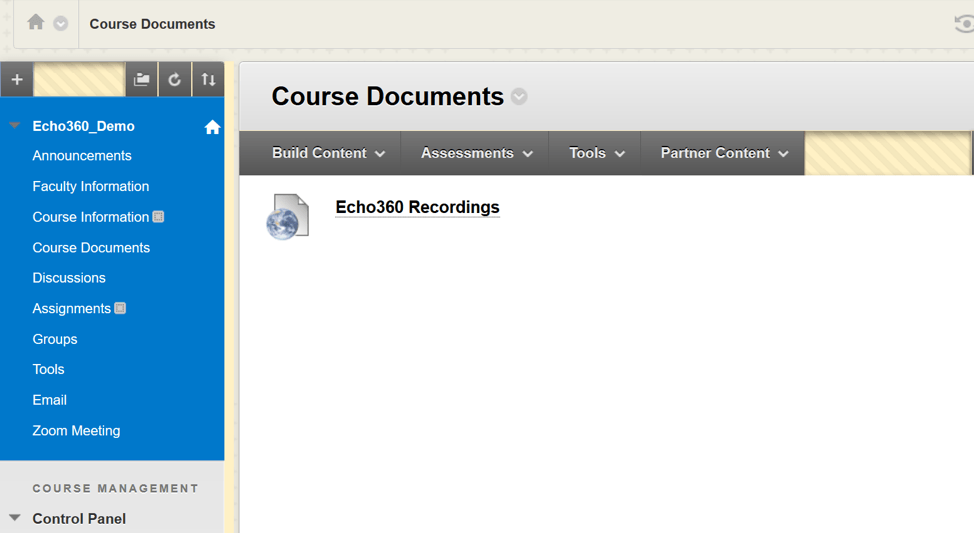
- Click on “Course Documents“
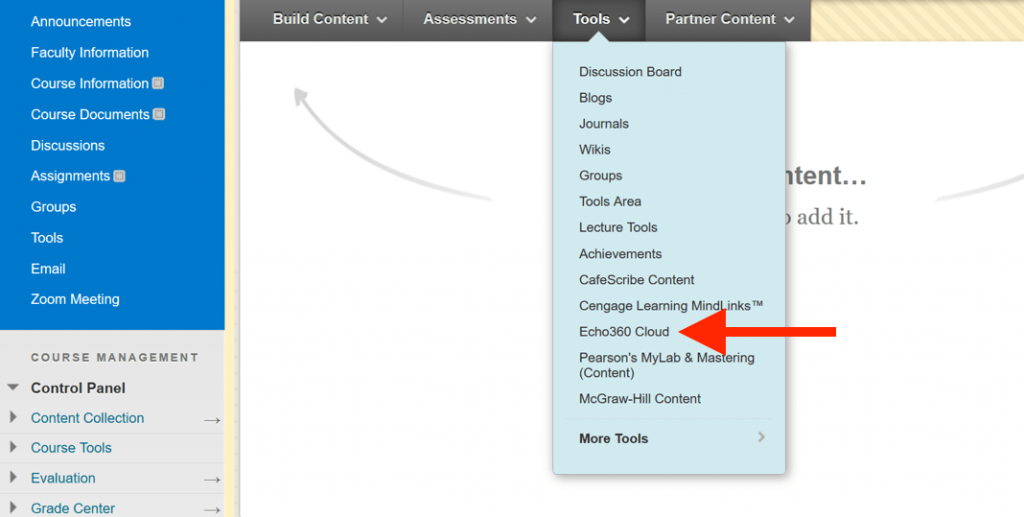
- Click on “Tools“
- Click on “Echo360 Cloud“
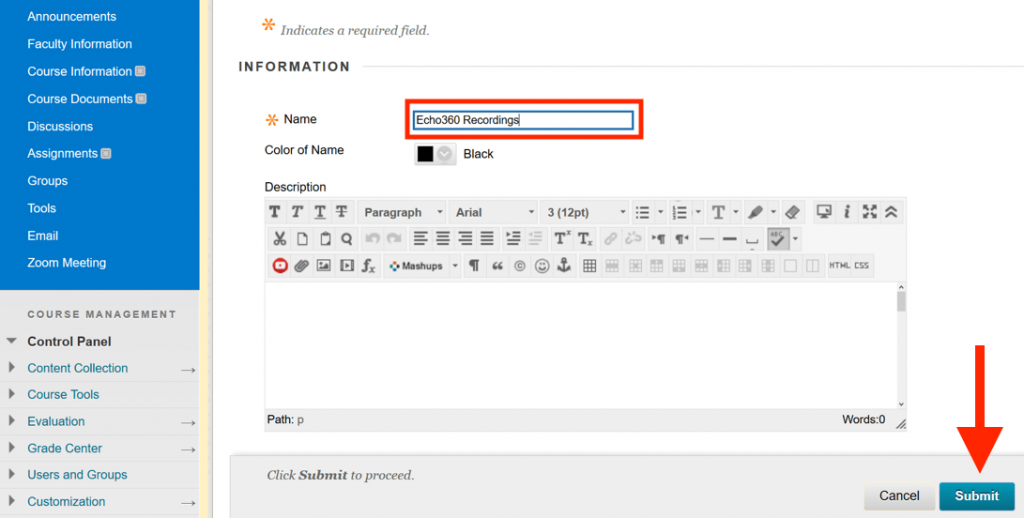
- In this page, enter a Name that makes it clear this is the link for Echo360 class content, for example: “Echo360 Recordings”
- Click “Submit“
- A new link will appear on your Course Documents page titled “Echo360 Recordings“. This maybe at the bottom of the Course Documents page
- Click on the “Echo360 Recordings” link. This will redirect you to the Echo environment
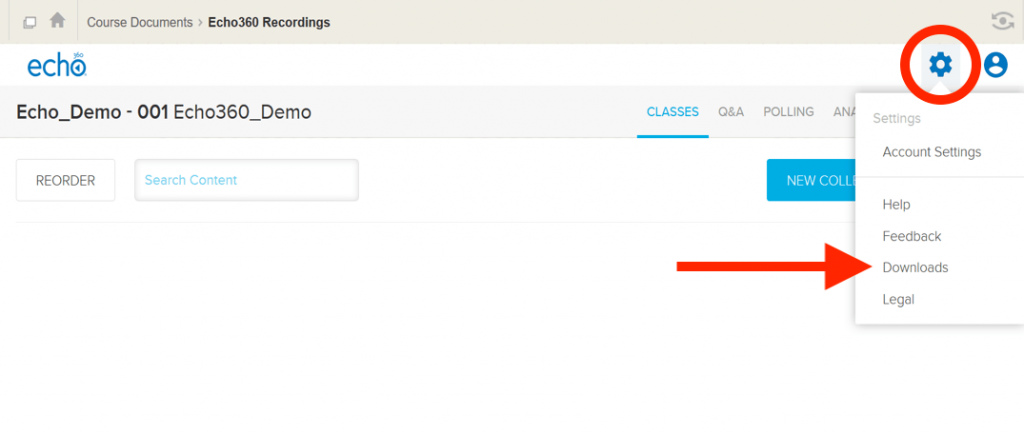
- Click on the “Gear Icon” on the top right
- Click on “Downloads“
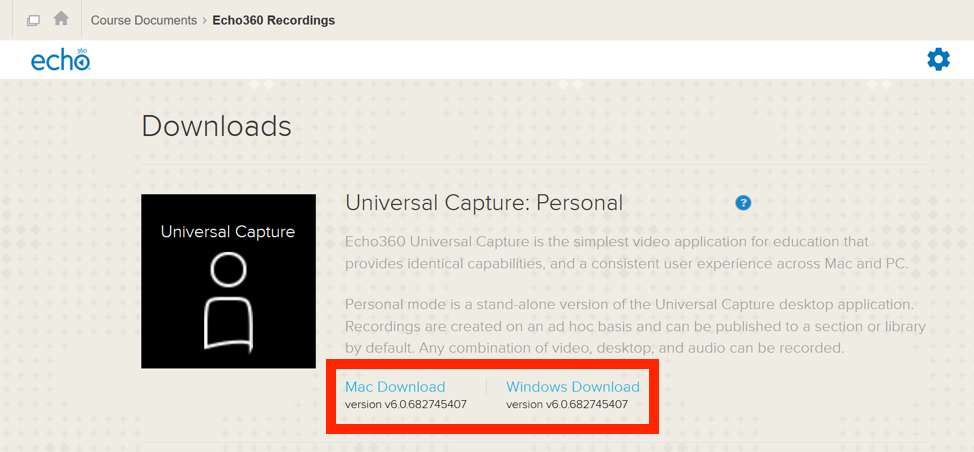
- From the Universal Capture: Personal area of the Downloads page, select the link to download the installer appropriate for the type of computer/operating system you are running. After you have downloaded the personal capture, follow the instructions on how to capture your lectures using this tool
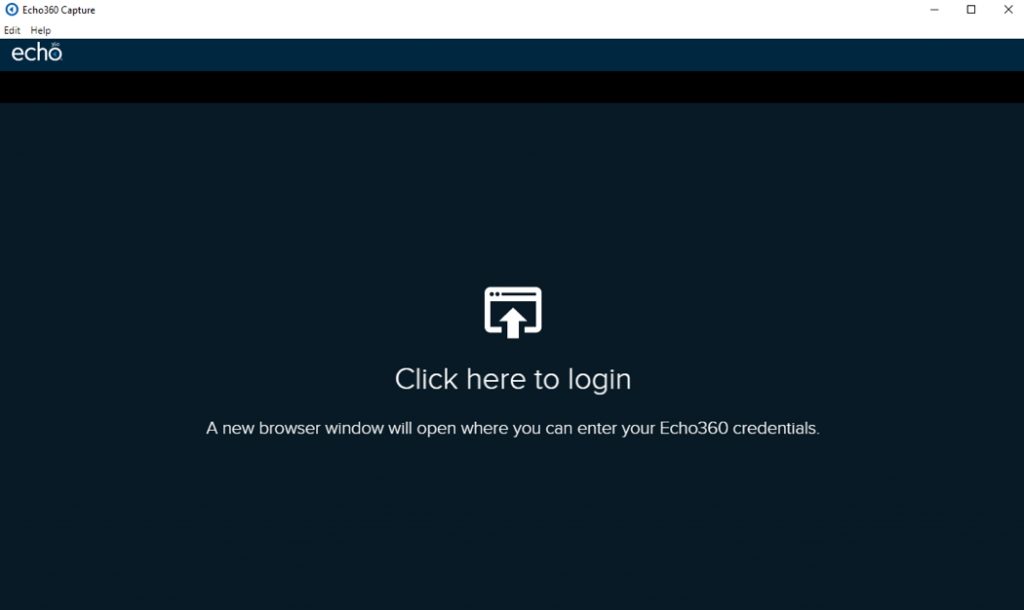
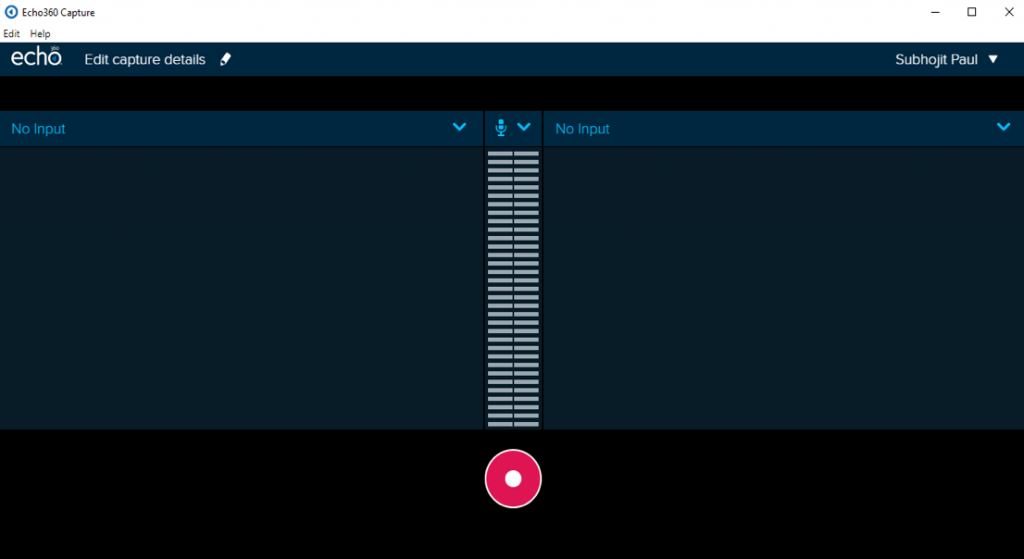
- Once you have installed the software, please launch the Universal Capture: Personal application. If you see the following login screen, click on the link and login with your FDU NetID credentials
- After logging in select the inputs you want to capture from the two drop down menu. If the drop down menu says No Input just select the option you want from the available sources
- Left Input: Click on the dropdown menu to select your input for the left video channel (e.g. display, webcam, etc.).
- The bars in the middle shows the volume levels of the audio capture.
- Right Input: Click on the dropdown menu to select your input for the right video channel (e.g. display, webcam, etc.).
- The Display option from the drop down menu chooses the application that you want to record from your computer for example a PowerPoint presentation.
- Preview the inputs on the screen; to be sure, they will record properly.
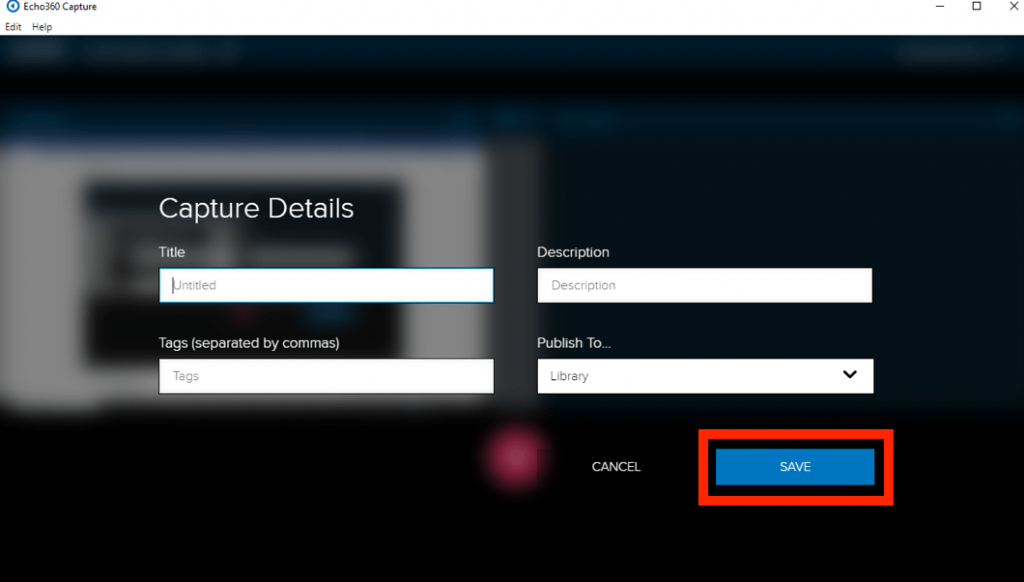
- Click the “Pencil Icon” or title to launch the Capture Details dialog box

- Enter a Title, add a Description or Tags and select a Publishing location for the recording. By default, your recordings are published to your “Library” folder
- Click “Save”
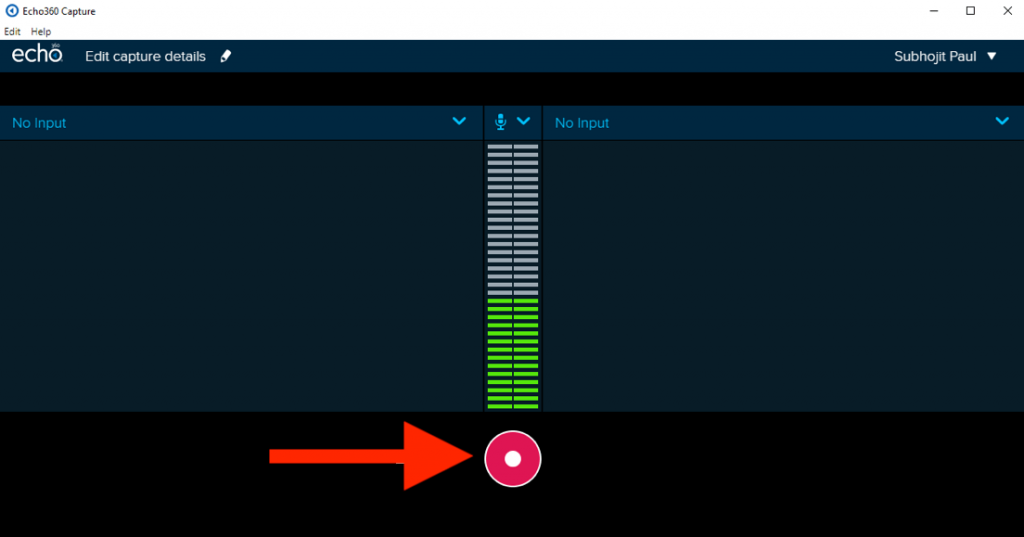
- At this point, if you are going to present any materials via PowerPoint, Web or any other applications open it and minimize it
- When you are ready, click the “Record” button. You will have 5 seconds before recording starts so you can switch to the material you want to present
- During a recording, you will have the option to Stop, Pause, or Cancel recording. Do not stop recording until you are totally finished with the session. If you click on the cancel button, it will cancel the entire recording
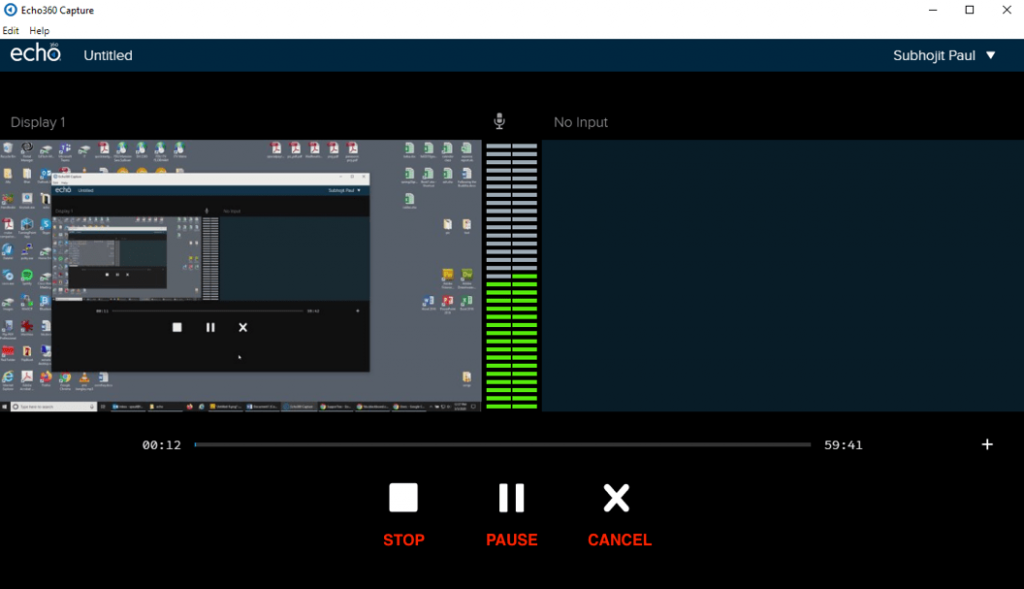
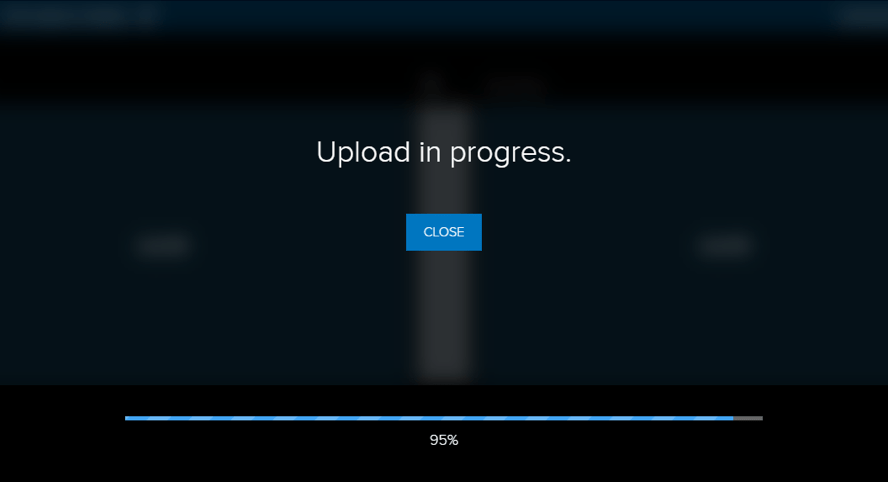
- Once you stop the recording, you will receive a message and you can click on the “Close” option to exit the program. Once your recording process is finished, it will automatically publish to the location that you have specified. You will receive an email when processing is finished and you are able to view your recording
Viewing Recording
Once you receive the email, your video is online and ready to be viewed.
- Log back into echo360.fdu.edu
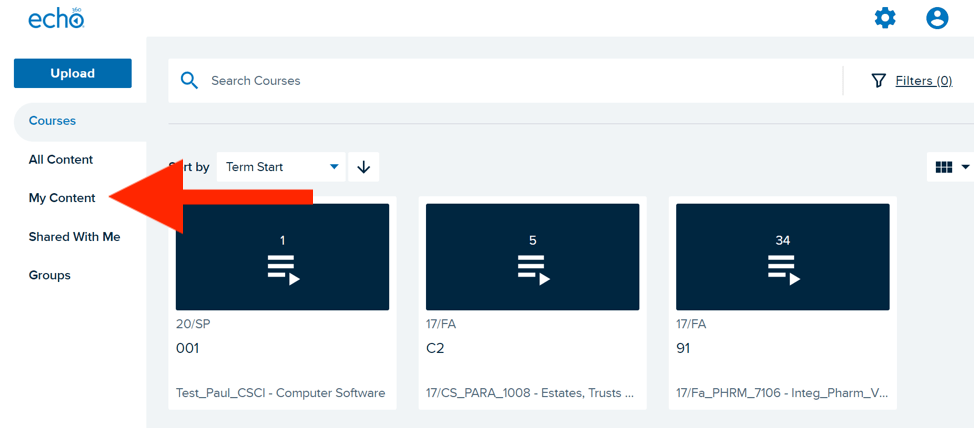
- Click on the “My Content” tab on the left side of the window.
- Click on the recording that you want to view
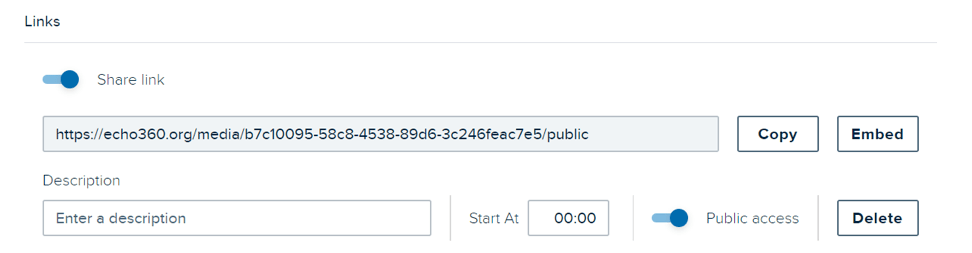
- If you want users to view your recording, scroll down towards the bottom of the screen to the “Links” section. Copy the link and you can send it to users via email