Self-Service is an interactive web application that enables students, faculty, and staff to view their individual information contained in FDU’s student information system. Students can use Self-Service to do things like view their financial aid, pay their bills, and register for classes. Likewise, faculty will use Self-Service to verify enrollment and enter grades.
To navigate the Tutorial, scroll down to the Index. From there you can navigate to any portion of the Tutorial by clicking on any “Part”.
Index
What is Degree Audit? Degree Audit is an online version of your check sheet, which allows you to track your academic requirements. On Degree Audit you can see what degree requirements you’ve completed, which are in progress, and which courses you have left to complete your degree.
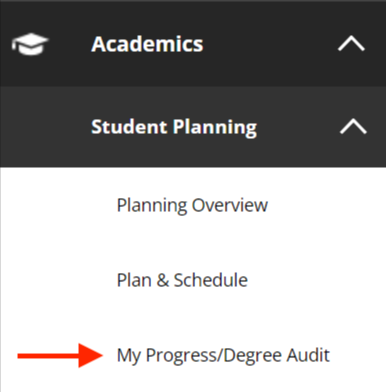
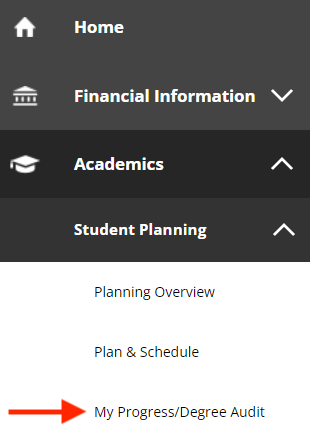
- On the left-hand side of the page, you will find your menus. Click on the menu called “Academics” and then click on “Student Planning.” Navigate to “My Progress/Degree Audit”
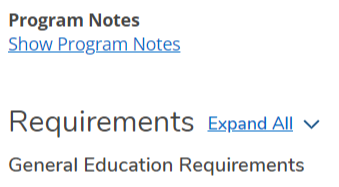
- Click on “Expand All” if you’d like to see all the requirements for your degree
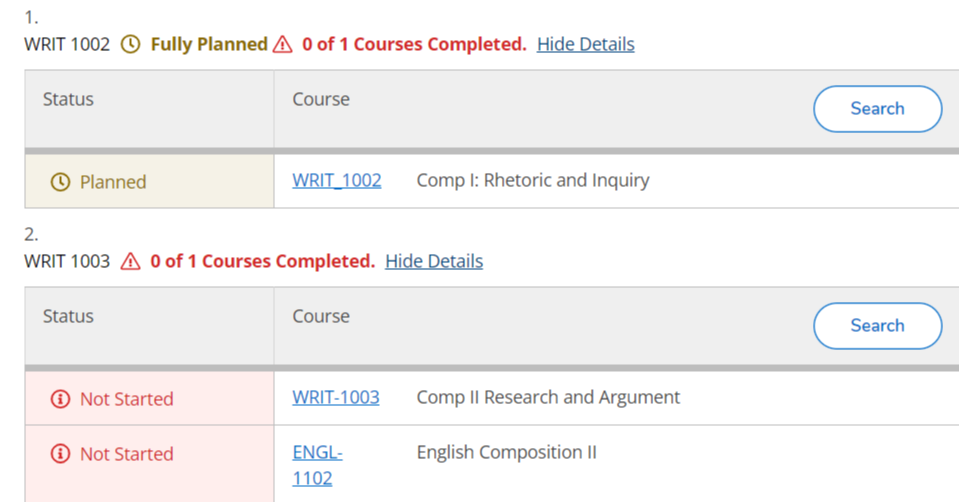
- Any action you have taken towards completing each requirement will be noted in the “Status” column
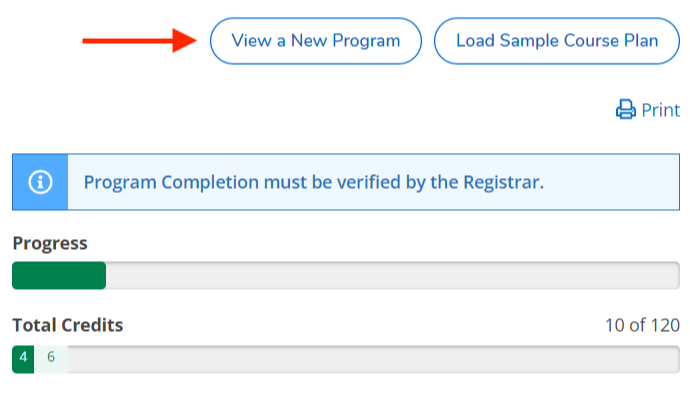
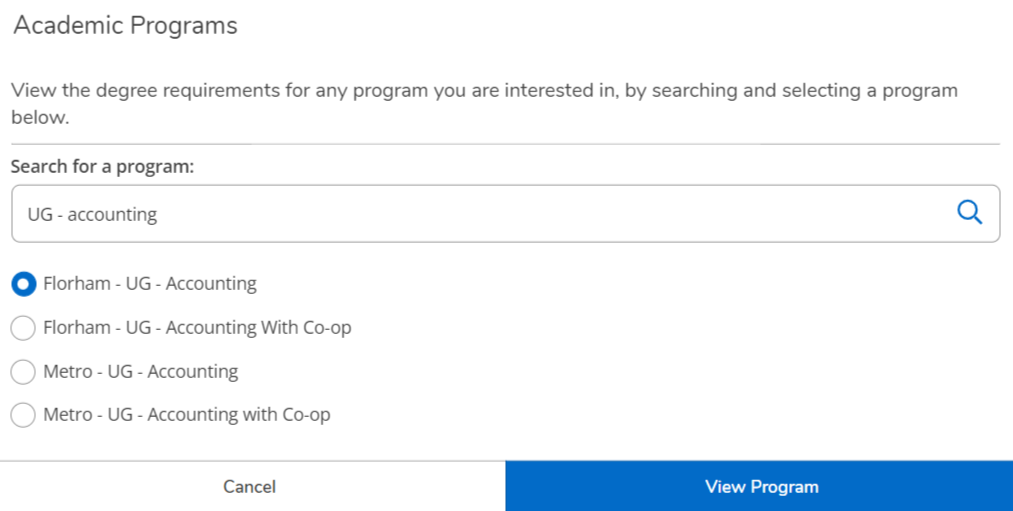
- If you would like to see what it would look like if you switched to a different program, then click on “View a New Program” at the top of your Degree Audit
- Use the search bar to find the program you are interested in. Select the program and click “View Program
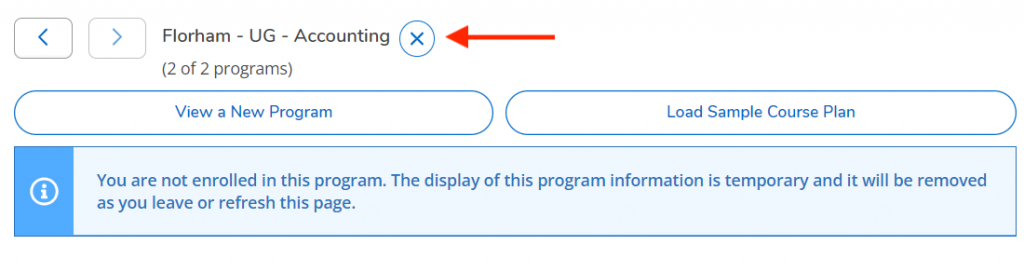
- If you no longer want to view this program, click the “X” to remove it
If you have any questions or need assistance,
please open a SAMI Support ticket, email selfserviceadmin@fdu.edu, or call (973)-443-8822.
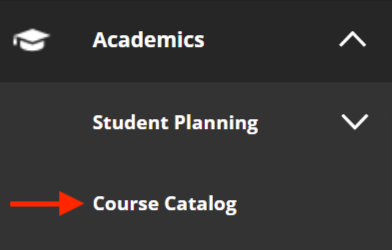
- On the left-hand side of the page, you will find your menus. Click on the menu called “Academics” and navigate to the “Course Catalog”
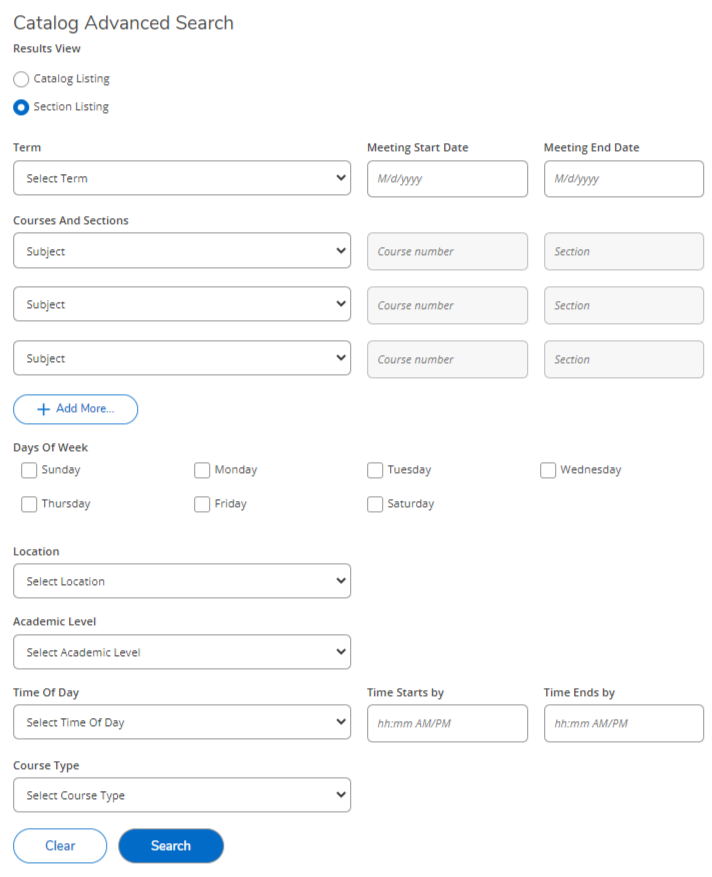
- Fill in as many fields as you’d like for your course search. It is suggested that you at least select a term and a subject. Click the blue “Search” button to get your results
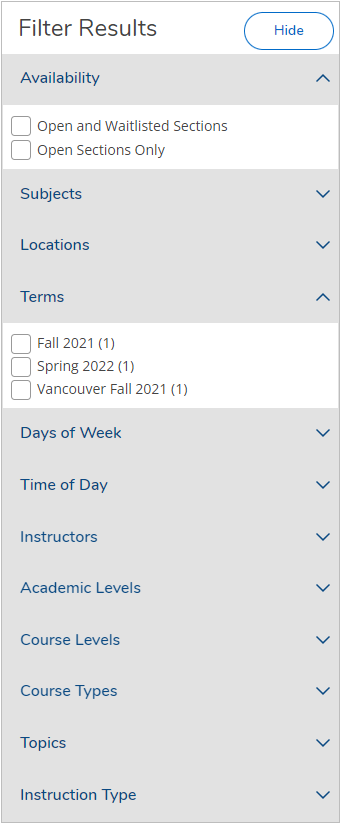
- You can narrow down your results further using the filters on the left-hand side
- Click on the “Hide” button to hide the filter menu and allow the results to fill your screen
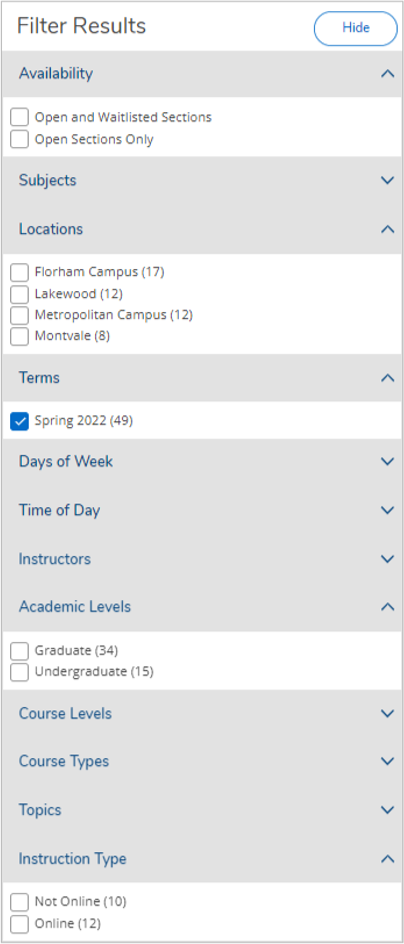
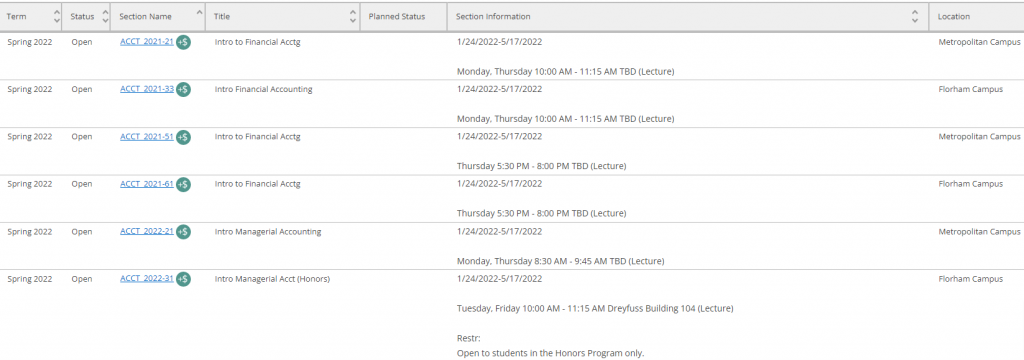
- You can click on the arrows in the header row to change how the results are sorted
Note
Section notes and restrictions can be found in the “Section Information” column.
If you have any questions or need assistance,
please open a SAMI Support ticket, email selfserviceadmin@fdu.edu, or call (973)-443-8822.
- You can search for courses by using the Course Catalog or your Degree Audit page. In this article, we will use the Degree Audit page method
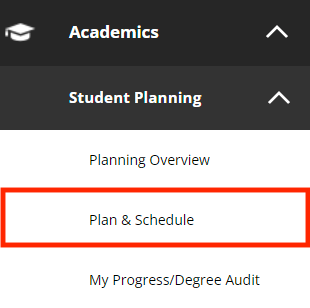
- Go to the menu on the left, select “Academics” from the options, and expand the “Student Planning” from the dropdown. Press “My Progress/Degree Audit”
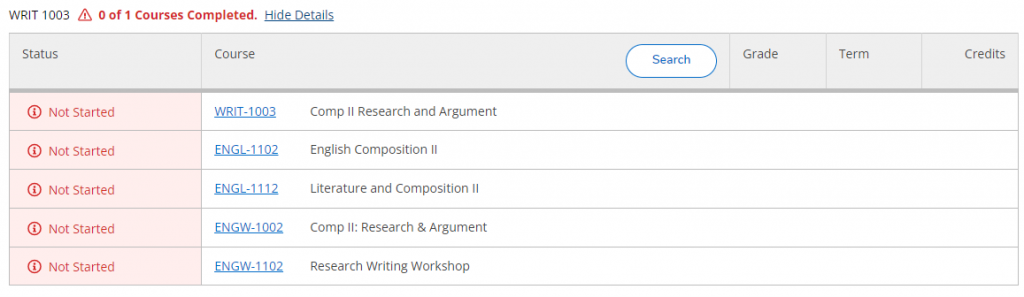
- Find the requirements you are looking to fulfill. Press on the “Search” button to find sections for every course that will meet this degree requirement
Note
If you know exactly which course you are interested in, then you can click directly on that course code to view its sections.
- Narrow down your results using the filters on the left-hand side.
Tip
Make sure to choose the correct semester.
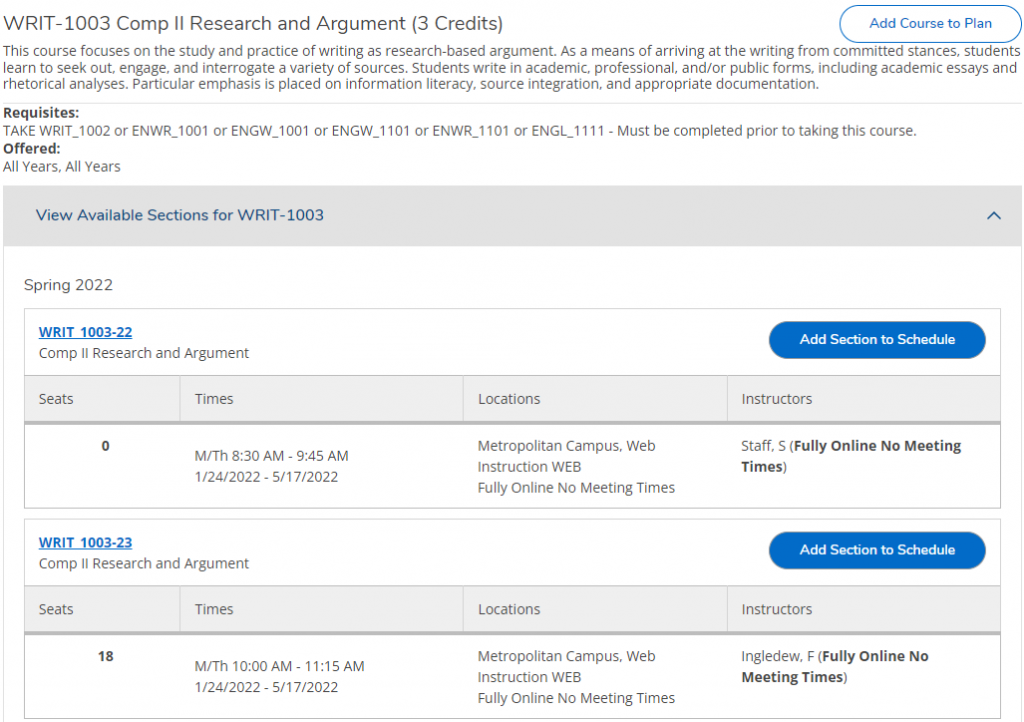
- Within the results, click on the grey bar that says “View Available Sections” for the course you’d like to add to your schedule. Find a section that fits on your schedule and click “Add Section to Schedule”
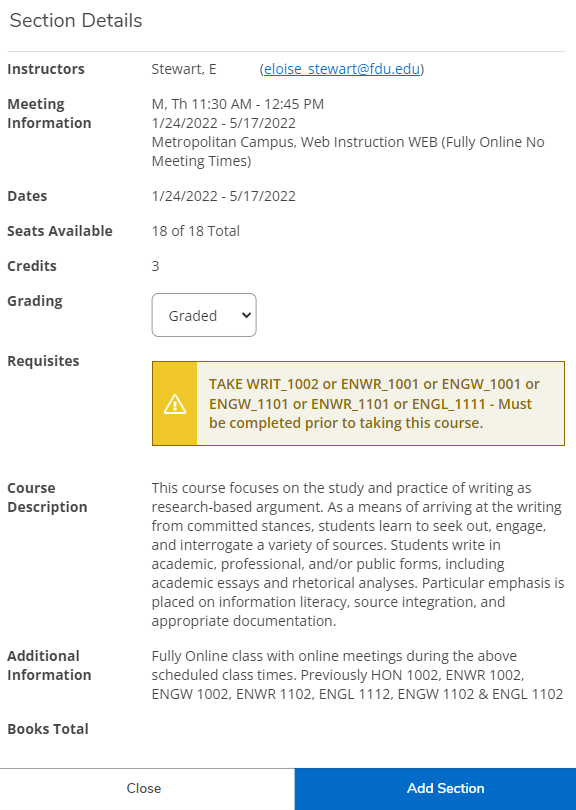
- Review the Section Details that pop up. If you still wish to add this section to your schedule, then click “Add Section”
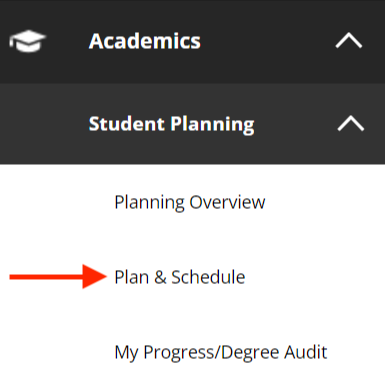
- To confirm the section appears on your schedule, navigate to the “Plan & Schedule” page

- To confirm the section appears on your schedule, navigate to the “Plan & Schedule” page
Tip
Sections can be removed by clicking on the “x” in the top right corner of the section.

- Repeat this process to add more courses to your schedule in preparation for priority registration
 Important
Planning a section does not guarantee you have a spot in that section.
If you have any questions or need assistance,
please open a SAMI Support ticket, email selfserviceadmin@fdu.edu, or call (973)-443-8822.
- On the left-hand side of the page, you will find your menus. Click on the menu called “Academics” and then click on “Student Planning.” Navigate to “Plan & Schedule
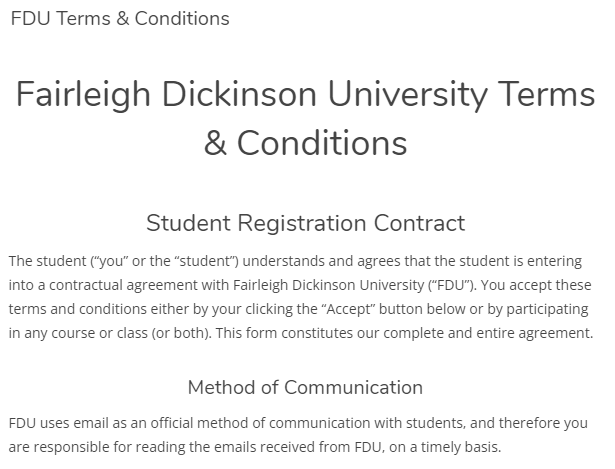
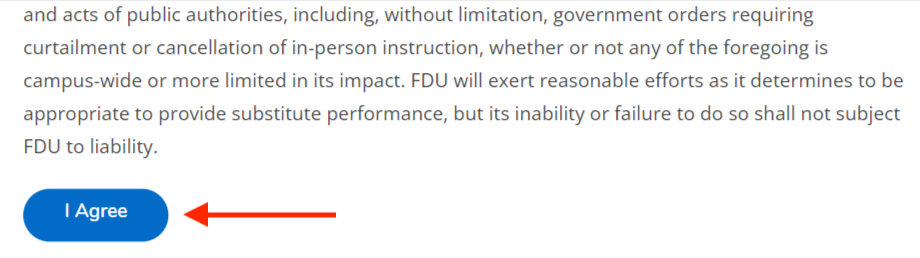
- The first time you come to this page for a given semester, you will be presented with the FDU Terms and Conditions Student Registration Contract. Scroll down to agree. You only need to do this once per term
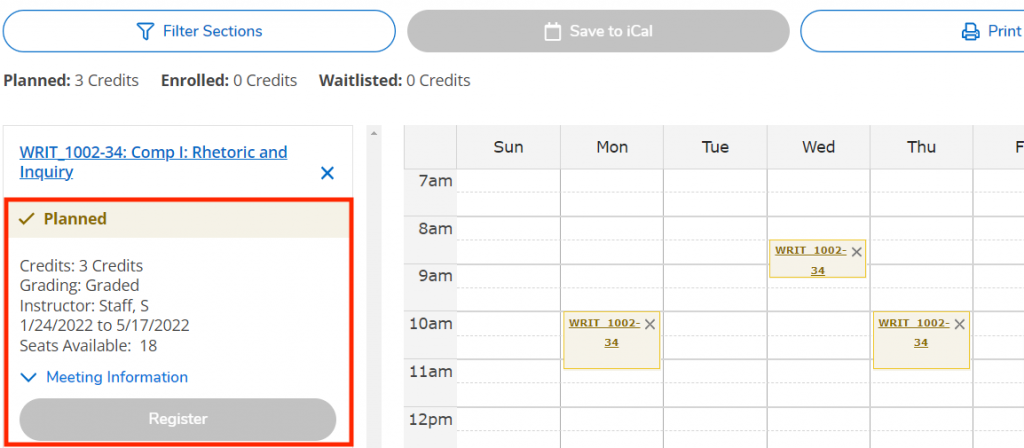
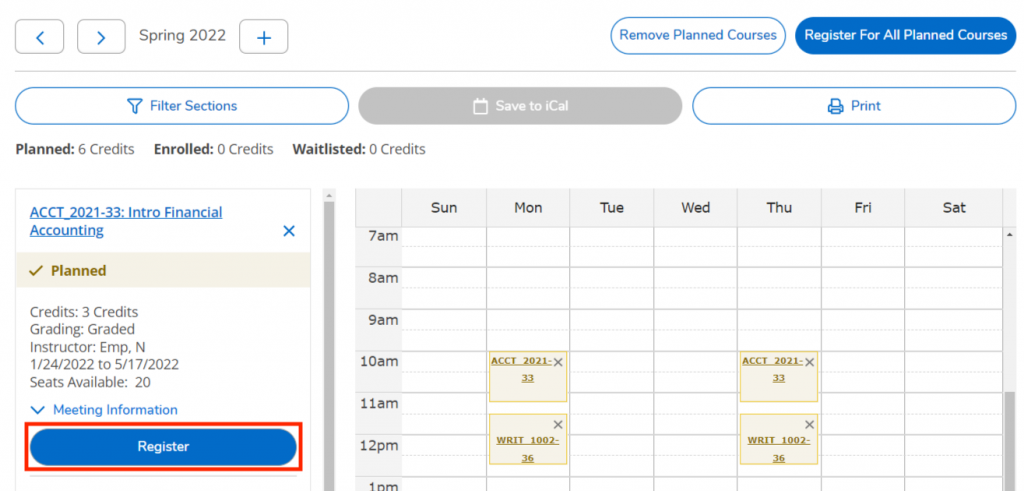
- Your planned courses will appear on the Plan & Schedule page and will be color-coded in yellow. If you have not planned your courses, please review how to in Section 1 – Part 3 “How to Plan Your Schedule Using Self-Service”
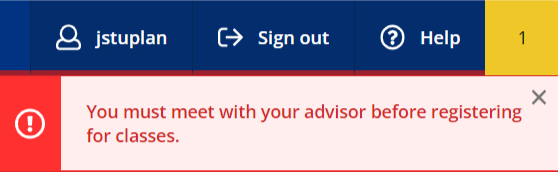
- If you have any holds, then they will appear in the top right corner of the page. You will need to resolve your holds before you can register for classes
- You will need to be mindful of your priority registration date. You will find a banner above your planned schedule informing you of the date and time you can register for classes
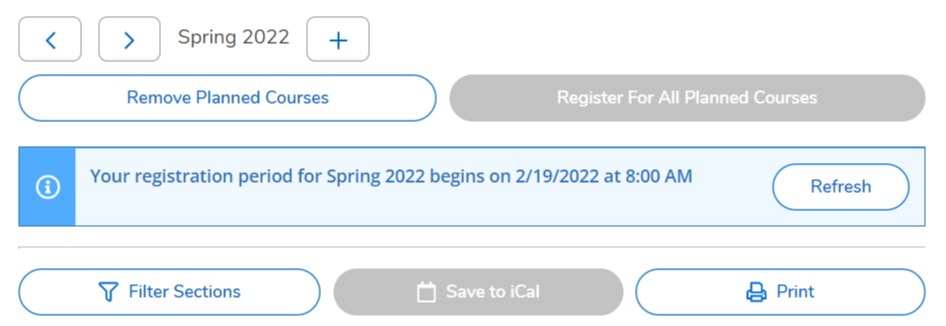
- Once all holds have been resolved and your priority registration date/time has arrived, you can register for all your courses by clicking on “Register For All Planned Courses.” If you would like to register for each course one at a time, then click on “Register” within each course tile
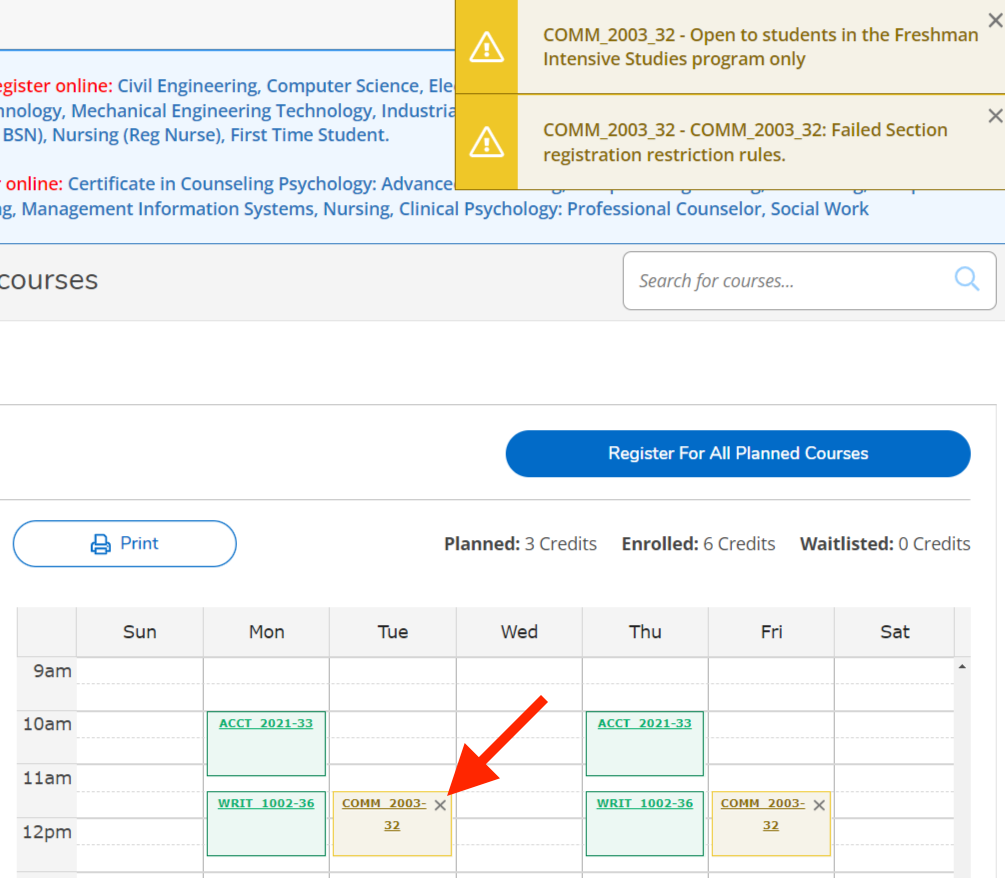
- Successful registrations will turn green and say “Registered”

- If you are ineligible for any of your planned sections, then the course will remain yellow and planned. You will get an alert in the top right corner explaining why you were unable to register for that section
- Click “x” on the section to remove it from your schedule
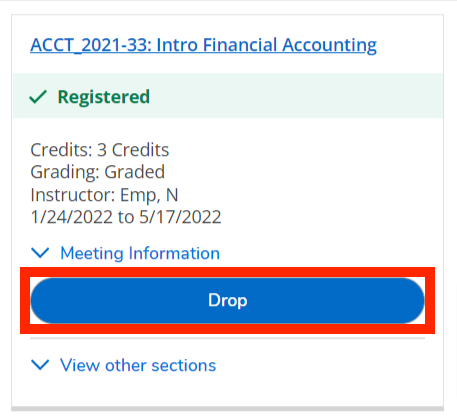
- If you need to drop a course during Priority Registration or Add/Drop, then click on “Drop” within the course tile
If you have any questions or need assistance,
please open a SAMI Support ticket, email selfserviceadmin@fdu.edu, or call (973)-443-8822.
- On the left-hand side of the page, you will find your menus. Click on the menu called “Academics” and click on the “Unofficial Transcript” button
- Select the transcript you wish to download by clicking on its text
Important
These documents are unofficial and do not replace official signed and sealed transcripts. To order official transcripts you must go to www.getmytranscript.org.
- After clicking on the transcript text, a pdf document will download. Open this document to view your unofficial transcript.
If you have any questions or need assistance,
please open a SAMI Support ticket, email selfserviceadmin@fdu.edu, or call (973)-443-8822.
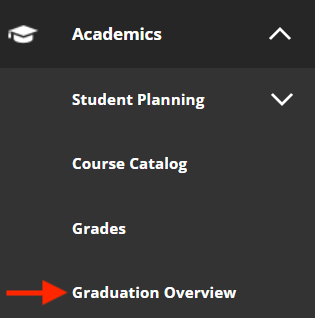
- On the left-hand side of the page, you will find your menus. Select “Academics” from the side menu and then select “Graduation Overview”
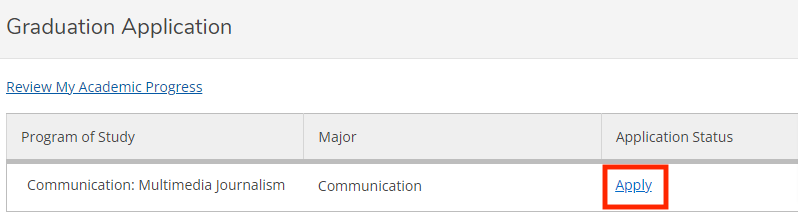
- Press “Apply” next to the program from which you wish to graduate
- Select your “Graduation Term” and type in your “Preferred Name on Diploma.” Select the address you would like your diploma sent to. Once these fields are filled in, you must confirm everything is correct and press “Submit”
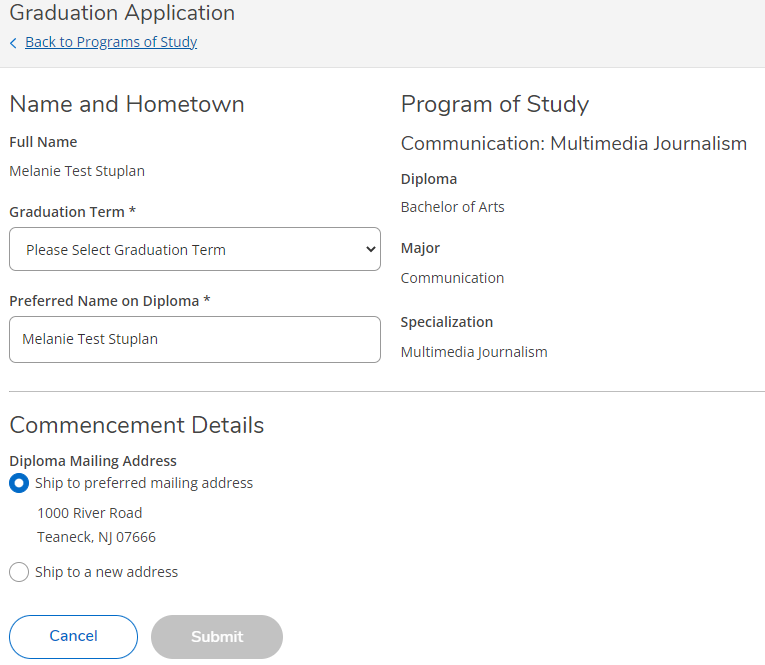
Important
Upon submitting the graduation application, students will be charged the appropriate fee in accordance with the degree they are seeking. Please do not apply more than once.
If you have any questions or need assistance,
please open a SAMI Support ticket, email selfserviceadmin@fdu.edu, or call (973)-443-8822.
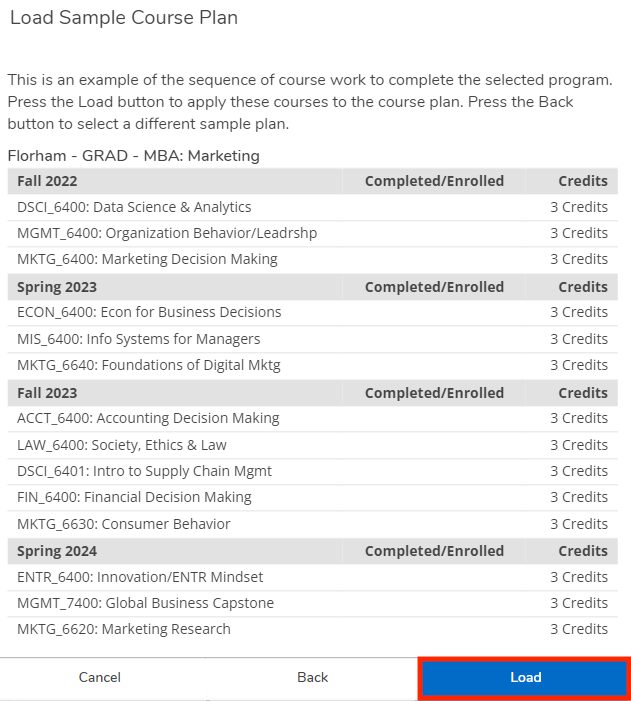
What is a course plan? A course plan is an example of the sequence of coursework you need to complete for your selected program. This will load courses onto your plan for current and future semesters. This will allow you to map out the courses you must take for your degree.
Note
Not every program has a course plan available.
- On the left-hand side of the page, navigate to “Academics.” Within the “Student Planning” dropdown menu, press “My Progress/Degree Audit”

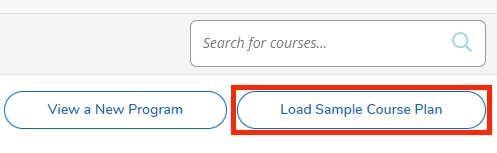
- On the top right side of the page, press “Load Sample Course Plan”
- Select your first term from the drop-down menu and select your program using the first radio button
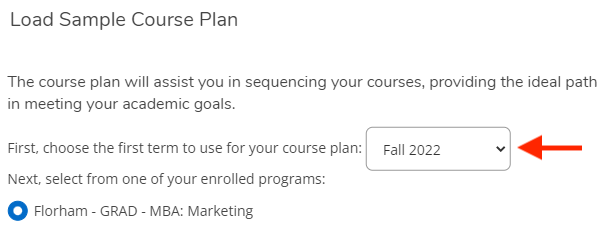
- Press on “Preview Plan” at the bottom of the window

- Review the sample course plan and press “Load”
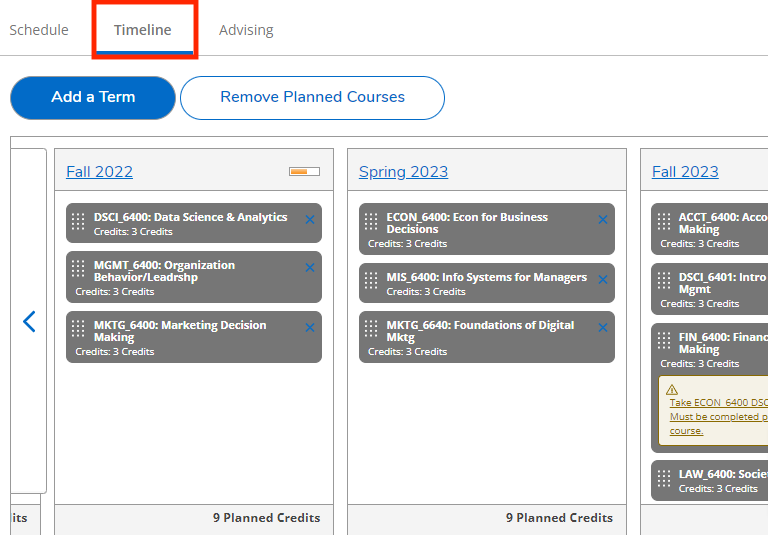
- Use the Timeline tab to view the courses that were loaded onto your plan. Make any adjustments, if needed
If you have any questions or need assistance,
please open a SAMI Support ticket, email selfserviceadmin@fdu.edu, or call (973)-443-8822.
- On the left-hand side of the page, you will find your menus. Click on the menu called “Academics.” Within the “Student Planning” menu, click on “Plan & Schedule”
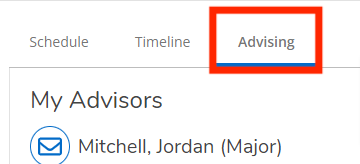
- Go to the “Advising” tab. Here you will see the names of your advisors
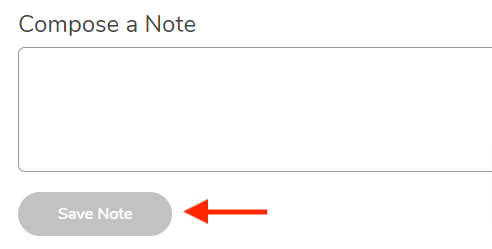
- You can leave a message for your advisor by typing in the “Compose a Note” box and clicking “Save Note“
- Click “Request Review” to have your advisor notified that your schedule is ready to be reviewed and approved

If you have any questions or need assistance,
please open a SAMI Support ticket, email selfserviceadmin@fdu.edu, or call (973)-443-8822.
If a class you have planned is full and has a waitlist enabled, then follow these steps to join the waitlist. Please note that there is no guarantee that you will get a spot in the course section.
Note
Students have the option to place themselves on the waitlist to see if a seat becomes available in the course section. For a course that offers waitlisting as an option, plus-ins are no longer a standard practice; neither an advisor nor a professor can approve a plus-in for a class. All registration rules and restrictions apply to waitlisting, so you may not be able to place yourself on a waitlist if you are not eligible. If you encounter difficulties adding yourself to a waitlist due to restrictions, you should reach out to your Academic Advisor for assistance.
- Go to the “Academics” menu, click on “Student Planning,” and navigate to “Plan & Schedule“
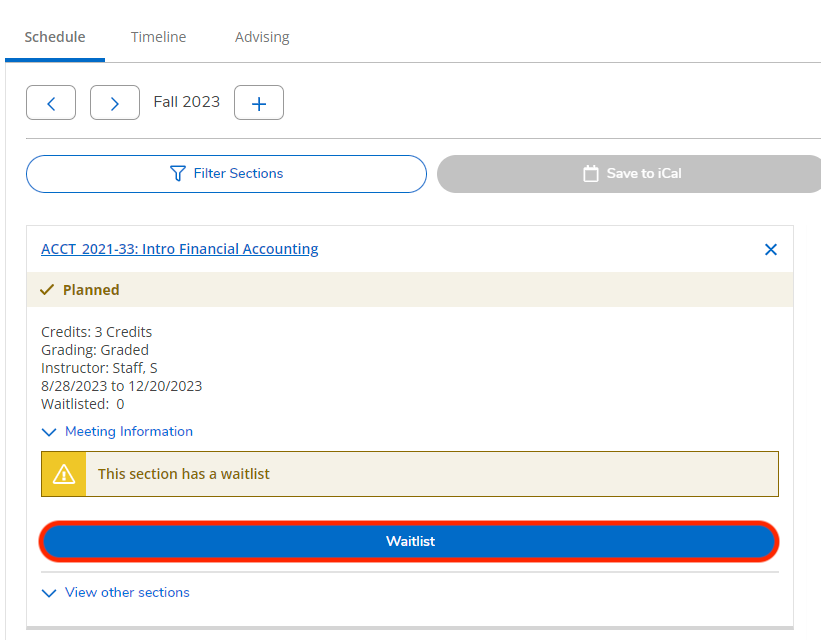
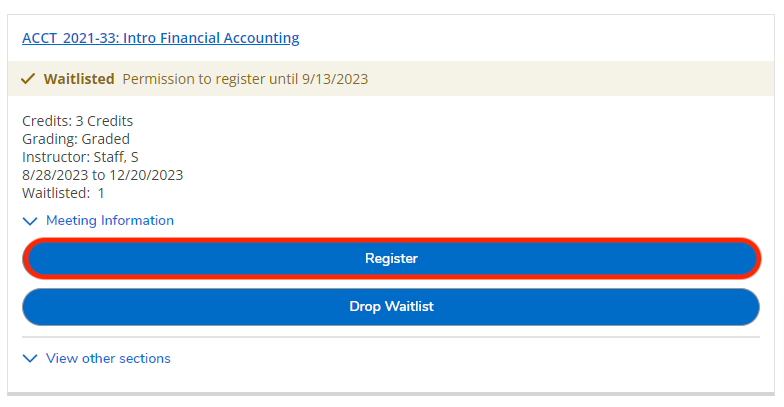
- Find the section that is full. If the waitlist is active, you will see a “Waitlist” button
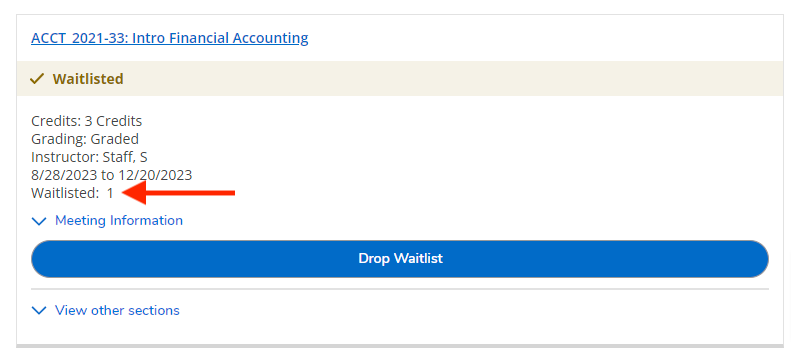
- Once you’ve joined the waitlist, the number of waitlisted students will increase by one and you will have the option to drop off the waitlist
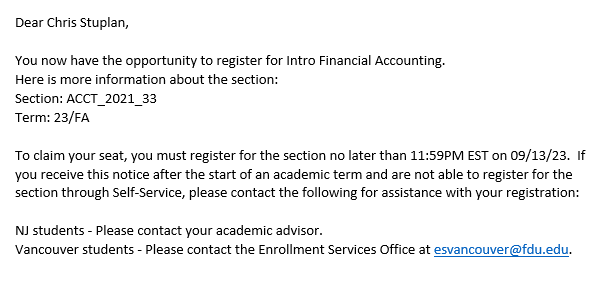
- When a spot opens in the section, you will get a notification sent to your FDU email address
Note
You will only have until 11:59 PM EST on the day specified in the email to register for the section. If you do not register on time, the spot will be offered to the next person on the waitlist.
- There will now be a “Register” button on the section within the Plan & Schedule page. Click on it to register for the waitlisted course
If you have any questions or need assistance,
please open a SAMI Support ticket, email selfserviceadmin@fdu.edu, or call (973)-443-8822.
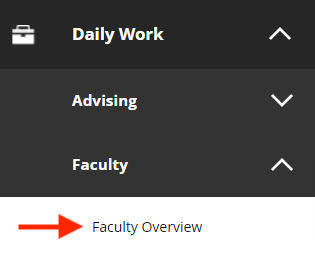
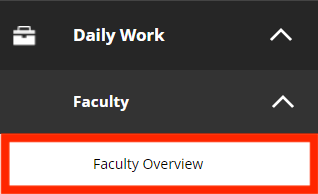
- On the left-hand side of the page, you will find your menus. Click on the toolbox icon, called “Daily Work”, and navigate to the “Faculty” submenu. Within this submenu, click on “Faculty Overview”
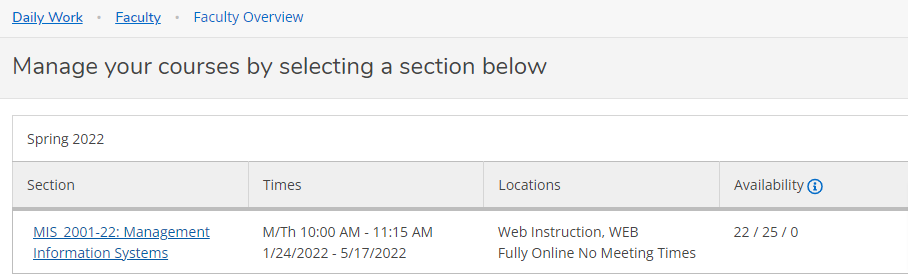
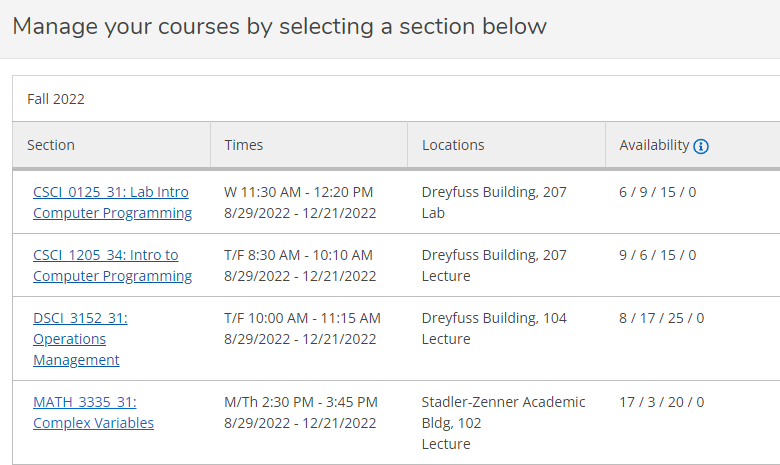
- Click on the row of the course you wish to verify the enrollment
- Within the “Roster” tab, you will see the list of students currently enrolled in the course. Use the radio buttons to select whether the student has “Attended” or “Never Attended”
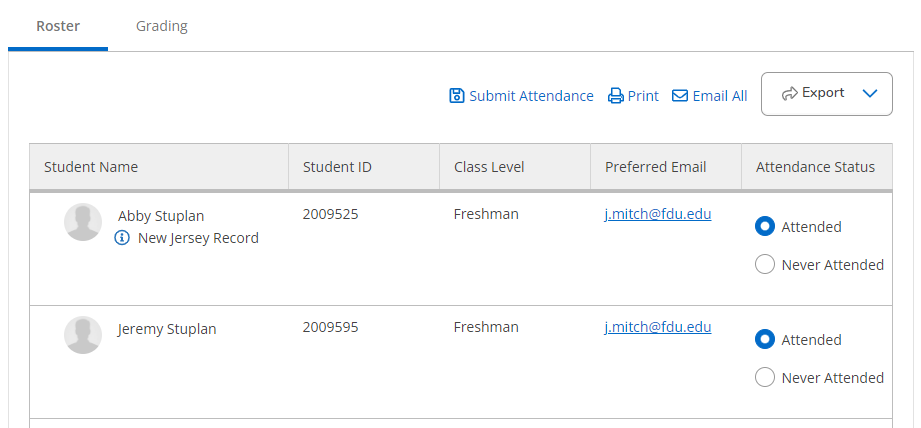
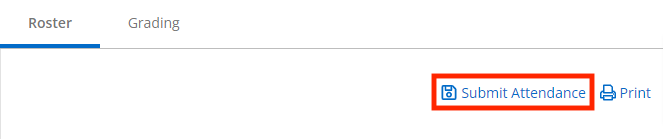
- Once you have completed verifying enrollment, you must click on “Submit Attendance“
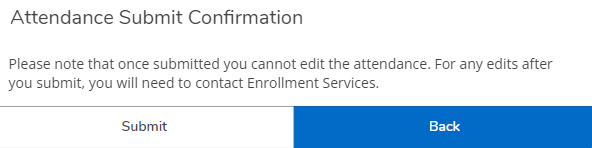
- Click on “Submit” in the pop-up window to complete the process
Important
Once you’ve submitted attendance, you cannot make any changes in Self-Service. If you need to make a change, you must contact Enrollment Services: Metro Campus – esteafdu@fdu.edu AND/OR Florham Campus esmadfdu@fdu.edu.
- After you’ve submitted the enrollment verification, you will see a green notification at the top of the page letting you know you were successful

If you have any questions or need assistance,
please open a SAMI Support ticket, email selfserviceadmin@fdu.edu, or call (973)-443-8822.
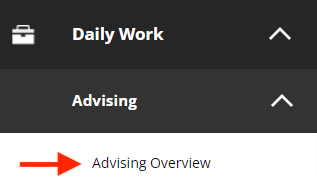
- On the left-hand side of the page, you will find your menus. Click on the toolbox icon, called “Daily Work”, and navigate to the “Advising” submenu. Within this submenu, click on “Advising Overview“
- Find the student you wish to advise using the prepopulated table of assigned advisees or by searching for their name or ID number in the search bar.
Note
You can search for any student, whether you are their advisor or not, by using the search bar.

- Click on the “View Details” button for the record of interest
- Click on the “Notifications” bar to expand it and view any holds on the student’s account
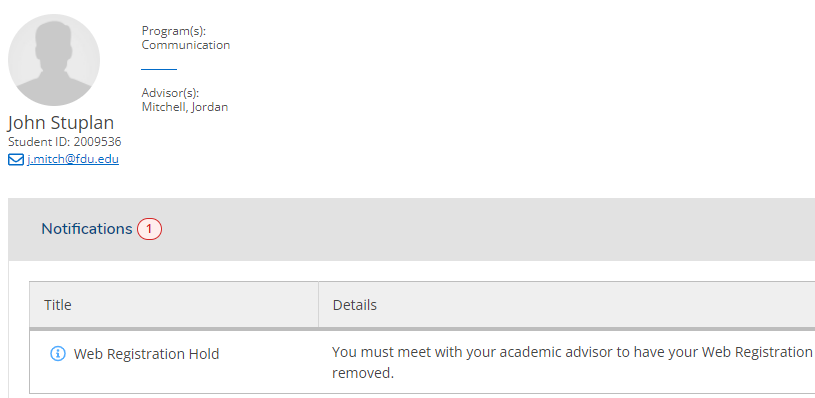
- Underneath the “Notifications” bar, you will find all the tabs you can use to gain a well-rounded view of the student’s academic progress

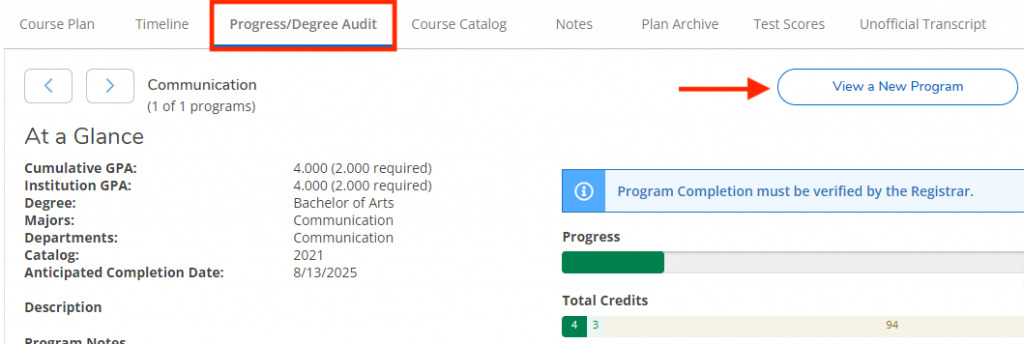
- Click on “Course Plan” to view the courses the student has registered for or is planning to register for
- Click on “Progress/Degree Audit” to view the student’s Degree Audit. Within this tab, you can click on “View a New Program” to see what it would look like if this student switched programs
- Click on “Test Scores” to see any official test scores that have been submitted to FDU and recorded in Colleague
- Click on “Grades” to view the student’s midterm and final grades broken down by semester
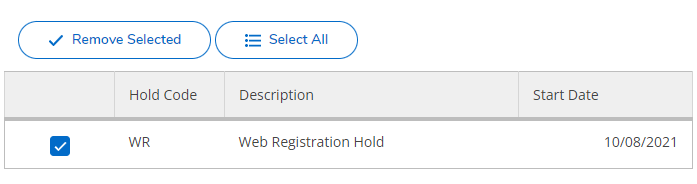
- Click on “Remove Hold” to remove the web registration hold from the student’s account. You will need to select the hold you wish to remove and click on “Remove Selected”
If you have any questions or need assistance,
please open a SAMI Support ticket, email selfserviceadmin@fdu.edu, or call (973)-443-8822.
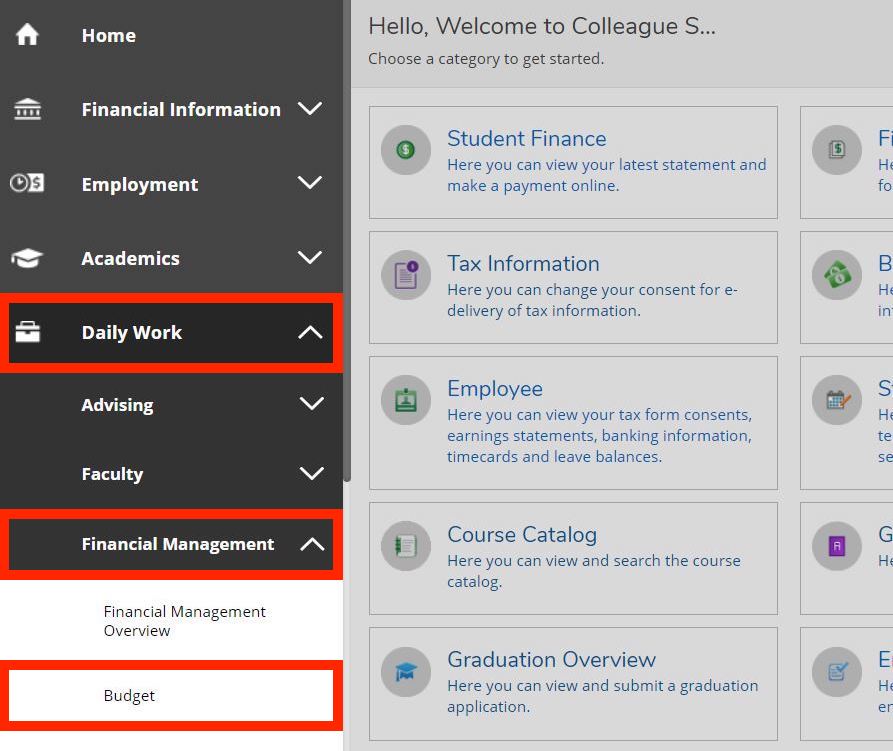
- On the left-hand side of the page, you will find your menus. Click on the toolbox icon, called “Daily Work”, and navigate to the “Financial Management” sub-menu. Within this sub-menu, click on “Budget”
- On the “Budget to Actuals” page, there will be options to filter your reports. By clicking on any of the arrows, you can expand or collapse the filter options. Once expanded, a field will appear where you can type the criteria you would like to search for. Additionally, you can change the Fiscal Year using the drop-down menu at the top of the page
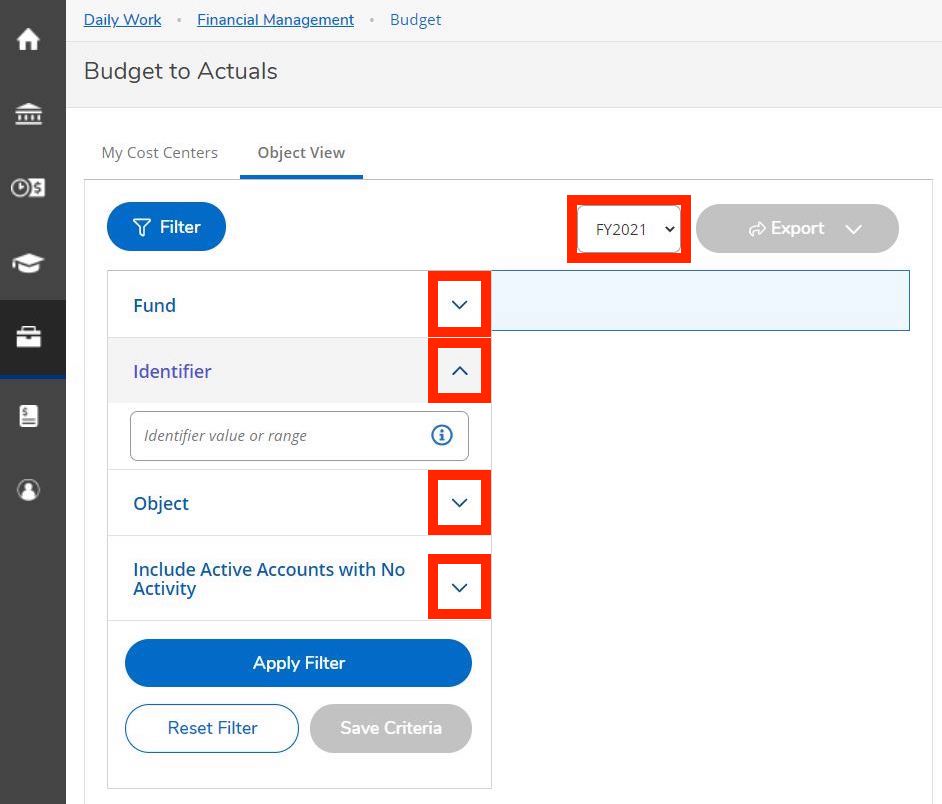
- Using “Identifier” as an example, you can type in your value(s) in the following ways. Hit “Enter” after each value to include in the search
- Type in the individual identifier, ex: 067110
- Type in the range of identifiers, ex: 067110-067115
- Type in the identifiers separated by commas, ex: 067110, 067111, 067115
- Type in the individual identifier, ex: 067110
- Click “Apply Filter” when done entering values. Your results will appear to the right of your filter menu
- If you need to change your filters:
- Open up the filter options by clicking on the blue “Filter” button
- You can add more values by typing them into the field, hitting “Enter”, and applying the filter again
- You can remove individual values by clicking on the “X” next to the value
- You can start over completely by clicking “Reset Filter”
- Open up the filter options by clicking on the blue “Filter” button
- If you are satisfied with your filter options and would like to detail in on a specific budget, then click anywhere on the budget you would like to view
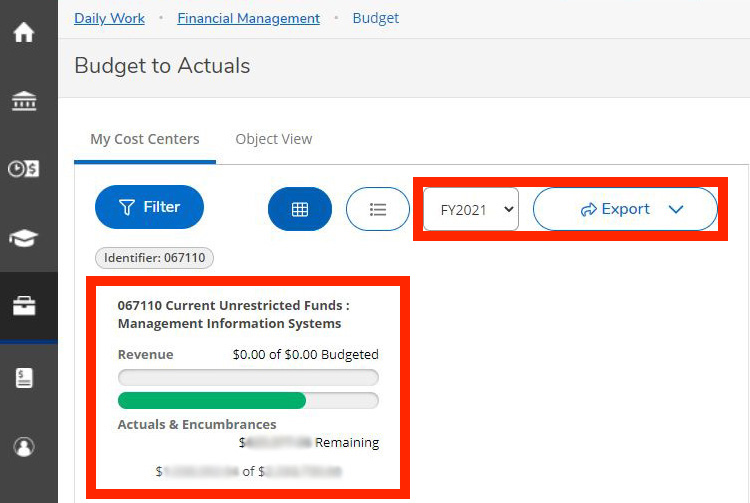
- Click anywhere within a row to view more details. The “Financial Health” column will display a yellow alert symbol if the budget is over 85% spent

- Continue to click on rows or documents to view more details. Download any page with an “Export” icon if you need to view it in Excel. You can click Back in your browser to go back a page
- On the left-hand side of the page, you will find your menus. Click on the toolbox icon, called “Daily Work”, and navigate to the “Financial Management” sub-menu. Within this sub-menu, click on “Budget”
- On the “Budget to Actuals” page, there will be options to filter your reports. By clicking on any of the arrows, you can expand or collapse the filter options. Once expanded, a field will appear where you can type the criteria you would like to search for. Additionally, you can change the Fiscal Year using the drop-down menu at the top of the page
- Using “Identifier” as an example, you can type in your value(s) in the following ways. Hit “Enter” after each value to include in the search
- Type in the individual identifier, ex: 067110
- Type in the range of identifiers, ex: 067110-067115
- Type in the identifiers separated by commas, ex: 067110, 067111, 067115
- Type in the individual identifier, ex: 067110
- Click “Apply Filter” when done entering values. Your results will appear to the right of your filter menu
- If you need to change your filters:
- Open up the filter options by clicking on the blue “Filter” button
- You can add more values by typing them into the field, hitting “Enter”, and applying the filter again
- You can remove individual values by clicking on the “X” next to the value
- You can start over completely by clicking “Reset Filter”
- Open up the filter options by clicking on the blue “Filter” button
- If you are satisfied with your filter options and would like to detail in on a specific budget, then click anywhere on the budget you would like to view
- Click anywhere within a row to view more details. The “Financial Health” column will display a yellow alert symbol if the budget is over 85% spent
- Continue to click on rows or documents to view more details. Download any page with an “Export” icon if you need to view it in Excel. You can click Back in your browser to go back a page
Note
Anytime you see the FY drop-down menu at the top of the page, you can change the FY you are viewing. Likewise, whenever you see the Export drop-down menu, you can download the information in your current view into a CSV file and open in Excel.
If you have any questions or need assistance,
please open a SAMI Support ticket, email selfserviceadmin@fdu.edu, or call (973)-443-8822.
- Go to the “Daily Work” menu, click on “Faculty,” and then click on “Faculty Overview“
- Select the course for which you need to enter midterm grades
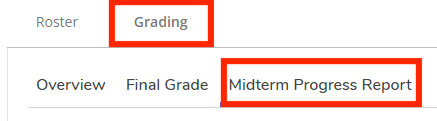
- Within the “Grading” tab, select the “Midterm Progress Report” tab
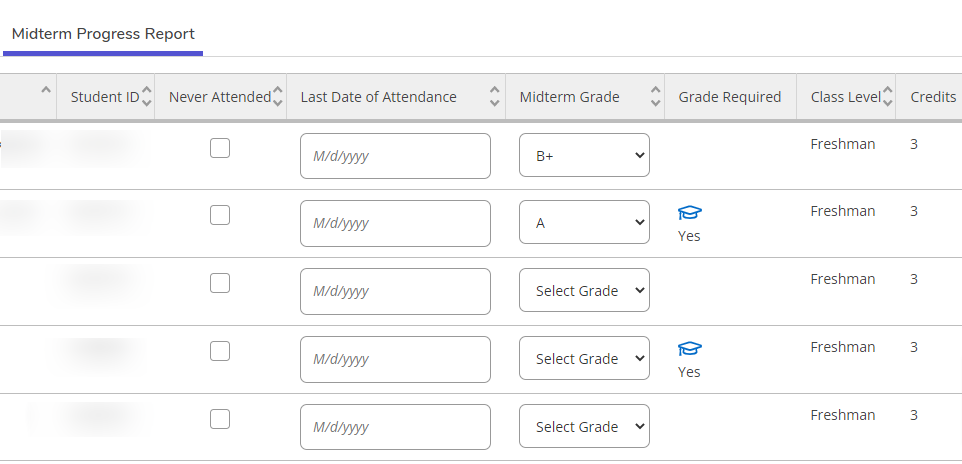
- Use the drop-down menu to select the grade for each student
Note
The “Grade Required” column will indicate which students MUST be given a midterm grade.
Note
There is no Submit button for Midterm grading. Grades are automatically saved when selected from the drop-down. Midterm grades may be changed at anytime, if needed.
If you have any questions or need assistance,
please open a SAMI Support ticket, email selfserviceadmin@fdu.edu, or call (973)-443-8822.
- Go to the “Daily Work” menu, click on “Faculty,” and then click on “Faculty Overview“
- Select the course for which you need to enter final grades
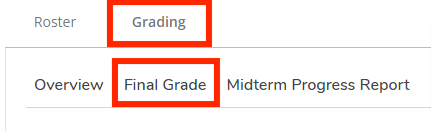
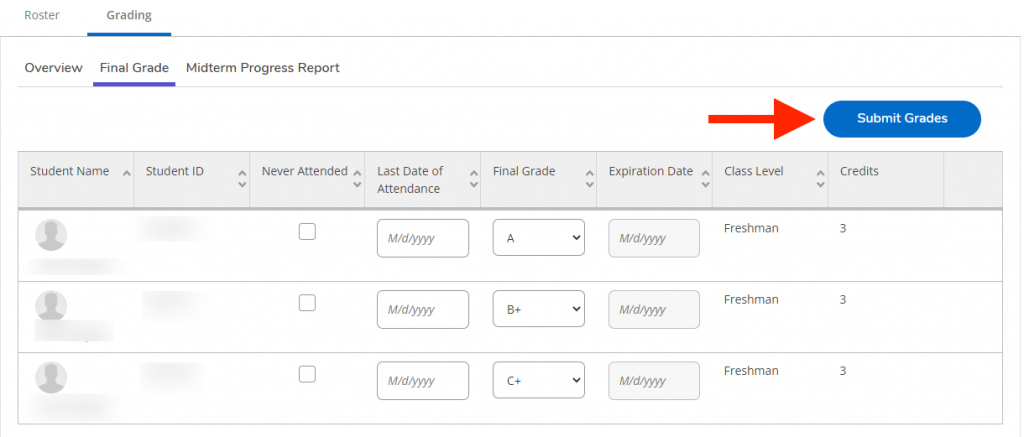
- Within the “Grading” tab, select the “Final Grade” tab
- Use the drop-down menu to select the grade for each student
Note
A grade must be entered for every student in order to submit grades.
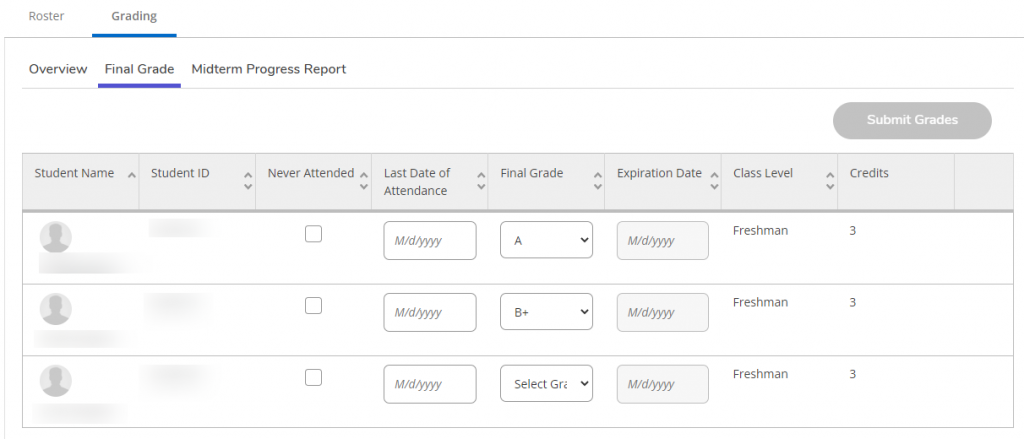
- Once all grades have been entered, you must click the “Submit Grades” button to save and submit your work
Note
You have a short window where you can change grades and resubmit in Self-Service. However, once grades have been verified in Colleague, you will no longer be able to make a change in Self-Service. You will then need to go through the Change of Grade process.
If you have any questions or need assistance,
please open a SAMI Support ticket, email selfserviceadmin@fdu.edu, or call (973)-443-8822.
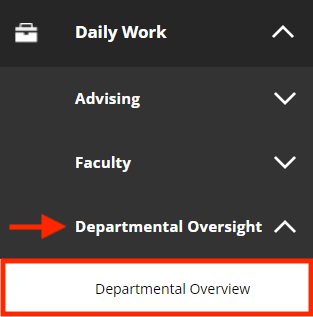
- Go to the Daily Work menu and click on “Departmental Oversight“. Within this menu, click on “Departmental Overview“
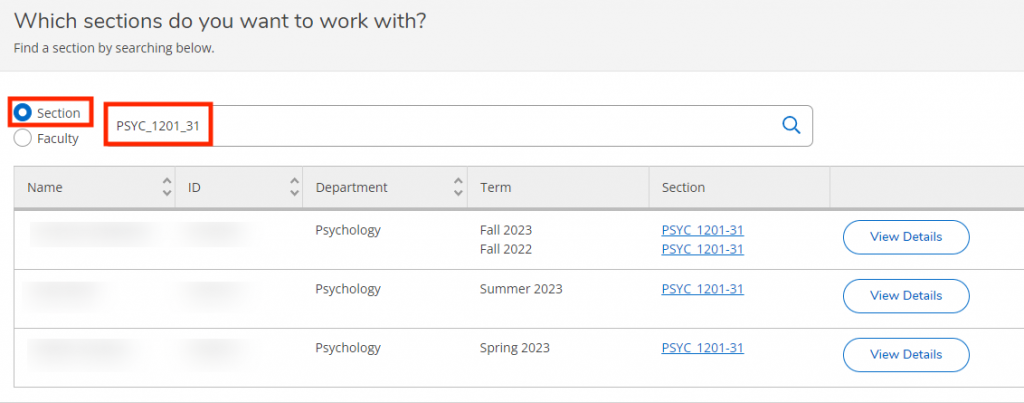
- To search for a section by course code, click on the “Section“ radio button. Type in the section information using the following valid formats only:
- Subject Code Only – Ex: PSYC
- Catalog Number – Ex: PSYC_1201
- Specific Section – Ex: PSYCH_1201_31
- To search for all the sections being taught by a specific faculty member, click on the “Faculty” radio button. Type in the faculty member’s name using the following valid formats only:
- First Name Last Name – Ex: Bob Smith
- Last Name, First Name – Ex: Smith, Bob
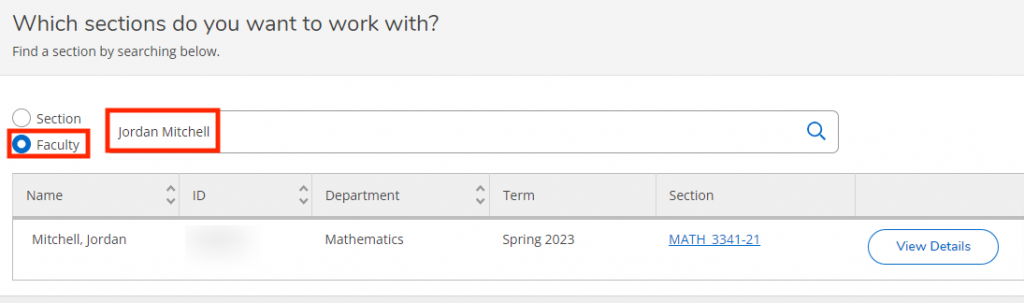
- Once you’ve found the section or faculty member you searched for, click on “View Details“
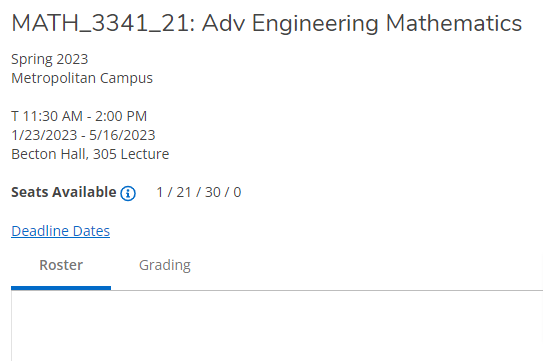
- To view the Enrollment Verification or Midterm/Final grades associated with a specific section, click on the section name
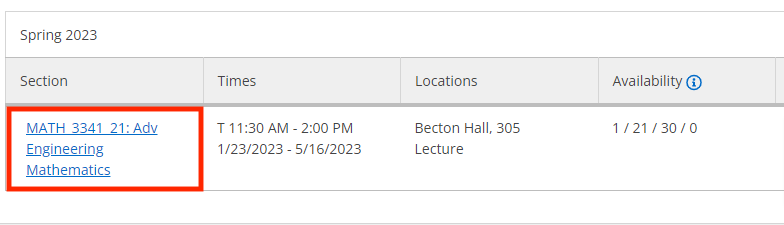
- Enrollment Verification can be found in the Roster tab and Midterm/Final grades can be found in the Grading tab
Note
You will not be able to submit grades on behalf of a faculty member. You can only view the grades that have been submitted.
If you have any questions or need assistance,
please open a SAMI Support ticket, email selfserviceadmin@fdu.edu, or call (973)-443-8822.
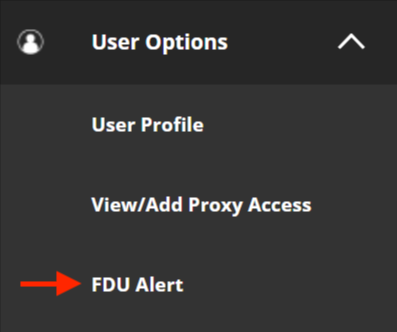
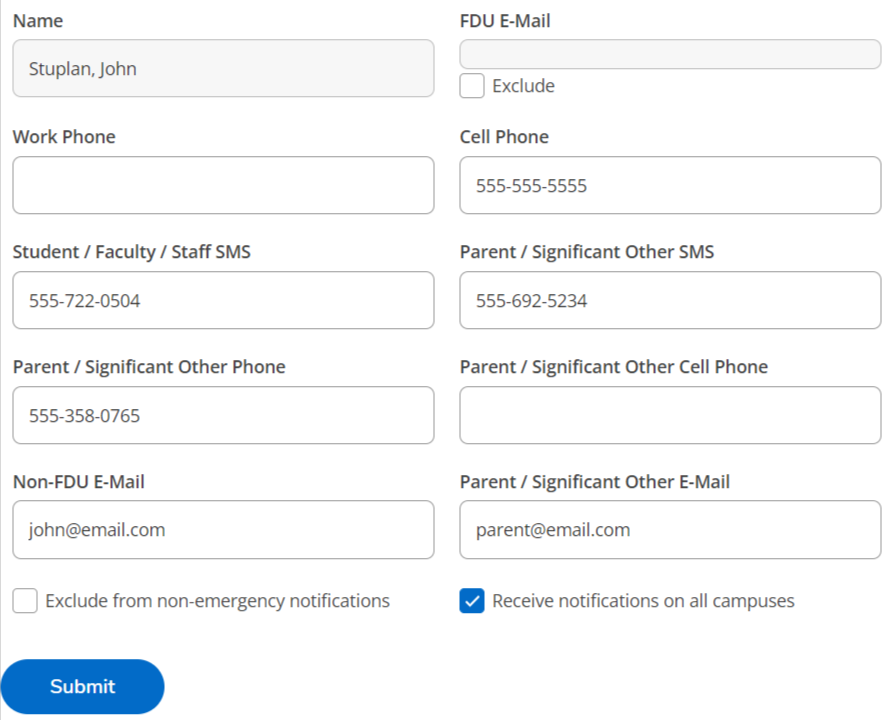
- On the left-hand side of the page, you will find your menus. Click on the menu called “User Options” and then click on “FDU Alert”
- Fill in the alert information presented on the page. If information already exists in these fields, make sure the information is up to date. Click “Submit” when finished
If you have any questions or need assistance,
please open a SAMI Support ticket, email selfserviceadmin@fdu.edu, or call (973)-443-8822.
What is a Proxy? A Proxy is a person to whom you grant permission to sign into your Self-Service account to access selected student records.
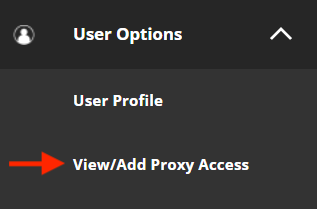
- On the left-hand side of the page, you will find your menus. Press on the menu called “User Options” and then press on “View/Add Proxy Access”
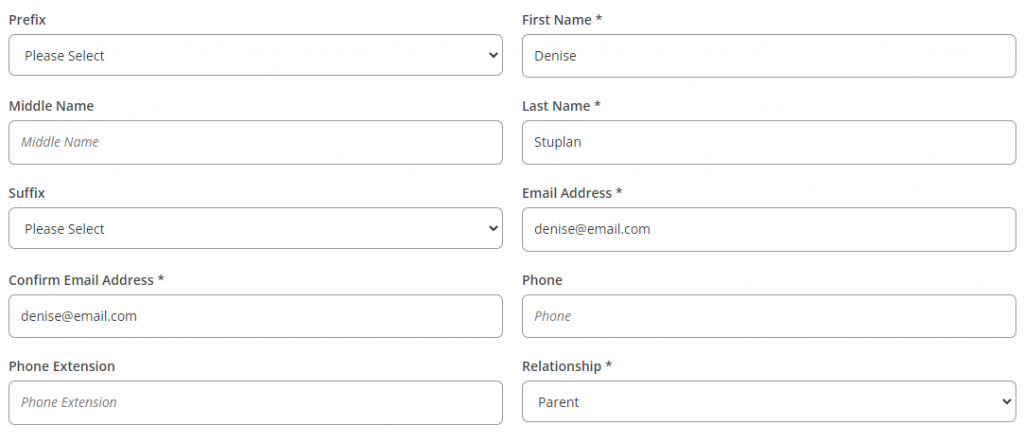
- Use the drop-down to add a proxy. If you see the person’s name, select them from the list and confirm their information. If you do not see their name, click on “Add Another User”

- You must fill in the personal information for the proxy
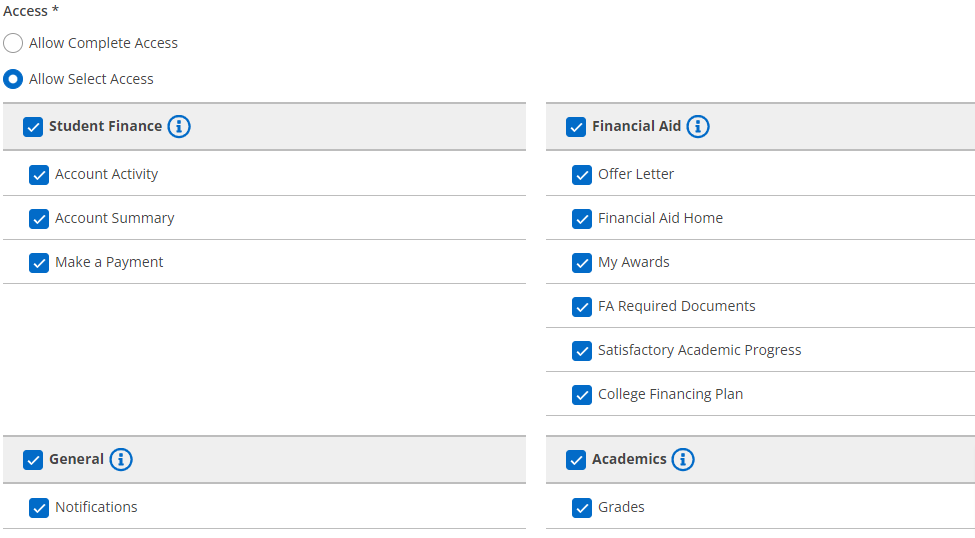
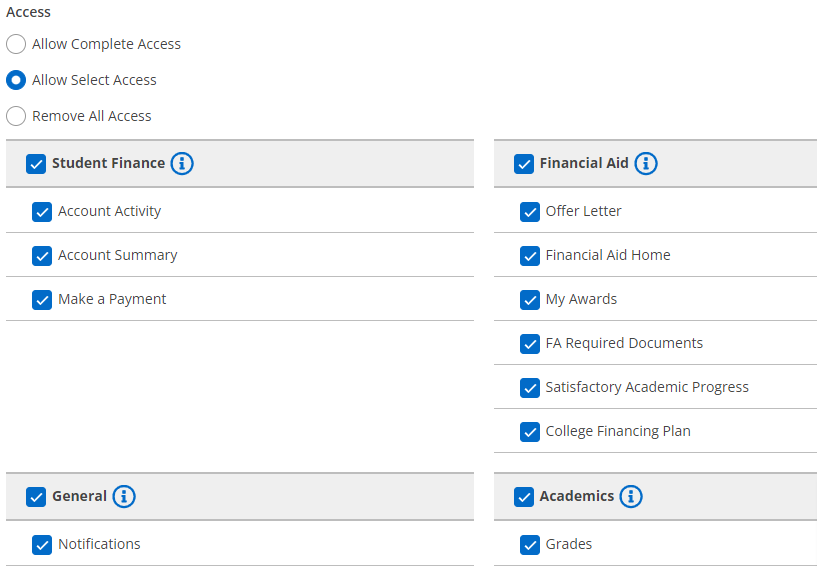
- You can pick and choose what access you want to give to this proxy
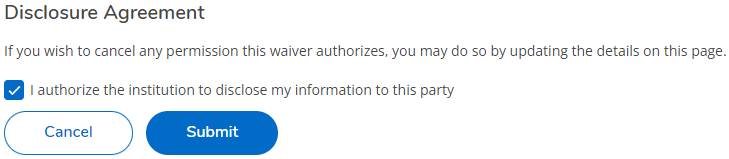
- You must agree to the Disclosure Agreement and press “Submit”
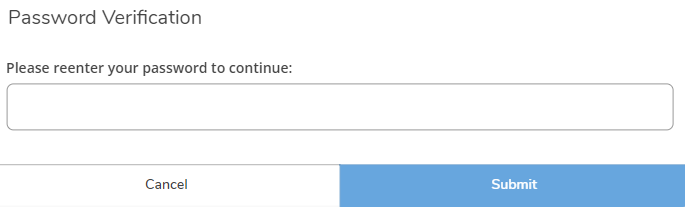
- You will be prompted to enter your Single-Sign-On password again and press “Submit”
- If you add a new user, you might get the following pop-up message. If you do, press “Continue“

- Now your proxy will be listed on the “View/Add Proxy Access” page
Note
Proxies will receive an email any time access is granted or revoked.
- If you want to change a proxy’s access at any time, simply click on the pencil next to their row

- Add or remove access by selecting the appropriate checkboxes. You can also remove all access entirely by selecting the “Remove All Access” radio button. Click “Save” to submit your changes
Important
If you are giving a proxy access to “Make a Payment” you must also make them an authorized user in TouchNet.
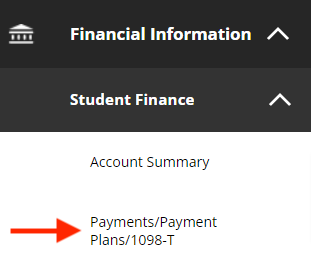
- To give access to Make a Payment via an authorized user, click on “Payments/Payment Plans/1098-T” within the “Student Finance” menu
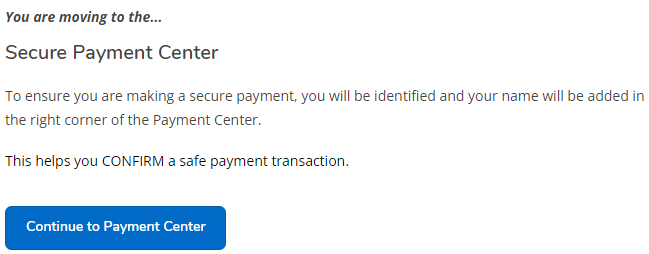
- Click on “Continue to the Payment Center” to navigate to TouchNet
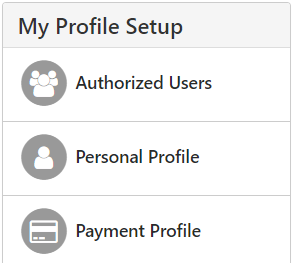
- Click on “Authorized Users” to add your proxy as an authorized user to pay your bill. Follow the instructions to add the authorized user
If you have any questions or need assistance,
please open a SAMI Support ticket, email selfserviceadmin@fdu.edu, or call (973)-443-8822.
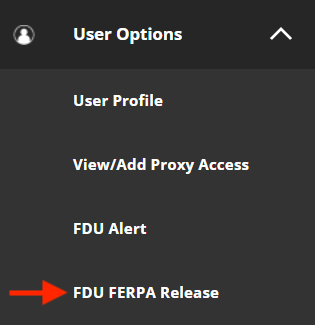
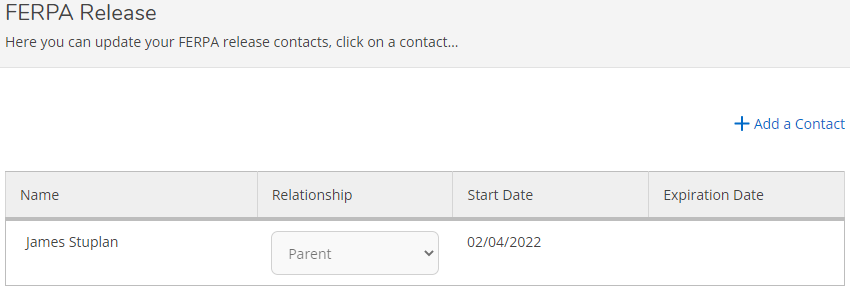
- On the left-hand side of the page, you will find your menus. Click on the menu called “User Options” and then click on “FDU FERPA Release”
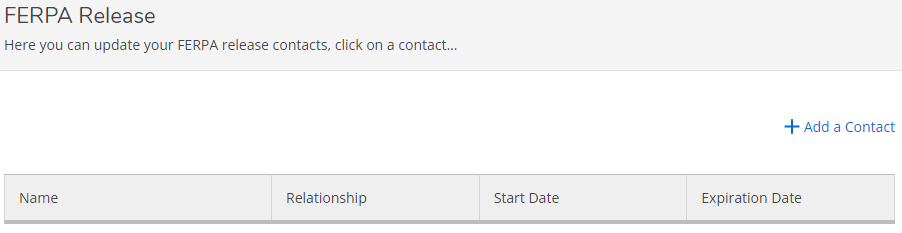
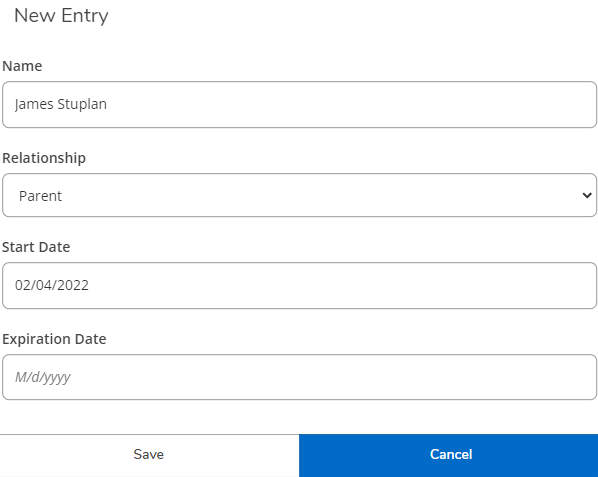
- Click on “Add a Contact” to add a new contact, a person to whom you want to grant access to your information
Important
By completing the information on this page, you are authorizing administrators, staff, and faculty members of Fairleigh Dickinson University to release information pertaining to academic records, financial aid, student bill/account and disciplinary records to the contacts you have noted. This waiver remains in effect throughout your tenure as a student at the University. If you wish to cancel the permissions this waiver authorizes, you may do so by updating the details on this page. Please be advised that this waiver DOES NOT apply to services provided by Health and Counseling services. All records pertaining to medical care and psychological services remain confidential.
- Adding a contact: Fill in the contact’s name, relationship, and the start date (the date that this will become effective). The expiration date is optional and can be changed at any point. Click “Save”
- You will now see this contact listed on the FDU FERPA Release page
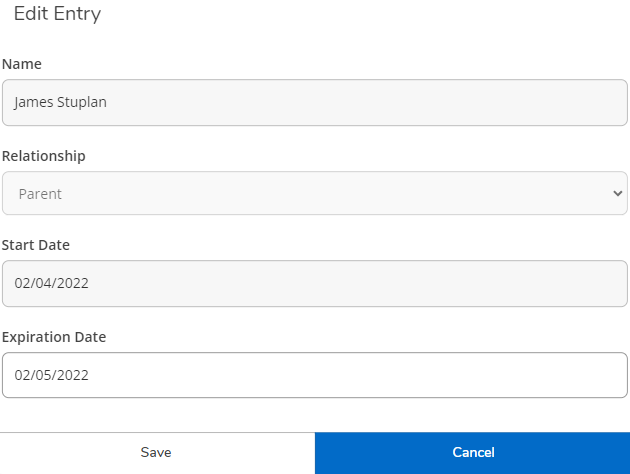
- If you want to end the permissions of a contact, press on the row containing their name
- Fill in an expiration date to end their permissions on that date. Press “Save”
- Repeat the steps above to add or change your contacts
If you have any questions or need assistance,
please open a SAMI Support ticket, email selfserviceadmin@fdu.edu, or call (973)-443-8822.
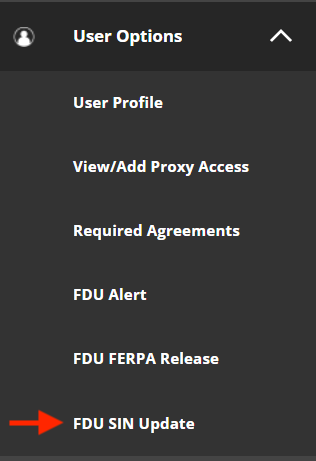
- Go to the “User Options” menu and click on “FDU SIN Update“
- Enter your SIN into the empty fields and click “Update“
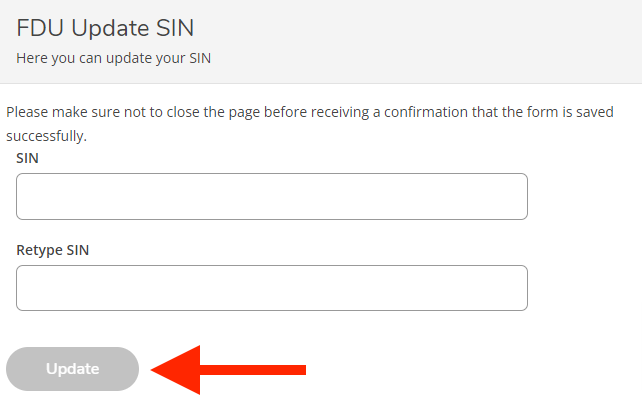
- You will know your submission is successful if you get a “SIN Updated” alert in the top right corner of the page

If you have any questions or need assistance,
please open a SAMI Support ticket, email selfserviceadmin@fdu.edu, or call (973)-443-8822.
The phone numbers the University has on file to communicate with you are displayed in your User Profile in Self-Service. If the information is incorrect in any way, you can update your contact data using the steps below.
Faculty/Staff
Please note that the phone number you enter under the ‘Work’ phone type will be publicly available in the FDU Faculty/Staff directory. Ensure that the number you provide for ‘Work’ is the one you want colleagues, students, and others to use to contact you.
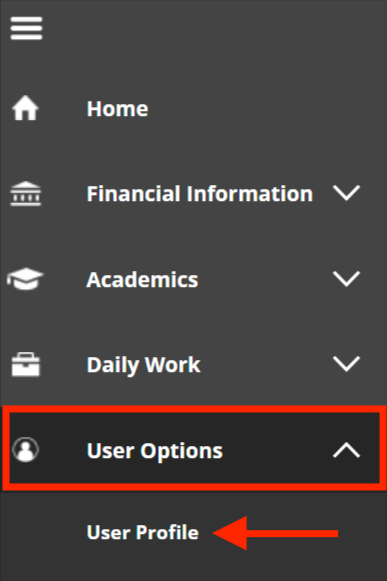
- Go to the “User Options” menu and press on “User Profile”
- Scroll down to the “Phone Numbers” section
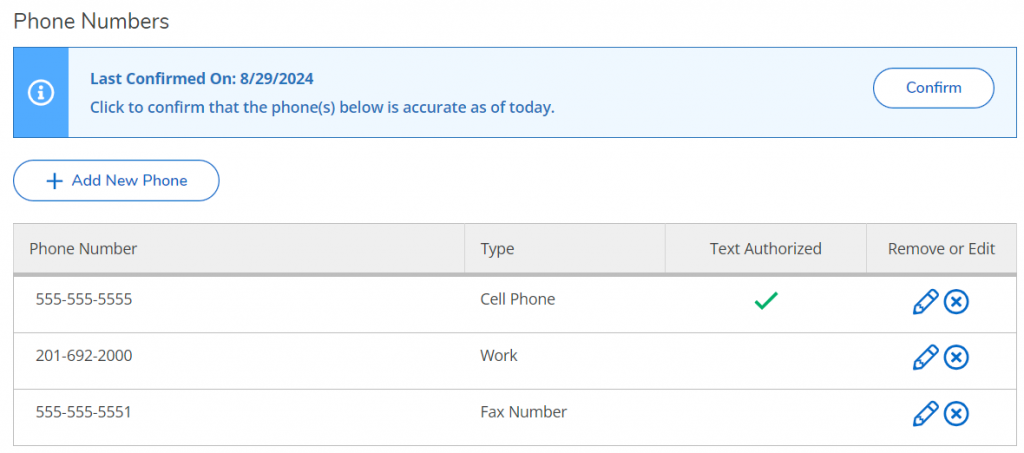
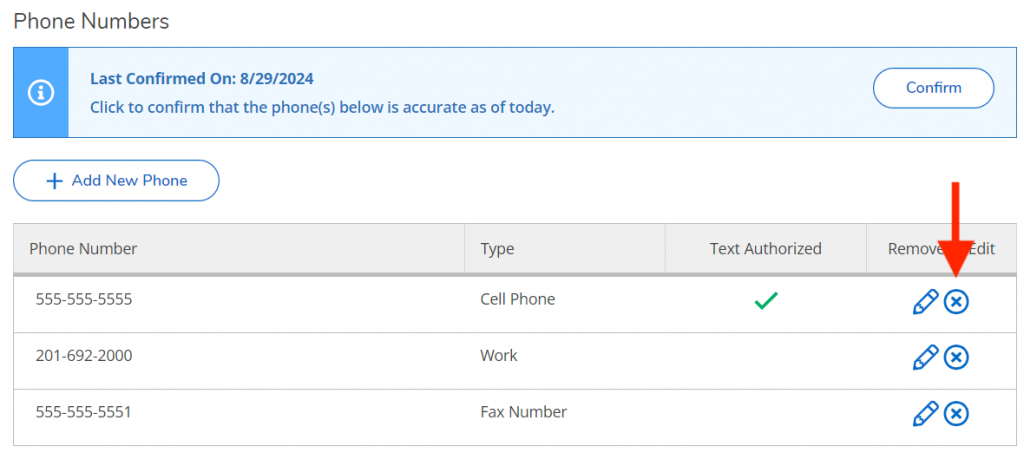
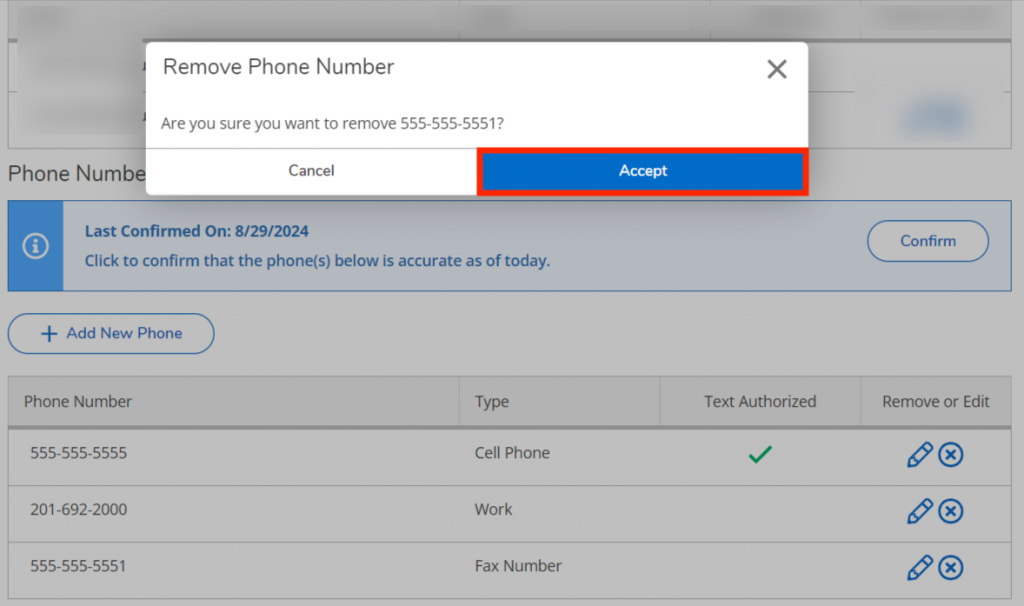
- If any of the phone numbers listed are no longer yours, you can press the “X” icon in the Remove or Edit column to delete them. Press “Accept” to confirm the deletion
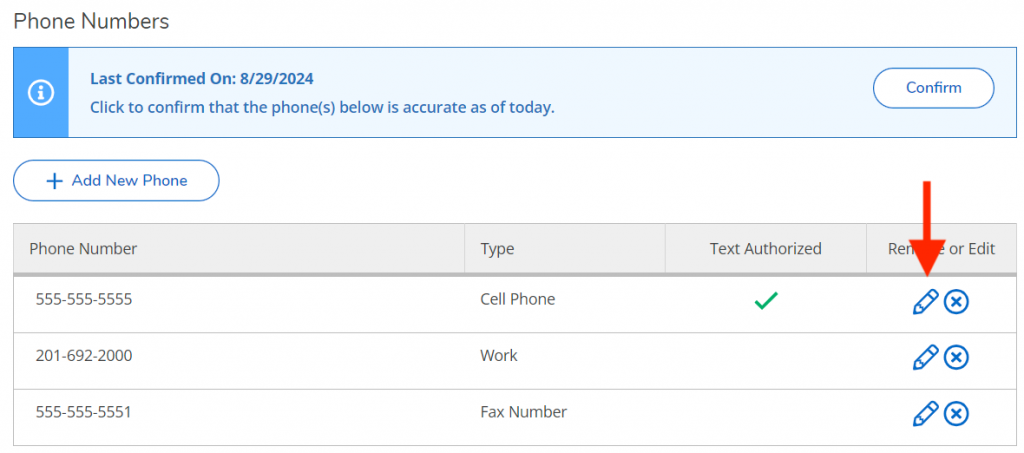
- If any of the numbers listed need to be corrected or updated, press the “Pencil” icon. Change the information that appears in the pop-up window and press “Update Phone”

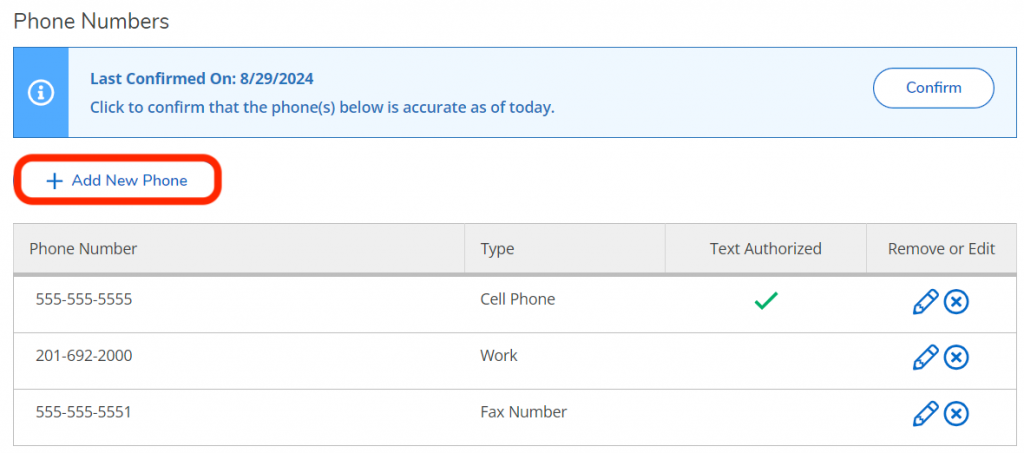
- If you need to add a new phone number to your record, press “+ Add New Phone”. In the pop-up window, fill in the number, and extension (if applicable), type, and select if you allow this number to be texted. Then press “Add Phone”
If you have any questions or need assistance,
please open a SAMI Support ticket, email selfserviceadmin@fdu.edu, or call (973)-443-8822.


