home

Connecting and Using an All-in-One at Home

Resources for:
icon Close

How to Connect an All-in-One for Work-at-Home

Making the Physical Connections

  1. Make the appropriate connections to the back of the all-in-one.
    • Plug in the power cable to the power port on the back of the all-in-one.
    • A physical network connection is only required if you do not want to or can not use wireless.
    • Both the keyboard and mouse can be plugged into any USB port.
  1. Turn the PC on and sign in as normal.

Connecting to Wi-fi (Skip if Using a Physical Network Cable)

  1. Click on the network icon on the bottom-right hand of the Start bar near the system clock.
  1. A list of available networks will populate. Select your home wireless network.
  1. Select your network and click “Connect“.
  1. Enter the network key for your wireless router. This can sometimes be located on the side or bottom of your router and/or modem. Click “Next“.

Connecting to VPN from Home

  1. Click on the arrow on the bottom right hand of the Start bar near the system clock and right-click on the “Cisco VPN Access” icon. On the pop-up menu, click “Connect“.
  1. If this is the first time connecting to VPN service please enter the text below as shown into the VPN field and click “Connect“.
  1. Enter your full NetID information and click “Ok“.
  1. Once a successful connection is made a prompt will appear and the icon for the Cisco VPN Access in the system try will appear with a lock.
Last Modified:

Home/Department Shared Drive Quota Limit Email

Resources for:
icon Close

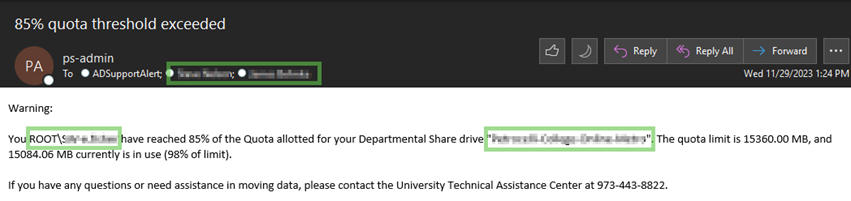
Home drives and departmental shared drives come with a limited capacity of data storage, known as a quota. When a drive reaches 85% of that quota, both the departmental shared drive manager as well as the user uploading the content that puts a drive over that threshold will receive a message from psadmin@fdu.edu as seen below.

By informing the share manager and providing the name of the share affected, the share manager has an opportunity to respond to the notification prior to any disruptions to day-to-day workflows.

Upon receiving this email, the share owner should:

  1. Review and confirm that all uploaded content is required for current business purposes
  2. Review and consolidate any duplicated items
  3. Remove any documents, files, or pictures no longer needed

Note

Shared drives are not intended for archival purposes. We ask that the share manager please remove documents, files or pictures that are no longer actively required.

These measures will resolve most shared drive quota issues. If the shared drive is still nearing its storage quota, please fill out the Home/Department Share Management Form using the link below:

Home/Department Share Management Form

Last Modified: