This article offers a detailed, step-by-step guide, on how to change your NETID password directly from your Mac using the Jamf Connect and how to synchronize this updated NETID password with your Mac’s user account password.
Changing and Syncing your NET ID Password on your Mac
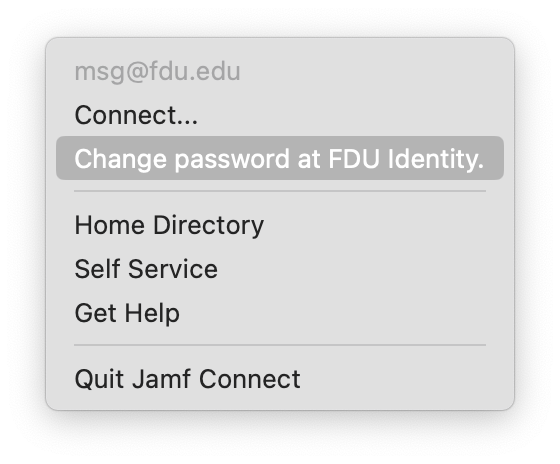
Click on the “FDU shield icon” located in the top right of your screen’s menu bar
Select “Change Password at FDU Identity“
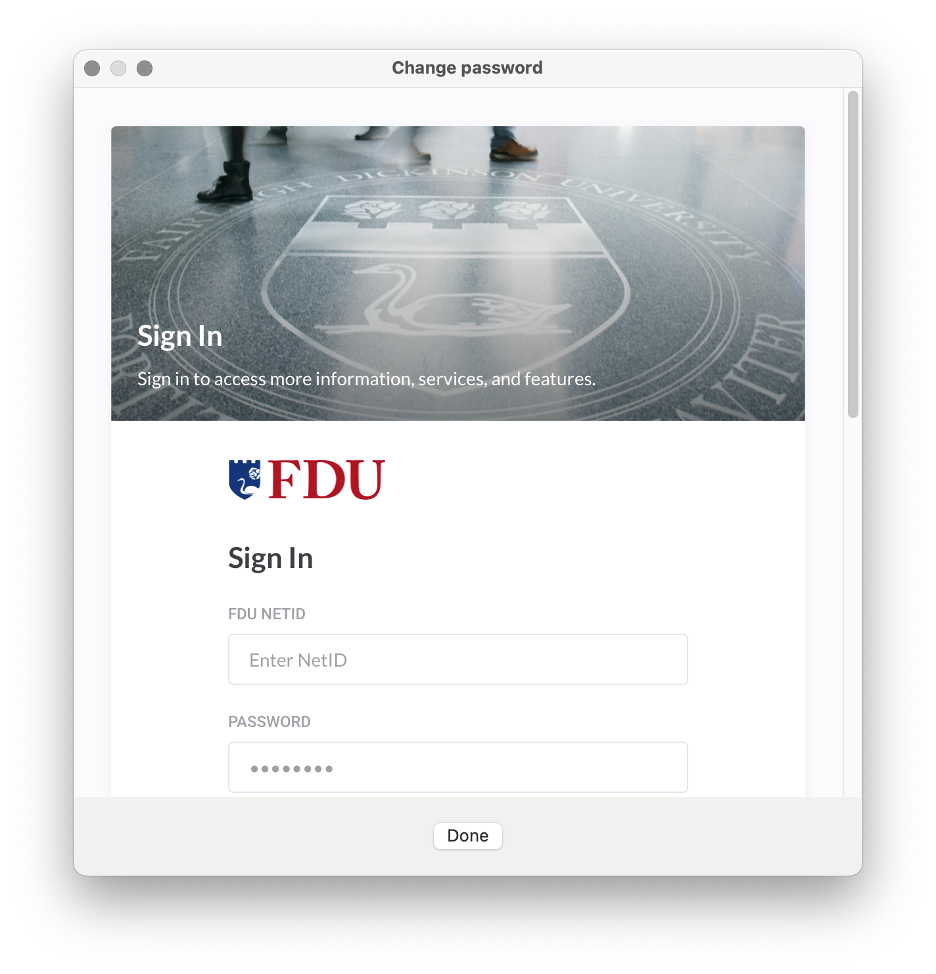
Sign in to the “FDU Identity Portal” that opens up
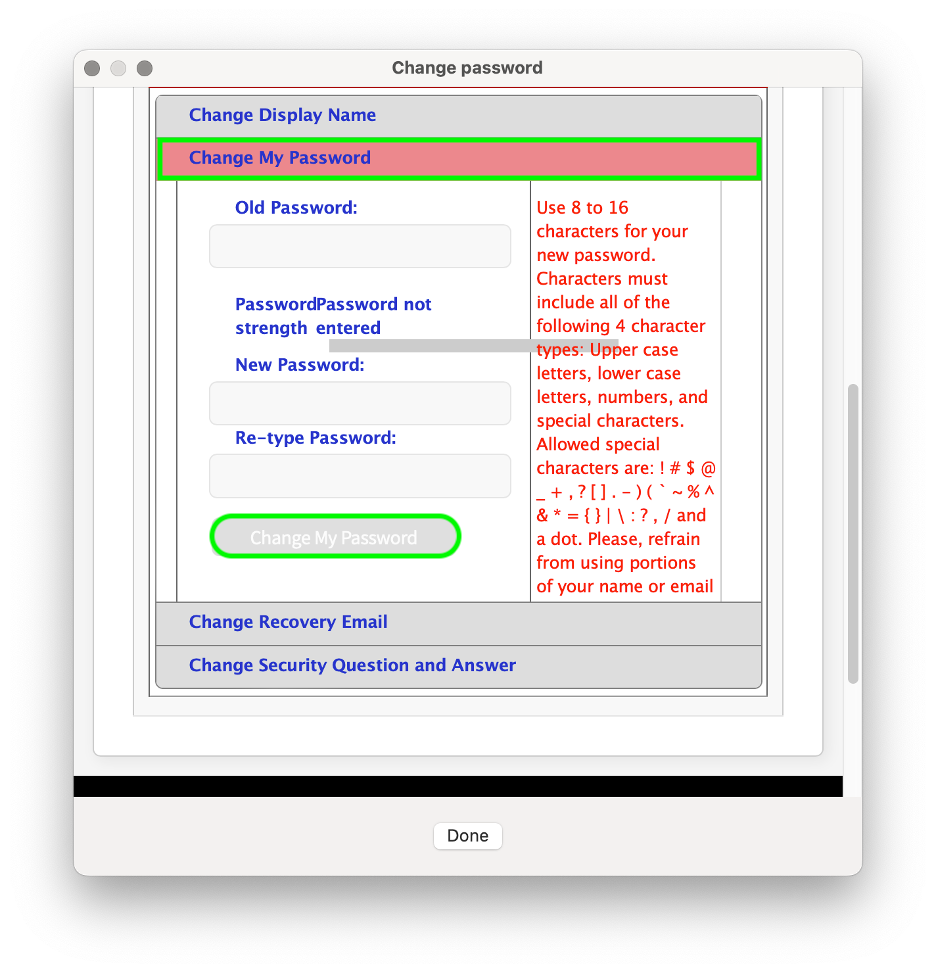
Scroll to “Change My Password” section and enter your old password and new password in the appropriate fields. Then click the “Change My Password” button
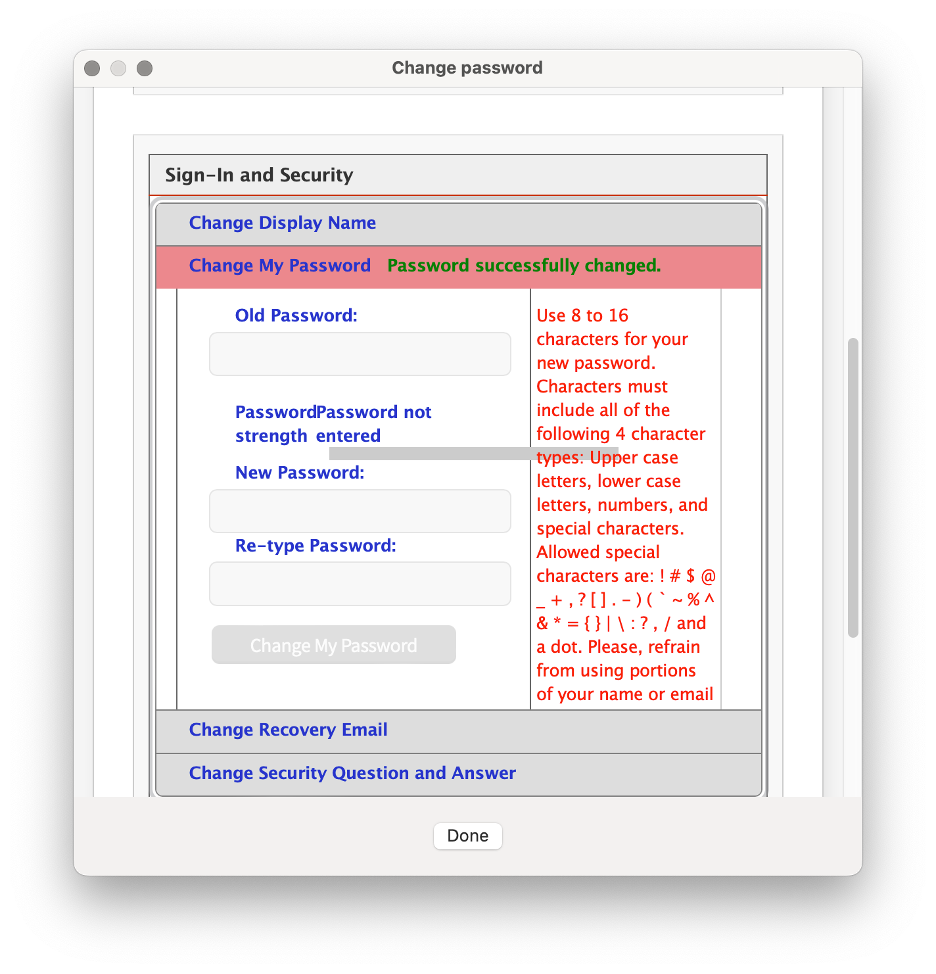
You will see the password successfully changed in the red bar when successful. Click “Done“
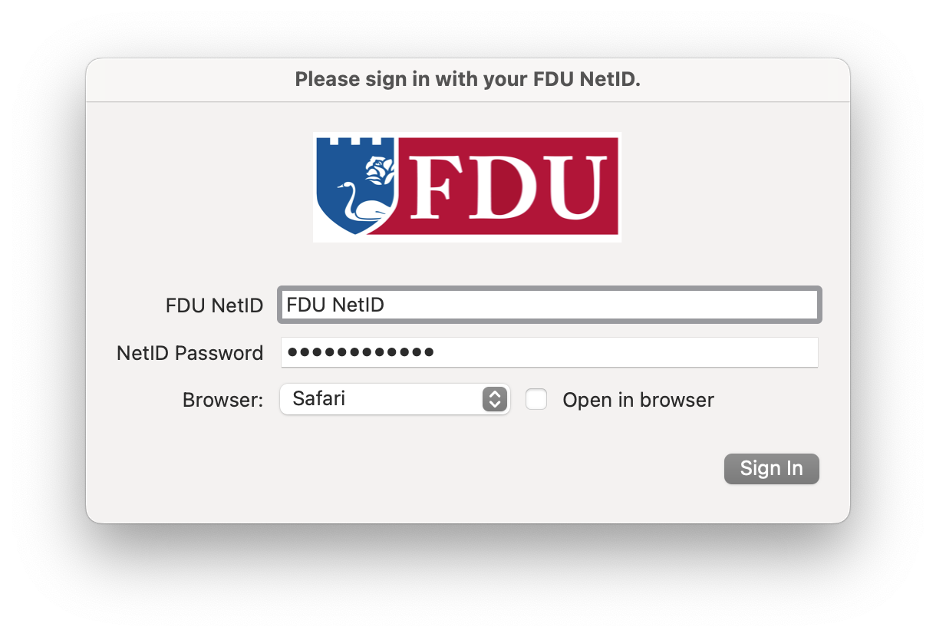
Enter your “FDU NetID” and “Password” in the corresponding fields. Click “Sign In”
Enter your old password in the “Local Password” prompt and click “Sync” to synchronize the new password with your Mac’s login password
Note
You will need to reauthenticate your Office 365 apps and FDU-Secure.
Synchronizing NETID Password with your Mac Password
If you changed your NETID password outside of your FDU Mac, you will be prompted automatically to sync your password to your Mac’s password the next time you are connected to the internet. You will first need to log in to the machine using your old password and then proceed with the synchronization following the steps below.
The following dialog box will appear once you are connected to the internet automatically. Enter your “FDU NetID” and “Password” and click “Sign In”
Enter your old password in the “Local Password” prompt and click the “Sync” button to synchronize the new password with your Mac’s login password
Note
You will need to re-authenticate to your Office 365 apps and FDU-Secure.
As technology evolves and new features are offered, there may be times when unwanted or unexpected things happen. This page is dedicated to providing some tips, tricks, and recommendations to circumvent these undesired circumstances.
Normalize Sound Levels – Windows
Microsoft Windows 10 automatically adjusts audio levels between different applications. This can affect the level of sounds from various applications depending on what program is currently being used. This feature can be turned off using the instructions below.
Instructions
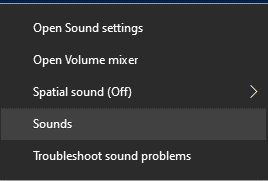
From the Sound Icon in your task bar, single right-click
Click “Sounds“
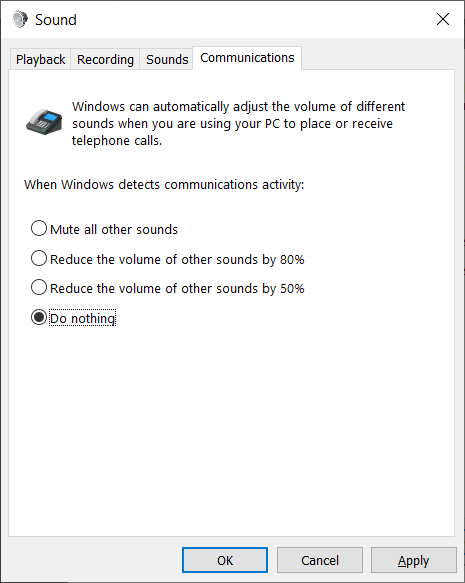
Click “Communications” tab.
Select the “Do nothing” radial button
Click “Apply”
Click “OK”
close
Adjust Microphone Settings – Windows
To ensure clear and audible audio in virtual meeting applications, such as Zoom, please follow the instructions below.
Instructions
Right-click the Audioicon in the system tray portion of the task bar
Click “Sounds”
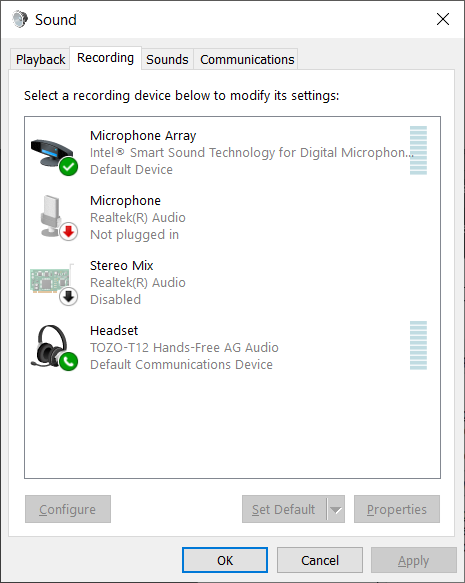
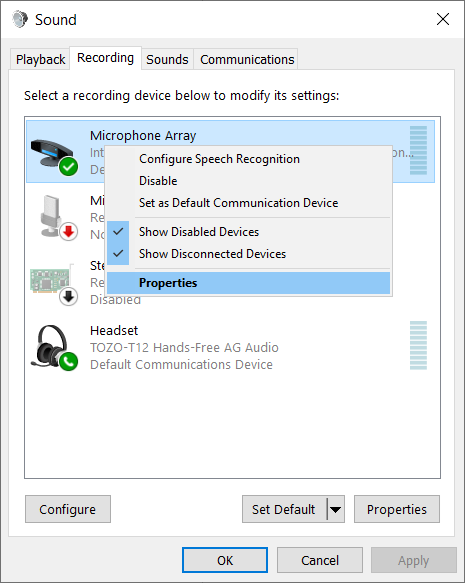
Click “Recording”
Note
Not all options may be visible.
Right Click on “Microphone Array” and select “Properties”
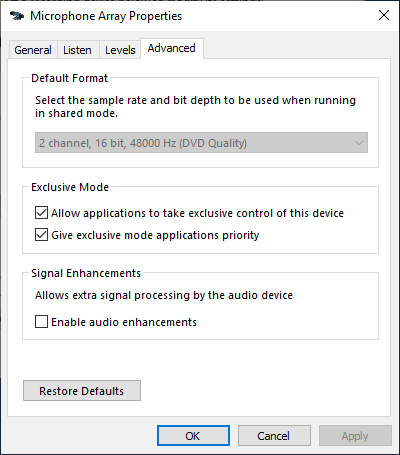
Click the “Advanced” and un-check “Enable Audio Enhancements”
Click “Apply”
Click “OK”
close
Adjust Power Options – Lenovo Laptops
Default power profiles in Windows 10 are configured to balance performance and battery life. To change these settings, please follow the steps below.
Instructions
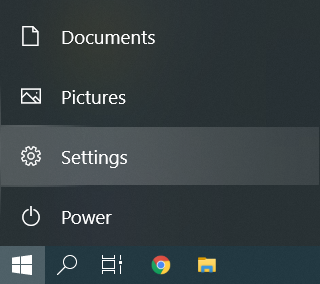
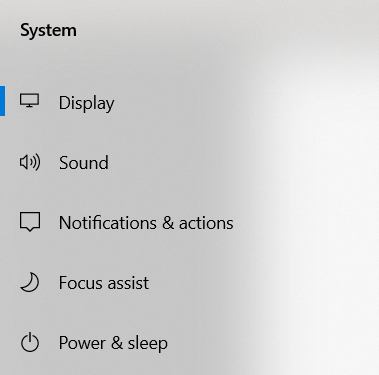
Click on Start, and then click “Settings“
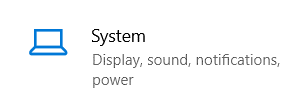
Click on “System“
Select “Power & Sleep“
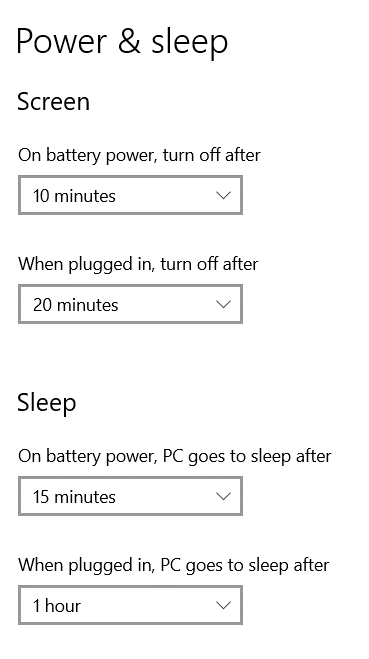
To modify power settings while the laptop is plugged in or on battery power, modify the below options
Note:
Selecting higher times may result in shorter battery life
For additional power settings, such as the laptop lid and power button settings, click Additional power settings
Note
Depending on window size, this option may be located towards the bottom or on the right side of the screen.
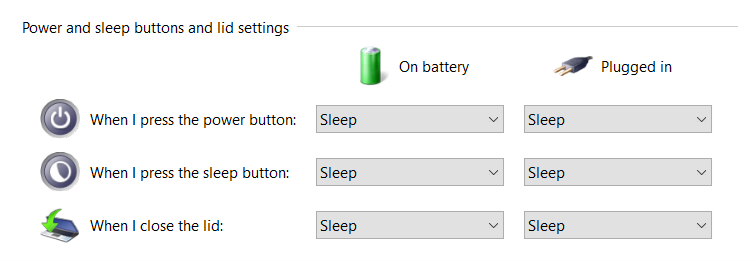
Select either “Choose what the power buttons do” or “Choose what closing the lid does“
The options below will allow modifying the effects of pressing the power button and closing the lid
Note
Setting DO NOTHING when closing the lid can lead to drastically less battery life as well as overheating when the laptop is placed inside a bag or briefcase.
close
Restarting A Computer
Rebooting a device is highly encouraged as it will help keep the system running at peak performance. The benefits of a weekly reboot include:
Mitigate vulnerabilities to cyber-attacks by applying critical updates
Prevent performance degradation
Prevent application memory faults
Effectively apply system policies
To restart a device, follow the instruction below.
Tip
Make sure any open application is saved and closed before a restart is performed. This includes applications like Outlook, Word, Excel and any other applications that may be opend.
Instructions for Windows
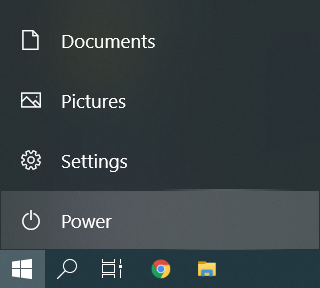
Click the Start bottom on the bottom left hand side of the task bar
Click the “Power” button
Click “Restart”
Note
Clicking “Shutdown” will not always properly apply updates or produce the desired effect. Clicking “restart” is the recomended option.
close
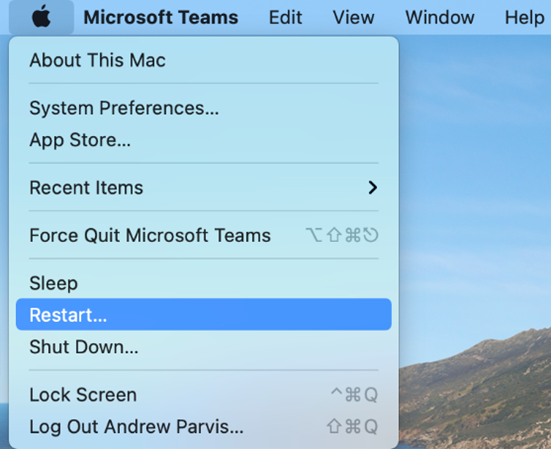
Instructions for macOS
Click the “Apple” at the top left-hand side of your screen
CrashPlan is a backup agent that will back up all data on a university device under the primary owner’s profile. The backup sets can be used for restoring data to a machine, whether it has been reformatted, replaced, or compromised. This document will outline the steps needed to install, activate, and restore data to a new or existing device.
CrashPlan is required on all University provided desktops and laptops to backup all University Business data to prevent data loss.
Who Can use CrashPlan?
CrashPlan is presently licensed for full-time faculty and full-time staff only. The University mandates CrashPlan for proper data security practices. If a user has personal data that they wish to exclude from being backed up, a folder labeled “Personal Documents” can be found and utilized in your “Documents” folder. This folder and its contents will be ignored by CrashPlan when your system is being backed up.
Personal Documents folder locations:
Windows PC
C:\users\username\Documents\Personal Documents\
macOS
/users/username/documents/Personal Documents/
Tip
If the Personal Documents folder does not exist in your Documents folder, you can manually create it and the folder will be automatically ignored by CrashPlan.
Is My Data Secure?
CrashPlan uses AES-256 encryption is used when storing your backups and can only be accessed by theCrashPlan account owner and administrators.
What is Backed Up?
All data found in a user profile will be backed up by CrashPlan.
Location of User Profile:
Windows PC
C:\users\UserName\
macOS
/users/username/
Warning
Any data not stored in the user profile will NOT be backed up by CrashPlan. It is highly encouraged to store university business data within your user profile.
To install CrashPlanon your Windows PC, please follow the instructions below.
Note
CrashPlan is being automatically deployed to all systems owned by Faileigh Dickinson University.
Before Installing CrashPlan, you must be logged in as the owner of the machine using your NetID Credentials.
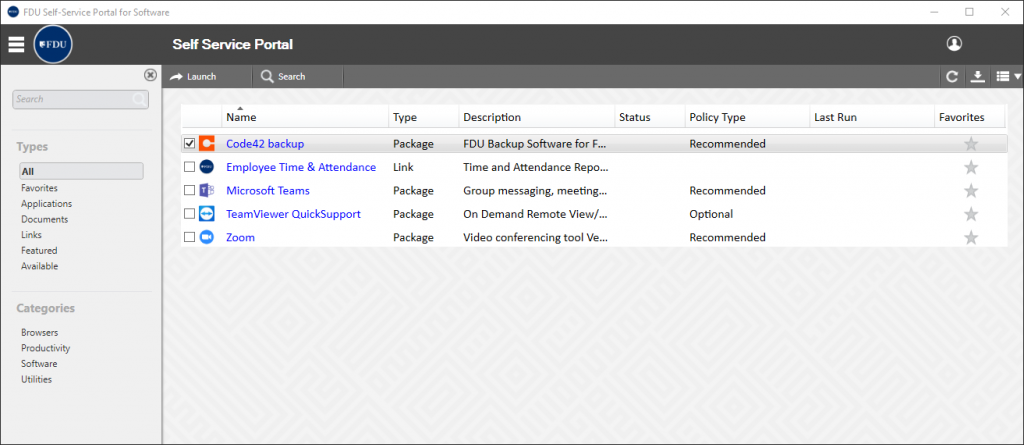
Open FDU Self Service Portal for Software on your University PC
Click on CrashPlan Backupand then click “Install” on the right-hand side
Note
It could take several minutes for the client to make the first connection and start the first backup.
The entire process will take approximately 5-7 minutes, depending on your internet speed. Once CrashPlanis installed, your account is automatically provisioned in the CrashPlansystem, and your backup will begin shortly.
To install CrashPlan on your macOS device, please follow the instructions below.
Note
CrashPlan is being automatically deployed to all systems owned by Faileigh Dickinson University.
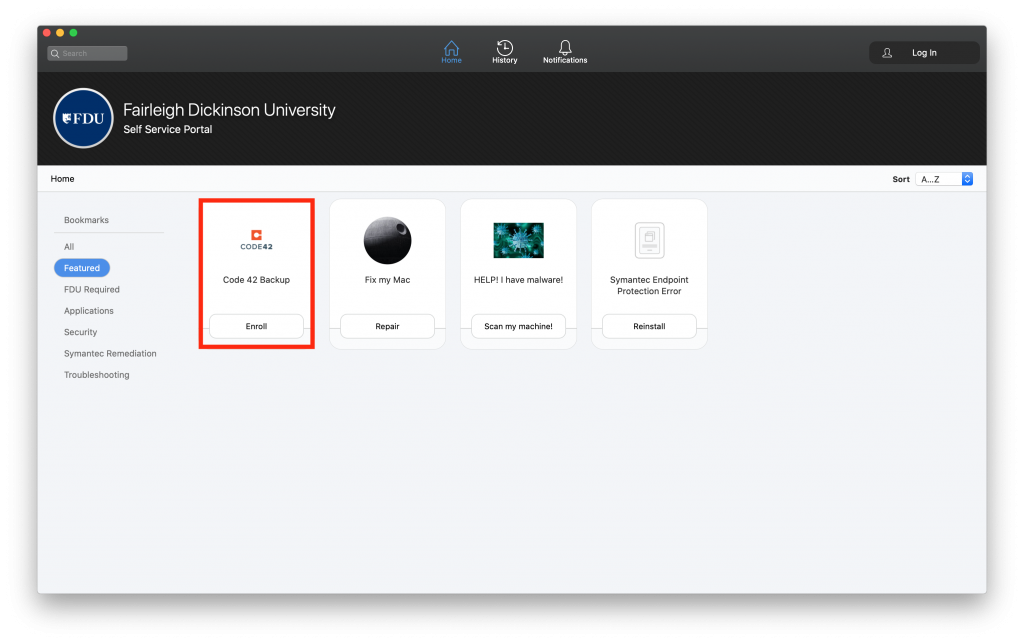
Locate the FDU Self Service Portal in your applications folder or locating the icon on your dock
Locate CrashPlan Backup and click “Enroll”
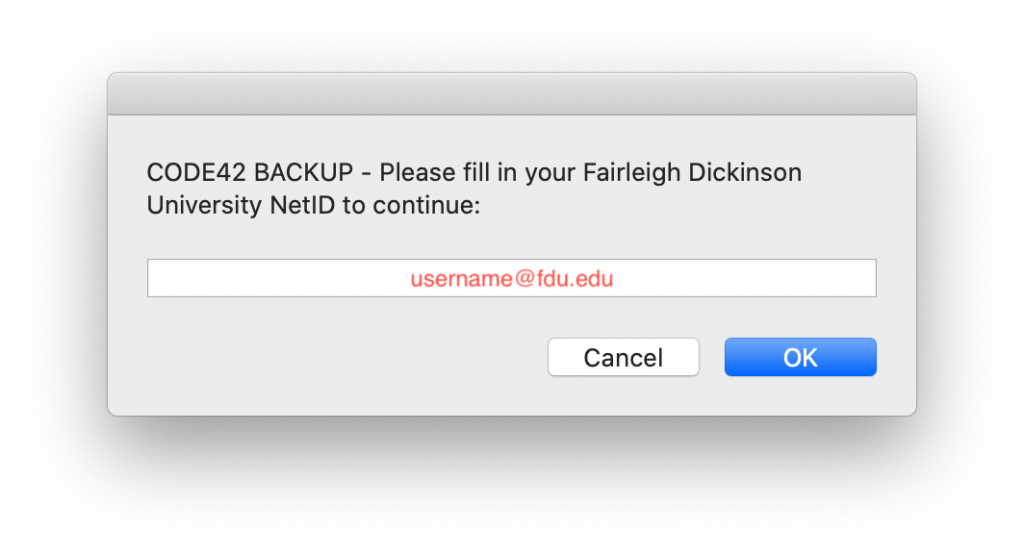
After the package installs, you will be prompted to enter your FDU email address and then click “OK“
Note
It could take several minutes for the client to make the first connection and start the first backup.
The entire process will take approximately 5-7 minutes, depending on your internet speed. Once CrashPlan is installed, your account is automatically provisioned in the CrashPlan system, and your backup will begin shortly.
This process is used when someone will be assigned a second device and wishes to have it backed up or if the CrashPlan needs to be re-installed on the same device. Because an account already exists, it cannot be provisioned automatically. It must be manually setup either to replace an existing device or create a new backup set on the second computer.
Note
In order to proceed, CrashPlan must be installed prior to continuing, please refer back to the Install instructions for your operating system from the CrashPlan User Guide. A link is found at the bottom of this page.
Tip
A backup set is CrashPlan’s way of describing the backup configuration and what files are being backed up.
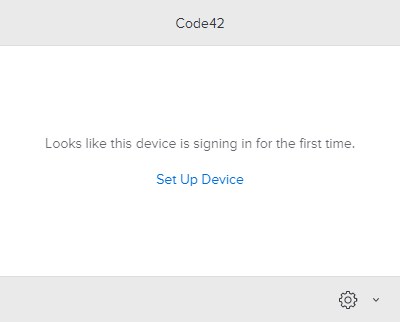
Click on the CrashPlan app in the system tray (PC) or Menu bar (macOS) and then click “Setup Device”
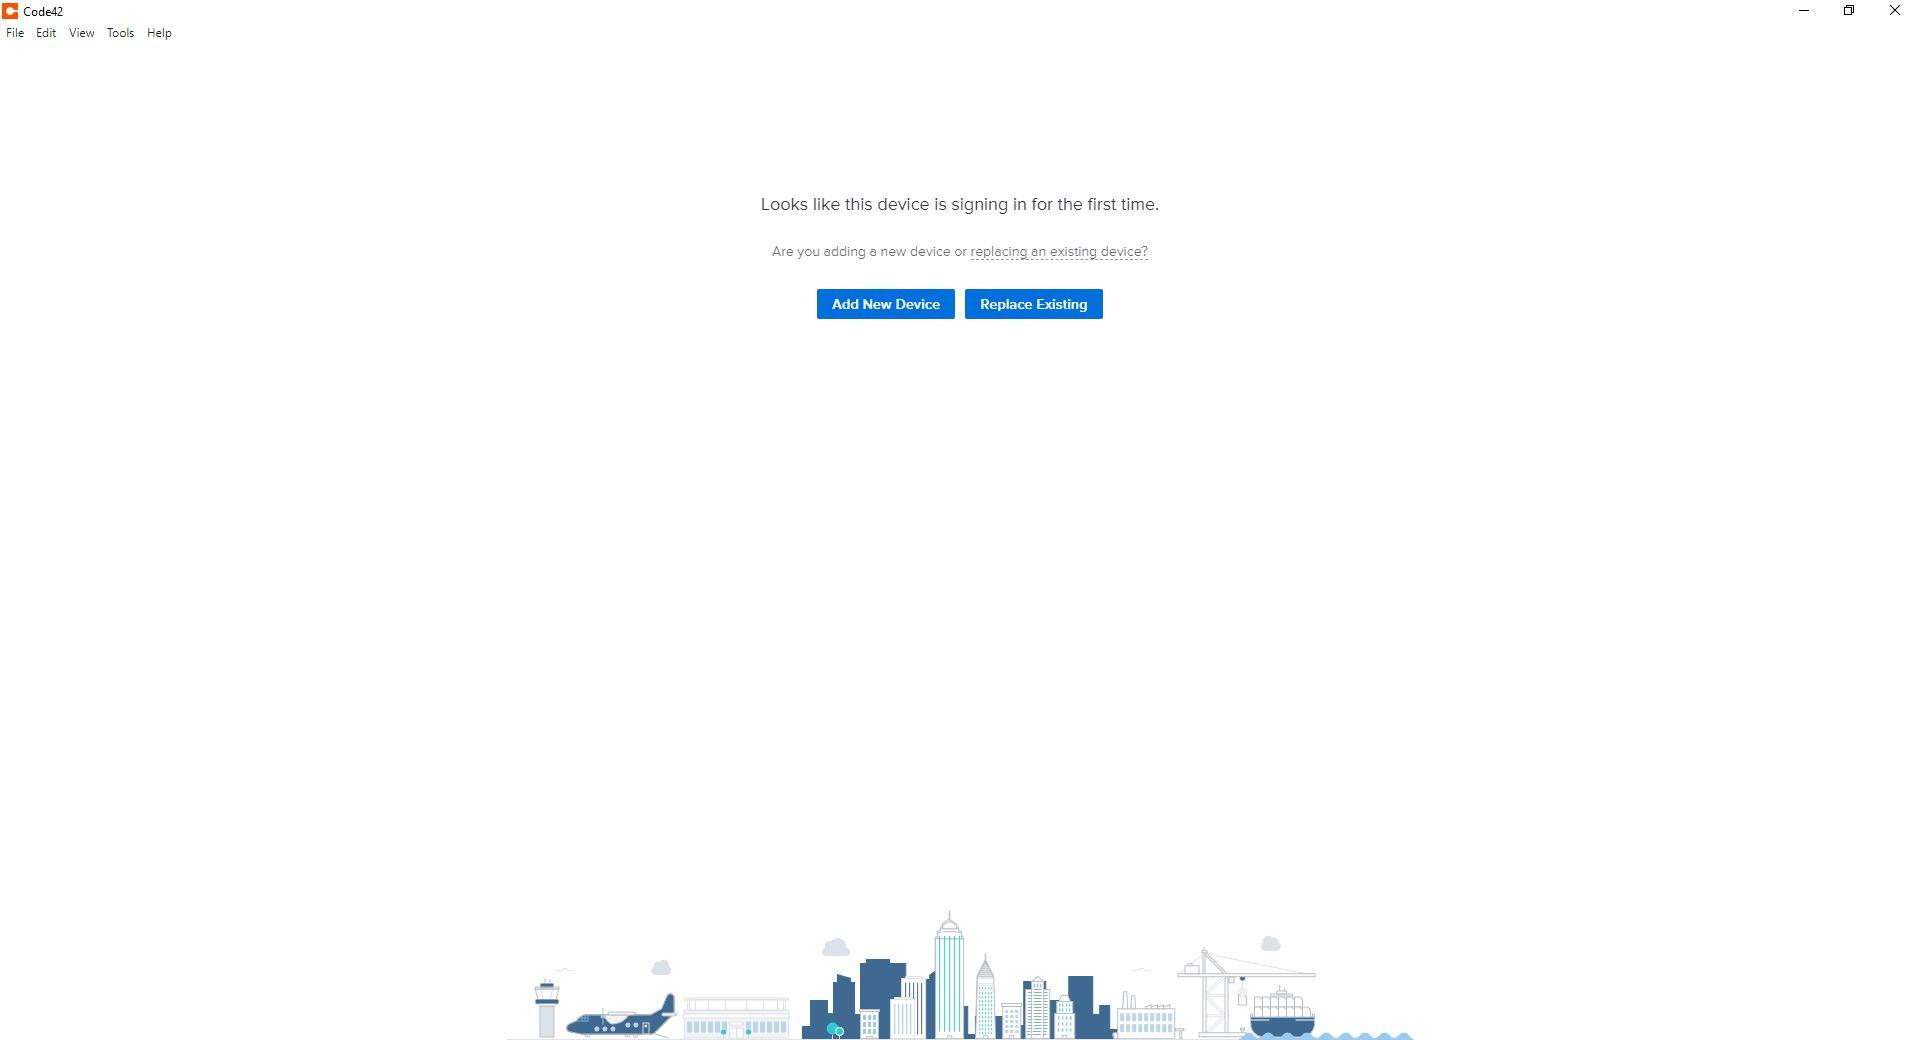
If prompted, log in to the FDU NetID Portal and proceed through the FDU single sign-on process
Click “Replace Existing”
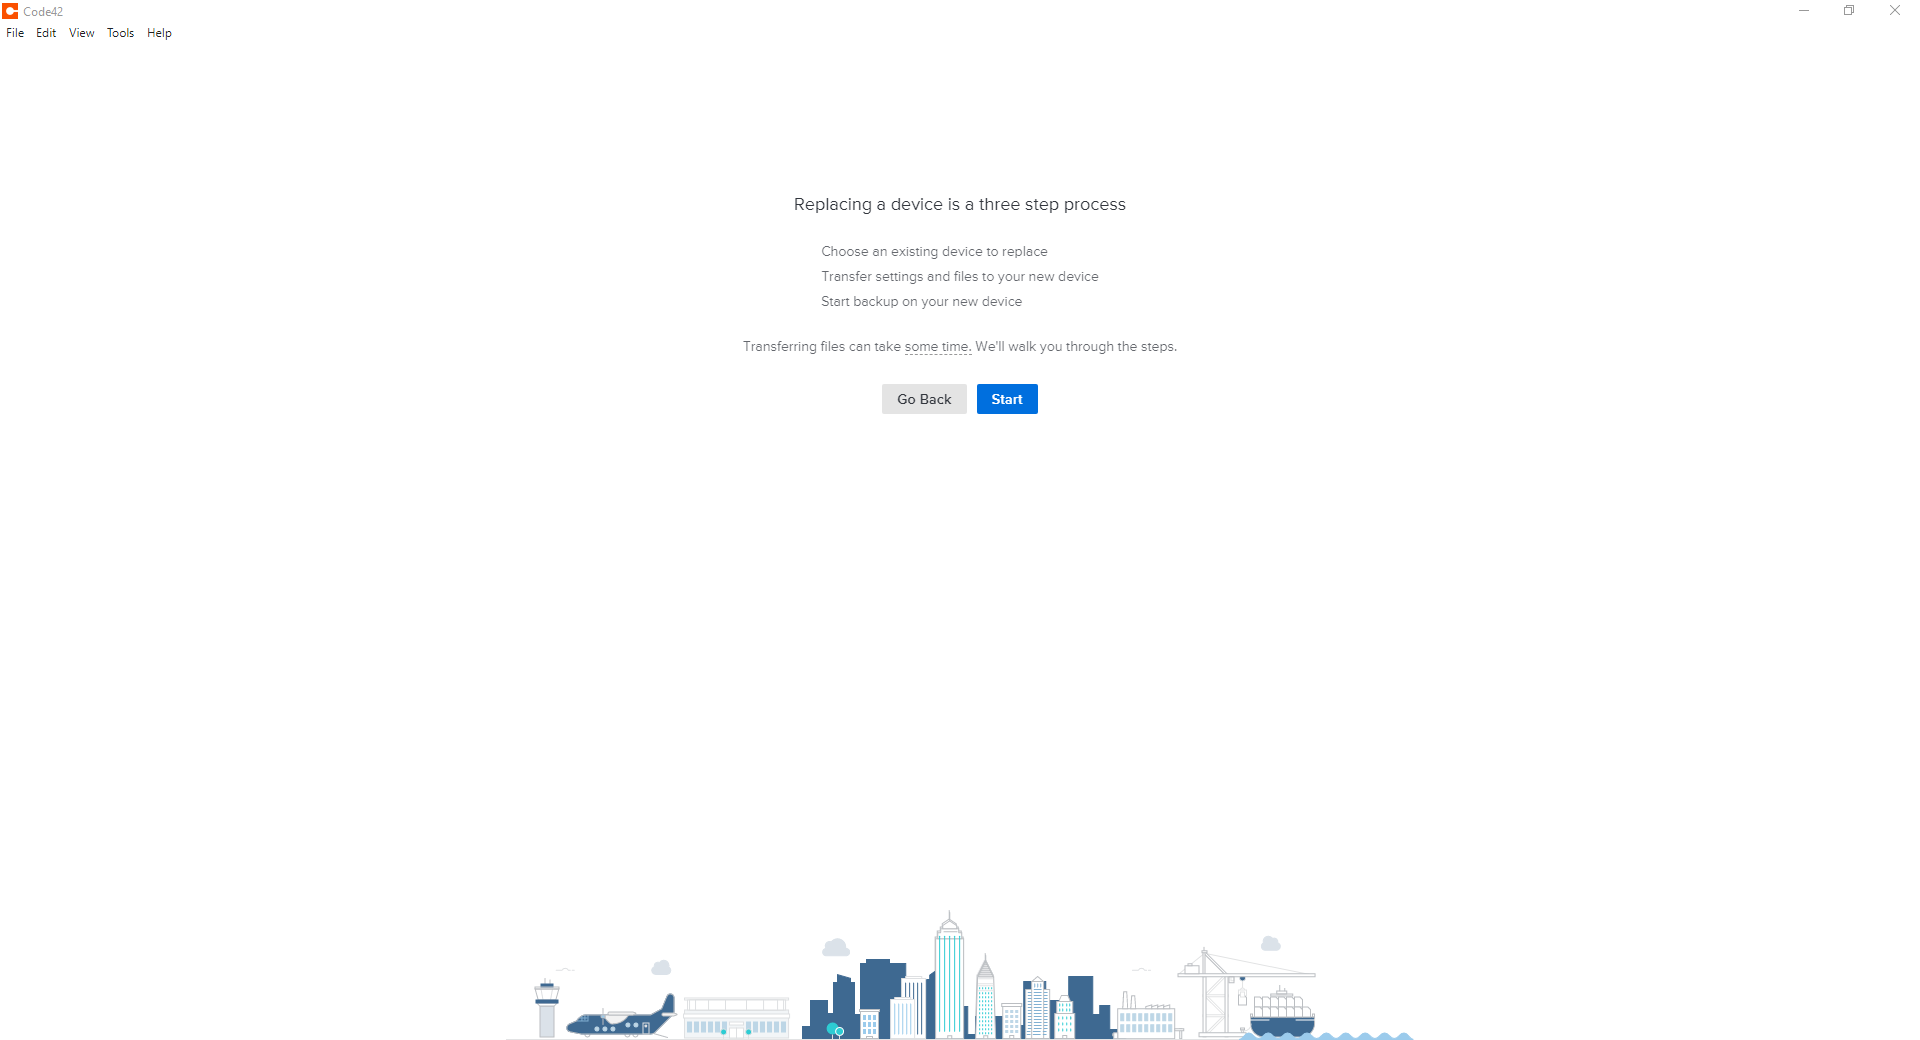
Click “Start” to continue with the replace existing device process
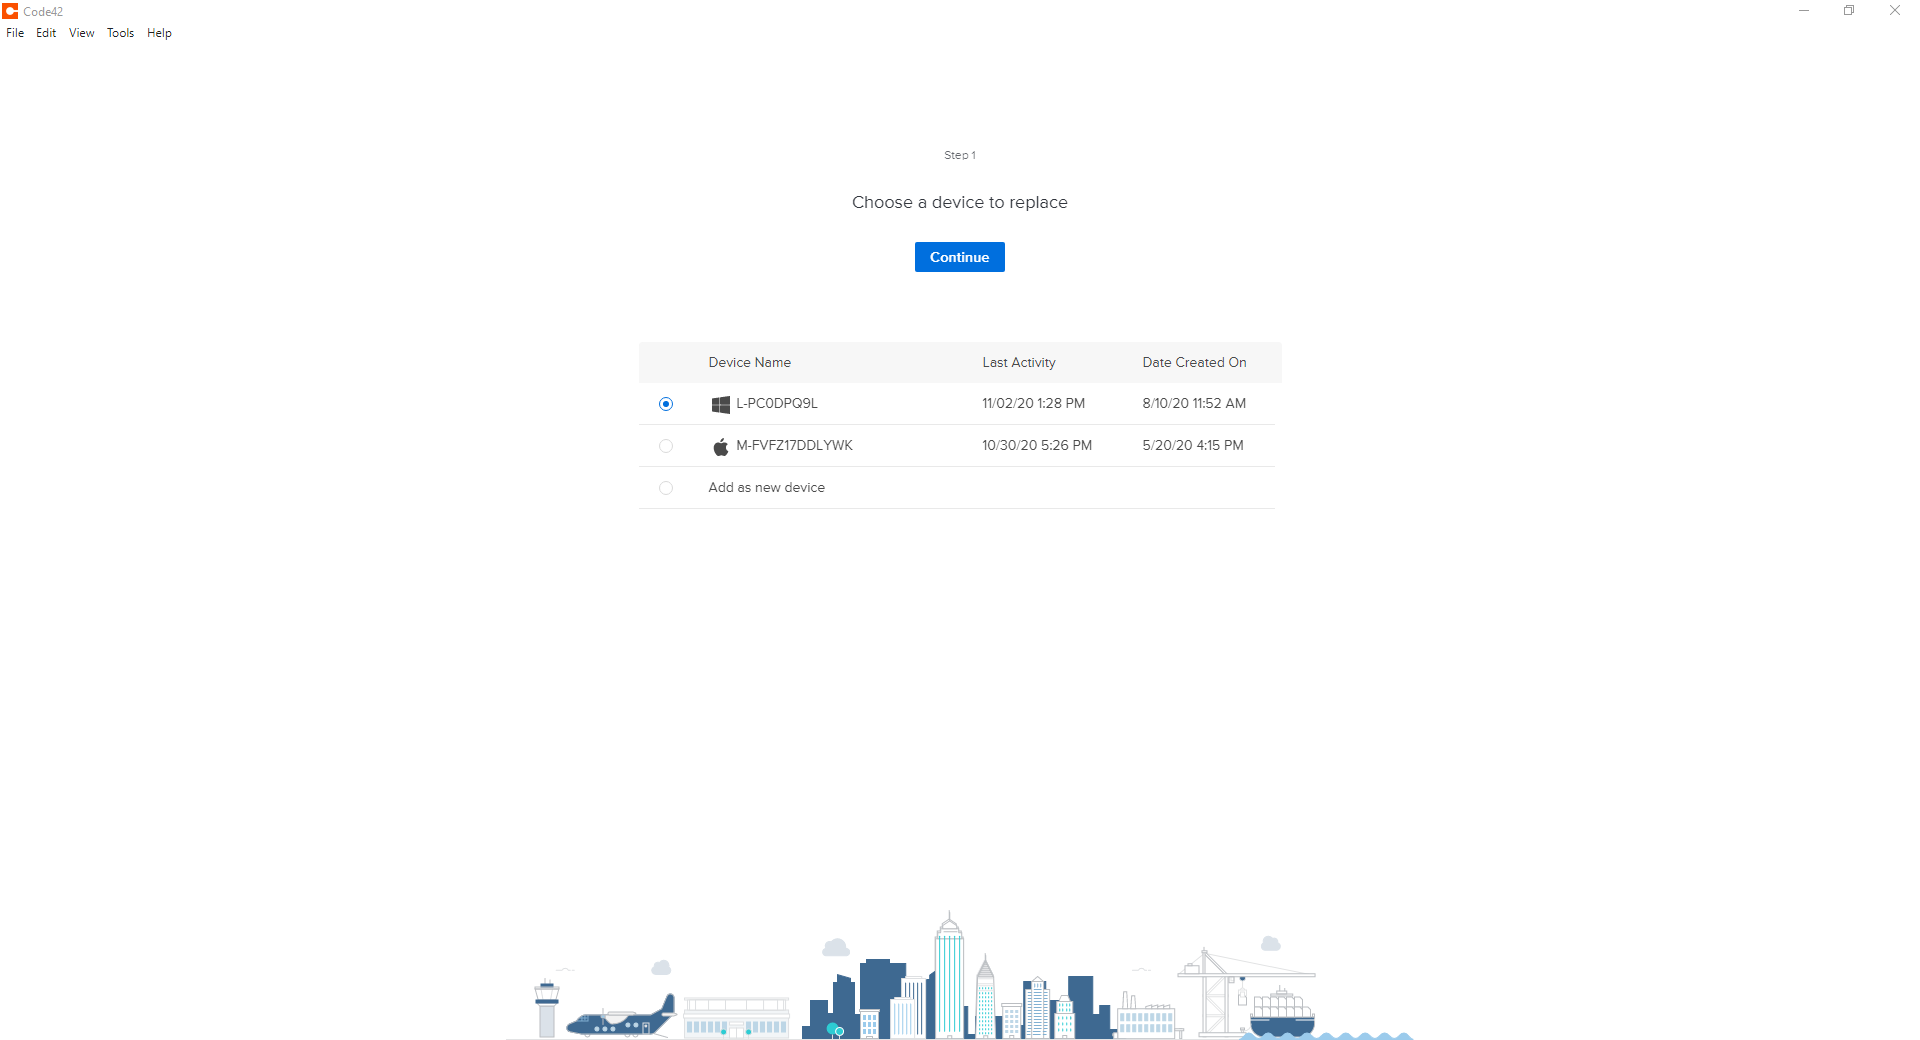
Select the device from the list you are replacing and click “Continue”
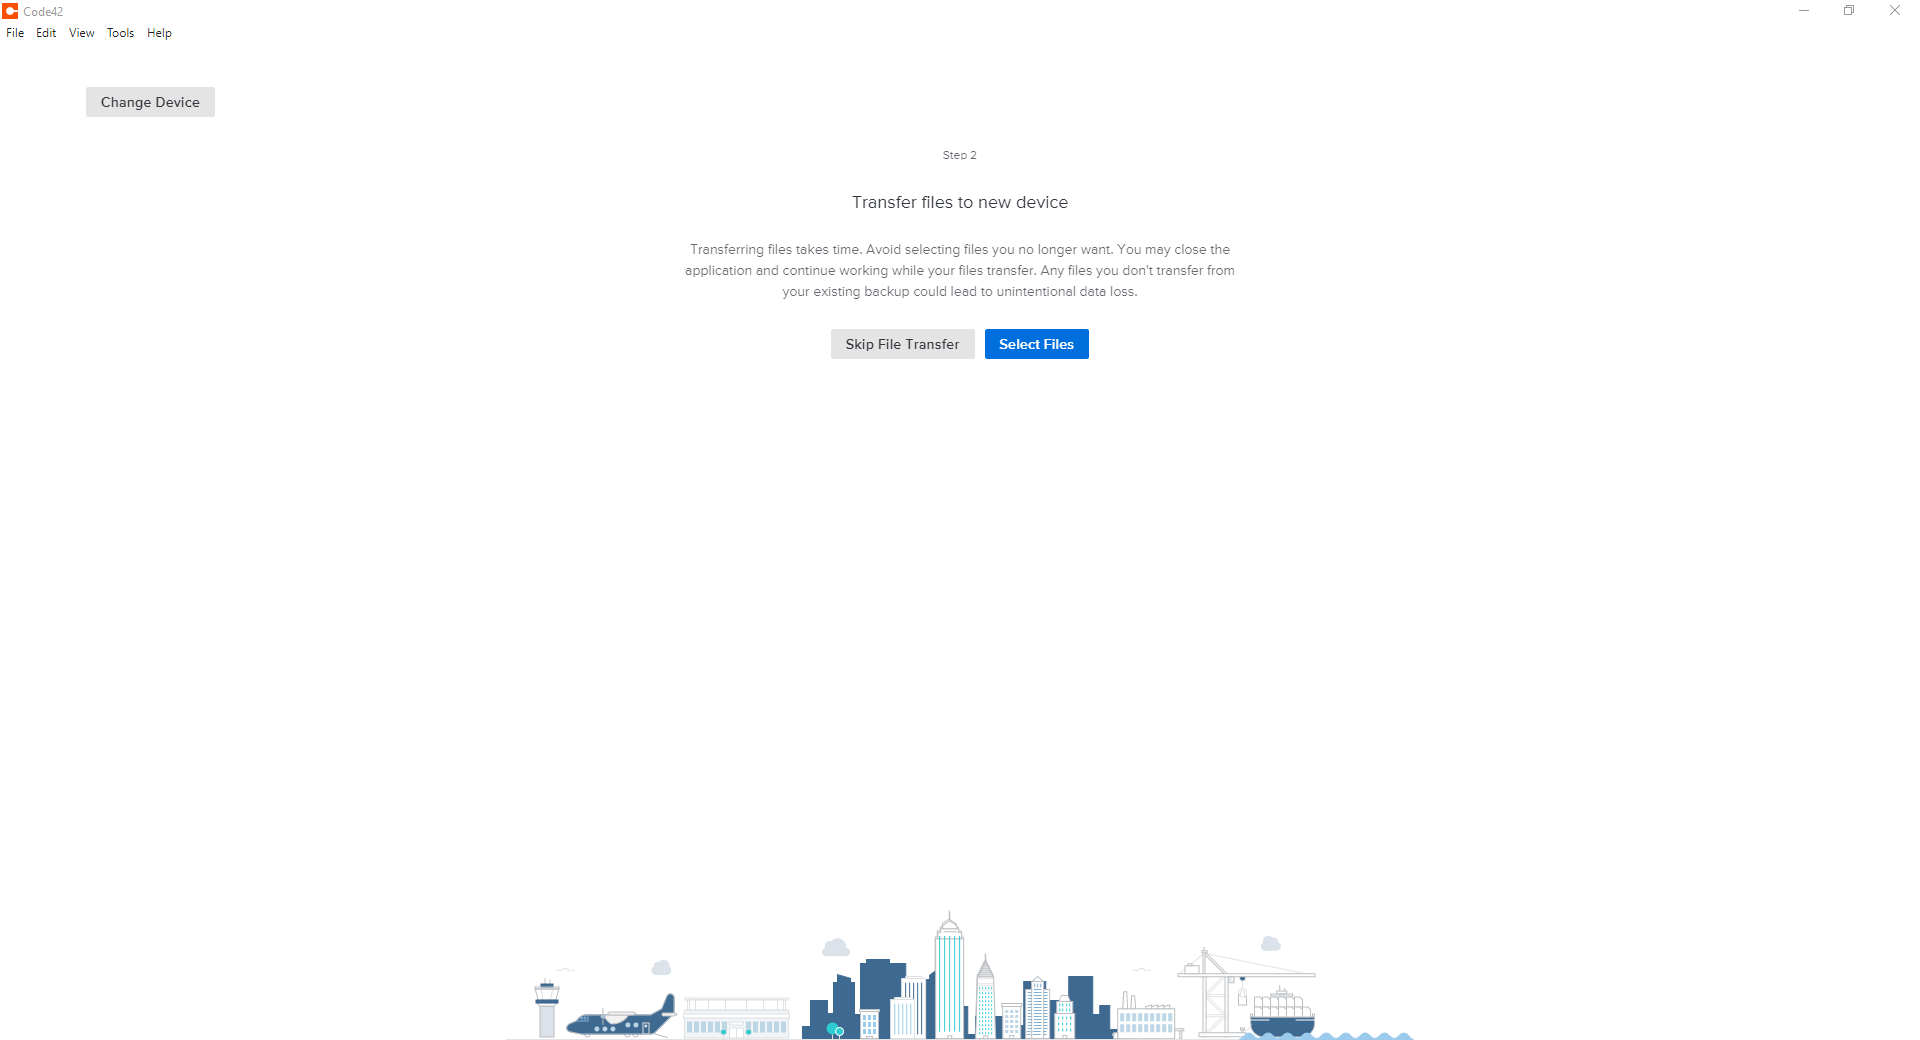
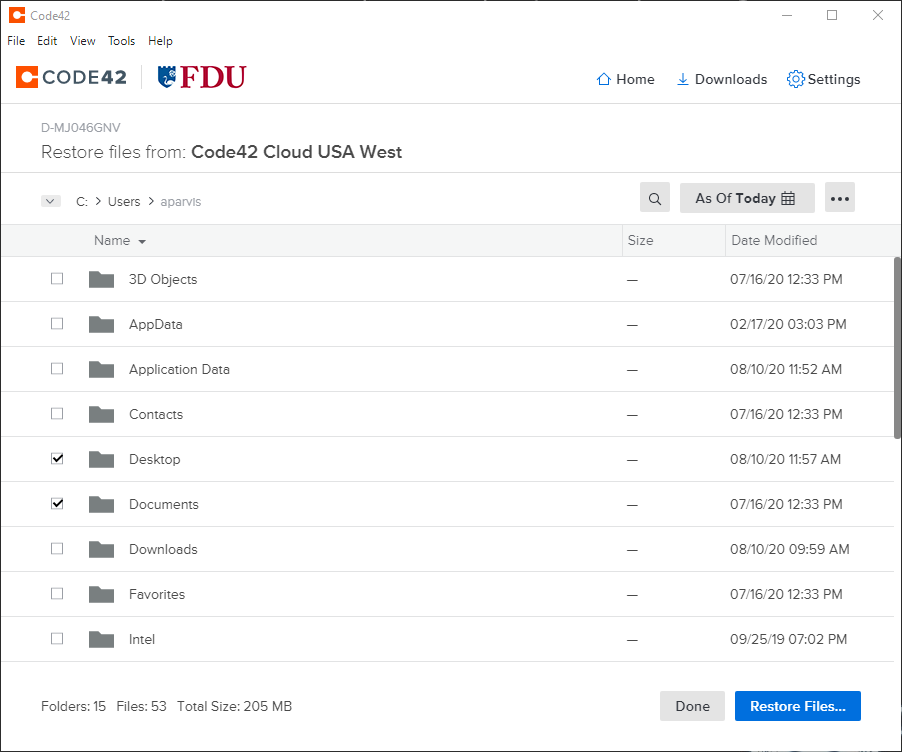
Click “Select Files” on the following window
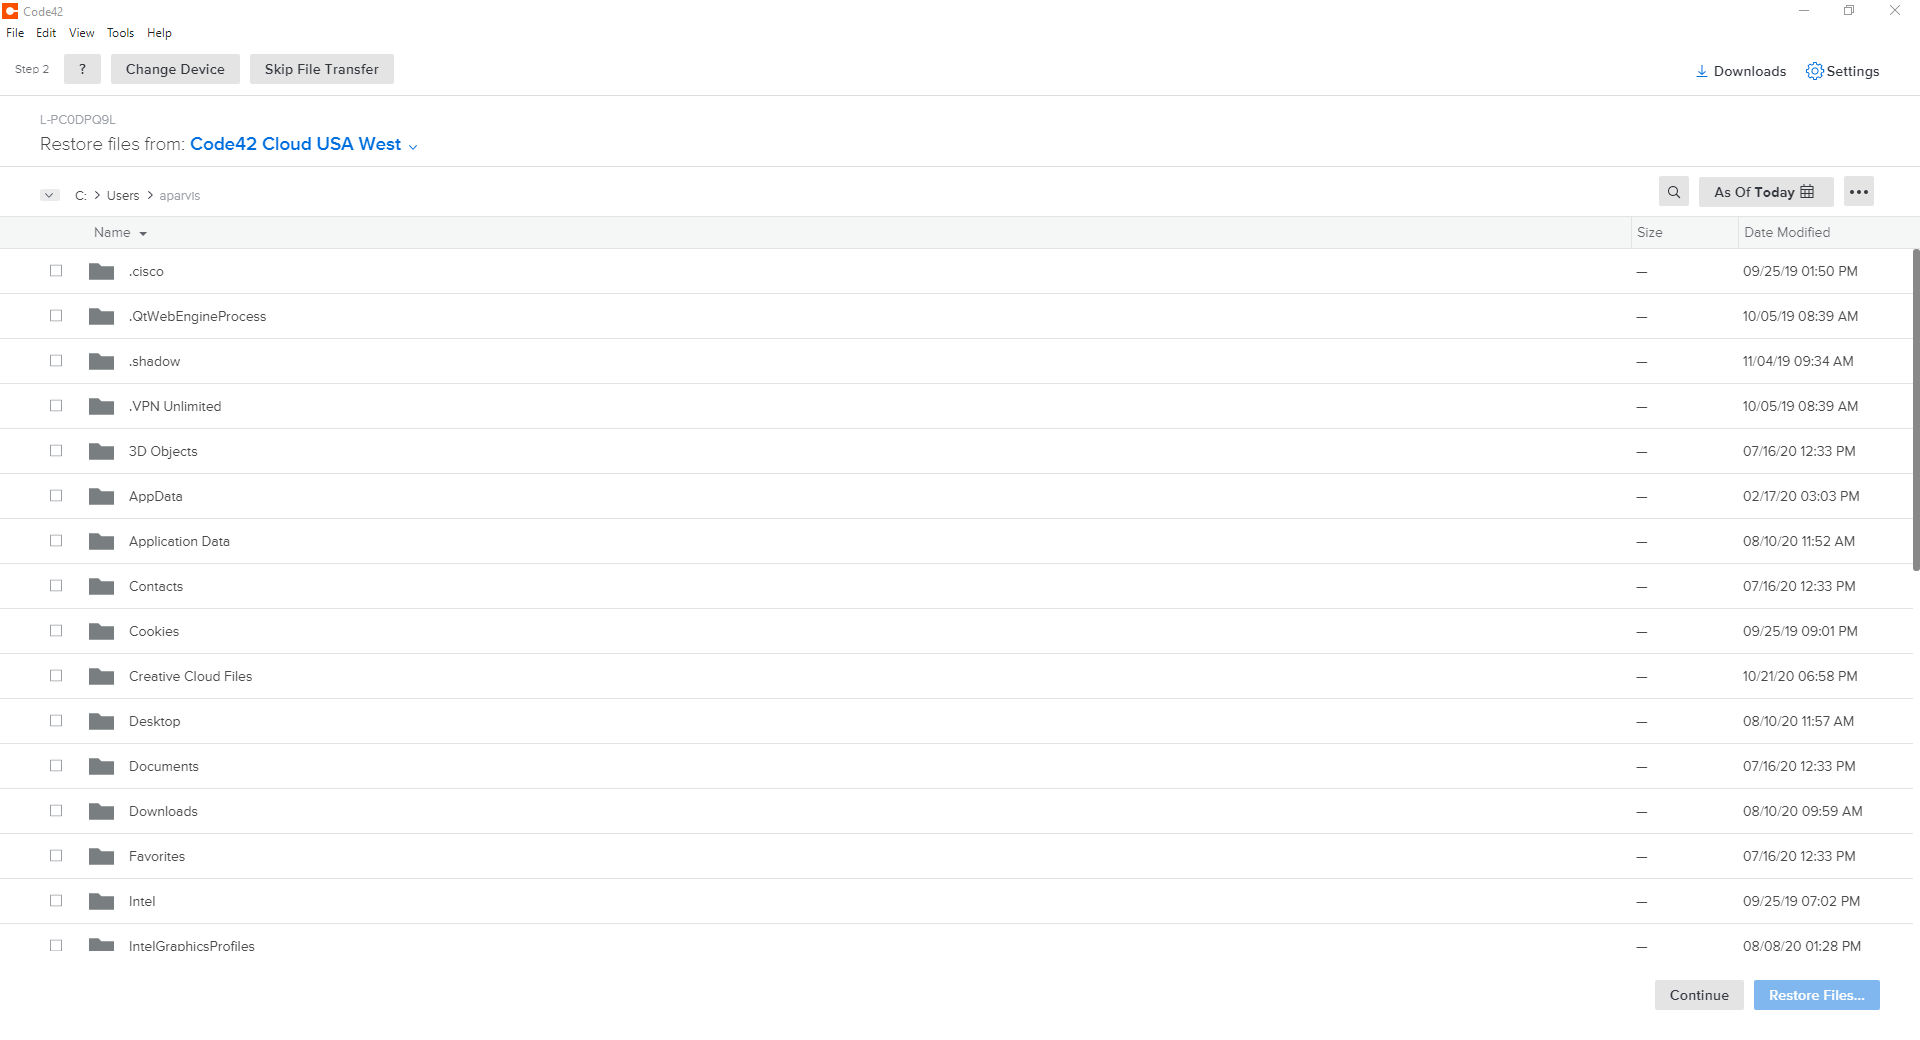
Select and Choose which files you wish to replace by placing a checkmark next to each. When finished, click “Restore Files”
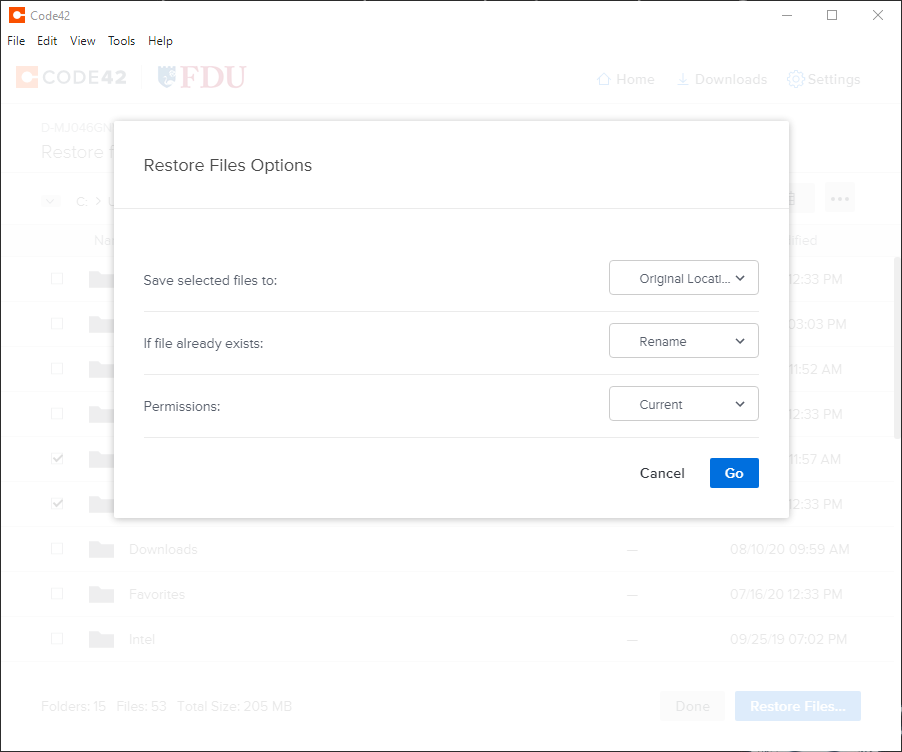
The next window will allow you to select how you wish to restore your files. Make your selections and click “Go”
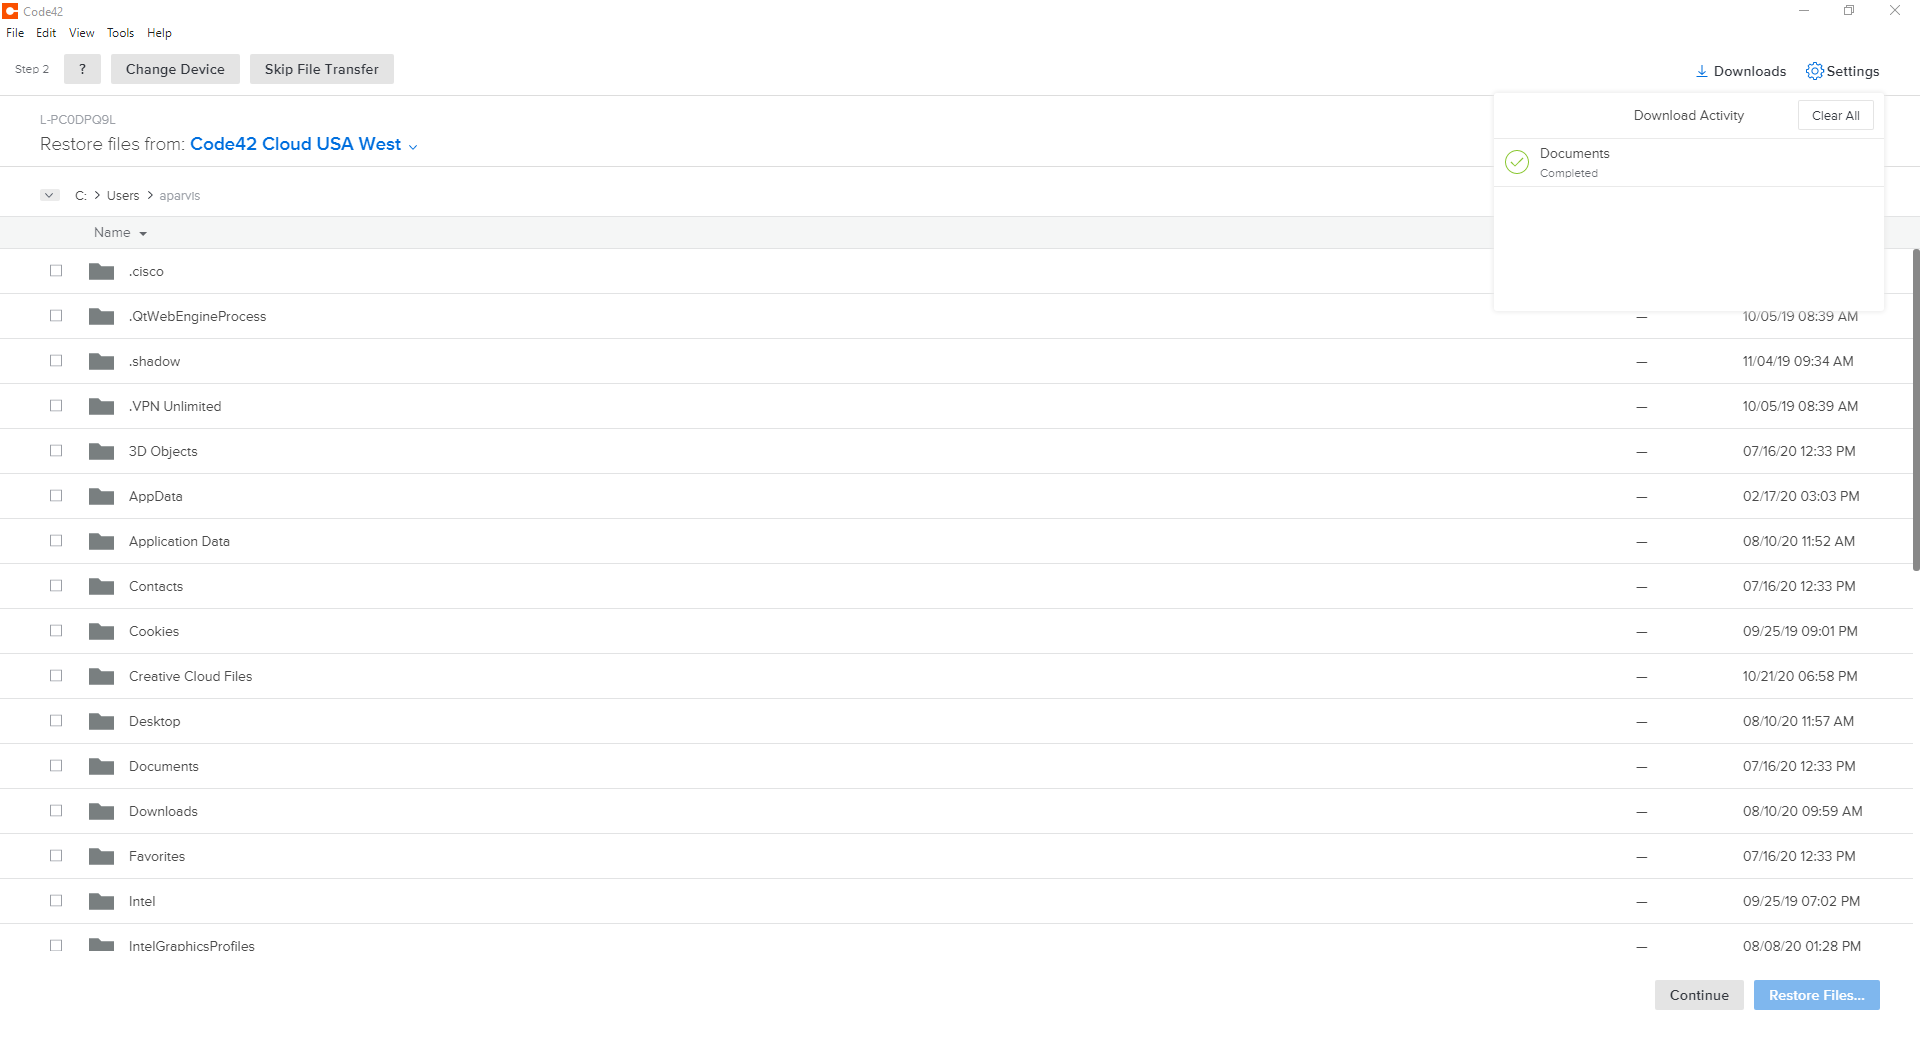
The next window will display download progress for the restore process. You can continue forward by clicking “Continue” at the bottom
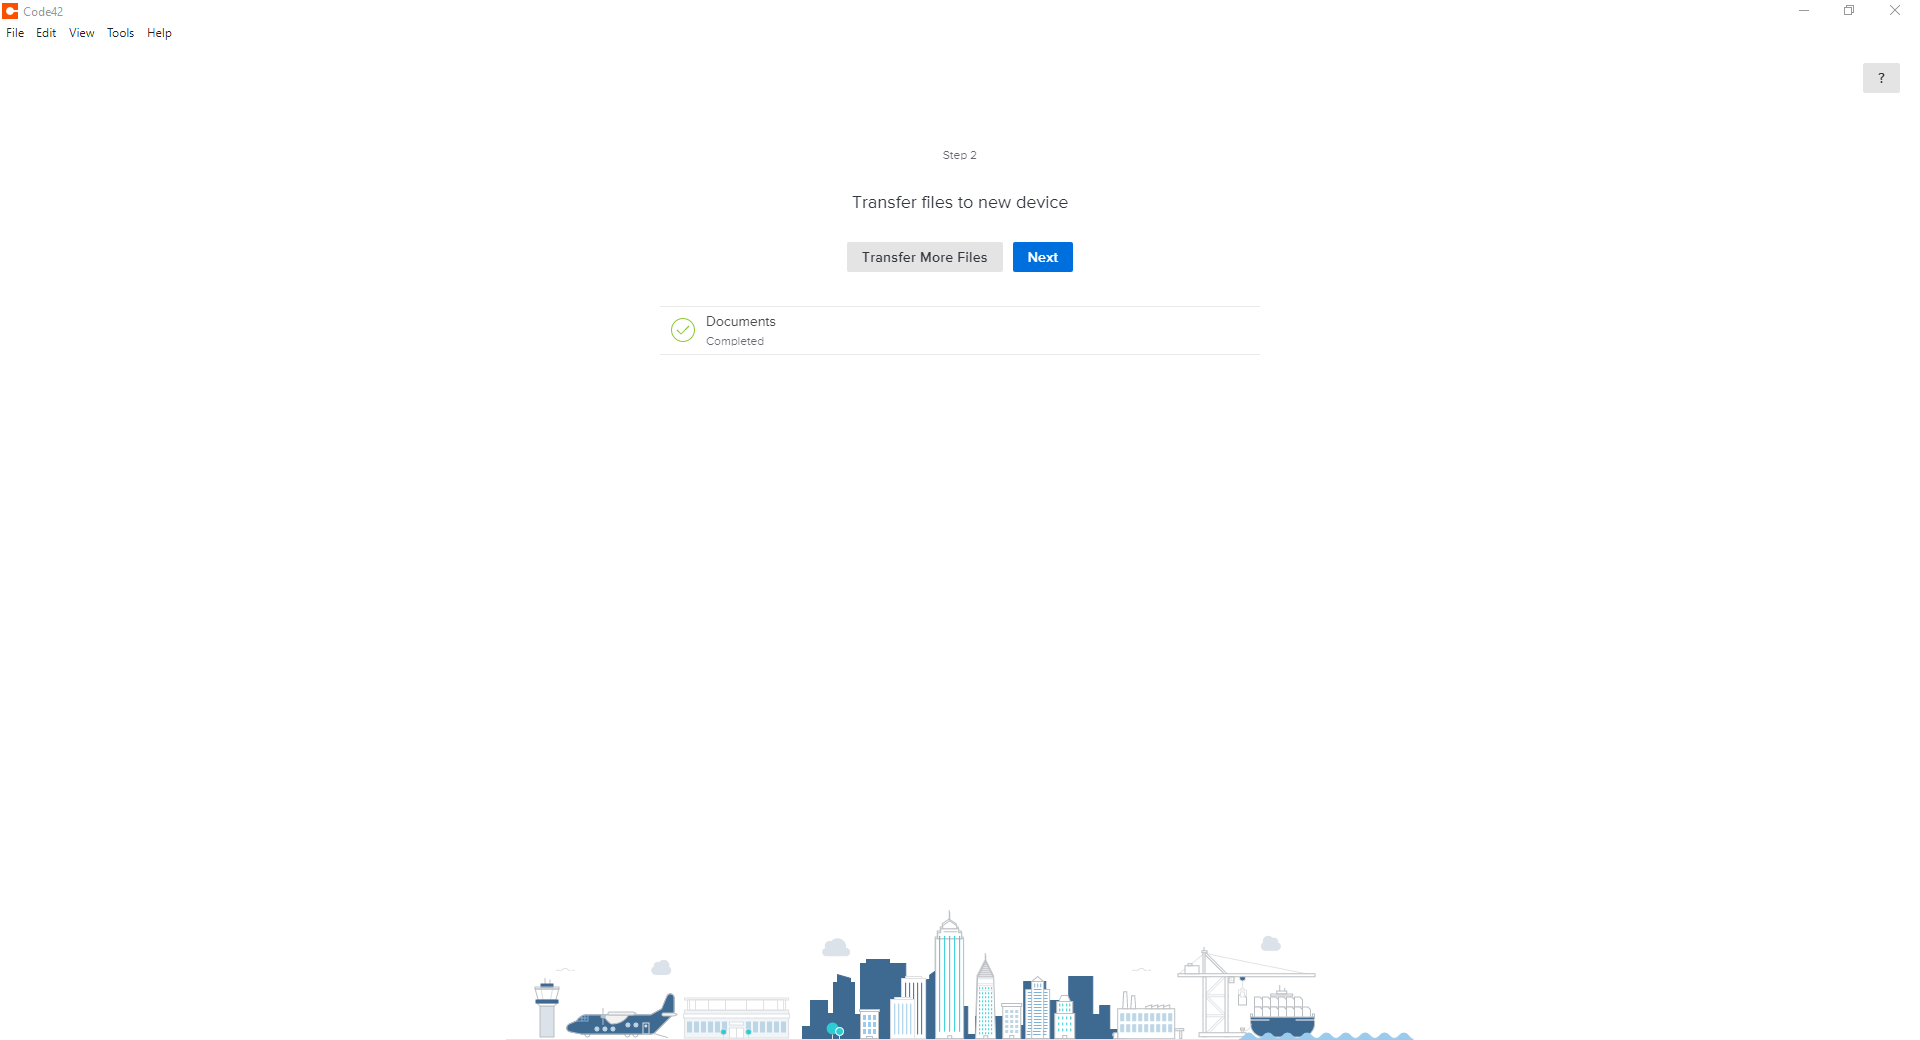
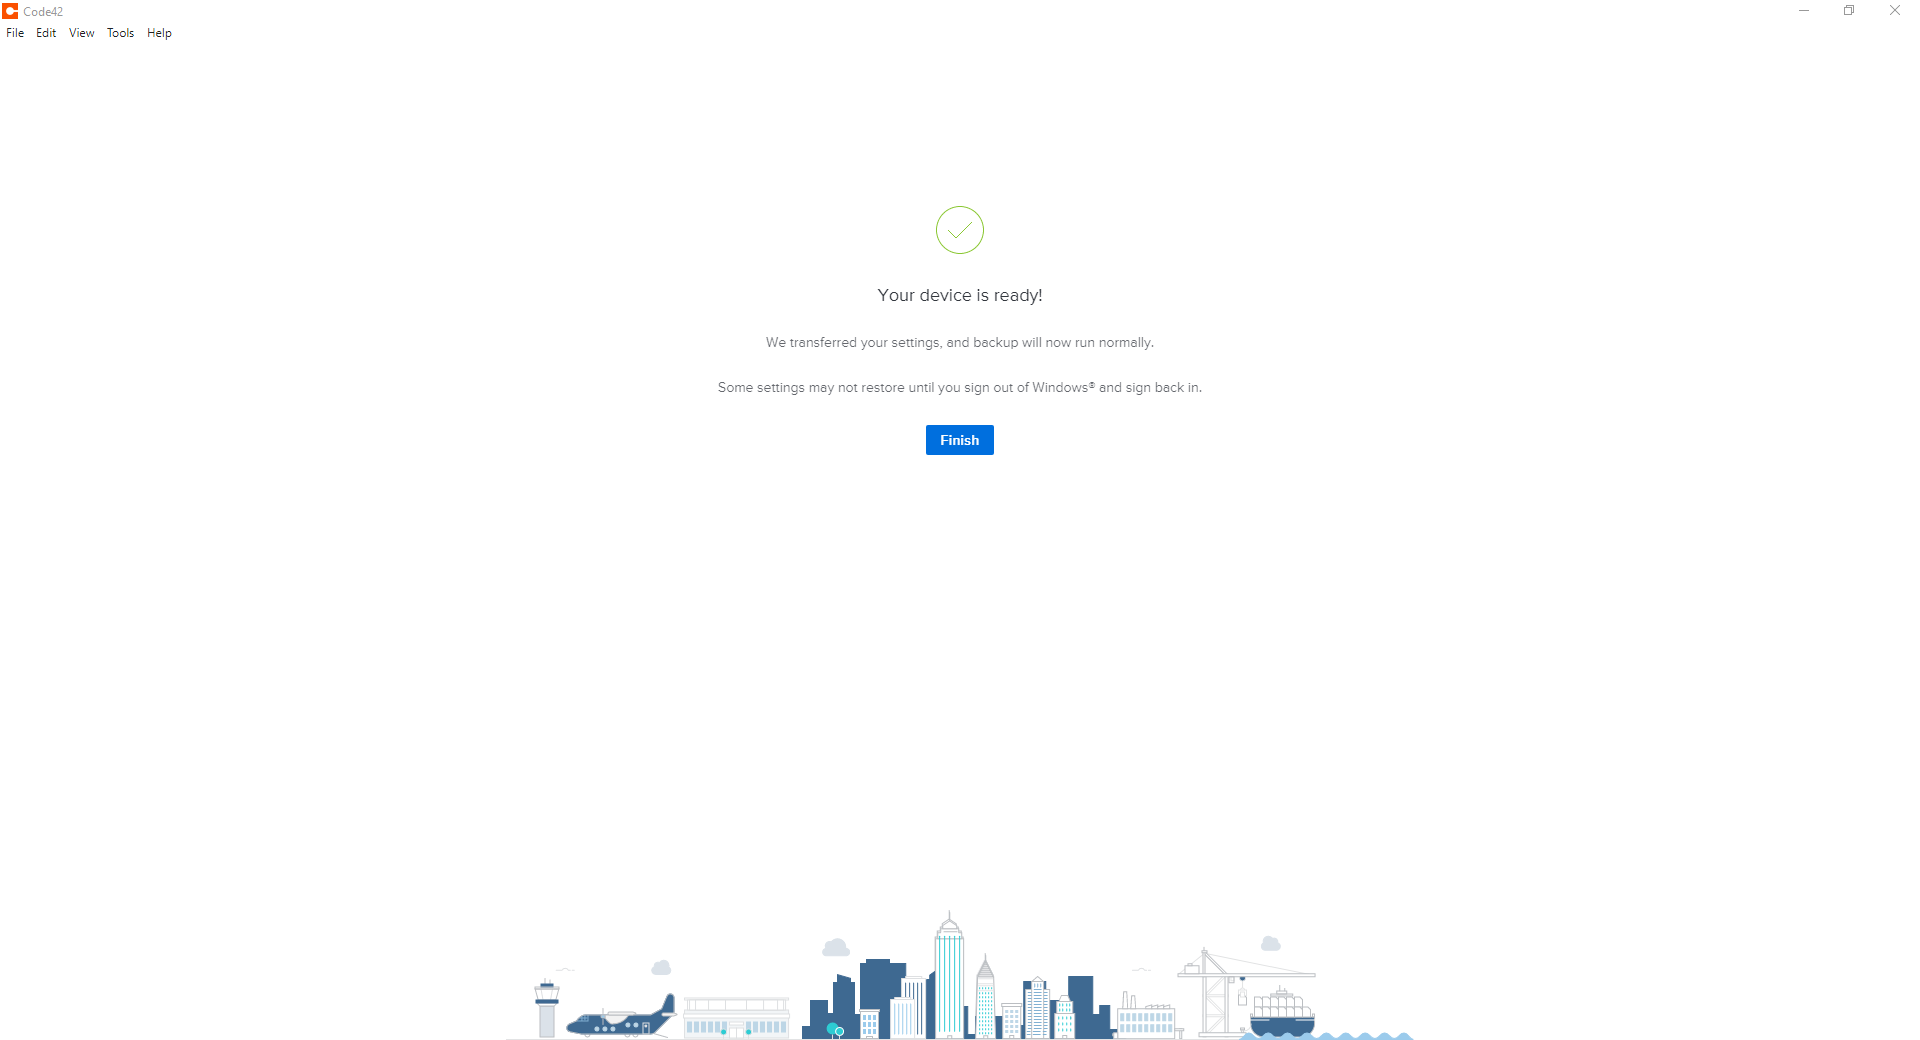
The next window Downloads the Files to your device. When the transfer is completed, click “Next”
Tip
You can close this window and continue working or you can click transfer more files and repeat the steps for additional files. This will extend the time it needs to restore.
If you are unsure if you have CrashPlan installed and backing up your system, this quick guide will help give you some comfort.
Click on theCrashPlan icon from the system tray on Windows and the menu bar on macOS
CrashPlan Icon
The Progress will be displayed like in the Figure below
Note
Depending on your backup size, this could take anywhere from a few minutes to a few days. CrashPlan will continue to run and backup in the background. After the first successful backup, incremental backups will occur.
CrashPlan allows you to manage your backup sets. If you want to review your backup set or request assistance, please contact the SAMI Service Desk to initiate a support request.
Accidentally deleted or unable to find a file? CrashPlan can help. Please follow the following guidelines in restoring lost or previous versions of files.
Click the CrashPlan System Tray or macOS menu bar Icon
CrashPlan Icon
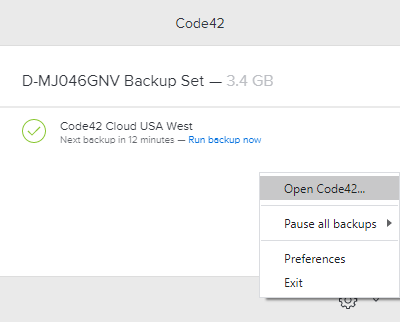
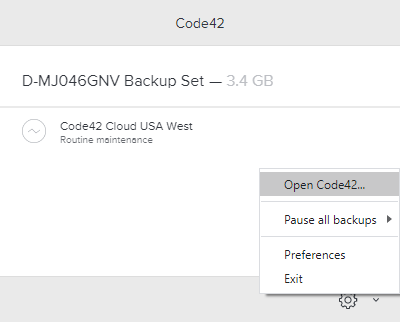
Left-click on the gear symbol and left-click on “Open CrashPlan….”
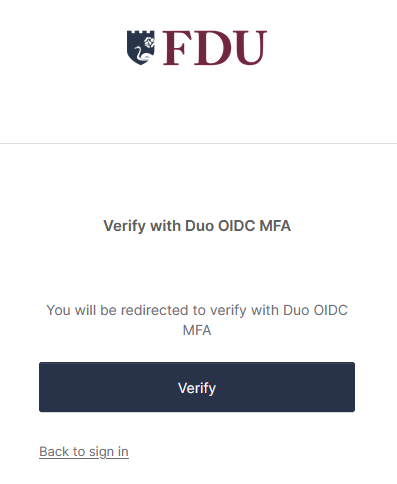
If prompted, log in to the FDU Single sign-on Portal and proceed through the FDU DUO Multifactor authentication procedures
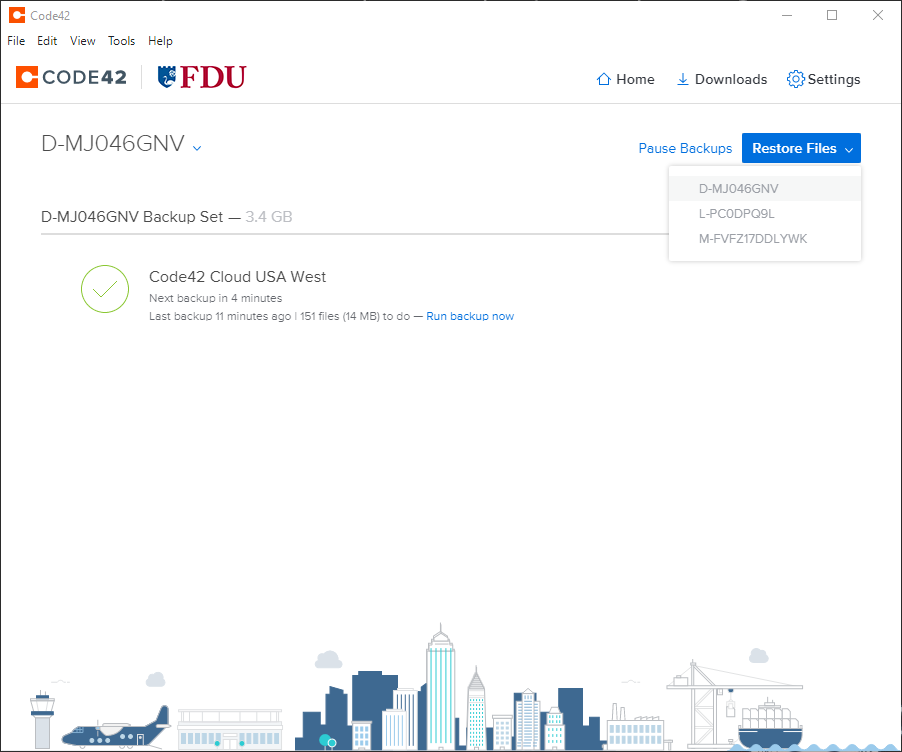
Click “Restore Files”
Select the device you wish to restore from
Note
If you have more than one backup device, please select the device from where you want to restore the file from.
You can select a date range from when you wish to restore from on the right-hand side
Navigate to the folder(s) and/or file(s) you wish to restore and place a check next to each one
Click “Restore Files”
Select how CrashPlan will restore your files. Click “Go” when finished
Note
Above are the recommended options for restoring files, this will help you find them more easily.
The time it takes to restore your files will depend on how much data is being restored, available system resources, and available bandwidth.
Using CrashPlan you can create backup sets that will back up your data to additional devices utilizing a schedule. This is useful to have immediate access to critical files in the event of data loss.
This guide is only needed if you wish to have a local backup of your data.
Note
If you schedule multiple backup sets to run at specific times and the backup sets go to the same destination, ensure that these times do not overlap. This ensures good backup performance.
Click the CrashPlan System Tray or macOS menu bar Icon
CrashPlan Icon
Left-click on the gear symbol and left-click on “Open CrashPlan….”
If prompted, log in to the FDU Single Sign-on Portal and proceed through the FDU DUO Multi-factor authentication procedures
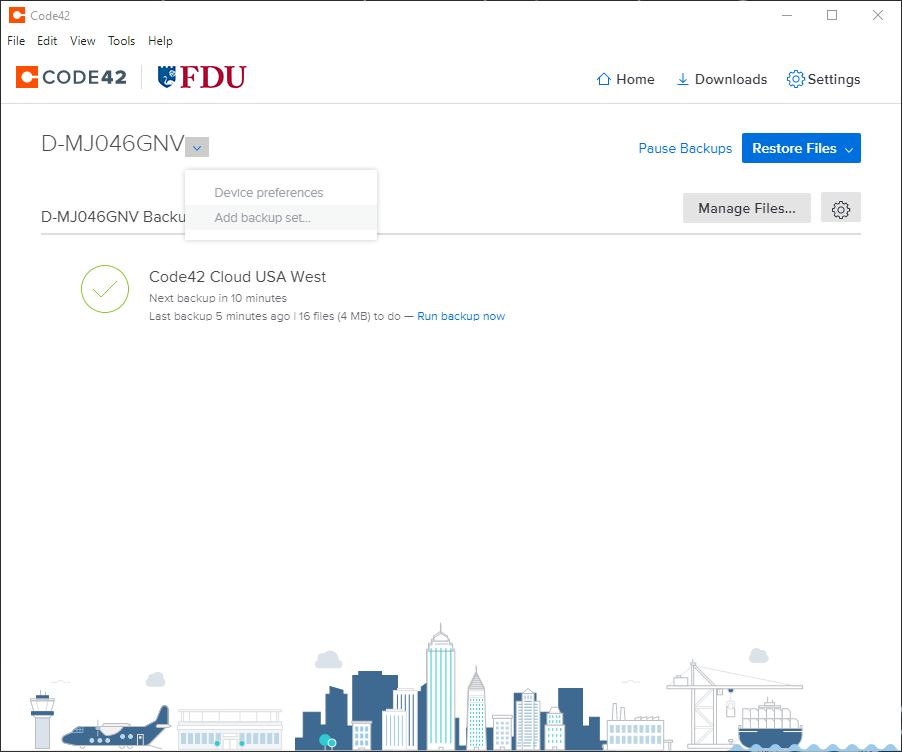
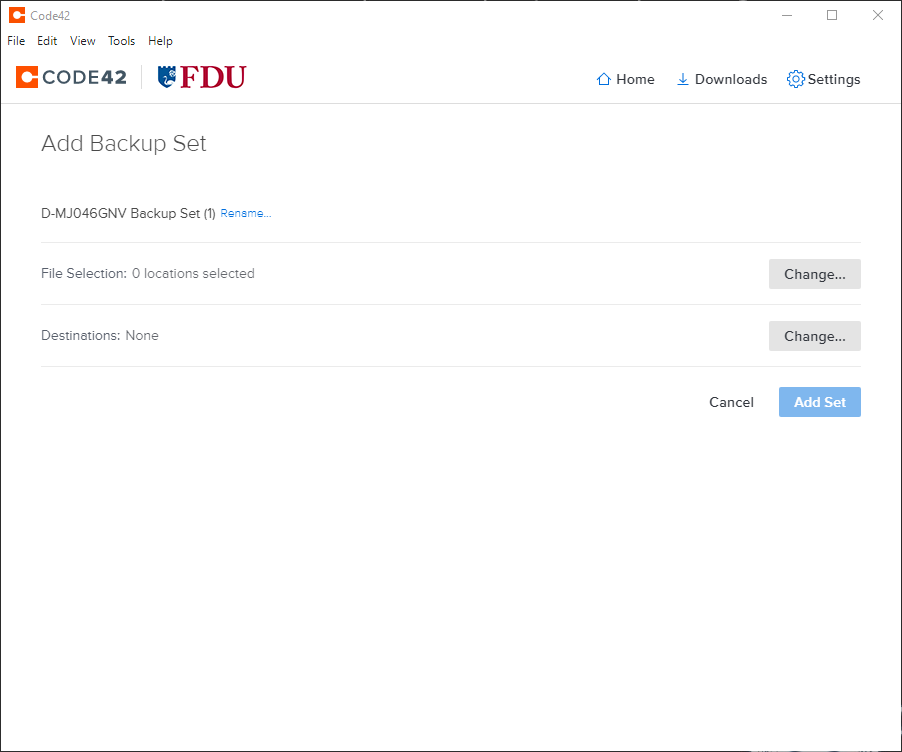
From the CrashPlan console window, click the “Dropdown Arrow” symbol next to your device name to drop down a menu, then click “Add Backup Set…”
The next window will be the Add Backup Set configuration window.
Note
The “Add Set” button will be un-clickable until it is completely configured.
Click “Rename” to label your backup set
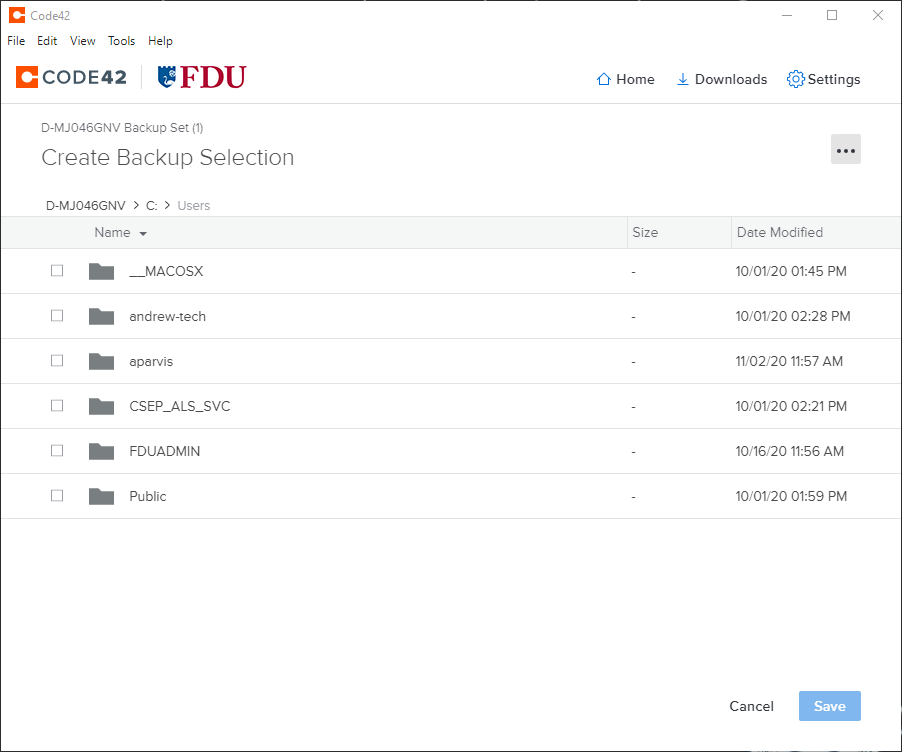
Changing Selected Files, click “Change”, and select the files and folders you wish to backup to a local destination
When finished click “Save“
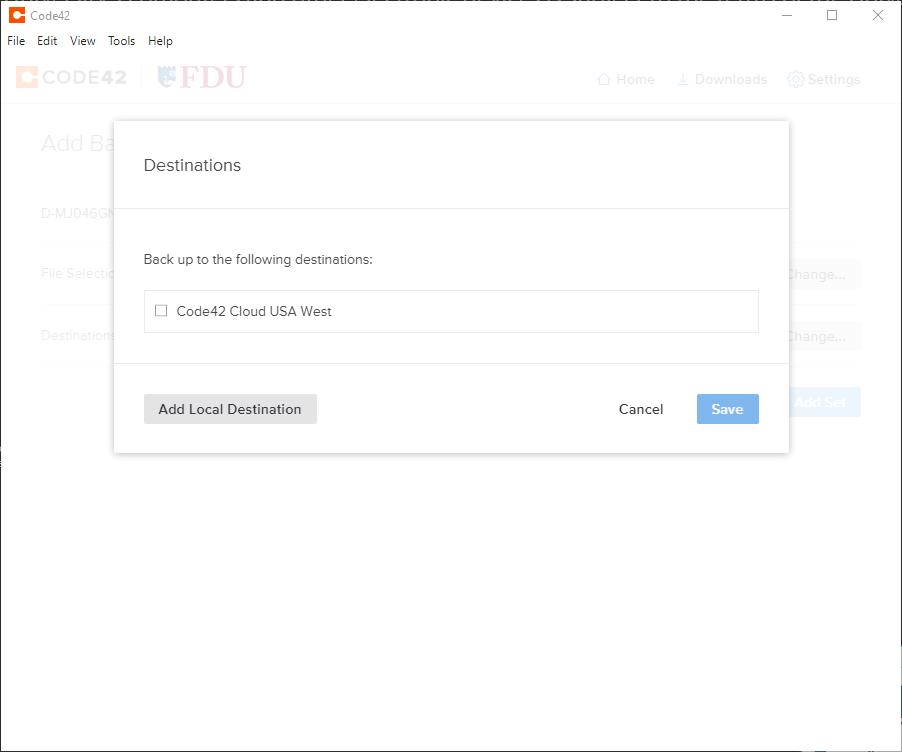
Click “Change” to set your destination for your backup
Select your destination by clicking “Add Local Destination (usually an external hard drive) and click “Save“
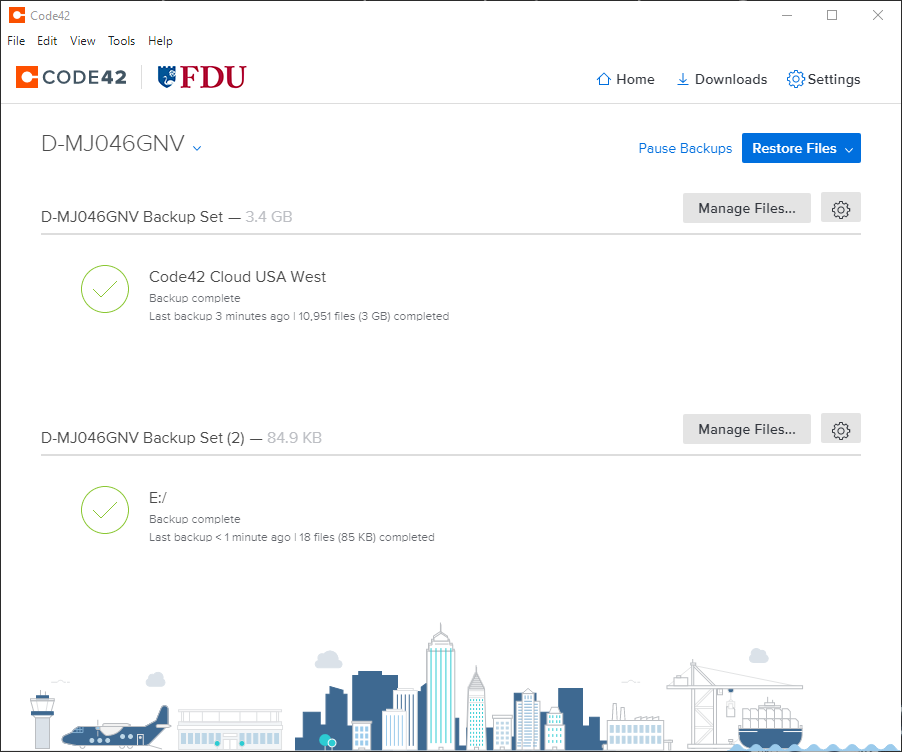
Click “Add Set” to finalize the setup and start backing up to a local location
Your new back upset is finished and will begin backing up as configured.
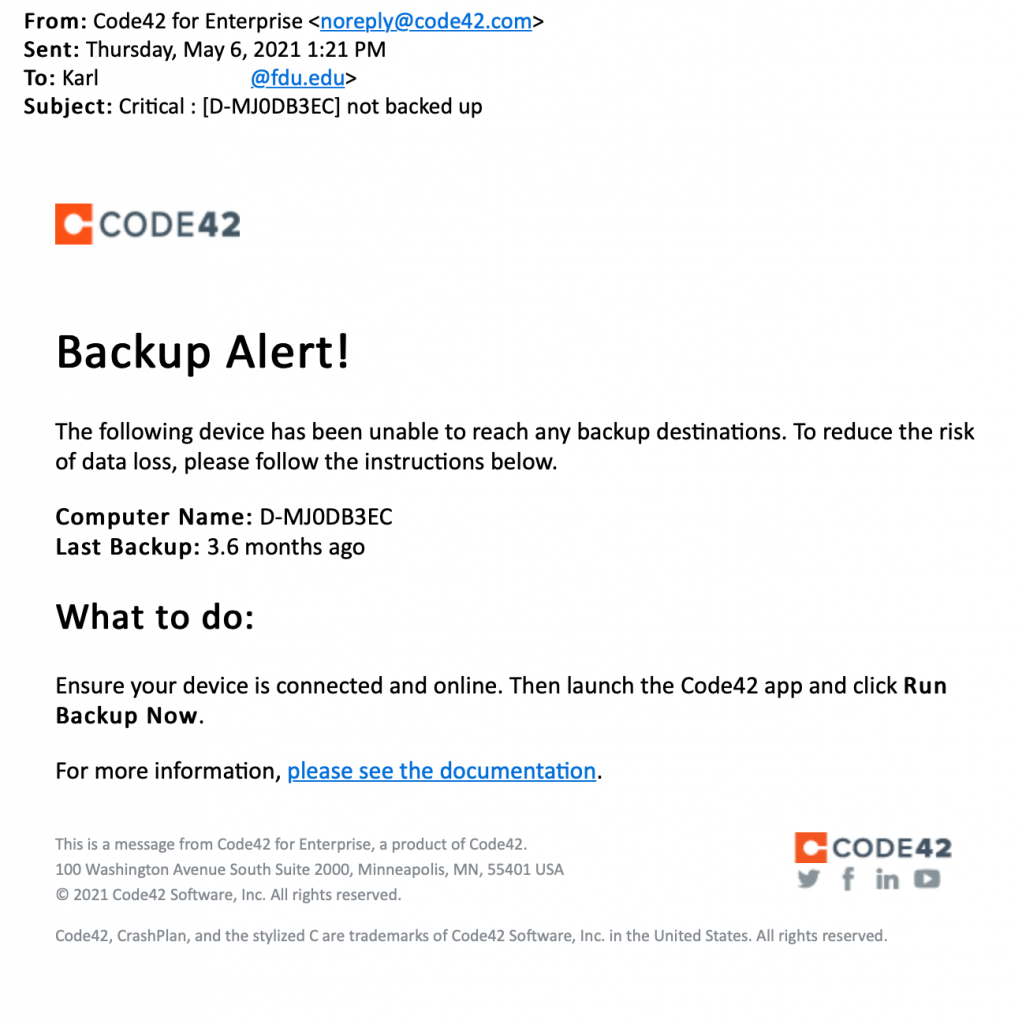
CrashPlan will send users an email alert notifying of any incomplete backups of their devices.
The CrashPlan email alert will be sent from CrashPlan for Enterprise <noreply@crashplan.com>
The Subject line of the email will be labeled with: Critical: [Name of Device] not backed up
Backup Alert
You will receive an alert when your computer hasn’t backed up to CrashPlan for 5 calendar days. The email will look like the example below:
CrashPlan Backup Alert Email Notification
What to do if you get a backup alert
After receiving a CrashPlan backup alert email, you should locate the device the email specifies in need of backup. The CrashPlan device name will be listed in the Subject: line and Computer Name: line of the CrashPlan backup alert email. To locate the name of a CrashPlan device, left-click the CrashPlan “C” symbol icon in the Windows System Tray, also referred to as the notification area.
Tip
The Windows System Tray or notification area is usually located on the bottom right of the Windows taskbar, next to the displayed digital clock.
For macOS users left-click CrashPlan symbol icon on the macOS icon menu bar. The CrashPlan device name will be displayed in the console. Ensure the CrashPlan application displays the same name as the CrashPlan backup alert email you received.
CrashPlan Symbol Icon
CrashPlan Device Name
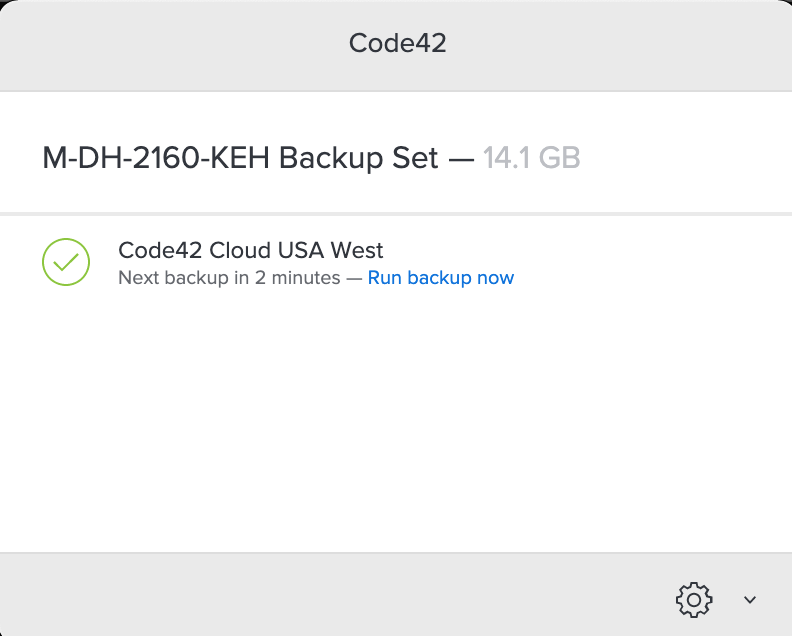
After locating the correct specified device stated in the CrashPlan backup alert email, force a backup of the device by performing the following:
Left-click the “CrashPlan” System Tray or macOS menu bar Icon
CrashPlan Icon
Left-click “Run backup now“
Note
The backup may take some time to complete. This depends on the length of time since CrashPlan’s last complete backup and the amount of new data needed to be backed up.
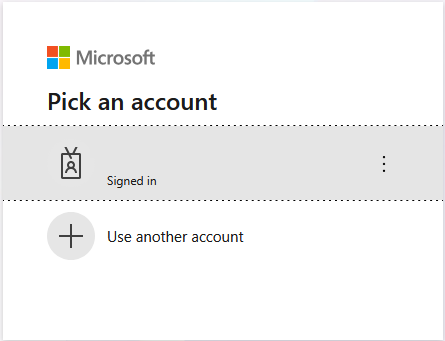
Sign in using your FDU account, enter your FDU username and password, complete DUO MFA verification by selecting “Approve”, and then select your Microsoft account (your FDU account)
After signing in, you will be taken to Web Outlook by default
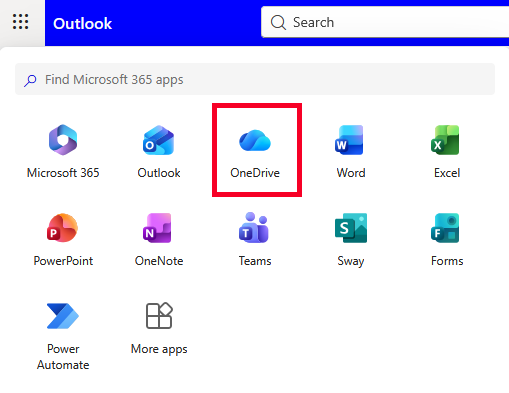
Click the “App Launcher” (9 dots in the top-left corner)
Click “OneDrive”
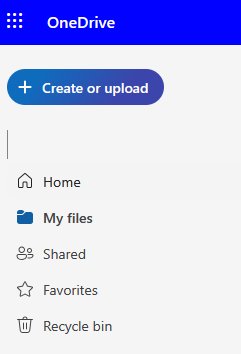
In the left column, click “My Files”
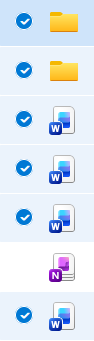
All files on your OneDrive will be displayed under My Files. To select all files, hover to the left of “Name”
Note
OneNote files cannot be downloaded in bulk. If a downloaded folder contains a OneNote notebook, the .zip file will include an error message in a .txt file.
Unselect any OneNote notebooks
Click “Download” icon
OneDrive will prepare a .zip file which will download to your computer
close
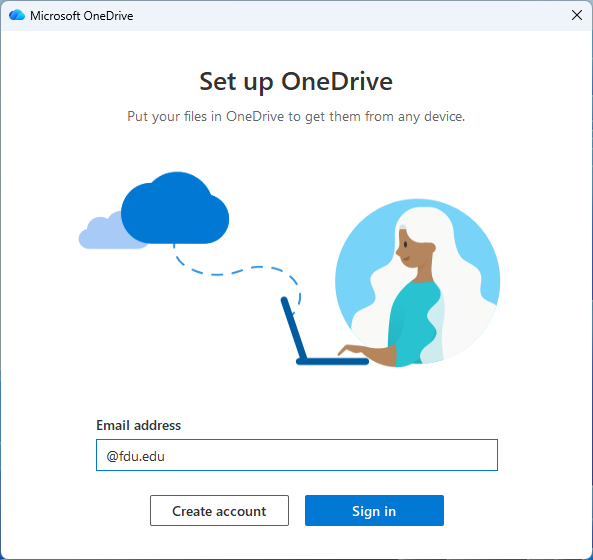
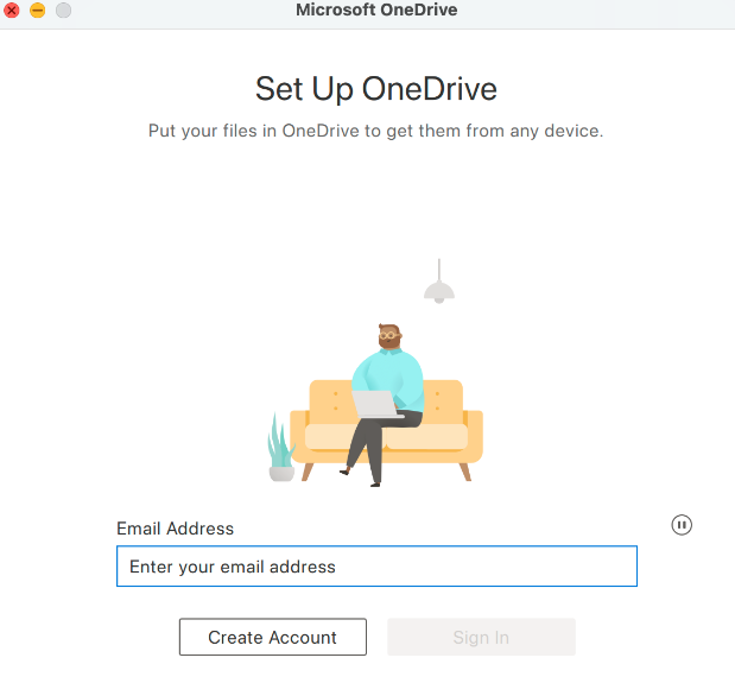
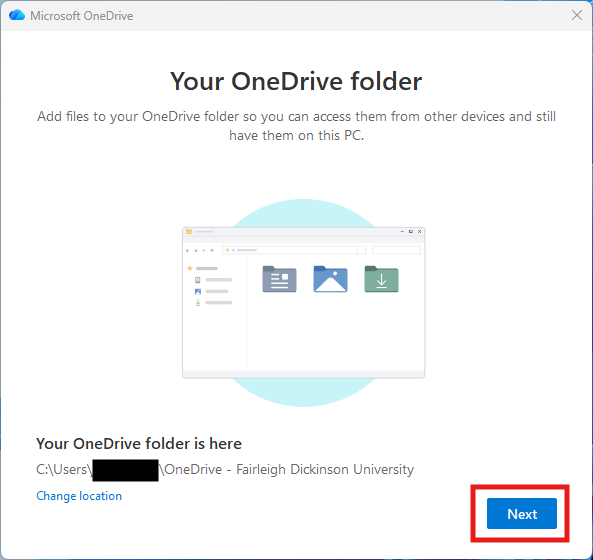
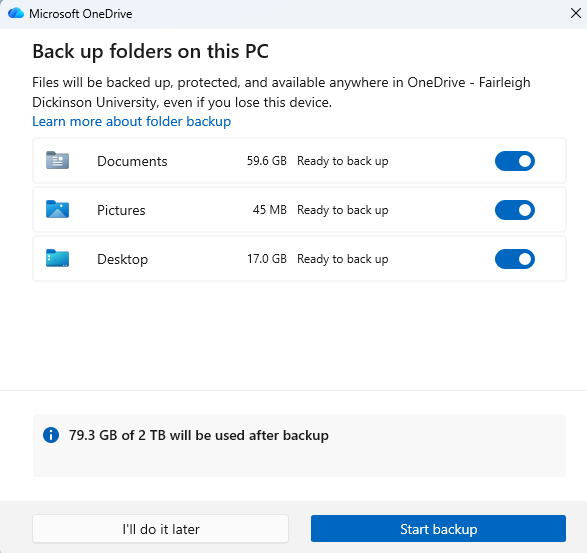
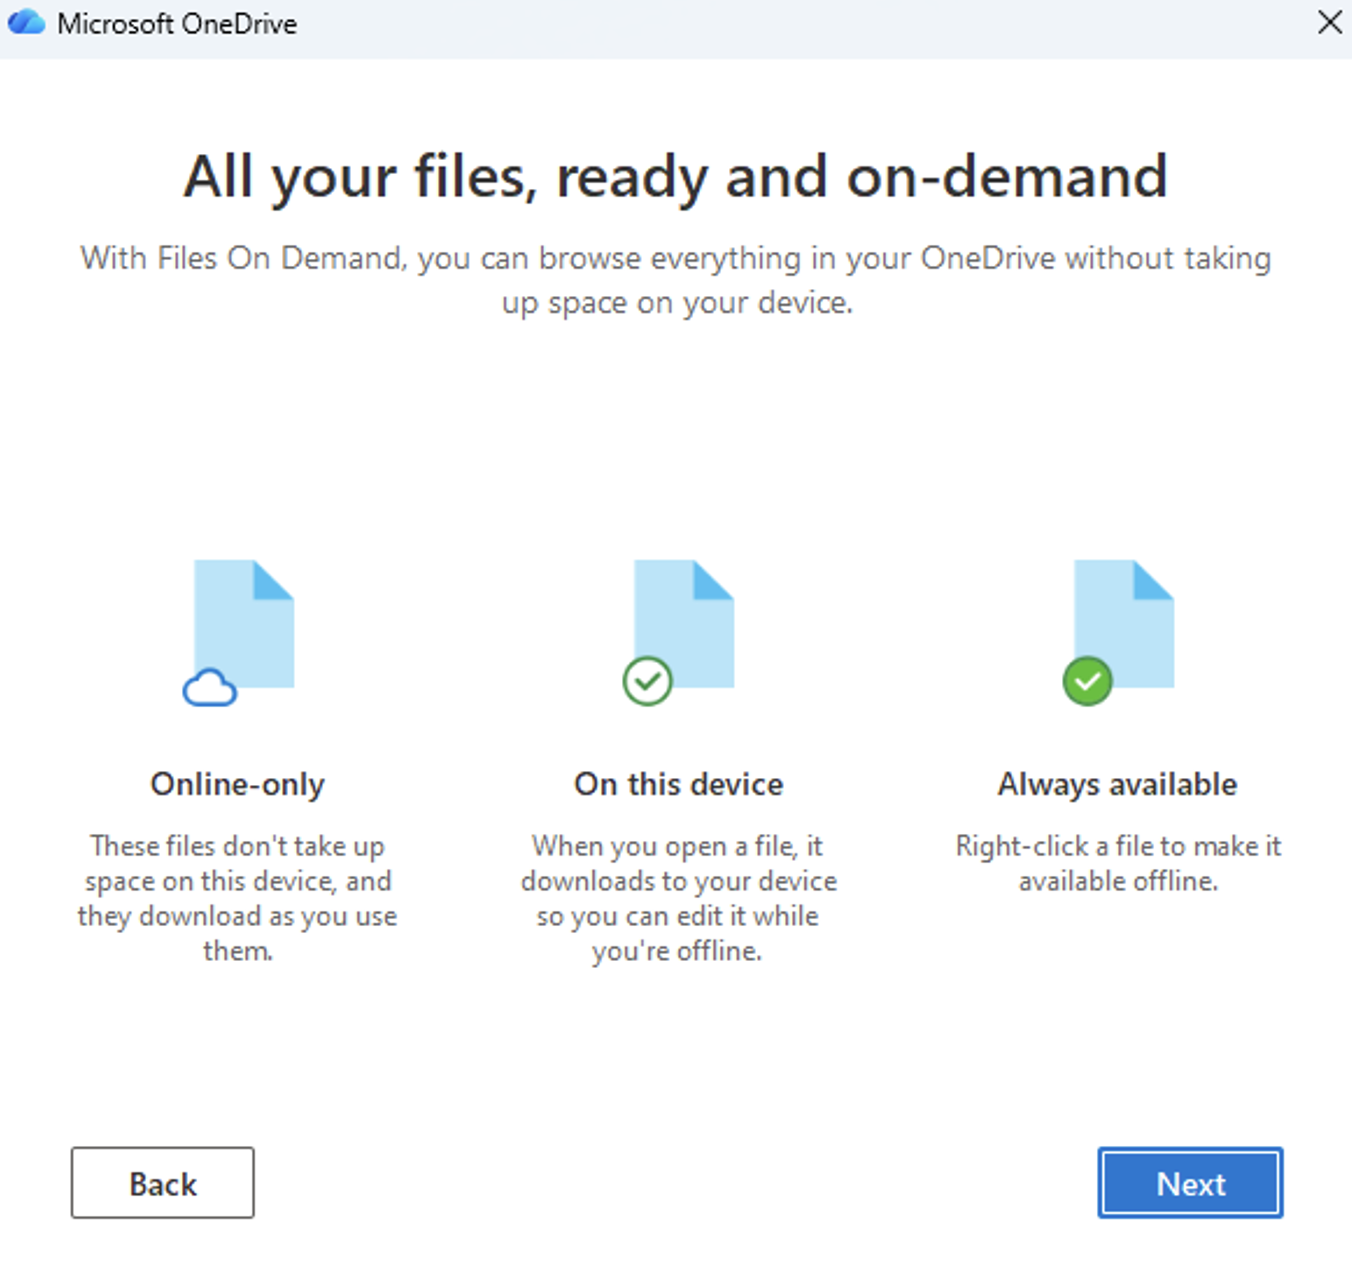
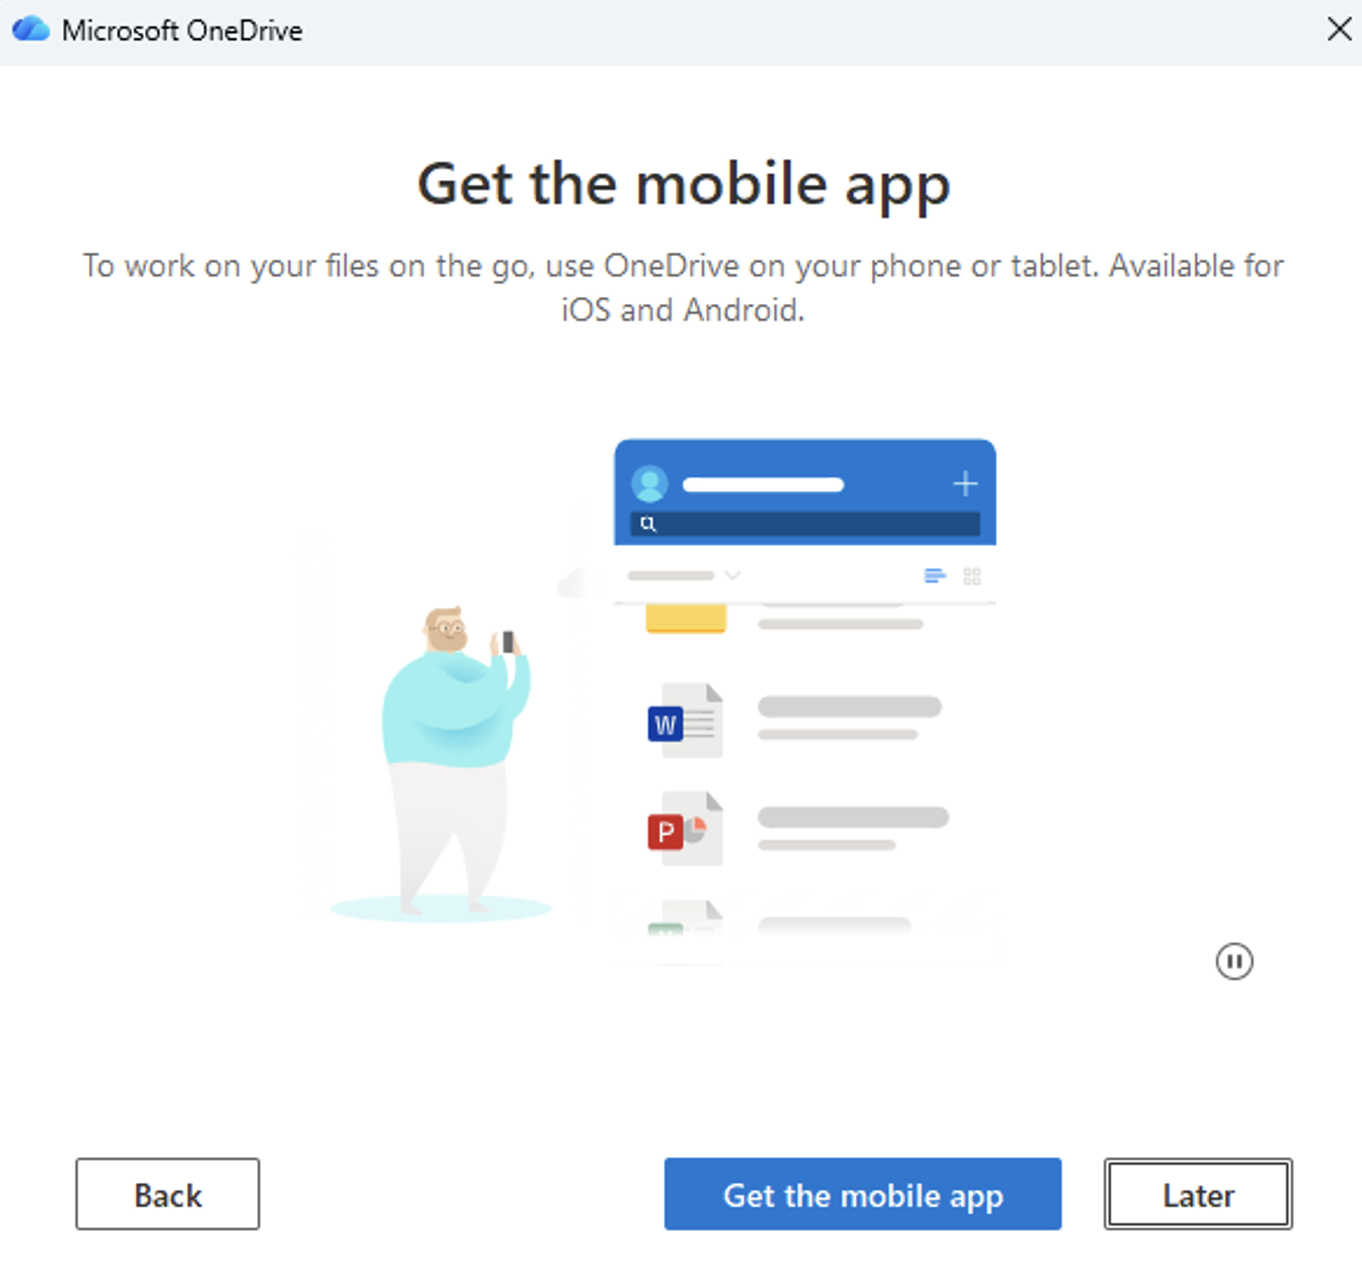
OneDrive Client
Install the Microsoft OneDrive client for Windows or macOS
Welcome to our comprehensive guide on utilizing the FDU Jamf Connect for login and NETID credential synchronization on macOS. This article is tailored for the staff, faculty, and students at FDU, providing a detailed walkthrough of the Jamf Connect login interface.
Tip
Connecting to FDU-Secure is not supported on this login screen. Please use a wired connection while on campus.
Jamf Connect Interface Walkthrough
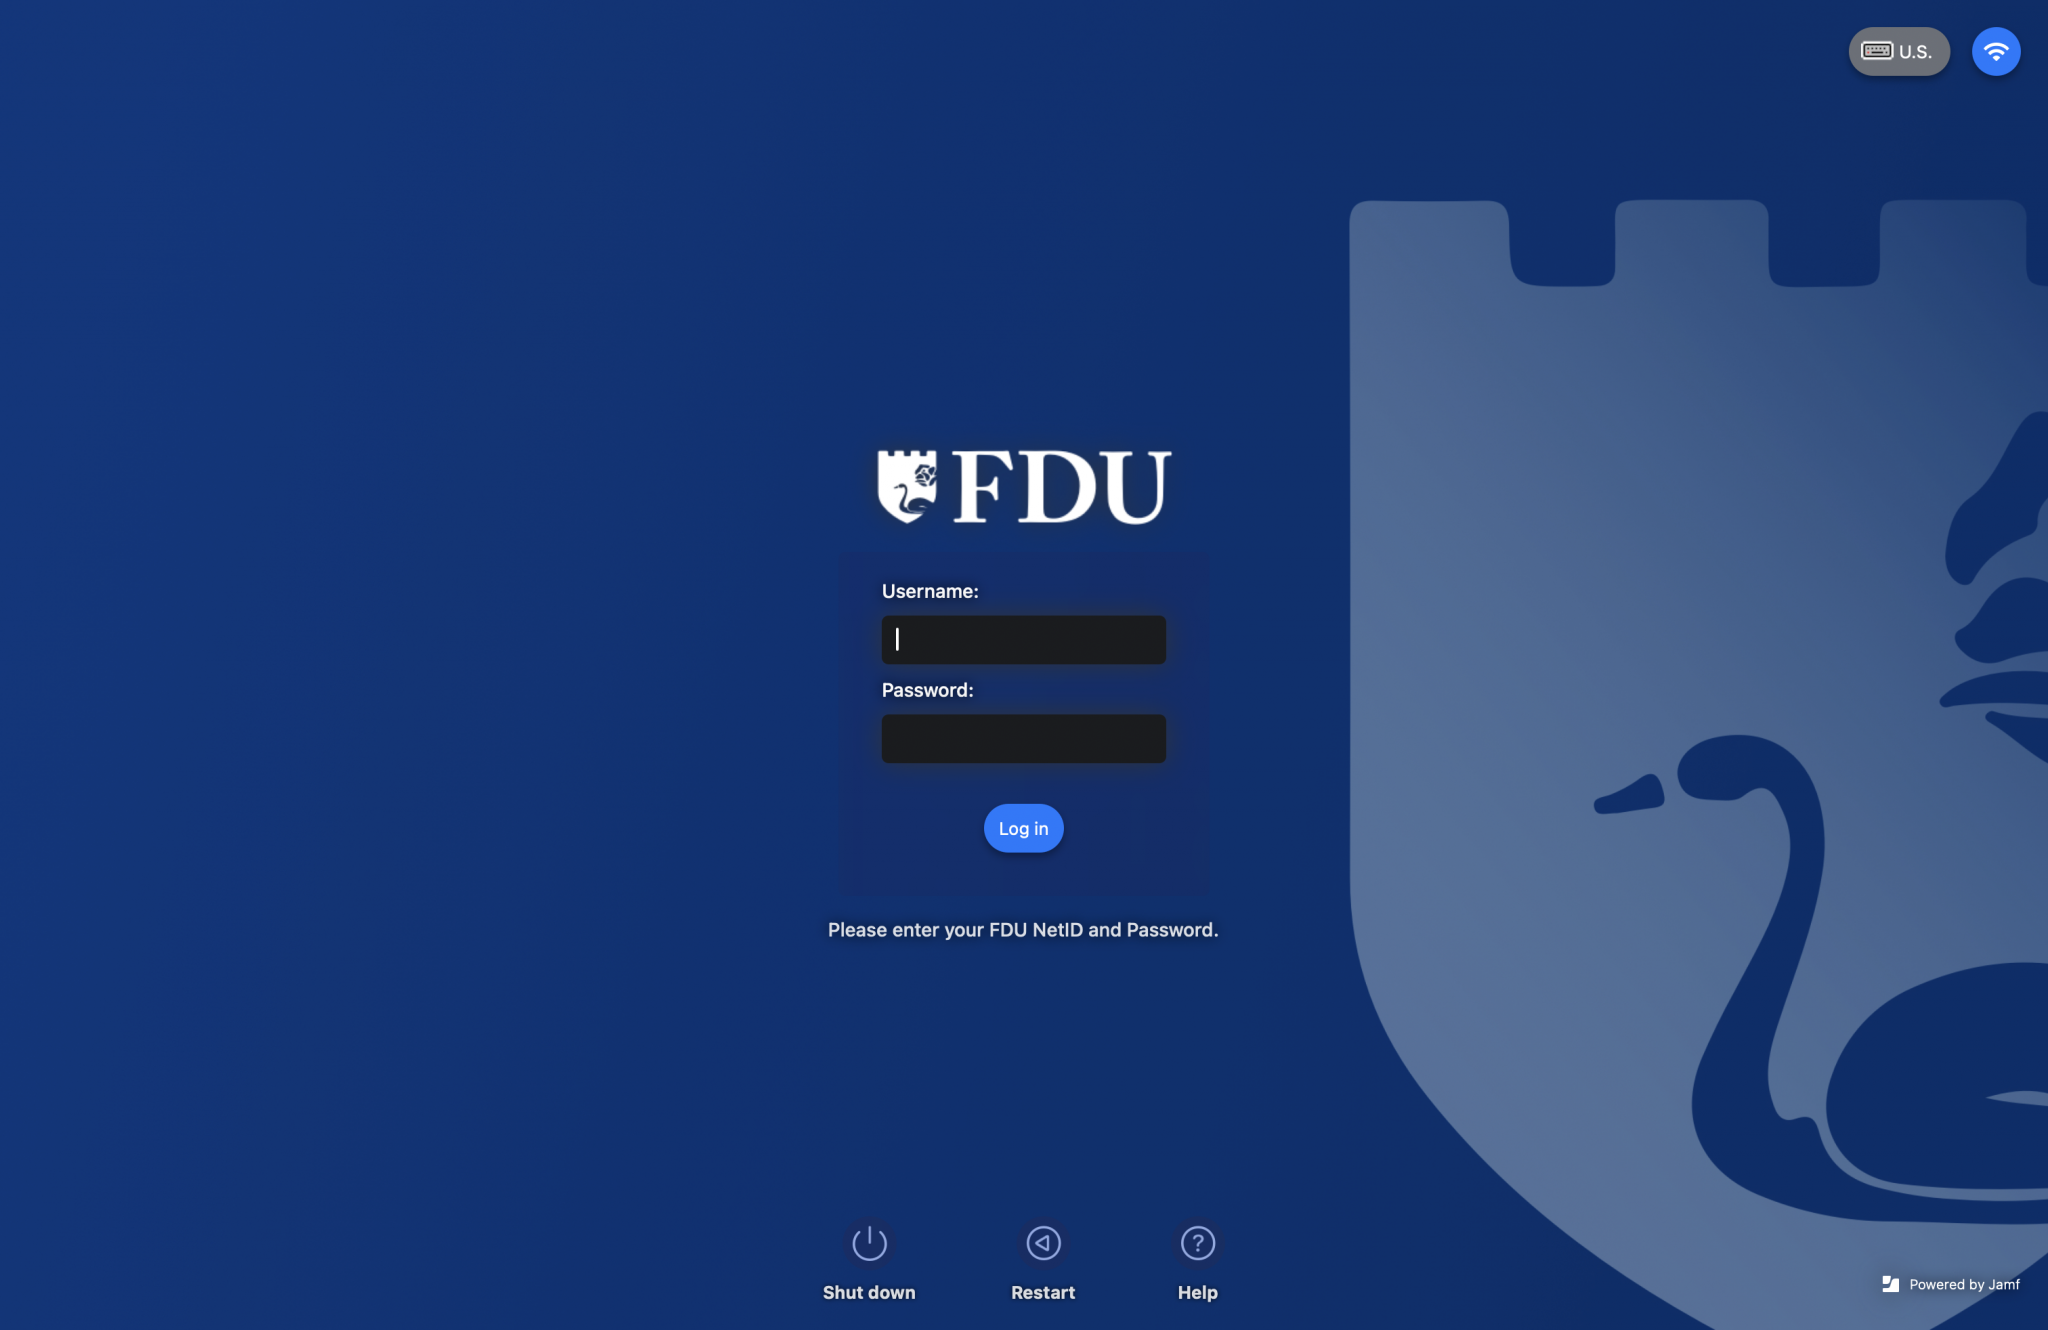
The Jamf Connect login screen consists of three sections: The login fields, the function buttons, and language and Wi-Fi.
The login fields are used to enter the NetID and password while the login button initiates the login. The username can be entered in any form that is recognized by Okta.
Shut down: Powers the machine off
Restart: Reboot the machine
Help: Opens a mini browser to the FDU IT site
Language Selection: Changes language
Wi-Fi: Allows selection of wireless network
close
Logging into Jamf Connect
Enter your “FDU NetID” and “Password” and click the “Login” button
You will see the message “Creating your account on this Mac” while the account is being created on the Mac
If you are using a non-standard account name that does not match your FDU NetID, you will be able to select this account at login and link it to your NetID
Locate the account and click “Connect” to link it to your NetID. If you do not wish to link the existing, account click “Create Account” to proceed with a new account
Note
Any data stored under the old account will not be accessible if choose not to link it.
You will be prompted to enter the “existing password” for the local account. Click “Connect” to complete the link.
close
Synchronize NETID Password via Jamf Connect App
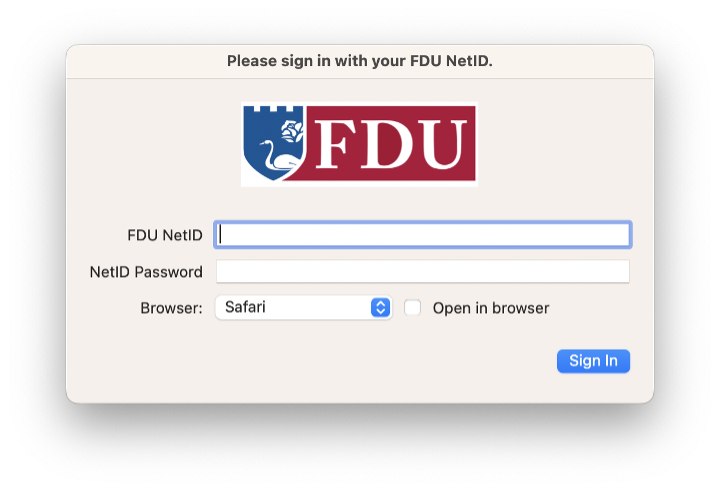
The Jamf Connect app is used to synchronize domain credentials with the local machine credentials.
Enter your “FDU NETID” and “Password” and click the “Sign In” button
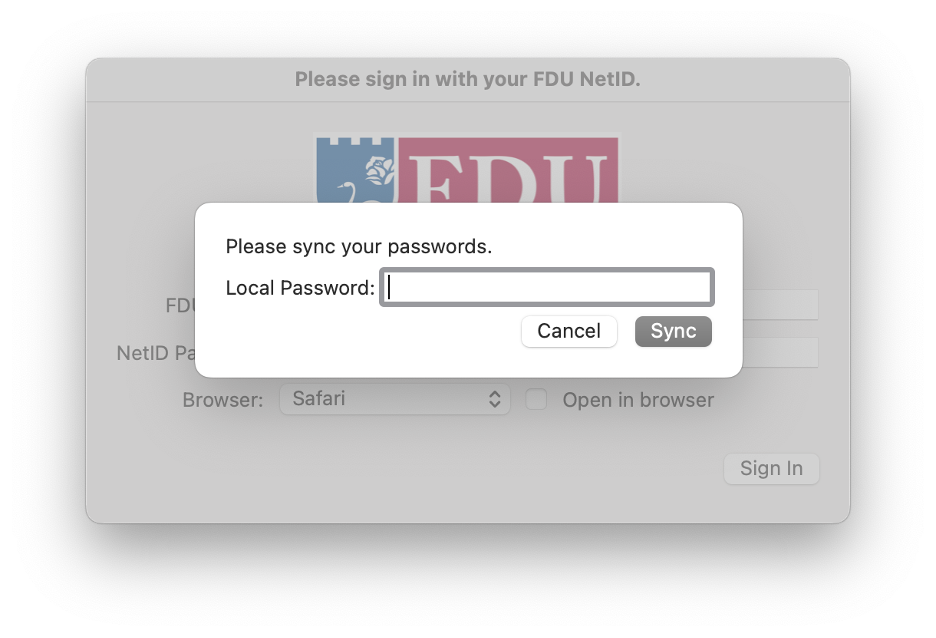
If your NETID password is out-of-sync, you will be prompted to sync them by entering the Local Password you use to sign into the machine. Click “Sync” to sync the new NETID password
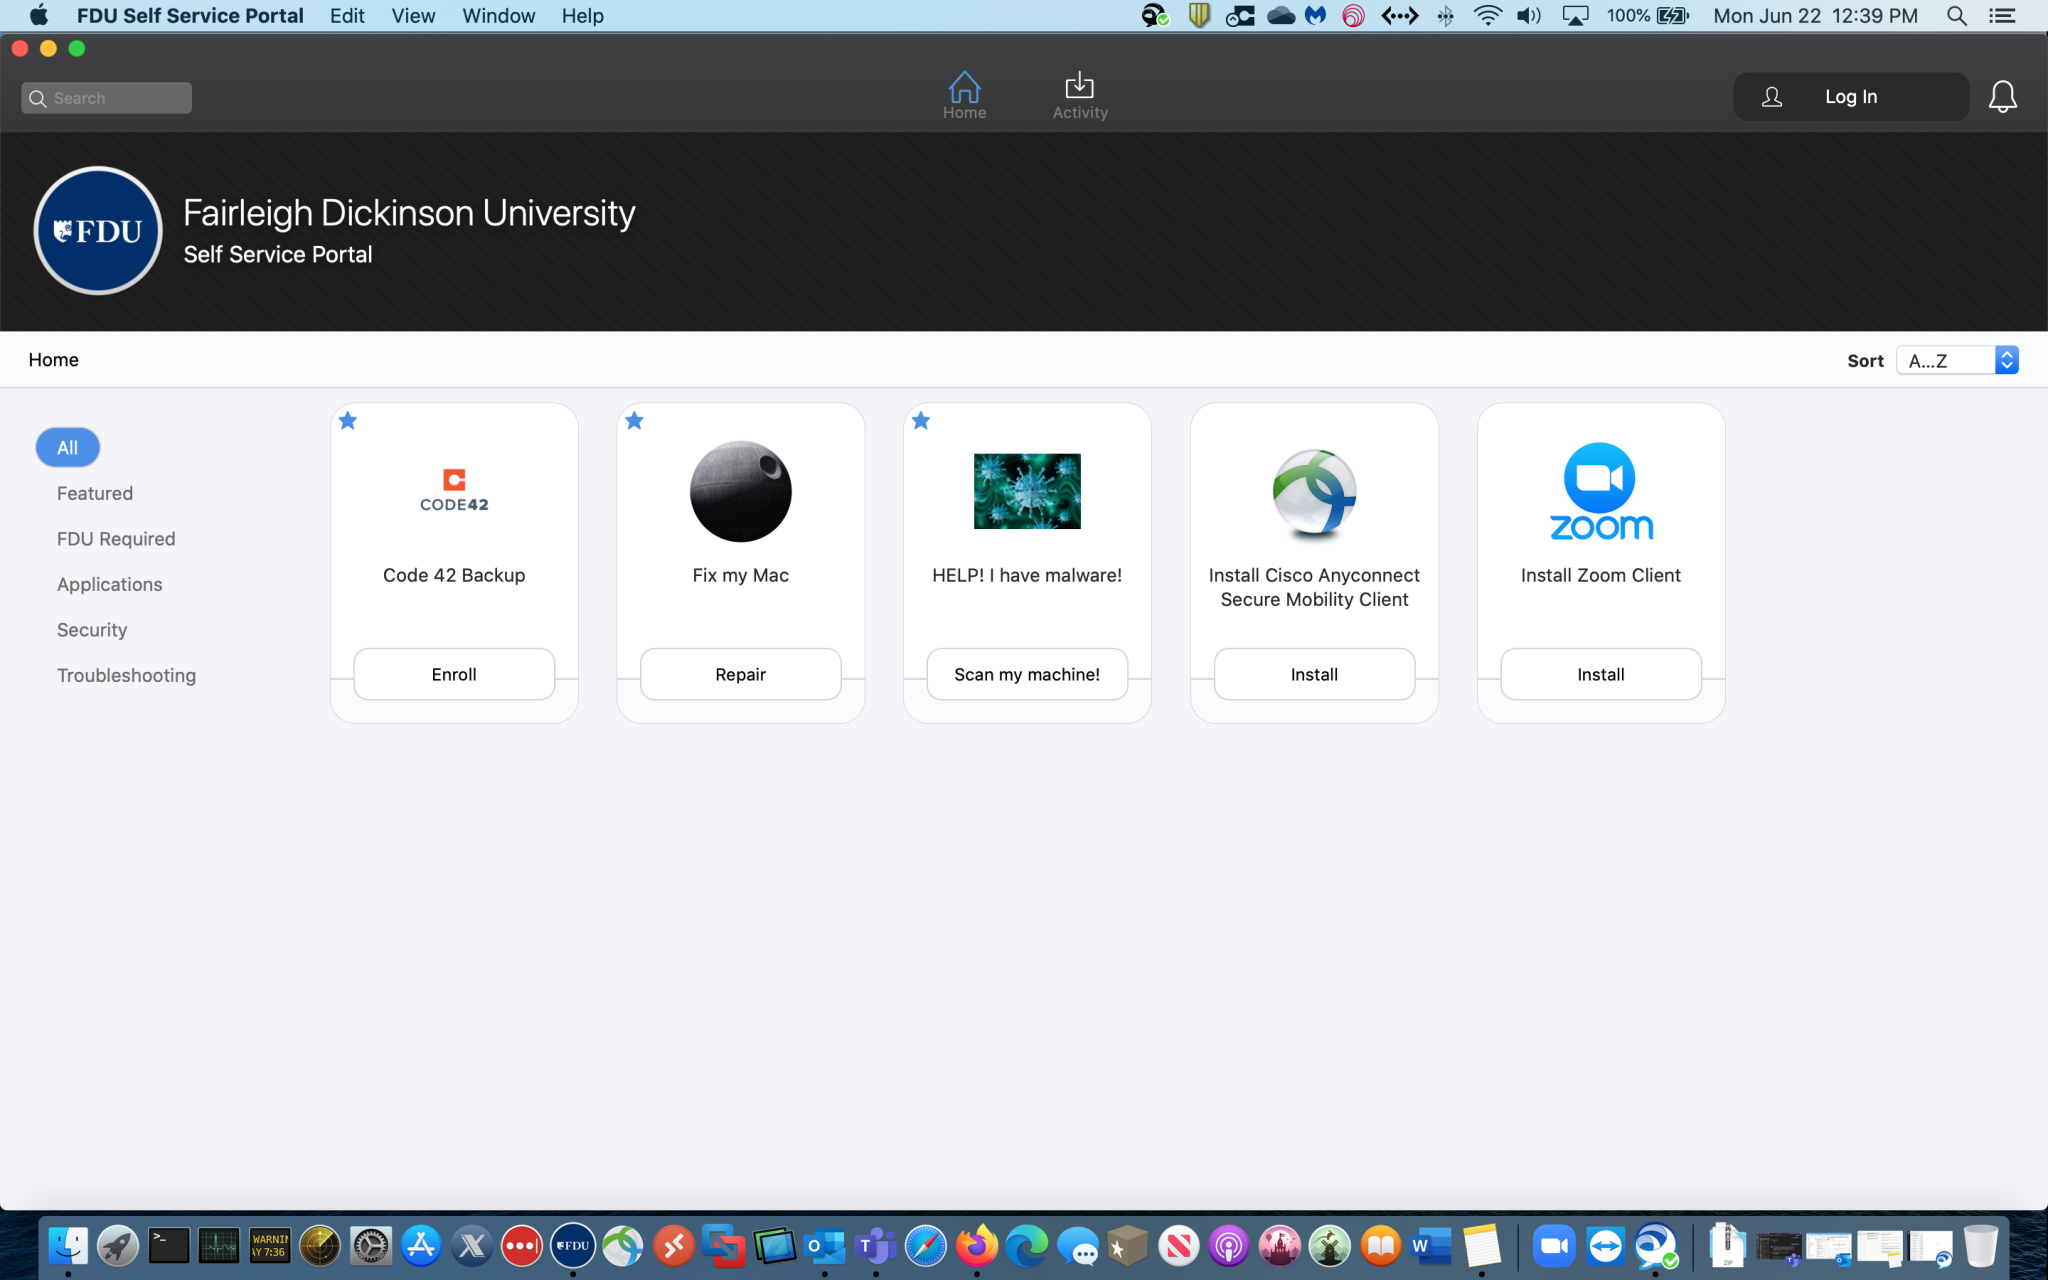
The FDU (Fairleigh Dickinson University) Self-Service Portal for Software is a a tool designed to enhance our community’s access to software and desktop related information. With the Self-Service Portal for Software, our Faculty and Staff can easily locate and install pre-loaded software onto FDU owned computers. Simply launch the portal and you will be presented with a variety of applications, each sanctioned and supplied by FDU. This portal will provide an easily searchable way to view all new applications made available to the user community, including Microsoft Teams, Cisco Jabber, the FDU VPN, and many more.
FDU Self Service Portal Icon
How to Use and Access the FDU Self Service Portal for Software
Windows
Locate the FDU Self-Service Portal for Software icon on the desktop and double-click it to launch the application or…
Select the ‘Windows’ logo/start button on the bottom left of the desktop
Type ‘FDU Self Service Portalfor Software’ into the search bar
Left click ‘FDU Self Service Portalfor Software’ app to launch
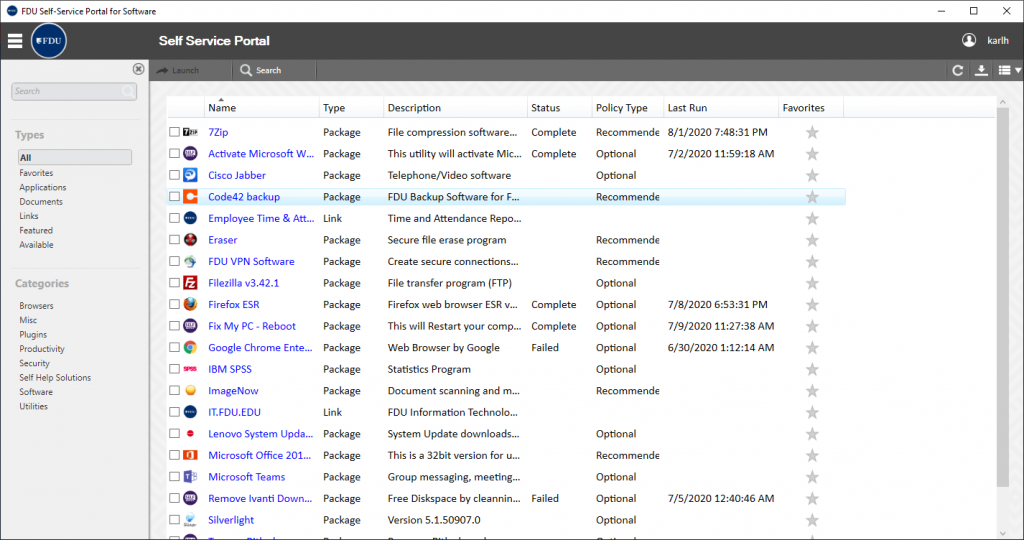
FDU Self-Service Portal for Software on Windows Devices
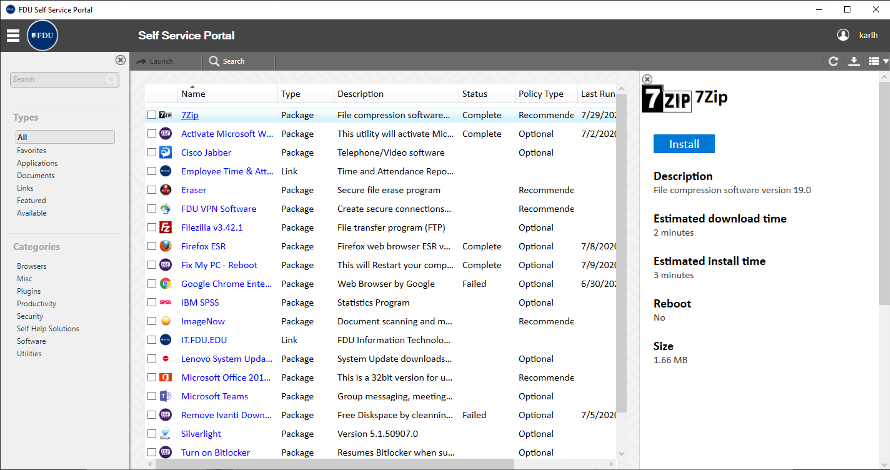
To install a program, click on the name of the application, then click on the “Install” button to the right
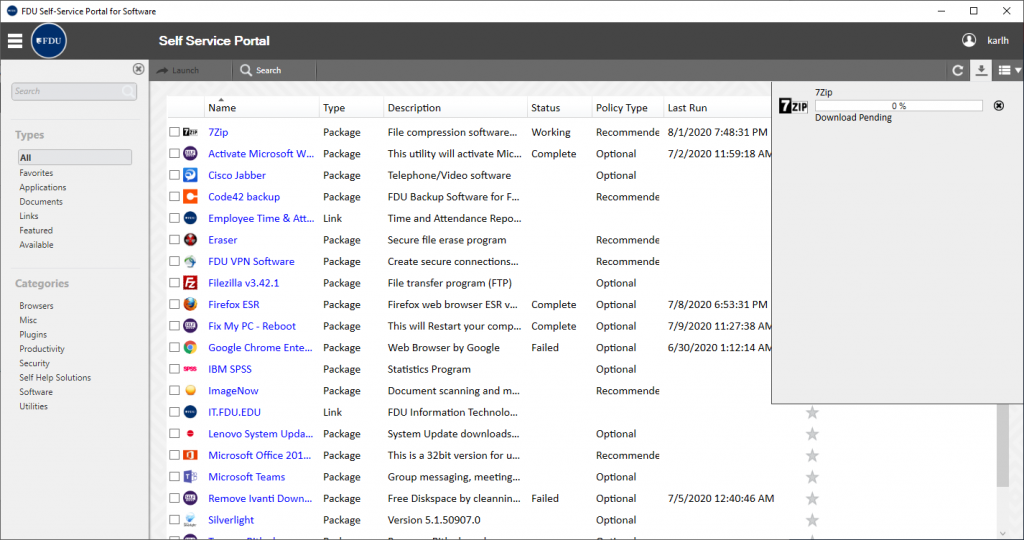
A progress window will provide updates as the program is installed on your system. When complete, the Status column should indicate “Complete”
After the selected application finished downloading, it will automatically install and when completed, the status will show as “Completed”
close
macOS
Open the ‘Applications’ folder and locate and click the ‘FDU Self Service Portal’ icon or…
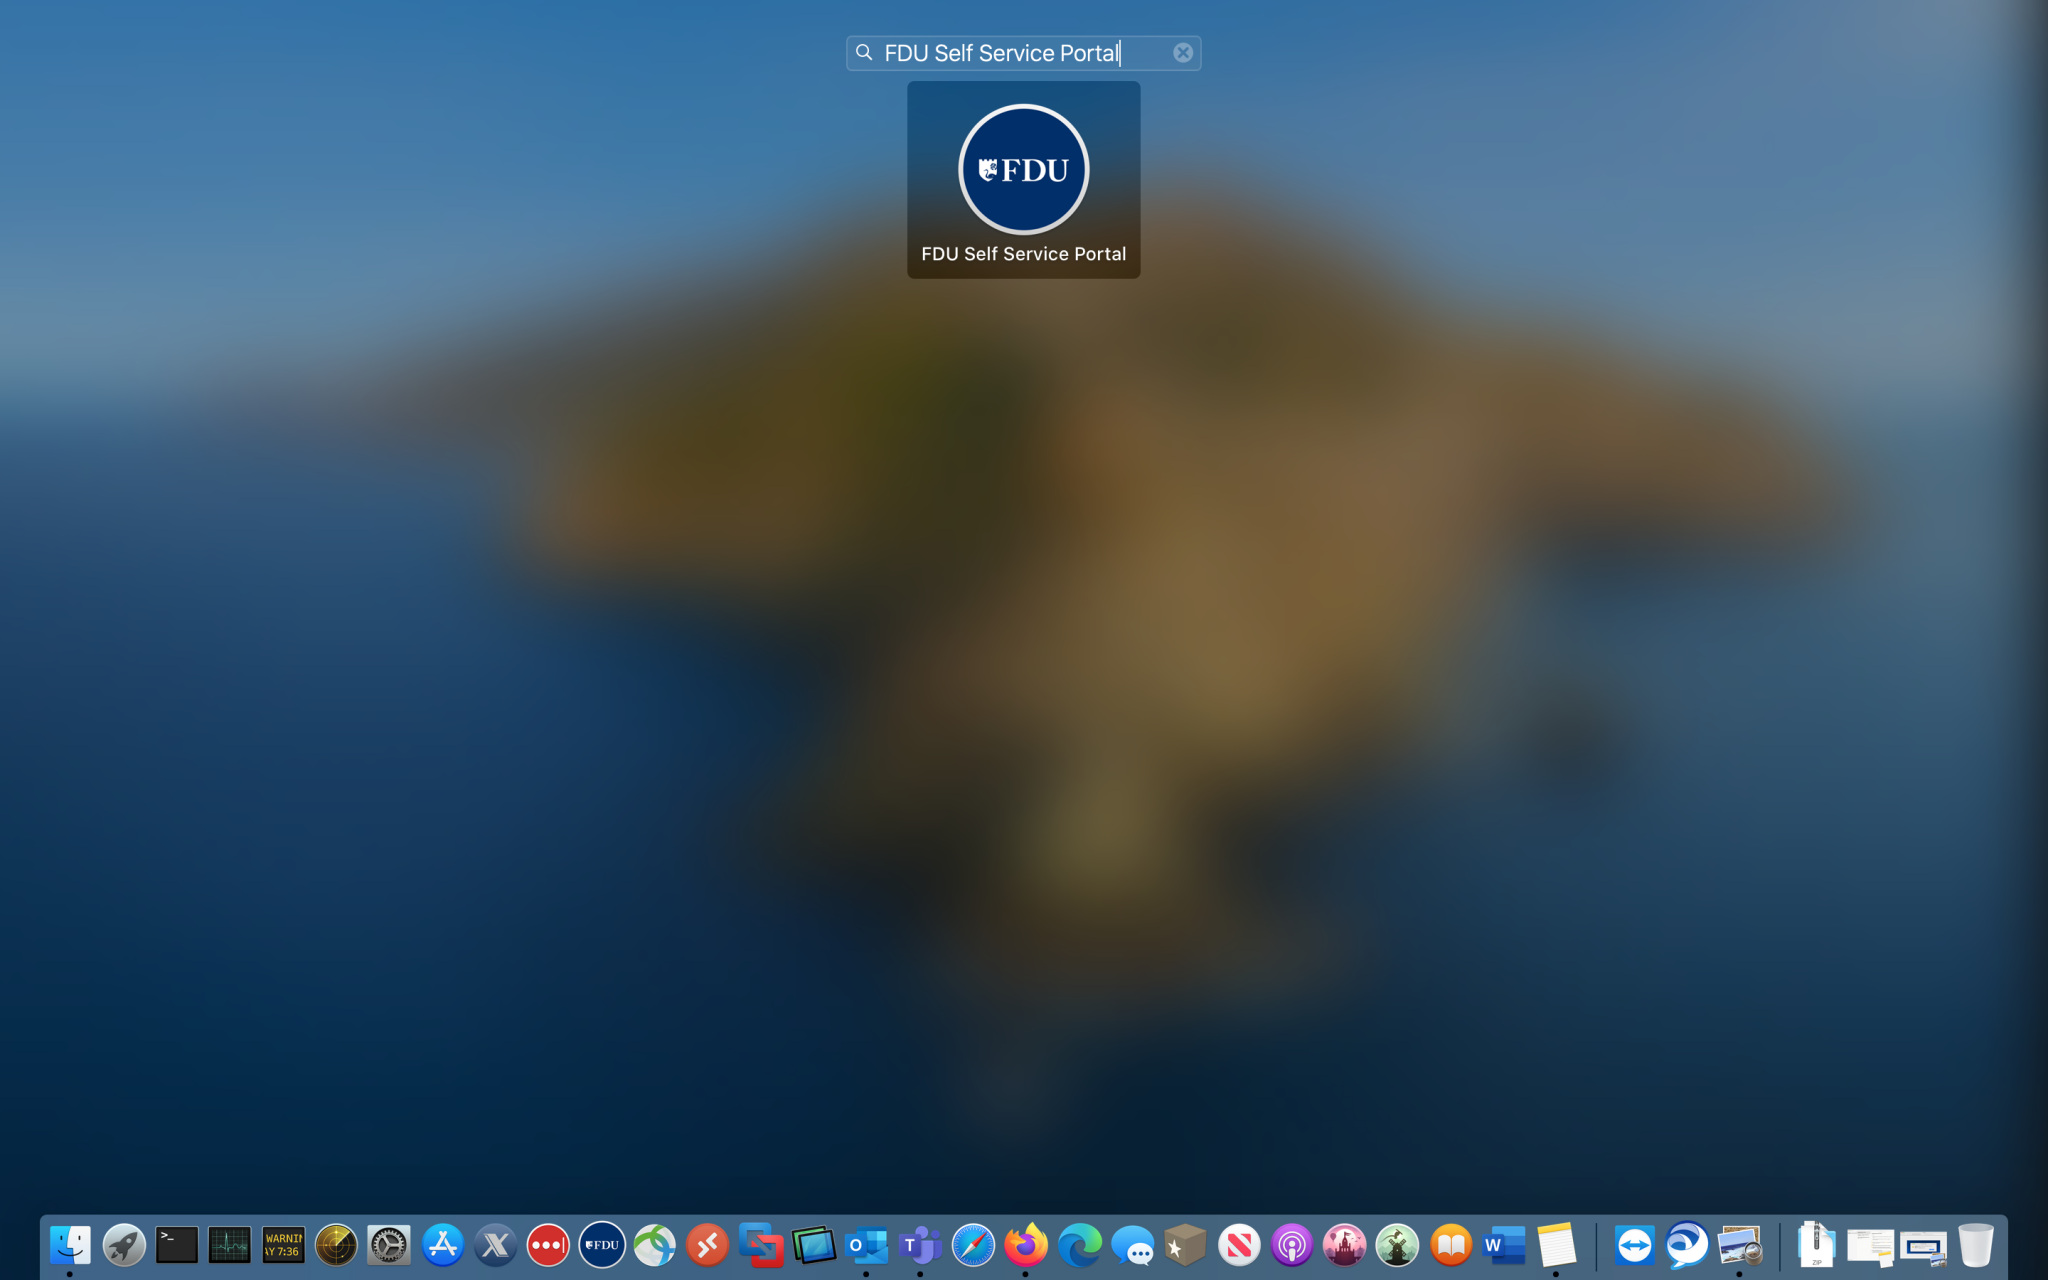
Select the ‘Launchpad’ icon from the dock
Launchpad Icon
Type ‘FDU Self Service Portal‘
Click the ‘FDU Self Service Portal’ icon to launch
FDU Self-Service Portal for macOS Devices
close
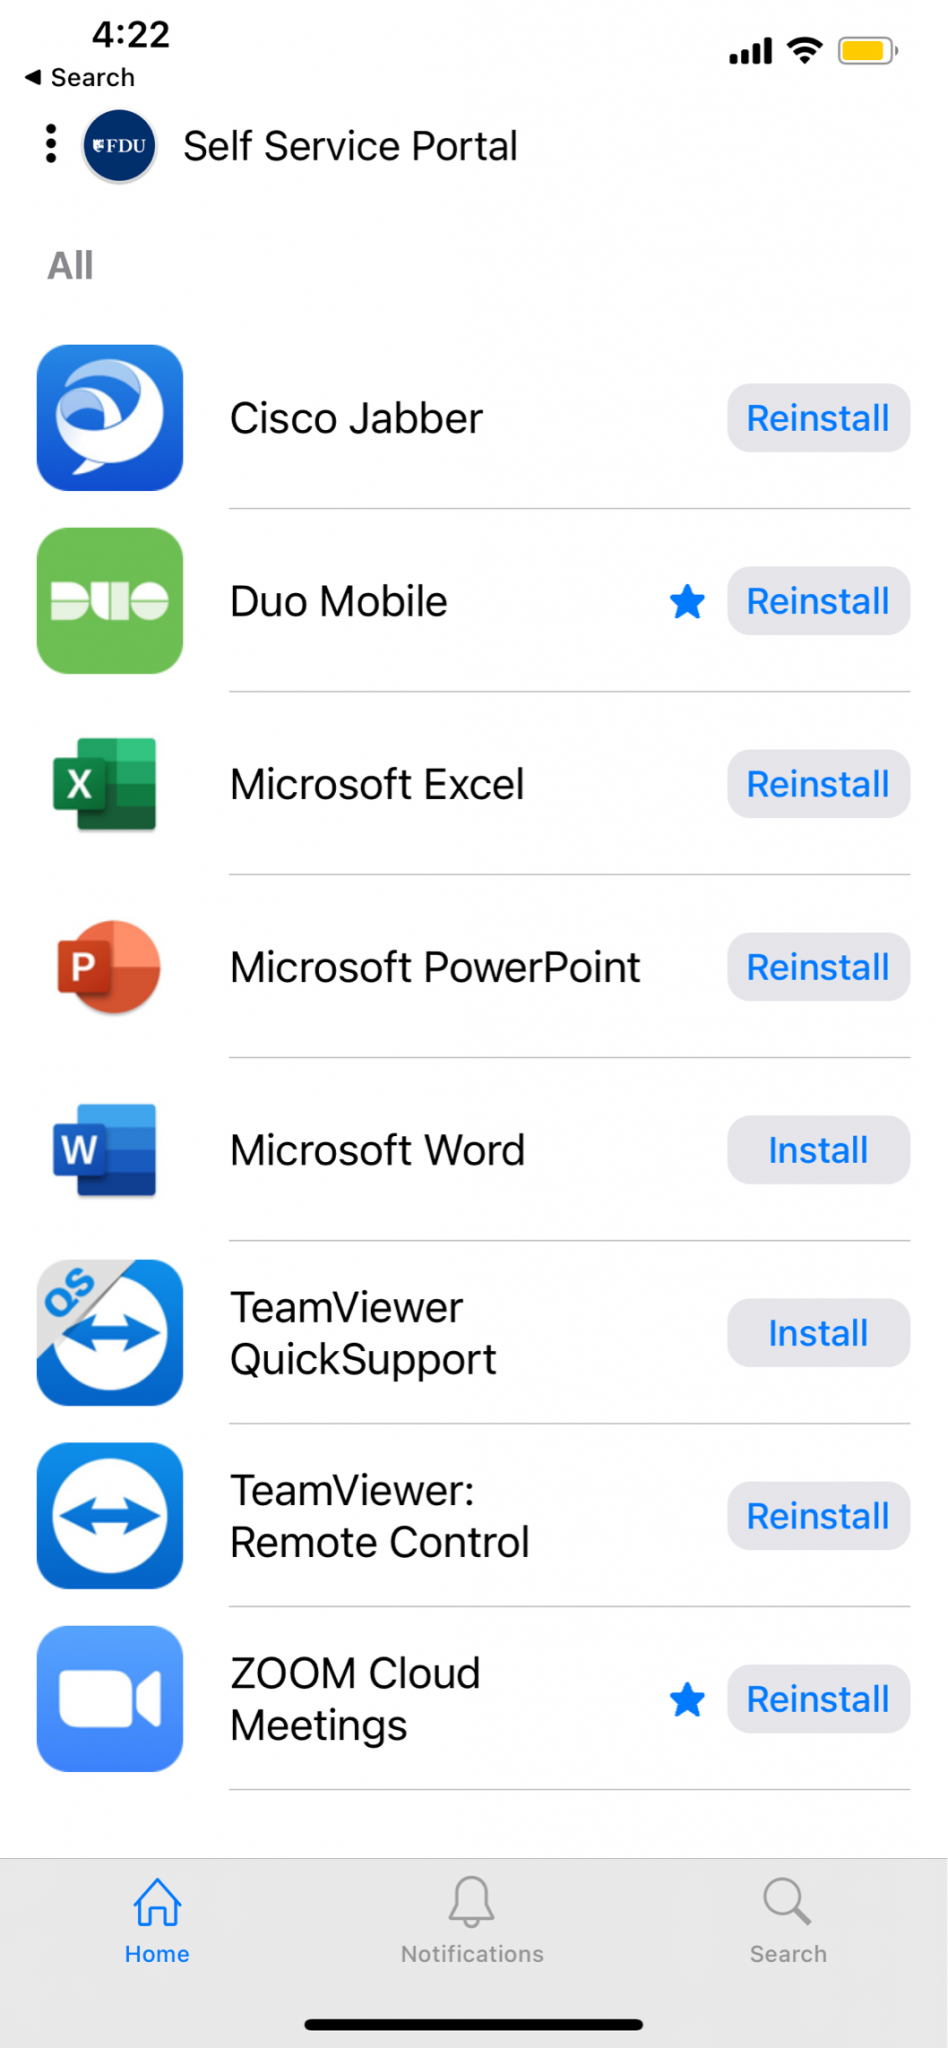
iOS & iPadOS
Find the ‘Self Service Portal’ app icon and tap to launch
FDU Self Service Portal App on iPadOS
FDU Self Service Portal App on iOS
Click ‘Install’ to install the requested item onto your device
Note:
The Android version of the FDU Self Service Portal will be available in the future.
Once the FDU Self-Service Portal application is open, you may then continue to select and install your desired software application. You may also access and use any self-service troubleshooting solutions that are available to you from within the FDU Self-Service Portal as well.
There are a few different ways to change your University NetID password. However, Computing Services strongly urges everyone to change their FDU NetID password using a provided Apple or Windows university computer.
The process for changing your FDU NetID password on a macOS device differs from a Windows device, so please follow the instructions provided for macOS computers below.
If you do not have a university-owned Apple or Windows laptop/desktop and cannot use a University lab computer, please follow the procedures described in “Using identity.fdu.edu Web Portal to Change your FDU NetID Password” below.
Please click on one of the links below for instructions on how to change your FDU NetID password:
Changing a FDU NetID Password on a FDU-owned Windows Computer
Note
To change your password, you must be logged into the machine and either on campus or connected to the Cisco AnyConnect VPN.
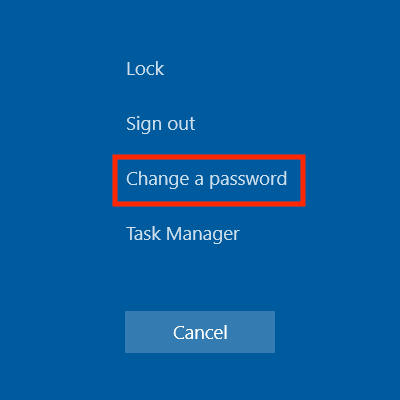
On FDU-issued laptops, desktops, and lab machines, the FDU NetID password can be changed by pressing the “Ctrl+Alt+Del” button combination on the keyboard from any screen and selecting “Change a Password”
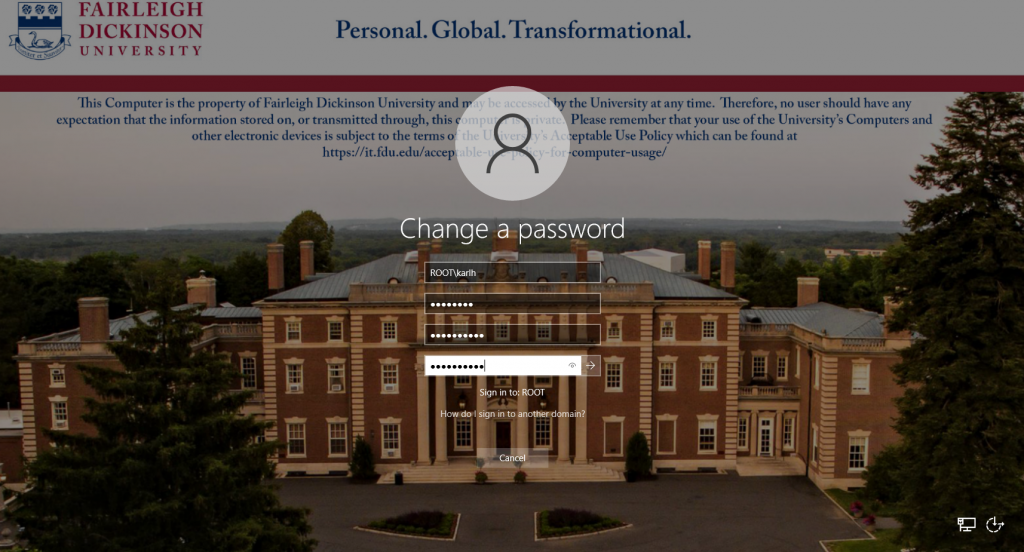
Now enter the following:
Your old or current password
Type in a new password
Retype the new password to confirm
Press the “Right Arrow” button to continue
Tip
The newly created FDU NetID password must meet the complexity requirements.
Use 8 to 16 characters for your new password. Passwords must include all of the following 4 character types: Upper case letters, lower case letters, numbers, and special characters. Allowed special characters are: ! # $ @ _ + , ? [ ] . – ) ( ` ~ % ^ & * = { } | : ? , / and a dot. Please refrain from using portions of your name or email address within the password. Please refrain from using a password that you have already used.
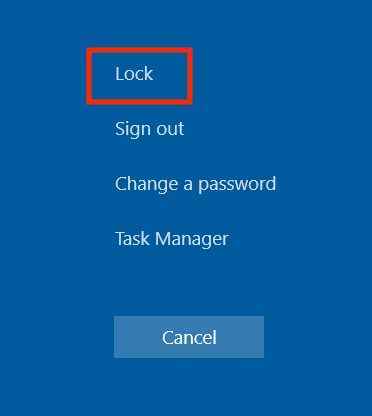
Once this has been done, you must lock and unlock the machine once to complete updating your password:
Press the “Ctrl+Alt+Del” keys combination again
Click “Lock”
Then log back in with your new password
Your FDU NetID password was changed successfully!
Note
Your new password will need to be updated in all web browsers with saved passwords and email clients across all devices. Examples include faculty and staff e-mail accounts synched to their iPad, iPhone, and or Android device. FDU-Secure Wi-Fi network access is also attached to your FDU NetID username and password and will need to be updated on devices that use it.
close
Changing and Syncronizing your FDU NetID Password on a FDU-owned Apple Computer
To change and/or synchronize your FDU NetID password with your FDU Issued Apple computer, please follow the directions provided in the following article:
Using “identity.fdu.edu” Web Portal to Change your FDU NetID Password
Adjunct professors, students, and anyone with a personal laptop/desktop/tablet device will use the FDU Identity Web Portal to change their NetID password.
Open a web browser (e.g., Google Chrome, Mozilla Firefox, Internet Explorer, Safari) and navigate to the following URL:
Click on “Account Maintenance” on the top right hand of the web page
You will be redirected to the FDU Single-Sign-On login page. Enter your FDU NetID email and password in the corresponding text boxes and click “Sign In.” Complete the FDU 2fa Duo push notification to proceed
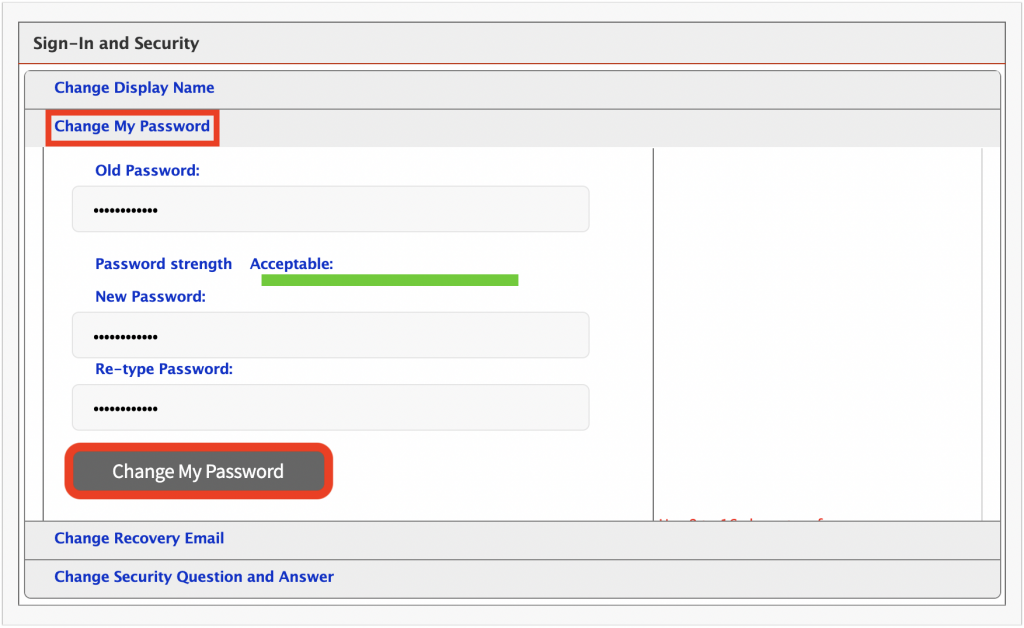
Under Sign-In and Security, select “Change My Password”
Enter your current password
Enter a new password
Retype your new password to confirm
When finished, select “Change My Password”
Tip
The newly created FDU NetID password must meet the complexity requirements.
Use 8 to 16 characters for your new password. Passwords must include all of the following 4 character types: Upper case letters, lower case letters, numbers, and special characters. Allowed special characters are: ! # $ @ _ + , ? [ ] . – ) ( ` ~ % ^ & * = { } | : ? , / and a dot. Please refrain from using portions of your name or email address within the password. Please refrain from using password that you have already used.
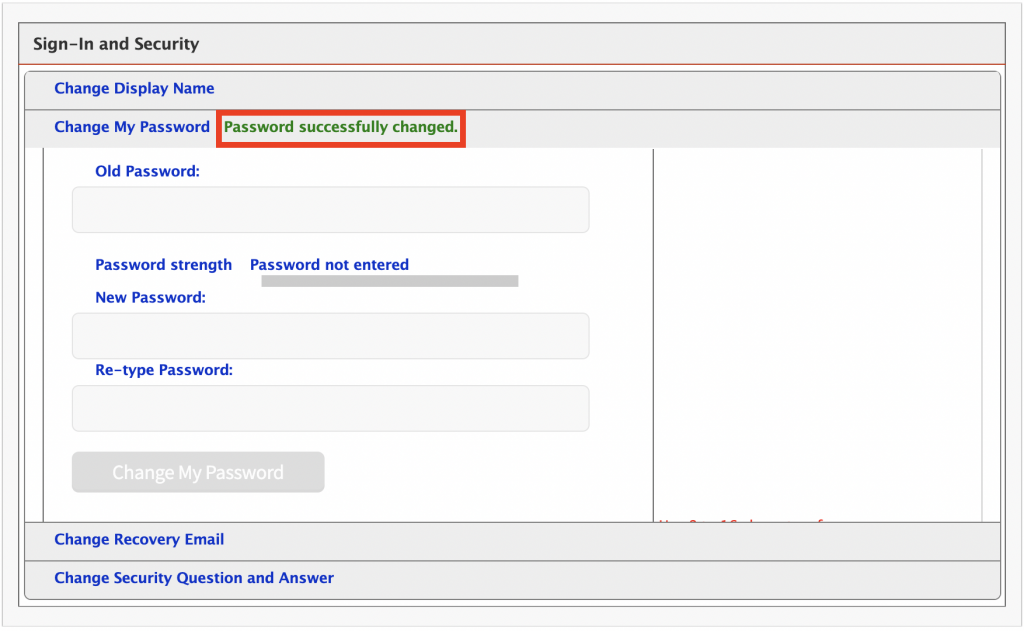
“Password successfully changed” will be displayed if your FDU NetID password was successfully changed
Note
Your new password will need to be updated in all web browsers with saved passwords and email clients across all devices. Examples include faculty and staff e-mail accounts synched to their iPad, iPhone, and or Android device. FDU-Secure Wi-Fi network access is also attached to your FDU NetID username and password and will need to be updated on devices that use it.
close
Using “identity.fdu.edu” Web Portal to Change your FDU NetID Display Name
You also have the option to change the name that is displayed on your NetID account.
Open a web browser (e.g., Google Chrome, Mozilla Firefox, Internet Explorer, Safari) and navigate to the following URL:
Click on “Account Maintenance” on the top right hand of the web page
You will be redirected to the FDU Single-Sign-On login page. Enter your FDU NetID email and password in the corresponding text boxes and click “Sign In.” Complete the FDU 2fa Duo push notification to proceed
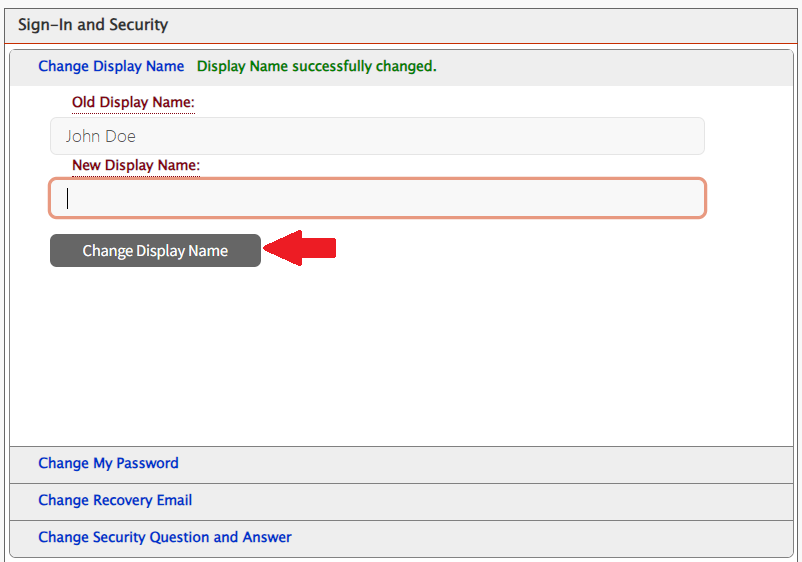
Under Sign-In and Security, select “Change Display Name”
Enter your New Display Name
Click on “Change Display Name“
“Display Name successfully changed” will be displayed if your Display Name was successfully changed
Fairleigh Dickinson University’s Acceptable Use Policy for Computer Usage states, “All computers and mobile devices accessing any FDU resource must run an operating system and configuration that is supported by its vendor with regard to security patches and updates.”
This guide defines the lifecycle of our support for different operating systems.
Note
Apple does not publish official End of Life dates, but typically provides security updates for the current release of macOS, as well as the previous two releases.
Support Status Descriptions
Active (Default)
This platform is supported by FDU Computer Services & University Systems and Networking and new machines will be built with this platform unless otherwise requested.
Active
This platform is supported by FDU Computer Services & University Systems and Networking and will be installed on request.
Containment
This platform is currently supported by FDU Computer Services & University Systems and Networking but no new machines will be built with this platform. Platforms in containment will receive security updates and patches for the FDU supported software components. FDU Computer Services & University Systems and Networking Facilities will not provide new software or major revisions to existing software for these platforms.
Phasing Out
FDU Computer Services & University Systems and Networking is actively working to migrate assets away from this platform. Platforms go in to this status automatically 6 months before the FDU End of Support Date. Platforms may be placed in this status before that time.
EOL
This platform is no longer supported by FDU Computer Services & University Systems and Networking. Software support will be dropped from any asset running this platform. Other levels of support may be dropped as circumstances warrant. A valid reason is required to maintain an asset running this platform past the End of FDU Support date. All exceptions must be logged and periodically reviewed.
Supported Operating Systems
Desktop
OS Family
Operating System
Latest Release
FDU Support Status
Vendor Release Date
Start of FDU Support
End of FDU Support
Latest Vendor EOL Date
macOS
Tahoe
26
Active (Default)
Sep-2025
Nov-2025
Jun-2028
~2028
Sequoia
15
Active (Default)
Sep-2024
Nov-2024
Jun-2027
~2027
Sonoma
14
Phasing Out
Sep-2023
Nov-2023
Jun-2026
~2026
Windows
Windows 11
25H2
Active (Default)
Sep-2025
Nov-2025
Sep-2028
Oct-2028
24H2
Phasing Out
Oct-2024
Jun-2025
Sep-2027
Oct-2027
23H2
Phasing Out
Oct-2023
Jul-2024
Oct-2026
Nov-2026
Windows 10
22H2
EOL
Oct-2022
Dec-2022
Oct-2025
Oct-2025
Mobile
OS Family
Operating System
Latest Release
FDU Support Status
Vendor Release Date
Start of FDU Support
End of FDU Support
Latest Vendor EOL Date
Apple
iOS
26
Active (Default)
Sep-2025
Nov-2025
Oct-2028
~2028
18
Phasing Out
Sep-2024
Nov-2024
Oct-2027
~2027
17
Containment
Sep-2023
Nov-2023
Oct-2026
~2026
Android
Baklava
16
Active (Default)
Jun-2025
Dec-2025
~2028
~2028
Vanilla Ice Cream
15
Active
Sep-2024
Dec-2024
~2027
~2027
Upside Down Cake
14
Active
Oct-2023
Dec-2023
~2027
~2027
Tiramisu
13
Phasing Out
Aug-2022
Oct-2022
~2026
~2026
Snow Cone V2
12.1
Phasing Out
Mar-2022
Jul-2022
~2026
~2026
Latest Release
The latest release for desktop operating systems includes all minor and incremental updates.
End of Life
Any operating system not listed above is considered EOL (End of Life) and will not be supported. Examples of EOL Operating Systems include:
Windows: 95,98, XP, ME, VISTA, 7, 8, 8.1, & 10
macOS: Yosemite, El Capitan, Sierra, High Sierra, Mojave, Catalina, Big Sur, Monterey, & Ventura
To access Forms, you will be directed to our SAMI Support Portal where you will be asked to log in using your NETID and authenticate using Duo. Once you click “Next,” you will be forwarded to samisupport.fdu.edu in a new window or tab.