Through Microsoft Outlook’s Scheduling Poll (formerly FindTime), you can select a few possible meeting times and send attendees a link to a poll that allows them to vote for what meeting time works best for them. Once a consensus is reached, you schedule the meeting for the preferred time.
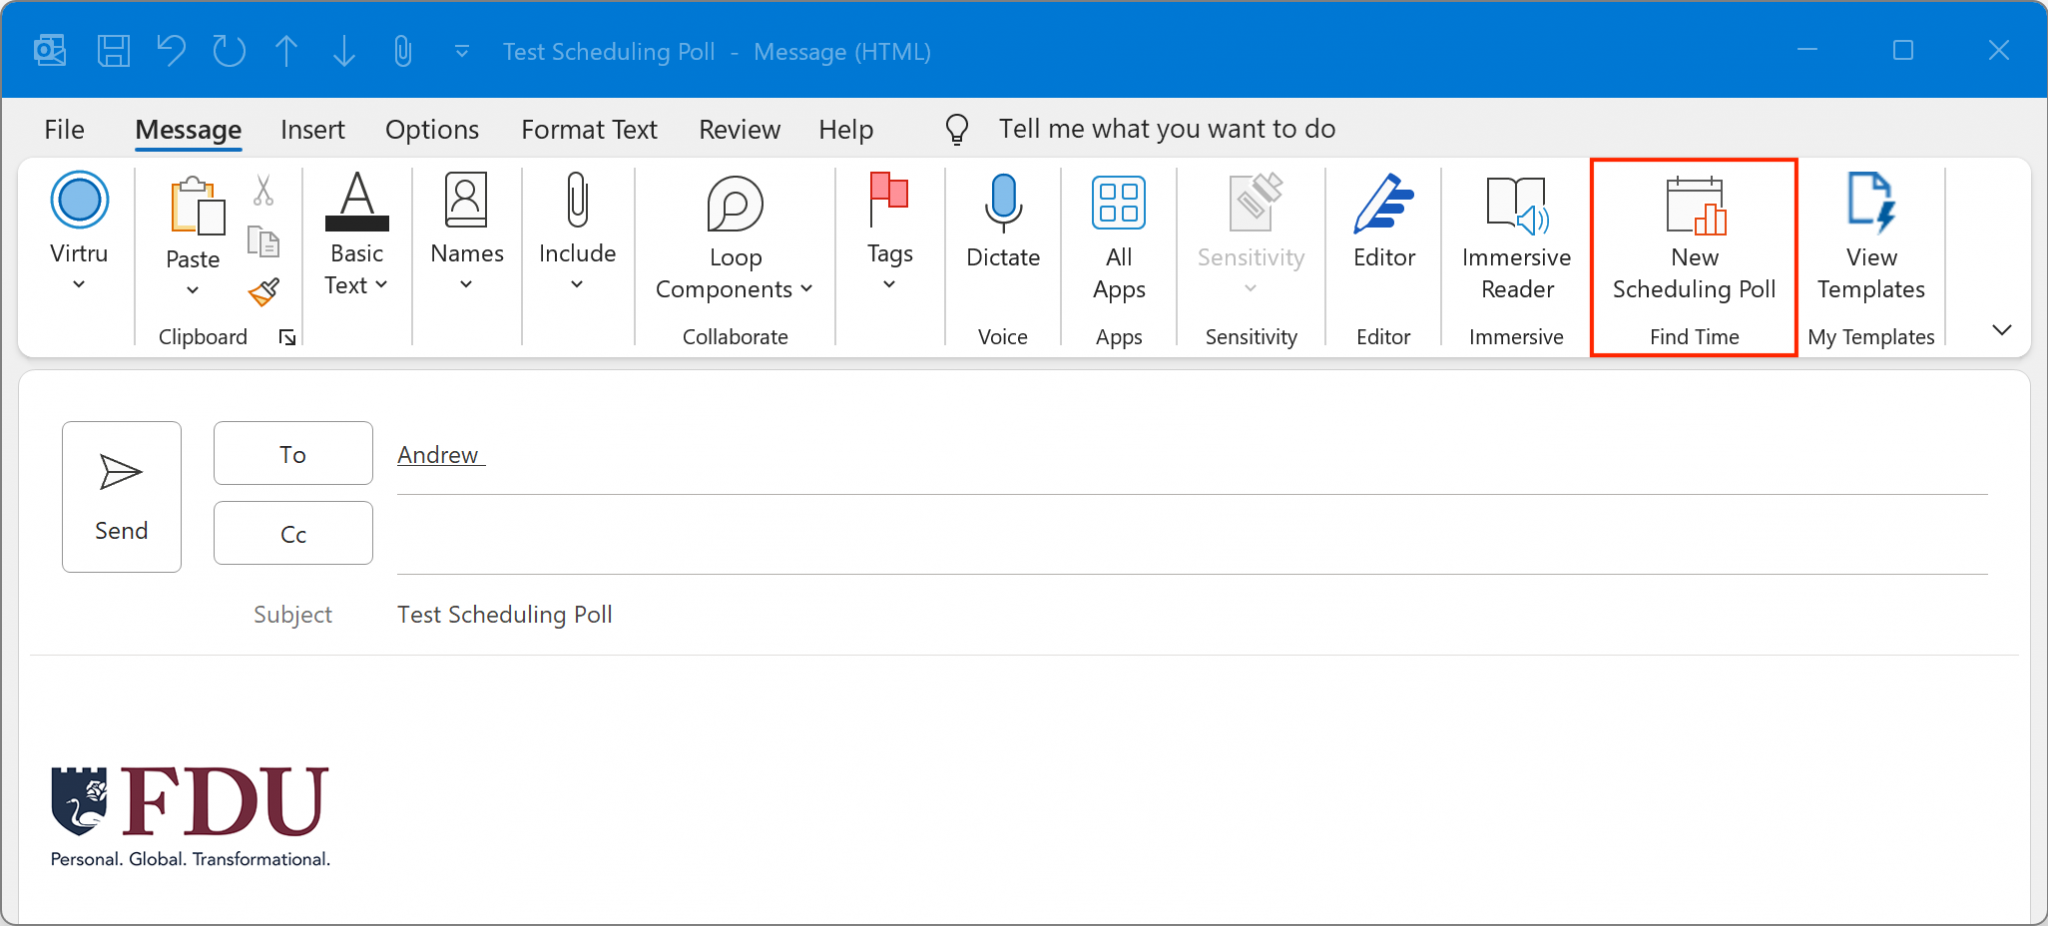
Scheduling Poll Icon
Like the Scheduling Assistant, the Scheduling Poll allows you to preview attendees’ FDU Outlook calendars (if available) so that the best possible options can be selected. This particular aspect of the feature will be less useful for attendees who…
DO NOT have FDU Outlook calendars
Have FDU Outlook calendars, but don’t keep them up-to-date
The Scheduling Poll has other convenient features, including email updates, the ability to schedule a meeting automatically, and more.
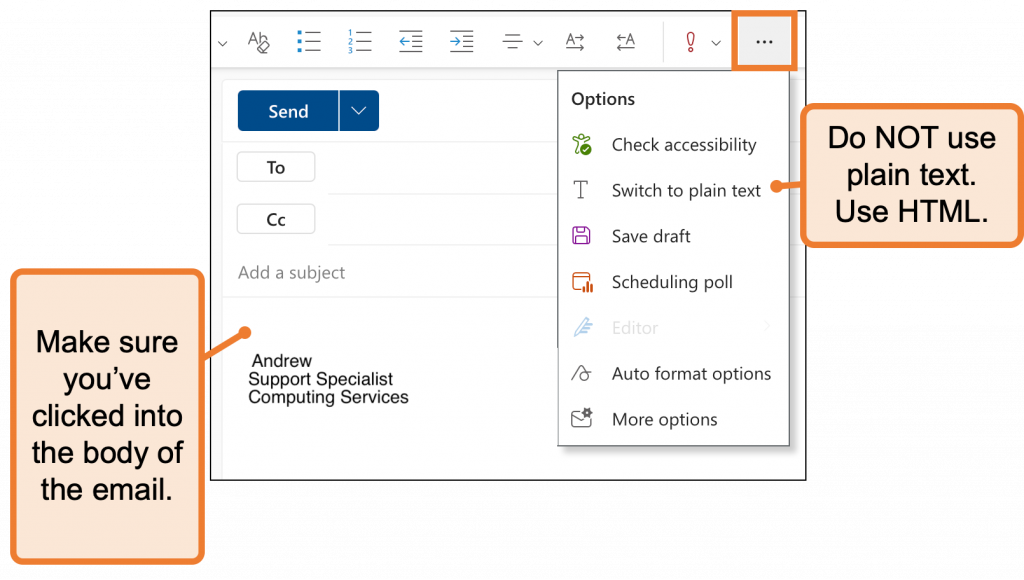
When using the Outlook web client, the Scheduling Poll feature is not available for emails composed in plain text. Emails must be composed in HTML.
Note
Doodle, a meeting scheduler add-in for Outlook, is not an approved application for use at FDU. Please use Microsoft Scheduling Poll as your meeting scheduling tool, as detailed in this article.
Where can I access the Scheduling Poll feature?
Windows
You can access the Scheduling Poll via the Mail or Calendar tabs of the Outlook desktop application.
In Mail, you can access the Scheduling Poll as follows:
Select “Reply with Scheduling Poll” on the “Home” tab when an email is open in the reading pane
Launch the compose pane by either creating a new message or hitting reply/forward for an existing message. List required recipients in the “To” field and optional recipients in the “CC” field. Then, on the “Message” tab, select “New Scheduling Poll”
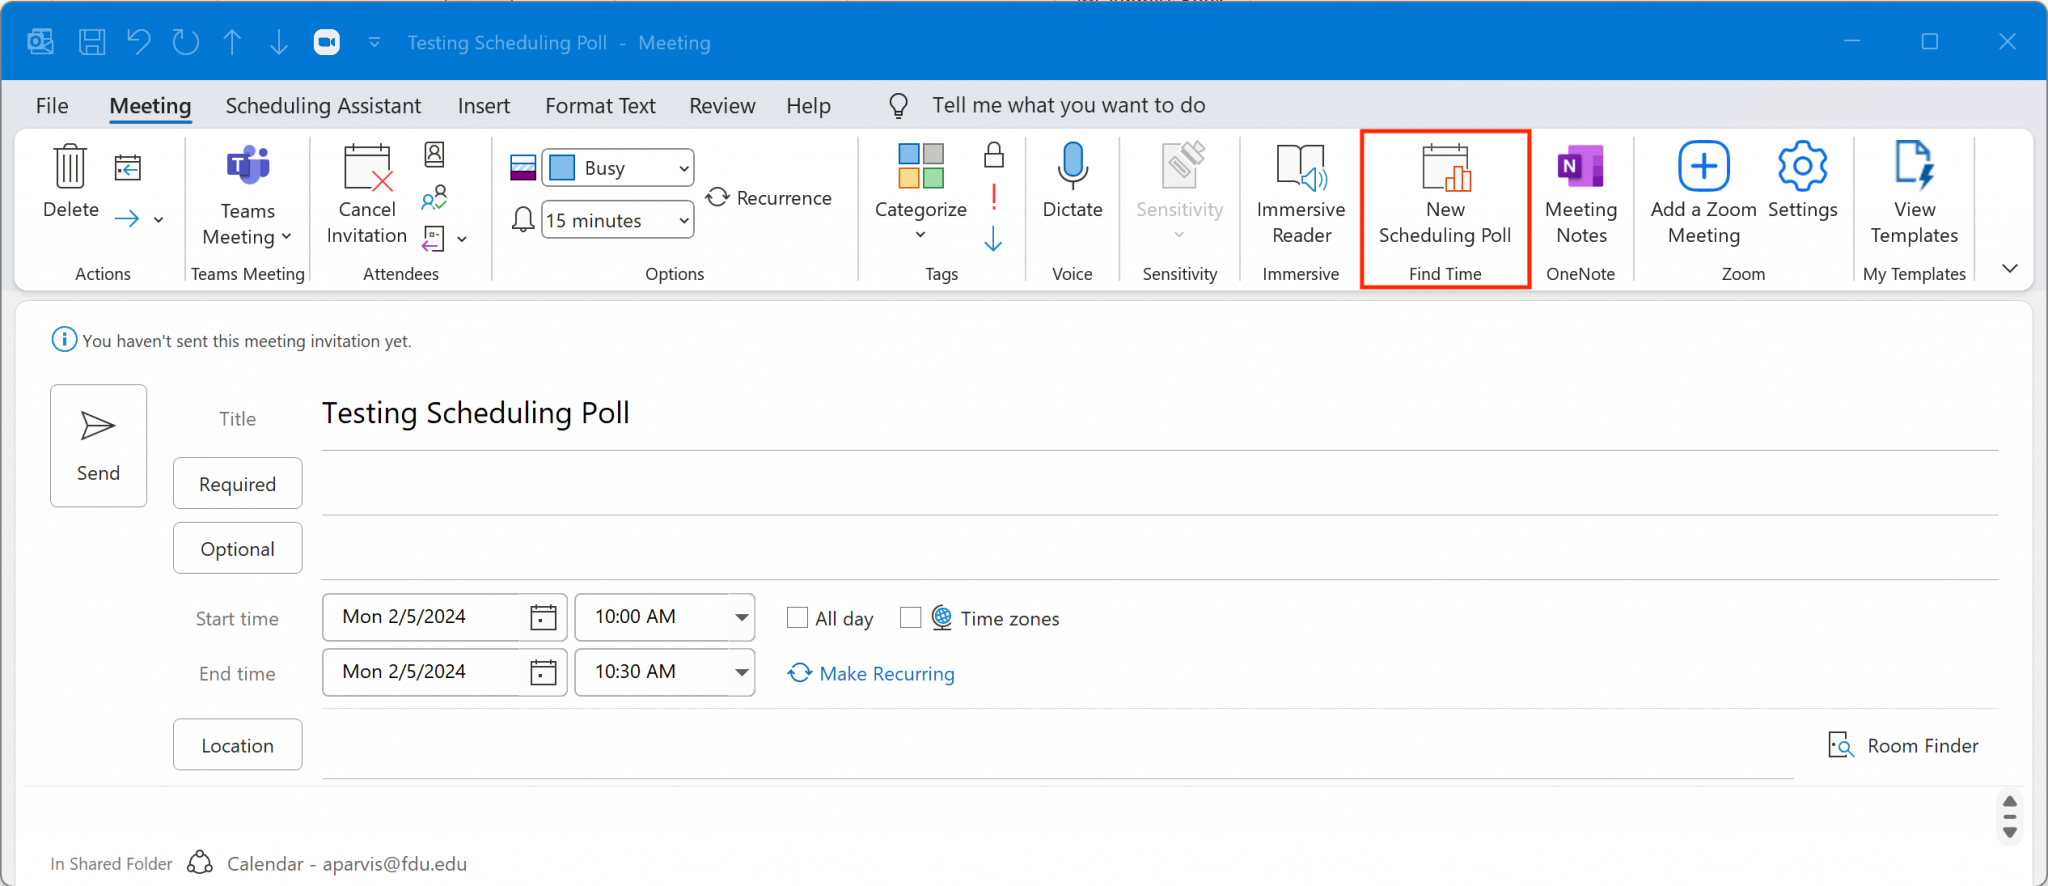
In Calendar, you can access the Scheduling Poll as follows:
Either by launching the compose form to create a new meeting event or opening an existing event in the edit form. List required attendees in the “Required” field and optional attendees in the “Optional” field. Select “New Scheduling Poll” under the “Meeting” tab
Start a new message or event
In the “Subject/Title” field, type what will eventually become the event’s name.
For example, “Team Meeting”
In the “To/Required” or Optional fields, add the people who will be attendees for this meeting. They do not all have to be from FDU. Scheduling Polls can be sent to and completed by non-FDU email addresses
Press into the body of the email and compose a message
Press into the area of the email body where you want the link to the Scheduling Poll to show up
Select the “Scheduling Poll” tab
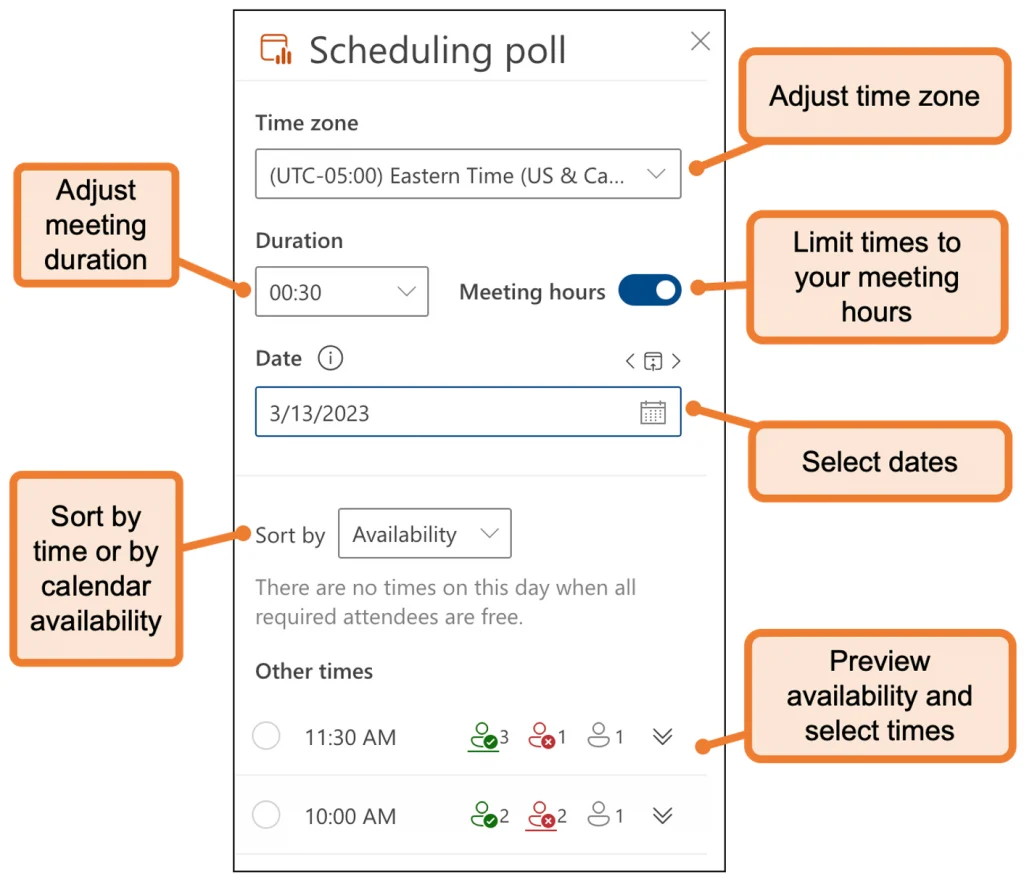
A Scheduling Poll panel will open. From here, you can adjust your meeting duration, move between dates, and preview the availability of your attendees
Note
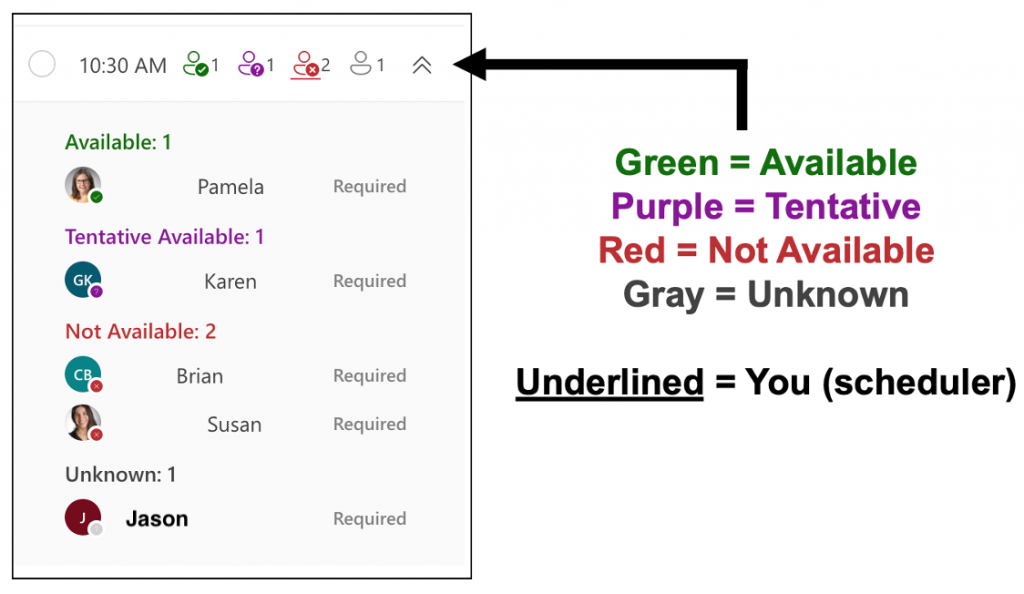
When selecting times for your poll, you can preview attendees’ FDU Outlook calendars, if available.
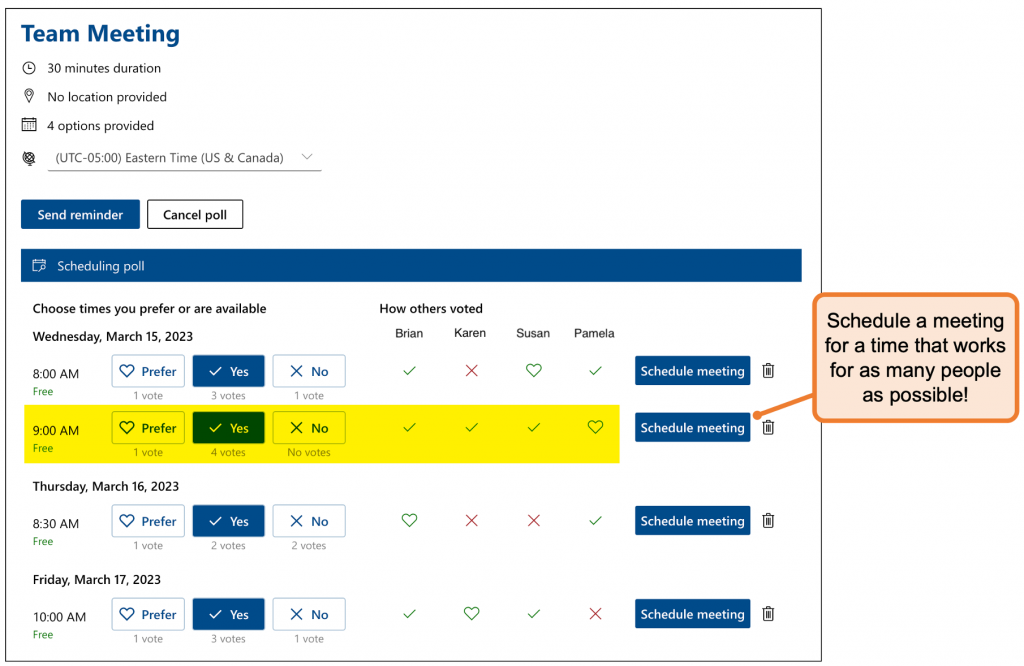
Select times that work for as many attendees as possible, paying particular attention to the attendees whose attendance is most critical
Press “Next” to proceed to the next step
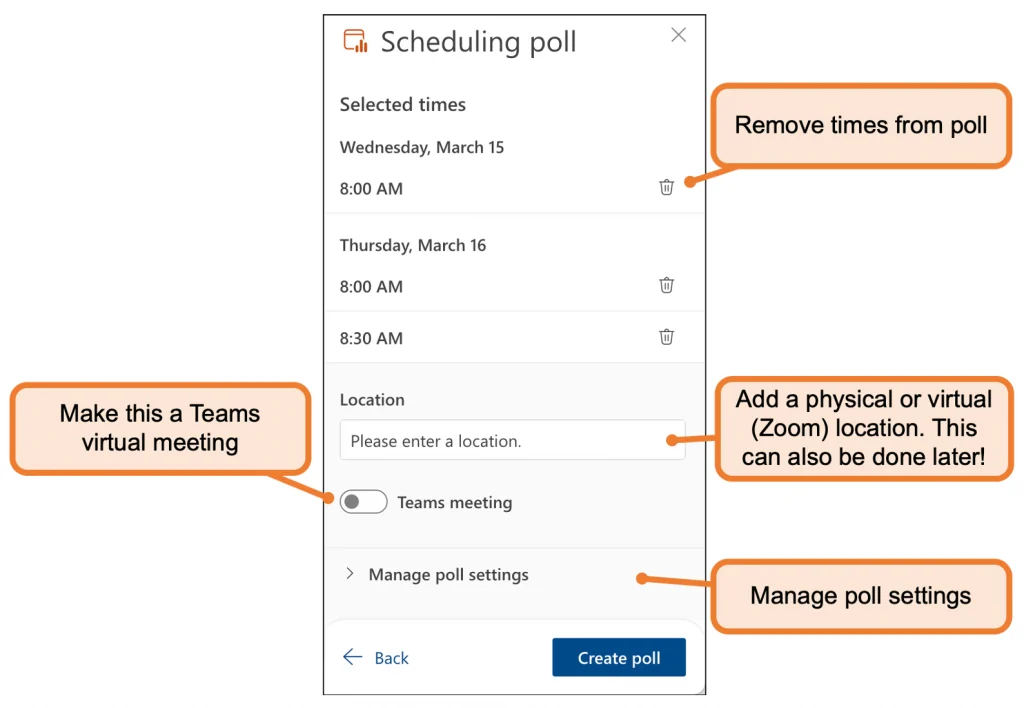
A new panel will open with the ability to delete selected times or adjust the meeting location
Note
You can also turn the Teams meeting feature on if you want Outlook to automatically schedule a Teams virtual meeting for this event.
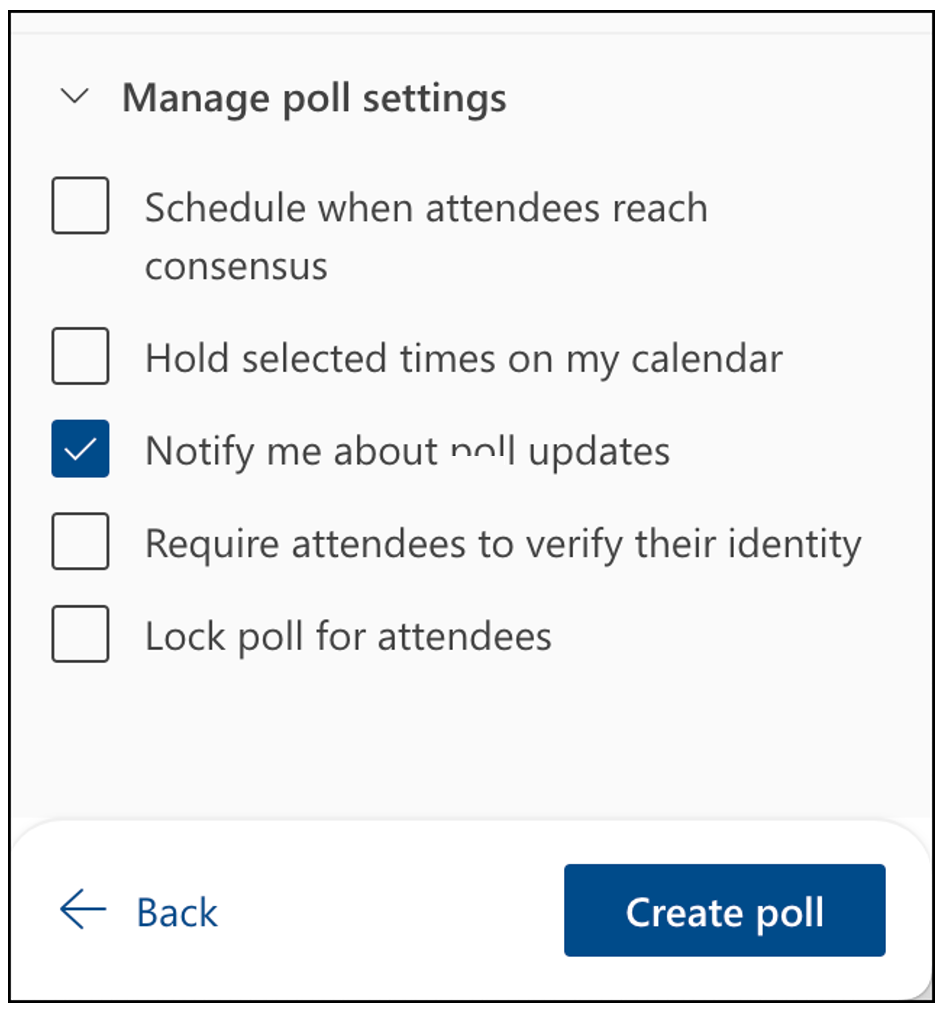
Press “Manage Poll Settings” to expand the menu. Options include:
Schedule when attendees reach consensus – Automatically schedules a meeting and sends out an invite to attendees if everyone agrees on a particular time. If multiple times work, the earliest one will be selected.
Hold selected times on my calendar – Puts a temporary hold on the scheduler’s calendar for each of the selected times. These holds are removed when the final invite is sent out.
Notify me about poll updates – Outlook will send an email update to the scheduler whenever an attendee submits their poll response.
Require attendees to verify their identity – Forces respondents to verify their identity either by logging in to their Outlook account or entering a numerical code that Microsoft sends them.
Lock poll for attendees – Prevents attendees from adding more people to the meeting or suggesting new meeting times.
When you’re ready, press “Create Poll”
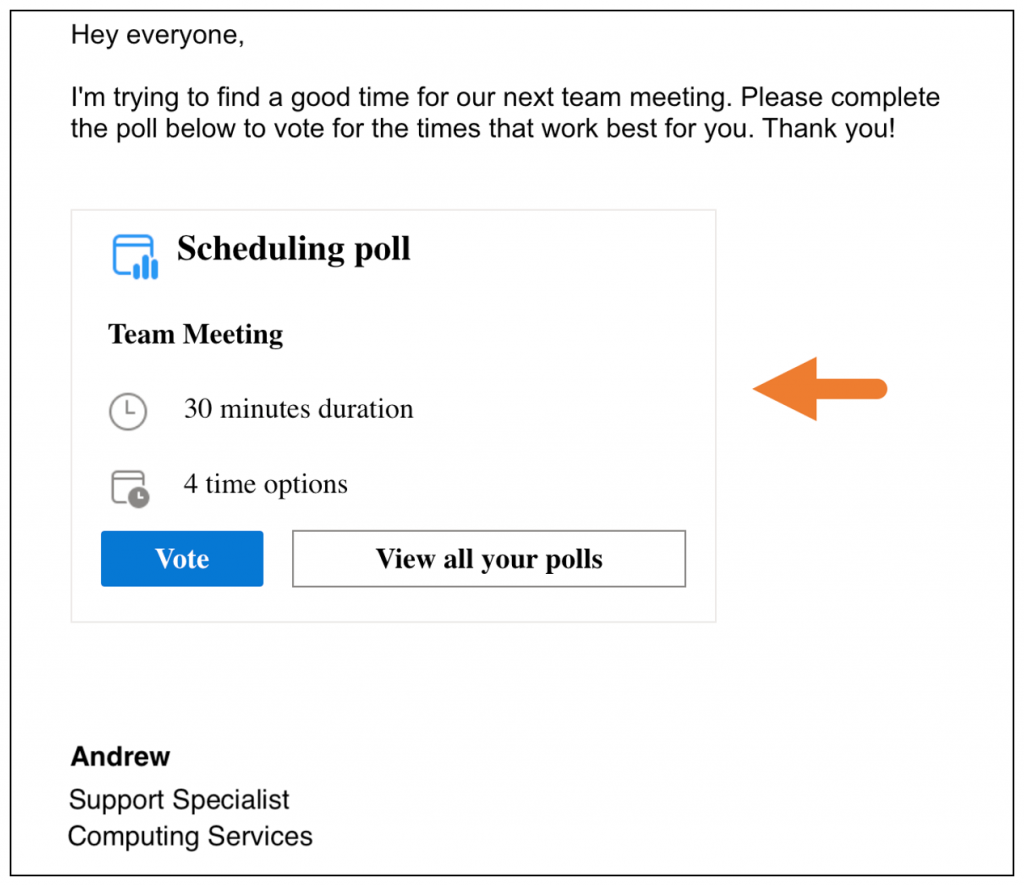
A Scheduling Poll meeting link will be inserted into your email
close
macOS
You can access “Scheduling Poll” via the Mail tab on the Outlook desktop application.
Open the Outlook desktop application on your Mac
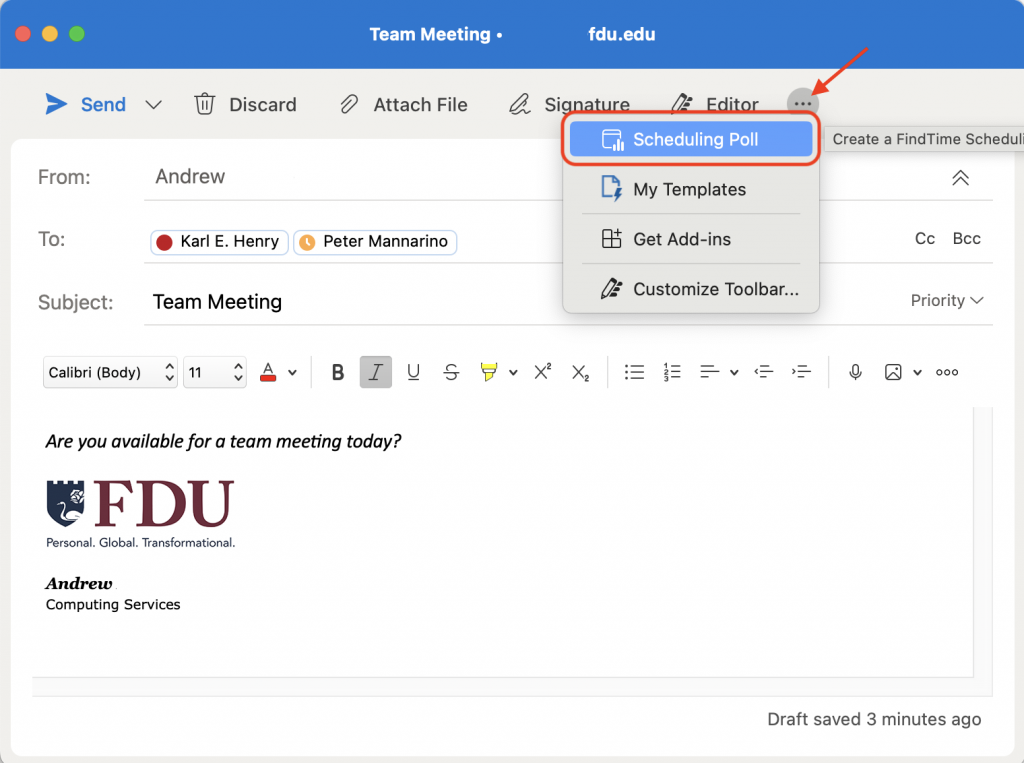
Start a new email message
In the “Subject” field, type what will eventually become the name of the event. For example: “Team Meeting”
In the “To” field, add the people who will be attendees for this meeting. They do not all have to be from FDU (Scheduling Polls can be sent to and completed by non-FDU email addresses)
Press into the body of the email and compose a message
Press into the area of the email body where you want the link to the Scheduling Poll to show up
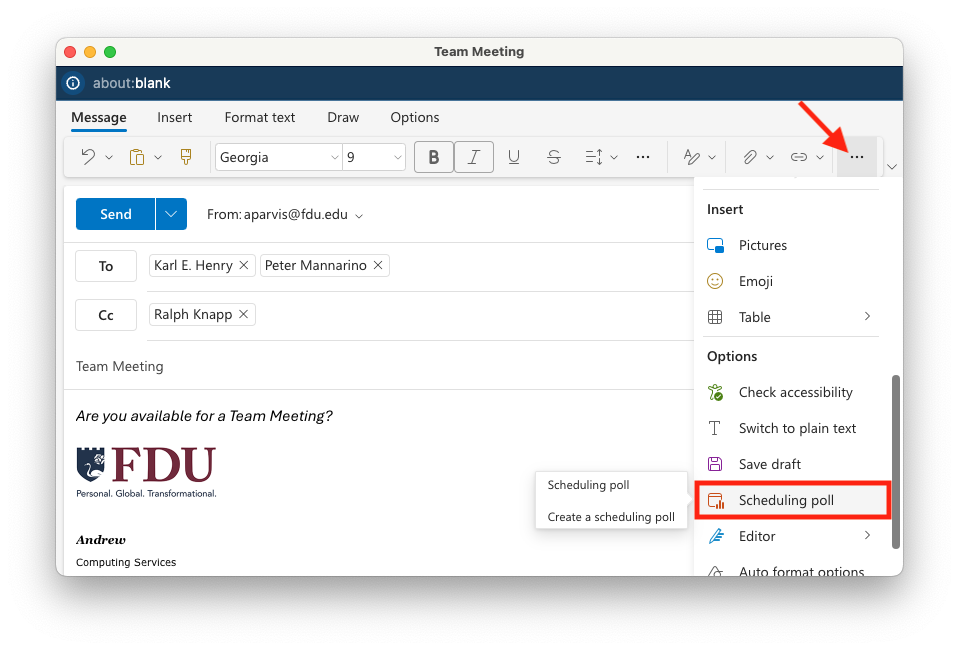
Press on the “More Options” button and select “Scheduling Poll”
A “Scheduling Poll” panel will open. From here, you can adjust your meeting duration, move between dates, and preview your attendees’ availability
Note
When selecting times for your poll, you can preview attendees’ FDU Outlook calendars, if available.
Select times that work for as many attendees as possible, paying particular attention to the attendees whose attendance is most critical
Click “Next” to proceed to the next step
A new panel will open with the ability to delete selected times or adjust the meeting location
Note
You can also turn the Teams meeting feature on if you want Outlook to automatically schedule a Teams virtual meeting for this event.
Press on “Manage Poll Settings” to expand the menu
When you’re ready, press “Create Poll”
A Scheduling Poll meeting link will be inserted into your email
close
Outlook on Web
You can access the “Scheduling Poll” feature via the Mail or Calendar web apps.
In the “Subject” field, type what will eventually become the name of the event. For example, “Team Meeting”
In the “To” field, add the people who will be attendees for this meeting. They do not all have to be from Fairleigh Dickinson University (Scheduling Polls can be sent to and completed by non-FDU email addresses)
Press into the body of the email and compose a message
Press into the area of the email body where you want the link to the Scheduling Poll to show up
Press on the “More Options” button and select “Scheduling Poll”
Note
If the “Scheduling Poll” option is grayed out, make sure you have clicked into the body of the email and that your email is being composed in HTML and not plain text.
A “Scheduling Poll” panel will open. From here, you can adjust your meeting duration, move between dates, and preview your attendees’ availability
Note
When selecting times for your poll, you can preview attendees’ FDU Outlook calendars, if available.
Select times that work for as many attendees as possible, paying particular attention to the attendees whose attendance is most critical
Press “Next” to proceed to the next step
A new panel will open with the ability to delete selected times or adjust the meeting location
Note
You can also turn the Teams meeting feature on if you want Outlook to automatically schedule a Teams virtual meeting for this event.
Press on “Manage Poll Settings” to expand the menu
Schedule when attendees reach consensus – Automatically schedules a meeting and sends out an invite to attendees if everyone agrees on a particular time. If multiple times work, the earliest one will be selected.
Hold selected times on my calendar – Puts a temporary hold on the scheduler’s calendar for each of the selected times. These holds are removed when the final invite is sent out.
Notify me about poll updates – Outlook will send an email update to the scheduler whenever an attendee submits their poll response.
Require attendees to verify their identity – Forces respondents to verify their identity either by logging in to their Outlook account or entering a numerical code that Microsoft sends them.
Lock poll for attendees – Prevents attendees from adding more people to the meeting or suggesting new meeting times.
When you’re ready, press “Create Poll”
A Scheduling Poll meeting link will be inserted into your email
close
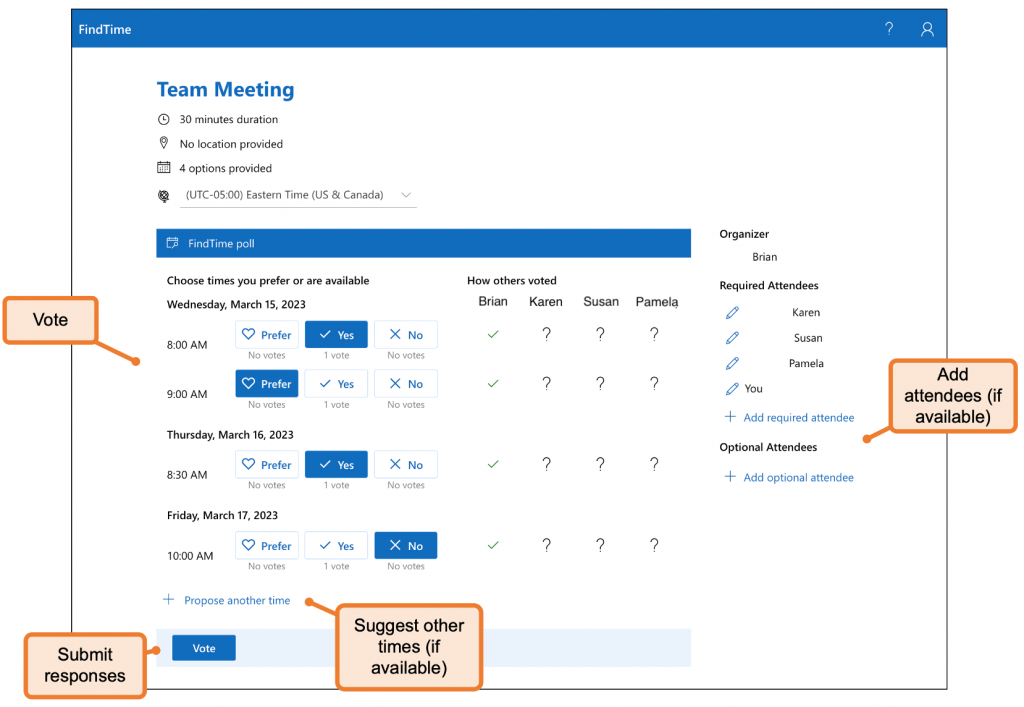
How do I finalize, vote, and manage a Scheduling Poll?
Sending a finalized Meeting Invite
This section describes how to manually send an invite from scheduling poll results. When setting up your poll, you can also have Outlook automatically send an invite if/when your attendees reach a consensus.
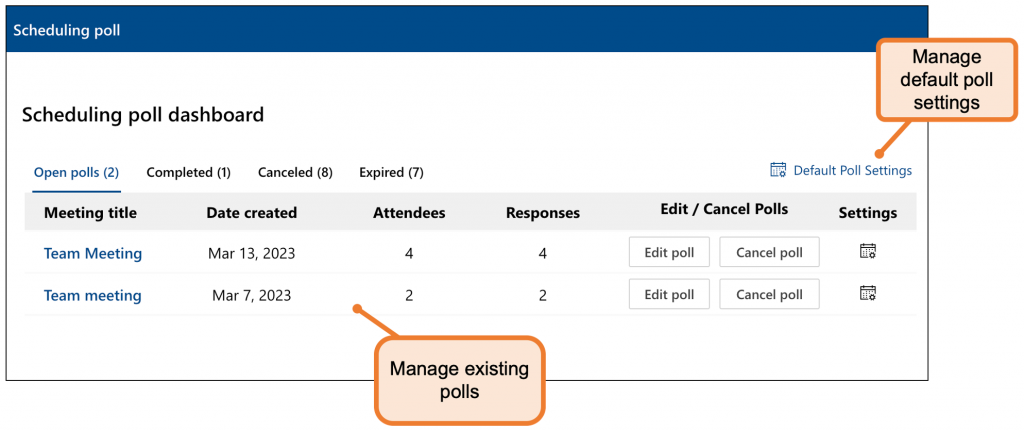
Visit the Scheduling Poll Dashboard on the Web and enter your FDU NetID credentials
Sign in to the FDU Single-Sign-On (SSO) page using your FDU NetID credentials
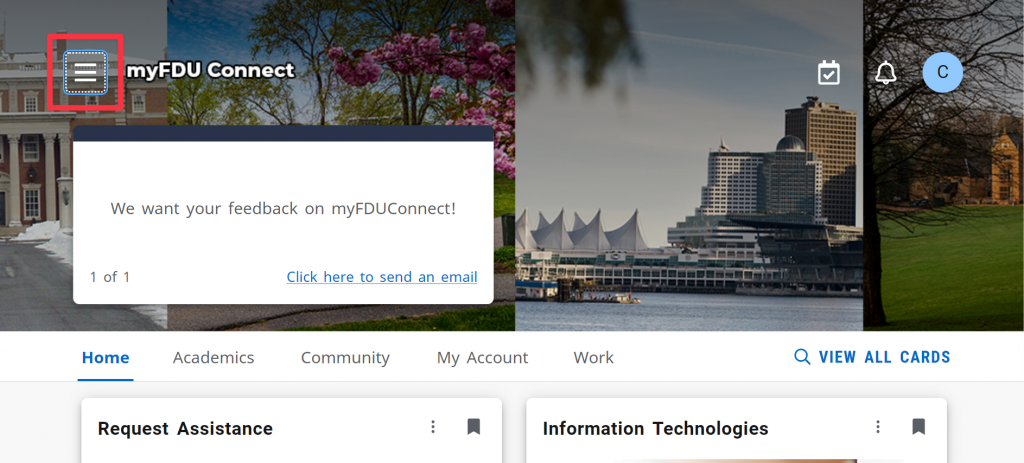
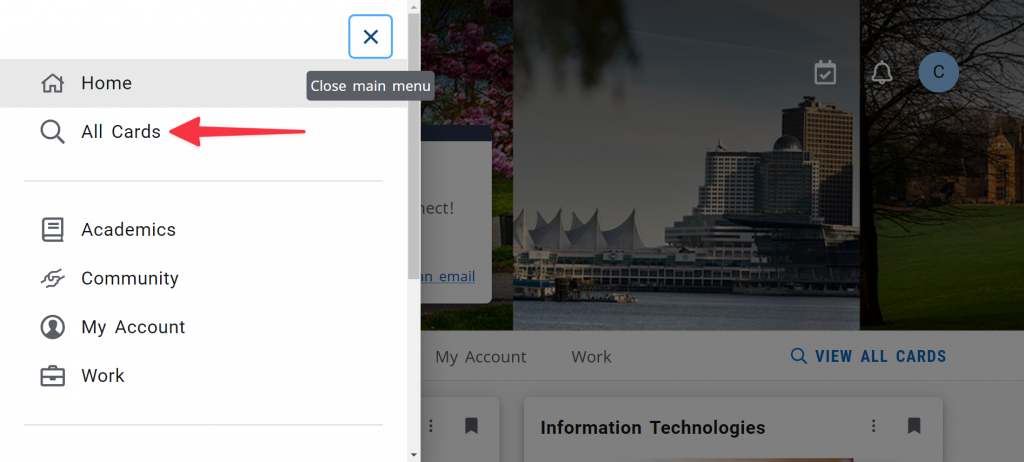
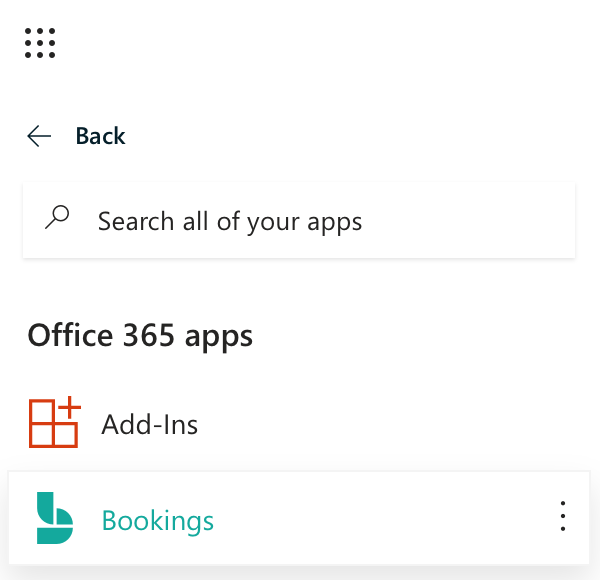
In the upper left corner, click the dotted square and select All Apps
In the All Apps menu, choose Bookings
Microsoft Bookings will open. Click the Get it Now button to begin
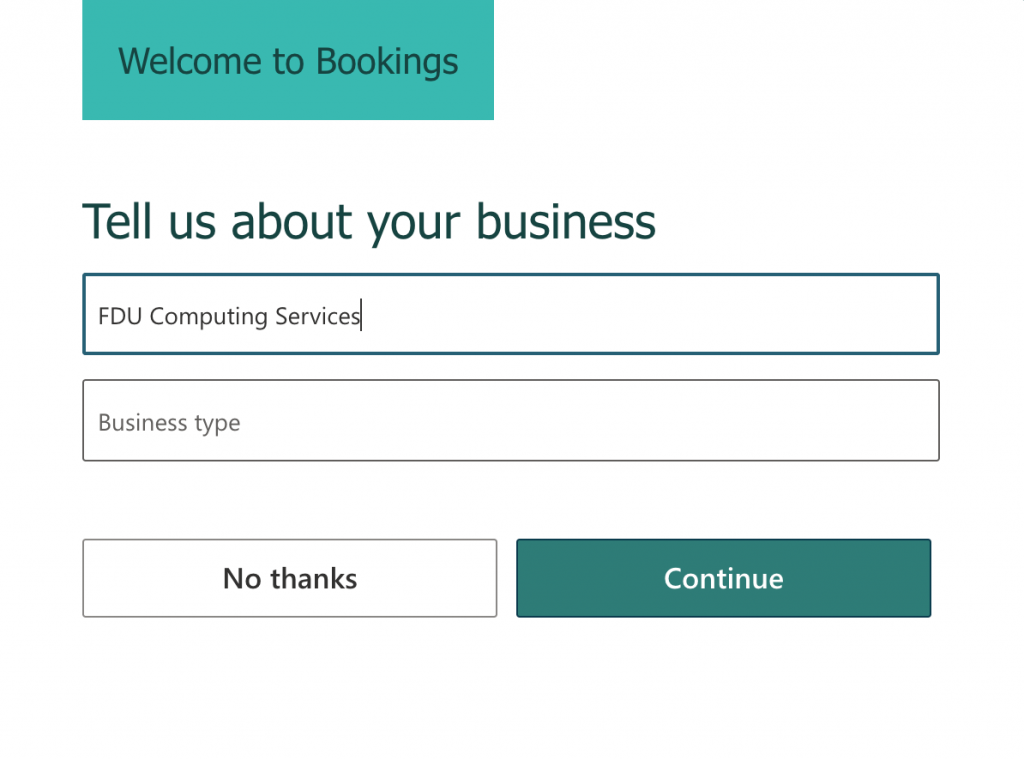
The next page will ask for two pieces of information: Business nameandBusiness type. Enter your Department name or your First and Last Name. Click Continue
Note
Designating a Business Type is not required to be able to Continue.
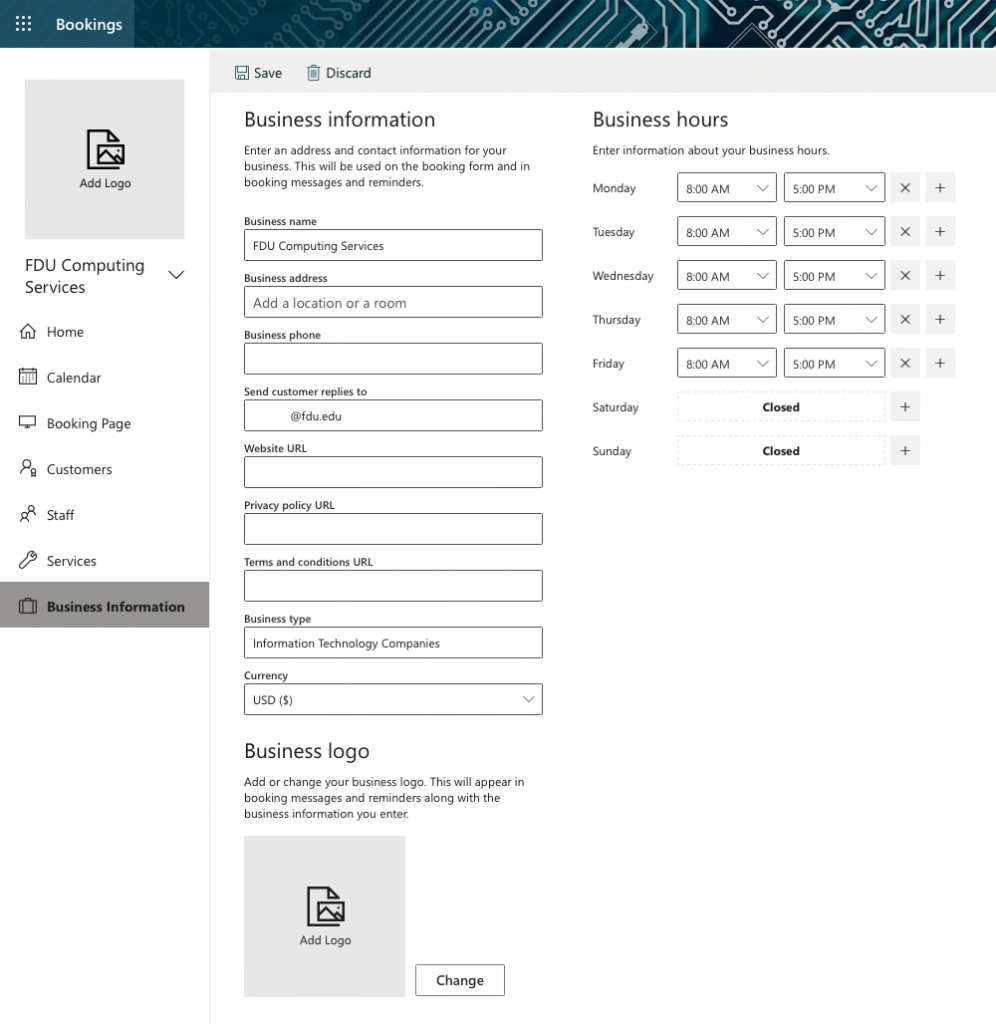
Once your Bookings page loads, the first section you should complete is Business Information. Click Business Information in the left menu
On the Business Information page, you can enter your business or department address, other contact information, upload a business logo, and set up your business hours
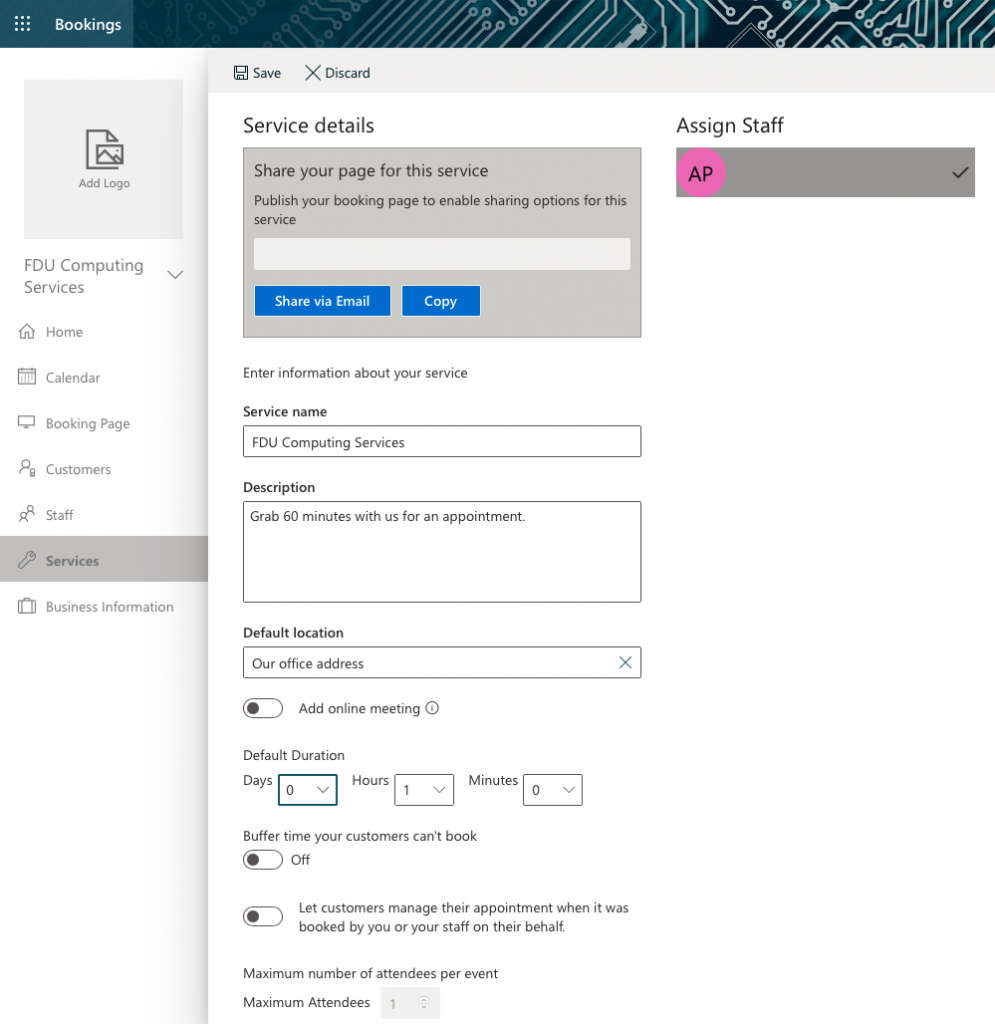
Next, set up your service offerings. Click Services from the left menu
Note
By default, Microsoft Bookings will add a service called “Initial Consult.” You can click the pencil next to this service and make it your own, OR you can add a new service by clicking Add a service at the top of the screen.
Once you’re on the service-editing page, enter your service details, including name, description, and location. When you start typing an address in the default location, suggested locations will populate. Below are explanations for the other fields on the service-editing screen:
Duration: You can enter how long you want the duration to last in days, hours, minutes, and set a buffer time when customers cannot book.
Reminders: You can have the system send customers email reminders before their scheduled appointment. Click the pencil to edit the text.
Leave Publishing options checked.
Online Scheduling Options: This is where you can manage the settings for when customers can book services.
You can choose to use the default scheduling policy by leaving the option checked, OR
You can manage the settings for your scheduling policy by unchecking the option. If you choose this option, we recommend setting the Minimum lead time to 24 and the maximum lead time to 30 days.
Don’t forget to click Save at the top of the Service details page
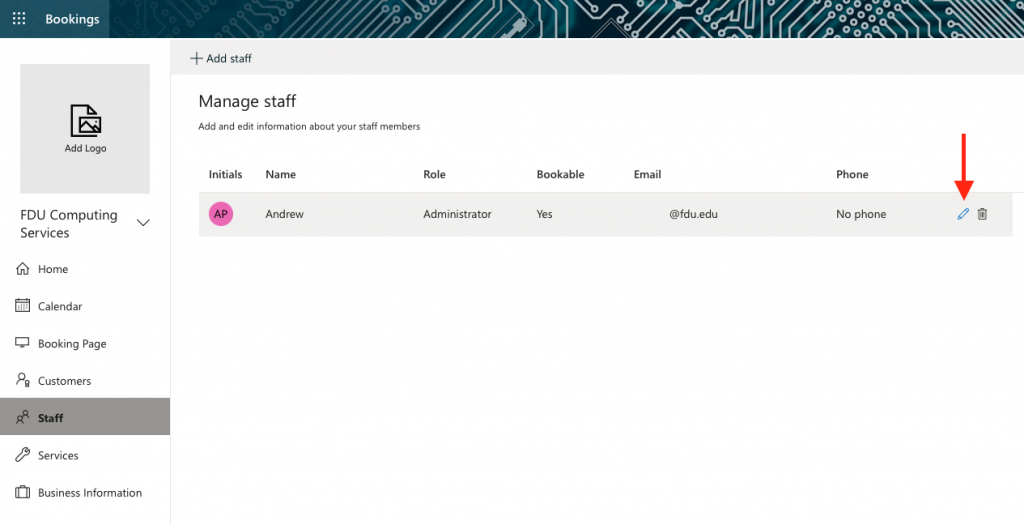
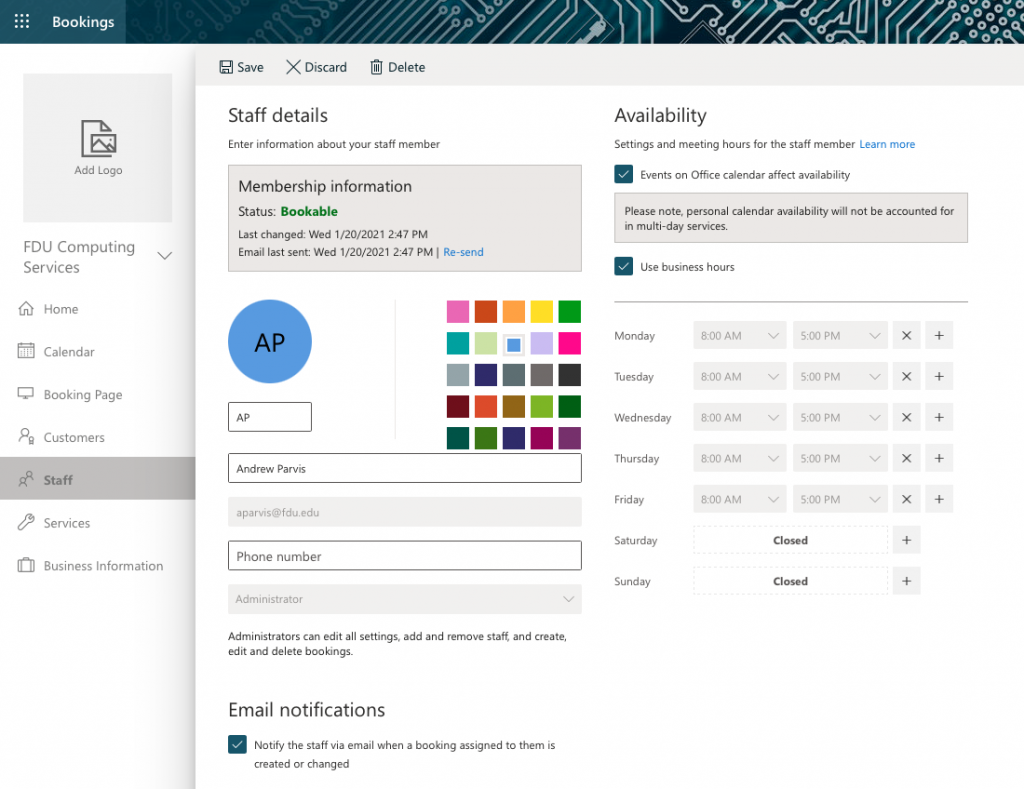
Next, click Staff from the left menu. Click the pencil next to your name to edit your information. Also, you may add any staff or faculty members in your department by clicking the + Add staff button
On this page, you can add information about yourself, including your office or department phone number and whether to receive email notifications (we recommend keeping this option checked). Click Save when finished
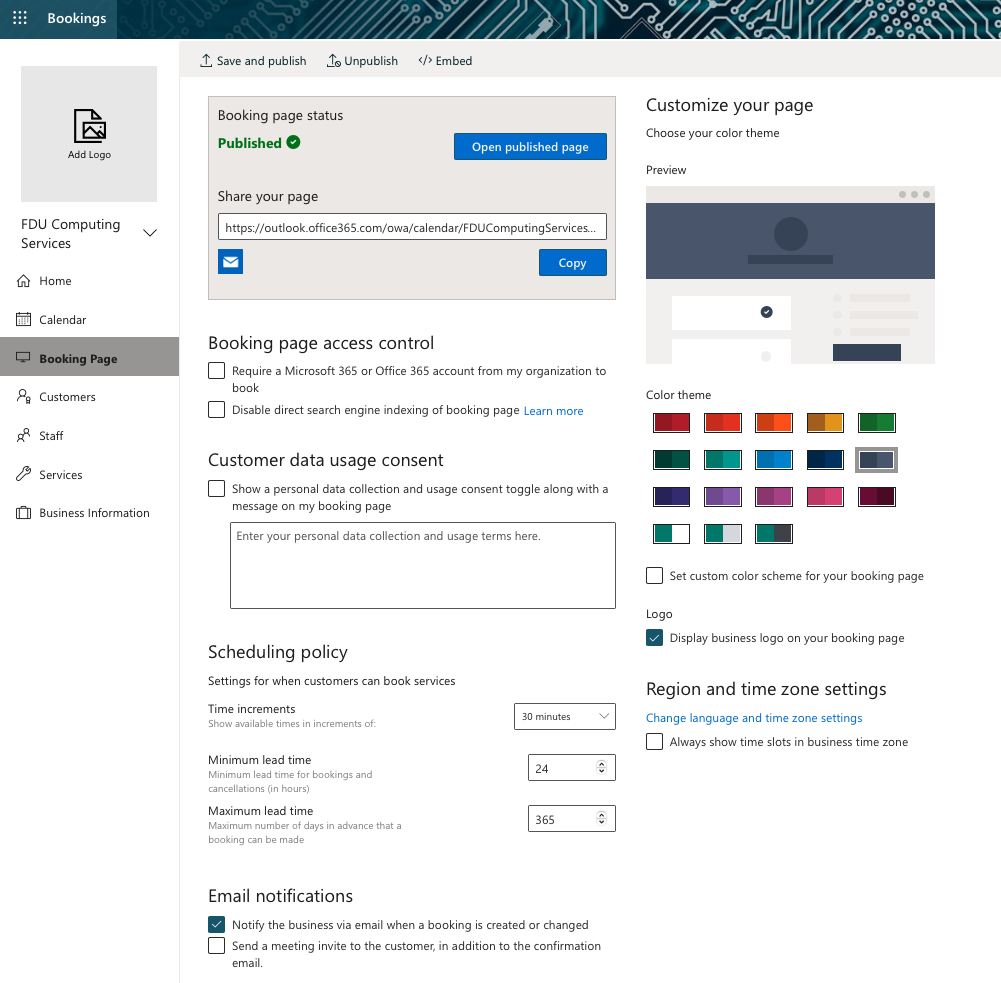
Next, select Booking page from the left navigation pane.
Booking page Status: Since this is the first time you are setting up your Bookings page, your status is set to Not published. Once you finish customizing your page and clicking Save, the status will change to Published.
Customer data usage consent (optional): Where you can customize a message for your visitors to consent to your site collecting their personal data.
Scheduling Policy: Where you can set site-wide scheduling policies. We recommend the following settings:
Minimum lead time: 24
Maximum lead time: 30
Email Notifications: Notifies you when an appointment is made.
Staff: You can allow customers to choose who they want to meet with. However, you can uncheck this option if you do not have any staff.
Customize your page: Choose a color theme for your bookings page.
Lastly, click Save and Publish
Once you click Save and publish, your Bookings site is now live! You can view your published page by clicking Open published page and share your page with others by copying the link
When scheduling a video production on or off Campus, it is important to provide a detailed description of what is expected, and what is most important. This will allow the Multimedia Services to anticipate any issues depending upon the location.
Off Campus Video Production
When recording off campus it is important to communicate the exact event location and contact information of anyone who is overseeing the venue. For secure office buildings it will be necessary that security be advised that a video crew will be arriving and to include the name(s) of the crew and the nature of the production. Also, it should be noted that recording in certain areas, both public and private locations may be prohibited or require a permit.
Additional Costs
Due to the nature of some off-campus productions there may be some additional costs, such as tolls, parking and fuel.
To access Forms, you will be directed to our SAMI Support Portal where you will be asked to log in using your NETID and authenticate using Duo. Once you click “Next,” you will be forwarded to samisupport.fdu.edu in a new window or tab.