Make the appropriate connections to the back of the all-in-one.
Plug in the power cable to the power port on the back of the all-in-one.
A physical network connection is only required if you do not want to or can not use wireless.
Both the keyboard and mouse can be plugged into any USB port.
Turn the PC on and sign in as normal.
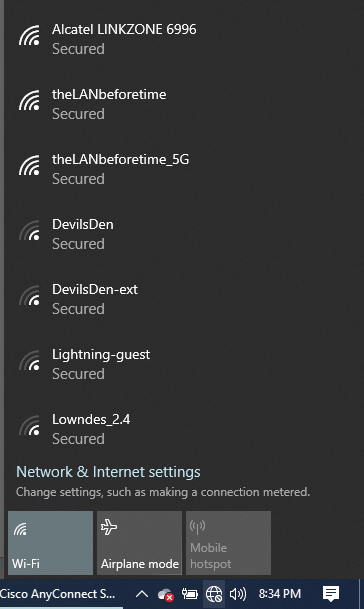
Connecting to Wi-fi (Skip if Using a Physical Network Cable)
Click on the network icon on the bottom-right hand of the Start bar near the system clock.
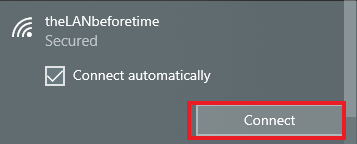
A list of available networks will populate. Select your home wireless network.
Select your network and click “Connect“.
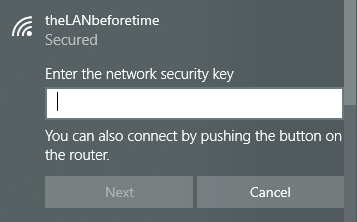
Enter the network key for your wireless router. This can sometimes be located on the side or bottom of your router and/or modem. Click “Next“.
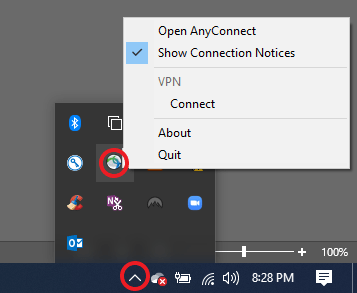
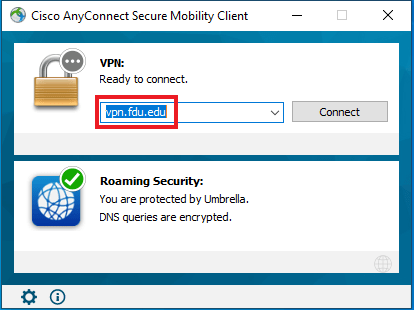
Connecting to VPN from Home
Click on the arrow on the bottom right hand of the Startbar near the system clock and right-click on the “Cisco VPN Access” icon. On the pop-up menu, click “Connect“.
If this is the first time connecting to VPN service please enter the text below as shown into the VPN field and click “Connect“.
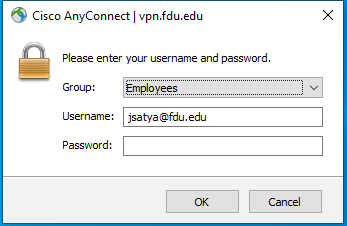
Enter your full NetID information and click “Ok“.
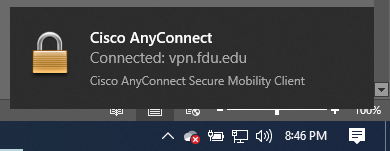
Once a successful connection is made a prompt will appear and the icon for the Cisco VPN Access in the system try will appear with a lock.
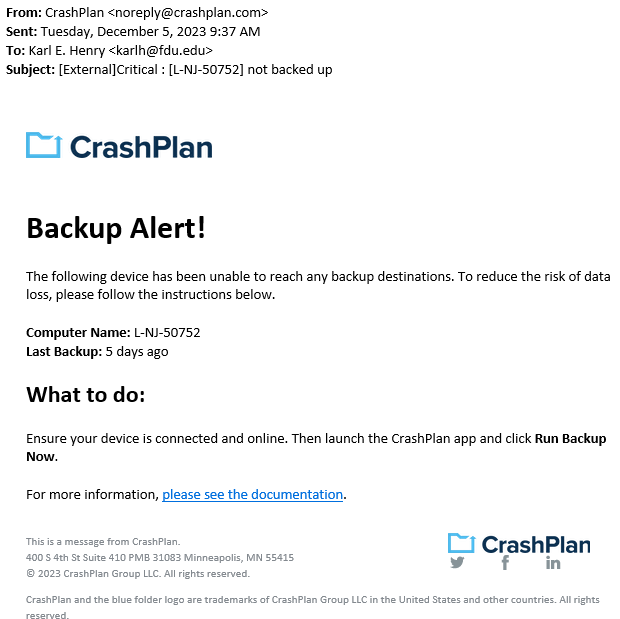
CrashPlan Backup will send users an email alert notifying them of any incomplete backups of their devices.
The CrashPlan Backup email alert will be sent from “CrashPlan <noreply@crashplan.com>”
The Subject line of the email will be labeled with: “[External]Critical: [Name of Device] not backed up“
Backup Alert
You will receive an alert when your computer hasn’t backed up to CrashPlan for 5 calendar days. The email will look like the example below:
CrashPlan Backup Alert Email Notification
What to do if you get a backup alert
After receiving a CrashPlan Backup alert email, you should locate the device the email specifies in need of backup. The CrashPlan Backup device name will be listed in the Subject: line and Computer Name: line of the CrashPlan backup alert email.
For Windows Devices
To locate the name of a CrashPlan Backup device:
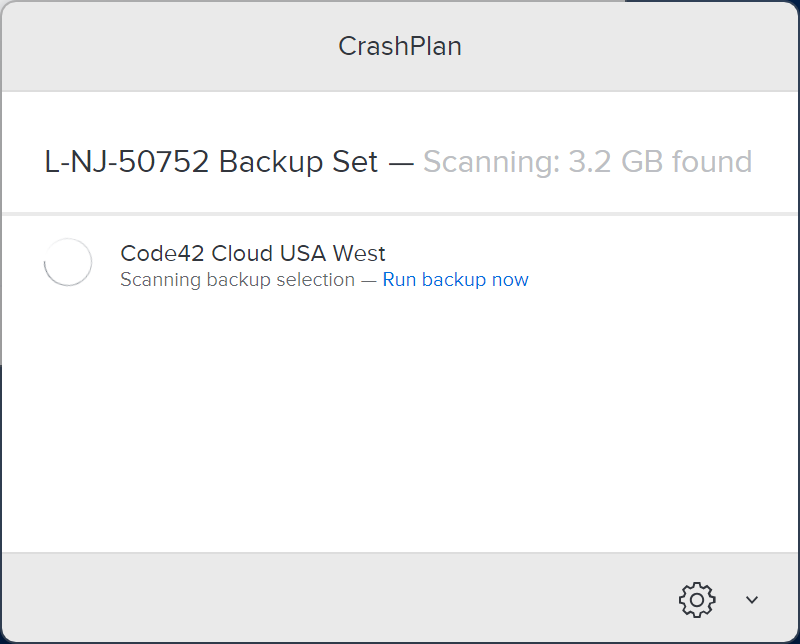
Click the CrashPlan Backup icon in the Windows System Tray, also referred to as the notification area.
CrashPlan Backup icon
Click “Run Backup now“
Tip
The Windows System Tray or notification area is usually located on the bottom right of the Windows taskbar, next to the displayed digital clock.
Ensure the CrashPlan backup application displays the same name as the CrashPlan Backup alert email you received.
close
For macOS Devices
After locating the correct specified device stated in the CrashPlan backup alert email, force a backup of the device by performing the following:
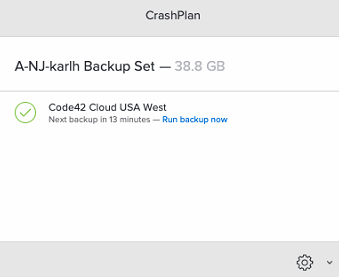
Click the “CrashPlan Backup” System Tray or macOS menu bar Icon
CrashPlan Backup Icon
Click “Run Backup now“
Note
The backup may take some time to complete. This depends on the length of time since CrashPlan Backup’s last completed backup and the amount of new data that needs to be backed up.
To access Forms, you will be directed to our SAMI Support Portal where you will be asked to log in using your NETID and authenticate using Duo. Once you click “Next,” you will be forwarded to samisupport.fdu.edu in a new window or tab.