FDU-Secure uses current encryption standards to connect to the FDU wireless network via secure wireless traffic. This is an evolving technology and occasionally, one of the changes made by FDU IT requires us to issue a new certificate. When this occurs, you will need to accept the certificate using the process below.
Note
Your process may vary slightly based on the version of the Operating System that your device is using.
SAMI Support
If you have any questions or concerns, please visit SAMI Support, where you can request additional information or search our extensive IT knowledge base. While SAMISupport provides the quickest and easiest access for IT support, you can contact the SAMI Service Desk by phone (973)-443-8822 or email at samisupport@fdu.edu.
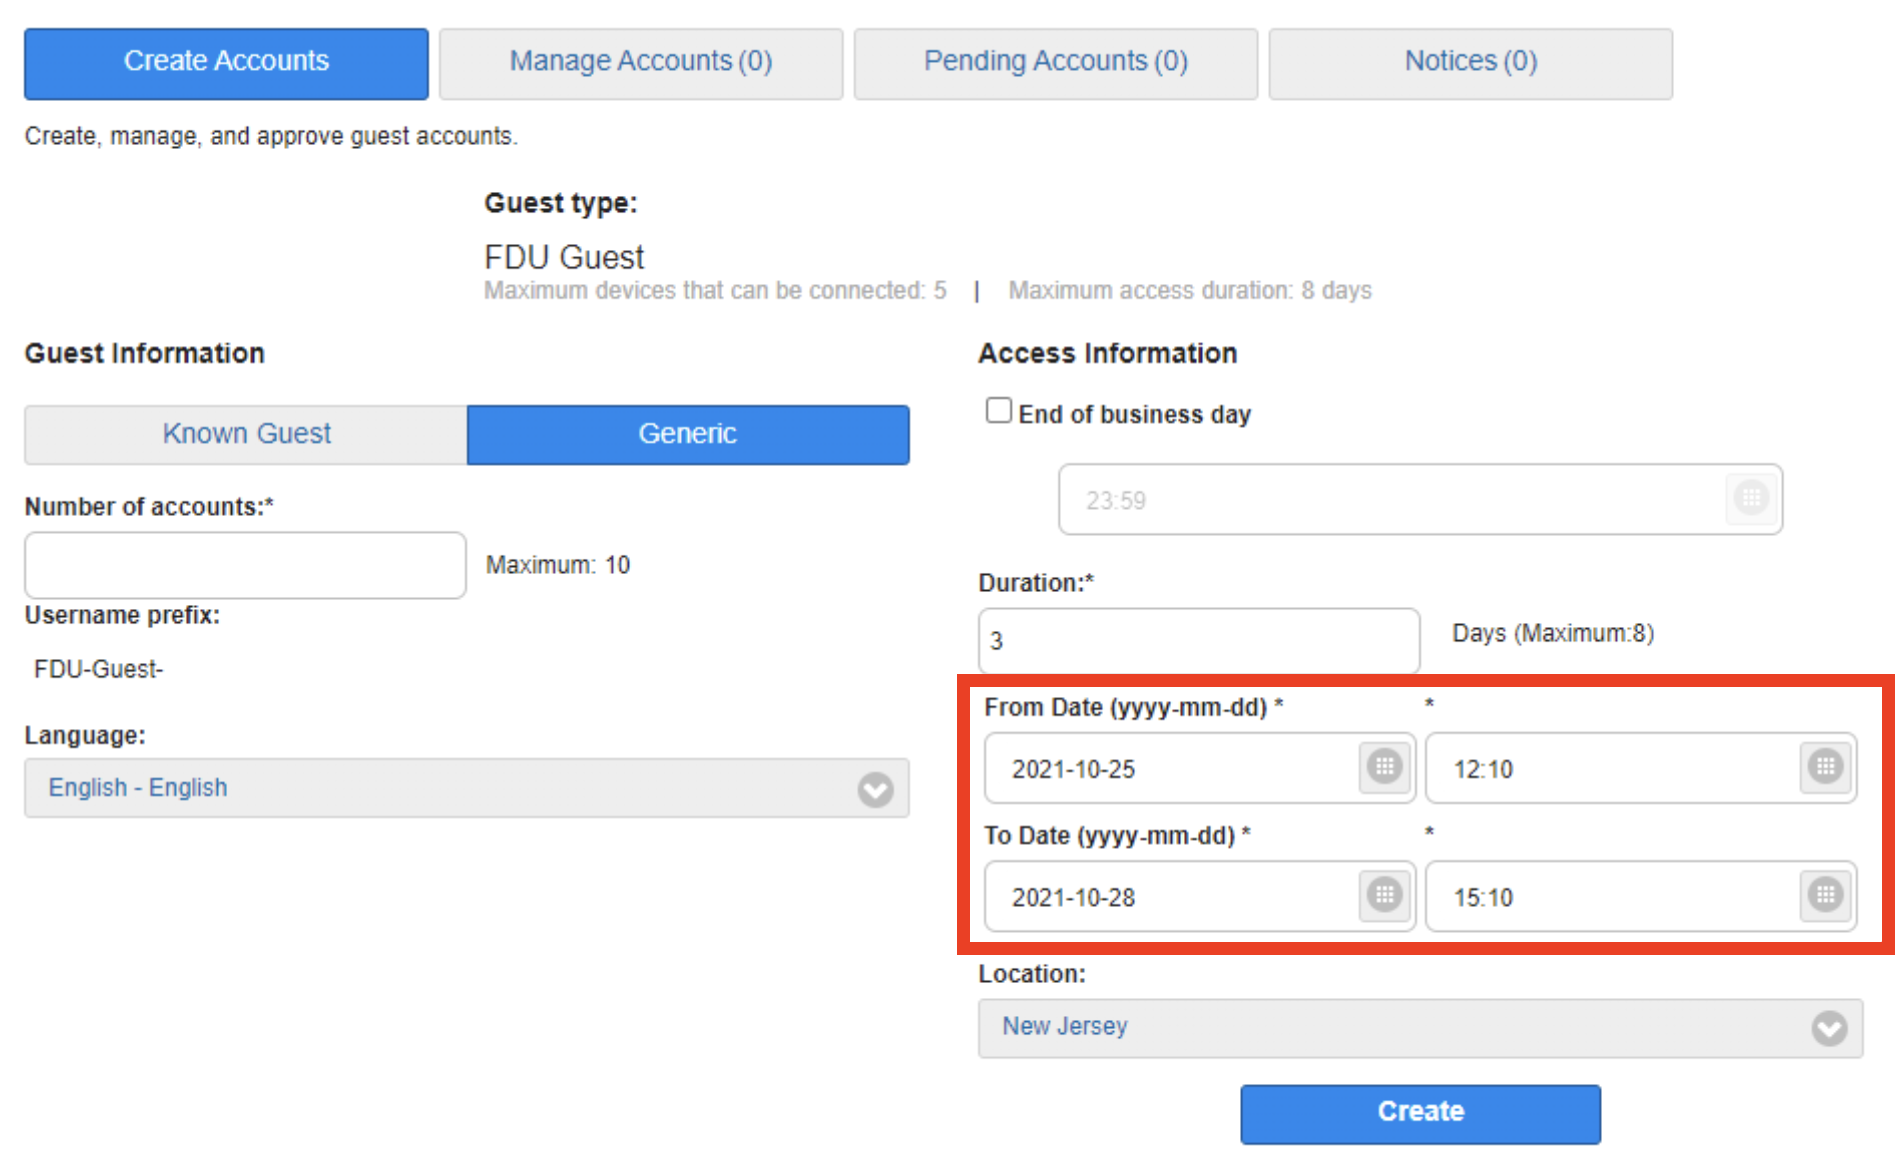
How to Accept the New Certificate for FDU-Secure Wireless
Windows
- Login to your Windows computer
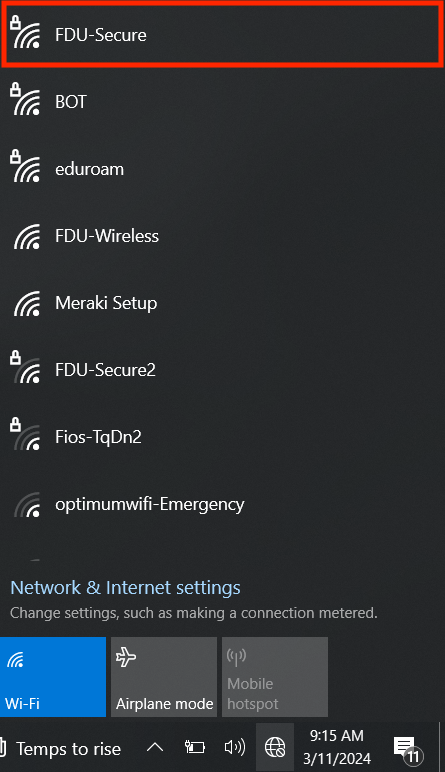
- Go to the bottom right taskbar > Click on the “Networks” icon:
- From the Networks list, select: “FDU-Secure“
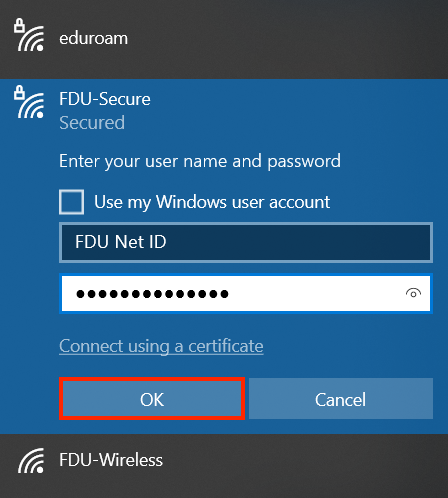
- Click “Connect“
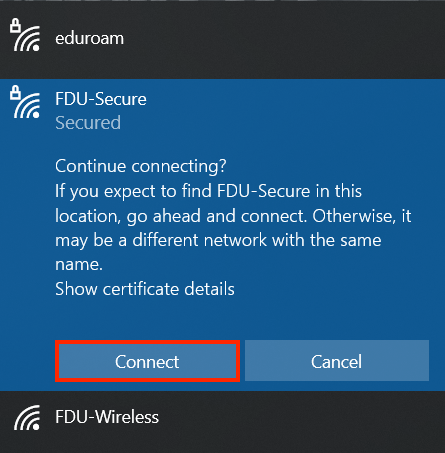
- At the “Continue connection?” prompt, click “Connect“
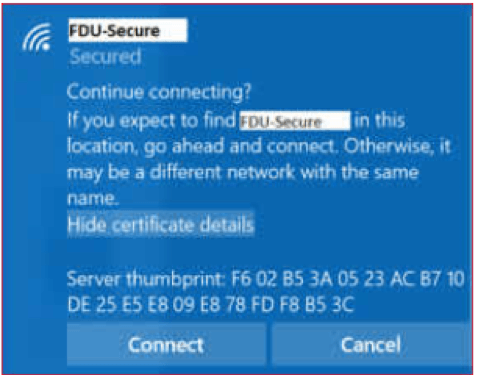
- Open your browser and test your Internet connection
close
macOS
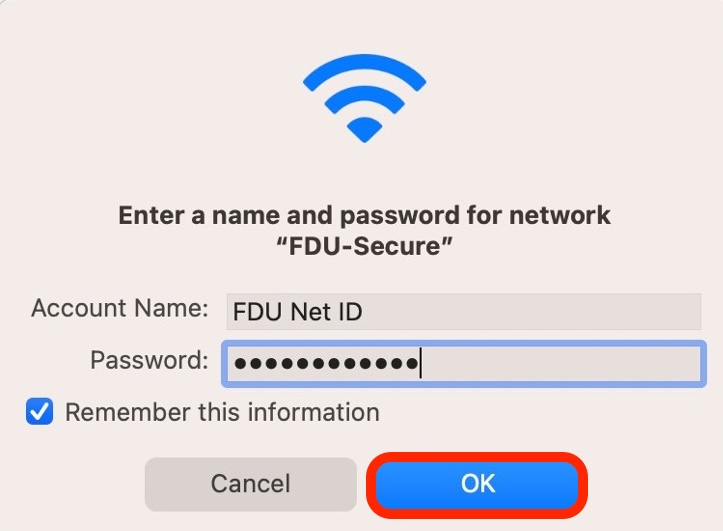
- Login to your Mac computer
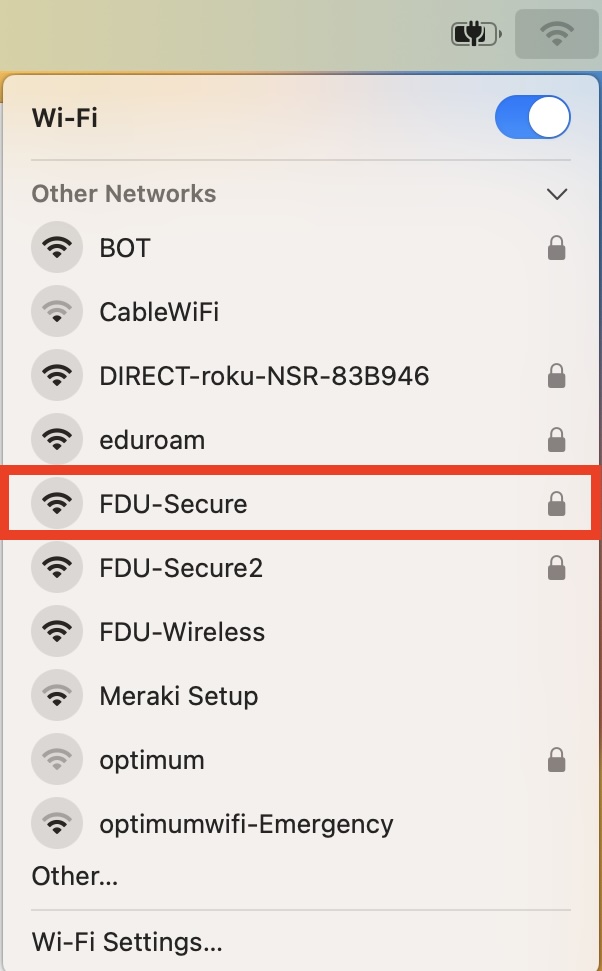
- Go to top right menu bar > Click “Wi-Fi” icon:
- From the Wi-Fi list, select: “FDU-Secure“
- Click “Join“
- At the “Authenticating to network FDU-Secure” prompt, click “Continue“
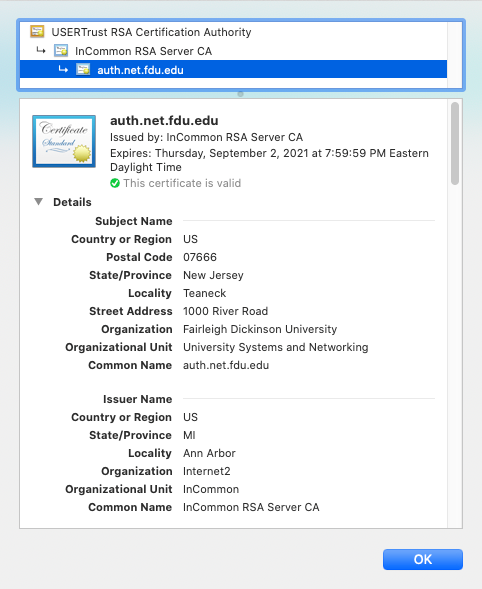
- Click “OK“
- Open your browser and test your Internet connection
close
iOS
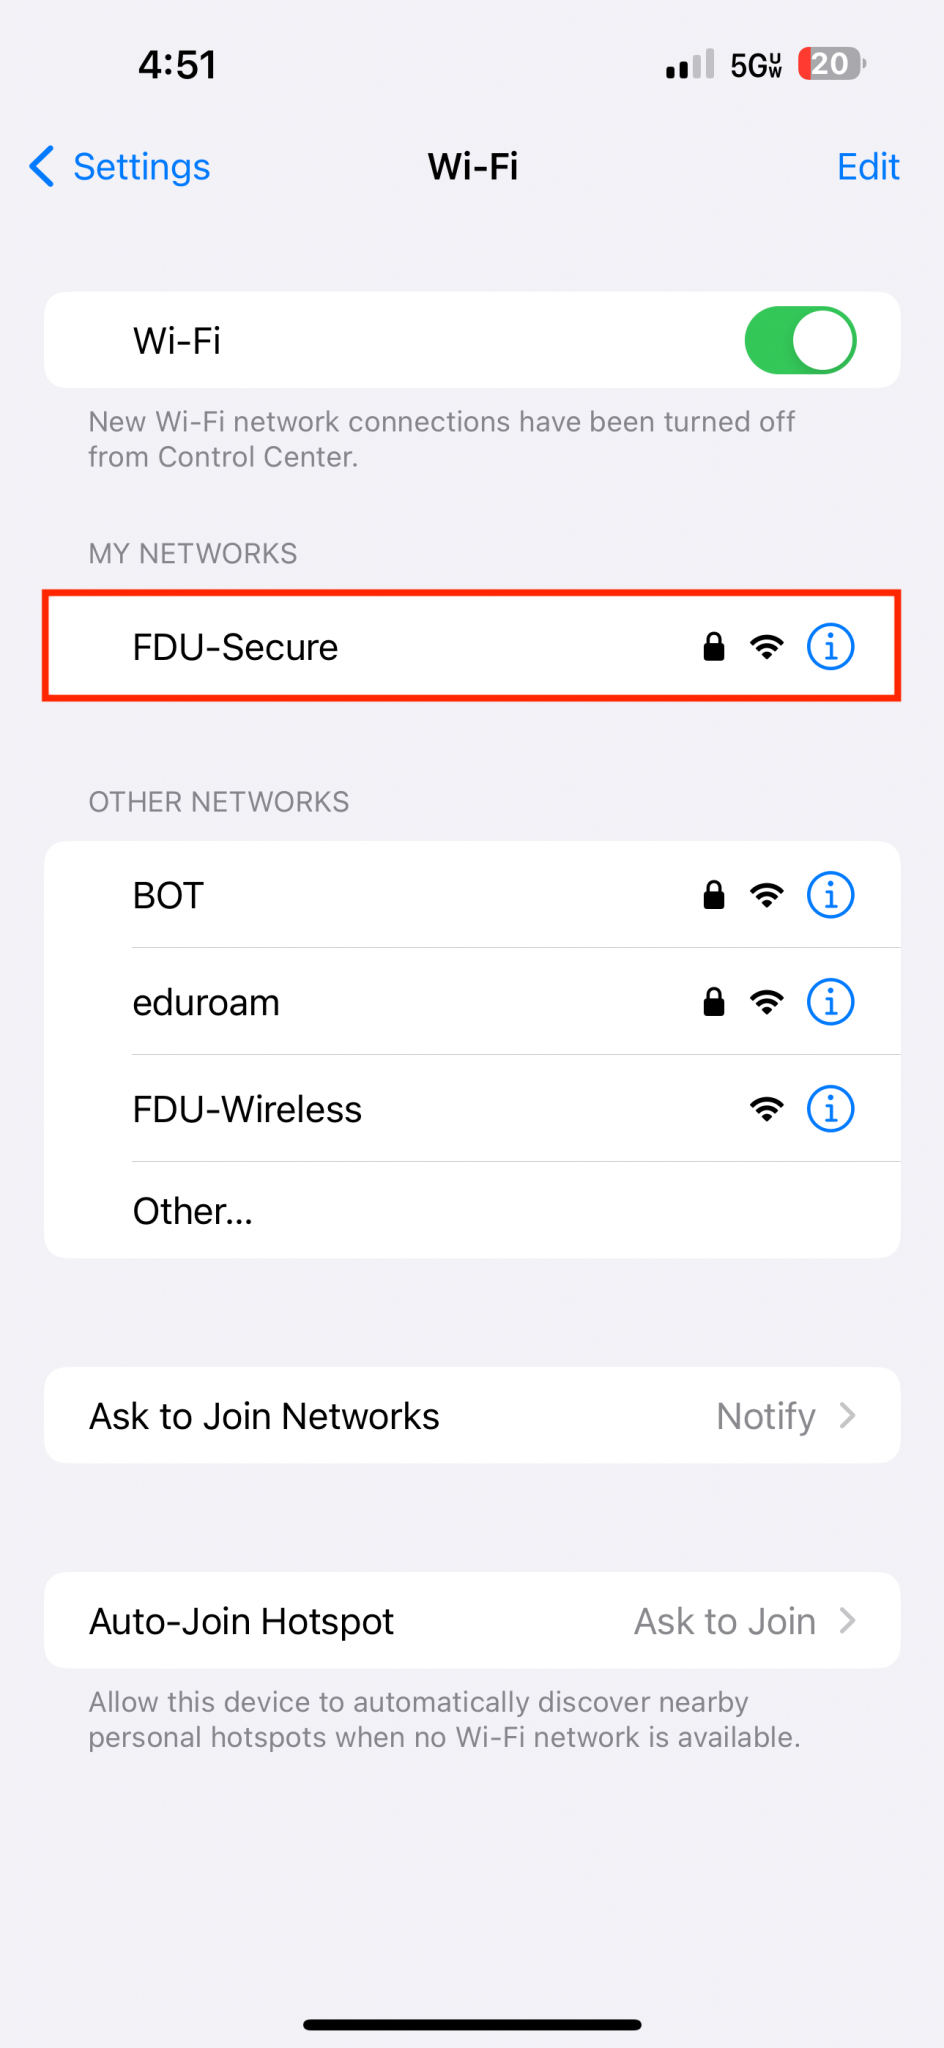
- Login your iOS device (eg. iPhone)
- Go to your device’s Settings App > Select “Wi-Fi” > Select “FDU-Secure” > Click “Forget This Network“
- Tap the “Back” button and select “Wi-Fi “once again to reload the available Wi-Fi networks:
- From the Wi-Fi list, select: “FDU-Secure“
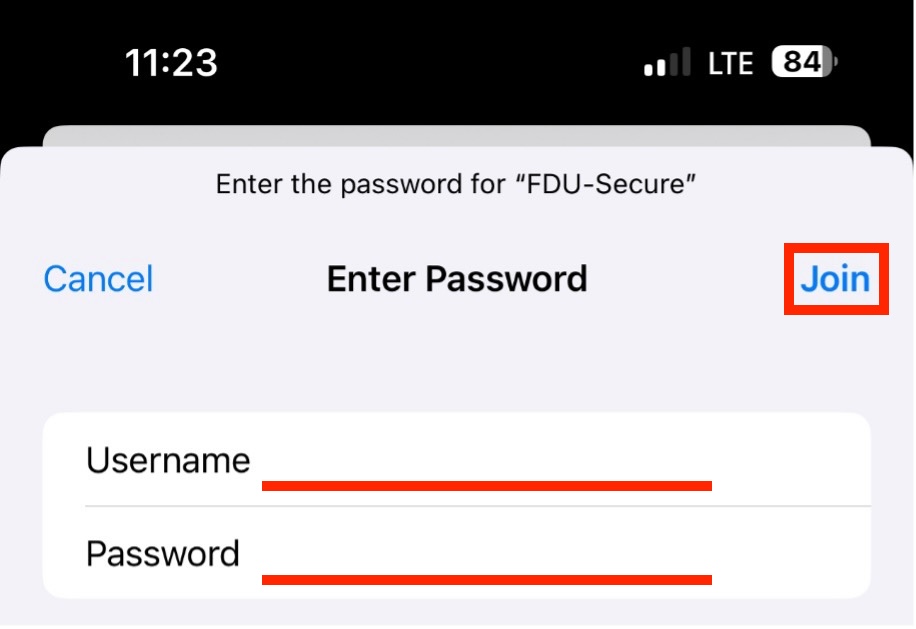
- Enter your complete FDU NetID as in the examples below: “username@fdu.edu, username@student.fdu.edu, username@alumni.fdu.edu”
- Enter your FDU NetID Password
- Click Join
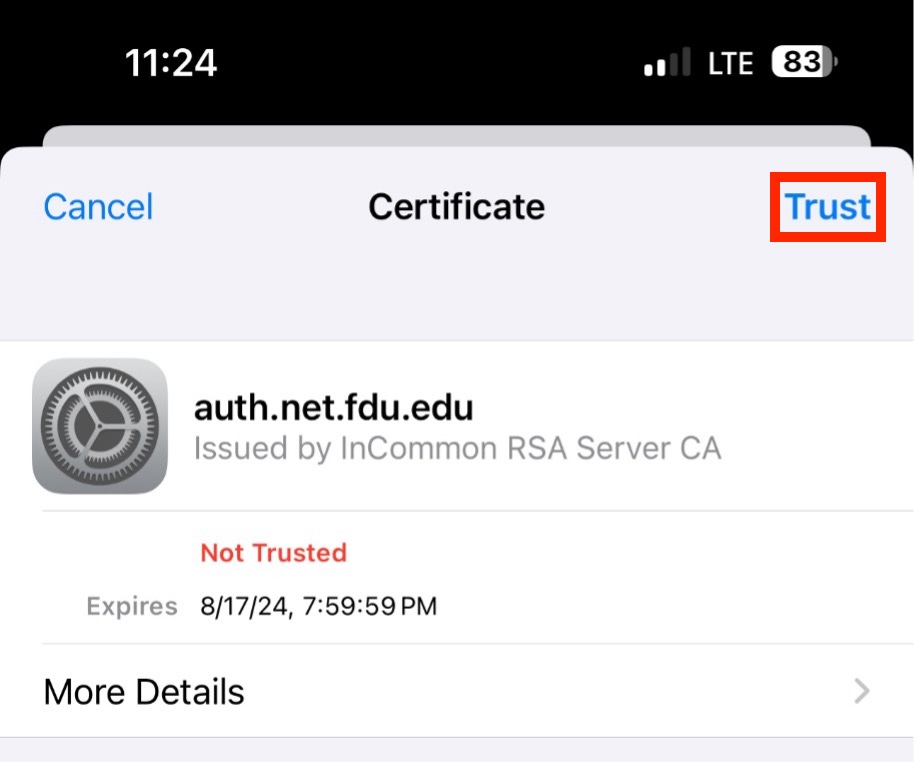
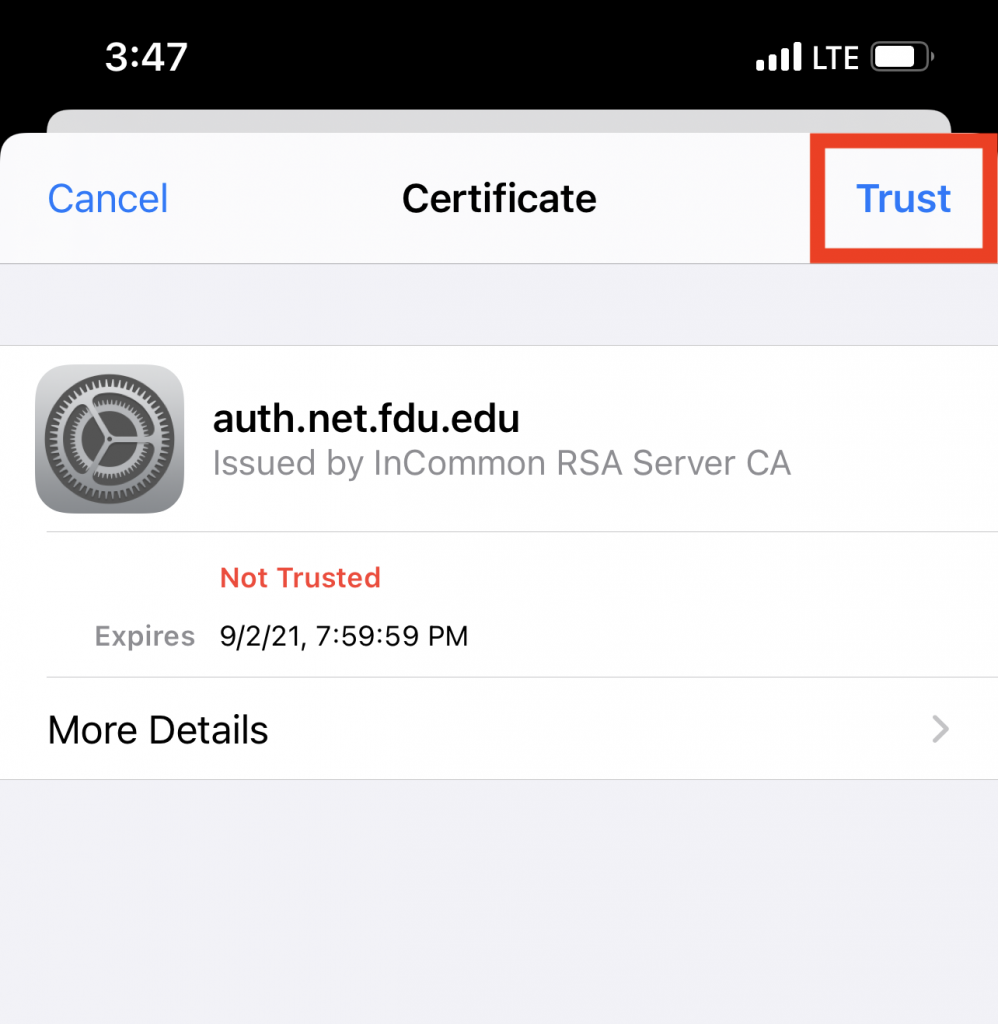
- At the “Certificate” prompt, tap “Trust“
- Open your browser and test your Internet connection
close
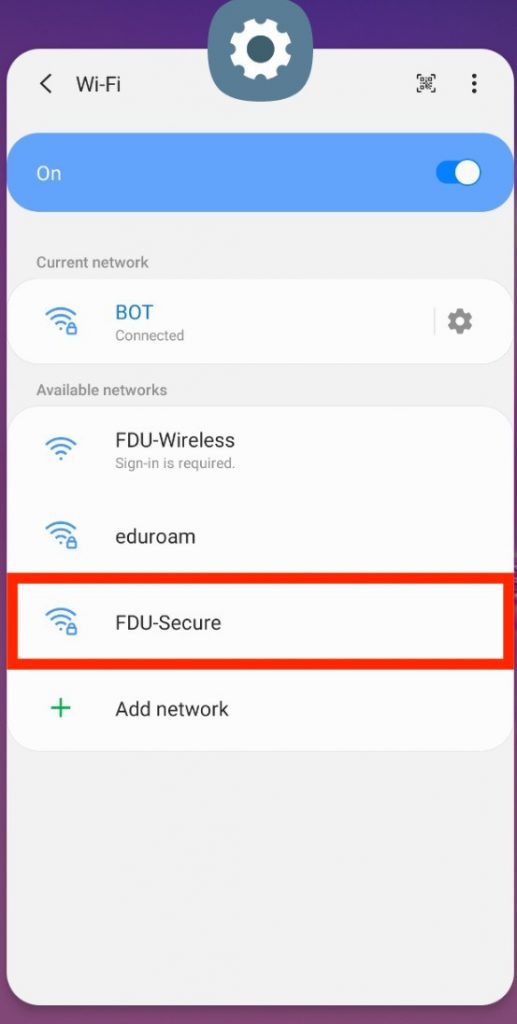
Android
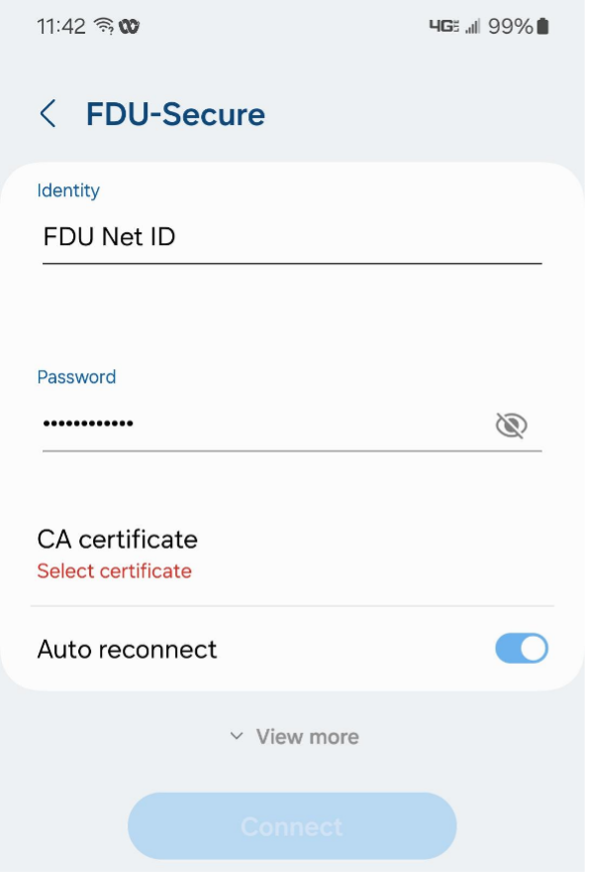
- Login to your Android Device
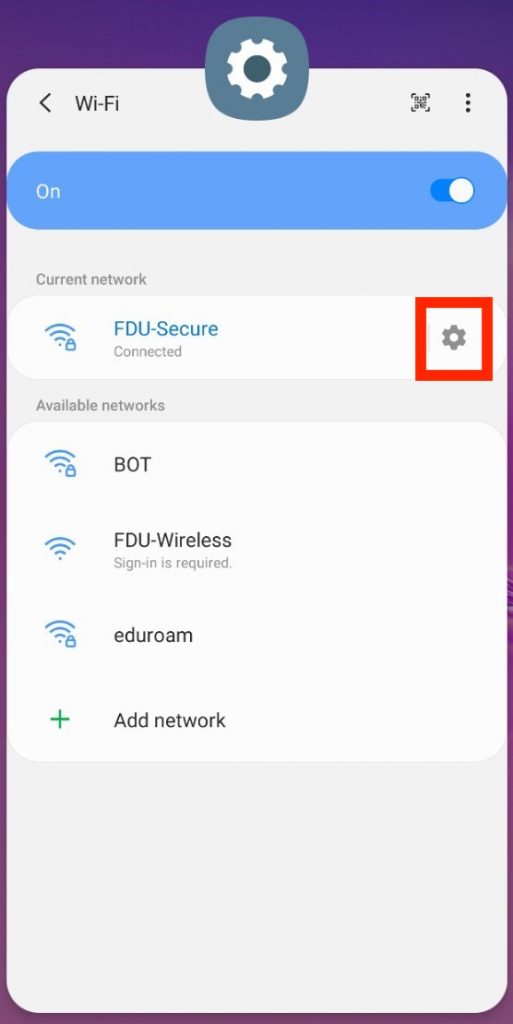
- Open the “Settings” Application > Select “Wi-Fi” > Select the Gear icon next to FDU-Secure
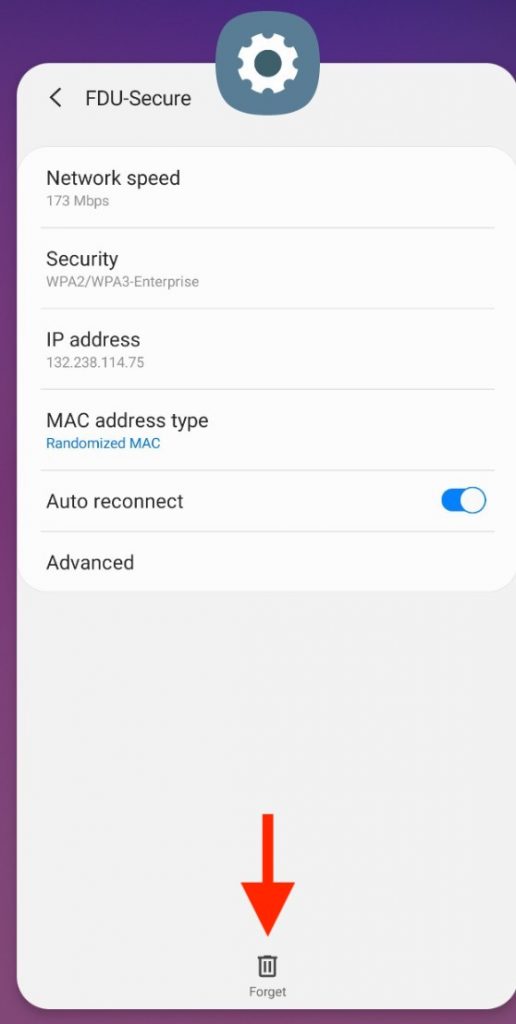
- Select “Forget This Network“
- Select FDU-Secure from the Wi-Fi menu
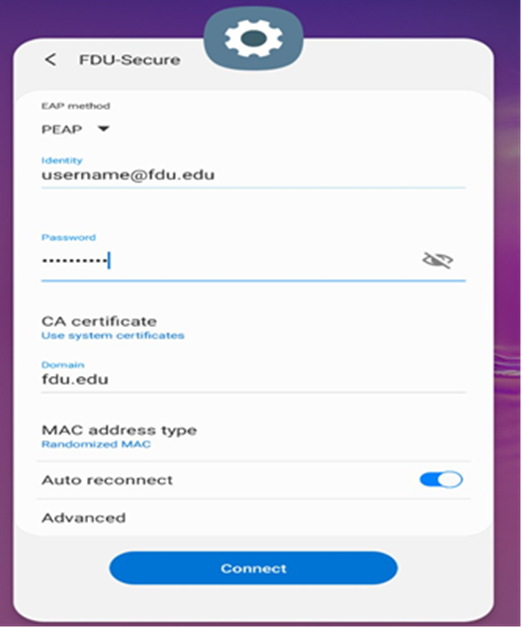
- Select “EAP method” and select “PEAP” from the dropdown menu
- Enter your complete FDU NetID and password
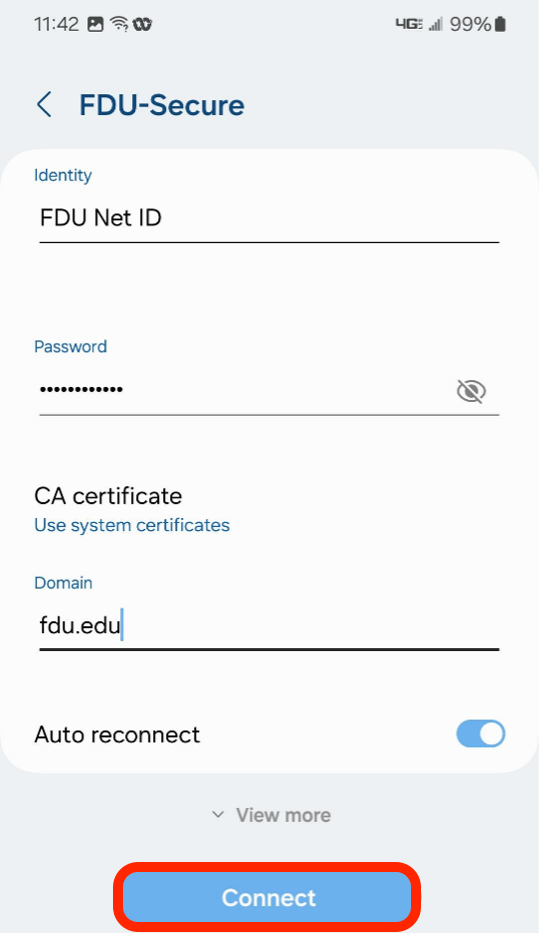
- In the “CA Certificate” field, select “Use System Certificates”
- In the Domain field, enter fdu.edu
- Enable “Auto Reconnect“
- Tap “Connect”
- Open your browser and test your Internet connection
close