Voice Services provides the campus with both basic and advanced telecommunications services. They offer phone service (desk and softphone), provision mobile devices, establish voicemail, and coordinate repairs, as well as additions, moves, and changes to phone numbers for faculty and staff on both NJ campuses and the Vancouver campus.
Approved accessories, such as a case, screen protector, charging cable and plug, will be provided with the purchase of a new phone.
Tip
The form can be used to request a replacement for these accessories. Additionally, the form can be used to request the addition of an international plan, process the return of a cellular device, or report a lost or stolen cellular device.
Fairleigh Dickinson University’s Cellular Policy can be reviewed below:
As a staff or faculty member, you can request a Headset for the new Cisco IP Unified Communications system.
Use the link below to access the “CDW Premium Page” for Fairleigh Dickinson University Voice Services.
This site will provide information, product offerings, and contract pricing regarding headsets that are compatible with Cisco 8000 Series phones (Models 8811 and 8851). Follow the steps as noted on the web page to select a suitable headset.
After you obtain a quote for the specified equipment, you will need to complete the purchase process as usual.
Below you can download the manuals for the FDU Unified Communications Phone Systems from Cisco. The manuals provide information on how to use and access the voicemail features.
For users utilizing Model 8845 Video Phones in conjunction with the Helios Door Entry system, please refer to the documentation for Model 8851 for information on basic features. The Video Phones enable users to see who is requesting entry when notified by the Helios System.
Initial Voice Mail Set-Up from Your Own Campus Extension
From your desk phone:
Press the message button on your phone instrument.
Enter your Mailbox ID, this is your 4 digit extension.
Enter the temporary PIN 13579 followed by the # sign.
Listen to the prompts to set-up your voicemail greeting.
Initial Voice Mail Set-Up from Off Campus
When off campus, you can setup your voicemail system by dialing your campus’ assigned voicemail number:
Florham Campus: (973)-443-8100
Metropolitan Campus: (201)-692-7600
Vancouver Campus: (604)-648-4485
Follow these instructions to log into and setup your voicemail:
Press 1 to access the voicemail system.
When prompted enter your ID, this is your 4 digit extension.
Enter the temporary PIN 13579 followed by the # sign.
Listen to the prompts to set-up your voicemail greeting.
Accessing Voicemail On Campus
Press the message button on your phone instrument.
Enter your Mailbox ID, this is your 4 digit extension.
Enter your 5 digit PIN followed by the # sign.
Accessing Voicemail Off Campus
You can access your voicemail when off campus by dialing your campus’ assigned voicemail phone number:
Florham Campus: (973)-443-8100
Metropolitan Campus: (201)-692-7600
Vancouver Campus: (604)-648-4485
Follow these instructions to log into your voicemail:
Press 1 to access the voicemail system.
When prompted enter your ID, this is your 4 digit extension.
Enter your 5 digit PIN followed by the # sign.
Accessing Your Voicemail from Another Extension
Dial the voicemail extension 8100, 7600 or 4485.
Press 1 to access the voicemail system.
When prompted enter your ID, this is your 4 digit extension.
Enter your 5 digit PIN followed by the # sign.
Changing Voicemail Messages & Passcodes
When you first set up your mailbox, you record a greeting, your name and select a passcode. The set-up options allows you to change these at any time. You should update your greeting(s) regularly to let callers know whether you’re in or out of the office. Your voicemail message should always be appropriate, so callers will feel confident in leaving messages. And, of course, boxes should be emptied daily, if not more frequently.
When the University or your department closes you should always redo your voicemail message making the caller aware that the University or your department is closed.
The voicemail system will prompt you as to how to make changes. When you are in doubt about what to do next, you can download the manuals for the new FDU Unified Communications Phone Systems from Cisco. The manuals provide information on how to use and access the voicemail features.
If you are NOT forwarding your office phone, you should create a new voice message similar to the messages below and establish a pattern and practice of checking your voicemail regularly.
Please update your outgoing message to reflect an appropriate out of office message.
Voicemail Forwarding Suggested Message
Below is a recommended Voicemail Message:
“You’ve reached the voicemail of [NAME, TITLE/DEPT]. I am out of the office today but will be checking my voicemail periodically. You can also reach me via email at [YOUR EMAIL]@fdu.edu. Thank you.”
XMedius Fax is an electronic fax (eFax) cloud-based solution that allows users to send and receive faxes. The XMedius Fax service is available as an on-campus resource only. Access to the efax.fdu.edu site is restricted to on-campus networks and FDU VPN users.
This document provides instructions on how to use of the FDU Xmedius Fax Service. It describes notifications and navigation of the website in detail to facilitate the proper use of this resource.
Notifications
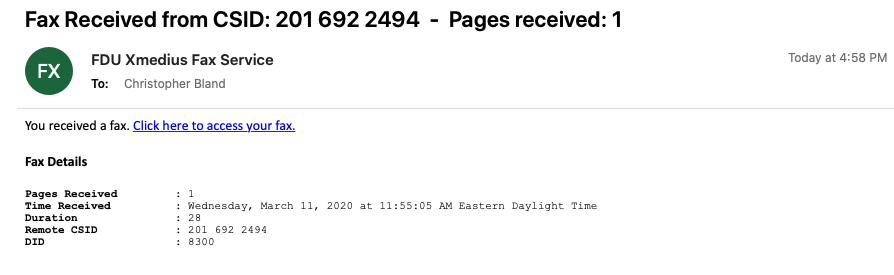
Each user given access to view incoming faxes will receive an email notification from the FDU Xmedius Fax Service
The email will look as follows:
Within each email will be a “Click here to access your fax” web link to the Xmedius Fax Server for quick access.
close
Logging In
To access the FDU Xmedius Fax server you can visit efax.fdu.edu or click the “Click here to access your fax” link provided in the fax notification email (The efax website is only accessible if you are located on-campus or connected to the FDU VPN). Once loaded in your web browser you will be prompted for a username and password. Please enter your full FDU NetID and password.
close
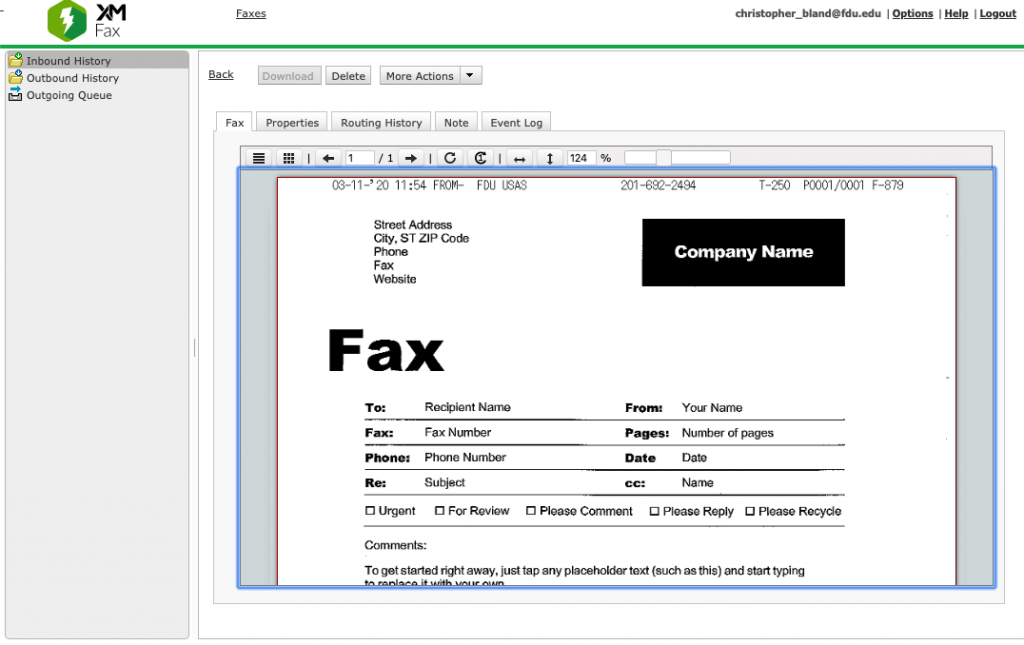
Accessing Faxes
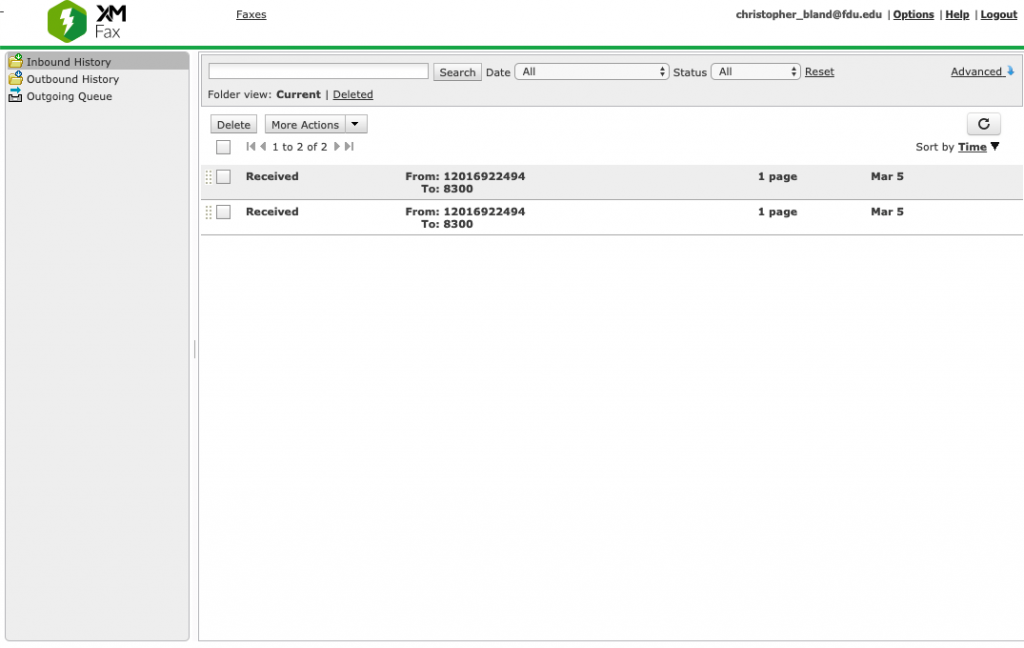
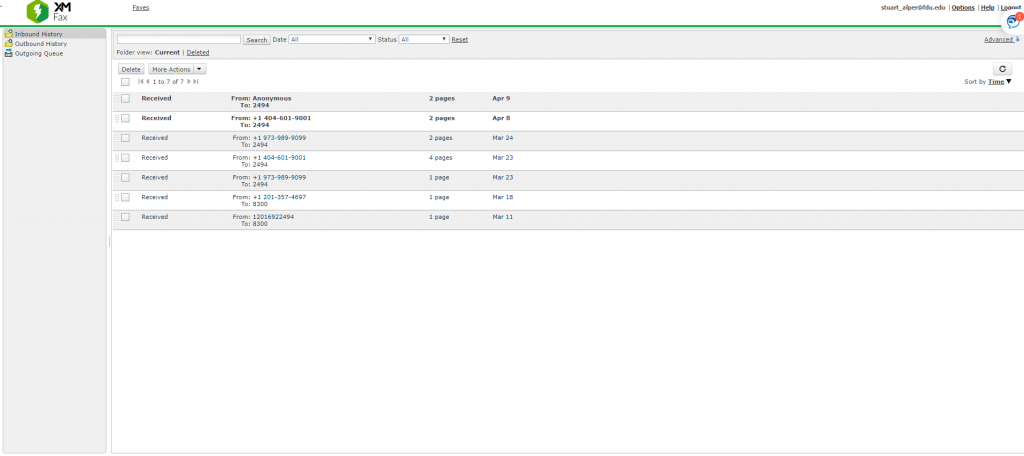
Once authenticated you will see all of your incoming faxes (Unread faxes will appear in bold type).
Note:
If you receive faxes on more than one campus they will all be shown in your Inbound History.
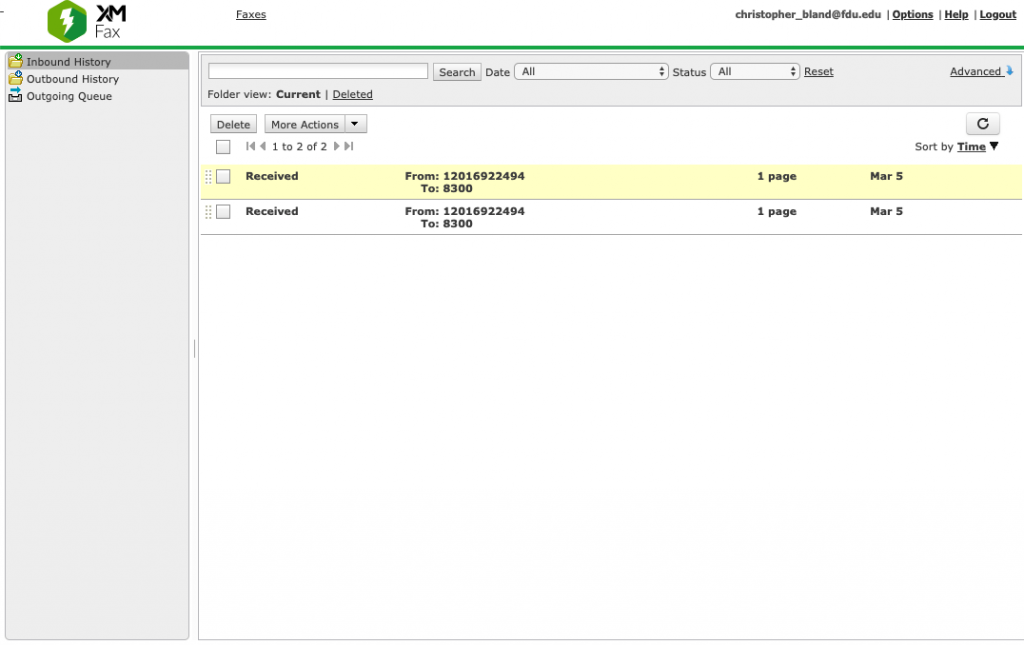
To view a fax simply move your mouse to the fax you want to view. The fax will turn yellow as your mouse hovers over it, click it
The fax will automatically open to the Fax tab showing the incoming fax
close
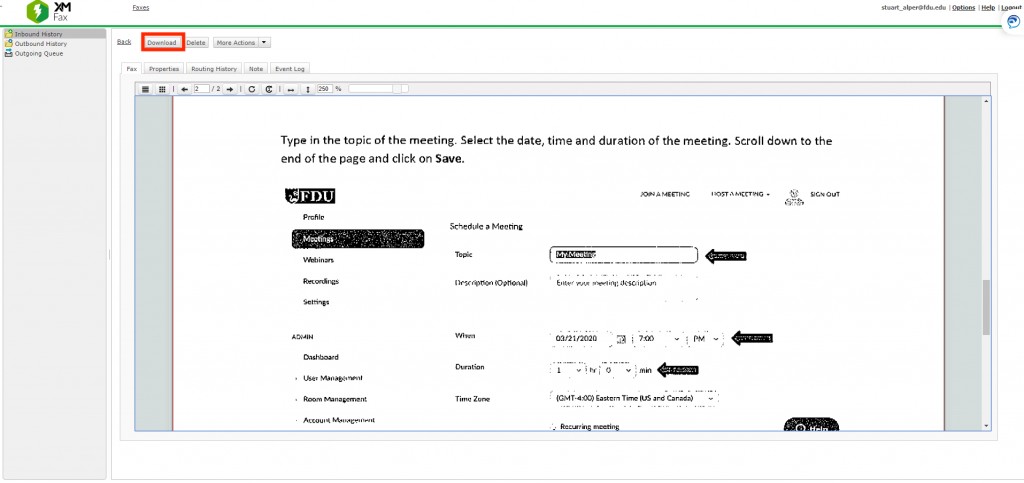
Printing Faxes
Users can print a fax to a local or networked printer, and can send a document to Perceptive Content by printing to the Perceptive Content printer. Below are the steps necessary to print a fax.
First, find the fax to be printed by scrolling over it with your cursor until the fax is highlighted yellow, then click on it
Once the fax is opened, locate the Download icon on the top left side of the screen, and click to download
Note
This will not actually download the file to your computer.
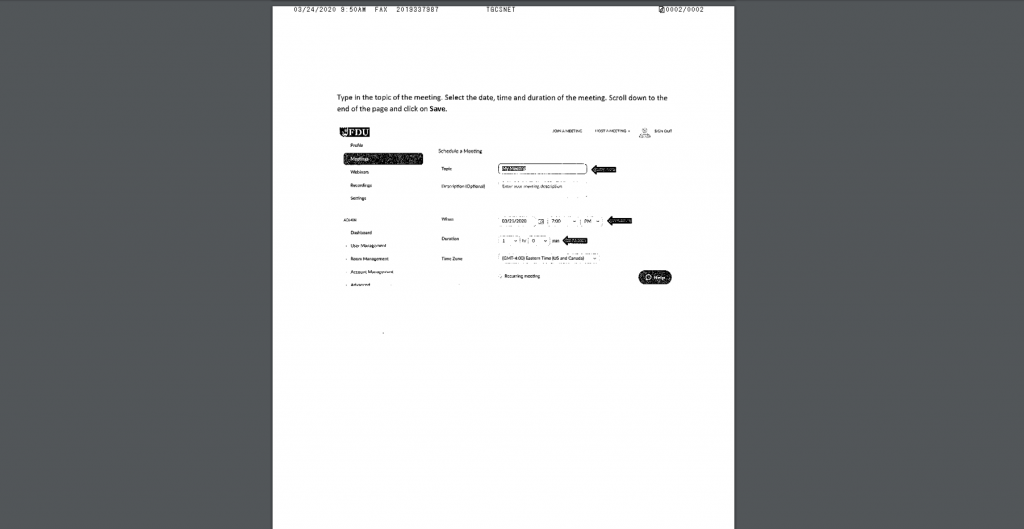
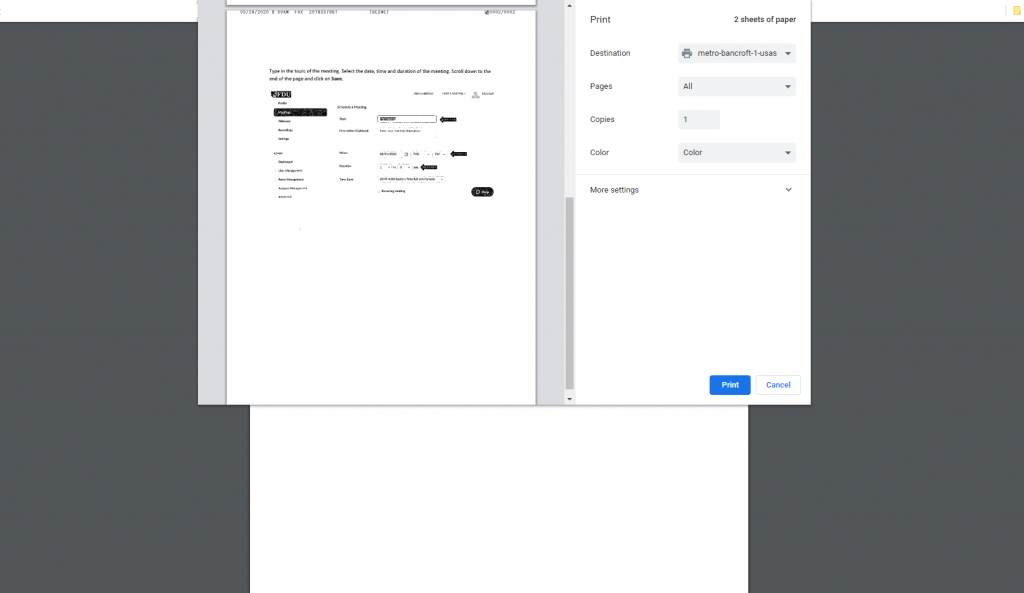
A new browser screen will open and the fax to be printed will appear
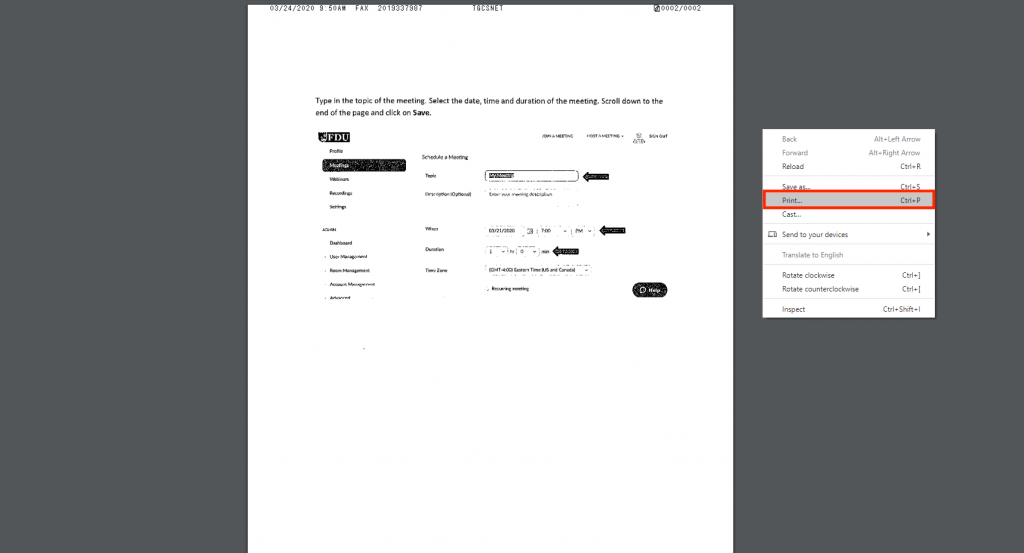
Right-click your mouse from anywhere on the page, and a second panel will be presented. Hover your cursor over the word Print, and left-click your mouse
Next to Destination, select the printer you wish to send the fax to, or the Perceptive Content Driver if you wish to move the fax to Perceptive Content. Then click on the Print icon at the bottom of the screen
close
Managing Faxes through Notes
Faxes can be stored in both the current Folder view and the Deleted Folder view. You can move faxes between the folders by clicking the Delete button from the Current view or the Restore button from the Delete view. To delete a fax from the portal, click on the Delete button while the fax is in the Delete view.
If faxes need to be stored and retrieved over a period of time, the number of faxes that might appear in either the Current or Deleted view could build up, and retrieving a fax could prove difficult. Using the Notes capability will make searching for archived faxes much easier. The Notes and search functions work in both the Current View and Deleted view.
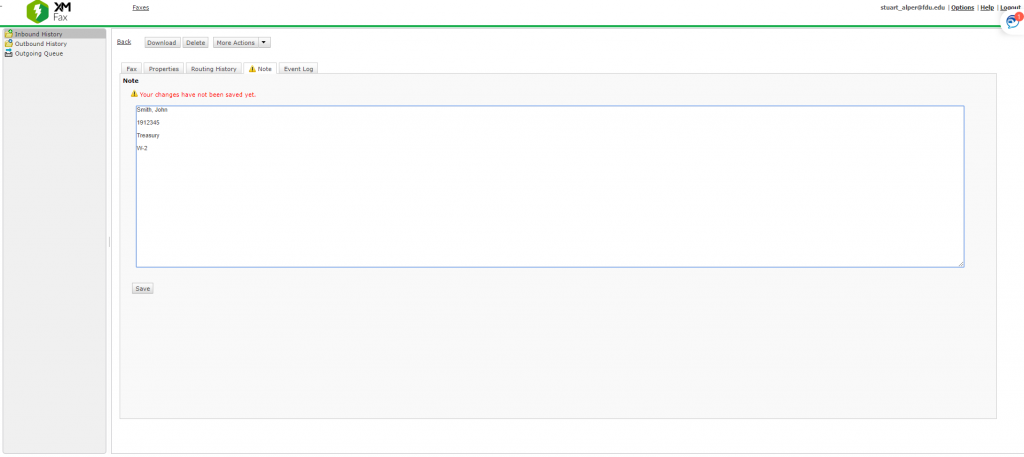
In the portal, open the fax you wish to Note
Then click on the Note button
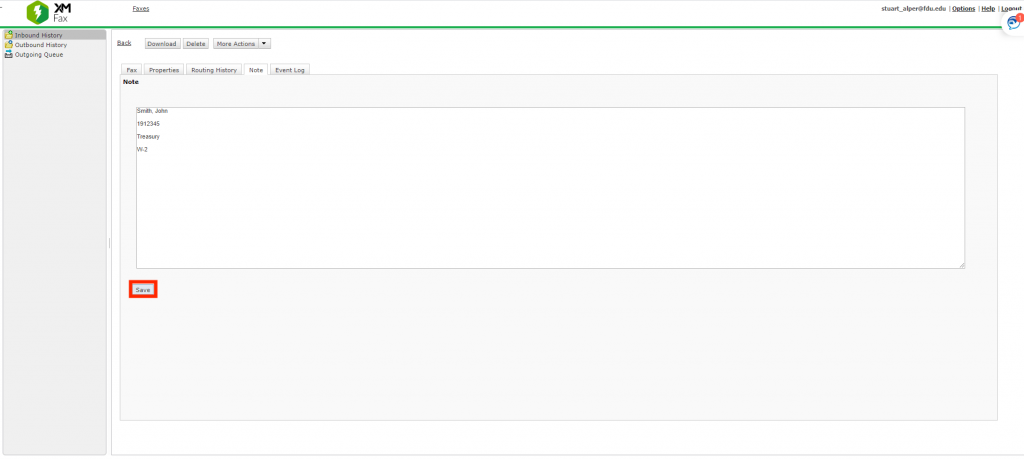
Start typing your note. You will notice a warning appear immediately letting you know the Note has not been saved yet. You can use multiple lines, and best practice would be to put a unique data point on each line. In the example below, Student Name, Datatel ID, the purpose of the fax, and the document type appear on separate lines
When done adding the Note, click Save at the bottom of the screen
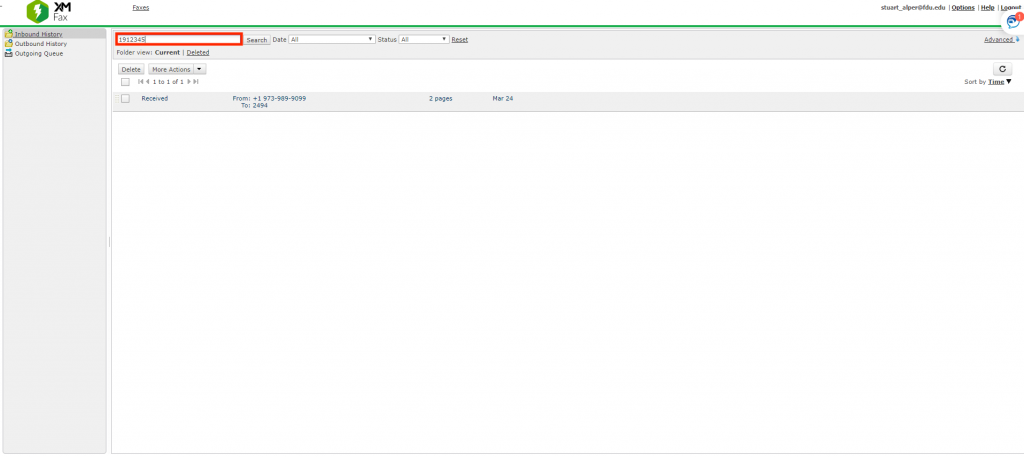
To search for a particular fax, or series of faxes, from the Current or Deleted view of the portal, type in the search criteria in the bar to the left of the search button, and then click the Search button. All faxes that meet that criteria will then appear
Note
From the example above, that if the search was for W-2’s, all faxes that contain W-2 would appear. If the search was for a Datatel ID, all documents received with that Datatel ID would appear. It is strongly suggested that departments standardize on how to use the Note area prior to implementing the eFax solution.
close
Managing Faxes through the Event Log
From time to time, it might be important to know more details about a particular fax, like who received it, who viewed it, who printed it or notated it. All that information, for each fax, can be found in the Event Log.
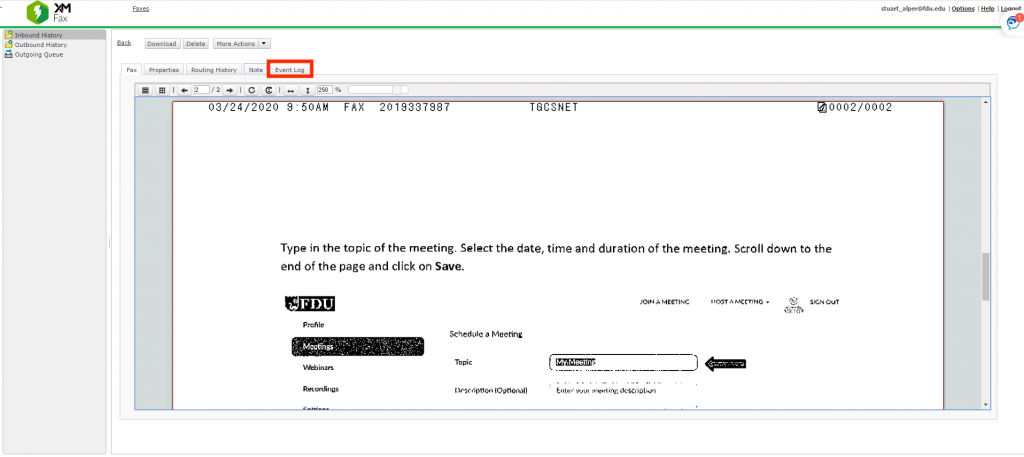
To view the event log from within a fax, simply click the Event Log tab.
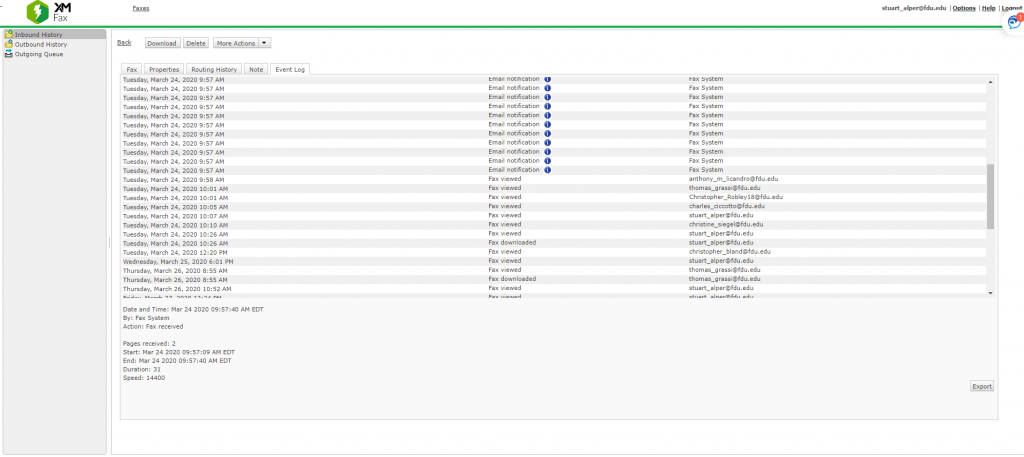
The event log will provide details of every action taken upon that Fax. Those actions include:
Routed to User – The Fax appears in that person’s Portal
Email Notification – An auto-generated email was sent to that person
Fax Viewed – The fax was opened by a specific user (if several people are assigned to retrieve faxes, you can see who viewed the fax and at what date and time)
Fax Downloaded – who downloaded the Fax for Printing
Fax Deleted – Who moved the fax from Current View to Deleted View
Note Saved – Who added a Note to the Fax
All this information can be very useful in a department where several individuals are responsible for managing and disseminating faxes.
close
Composing a Fax
From the eFax portal, users can send faxes with cover sheets and attachments. Below are the steps to compose and send a fax.
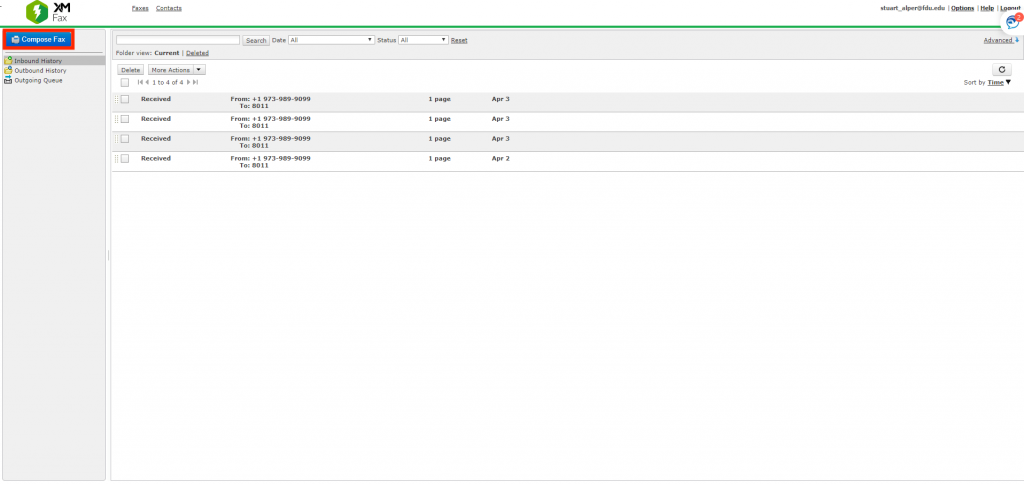
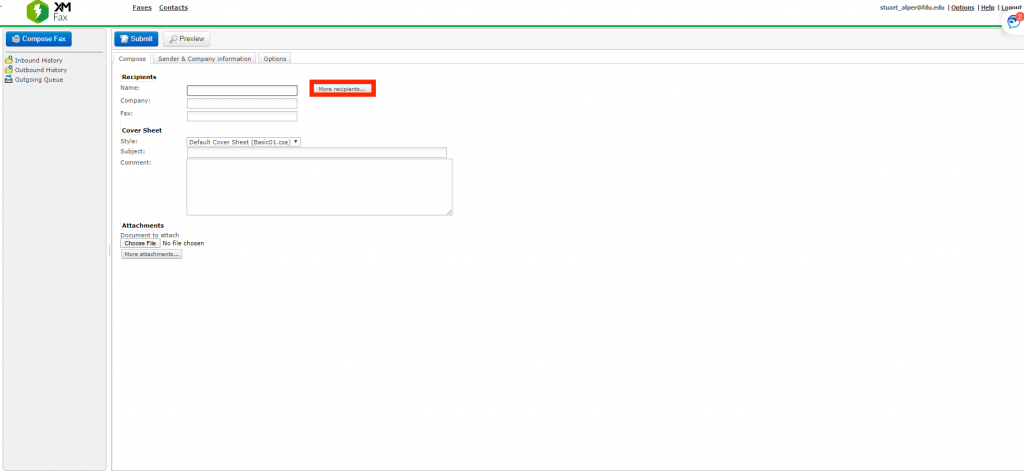
First, click on the Compose Fax icon colored blue
Enter in the recipient’s information, including Fax Number starting with a 3. If you are faxing within FDU, you only need to use the four-digit fax extension. If the Fax is going to more than one fax machine, click on More Recipients
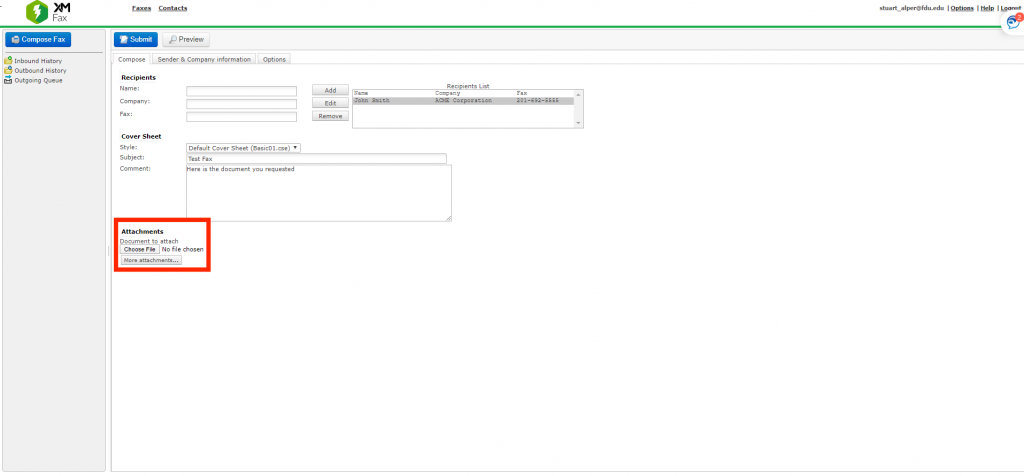
Add the additional recipients’ information, and click Add. Type in a Subject for the fax, and any comments needed for the cover sheet. If a document needs to be attached, click on the Choose File icon at the bottom left of the screen, and choose the file you wish to attach. It is recommended that files be converted to .PDF if at all possible
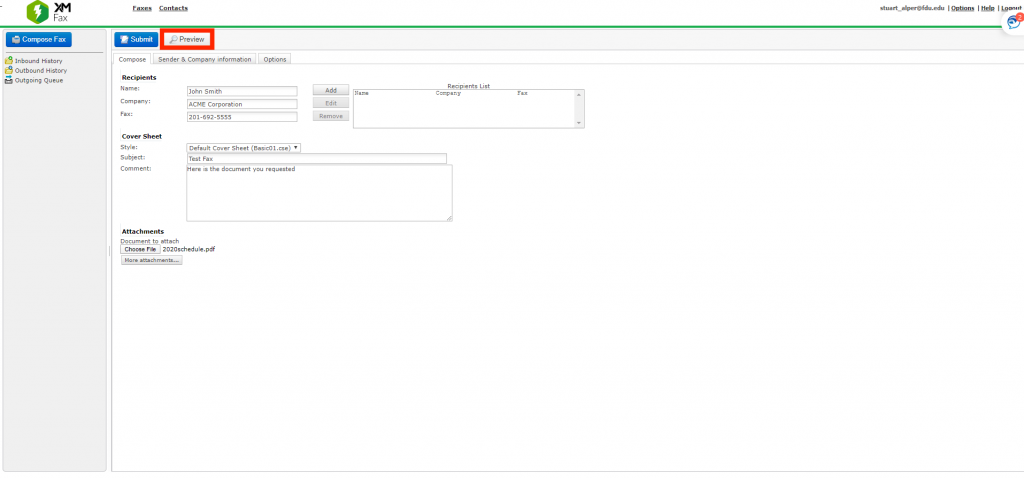
When complete, the file name will appear next to Choose File. You can repeat for as many files as needed. When you are ready, click the Preview button to review the appearance of your fax
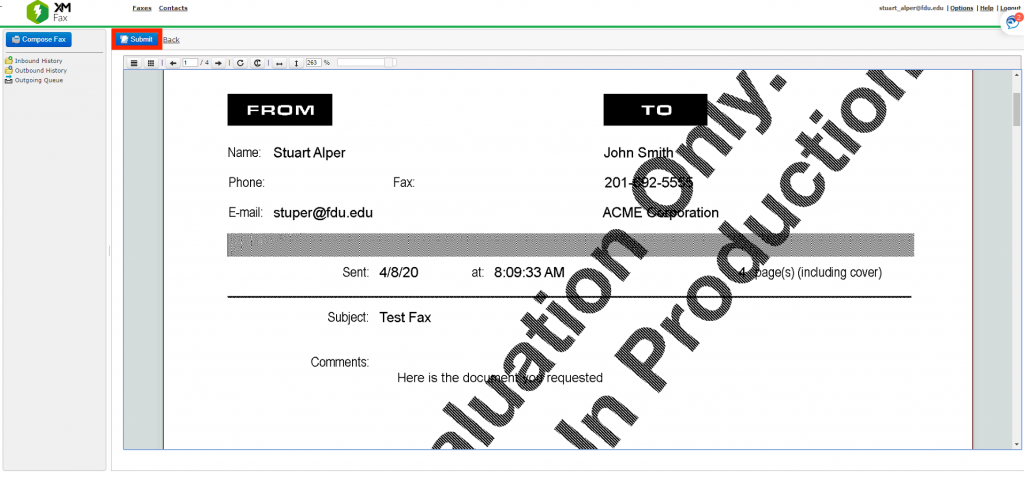
From here, you can view all the pages of your fax. If you are not satisfied with your fax, click the back button to go to the Compose screen, and click the Choose File button to either remove or re-attach a file. When ready, click Submit
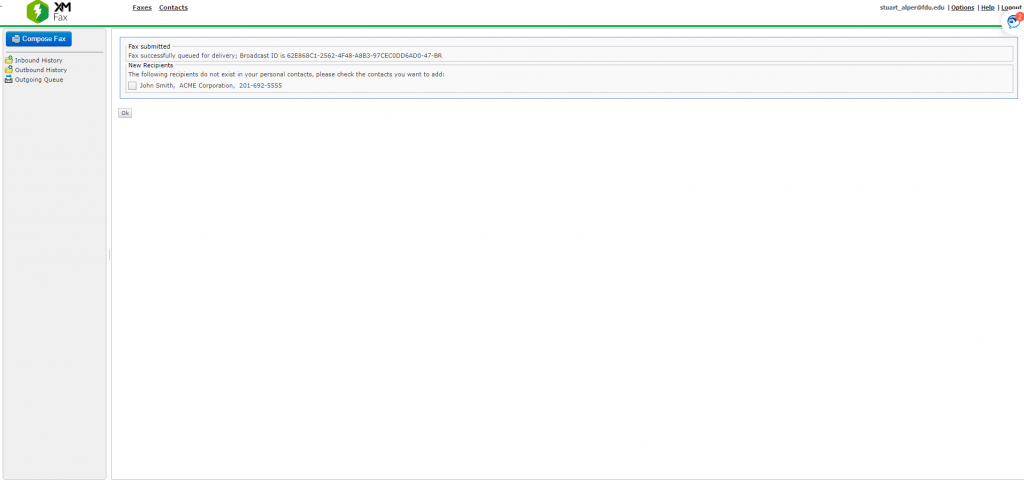
If successful, a Fax Submitted message will appear. There will be an opportunity to add the recipient to your xFax contact list if they are a frequent user. Click OK
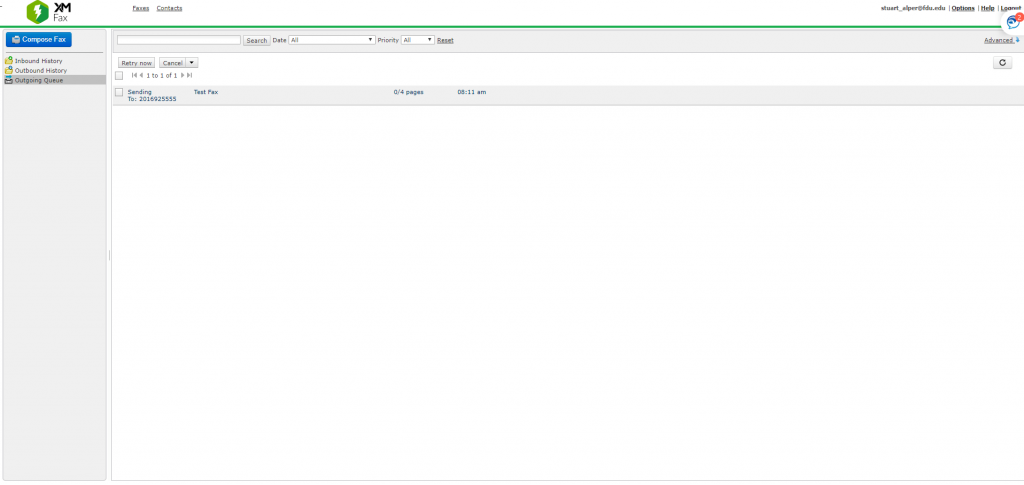
You will then see the fax in your Outbound Queue, in a Sending Status
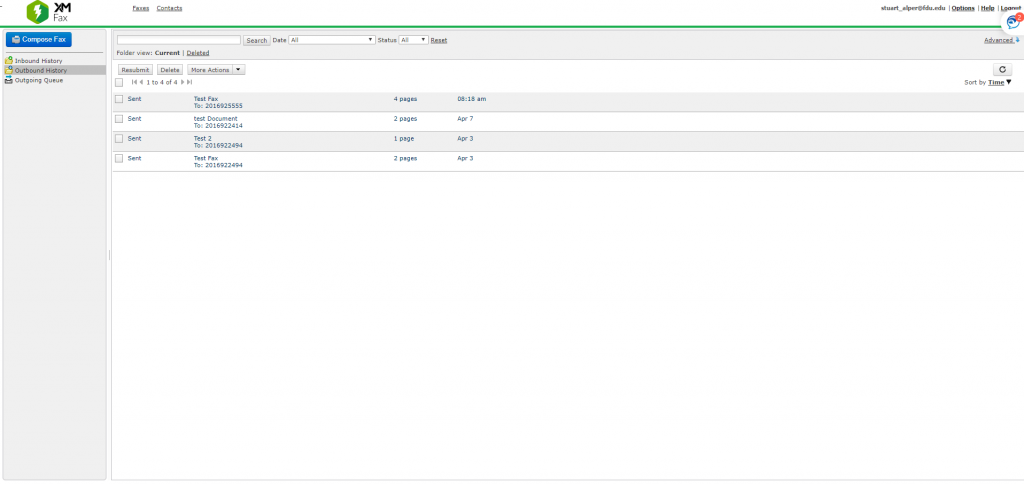
Finally, the fax information will be moved to the Outbound History File
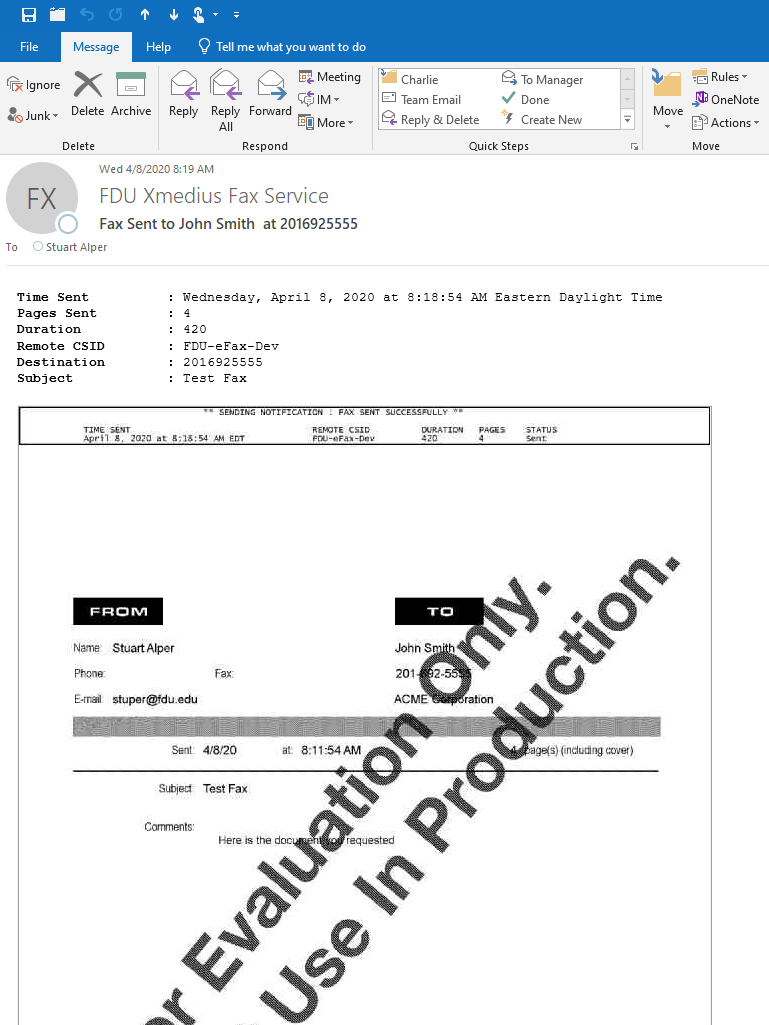
Once the transmission has been completed, an email will be sent to the user confirming the successful receipt of the fax by the receiving fax machine
close
Deleting Faxes
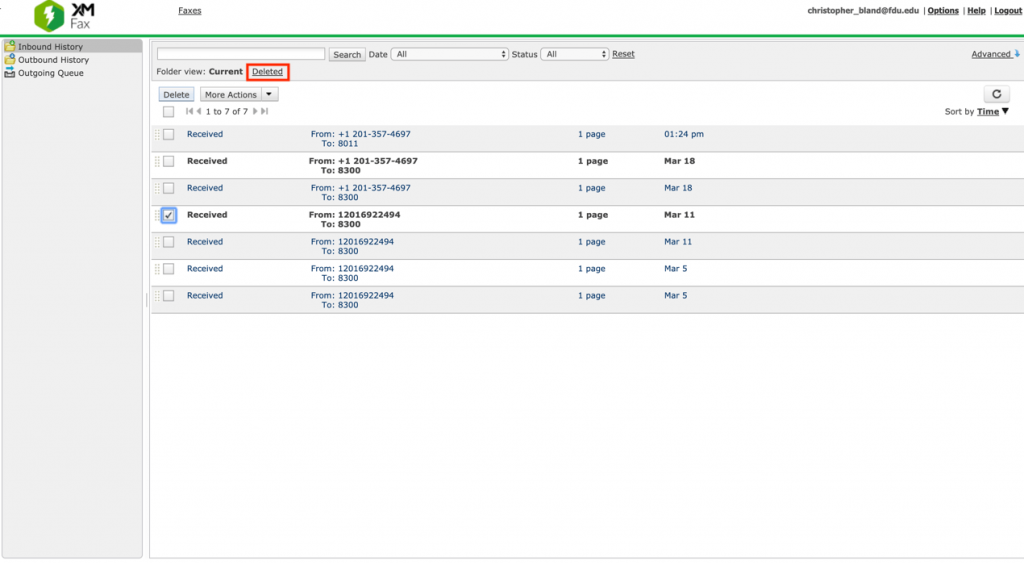
Users can remove faxes from their Inbound History by checking the box next to the fax they want to delete and then clicking the Delete button
Once deleted, faxes are visible by clicking the Deleted folder view
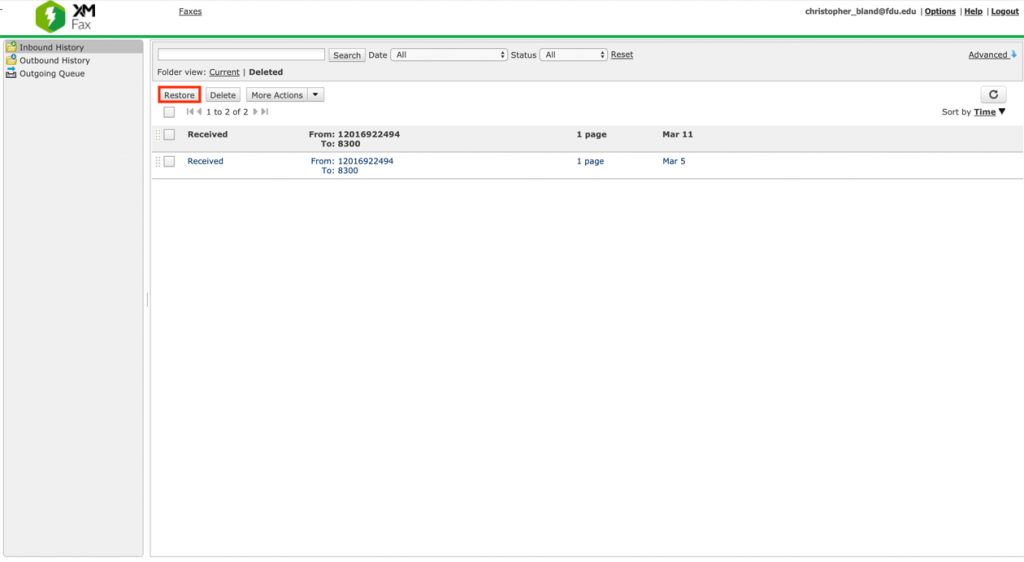
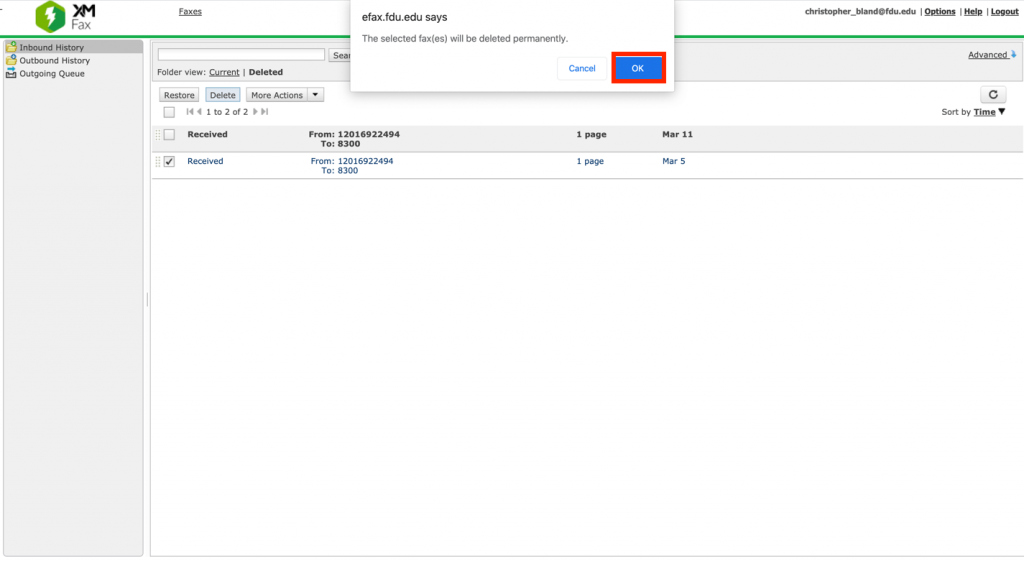
Users will then have the ability to restore the fax to their Inbound History by clicking the Restore button. Alternately, faxes can be permanently deleted by pressing the Delete button. A final confirmation screen will be shown before permanently deleting fax
close
Centralize Portal Option
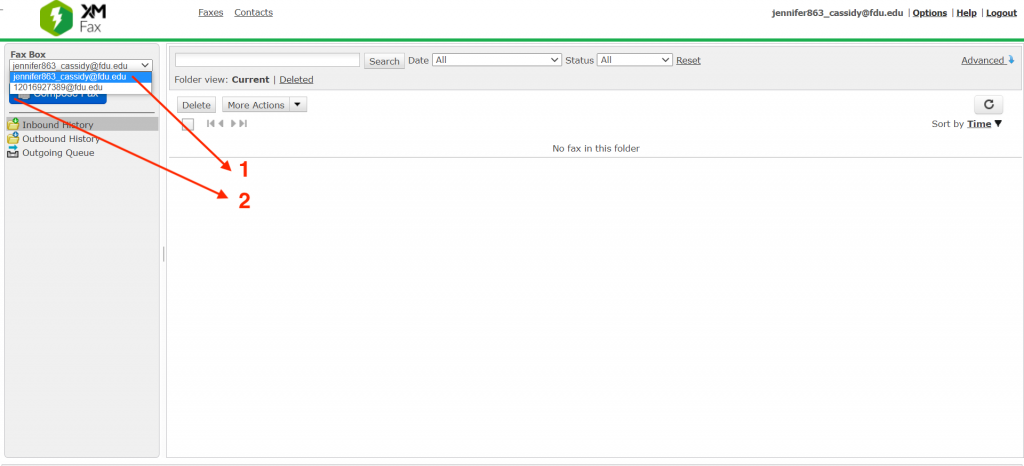
Each member of the Fax group in which you are the owner manages faxes within their own portal. In other words, if there are 5 employees (including yourself) that can access your fax #, each of you receives all the faxes sent to that # individually and manages those faxes independently.
However, if you desire a centralized portal, where there is one view, one fax, and, for example, if you delete a fax, it’s removed from view for all members of that group.
Individually Managed Faxes: Still available to view if necessary
Shared Centralized eFax Box: Users with the option to have the ability to manage the faxes for all individuals set up in the shared option. For Example: When deleting a fax it removes it from all the users set up to have access to this particular fax line.
Eligible FDU employees may receive reimbursement for business related expenses incurred on personally owned mobile communications devices, or, be issued a FDU owned and managed mobile communications device for business and reasonable personal use.
Below is the policy regarding the return of Cisco Desk phones that are no longer in use.
The process, known as the “Telephone True-Up Process,” commences with a departmental request to remove currently active phones from service. The department is required to initiate the process by submitting a “True Up – Cisco Desk Phone Form” containing the necessary equipment details. Submission of this form generates a support ticket with Voice Services, initiating the removal process for the specified active phones from service.
The True Up – Cisco Desk Phone Form is accessible within the SAMI Support Portal via the link below:
Once on the portal, navigate to Forms > Staff & Faculty > True Up – Cisco Desk Phone Form.
Warning
Do not remove the phones without the help from an IT department technician.
Leave these phones in place and mark them with a Post-It Note that provides the HOST/MAC address of the phone. This ensures easy identification when a technician arrives to retrieve the device.
There are two methods to find the HOST/MAC address:
Press the gear button on the phone and use the central navigation key to scroll to “Phone Information.”
Alternatively, this information is also listed on the back of the phone.
The True-Up process is carried out annually, around June, coinciding with the end of the University’s Fiscal Year. The new True-Up cycle begins on July 1st with the commencement of the new Fiscal Year. Phones can be removed at any point during the year and stored until the next True-Up. However, billing for these phones continues until the end of the Fiscal Year.
Note
If you remove a phone but retain the line for services like voicemail, call forwarding, or Jabber, there is a monthly charge of $20 that will continue to be applied for these services.
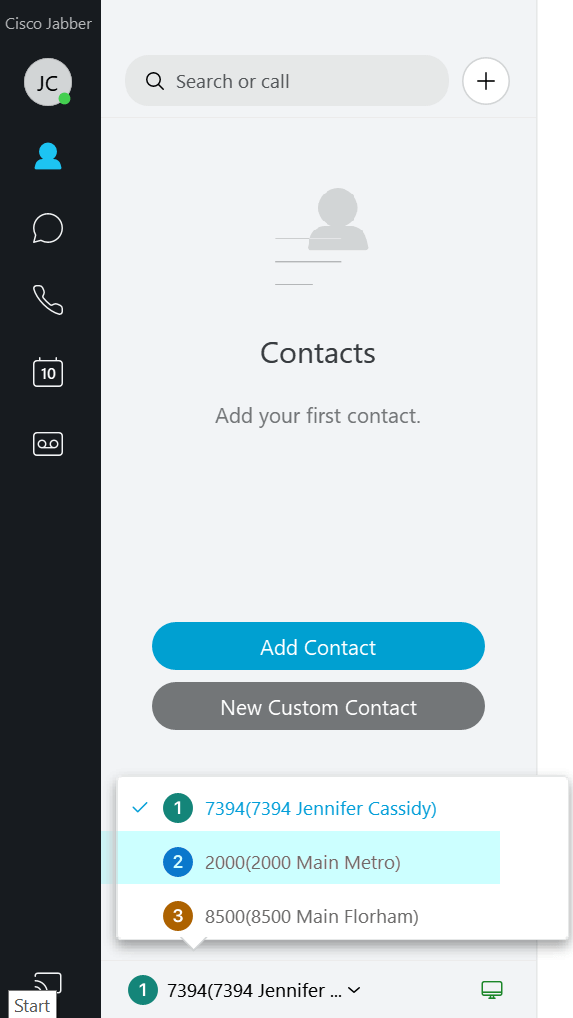
When multiple lines are enabled in Unified Communications (UC) Softphone, a drop down of the available lines will be displayed near the bottom of the “Contacts” windows.
To Make a Call
Click on the arrow near the number displayed.
Choose the line (Number) you desire to call from.
Make the call as normal.
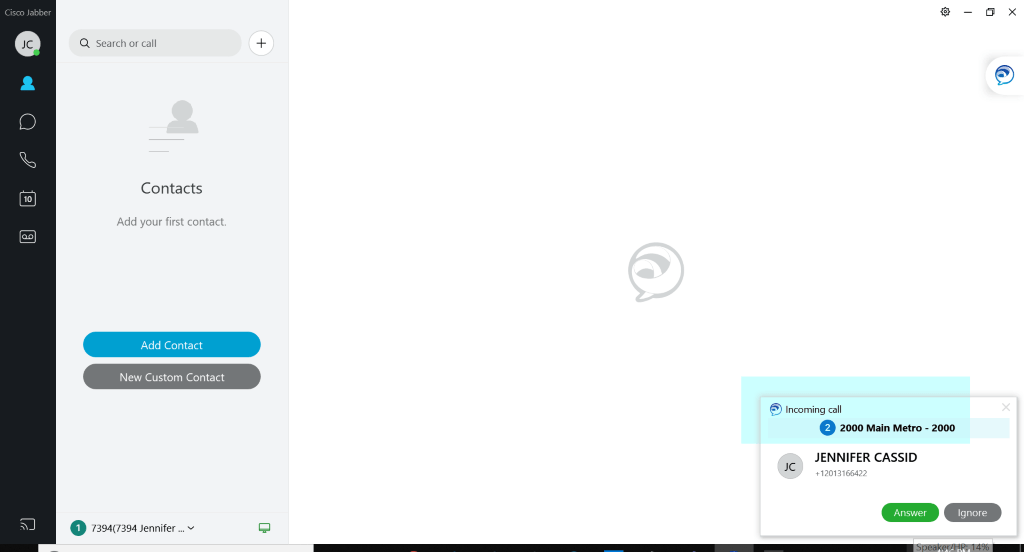
When receiving a call, the caller ID will display the line from which the call is coming from.
A call can be made or received from all the available lines.
Fill out the form, then select “No” under “New and Existing Device Request
Choose the “International Calling” option for “Please select Accessories or International Feature”
Once you submit the form, a ticket will be generated for Voice Services.
Please submit the form at least one week before your trip. Provide the departure and return dates, as well as your destination. We will send you the voice rates, settings, and dialing instructions. It is important that this request is processed before your departure.
Select the form titled “Mobile Device Request & Feature Change Form”
Select “Yes – New or Existing Device Request”
For the type, choose “New Device – Request”
You will then have the option to select a device
Complete the remainder of the form
Once submitted, this will generate a ticket for Voice Services, which will process the request and provide a selection of phone models from which to choose.
Select the form titled “Mobile Device Request & Feature Change Form”
Select “Yes – New or Existing Device Request”
For type, select “Existing Device – Lost/Stolen”
You will then have the option to select a device. Complete the remainder of the form. It will be routed to the Voice Services department.
Voice Services will interface with Verizon Wireless to report the phone as lost or stolen and to have the service suspended. Voice Services will arrange for a loaner replacement smartphone. You cannot order a phone directly from the carrier.
The Directory is published electronically once a month. The information is refreshed each month using the University’s Human Resource Information System.
It will be routed to the Voice Services department. Voice Services will collaborate with University Systems and Networking to have a new phone installed.
To access Forms, you will be directed to our SAMI Support Portal where you will be asked to log in using your NETID and authenticate using Duo. Once you click “Next,” you will be forwarded to samisupport.fdu.edu in a new window or tab.


 on your phone instrument.


 Email
Email 

