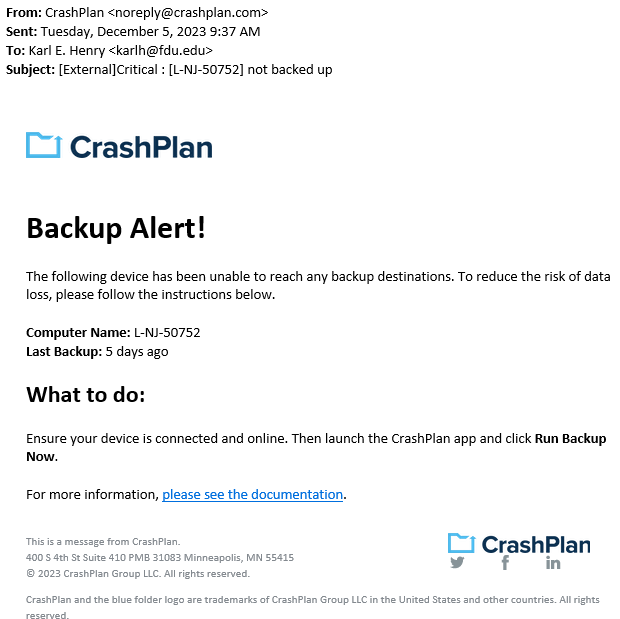
Code42 will send users an email alert notifying of any incomplete backups of their devices.
The Code42 email alert will be sent from Code42 for Enterprise <noreply@code42.com>
The Subject line of the email will be labeled with: Critical: [Name of Device] not backed up
Backup Alert
You will receive an alert when your computer hasn’t backed up to Code42 for 5 calendar days. The email will look like the example below:
Code42 Backup Alert Email Notification
What to do if you get a backup alert
After receiving a Code42 backup alert email, you should locate the device the email specifies in need of backup. The Code42 device name will be listed in the Subject: line and Computer Name: line of the Code42 backup alert email. To locate the name of a Code42 device, left-click the Code42 “C” symbol icon in the Windows System Tray, also referred to as the notification area.
Tip
The Windows System Tray or notification area is usually located on the bottom right of the Windows taskbar, next to the displayed digital clock.
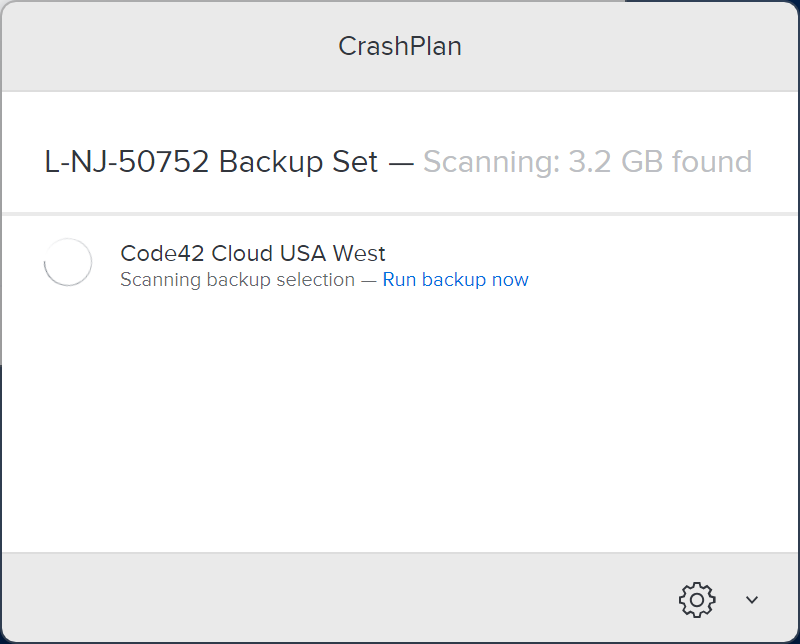
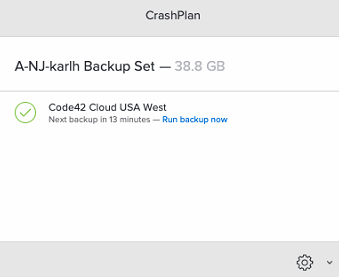
For macOS users left-click Code42 “C” symbol icon on the macOS icon menu bar. The Code42 device name will be displayed in the console. Ensure the Code42 application displays the same name as the Code42 backup alert email you received.
Code42 “C” symbol icon
Code42 Device Name
After locating the correct specified device stated in the Code42 backup alert email, force a backup of the device by performing the following:
Left-click the “Code42” System Tray or macOS menu bar Icon
Code42 Icon
Left-click “Run backup now“
Note
The backup may take some time to complete. This depends on the length of time since Code42’s last complete backup and the amount of new data needed to be backed up.
As technology evolves and new features are offered, there may be times when unwanted or unexpected things happen. This page is dedicated to providing some tips, tricks, and recommendations to circumvent these undesired circumstances.
Normalize Sound Levels – Windows
Microsoft Windows 10 automatically adjusts audio levels between different applications. This can affect the level of sounds from various applications depending on what program is currently being used. This feature can be turned off using the instructions below.
Instructions
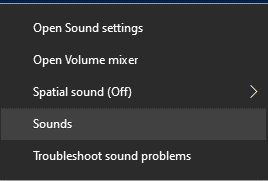
From the Sound Icon in your task bar, single right-click
Click “Sounds“
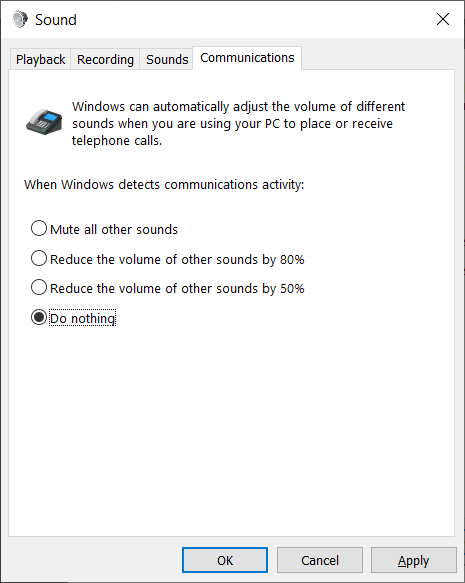
Click “Communications” tab.
Select the “Do nothing” radial button
Click “Apply”
Click “OK”
close
Adjust Microphone Settings – Windows
To ensure clear and audible audio in virtual meeting applications, such as Zoom, please follow the instructions below.
Instructions
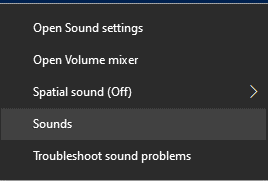
Right-click the Audioicon in the system tray portion of the task bar
Click “Sounds”
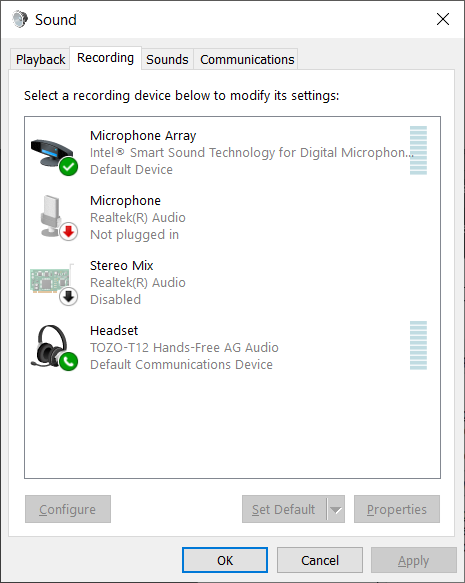
Click “Recording”
Note
Not all options may be visible.
Right Click on “Microphone Array” and select “Properties”
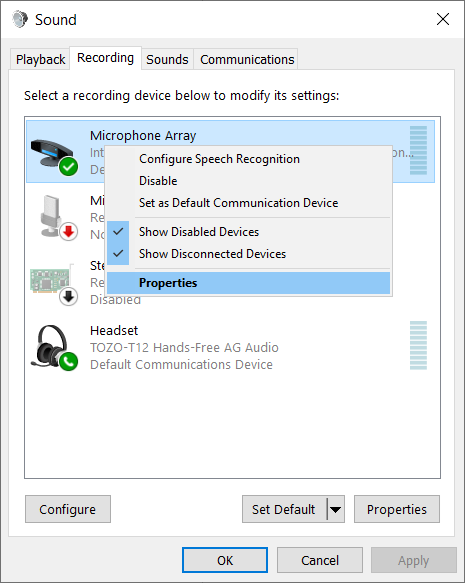
Click the “Advanced” and un-check “Enable Audio Enhancements”
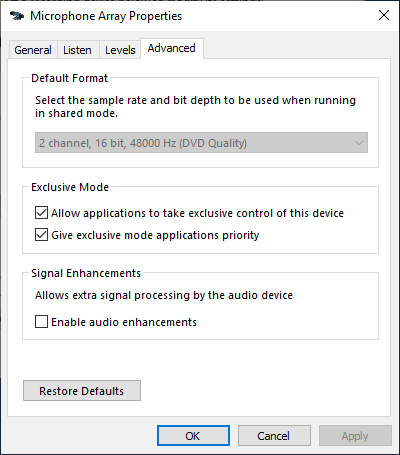
Click “Apply”
Click “OK”
close
Adjust Power Options – Lenovo Laptops
Default power profiles in Windows 10 are configured to balance performance and battery life. To change these settings, please follow the steps below.
Instructions
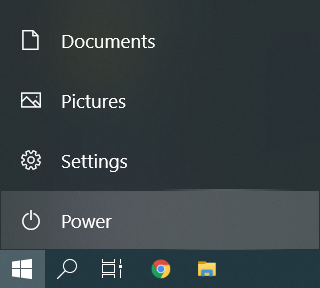
Click on Start, and then click “Settings“
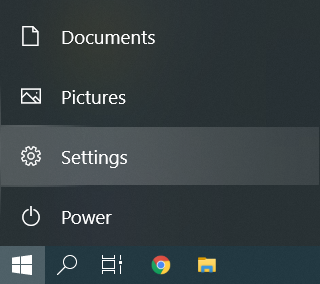
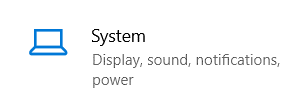
Click on “System“
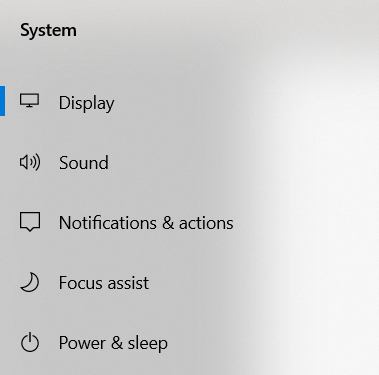
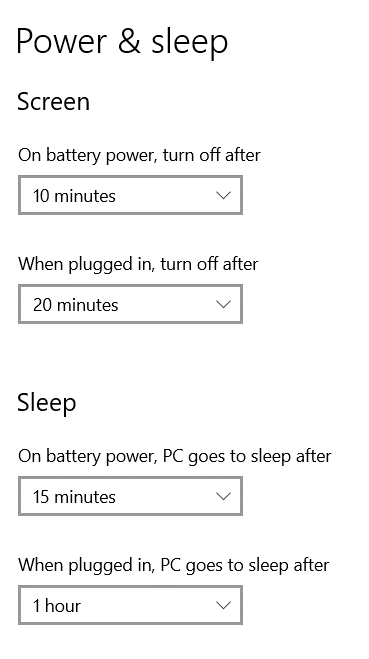
Select “Power & Sleep“
To modify power settings while the laptop is plugged in or on battery power, modify the below options
Note:
Selecting higher times may result in shorter battery life
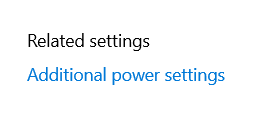
For additional power settings, such as the laptop lid and power button settings, click Additional power settings
Note
Depending on window size, this option may be located towards the bottom or on the right side of the screen.
Select either “Choose what the power buttons do” or “Choose what closing the lid does“
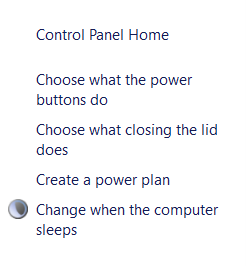
The options below will allow modifying the effects of pressing the power button and closing the lid
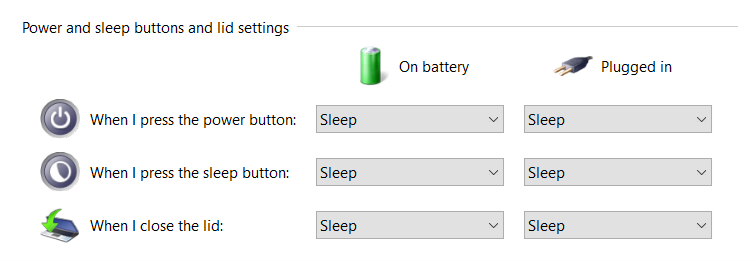
Note
Setting DO NOTHING when closing the lid can lead to drastically less battery life as well as overheating when the laptop is placed inside a bag or briefcase.
close
Restarting A Computer
Rebooting a device is highly encouraged as it will help keep the system running at peak performance. The benefits of a weekly reboot include:
Mitigate vulnerabilities to cyber-attacks by applying critical updates
Prevent performance degradation
Prevent application memory faults
Effectively apply system policies
To restart a device, follow the instruction below.
Tip
Make sure any open application is saved and closed before a restart is performed. This includes applications like Outlook, Word, Excel and any other applications that may be opend.
Instructions for Windows
Click the Start bottom on the bottom left hand side of the task bar
Click the “Power” button
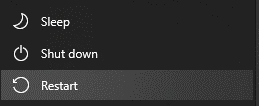
Click “Restart”
Note
Clicking “Shutdown” will not always properly apply updates or produce the desired effect. Clicking “restart” is the recomended option.
close
Instructions for macOS
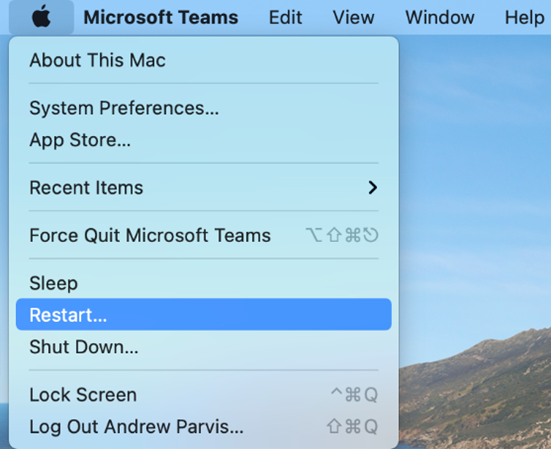
Click the “Apple” at the top left-hand side of your screen
The following tutorial will guide you through the process of connecting a printer while on-campus. Faculty and Staff members should review the purchasing process before engaging with the process for connecting a printer.
Note
Wireless printing is not permitted on campus. The information below is for wired connections only.
Connecting a Printer for Students in the Residence Halls
Most new printers are plug and play compatible with Windows 10. When you receive your new printer, you can unbox it and remove any orange tape you see. After plugging in the power and turning the printer on, allow the printer to initialize (most new printers will have a display to show you it’s progress). When the printer finishes initializing, just connect the usb printer cable from the printer to your computer. Windows 10 should automatically install the printer for you.
close
Printer Purchasing Process for Faculty and Staff
All printer purchases for faculty and staff on-campus use must appear on OIRT’s list of approved printer models. For the most up to date list of approved printer models, please contact the Purchasing Department. The purchase of any printer not on the list must be pre-approved by the CIO.
Determining if a Printer will be Directly Connected or On-Network
Faculty and Staff Members have the option of either making a direct or network connection to the printer. A direct connection is when a printer is connected to a single computer and an on-network printer means that multiple parties can print to it. Generally speaking, unless a printer is shared by three or more employees, users should request a direct connect printer.
If you are planning to use a direct connection, simply purchase any printer contained on the Purchasing Department’s list of approved models and follow the instructions for “Installing a Local Printer” in the “Connecting a Printer for Faculty and Staff Members” section below.
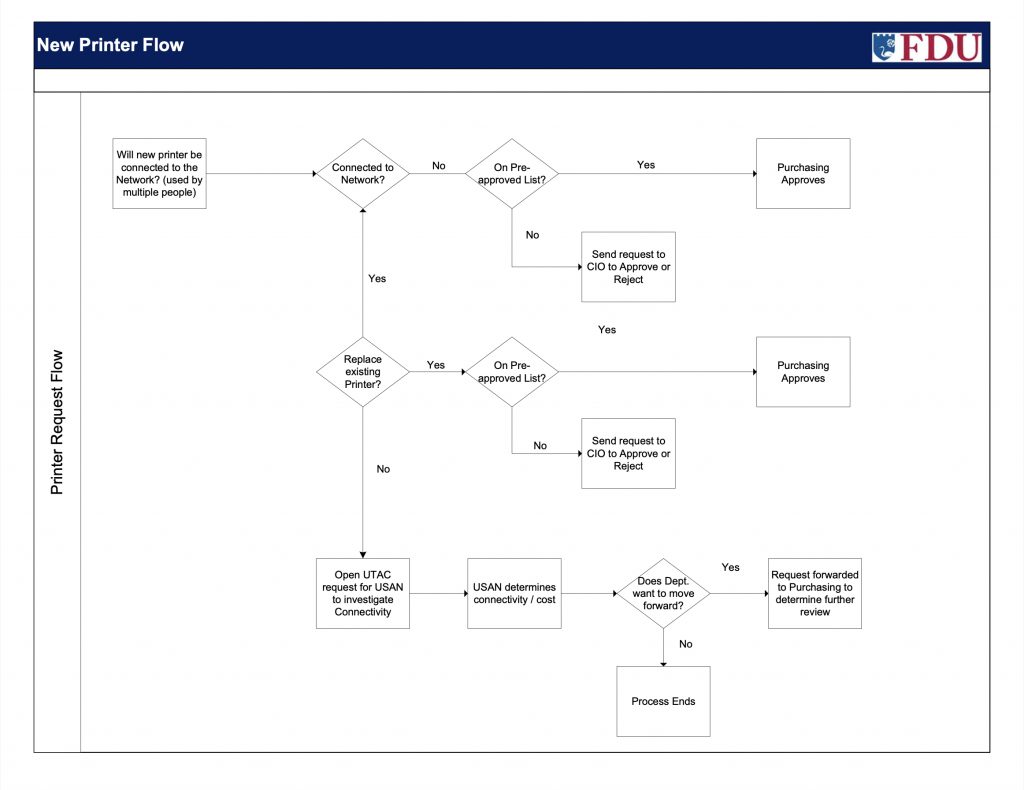
If your new printer will be on-network, please ask your department to contact the Fairleigh Dickinson University Technical Assistance Center (UTAC) for USAN to investigate the viability of any data jacks in the vicinity of where the printer will be located. The full workflow for this process is shown in the following diagram.
Most new printers are plug and play compatible with Windows 10. When you receive your new printer, you can Most new printers are plug and play compatible with Windows 10. When you receive your new printer, you can unbox it and remove any orange tape you see. After plugging in the power and turning the printer on, allow the printer to initialize (most new printers will have a display to show you it’s progress). When the printer finishes initializing, you can just connect the usb printer cable from the printer to your computer. Windows 10 should automatically install the printer for you.
Connecting to a Network Printer
Employees are able to add network printers to their own machines.
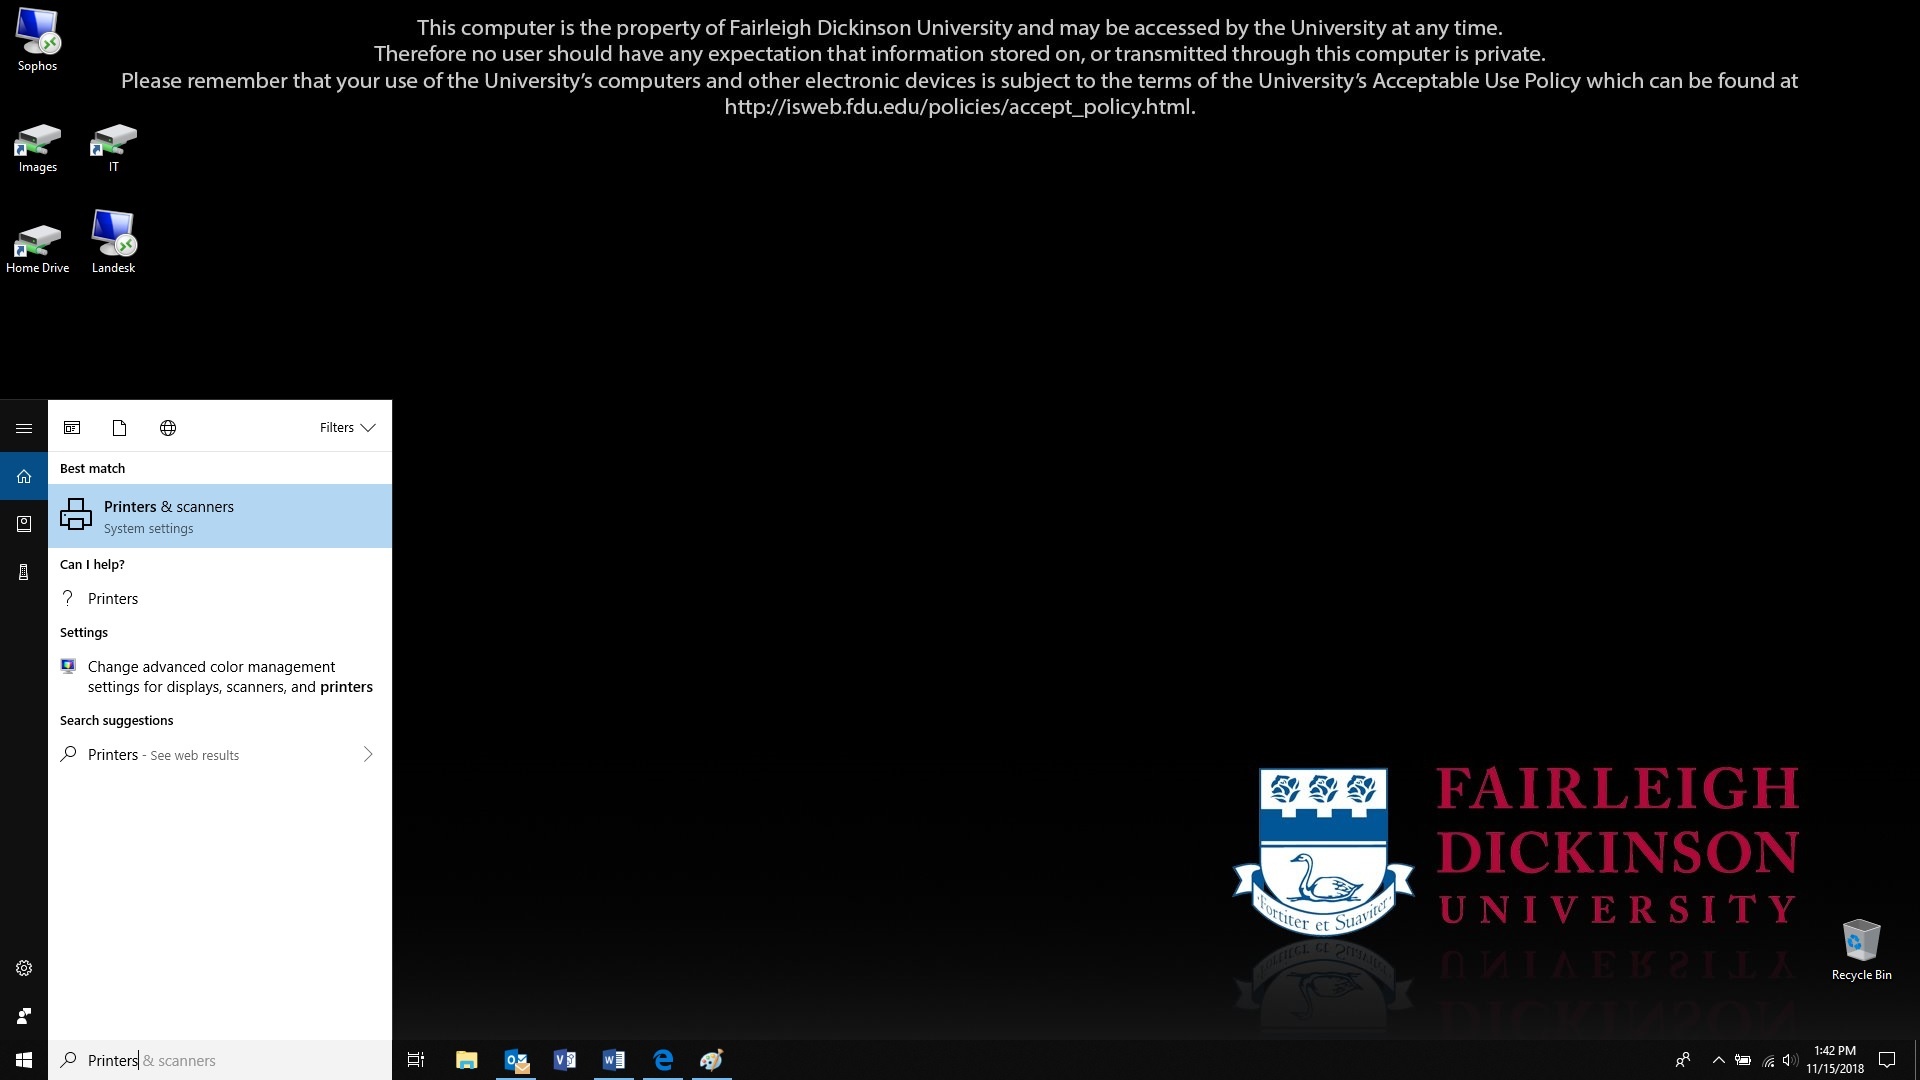
Do a search for printers, and click on “Printers & Scanners”
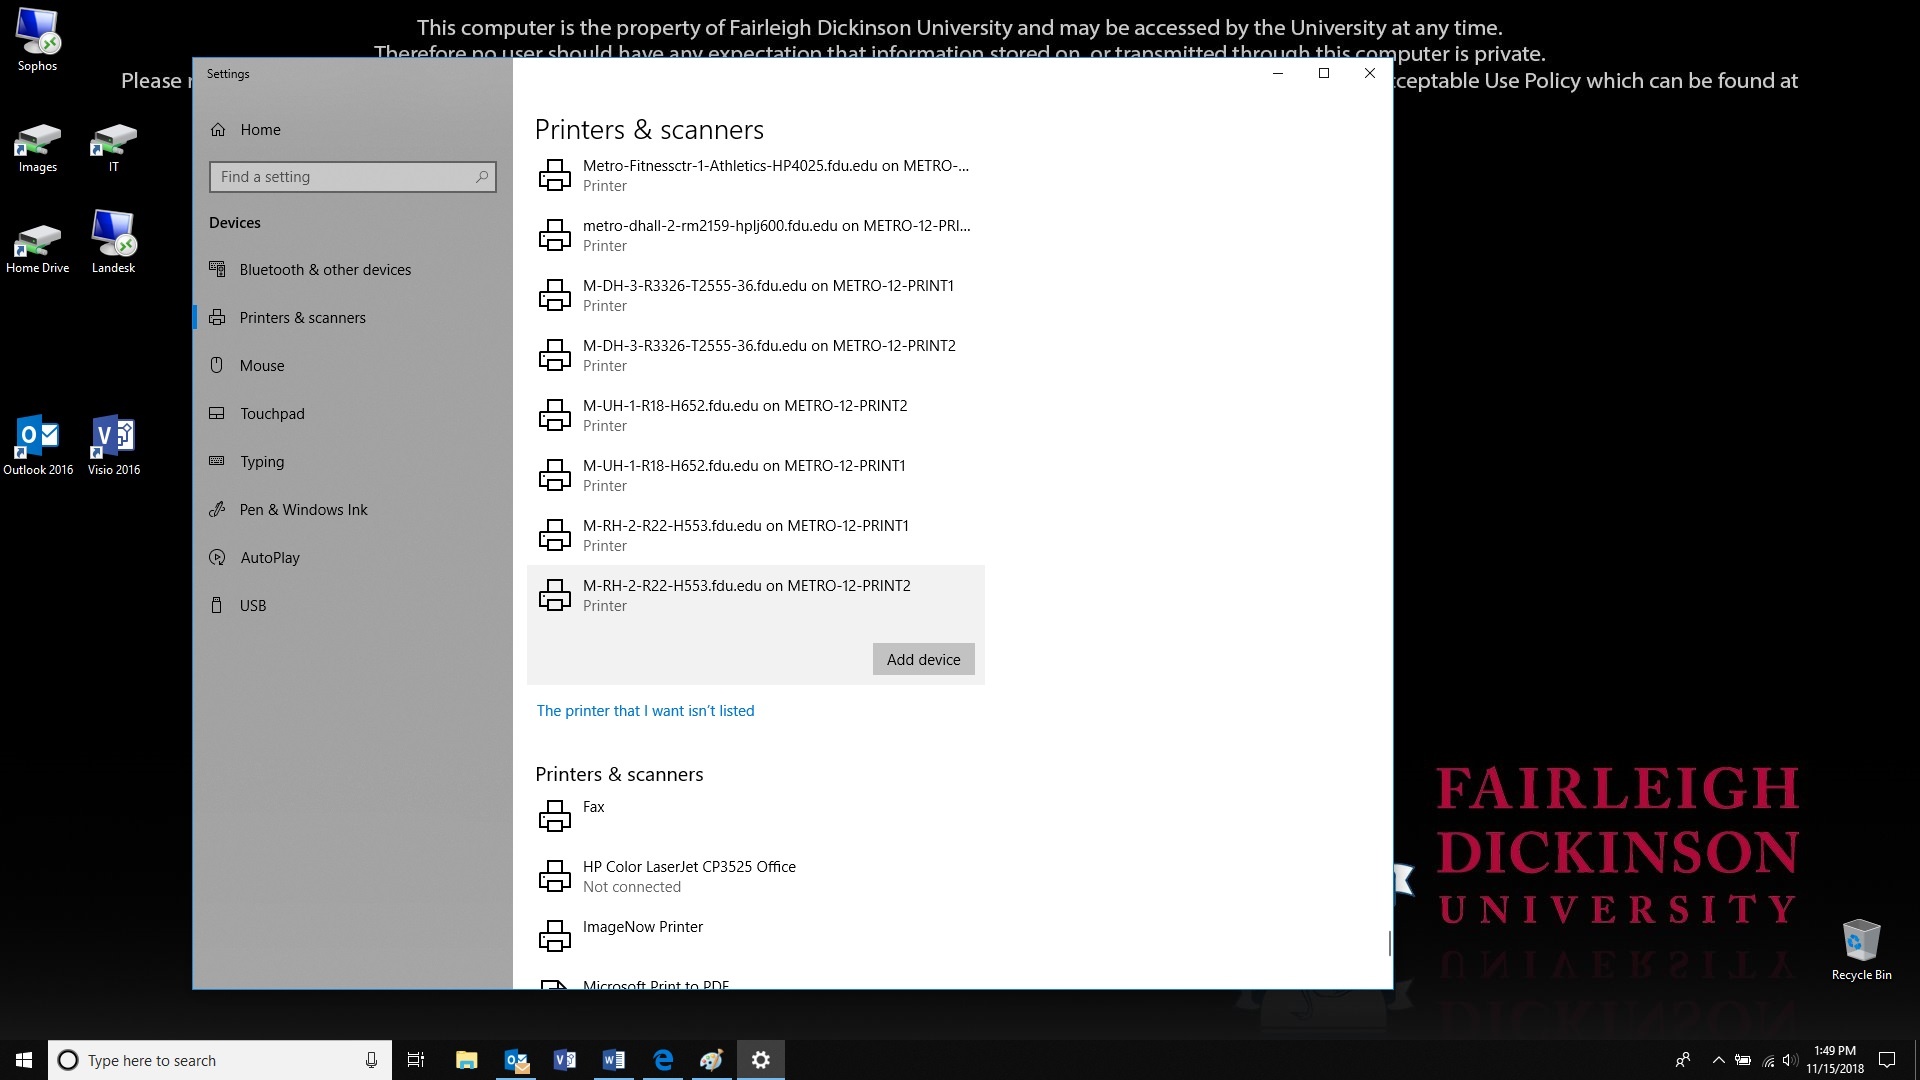
Click on “Add a printer or scanner”
The list will start to populate and if you find your printer you can click on it and then click on “Add device”, otherwise scroll down to the bottom of the list and select “The printer I wanted wasn’t listed”
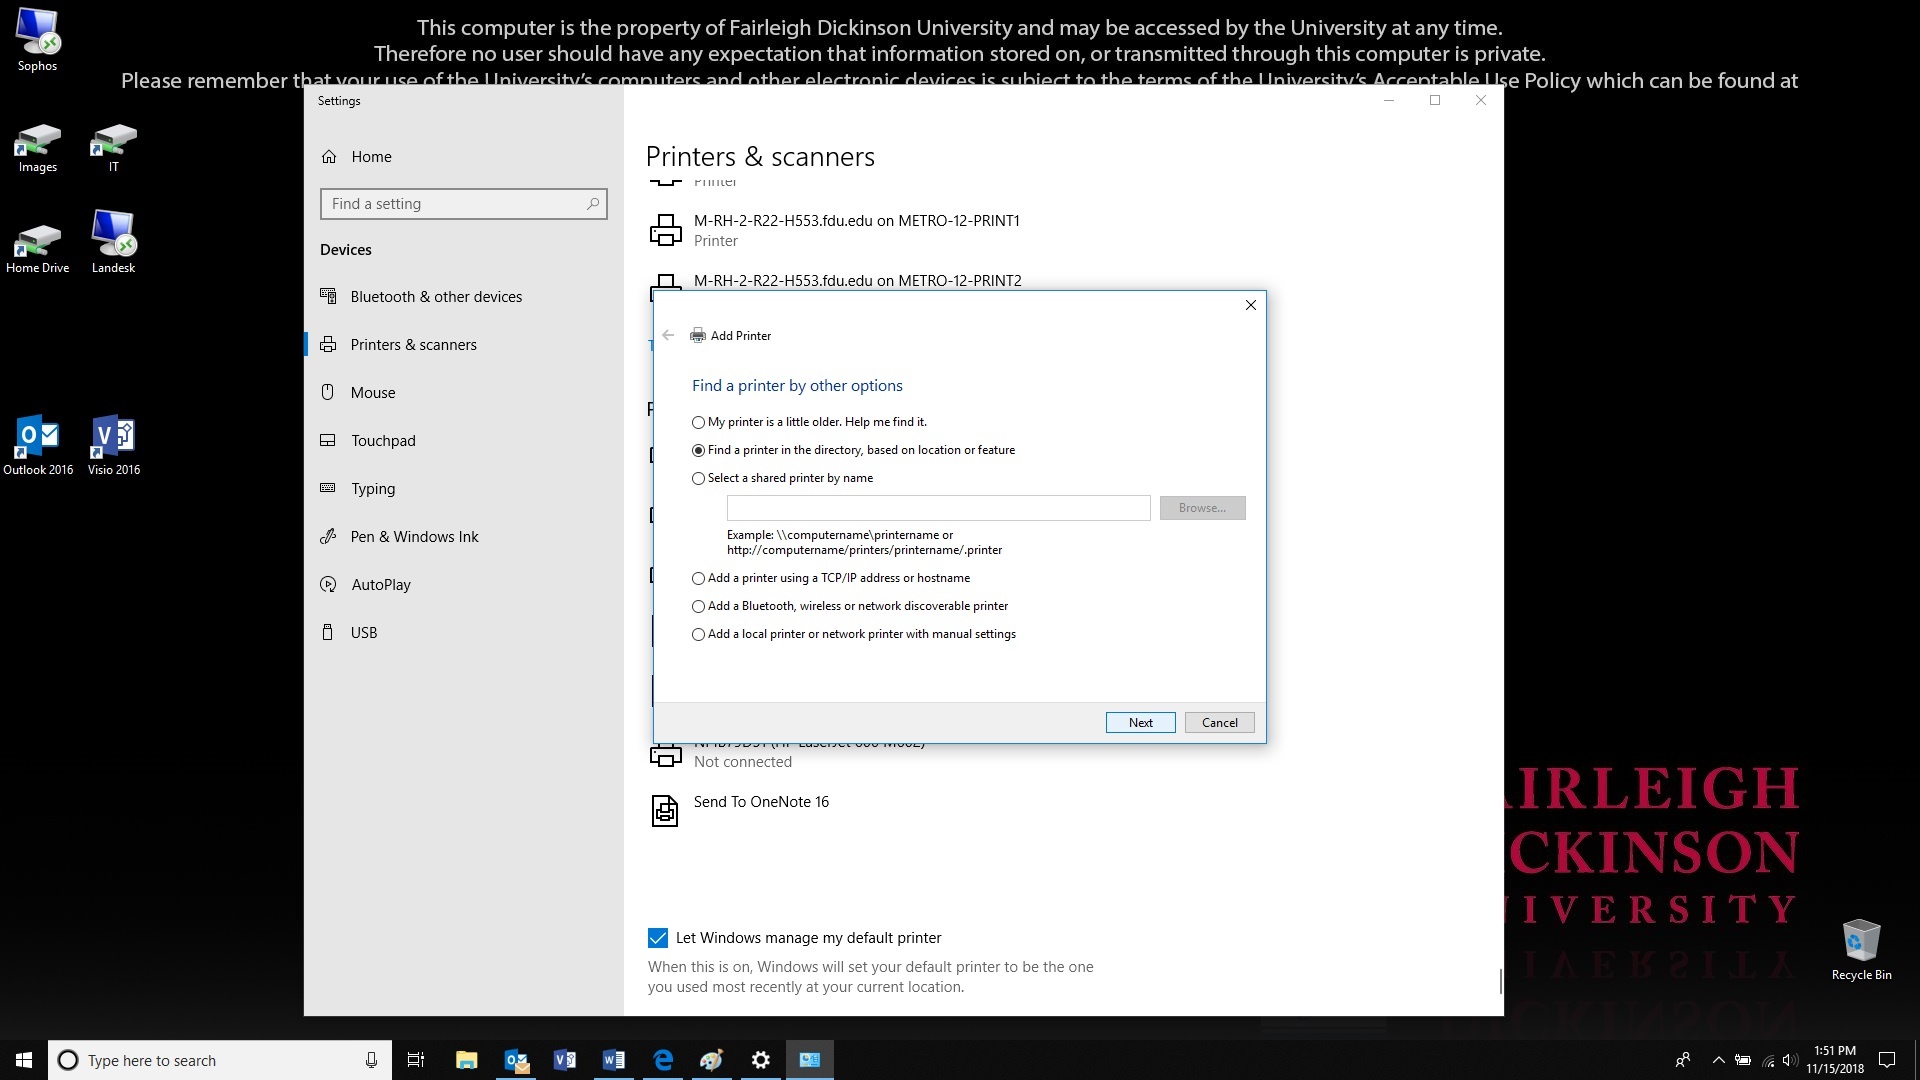
In the new dialog box, select “Find a printer in the directory” and click “Next”
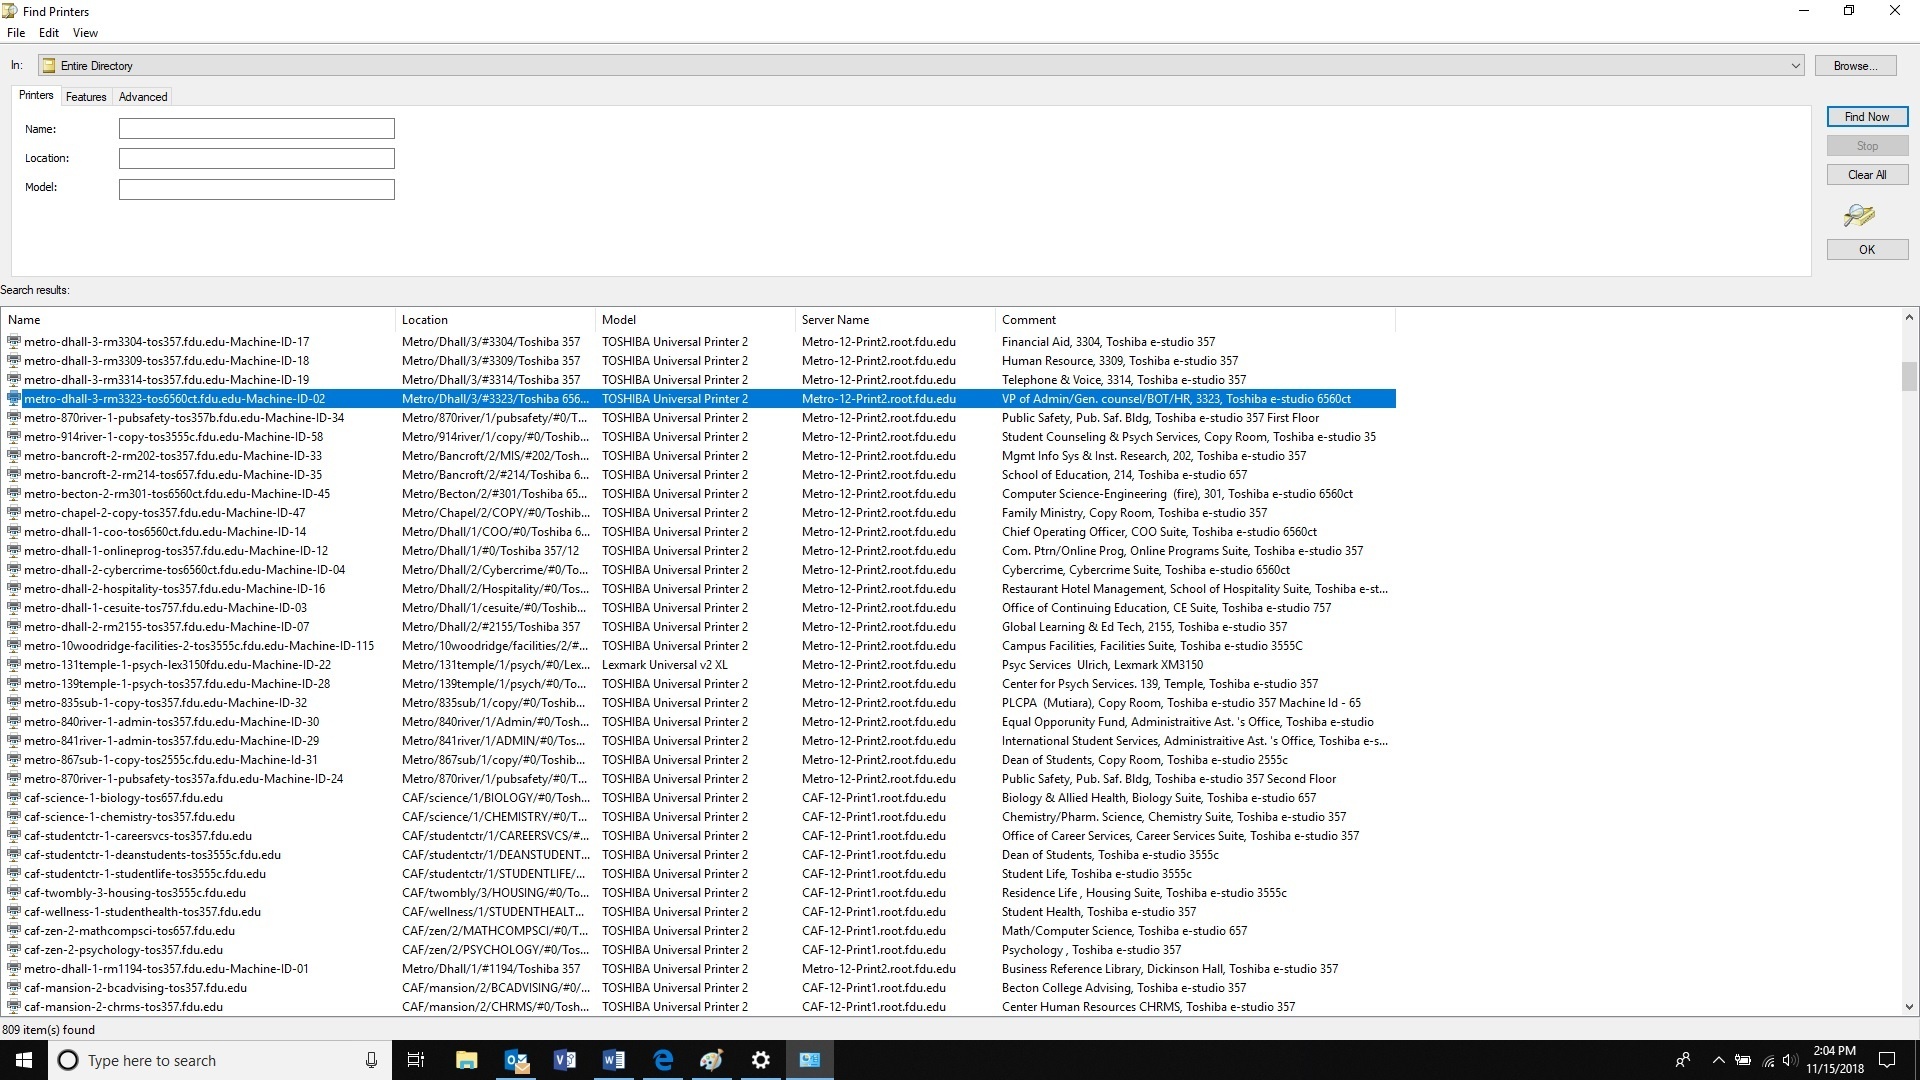
Search for your printer and double click on it when you find it
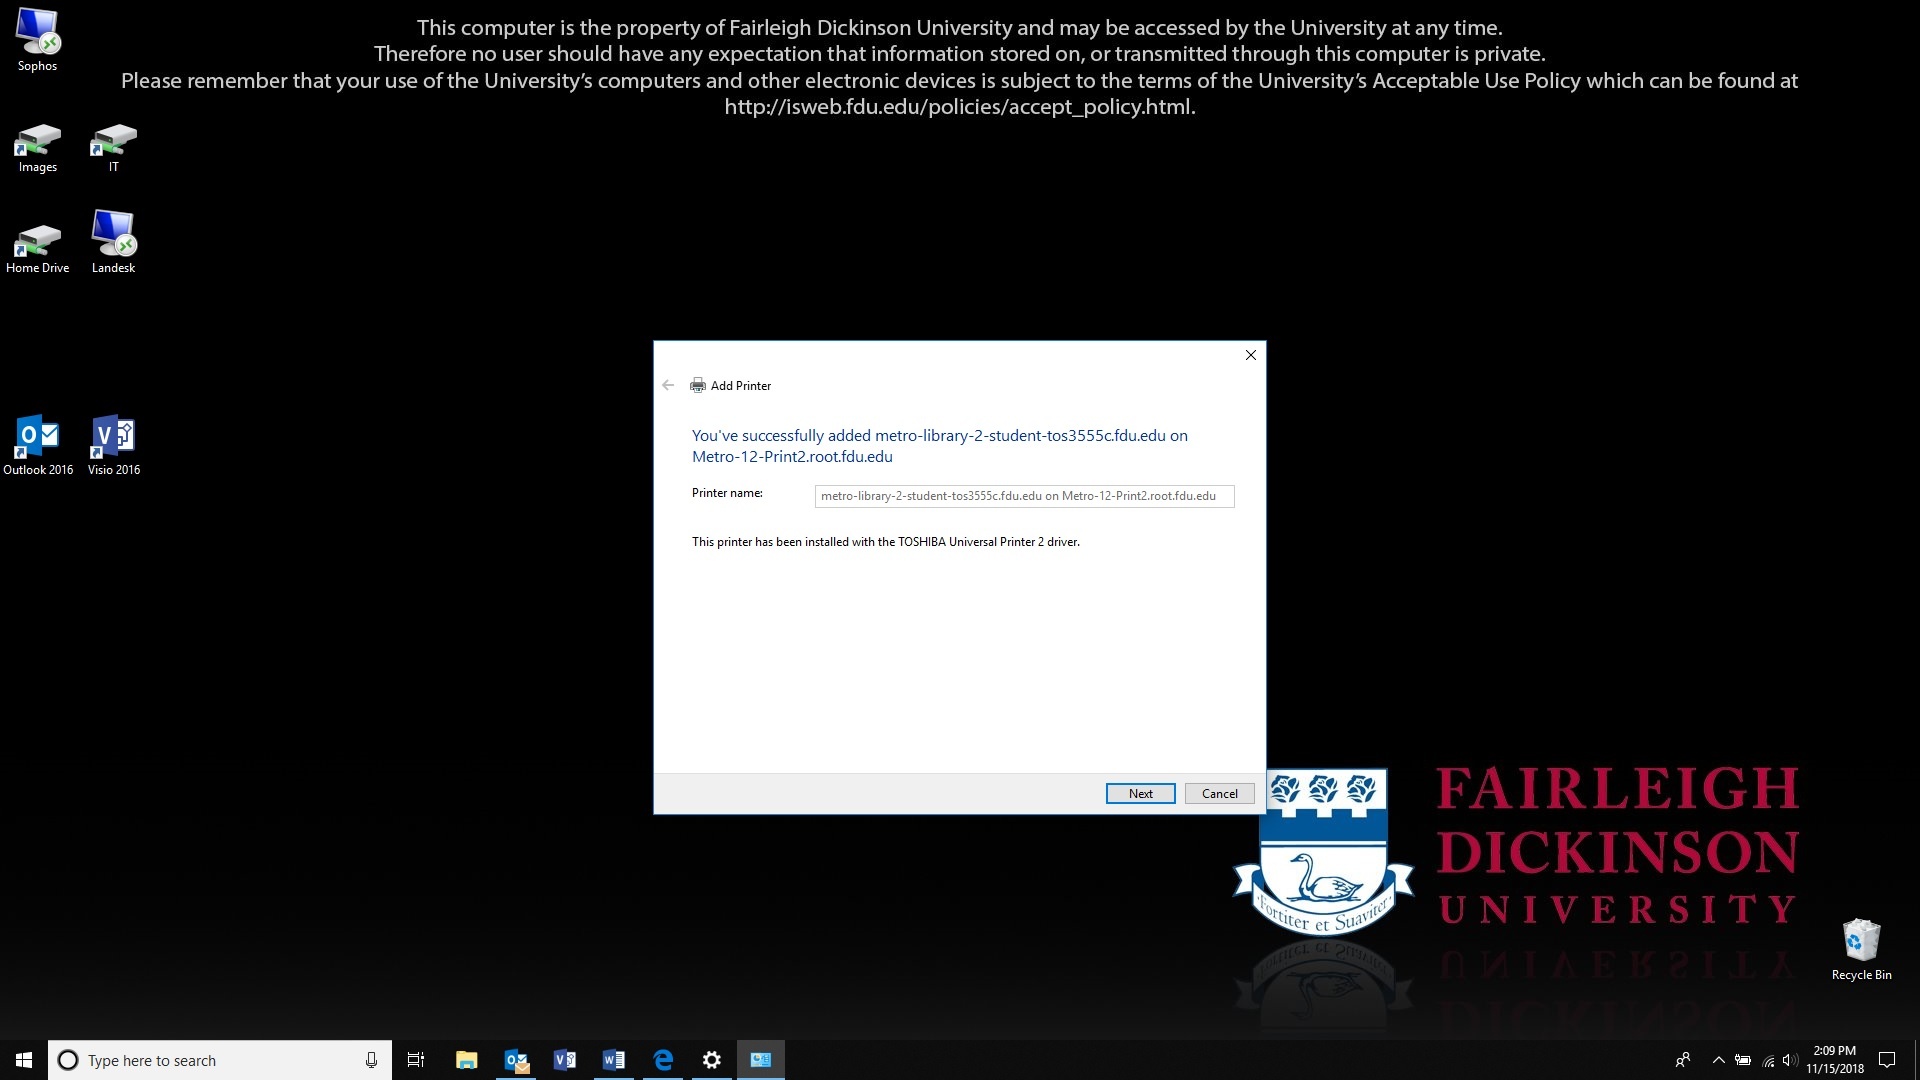
A box will let you know that the printer was successfully installed. Click “Next”
You can click on “Print a Test Page” to verify you are connected to the right printer otherwise click on “Finish”
To prevent excessive printing, the Department of Computing Services charges students a small fee for printing in the FDU Computer Labs. Black and white printing costs $0.05 per page and color printing is $0.25 per page.
Each student pays a technology fee which includes $10.00 of lab printing for each of the fall, spring, and summer semesters. Printing charges above the $10.00 per semester will appear as a Printing Fee on the next tuition bill.
The $10 per semester printing credit is a standard allotment that expires each semester and has no cash value. No refunds will be given for pages not printed and unused prints for each semester’s allotment do not carry forward.
FDU staff and faculty members can use lab printers on a limited basis without charge for the purpose on conducting FDU business. Please use your department’s printer(s) as your primary printing resource. Faculty and staff members are limited to 200 pages per semester. Any attempt to print past this quota will result in an error message stating that the account does not have enough credit.
Note: You are responsible for all activity on your account. If you share your password with others or forget to log out, you will be held responsible for any activity done via your account, including printing charges. Computing Services strongly recommends that you use non-trivial passwords and log out completely before leaving a workstation.
View and Manage your Lab Printing
PaperCut Icon
Hovering your cursor on the Papercut tray icon shows the Balance
When you click on the Papercut tray icon, it opens a new window as seen below:
Clicking on the “Details…” button on the lower right of the Balance within the Papercut window opens a web browser that will let the user log in and see their job history
Receiving Credit for Printing Errors
Credit will be given for errors caused by the printer (paper jams, toner problems, etc.) In such situations, please take the bad printouts to a Lab Assistant in Dreyfuss, Dickinson Hall, or University Hall. Your information will be taken, and reimbursement will be made in the form of a credit applied to your total charge for the semester. Situations which could have been prevented before printing, such as extra blank pages at the end of a document, will not be reimbursed.
Can I Use My Own Paper in These Printers?
No. Jobs are printed as they are received. There is the possibility that after loading the printer with your paper someone will print a job that will then be printed out on your paper. Transparencies and mailing labels are not allowed in the lab printers due to the high heat that laser printers use and the potential for damage to the equipment.
To access Forms, you will be directed to our SAMI Support Portal where you will be asked to log in using your NETID and authenticate using Duo. Once you click “Next,” you will be forwarded to samisupport.fdu.edu in a new window or tab.