printing

On-Campus Printing

Resources for:
icon Close

The following tutorial will guide you through the process of connecting a printer while on-campus. Faculty and Staff members should review the purchasing process before engaging with the process for connecting a printer.

Note

Wireless printing is not permitted on campus. The information below is for wired connections only.

Connecting a Printer for Students in the Residence Halls

Most new printers are plug and play compatible with Windows 10. When you receive your new printer, you can unbox it and remove any orange tape you see. After plugging in the power and turning the printer on, allow the printer to initialize (most new printers will have a display to show you it’s progress). When the printer finishes initializing, just connect the usb printer cable from the printer to your computer. Windows 10 should automatically install the printer for you.

close
Printer Purchasing Process for Faculty and Staff

All printer purchases for faculty and staff on-campus use must appear on OIRT’s list of approved printer models. For the most up to date list of approved printer models, please contact the Purchasing Department. The purchase of any printer not on the list must be pre-approved by the CIO.

Determining if a Printer will be Directly Connected or On-Network

Faculty and Staff Members have the option of either making a direct or network connection to the printer. A direct connection is when a printer is connected to a single computer and an on-network printer means that multiple parties can print to it. Generally speaking, unless a printer is shared by three or more employees, users should request a direct connect printer.

If you are planning to use a direct connection, simply purchase any printer contained on the Purchasing Department’s list of approved models and follow the instructions for “Installing a Local Printer” in the “Connecting a Printer for Faculty and Staff Members” section below.

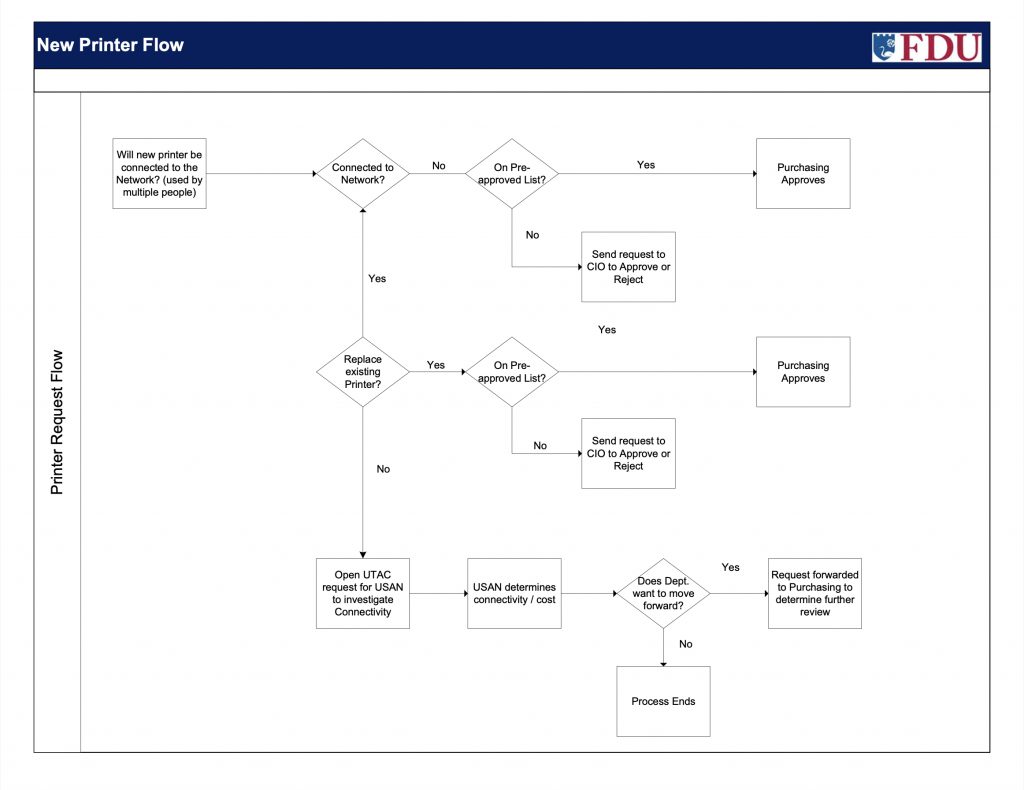
If your new printer will be on-network, please ask your department to contact the Fairleigh Dickinson University Technical Assistance Center (UTAC) for USAN to investigate the viability of any data jacks in the vicinity of where the printer will be located. The full workflow for this process is shown in the following diagram.
close
Connecting a Printer for Faculty and Staff

Installing a Local Printer

Most new printers are plug and play compatible with Windows 10. When you receive your new printer, you can Most new printers are plug and play compatible with Windows 10. When you receive your new printer, you can unbox it and remove any orange tape you see. After plugging in the power and turning the printer on, allow the printer to initialize (most new printers will have a display to show you it’s progress). When the printer finishes initializing, you can just connect the usb printer cable from the printer to your computer. Windows 10 should automatically install the printer for you.

Connecting to a Network Printer

Employees are able to add network printers to their own machines.

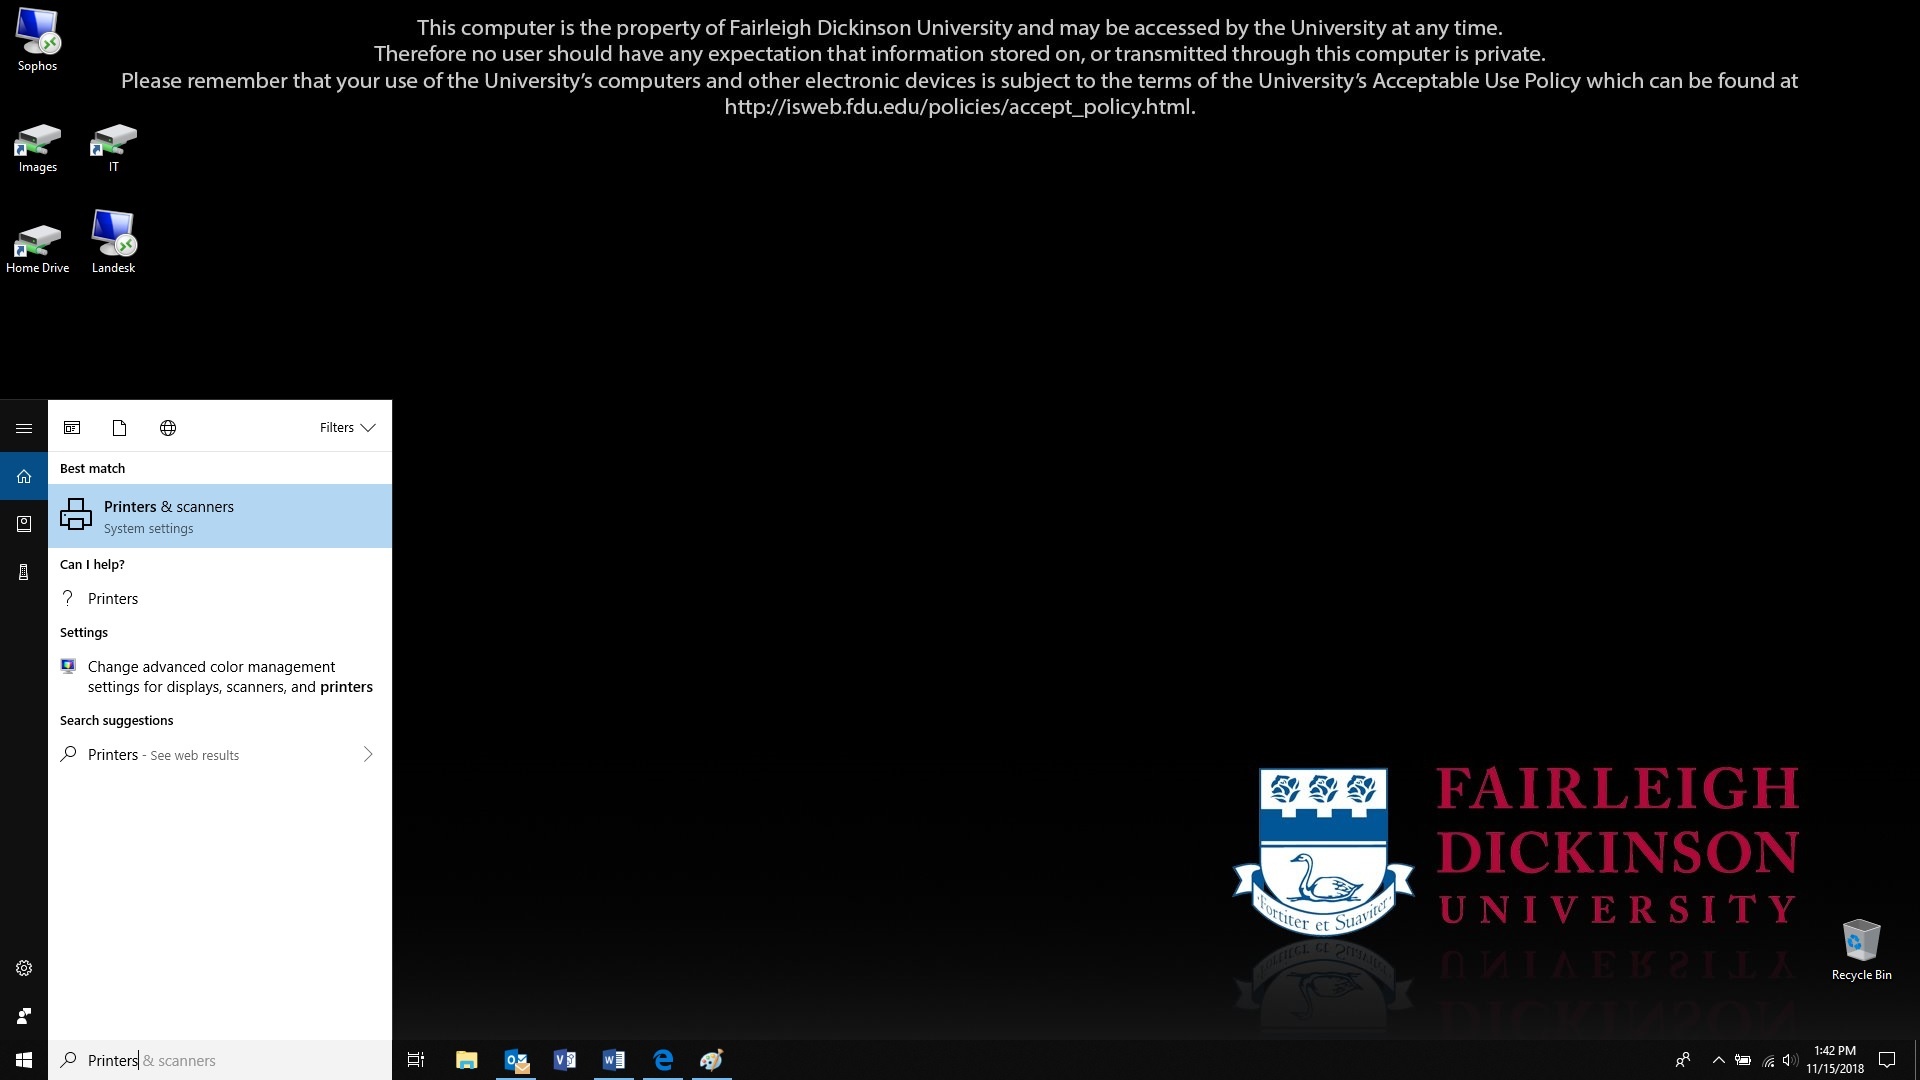
  1. Do a search for printers, and click on “Printers & Scanners

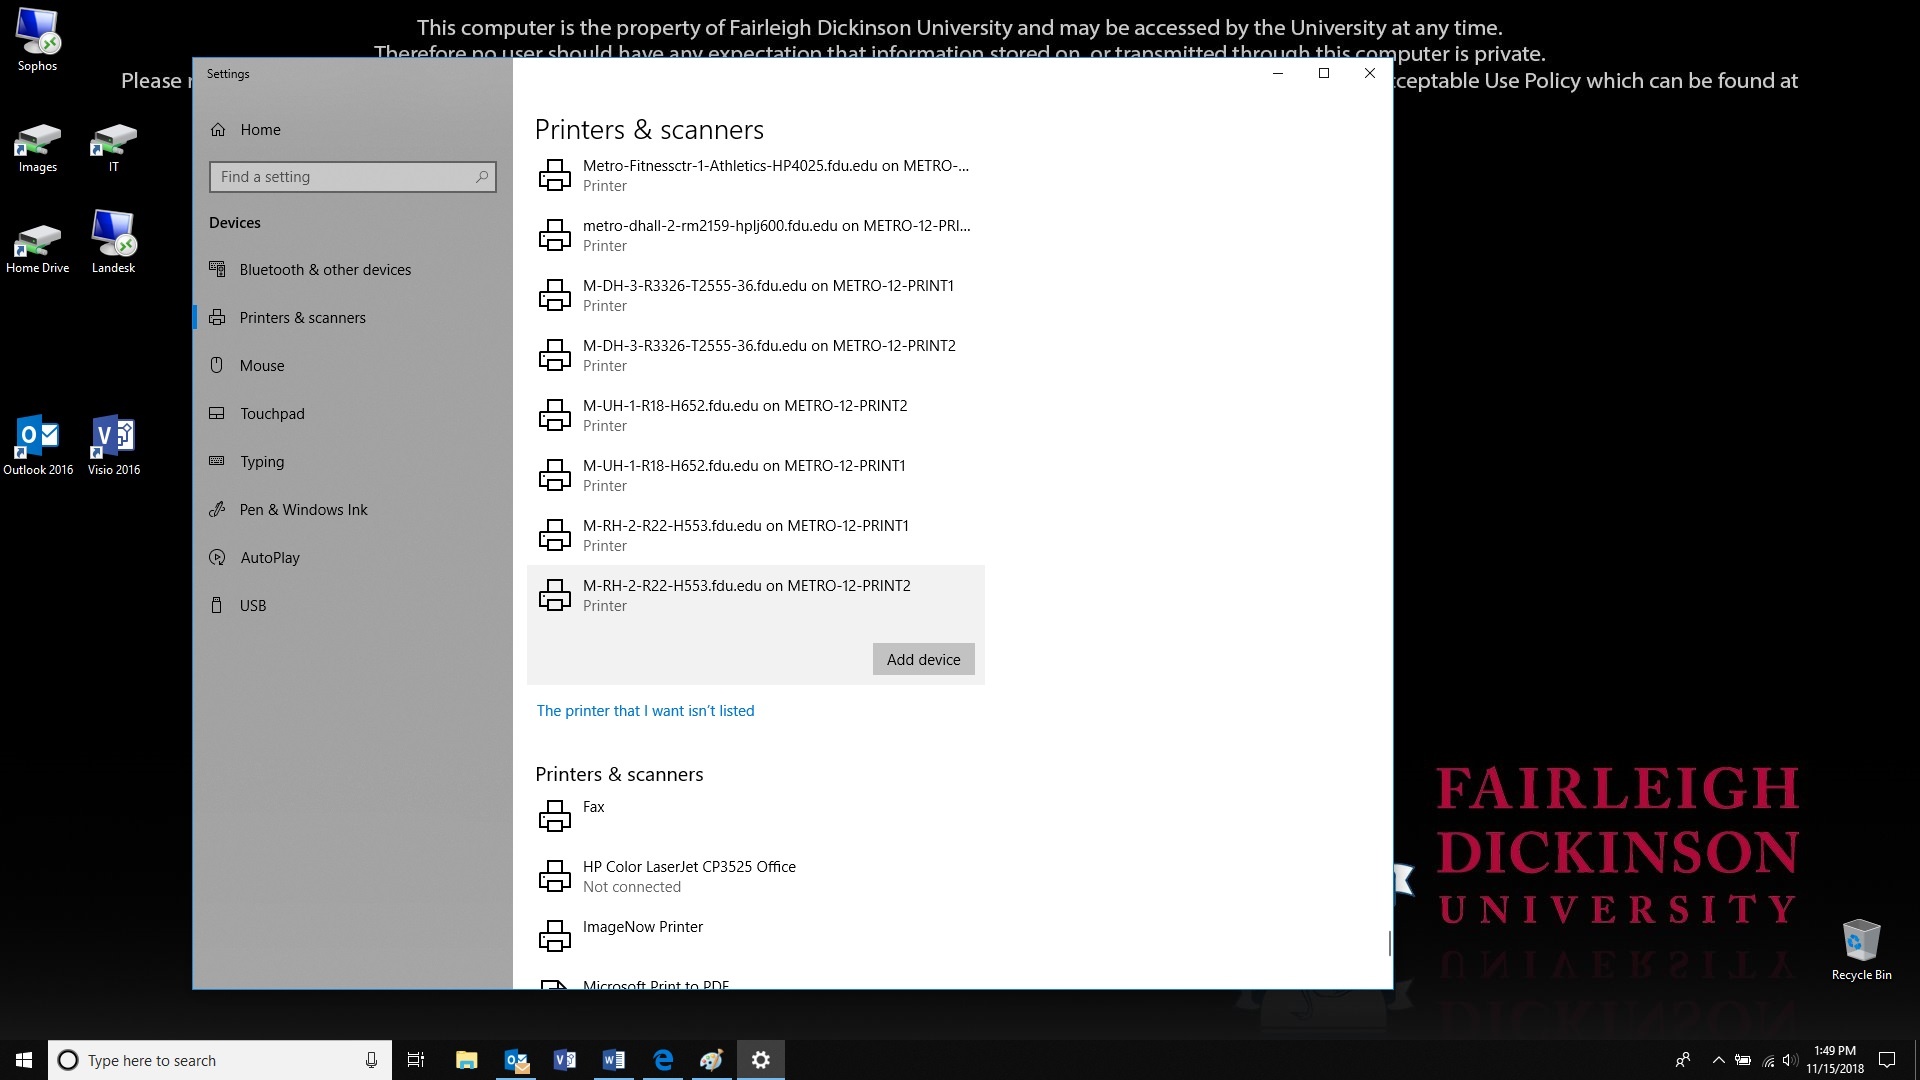
  2. Click on “Add a printer or scanner

  3. The list will start to populate and if you find your printer you can click on it and then click on “Add device”, otherwise scroll down to the bottom of the list and select “The printer I wanted wasn’t listed

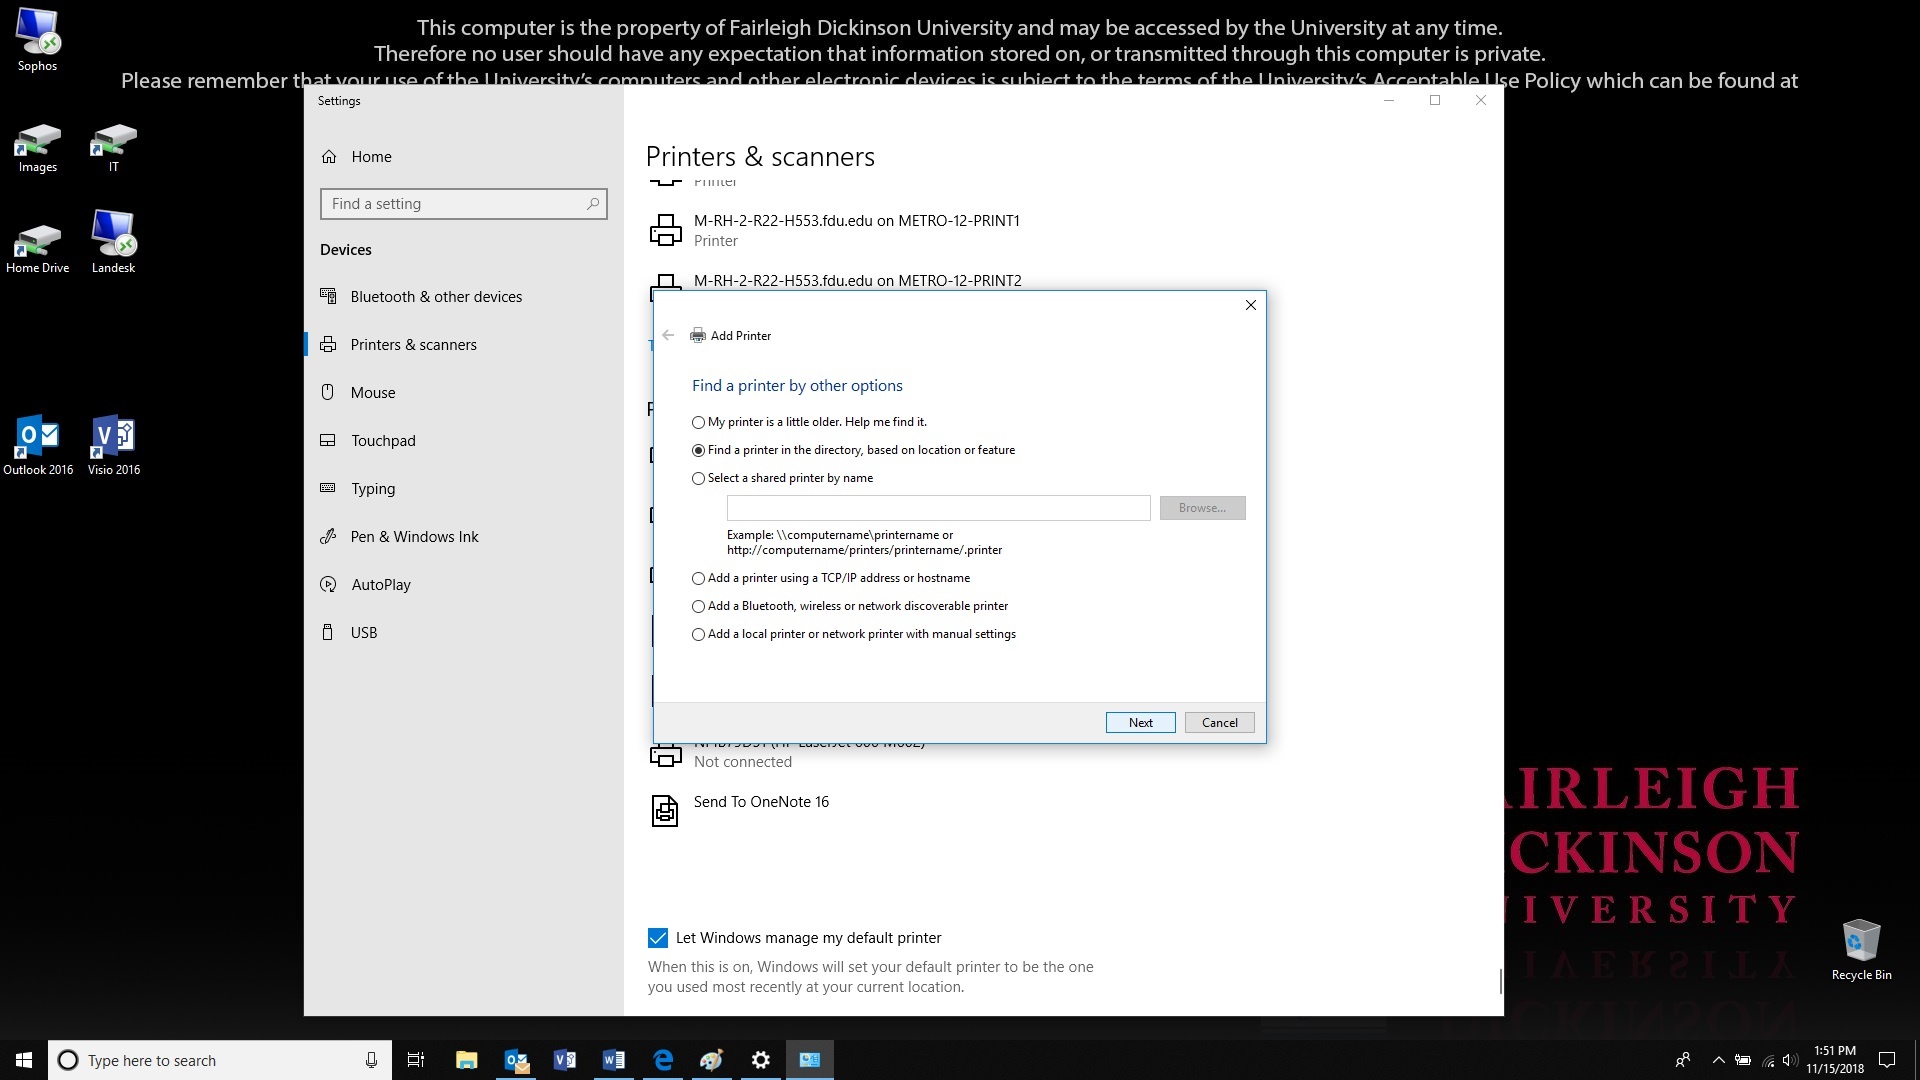
  4. In the new dialog box, select “Find a printer in the directory” and click “Next

  5. Search for your printer and double click on it when you find it
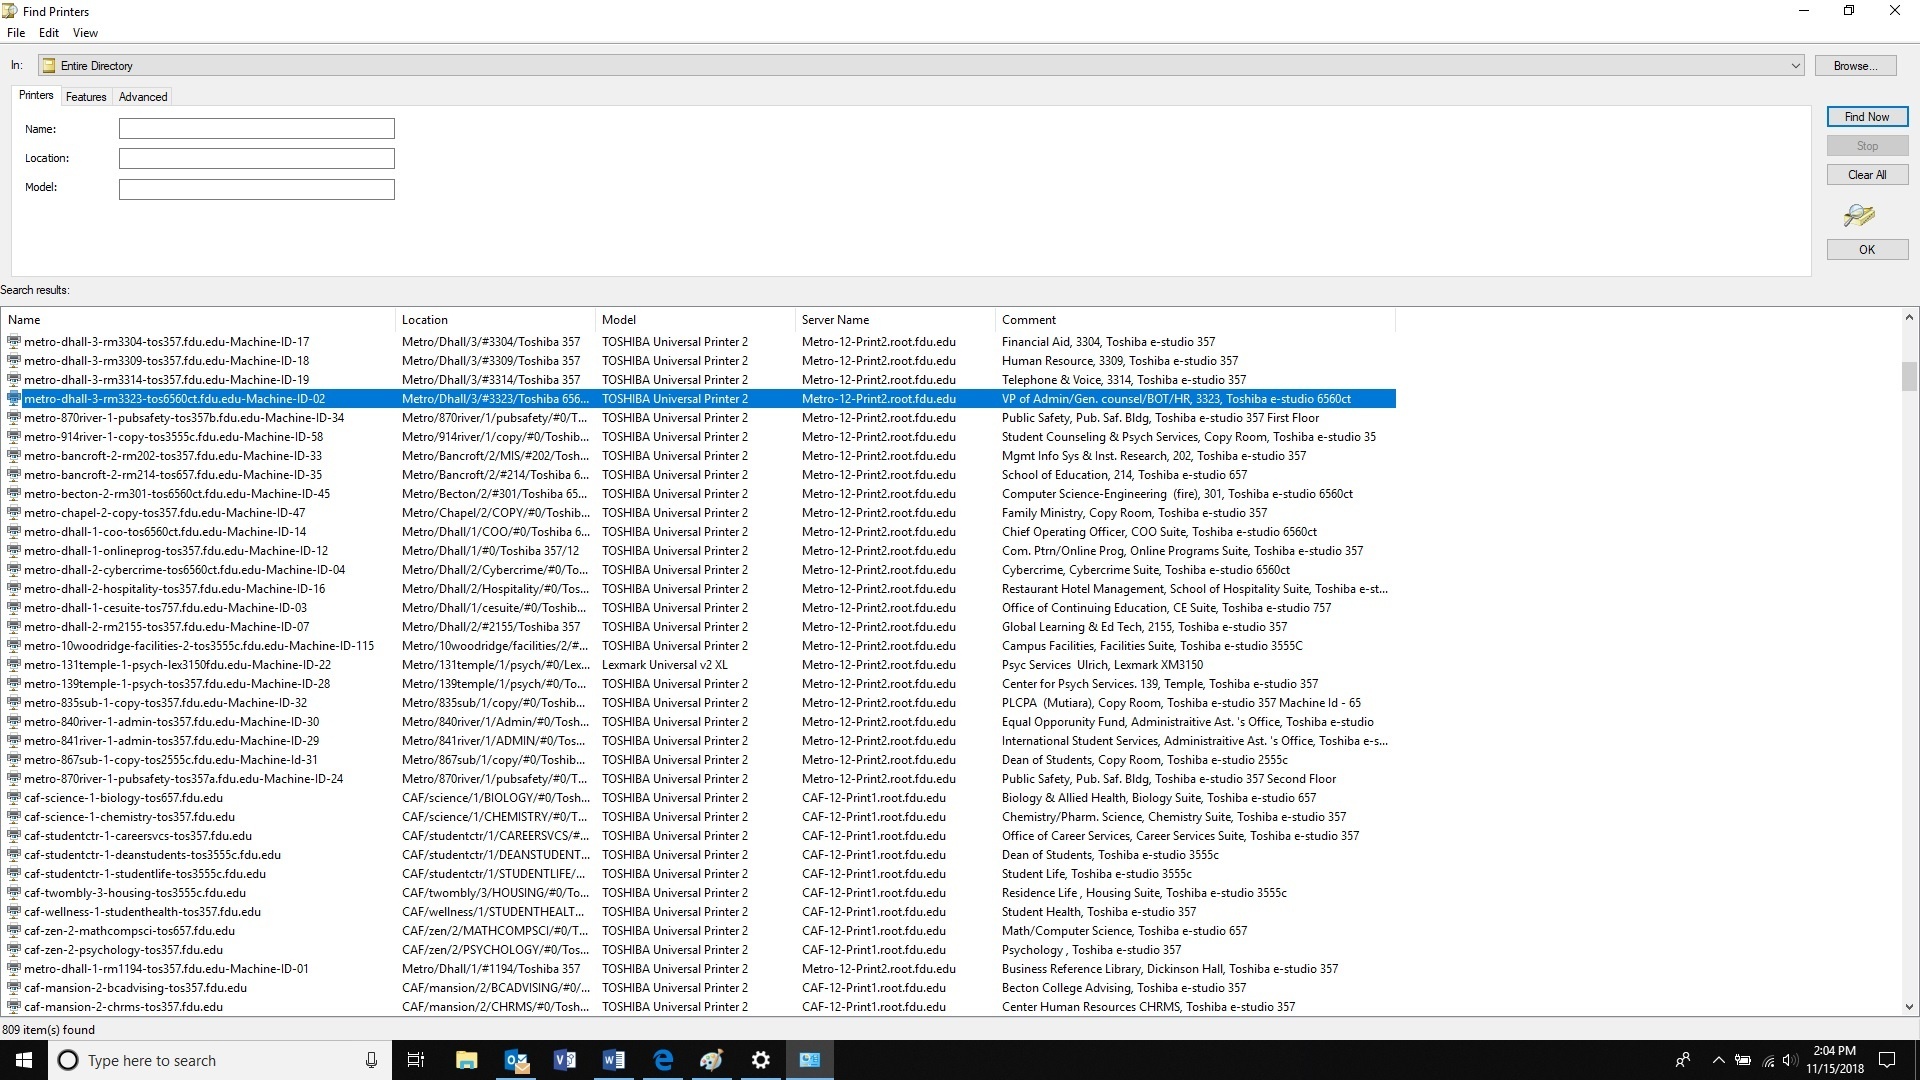
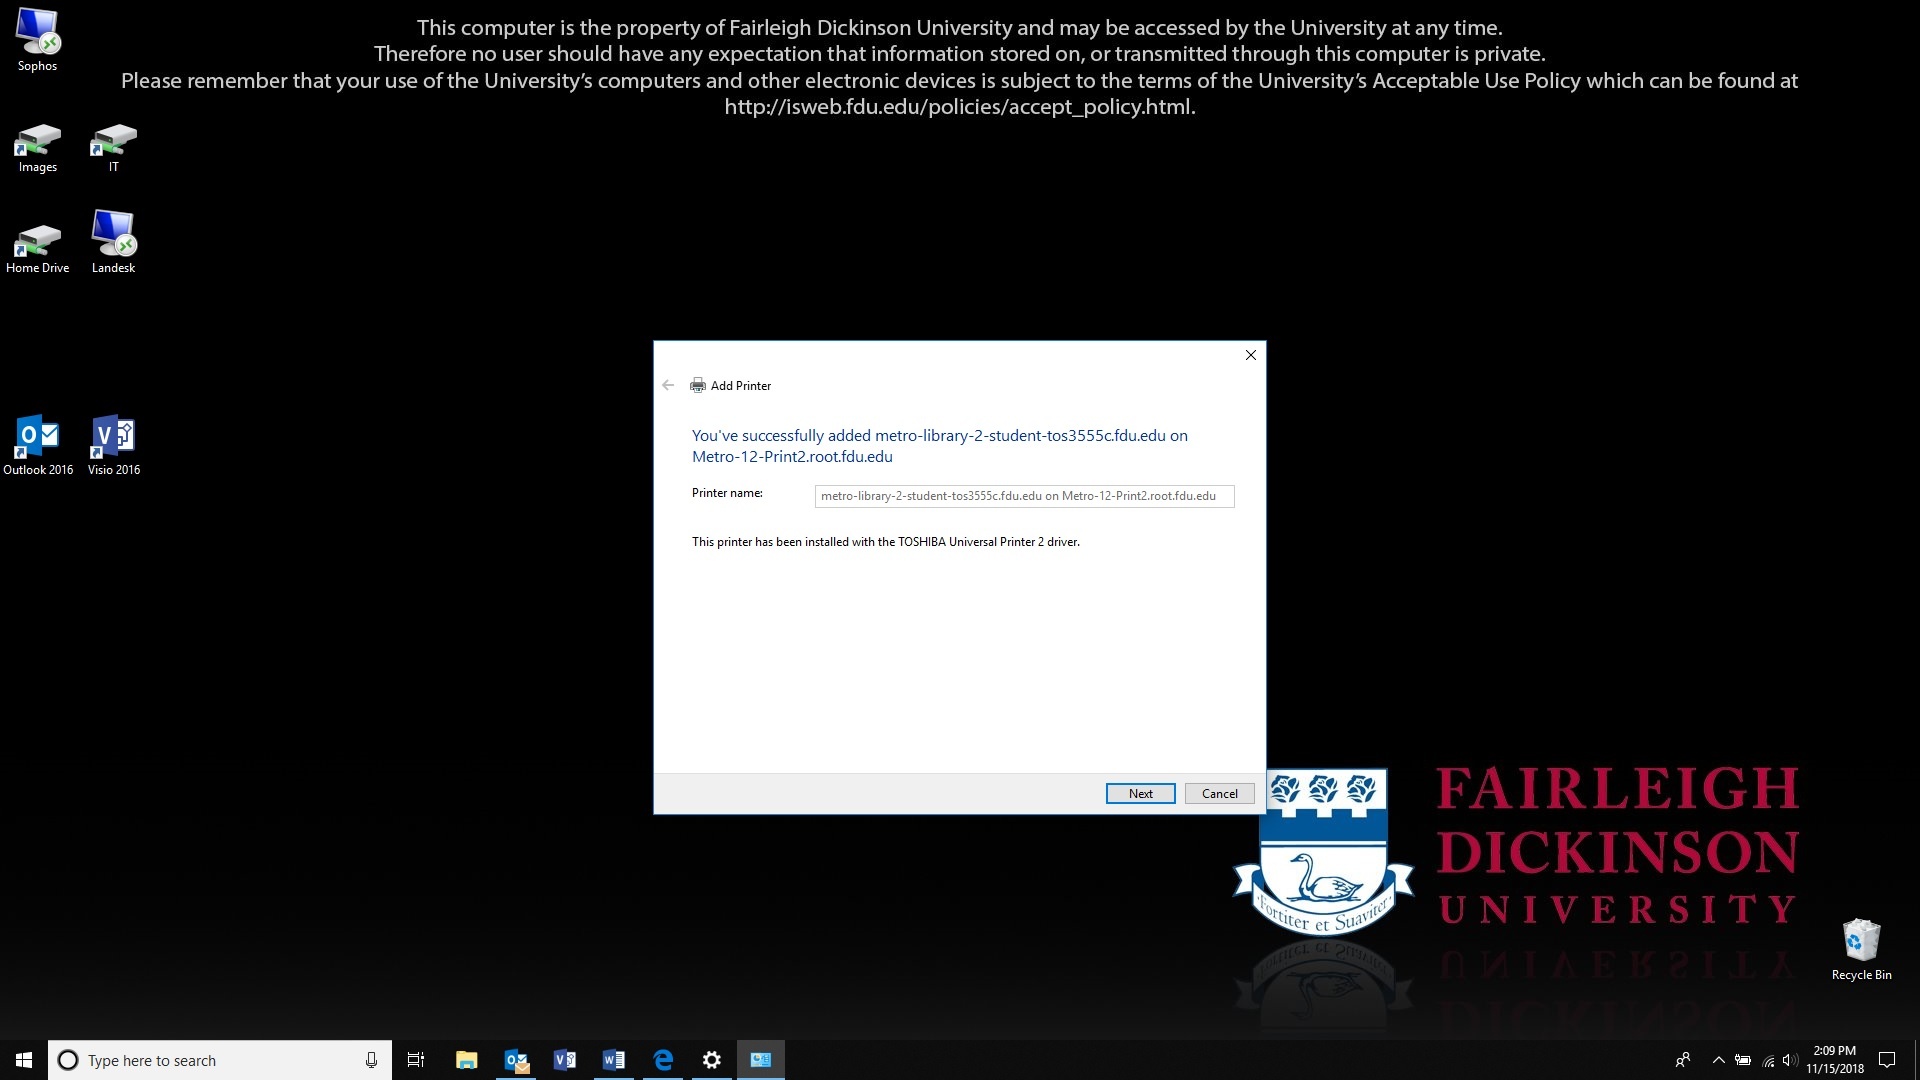
  6. A box will let you know that the printer was successfully installed. Click “Next

  7. You can click on “Print a Test Page” to verify you are connected to the right printer otherwise click on “Finish

close
Last Modified:

Papercut Printing User Instructions

Resources for:
icon Close

The instructions below pertain to any Vancouver user that will use the Secure Print, Scan to email, and Copy functions of the Xerox printers.

Account Balances

Vancouver users have the following account balances listed below:

  1. Free Quota, is a designated account balance that is applied to all the students and is auto-replenished on schedule – before the start of the semester. This is the first balance that gets deducted after which the secondary “Paid_Balance” goes into effect.
  2. Paid Balance is the amount credited onto a student’s account when they pay for extra printing credits.

Free Quota Account Balance Automated Replenishment

Each user listed below has a specified amount of Free Quota replenished according to a schedule:

  • Adjuncts: $1000.00 replenished at the start of the school year
  • Student IT Assistants And Student Workers: $200.00 replenished at the start of every school term
  • Staff and Faculty: $1000.00 replenished at the start of every school term
  • Students: $10.00 replenished at the start of every school term

Paid Balance Reload / Replenishment

The instructions below are for Students on how to reload/replenish their Paid Balances:

  1. Go to Enrollment Services to pay for the amount they wish to recharge
  2. Bring the receipt to IT Office to request the reload for their Paid Balance
Logging In
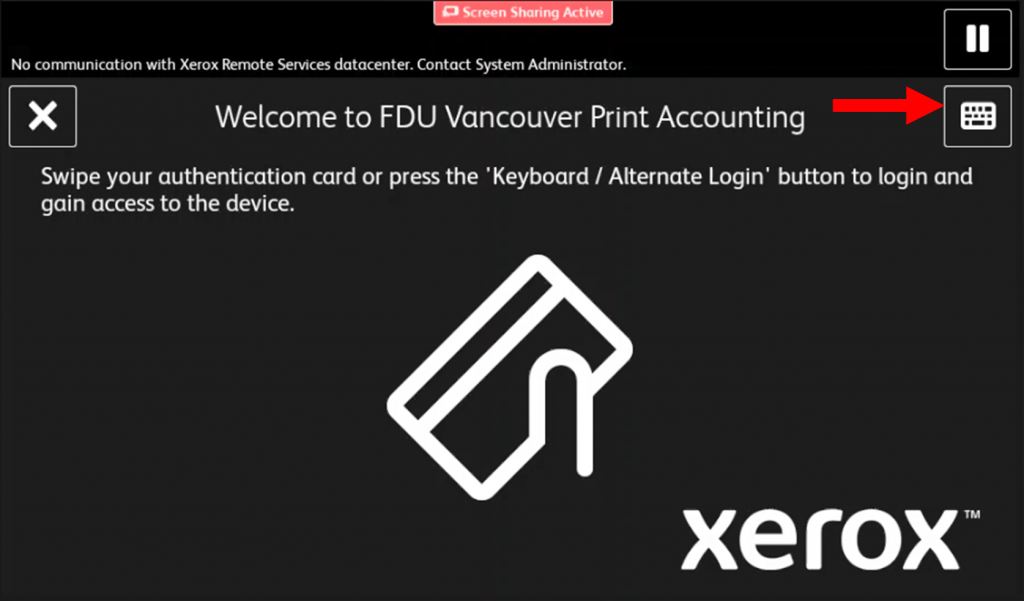
  1. Users can either swipe their badge or use their FDU NetID and password to log in. To use your credentials press the “Keyboard” button on the top right of the screen
Papercut Log in using credentials
  • If upon swiping your badge the following screen appears on the Xerox printer screen. Enter your credentials to associate them with your account. For a detailed walkthrough, play the video below:
close
Checking Account Balance on Printer

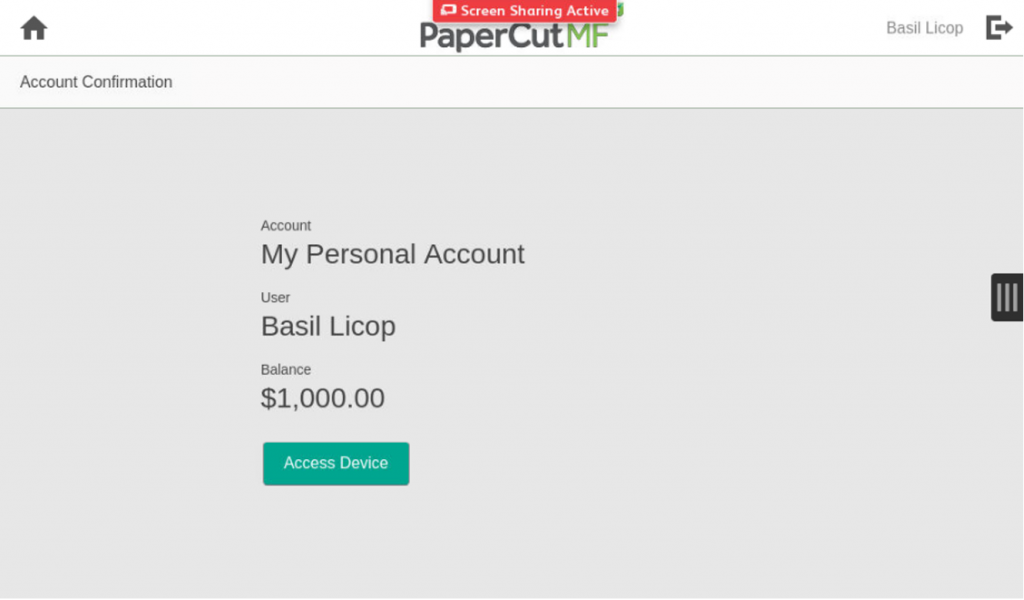
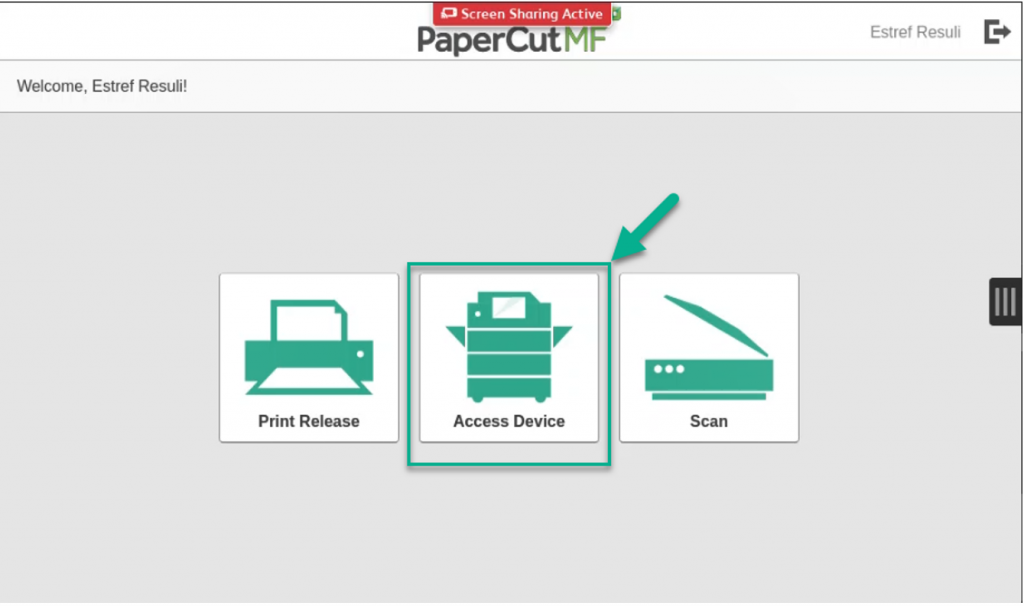
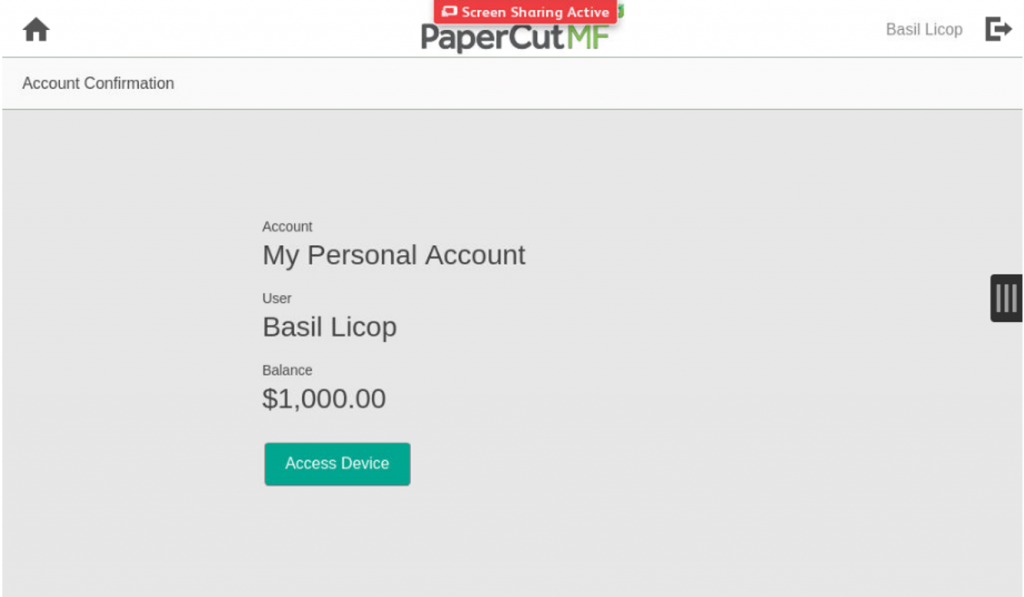
To check your total balance from the printer, log into that printer and press the “Access Device” button. The balance will be displayed on the screen.

close
Secure Print
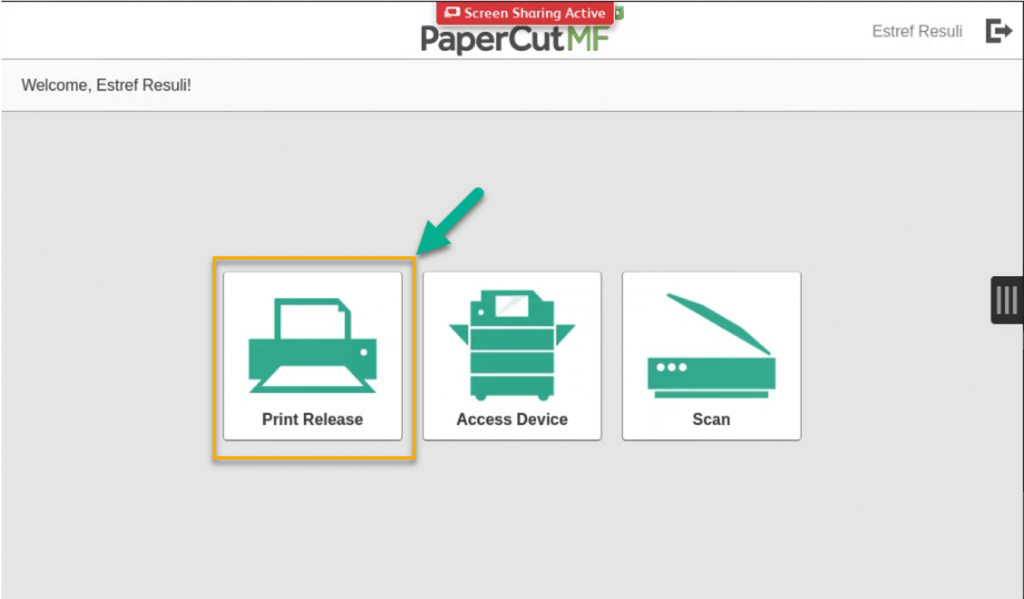
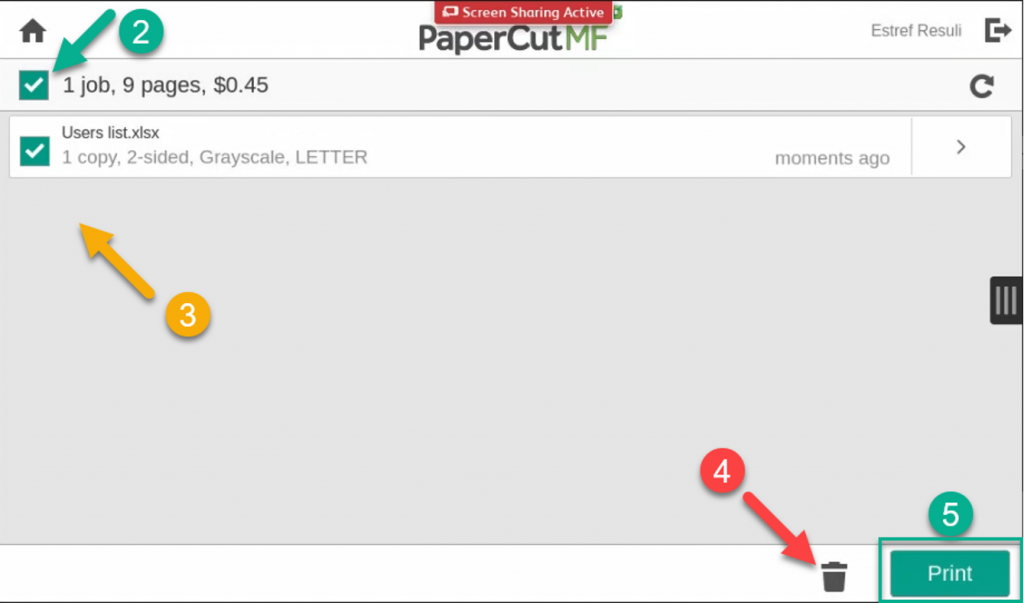
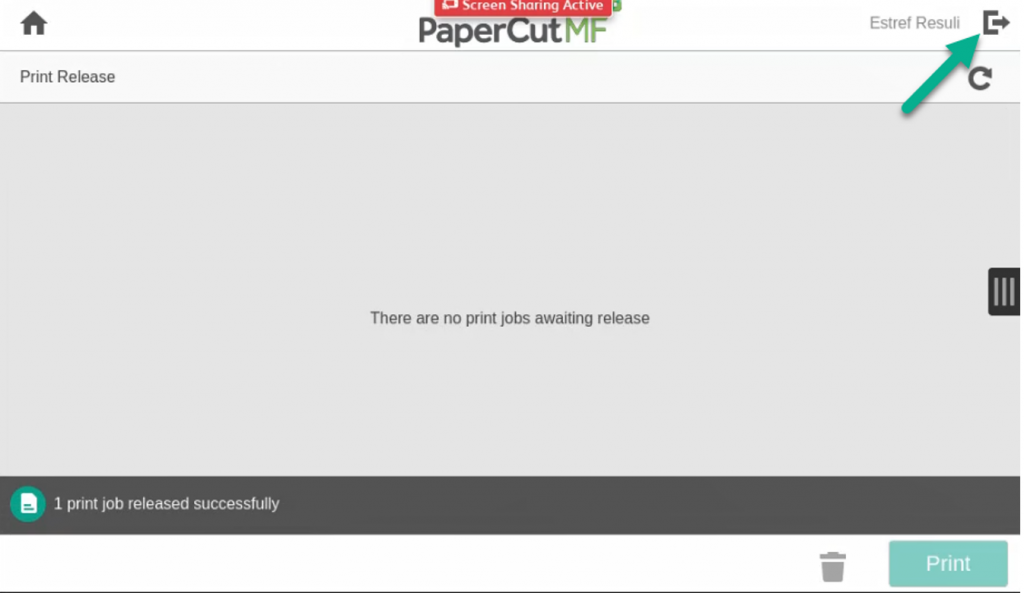
  1. To release a print job after you have sent a print job to the appropriate printer and logged into that printer. Press the “Print Release” button
  • To print all jobs under the queue press the checkbox above all the jobs (2) then press the “Print” button (5)
  • To print a selection of the jobs, select the appropriate checkbox beside the jobs you want to print (3), then press the “Print” button (5)
  • To delete jobs from the printer’s queue, select the appropriate checkbox beside the jobs you want to delete (3), then press the “Trashcan” button (4)
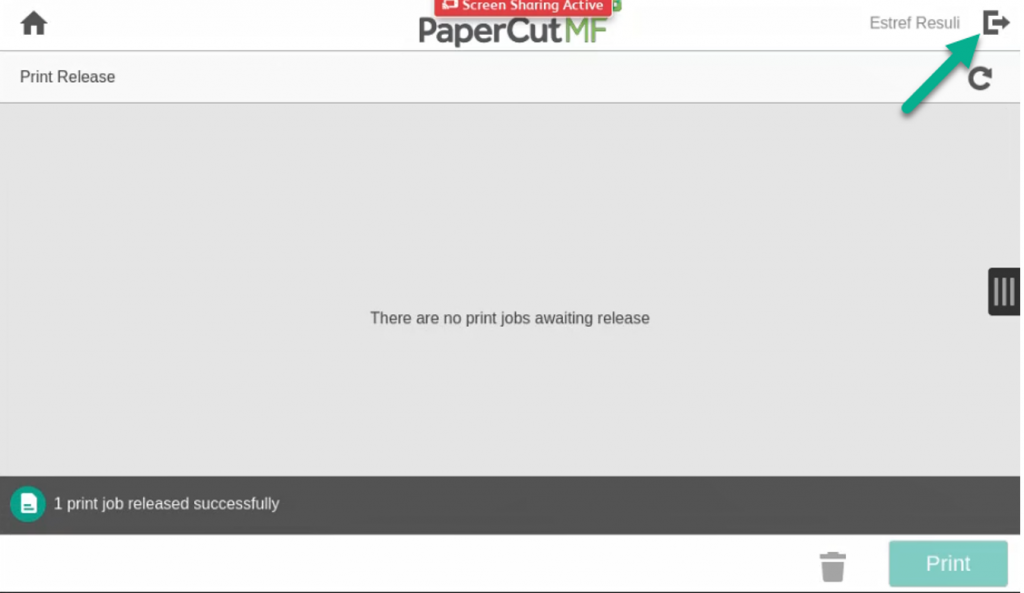
  1. To log off of the printer, press the “Log Out” icon on the top right next to your name
close
Scan to Email
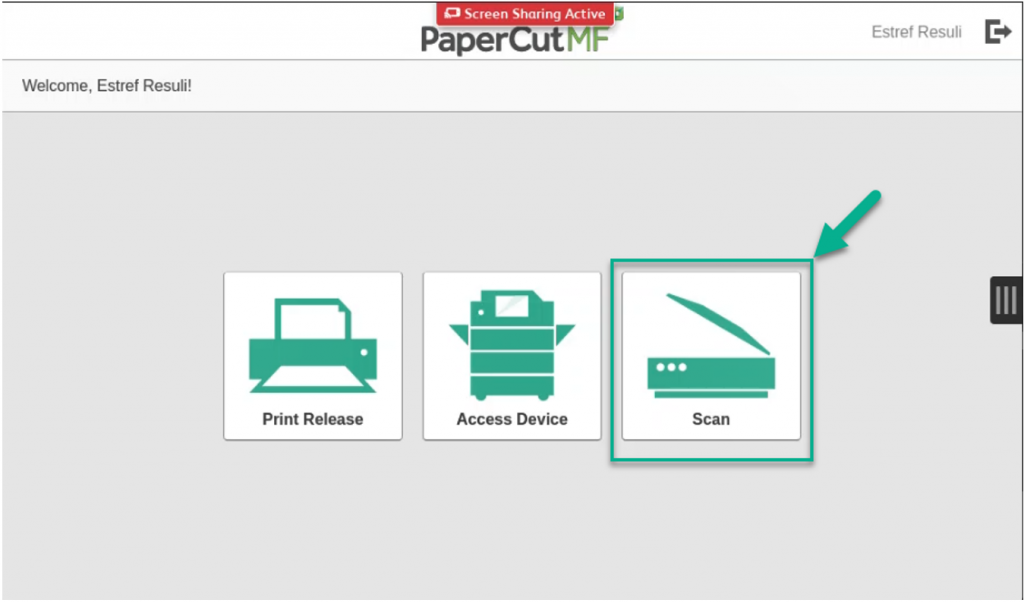
  1. To start a scan-to-email job, log into a printer and press the “Scan” button
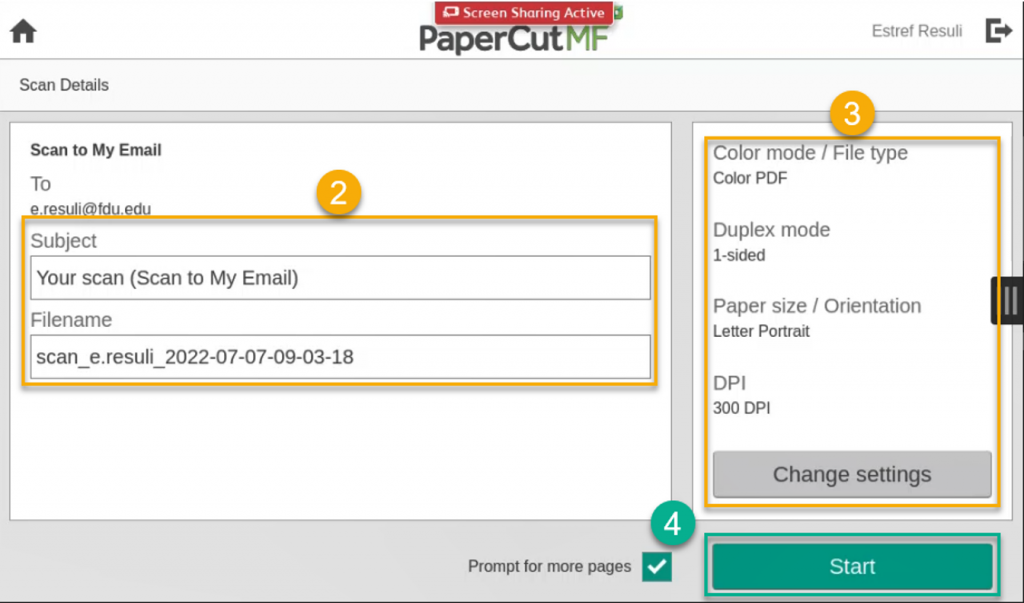
  1. You can press the “Star“’ button (4) immediately to start scanning
    • Optionally you can edit the Subject and Filename entries (2) and the scan settings (3)
  1. To log off of the printer, press the “Log Out” icon on the top right next to your name
close
Copying
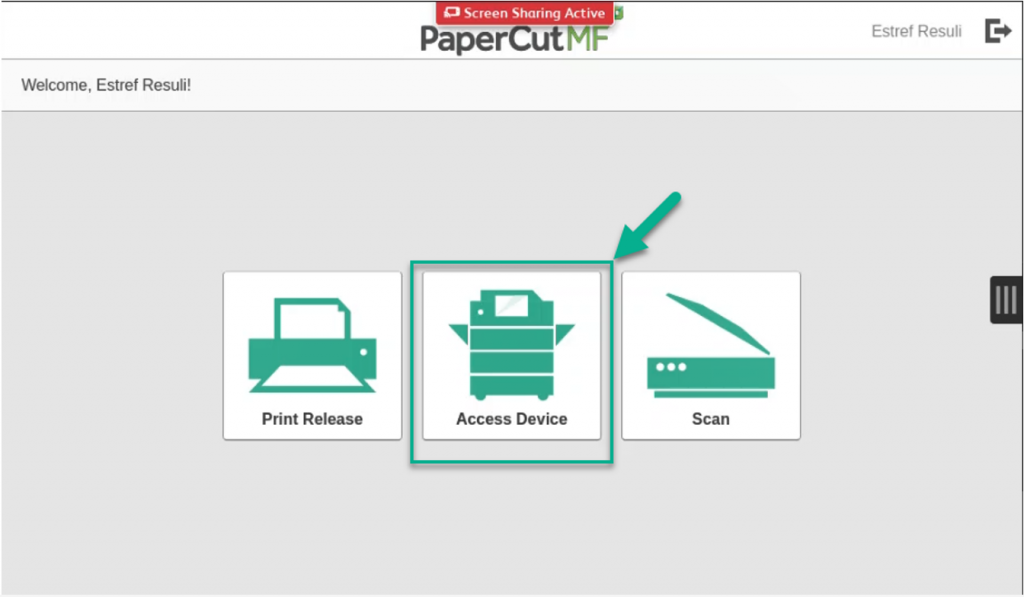
  1. To start a copy job, log into a printer and press the “Access Device” button
  1. Press “Access Device
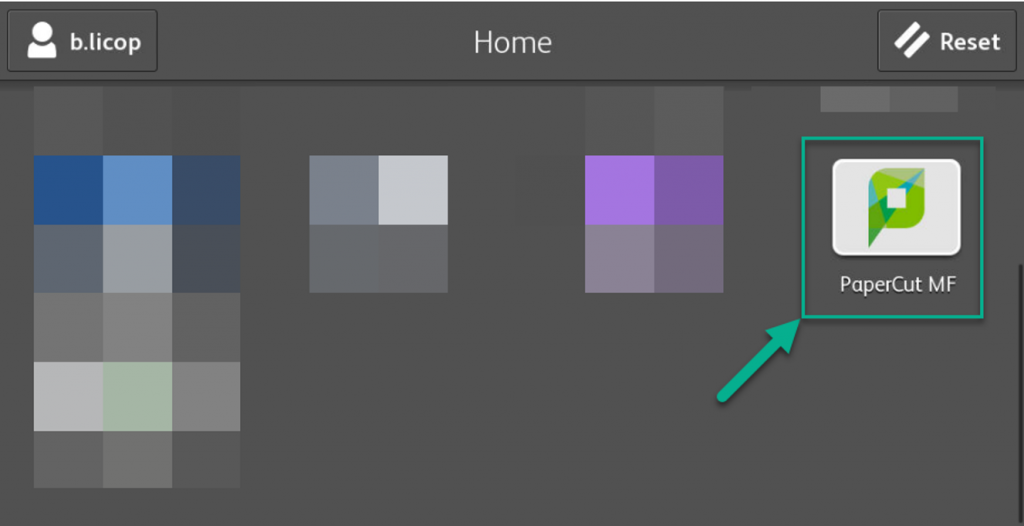
  • To return to the PaperCut MF main screen, press the “PaperCut MF” button
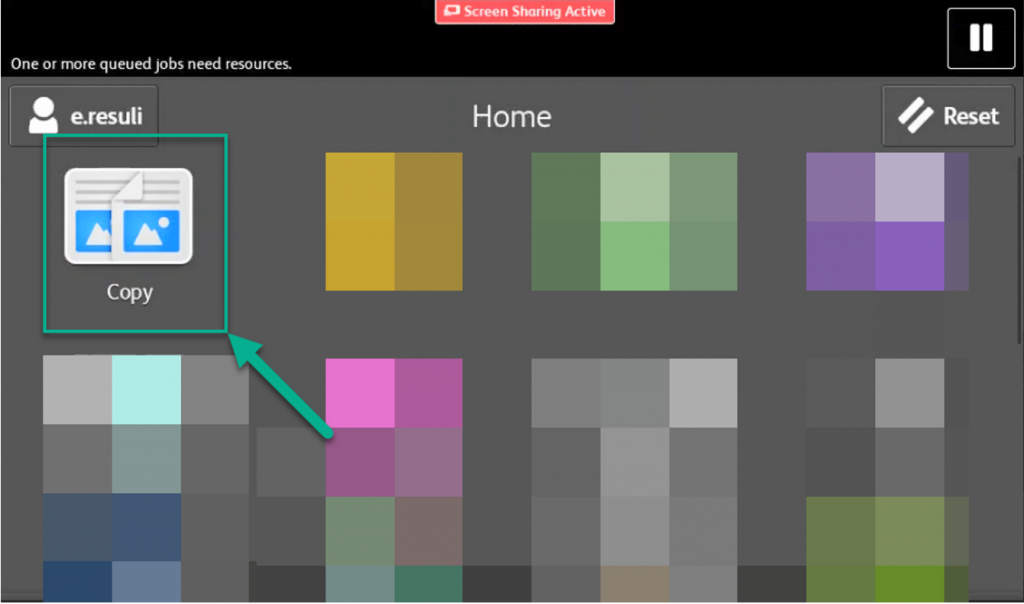
  1. To copy, press the “Copy” button
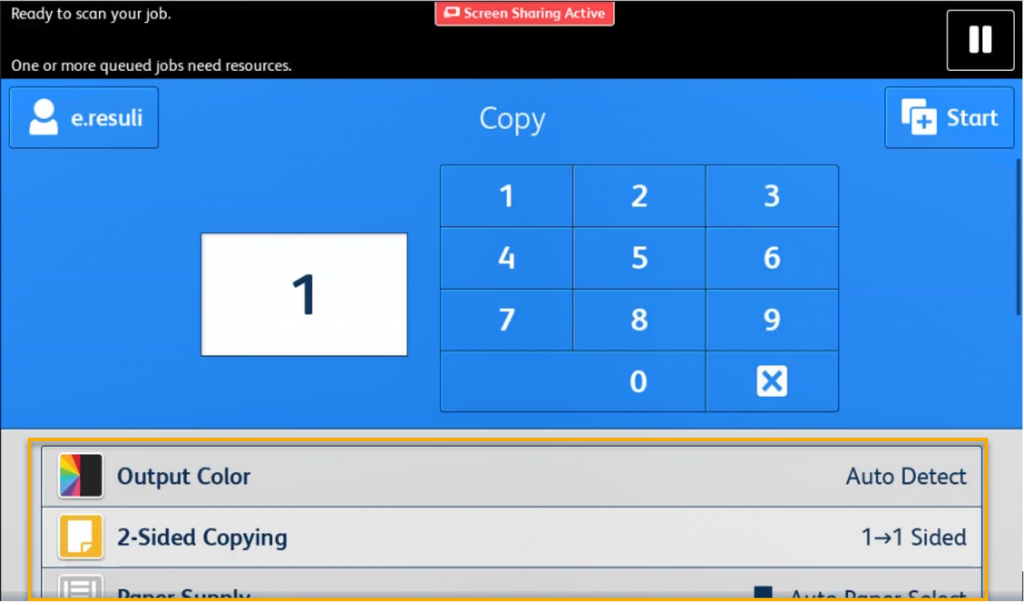
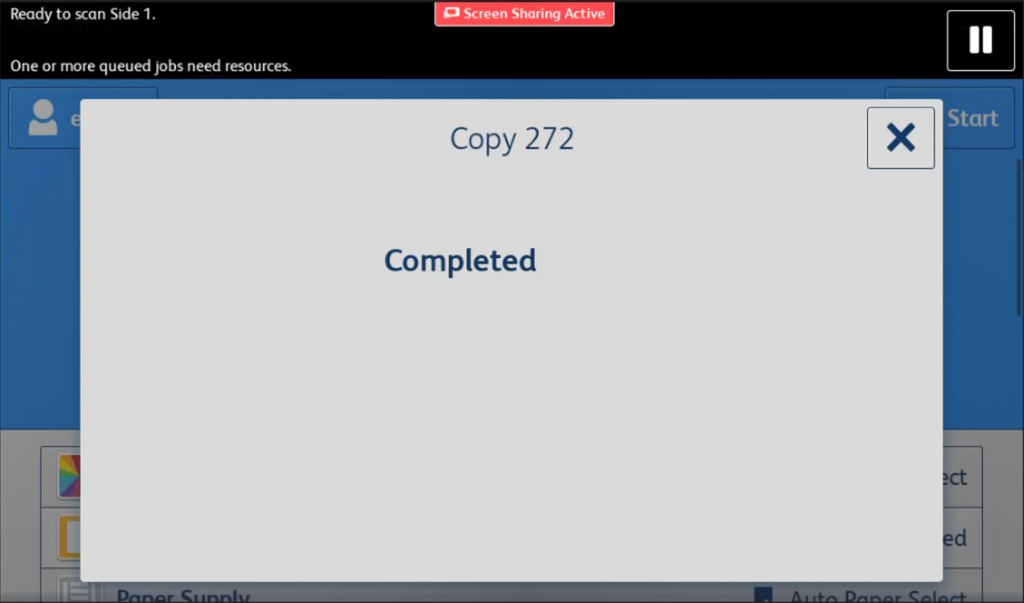
  1. Enter the number of copies and then press the “Star“’ button for the default selection (Auto Detect Color, 1-1 Sided copies). Optionally you can change the settings shown in the yellow box below, then press the “Star” button
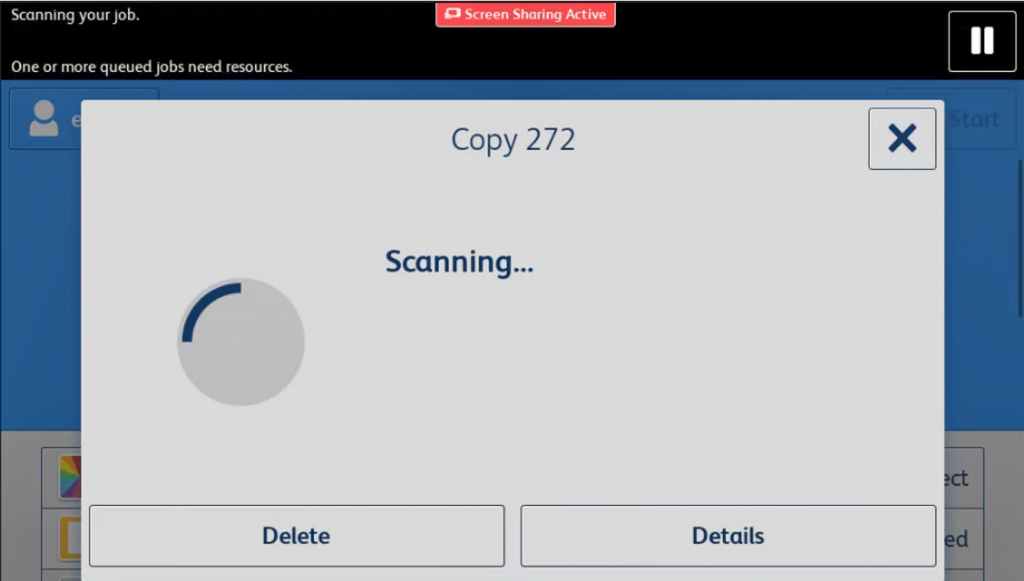
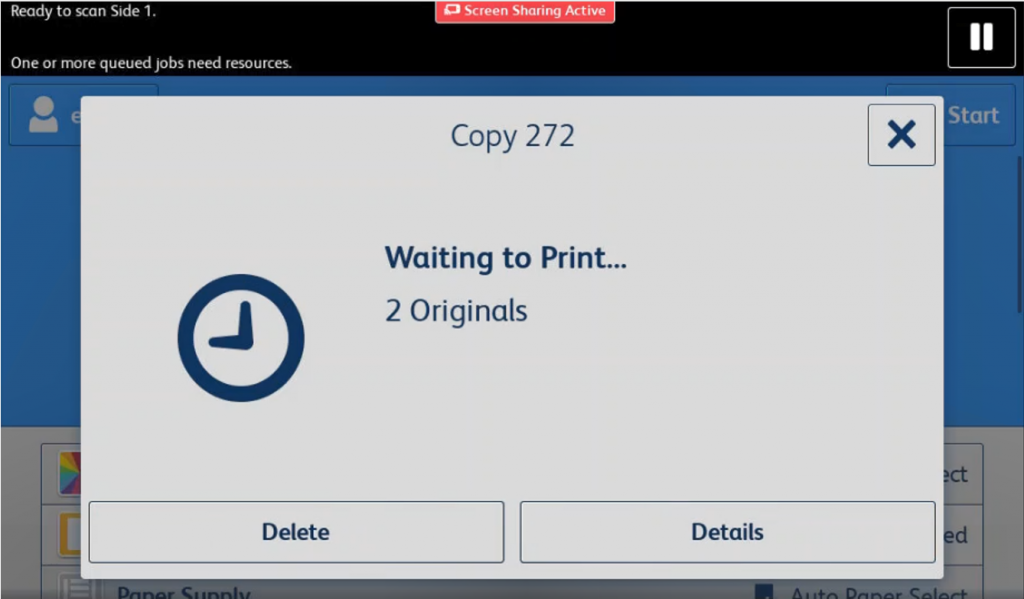
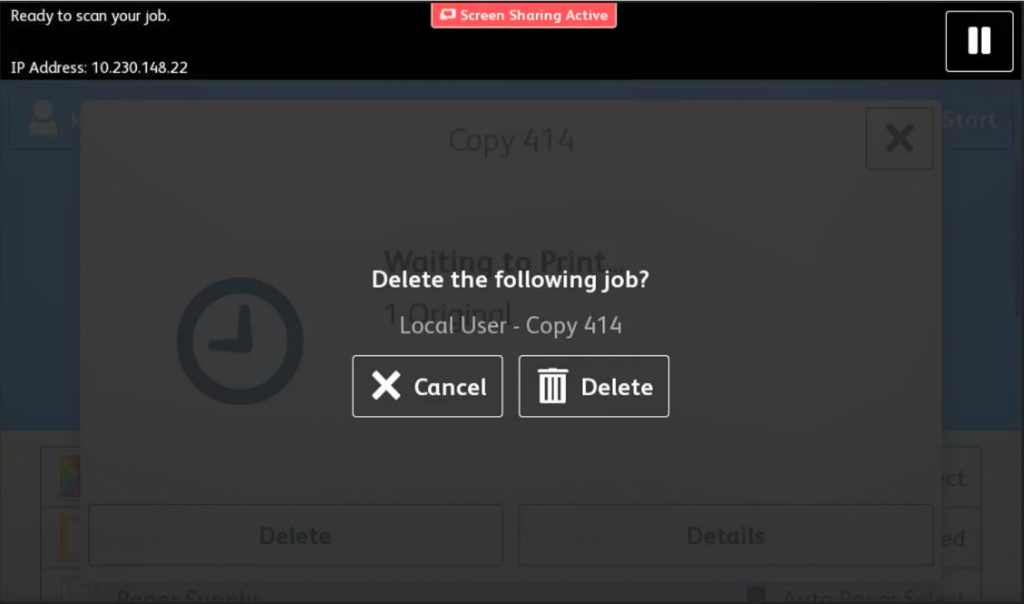
  • You can delete the job at any point in the previous screens by pressing the “Delete” button. If only N number of pages have been printed, you will only be charged N times
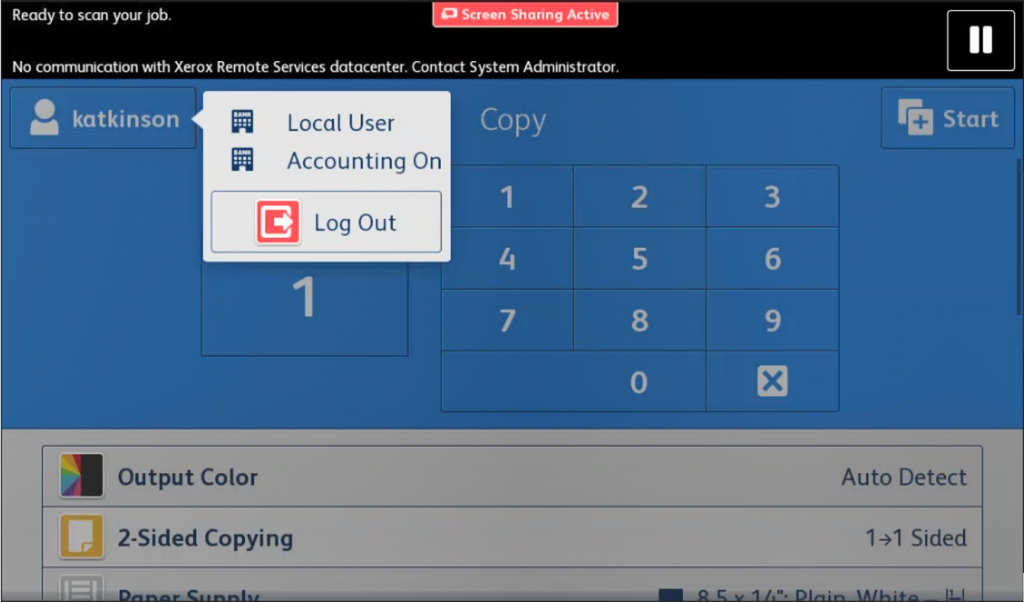
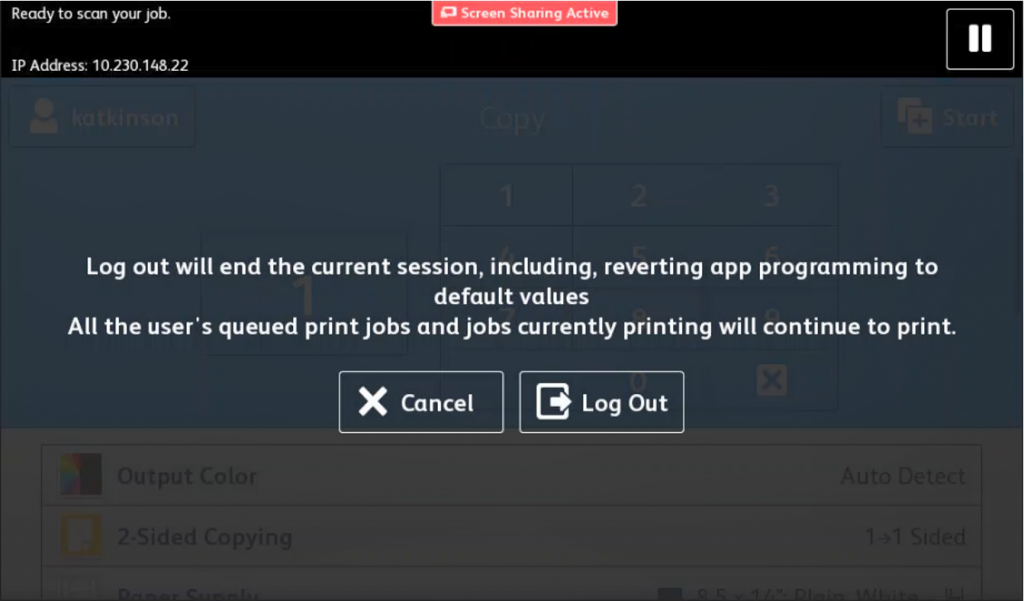
  1. To log off of the printer, press your username on the top left and then press the “Log Out” button.
  1. Press the “Log Out” button again
close

Accessing your Papercut Account

The user console can be accessed via vanpd-papercut.vancouver.fdu.edu.

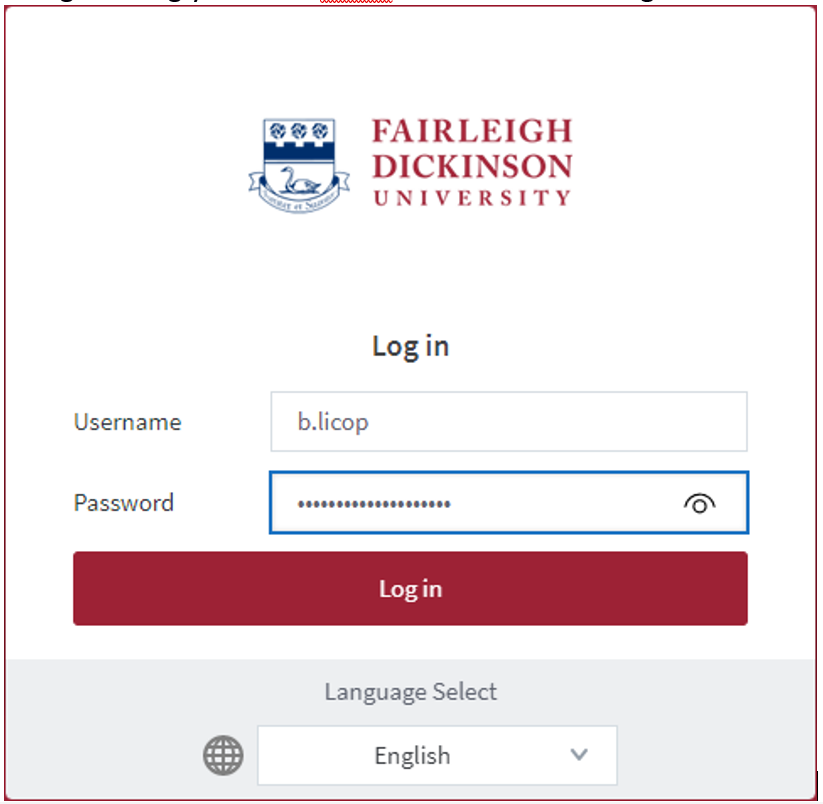
  1. Log in using your FDU netID then select the “Login” button
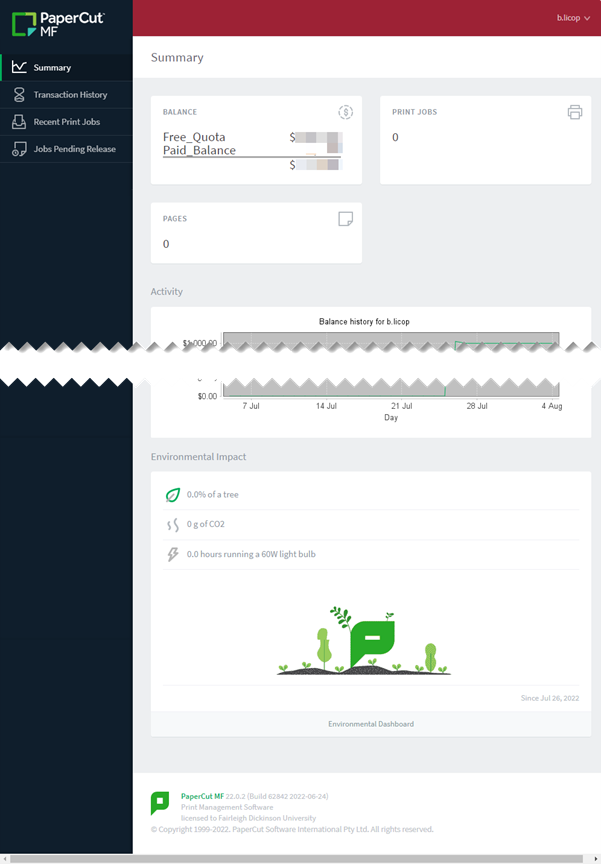
  1. You can review your Transaction History, Balances, Recent Print Jobs & Jobs Pending Release by selecting the appropriate tab on the left-hand side. You can also see your environmental impact according to your print, scan & copy activities
Last Modified:

Printing at Home while Connected to FDU VPN

Resources for:
icon Close

Issue

When I am connected to the FDU VPN or Cisco AnyConnect Adapter, I am unable to print documents while working from home.

Cause

While connected to the FDU VPN network, you are unable to access any local printers or network devices / services to help protect your computer from various threats while working outside of the FDU Campus Network.

Resolution

In order to Print, please disconnect from the VPN client, and once your documents have printed, reconnect.

Tip

Print jobs will continue to queue while you’re connected to the FDU VPN and will print when you disconnect from the VPN.

You can also connect a USB cable from the printer to your laptop, where available, and you can remain on the FDU VPN and print anything you need.

Last Modified:

Printing in The Computer Labs

Resources for:
icon Close

Cost and Billing

To prevent excessive printing, the Department of Computing Services charges students a small fee for printing in the FDU Computer Labs. Black and white printing costs $0.05 per page and color printing is $0.25 per page.

Each student pays a technology fee which includes $10.00 of lab printing for each of the fall, spring, and summer semesters. Printing charges above the $10.00 per semester will appear as a Printing Fee on the next tuition bill.  

The $10 per semester printing credit is a standard allotment that expires each semester and has no cash value. No refunds will be given for pages not printed and unused prints for each semester’s allotment do not carry forward.

FDU staff and faculty members can use lab printers on a limited basis without charge for the purpose on conducting FDU business. Please use your department’s printer(s) as your primary printing resource. Faculty and staff members are limited to 200 pages per semester. Any attempt to print past this quota will result in an error message stating that the account does not have enough credit.

Note: You are responsible for all activity on your account. If you share your password with others or forget to log out, you will be held responsible for any activity done via your account, including printing charges. Computing Services strongly recommends that you use non-trivial passwords and log out completely before leaving a workstation.

View and Manage your Lab Printing

PaperCut Icon
  1. Hovering your cursor on the Papercut tray icon shows the Balance
  1. When you click on the Papercut tray icon, it opens a new window as seen below:
  1. Clicking on the “Details…” button on the lower right of the Balance within the Papercut window opens a web browser that will let the user log in and see their job history

Receiving Credit for Printing Errors

Credit will be given for errors caused by the printer (paper jams, toner problems, etc.) In such situations, please take the bad printouts to a Lab Assistant in Dreyfuss, Dickinson Hall, or University Hall. Your information will be taken, and reimbursement will be made in the form of a credit applied to your total charge for the semester. Situations which could have been prevented before printing, such as extra blank pages at the end of a document, will not be reimbursed.

Can I Use My Own Paper in These Printers?

No. Jobs are printed as they are received. There is the possibility that after loading the printer with your paper someone will print a job that will then be printed out on your paper. Transparencies and mailing labels are not allowed in the lab printers due to the high heat that laser printers use and the potential for damage to the equipment.

Last Modified: