Explore our comprehensive IT resource library to discover a wealth of helpful information tailored to your needs. Utilize our filters to refine your search by role at FDU, department, or specific service for a more personalized experience.
Eligible FDU employees may receive reimbursement for business related expenses incurred on personally owned mobile communications devices, or, be issued a FDU owned and managed mobile communications device for business and reasonable personal use.
Fairleigh Dickinson University’s Acceptable Use Policy for Computer Usage states, “All computers and mobile devices accessing any FDU resource must run an operating system and configuration that is supported by its vendor with regard to security patches and updates.”
Cisco Duo regularly updates the Duo Mobile app and its mobile platform requirements to maintain secure, reliable authentication and align with modern mobile security standards.
Duo Mobile relies on digital certificates to establish secure communication with Duo’s authentication servers. These certificates are issued by trusted certificate authorities (CAs). Periodically, Duo updates its certificate trust bundle to ensure encrypted connections remain valid and protected.
Older versions of Duo Mobile rely on certificate trust methods that are being retired across the industry. If the app is not updated, this can result in Duo Push failures.
Mobile operating systems evolve to address security vulnerabilities and update encryption standards. Duo aligns its supported operating system versions with Apple and Google security baselines to ensure authentication remains secure and reliable.
To continue using Duo Push authentication without interruption:
Keep Duo Mobile updated
Ensure your device meets Duo’s minimum operating system requirements
Tip
Keeping Duo Mobile and your device’s operating system up to date ensures secure, uninterrupted Duo Push authentication for FDU users.
SAMI Support
If you have any questions or concerns, please visit SAMI Support, where you can request additional information or search our extensive IT knowledge base. While SAMI Support provides the quickest and easiest access for IT support, you can always contact the SAMI Support Desk by phone (973)-443-8822 or email samisupport@fdu.edu.
FDU Network Share Mounter lets faculty and staff quickly connect to their FDU DFS network shares from the macOS menu bar. Once the shares are mounted, you can access them in Finder. Use the steps below to mount, unmount, or view your network shares.
Note
If you are off campus, connect to the FDU VPN before mounting your network shares.
Locate the Network Share Mounter icon in the macOS menu bar
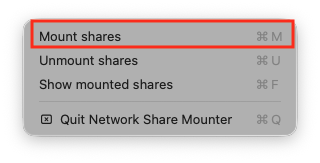
Click the Network Share Mounter icon and select Mount Shares
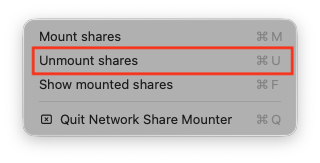
Click the Network Share Mounter icon and select Unmount Shares when you no longer need access
Click the Network Share Mounter icon and select Show Mounted Shares to open a Finder window displaying your network shares
Get Help
If you need help connecting to the FDU VPN or accessing your network shares, submit a request through SAMI Support.
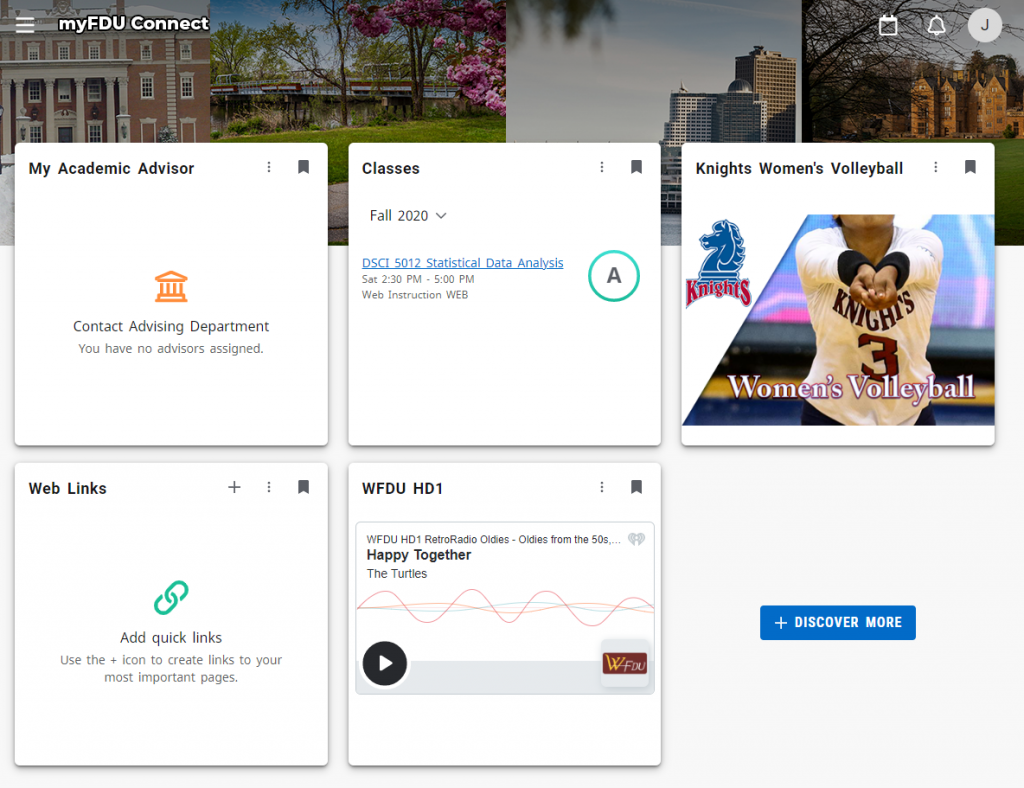
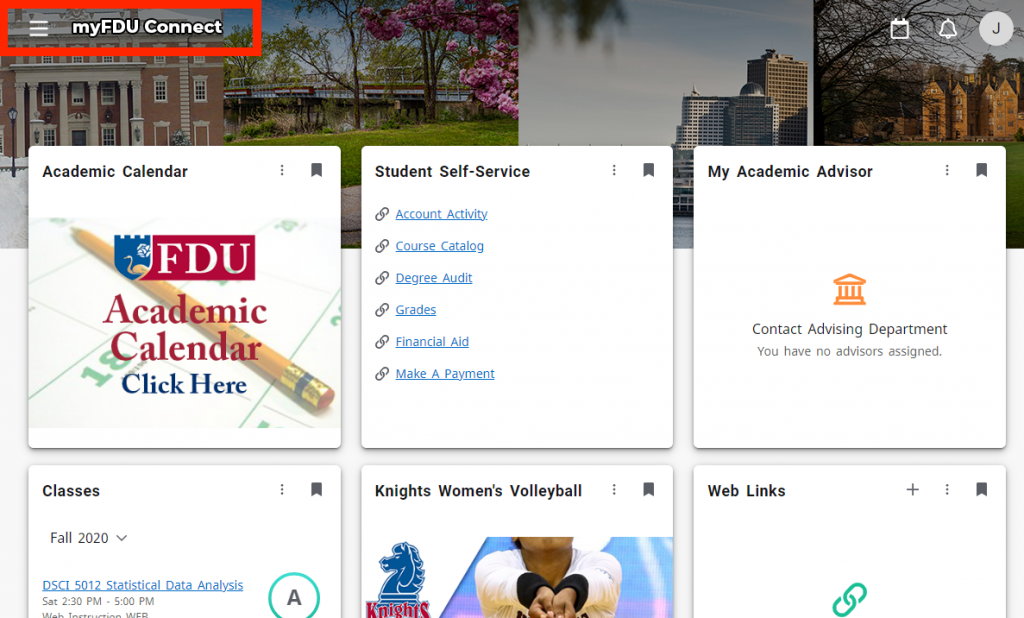
myFDU Connect is a place where Students, Faculty, and Staff can go as their single point of entry for everything FDU. The homepage consists of a dashboard full of “cards” that represent different aspects of FDU. Users can personalize their dashboard to display cards relevant to their life on campus..
How to Navigate myFDU Connect
To log into myFDU Connect, you will need to visit myfduconnect.fdu.edu and login with your FDU NetID. Once logged in, you will land on your customizable homepage
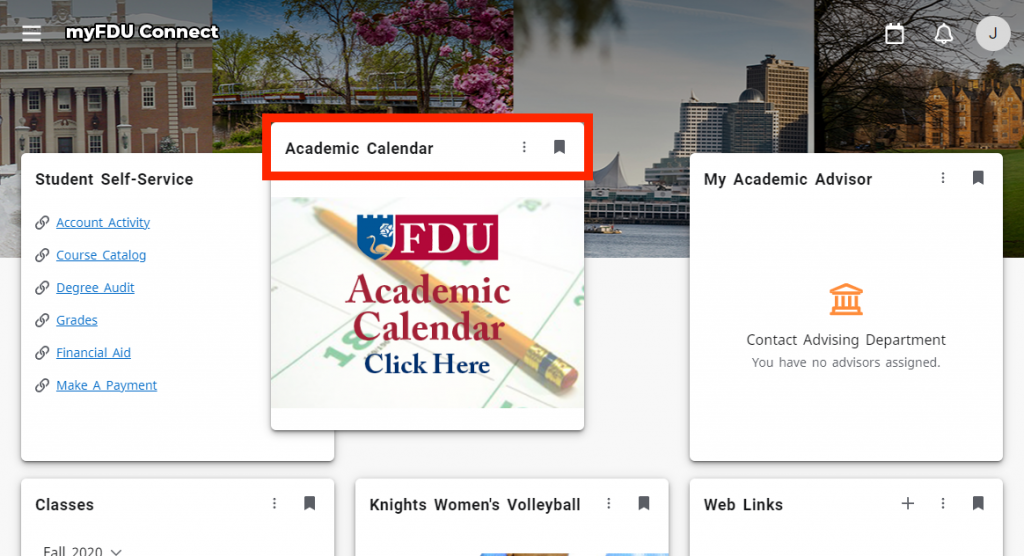
The cards you see can be added to, removed, and rearranged to your liking. To add a new card, click on the “+ Discover More” button
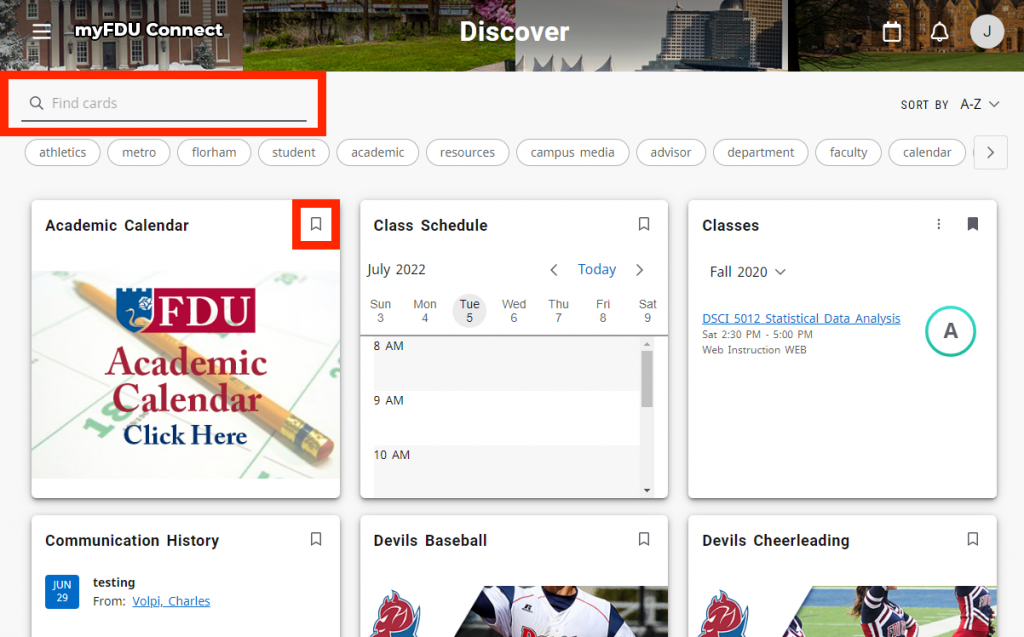
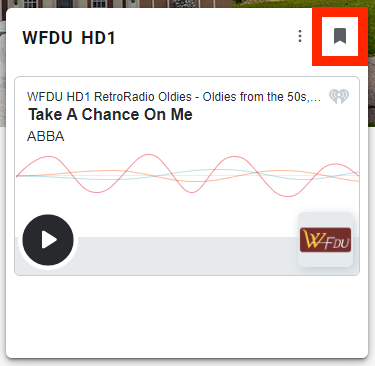
In the top left of the page, you can use the search field to find specific cards. You can also scroll through the page to see everything that is available. When you have found a card you would like to add to your homepage, click on the “save card” ribbon on the top right of the card
Click on “myFDU Connect” in the top left of the page to return to your homepage. You should see your new card in the first slot
If you would like to change the order of your cards, click and hold on the top of the card and move the card to a new position
If you wish to remove a card from your homepage, click on the “remove card” ribbon on the top right
When new cards are available, you will be notified on the alarm button on the top right of the page
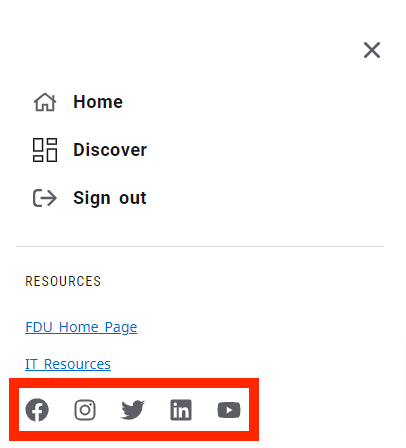
To access FDU’s social media pages, click on the hamburger menu in the top left of the page
The following tutorial will guide you through the process of connecting a printer while on-campus. Faculty and Staff members should review the purchasing process before engaging with the process for connecting a printer.
Note
Wireless printing is not permitted on campus. The information below is for wired connections only.
Connecting a Printer for Students in the Residence Halls
Most new printers are plug and play compatible with Windows 10. When you receive your new printer, you can unbox it and remove any orange tape you see. After plugging in the power and turning the printer on, allow the printer to initialize (most new printers will have a display to show you it’s progress). When the printer finishes initializing, just connect the usb printer cable from the printer to your computer. Windows 10 should automatically install the printer for you.
close
Printer Purchasing Process for Faculty and Staff
All printer purchases for faculty and staff on-campus use must appear on OIRT’s list of approved printer models. For the most up to date list of approved printer models, please contact the Purchasing Department. The purchase of any printer not on the list must be pre-approved by the CIO.
Determining if a Printer will be Directly Connected or On-Network
Faculty and Staff Members have the option of either making a direct or network connection to the printer. A direct connection is when a printer is connected to a single computer and an on-network printer means that multiple parties can print to it. Generally speaking, unless a printer is shared by three or more employees, users should request a direct connect printer.
If you are planning to use a direct connection, simply purchase any printer contained on the Purchasing Department’s list of approved models and follow the instructions for “Installing a Local Printer” in the “Connecting a Printer for Faculty and Staff Members” section below.
If your new printer will be on-network, please ask your department to contact the SAMI Service Desk for USAN to investigate the viability of any data jacks in the vicinity of where the printer will be located. The full workflow for this process is shown in the following diagram.
Most new printers are plug and play compatible with Windows 10. When you receive your new printer, you can Most new printers are plug and play compatible with Windows 10. When you receive your new printer, you can unbox it and remove any orange tape you see. After plugging in the power and turning the printer on, allow the printer to initialize (most new printers will have a display to show you it’s progress). When the printer finishes initializing, you can just connect the usb printer cable from the printer to your computer. Windows 10 should automatically install the printer for you.
Connecting to a Network Printer
Employees are able to add network printers to their own machines.
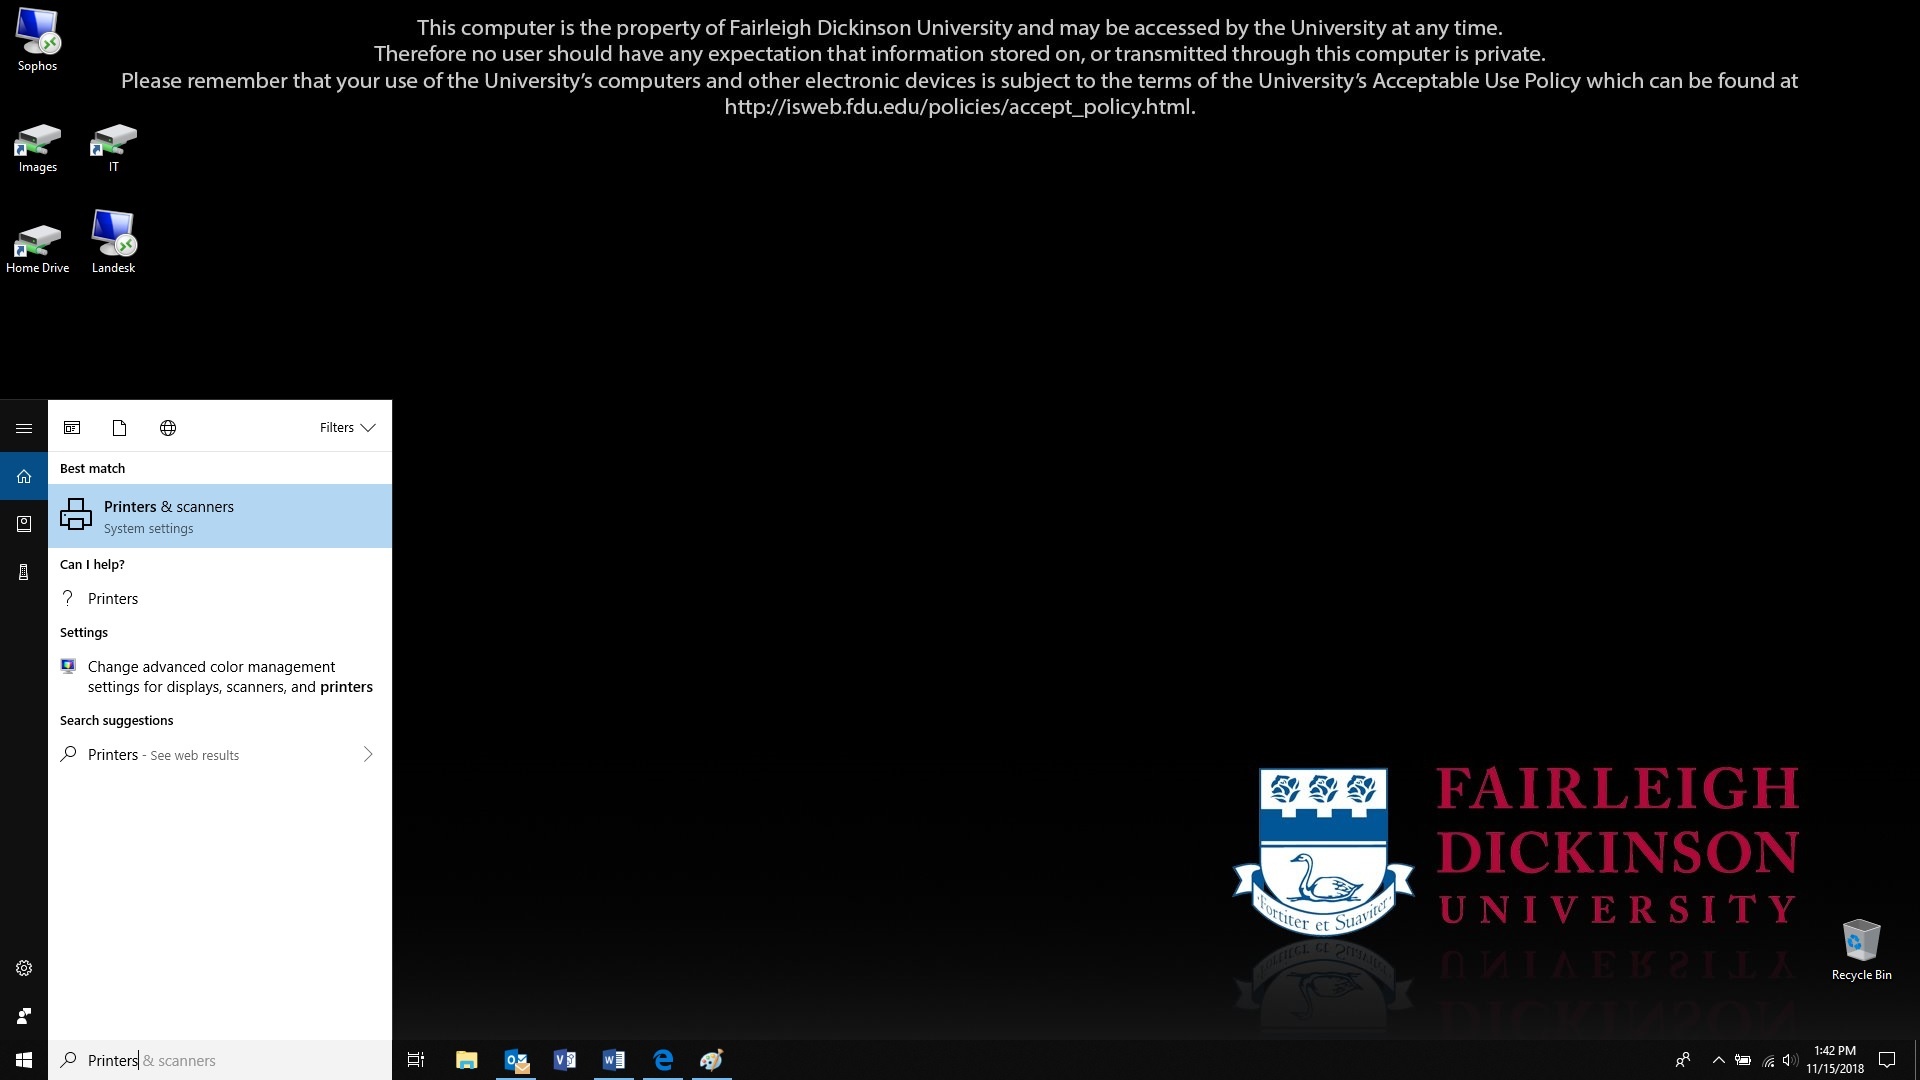
Do a search for printers, and click on “Printers & Scanners”
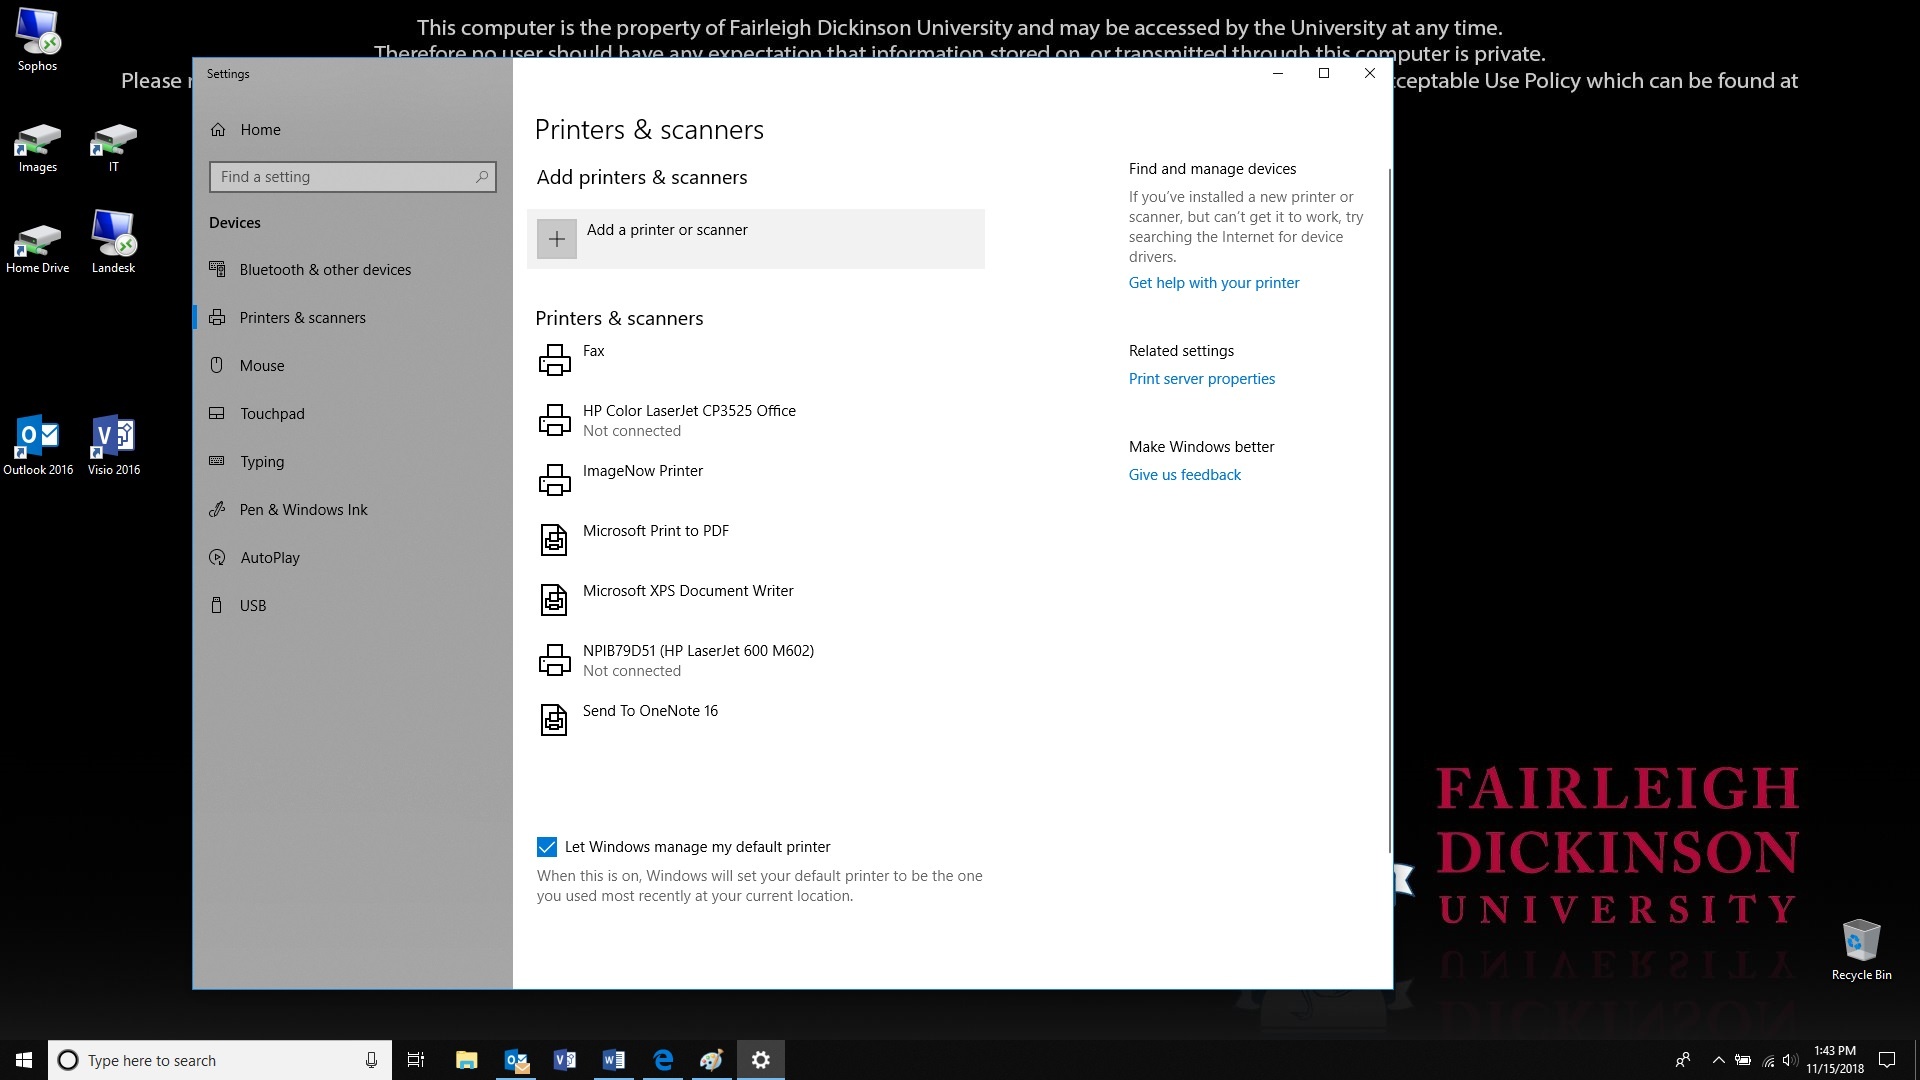
Click on “Add a printer or scanner”
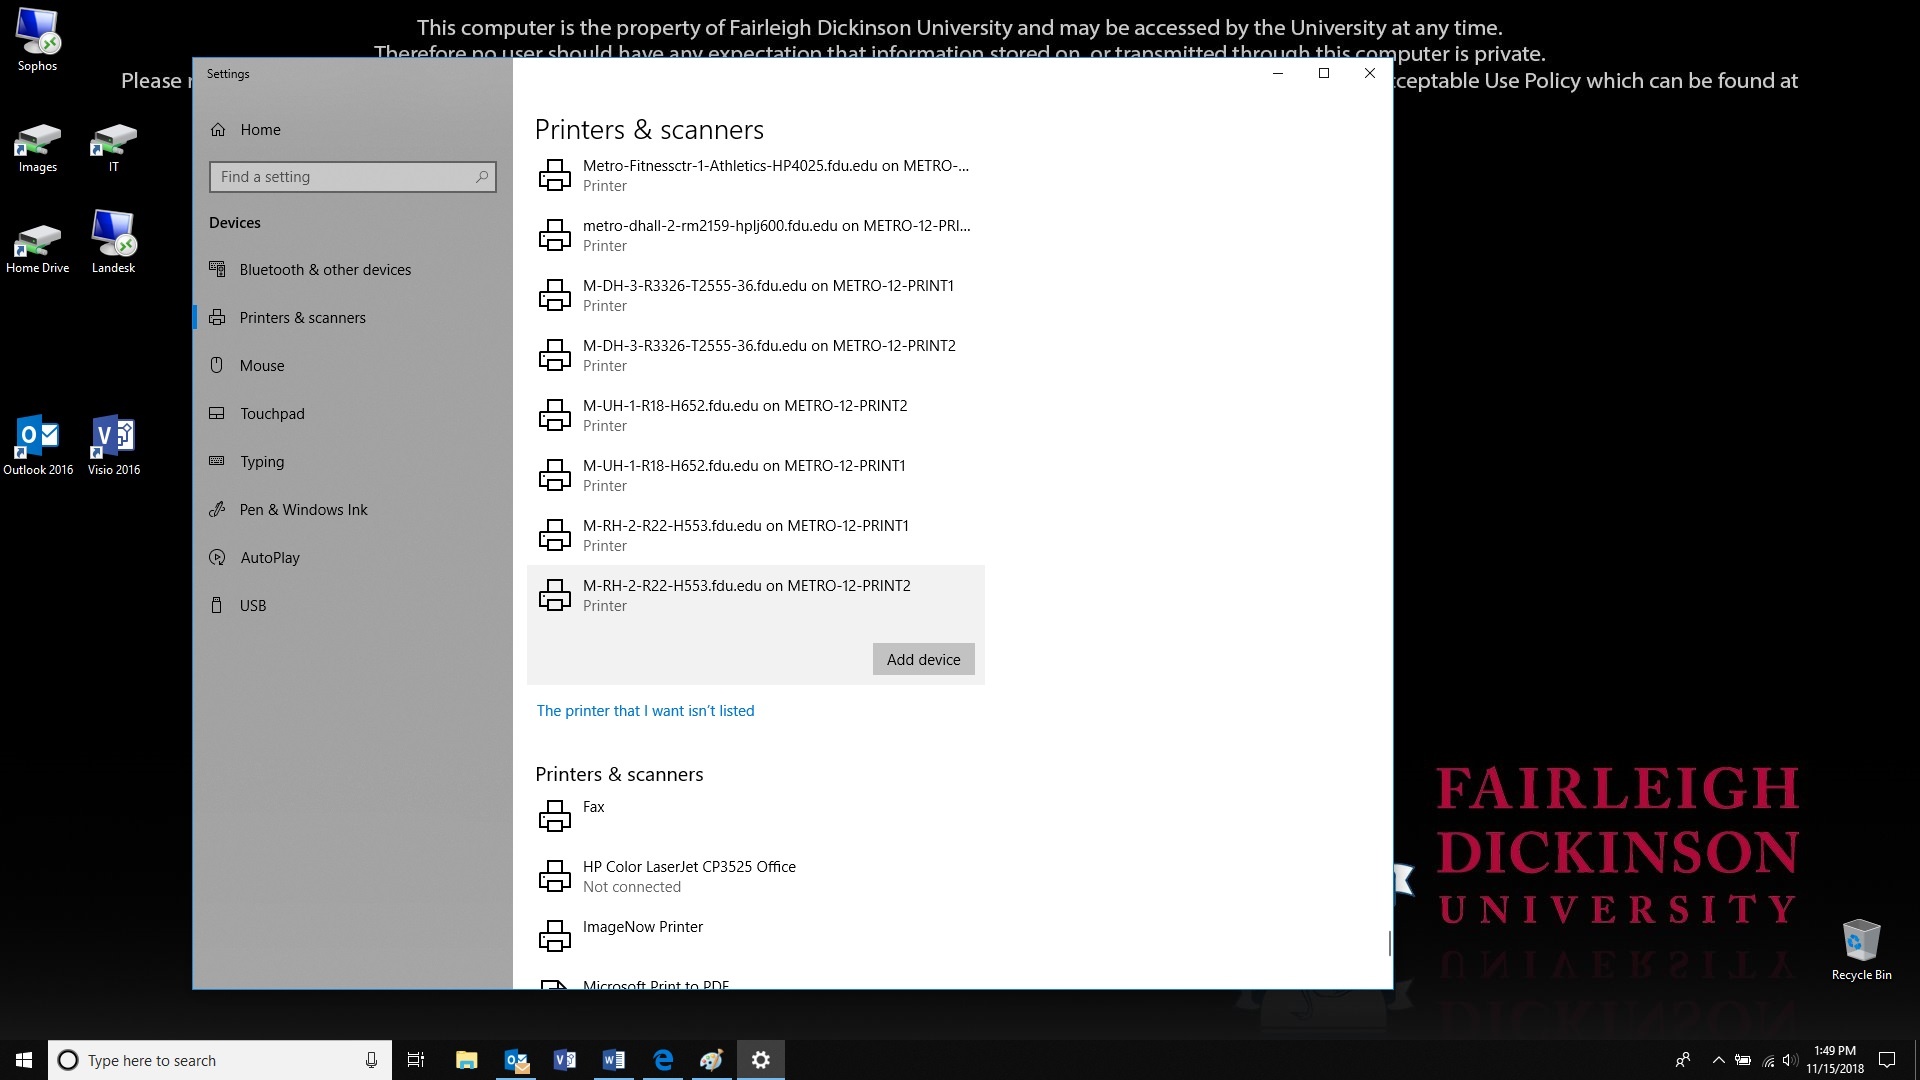
The list will start to populate and if you find your printer you can click on it and then click on “Add device”, otherwise scroll down to the bottom of the list and select “The printer I wanted wasn’t listed”
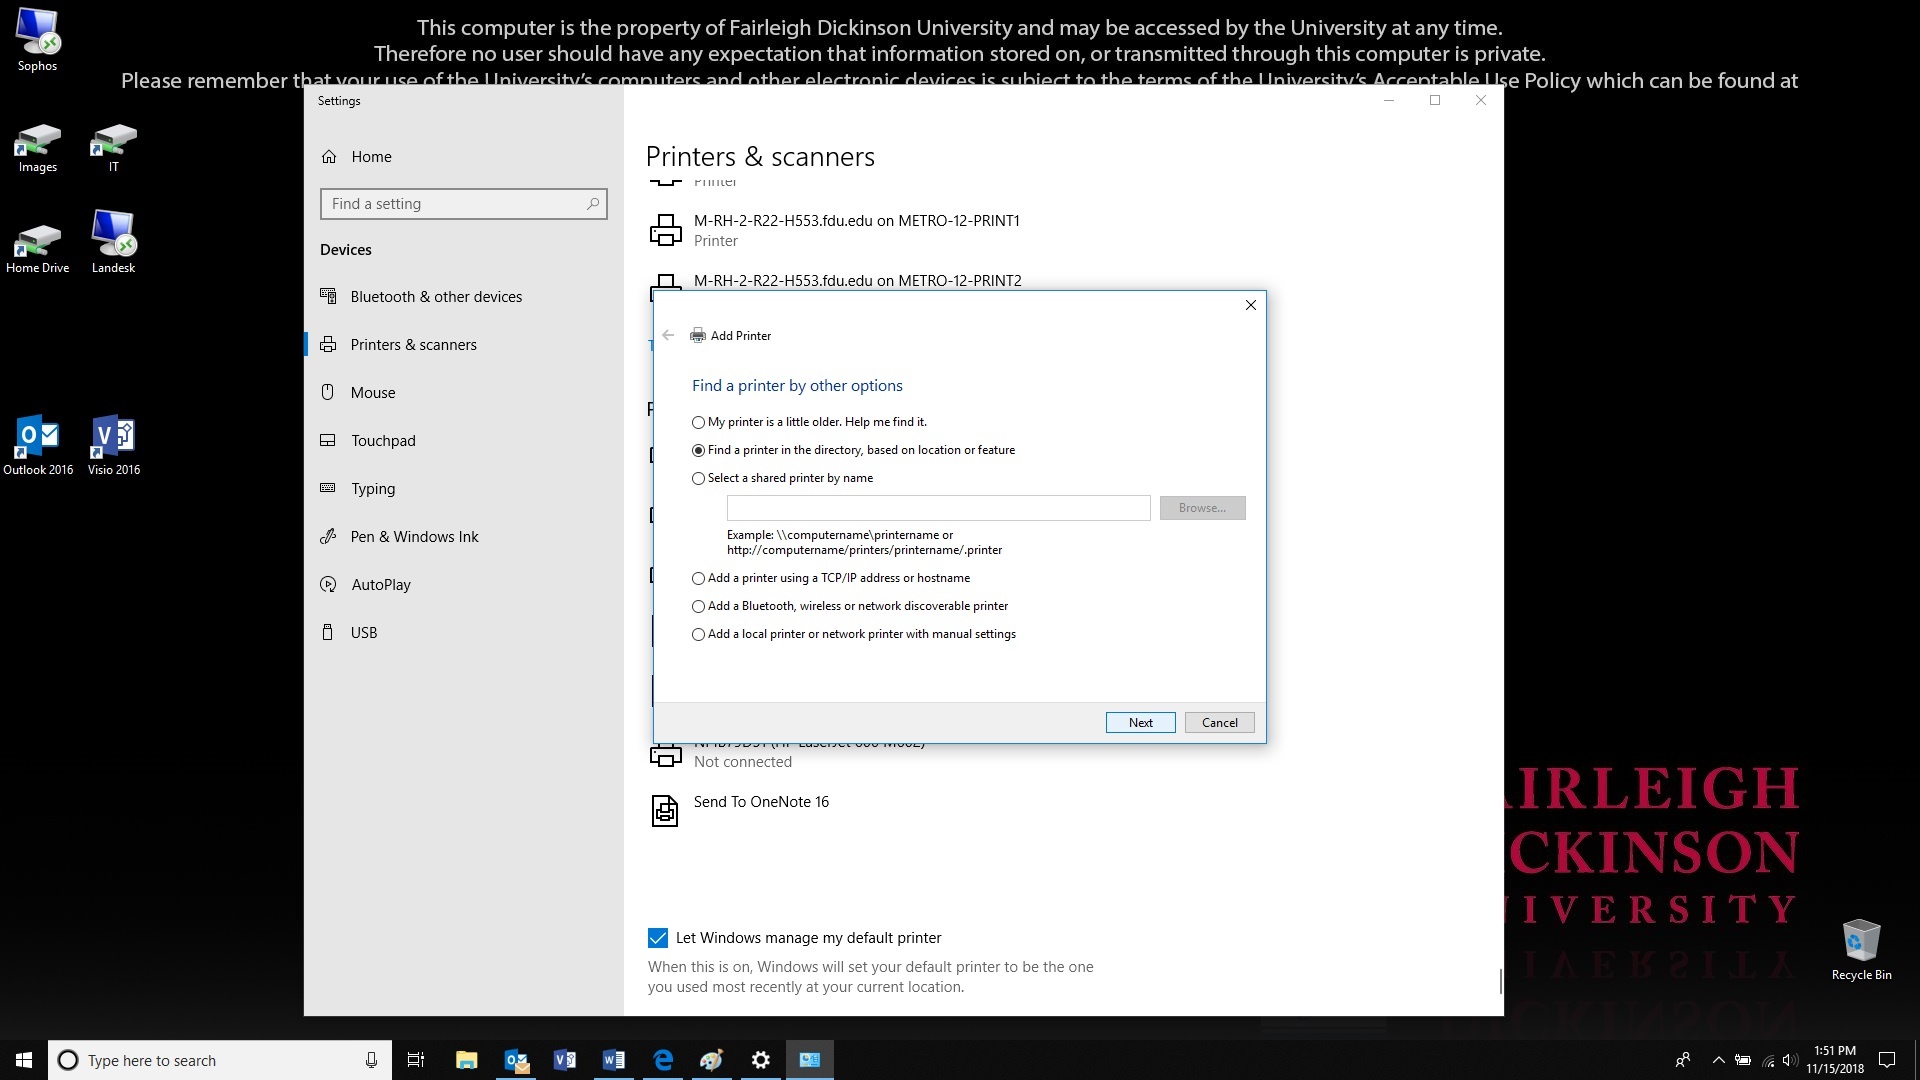
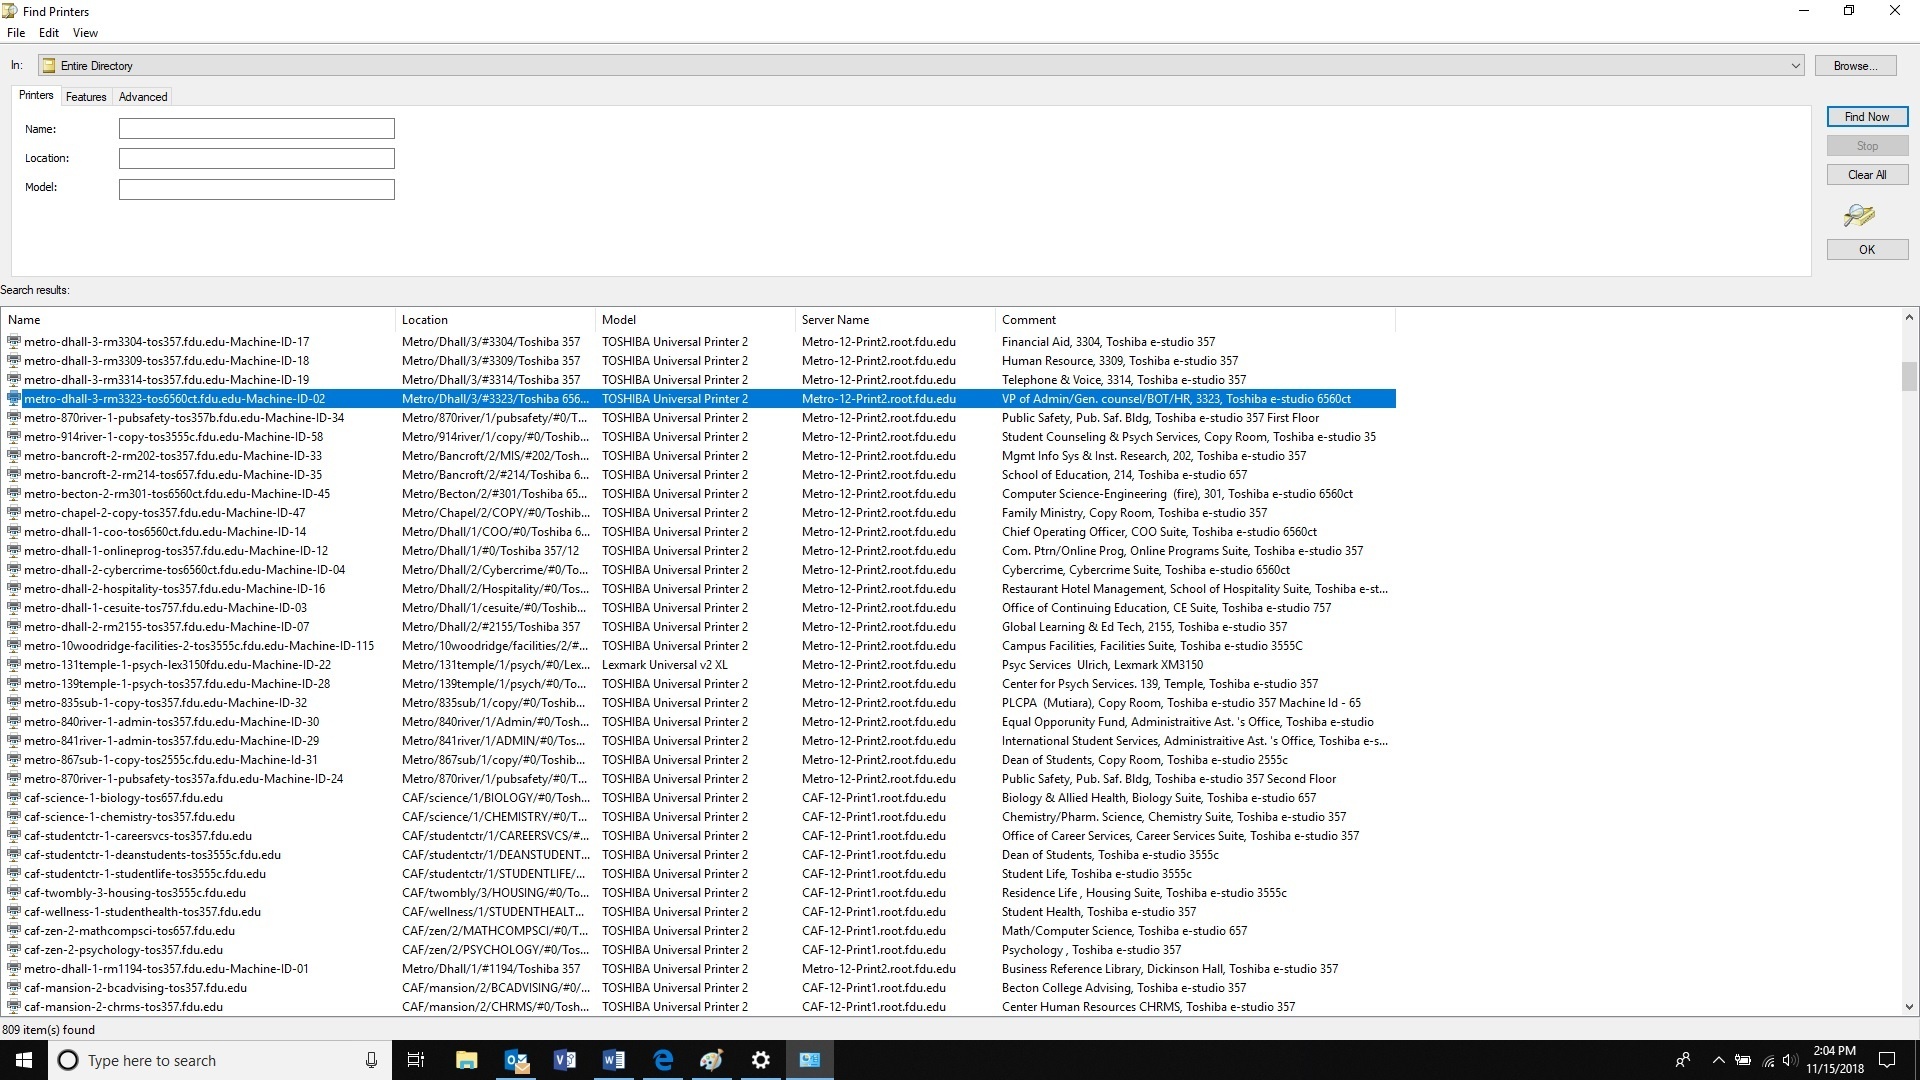
In the new dialog box, select “Find a printer in the directory” and click “Next”
Search for your printer and double click on it when you find it
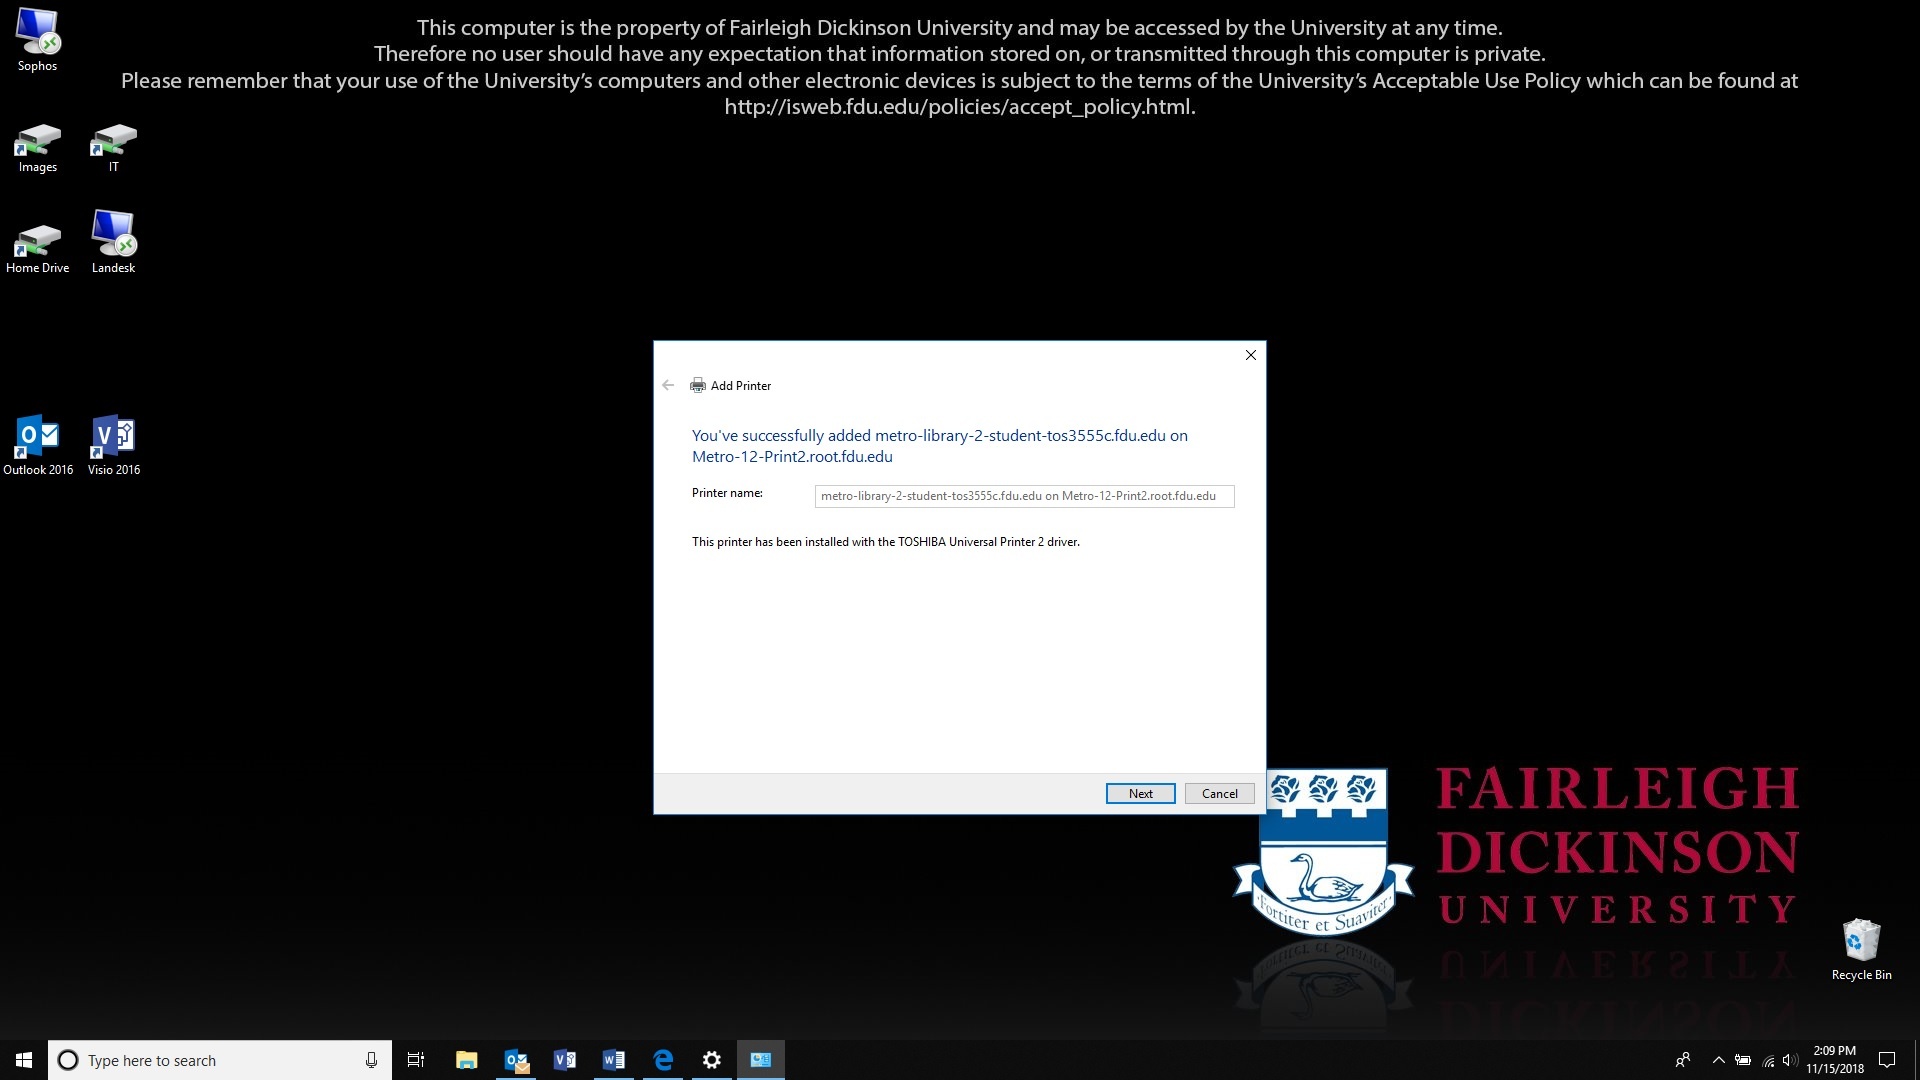
A box will let you know that the printer was successfully installed. Click “Next”
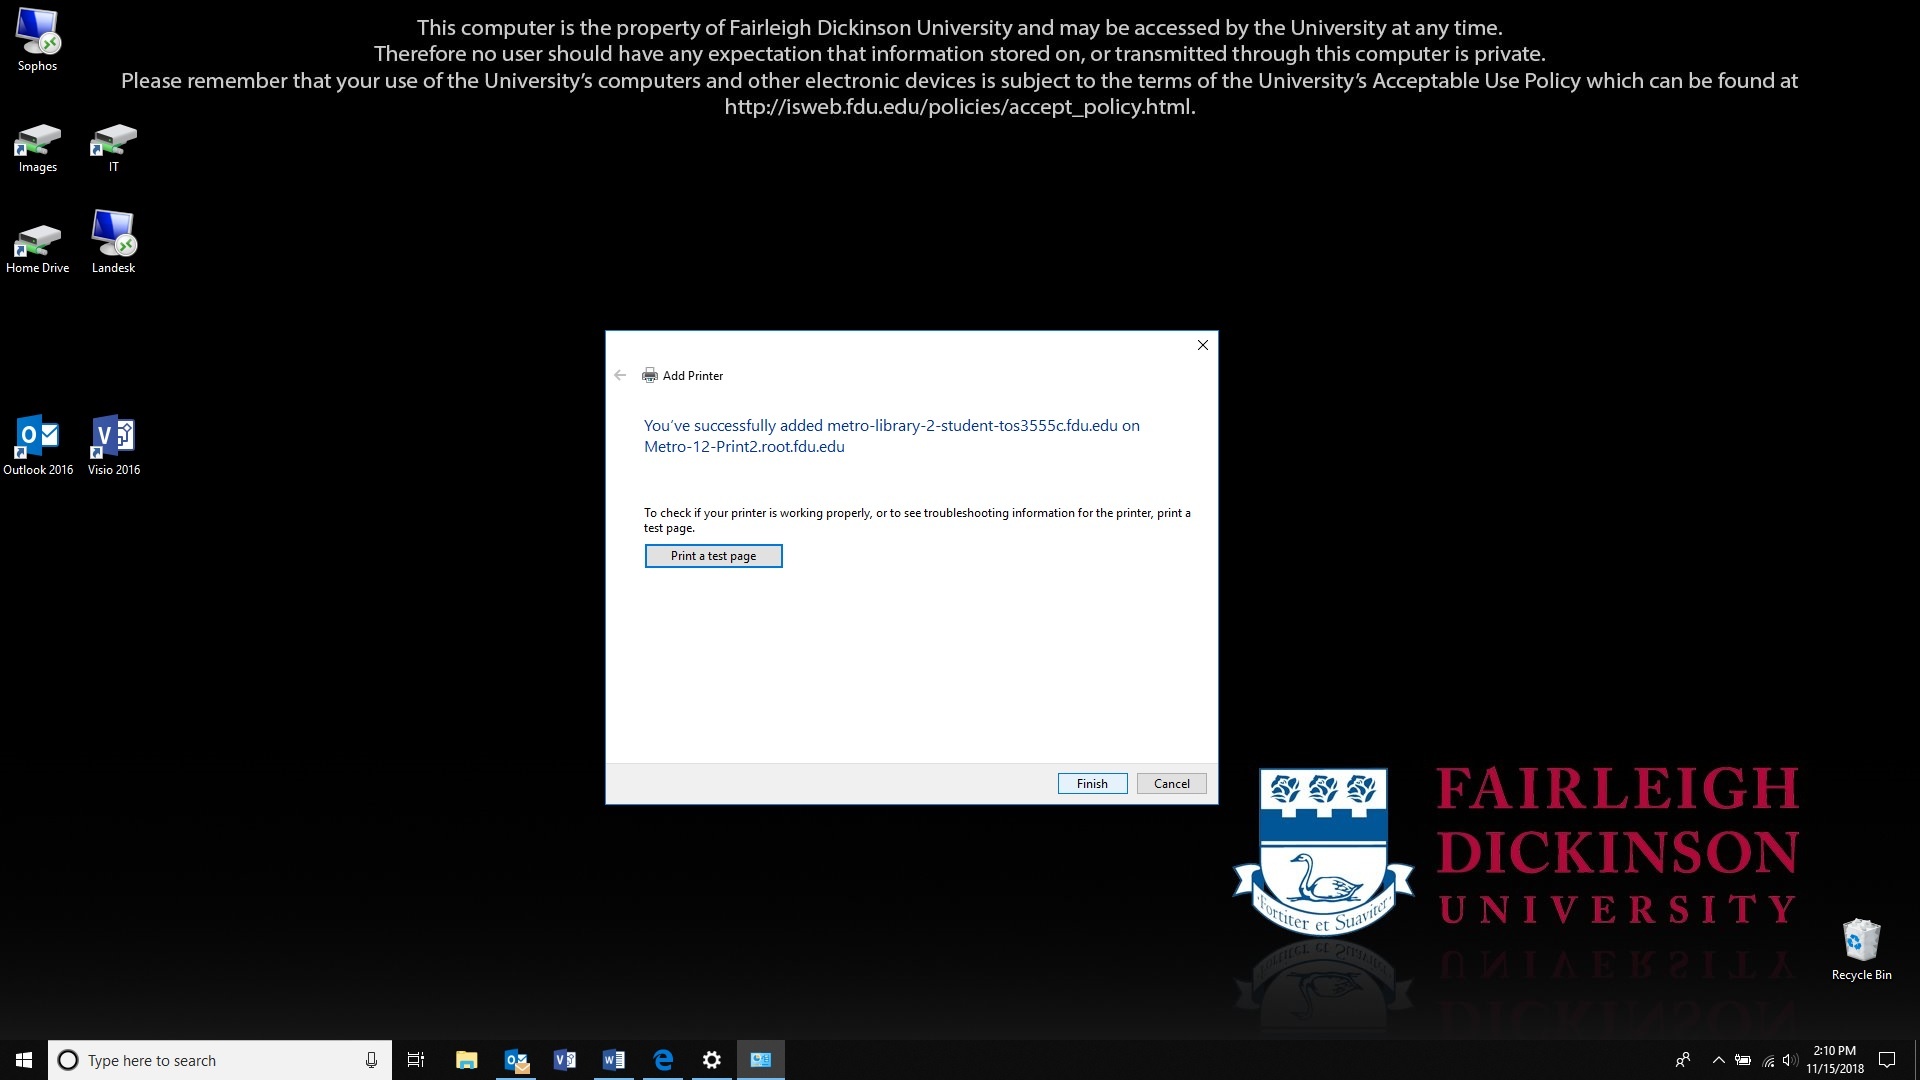
You can click on “Print a Test Page” to verify you are connected to the right printer otherwise click on “Finish”
Fairleigh Dickinson University’s Acceptable Use Policy for Computer Usage states, “All computers and mobile devices accessing any FDU resource must run an operating system and configuration that is supported by its vendor with regard to security patches and updates.”
This guide defines the lifecycle of our support for different operating systems.
Note
Apple does not publish official End of Life dates, but typically provides security updates for the current release of macOS, as well as the previous two releases.
Support Status Descriptions
Active (Default)
This platform is supported by FDU Computer Services & University Systems and Networking and new machines will be built with this platform unless otherwise requested.
Active
This platform is supported by FDU Computer Services & University Systems and Networking and will be installed on request.
Containment
This platform is currently supported by FDU Computer Services & University Systems and Networking but no new machines will be built with this platform. Platforms in containment will receive security updates and patches for the FDU supported software components. FDU Computer Services & University Systems and Networking Facilities will not provide new software or major revisions to existing software for these platforms.
Phasing Out
FDU Computer Services & University Systems and Networking is actively working to migrate assets away from this platform. Platforms go in to this status automatically 6 months before the FDU End of Support Date. Platforms may be placed in this status before that time.
EOL
This platform is no longer supported by FDU Computer Services & University Systems and Networking. Software support will be dropped from any asset running this platform. Other levels of support may be dropped as circumstances warrant. A valid reason is required to maintain an asset running this platform past the End of FDU Support date. All exceptions must be logged and periodically reviewed.
Supported Operating Systems
Desktop
OS Family
Operating System
Latest Release
FDU Support Status
Vendor Release Date
Start of FDU Support
End of FDU Support
Latest Vendor EOL Date
macOS
Tahoe
26
Active (Default)
Sep-2025
Nov-2025
Jun-2028
~2028
Sequoia
15
Active (Default)
Sep-2024
Nov-2024
Jun-2027
~2027
Sonoma
14
Phasing Out
Sep-2023
Nov-2023
Jun-2026
~2026
Windows
Windows 11
25H2
Active (Default)
Sep-2025
Nov-2025
Sep-2028
Oct-2028
24H2
Phasing Out
Oct-2024
Jun-2025
Sep-2027
Oct-2027
23H2
Phasing Out
Oct-2023
Jul-2024
Oct-2026
Nov-2026
Windows 10
22H2
EOL
Oct-2022
Dec-2022
Oct-2025
Oct-2025
Mobile
OS Family
Operating System
Latest Release
FDU Support Status
Vendor Release Date
Start of FDU Support
End of FDU Support
Latest Vendor EOL Date
Apple
iOS
26
Active (Default)
Sep-2025
Nov-2025
Oct-2028
~2028
18
Phasing Out
Sep-2024
Nov-2024
Oct-2027
~2027
17
Containment
Sep-2023
Nov-2023
Oct-2026
~2026
Android
Baklava
16
Active (Default)
Jun-2025
Dec-2025
~2028
~2028
Vanilla Ice Cream
15
Active
Sep-2024
Dec-2024
~2027
~2027
Upside Down Cake
14
Active
Oct-2023
Dec-2023
~2027
~2027
Tiramisu
13
Phasing Out
Aug-2022
Oct-2022
~2026
~2026
Snow Cone V2
12.1
Phasing Out
Mar-2022
Jul-2022
~2026
~2026
Latest Release
The latest release for desktop operating systems includes all minor and incremental updates.
End of Life
Any operating system not listed above is considered EOL (End of Life) and will not be supported. Examples of EOL Operating Systems include:
Windows: 95,98, XP, ME, VISTA, 7, 8, 8.1, & 10
macOS: Yosemite, El Capitan, Sierra, High Sierra, Mojave, Catalina, Big Sur, Monterey, & Ventura
To access Forms, you will be directed to our SAMI Support Portal where you will be asked to log in using your NETID and authenticate using Duo. Once you click “Next,” you will be forwarded to samisupport.fdu.edu in a new window or tab.





 Feedback
 Copy Link