Due to the increasing demand of the academic computer facilities, a general document detailing the policies for computer lab reservations has been outlined. The purpose of the computer lab reservation policy is to provide faculty, staff and students with equitable access to campus computing lab resources.
Most computer labs are used as classrooms, and they are available for open-access use when there are no classes in session.
Computing Services Instructional Labs
There are currently four Computing Services computer labs which can be used for classroom instruction on each campus.
Florham Campus (Dreyfuss Building):
D206
D207
D208
D209
Metropolitan Campus:
Dickinson Hall: DH2163, DH2164, DH2165
University Hall: UH Front Lab (UH22), UH Back Lab (UH28)
Multimedia Labs
There are three multimedia labs: two on the Florham Campus and one on the Metropolitan Campus.
Florham Campus:
D211 — Animation Lab (Dreyfuss Building)
ZEN110 — Graphic Design Lab (ZEN Building)
Metropolitan Campus:
Becton Hall Room 403 — Multimedia Lab (MML)
The multimedia labs are primarily used for courses offered by the FDU School of Arts.
Equipment
All labs used for classroom instruction and general use are equipped with a LaserJet printer and data projector.
The Animation Lab is equipped with 3D printers.
All multimedia labs are equipped with ZOOM capability to support hybrid instruction.
If you have any questions regarding the lab reservation policy, please contact Genesis Lopez at g.lopez@fdu.edu
Computing Services has multiple computer labs in our New Jersey Campuses for classroom instruction and student use.
Florham Campus
Dreyfuss Building
Room
Mon
Tue
Wed
Thur
Fri
Sat
Sun
Dreyfuss Building
8AM- 11PM
8AM- 11PM
8AM- 11PM
8AM- 11PM
8AM- 5PM
10AM- 5PM
12PM- 9PM
Dreyfuss 212, 213
8AM- 11PM
8AM- 11PM
8AM- 11PM
8AM- 11PM
8AM- 5PM
10AM- 5PM
12PM- 9PM
Dreyfuss211
10PM- 1AM
10PM- 1AM
10PM- 1AM
10PM- 1AM
10PM- 1AM
12PM- 5PM
12PM- 5PM
Computer Labs
D206
D207
D208
D209
Laptop Work Stations (Monitors Only)
D212
D213
Animation Lab
D211
close
Zen Building
Room
Mon
Tue
Wed
Thur
Fri
Sat
Sun
Zen 110, 242
8AM- 8PM
8AM- 8PM
8AM- 8PM
8AM- 8PM
8AM- 8PM
10AM- 5PM
12PM- 5PM
Phone:
(973)-443-8689
close
Metropolitan Campus
Dickinson Hall – Hackensack
Room
Mon
Tue
Wed
Thur
Fri
Sat
Sun
Dickinson Hall
8AM- 11PM
8AM- 11PM
8AM- 11PM
8AM- 11PM
8AM- 5PM
CLOSED
CLOSED
Rooms:
Lab A (DH2163)
Lab B (DH2164)
Lab C (DH2165)
Phone:
(201)-692-7111
close
University Hall – Teaneck
Room
Mon
Tue
Wed
Thur
Fri
Sat
Sun
University Hall
8AM- 11PM
8AM- 11PM
8AM- 11PM
8AM- 11PM
8AM- 5PM
10AM- 6PM
2PM- 10PM
Rooms:
Front Lab (UH 22)
Back Lab (UH 28)
UH Side Lab*
Phone:
(201)-692-7112
*Temporarily Closed
The UHall Side lab is currently closed to Students and Faculty for the fall semester for internal use.
Dickinson Hall Lab C is always available to students during lab hours.
close
Student Union Building – Teaneck
Rooms:
Multipurpose Room 135
Phone:
(201)-692-2222
Tip
The Student Union Building Multipurpose Room will be locked at all times. To gain access to the Student Union Building computer lab, you will need to contact Public Safety at (201)-692-2222.
close
Note
Computer Lab hours of operation are subject to change based on utilization throughout the semester. Lab computers are available on a first-come-first-serve basis unless reserved for classes. Class reservations are posted at the lab entrances.
Microsoft Teams is a unified communication and collaboration platform that combines persistent workplace chat, video meetings, file storage, and application integration. Continue reading to find more information about the new Teams app, common features and settings most commonly used.
A New Teams client is rolling out! Though it looks nearly identical to classic Teams, it has been redesigned from the ground up to take advantage of future developments. Microsoft has discontinued the use of classic teams in July of 2024.
For a comprehensive list of all the new features of Microsoft Teams, click the link below:
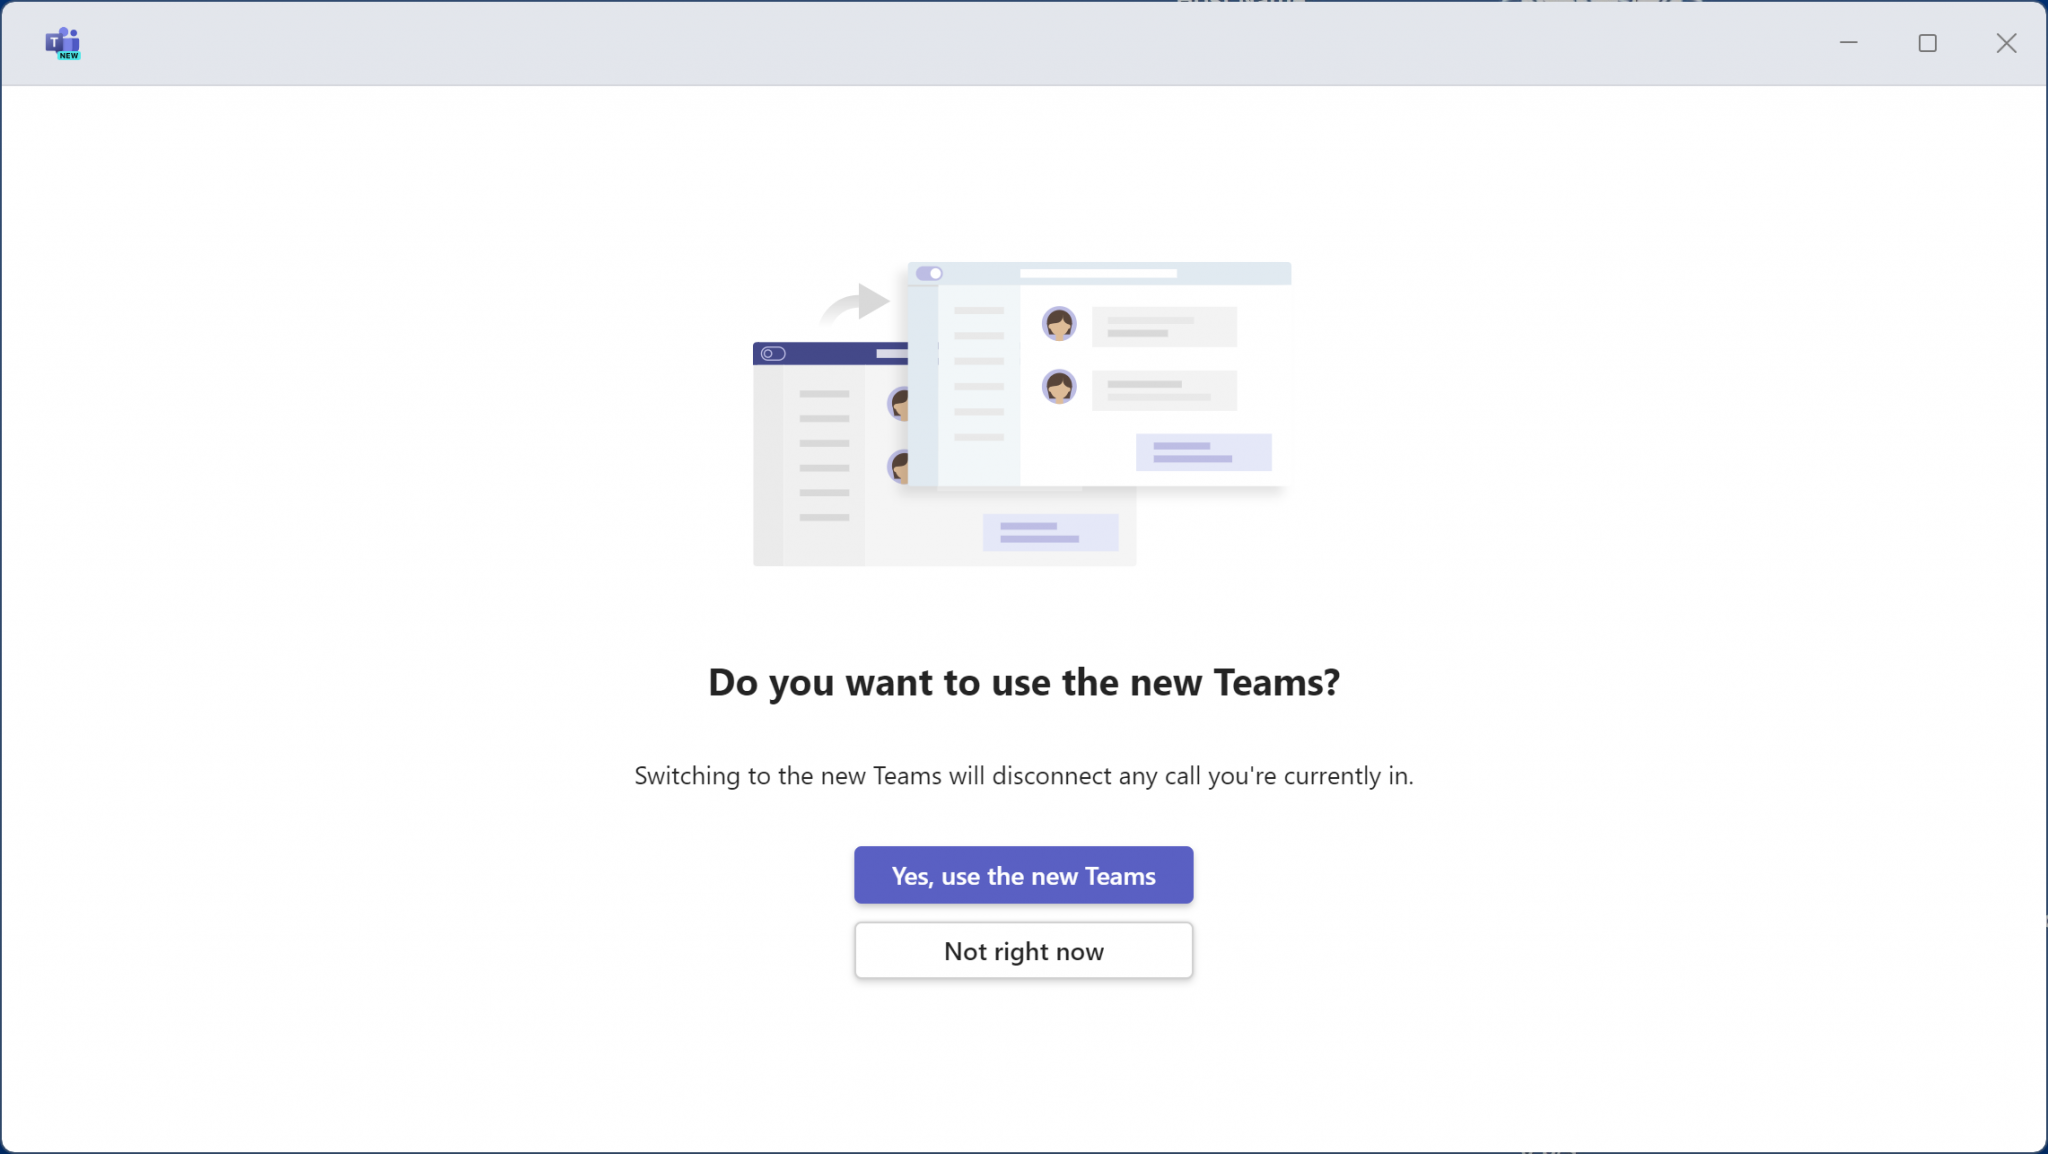
Looking for the new Teams experience? The upgrade process itself is quick and silent, where Microsoft 365 will install the new Teams client in the background.
For all university owned computers, the new Teams app has been silently rolling out in the background and may be presented with as the following options to switch over
New Teams experience has been delivered to the device
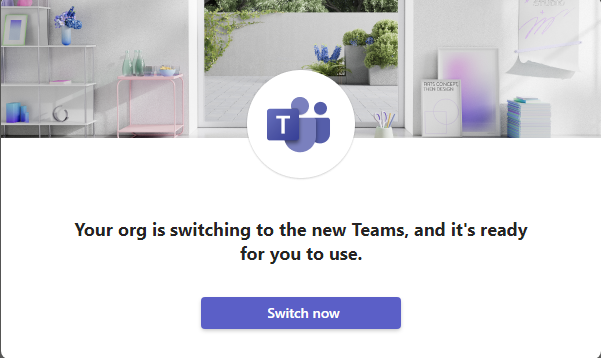
You may be presented with an option to Upgrade your device with the New Teams experience
A notification prompt to switch your device to the new Teams experience
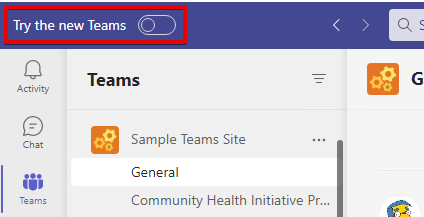
A “Try the new Teams” toggle switch will present itself if the new Teams app upgrade has completed but continue to use the classic Teams experience.
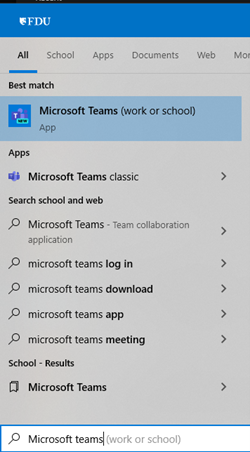
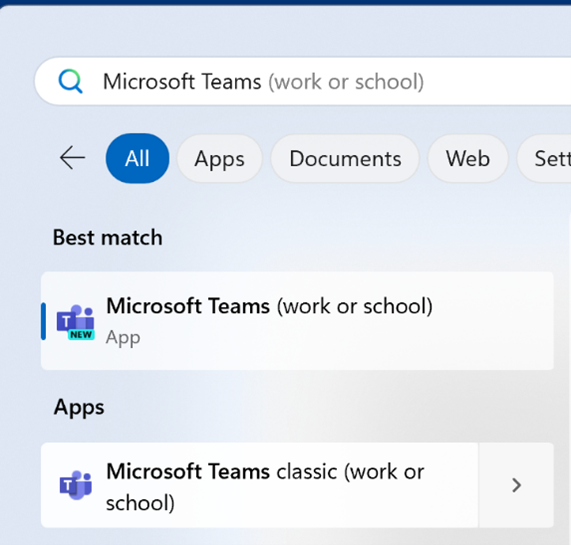
During the transition phase, which will end in June of 2024, you might see two icons. The old Teams is labelled Microsoft Teams classic (work or school), and the new Teams will be labeled Microsoft Teams (work or school). The new Teams will also have a cyan “New” label on the icon as well.
Windows 10 Search for Microsoft Teams
Windows 11 Search for Microsoft Teams
macOS spotlight search for Microsoft Teams
Note
The new Teams app should be used unless there is a specific reason not to (like troubleshooting a Teams Application issue).
For a complete list of all changes in the New Microsoft Teams, visit:
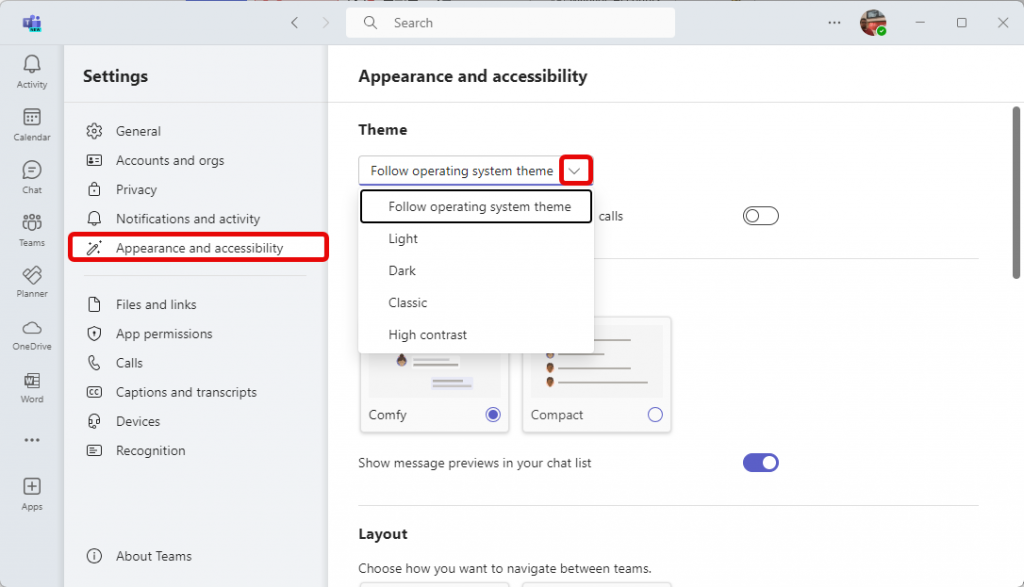
When you’re upgraded to the new Teams, your display settings will reset. Here’s how to change the most commonly accessed display settings.
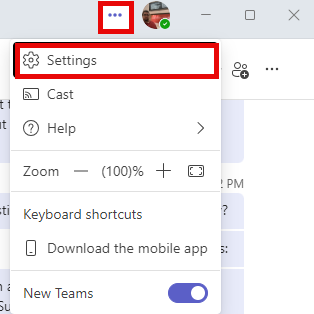
Click on the “Ellipses” in upper right-hand corner, and then “Settings”
The default theme for new Teams is Light, which appears grey. Dark will color the window black. Classic will bring back the purple/gray theme from classic Teams
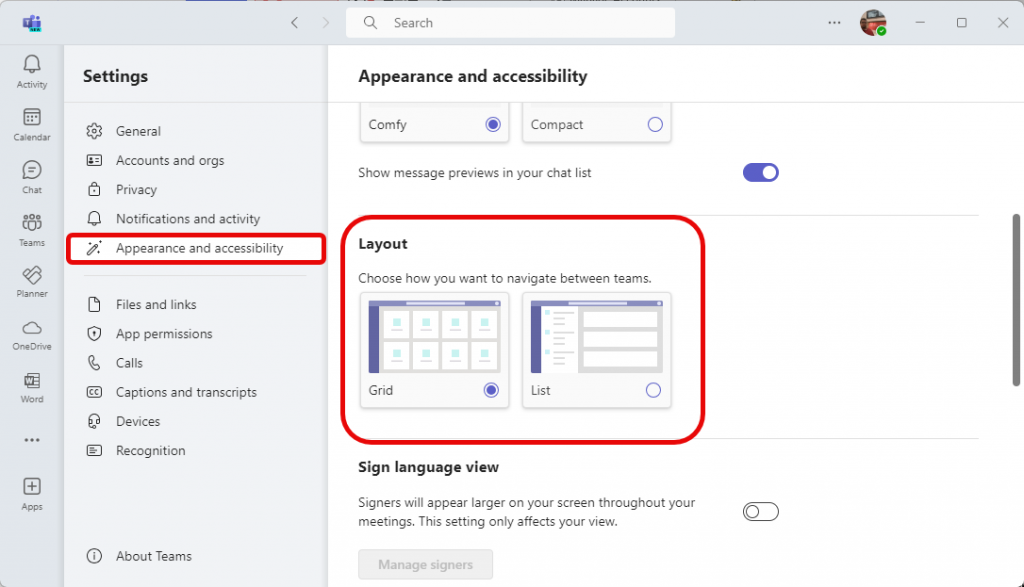
Another commonly changed display setting is Layout. You can choose your Teams to display in a Grid view, which is the new Teams default, or a List view, which will show all your Teams in a list on the left, similar to how Outlook displays folders.
There are many other settings in Teams, and we encourage you to review your device settings and video effects (blurred and custom backgrounds) prior to joining your next meeting. Custom backgrounds may need to be re-added.
What happened to my Contacts list on the Chat tab?
Microsoft has moved the Contacts list to the People app. You can find People by clicking the “…” tab in the left navigation bar and typing “People” in the search.
To pin it to your sidebar, right click “People” then select “Pin”
Note
If People is not able to be found when searching, this means that the People App is already Pinned.
close
Where are my Saved Items?
Saved Items are not currently available in new Teams. Microsoft plans to release a new functionality that will replace it and offer you a method for exporting Saved Items from Teams Classic in the near future. For now, Microsoft recommends using Classic Teams to access Saved Items.
close
Why are my Office documents opening in my browser or Teams app unexpectedly?
We have observed some cases where upgrading to new Teams will reset your file open preference. You can change it by going to “Settings > Files and Links” from the (•••) menu at the upper right.
close
Why can’t I tag some private channels?
We have observed that you cannot @ mention or tag some private channels in the new Teams experience. This issue appears most likely to affect older private channels and has been reported to Microsoft.
close
What happened to Groups?
Groups are now called Categories and how to create and manage categories will be discussed in the Section for Teams Chat.
close
What happened to Contacts?
Contacts have been moved to the People App. How to manage and use People will be discussed in the Teams Chat Section.
The page will automatically detect your operating system and redirect you to the appropriate desktop client (e.g. Windows, macOS) or mobile client (e.g. Android, Apple iOS).
The Microsoft Teams application is automatically pushed to all university owned computers. To determine if you already have it installed, search for “Teams” using the Windows Search Bar or Spotlight Search on Apple devices. If you are working on a university computer and you cannot locate the Microsoft Teams application, you can install by following the instructions below.
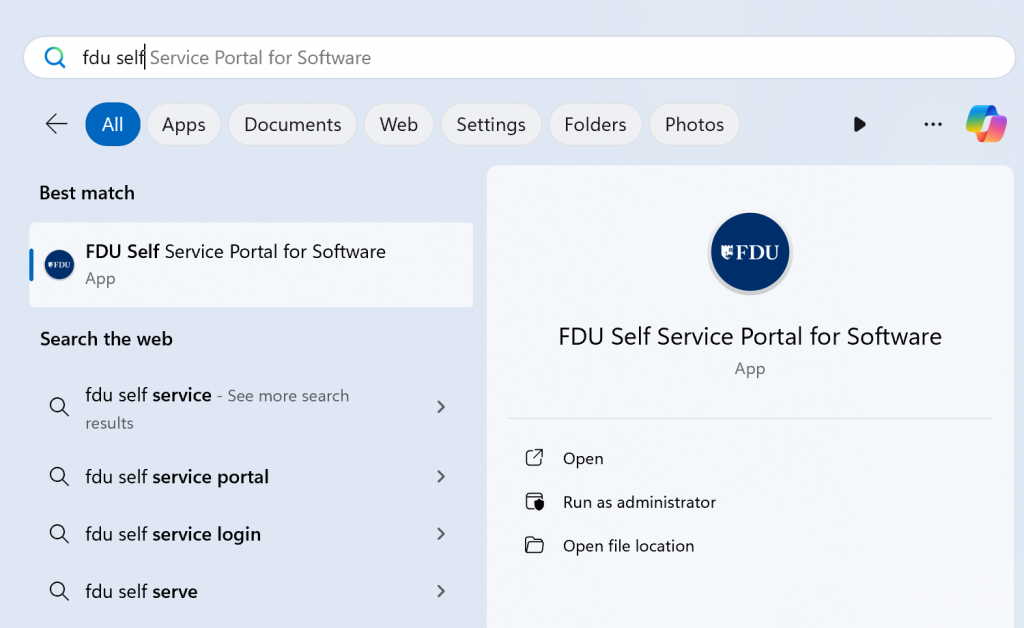
Windows – FDU Self Service Portal for Software
Press the “Windows key” on your keyboard and type “FDU Self”
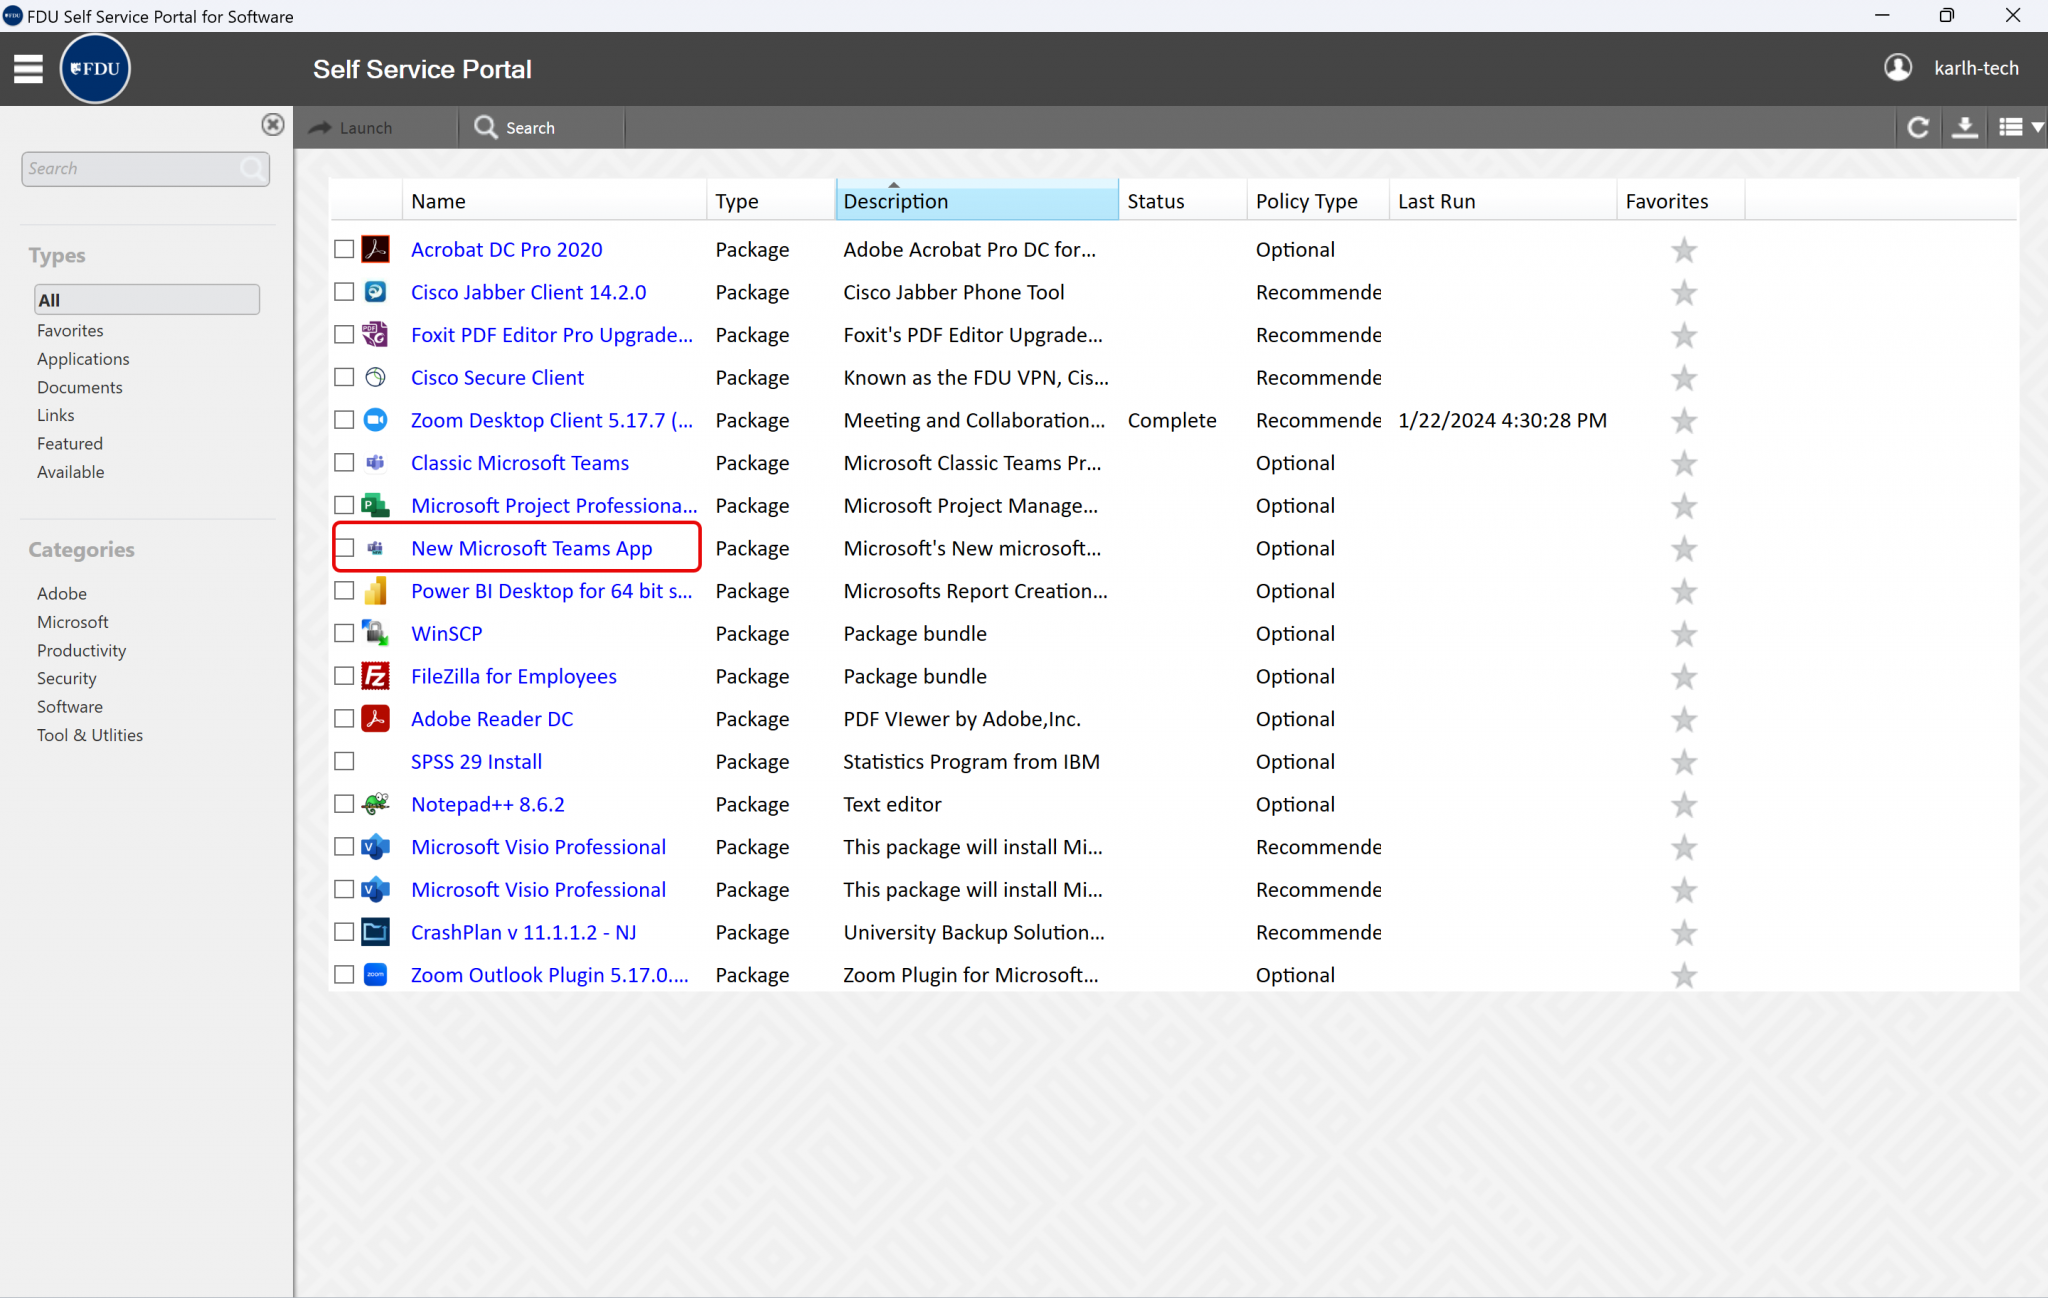
Launch “FDU Self Service Portal for Software” from the search results list
Select the “Microsoft Teams” experience from the list and click “Install”
The classic Teams experience will be available until the end of June of 2024.
Web – Access the Office Web Application
The web client is a full, functional client that can be used from a variety of browsers including Google Chrome, Edge Browser, and Mozilla Firefox. Microsoft Teams will also be available on Safari soon.
Teams allow’s for text-based conversations using the Chat feature. Although it does not replace email in all use cases, it is a great tool for asking quick questions or just saying hello. When using chat, be mindful and adhere to FDU’s Written Information Security Program.
Select “Chat” from the left menu and then click on the top search bar
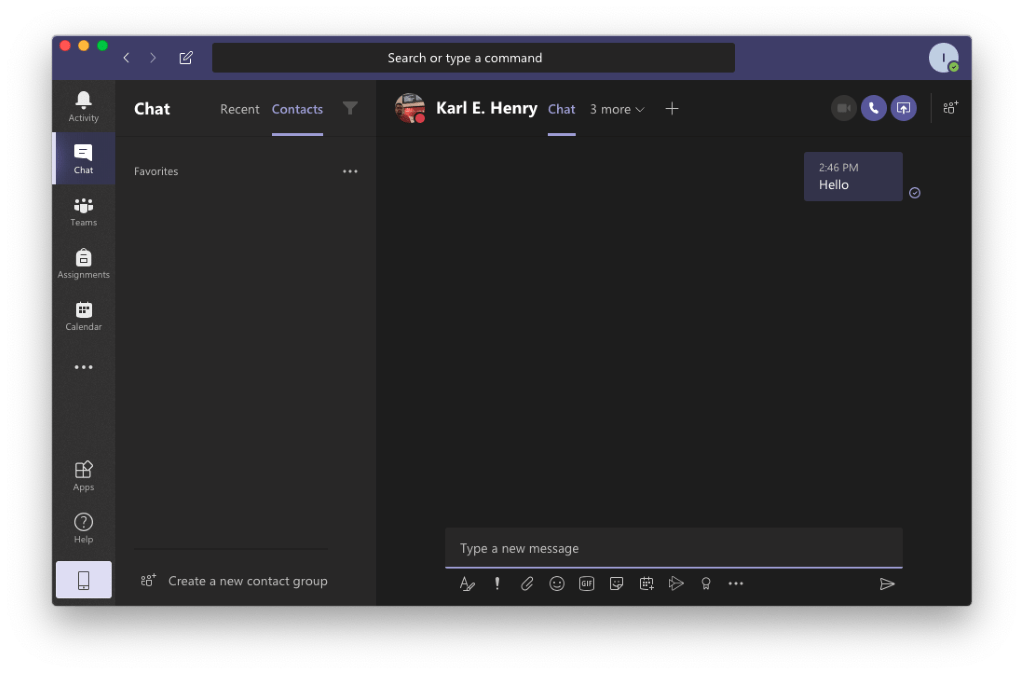
Classic Teams
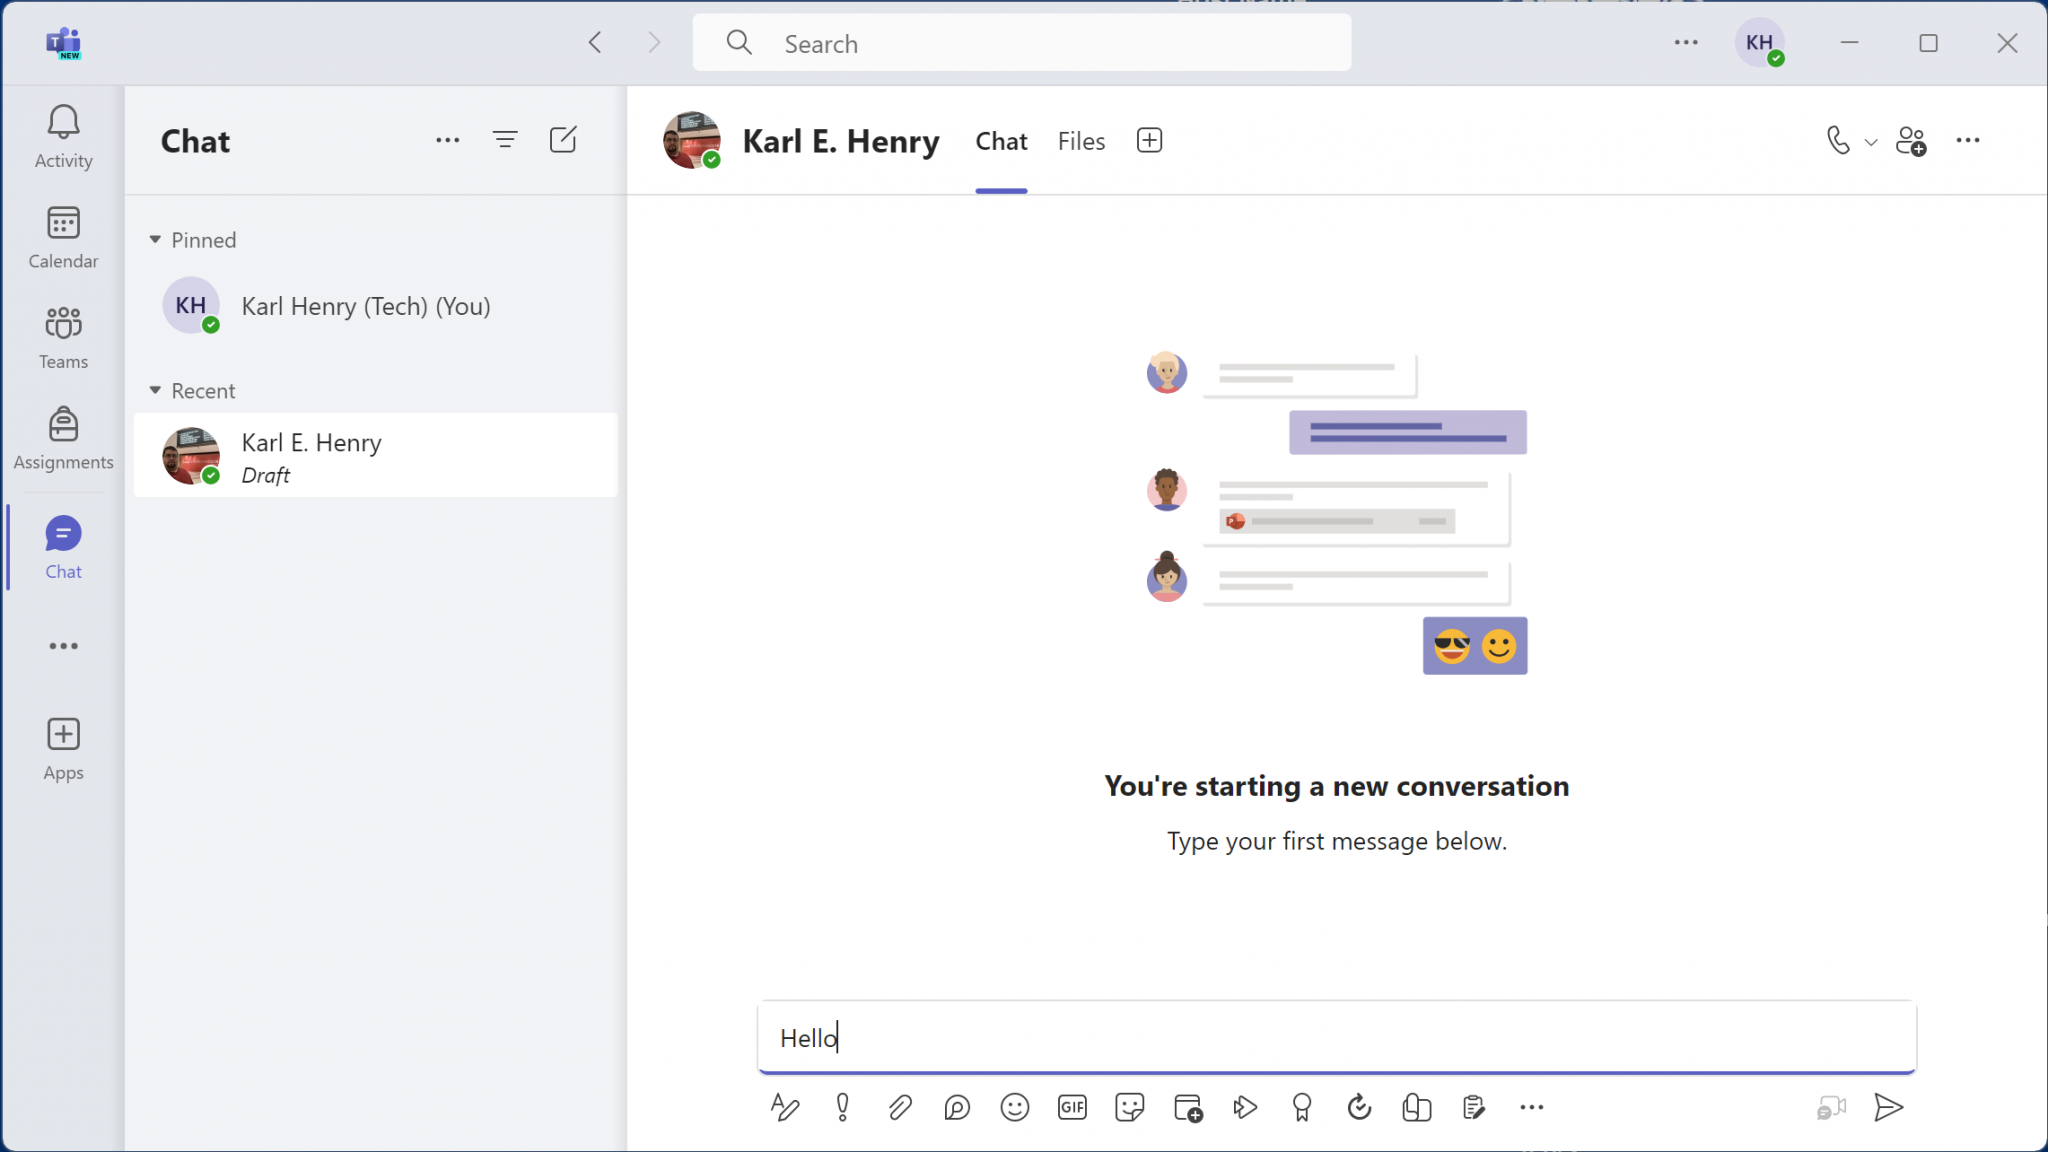
New Teams
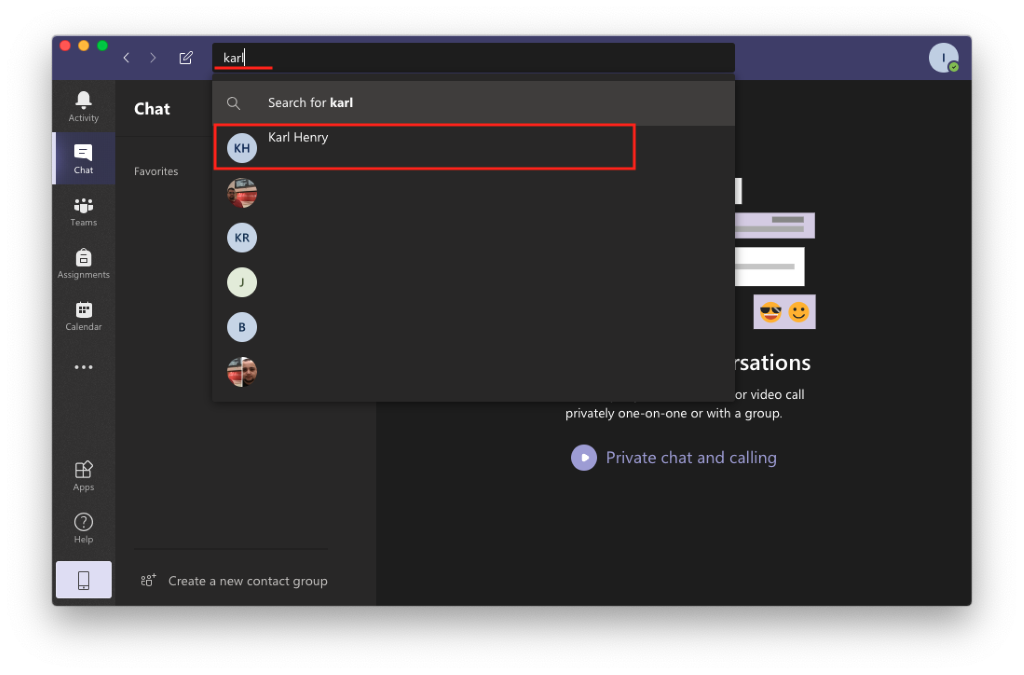
Type the name of the person you are attempting to locate and click on their name. Only FDU faculty, staff, and students are accessible in Microsoft Teams
Classic Teams
New Teams
You will be brought to the chat window and can start your conversation
The Chat window has many convenient tabs and shortcuts aimed at improving collaboration. Near the top of the screen, next to the name of the contact that you are chatting with, you will notice the default tabs, followed by a plus sign.
Classic Teams – Tabs
Chat: tab contains the conversation
Files: tab contains all files shared in during the conversation
Organization: Two person conversations, the Organizationtab shows your contact’s organization chart. This information is pulled from Office 365
Note
Datatel remains the authoritative source for this information and the data contained here is not intended to be 100% accurate.
In two person conversations, the “Activity” tab will list the latest activity of your contact
You can use the “+ sign” to create a new tab from a file or an app. This can be a quick and convenient way to access a collaborative file that was previously shared in the conversation
To the right of these tabs are a series of shortcut icons which perform the following functions:
Classic Teams – Shortcuts
Video call: icon starts a new video call
Audio call: icon starts a new voice call
Screen sharing: icon allows you to share your desktop or an application
Add people: icon is used to invite additional people to the chat
Pop out chat: icon creates a separate window with your chat
close
New Teams – Tabs
Chat: contains the conversation
Files: Contains all files shared in during the conversation
Add a Tab: Add an App to the tab list for all users
To the right of these tabs are a series of shortcut icons which perform the following functions.
Shortcuts – New Team
Audio Call icon starts a new voice call
Add people icon is used to invite additional people to the chat
Ellipses is used for additional features:
Open Chat in New Window: Pops chat in separate window
Schedule Meeting: schedules a meeting with individual
Screen Sharing: initiates a screen sharing session and calls individual
Pin: Pins person to pinned section in teams
Note
Depending on your screen resolution and application window size, your view may differ from the picture above, but all options outlined will be available.
The Chat function allows you to have conversations with one person or groups of people. In classic Teams, this is known as Contacts and in the New teams, this is called People.
The pane on the left-hand side of the screen is split into Recent and Contacts. Contacts acts like a rolodex that allows you to store and sort a list of the people you contact most frequently. The Recent list will display your most recent conversations with single people or group messages.
Types of Contacts
There are two types of contacts, directory contacts which come from your organization, and local contacts which you can add from scratch to your copy of Teams.
Directory contacts have some fields set by your organization, and additional fields which can be edited by you.
Local contacts are stored within your local copy of Teams, and do not synch with an organization’s directory.
Note
For contacts you create based on the company directory, the admin may control some of the fields, like the name and email. They will appear grayed out and you will not be able to modify them.
Classic Teams – Contacts
By default, the Contacts tab will already have a “Favorites” group. However, creating new groups can be a helpful way to organize your contacts. For example, you may wish to create a group for people that you are working with on a project or for people that you interact with from a department.
To create a new contact group, click “Create a new contact group” on the bottom of the pane
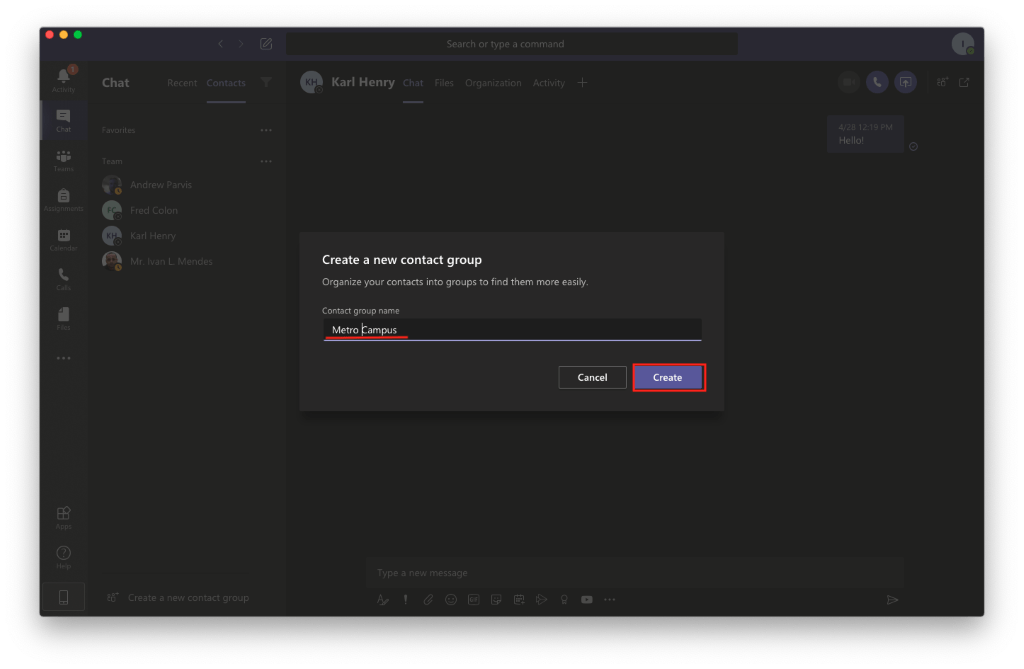
Enter a name for your group, and click “Create”
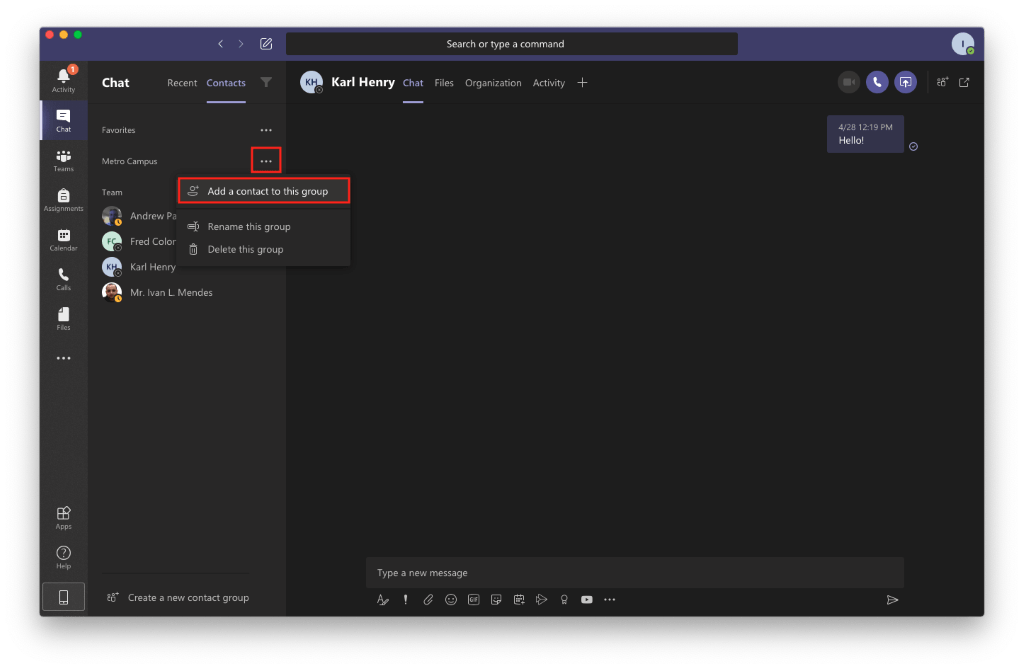
To add contacts to a group, click the “More options” icon (•••) next to the group name and select “Add a contact to this group” from the drop-down menu
Begin typing the name of your contact. Once you see their name appear, select it and select “Add”
You can add the same contact to as many groups as you would like. The chat with your contact will remain the same regardless of which group you are accessing the conversation from.
close
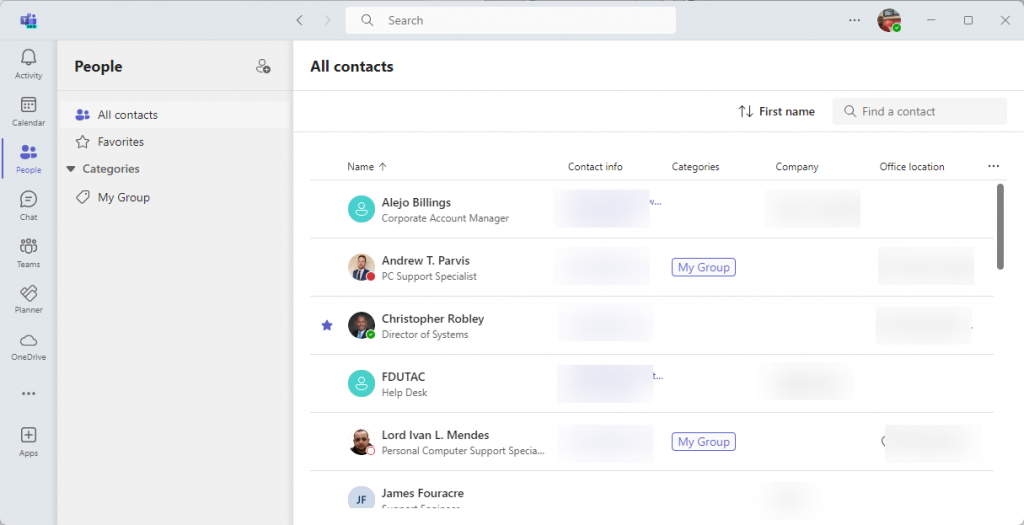
New Teams – People
Microsoft has moved the Contacts into the People App. By default, the People tab will already have a “Favorites” group and a “My Group” category. However, creating new categoriess can be a helpful way to organize your contacts.
For example, you may wish to create a category for people that you are working with on a project or for people that you interact with from a department.
Add People to Favorites
Find the contact you wish to be added to favorite and click the star in front of their name
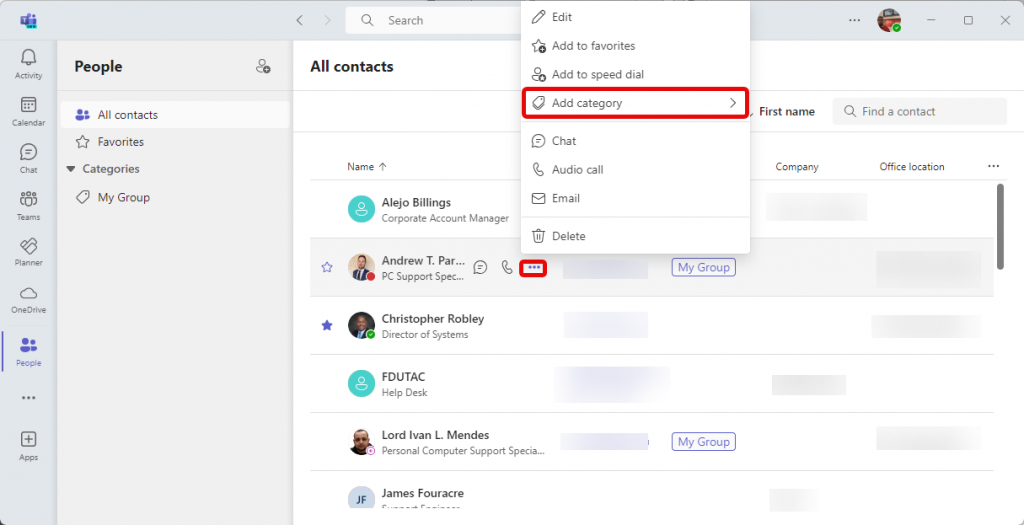
Add People to Category
Next to the contact, click the ellipses button and then click “Add Category”
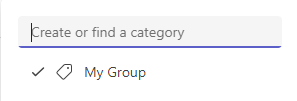
Type in the name of the new Category, search for an existing category, or select from the provided list
Screen sharing is one of Microsoft Teams’ most powerful collaborative features. You can show your screen to your colleagues and even grant them control to edit Microsoft Office files with you in real time.
Note
Before you get started, make sure that you are using the installed version of Microsoft Teams, as the browser-based Teams version does not support this functionality.
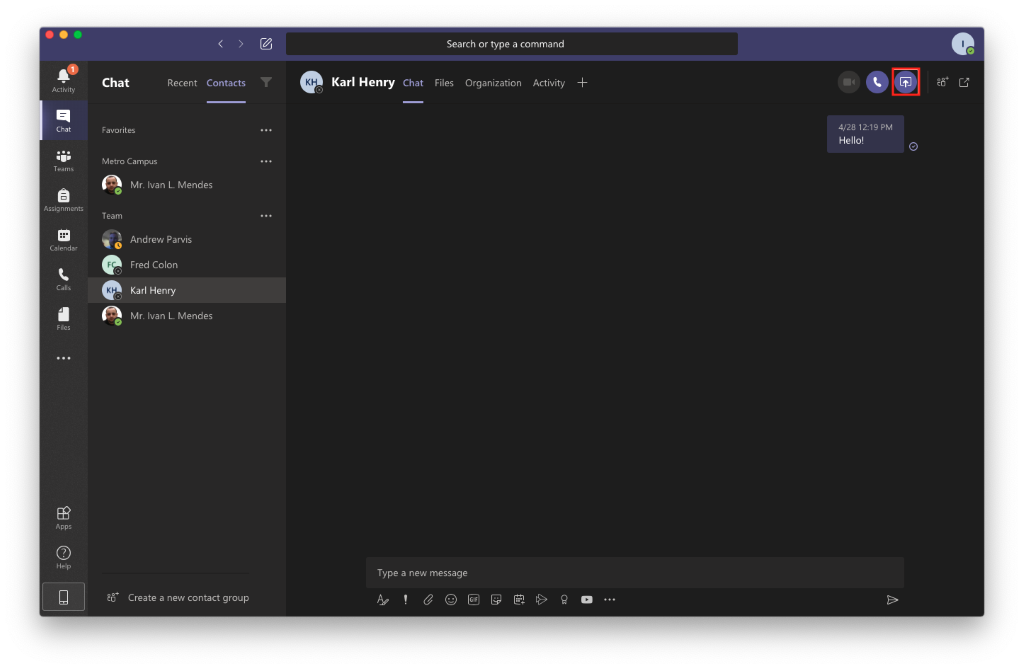
From the chat window or from an ongoing call, click on the “Screen Sharing / Share” icon
Classic Teams
New Teams
You be given a choice to either share your desktop or an application from the Microsoft Office suite, click on the window you want to share
Classic Teams
New Teams
Once you select the screen you wish to share, the members of your chat or call will be able to view your screen and request access to remotely control your desktop or program.
You can only share your screen with a mobile device user if you are engaged in an active voice or video call with them.
Creating a team provides remote team members with the ability to work together and share information via a common online space. You can also organize your information by creating channels to help optimize your team’s workflow.
To create a Microsoft Team, you must request one using an online form on SAMI Support. To request a team, follow these instructions:
Navigate to the SAMI Support using the link below, logging in with your FDU NetID account
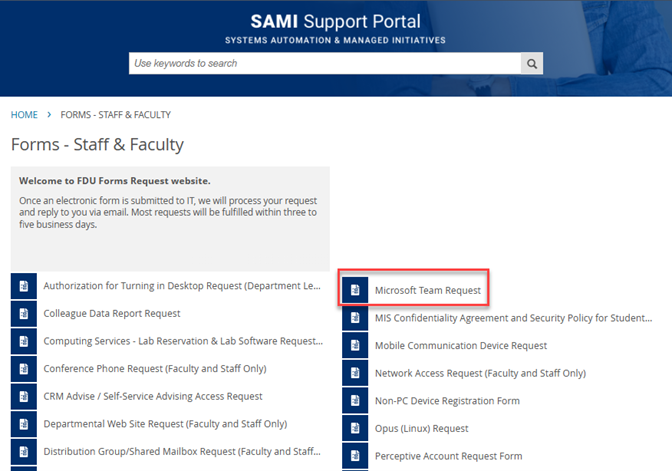
Scroll down to “Microsoft Team Request” and click on it to expand the information
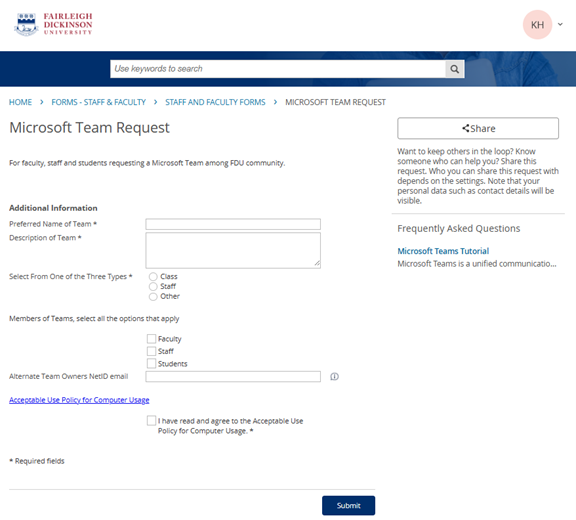
Fill out all the fields and click on the “Submit” button
Note
You can specify additional team owners. Owners will have rights to invite and make other changes to the team after its creation.
You should now see a screen informing you that your form was successfully submitted
Note
Please allow 3 to 5 business days for the Team to be created.
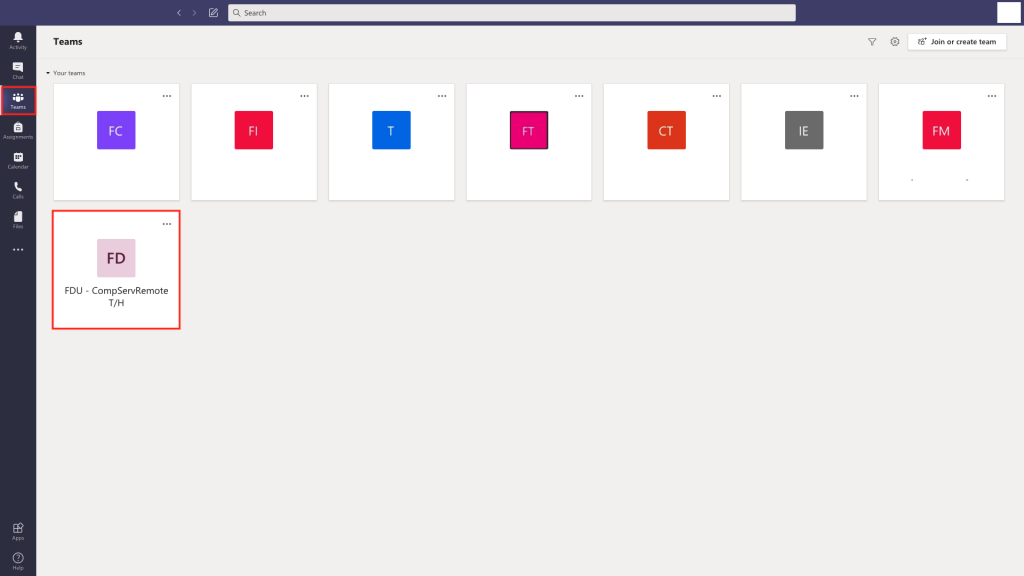
You will receive an email once the team is created. The next time you log in to Teams you will see your team listed in the Teams section
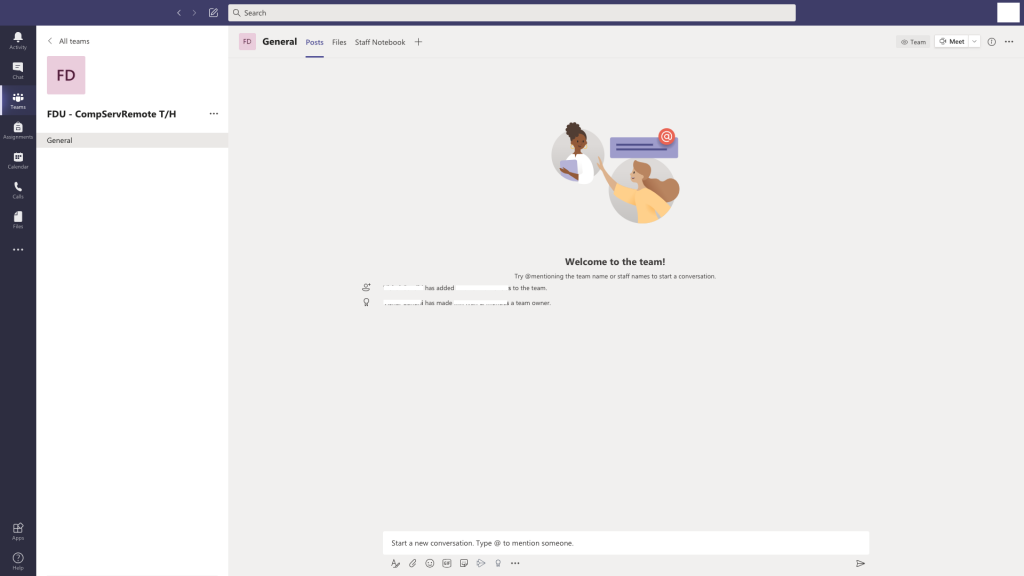
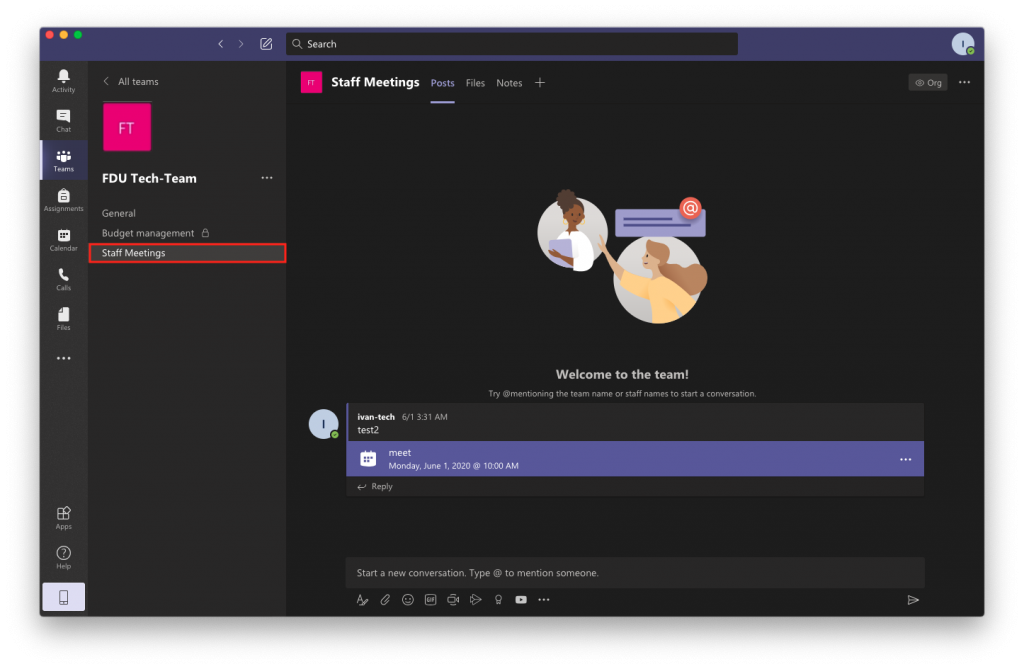
Click on your team to open the general channel. From here you can create channels, add users, and customize your team. Any team members that you add will receive an email notifying them that they were added to your team. The next time that they log in or open Teams, they will find the team listed in their Teams section
Channels are dedicated sections within a team. You can keep conversations organized by specific topics, projects, disciplines, or whatever works for your team! Channels are where conversations happen and where the work gets done. There can be public channels which are open to all team members or, if you require a more select audience, private channels can be open to a subset of your team.
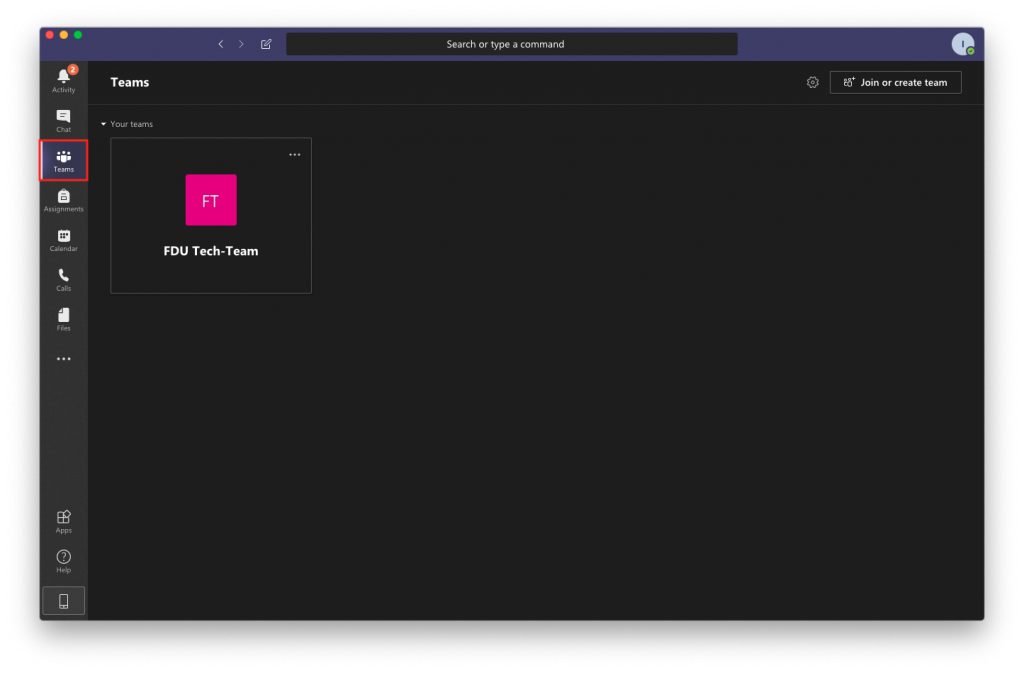
Select Teams from the menu on the left-hand side of the screen. If you have multiple teams, select your team of choice
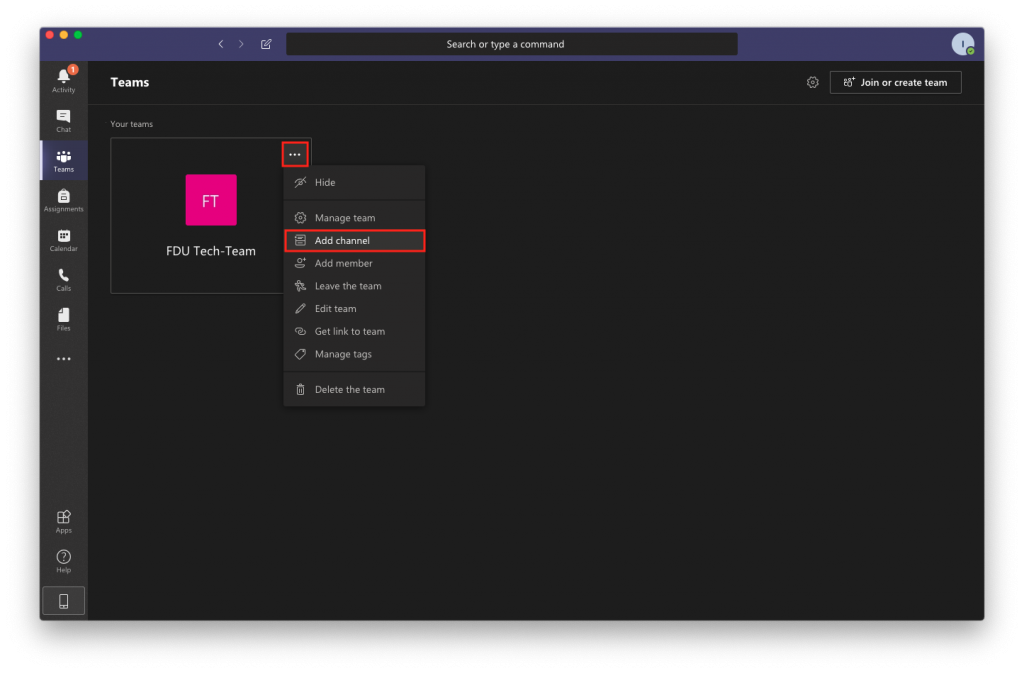
Click on the “More options” icon (•••) next to the team name and select “Add channel”
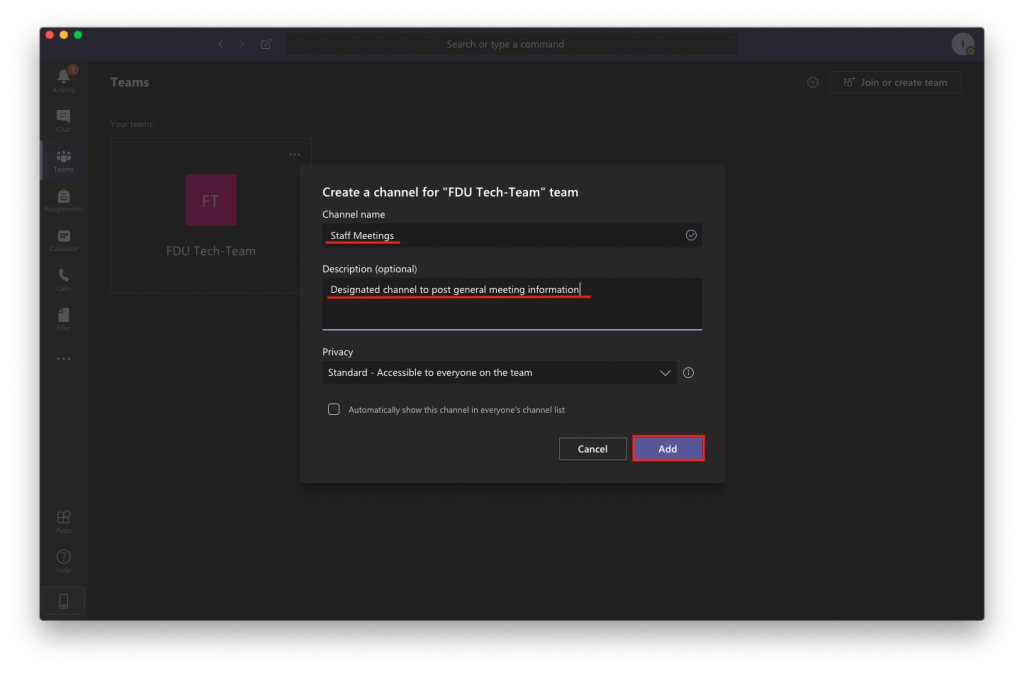
Give the channel a name, and a brief description as if would would like
Select your channel’s preferred level of privacy and press “Add”
Standard channels are open for anyone to join Private channels are invitation only
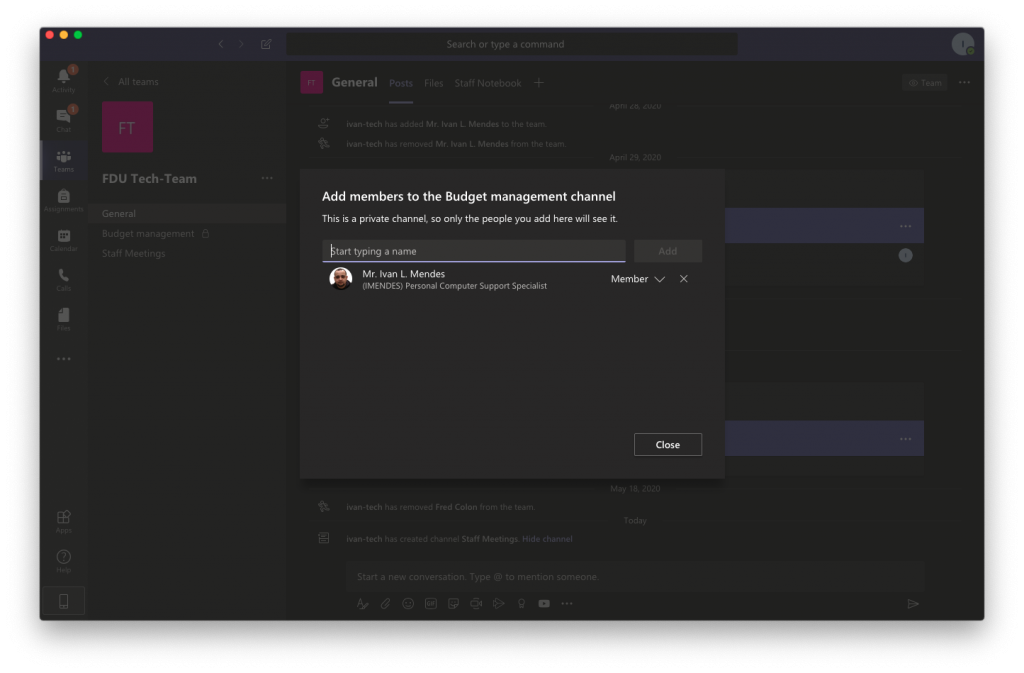
If you selected “Private” you will see a window that lets you add the team members that should have access to the channel. Once all members are added, press “Close”
Once a channel is created it will show up under the General channel in the channels list. If the channel was set to Private, only the members can see it. Anyone who belongs to the channel can click on it to view its contents
Note
Since channels are sections within a team, it is not possible to add members to a channel that are not part of the team.
Now that your teams and channels are created, you can begin to take advantage of Microsoft Teams’ management features. Team management includes essential functions such as adding and removing members, assigning permissions for individual members, and managing your channels. You can also implement granular customizations such as setting parameters on the use of tags and emojis.
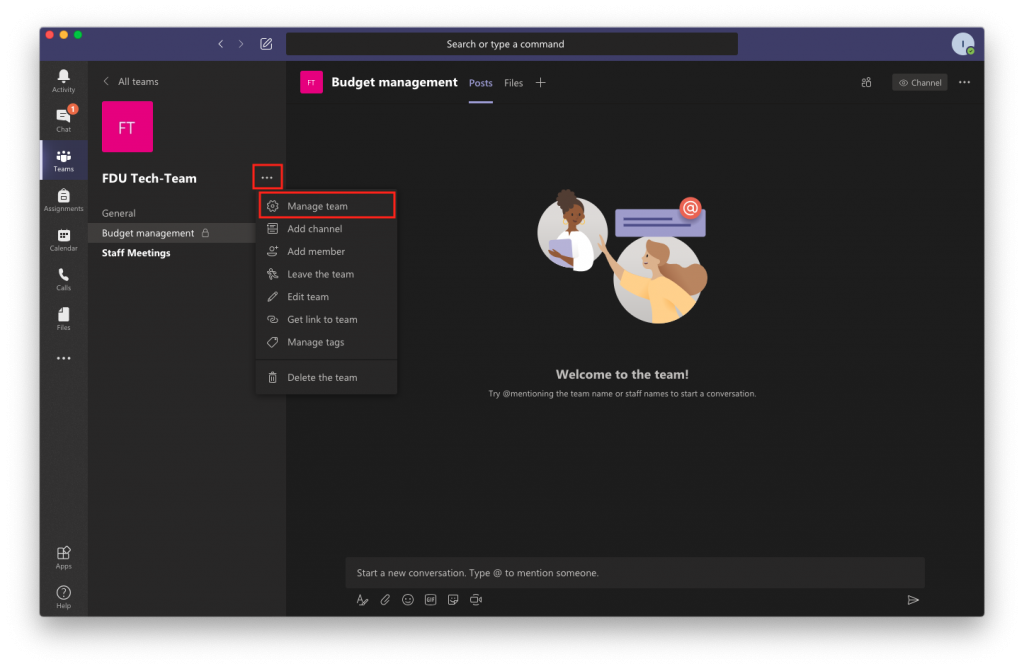
Select Teams from the left menu. If you have more than one team, click on your team
Click “More Options” icon (•••) next to the team name and select “Manage Team”. From here, you can select one of the following tabs
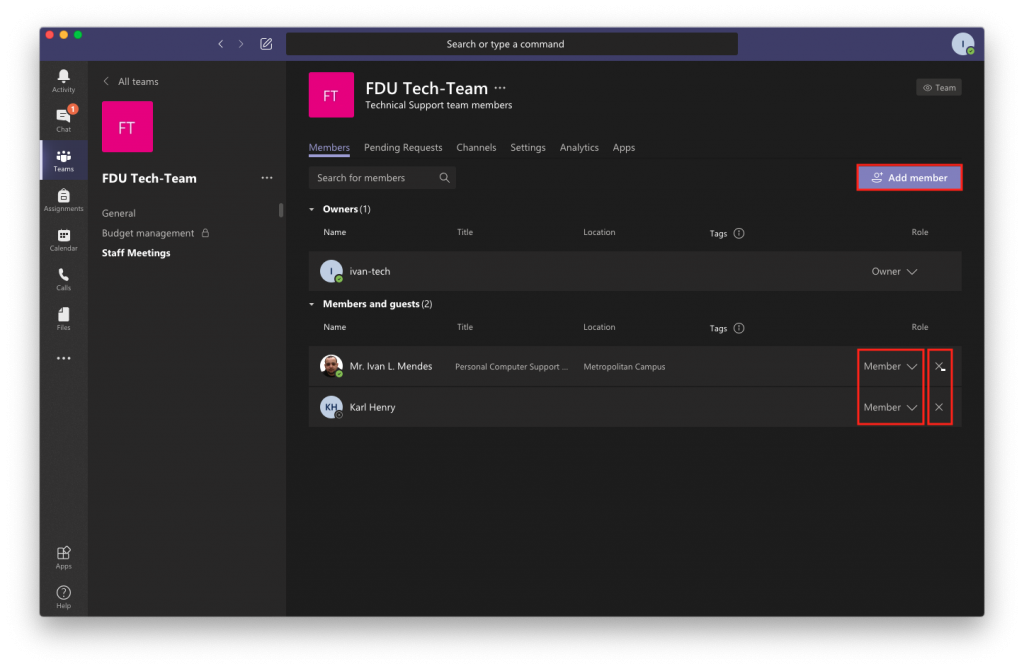
Manage Members Tab
Add a member by clicking “Add Member” button on the top right of the window
Remove a member by pressing “X” button on the right of their name
Use the drop-down menu to change a member’s role to Owner. This allows them full access to change settings
Manage Request Tab
Use this tab to accept or deny a person’s request to join your team
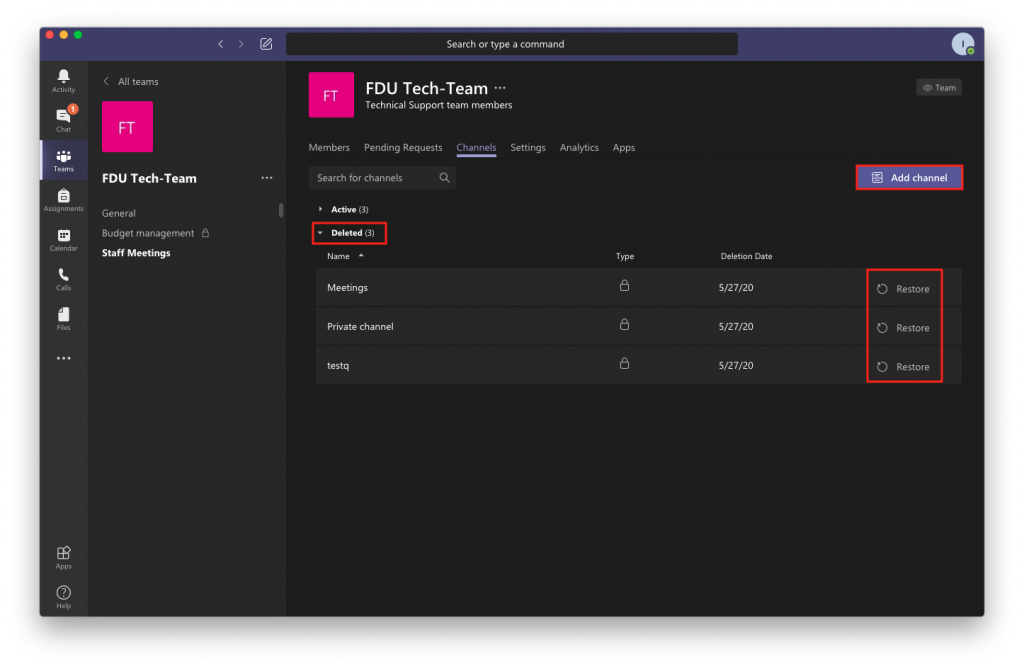
Manage Channels Tab
Create a channel by pressing the “Add channel” button on the top right of the window
You can restore deleted channels by expanding the “Deleted” list and pressing on “Restore”
The experience for managing a team setting varies between both the classic and new Teams.
Classic Teams – Manage Settings Tab
Team picture: is an optional setting which allows you to set a profile picture for your team. You can upload your own image or use one of the colorful templates provided by Microsoft
Member permissions: to set editing permissions for your team members
Guest permissions: settings you can allow guests to create, update, and delete channels
@mentions: lets you choose if you allow the @mention function to send notifications to individuals or entire channels
Team code: will provide you with a join code that you can give out to new members. This will allow them to join without being placed in the Pending Requests section
Fun stuff: lets you allow gifs and memes to be displayed on the channel
Tags: setting todecide who can use the tags feature. With tags, your team members can add labels help them better identify other members of the team
close
New Teams – Manage Settings Tab
Team Details: is an optional setting which allows you to set a profile picture, description and set privacy options for your team. You can upload your own image or use one of the colorful templates provided by Microsoft
Member permissions: to set editing permissions for your team members
Guest permissions: settings you can allow guests to create, update, and delete channels
@mentions: lets you choose if you allow the @mention function to send notifications to individuals or entire channels
Team code: will provide you with a join code that you can give out to new members. This will allow them to join without being placed in the Pending Requests section
Fun stuff: lets you allow gifs and memes to be displayed on the channel
Tags: setting todecide who can use the tags feature. With tags, your team members can add labels help them better identify other members of the team
Team Expiration: Specifies when the Team will expire. By policy no user can change the expiration policy and can visit SAMI Support to extend the expiration when nearing the expiration date.
New Teams – Team Settings Page
New Teams – Team Details Page
New Teams – Team Image Page
close
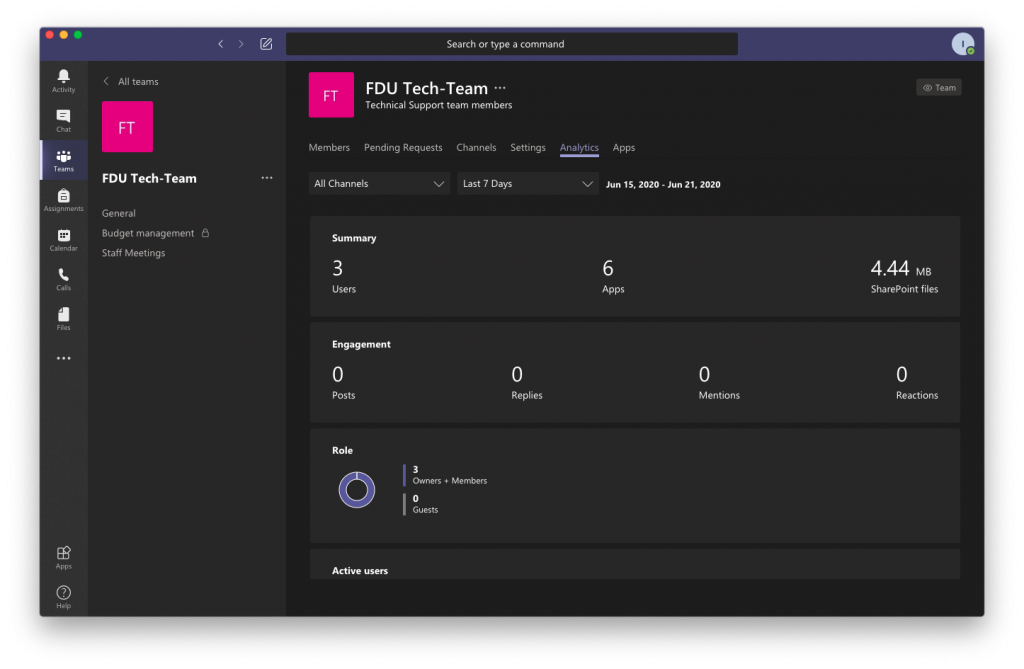
Manage Analytics Tab
The Analytics tab displays usage information for your team
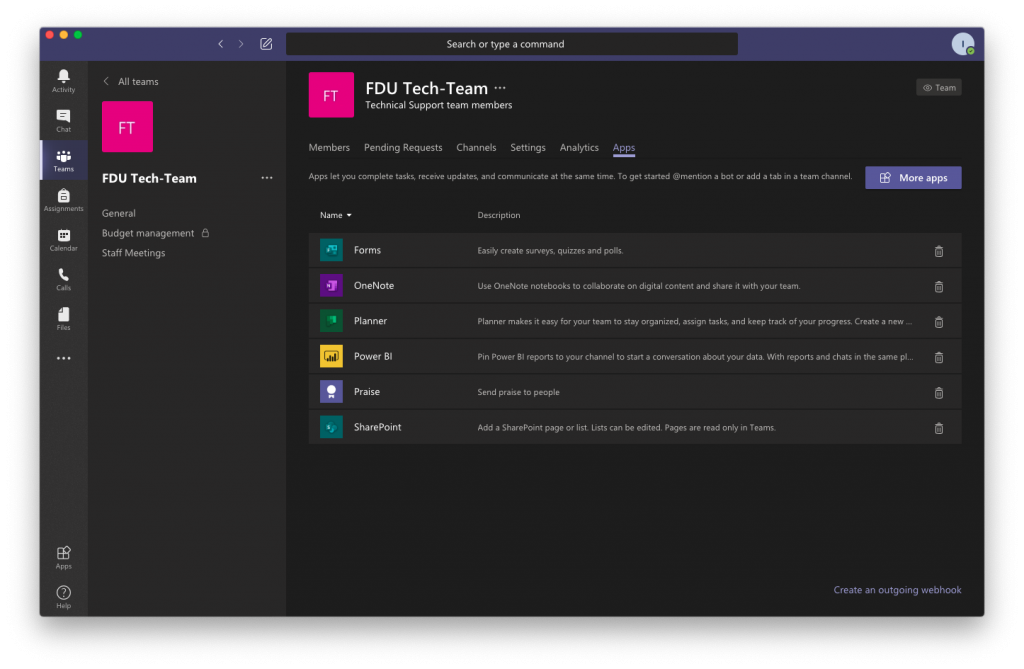
Manage Apps Tab
The Apps tab allows you to add or remove application plug ins for your channels
Instead of scheduling a meeting for a future date, you can start one right away and invite people in on the fly.
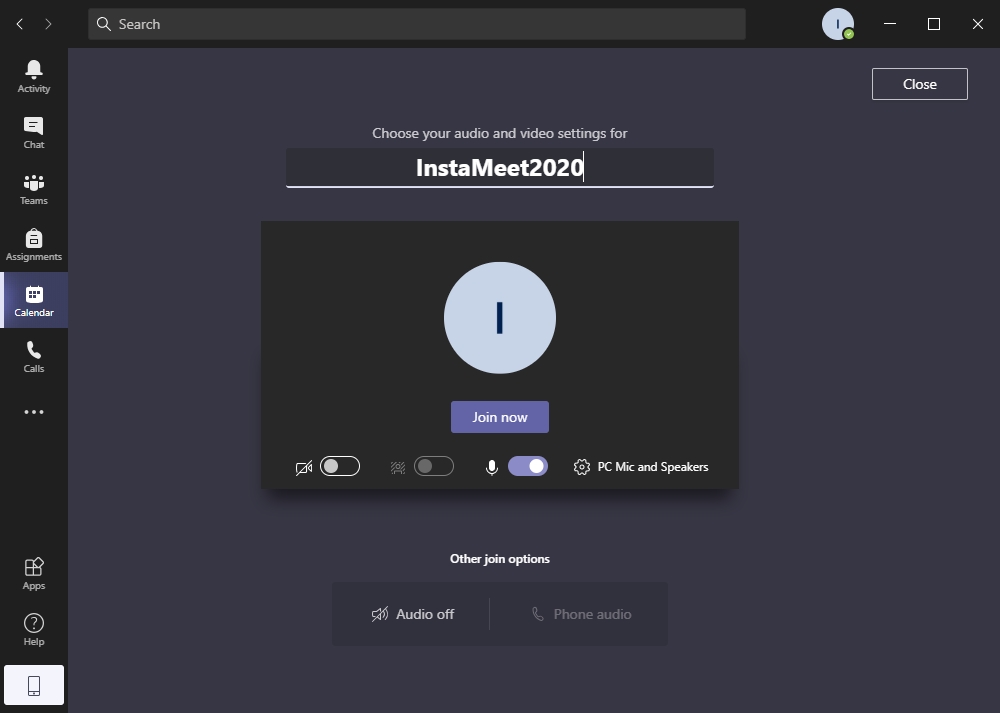
Select “Calendar” from the left-hand side of the screen and press “Meet Now”
Give your meeting a name, select audio and video options, and press on “Join Now”
Classic Teams – Meet Now Options
New Teams – Meet Now Options
New Teams – Meet Now Audio Options
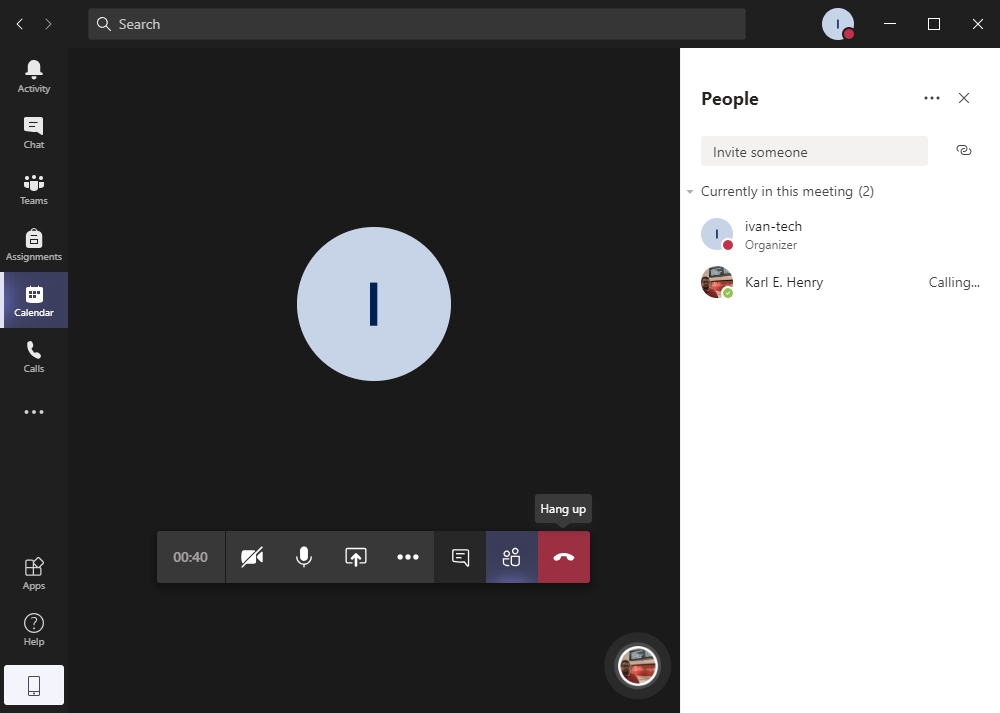
New Teams – Meet Now Invite Prompt
Your meeting should start with the “Participants” tab displayed so you can start inviting people right away. As you search for people and add them to your meeting, they will receive a call to be connected
As people accept the meeting invitation they will automatically be connected
Meetings in Teams include audio, video, and screen sharing. They’re one of the key ways to collaborate in Teams.
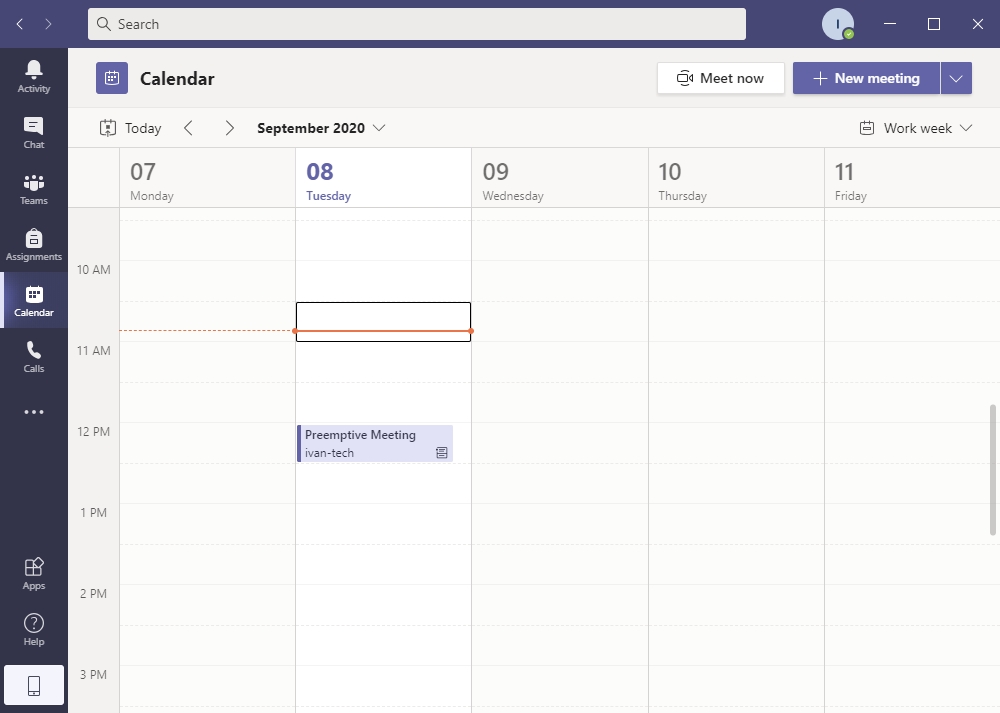
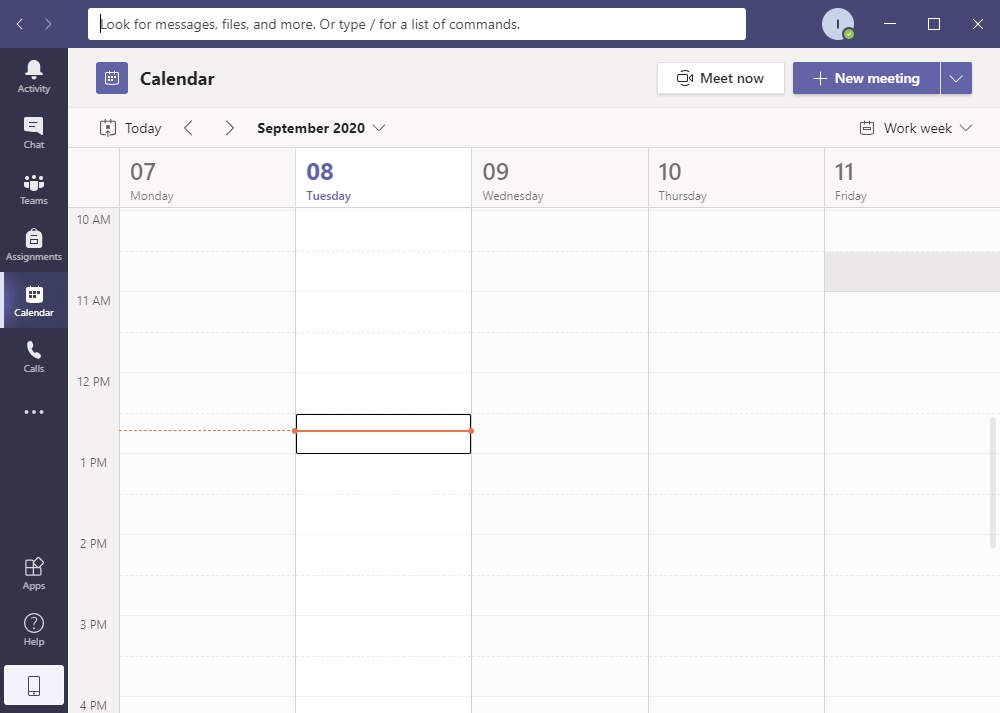
The Teams Calendar can be found by clicking Calendar in the left pane
Classing Teams – Scheduled Meeting
New Teams – Scheduled Meeting
You can join a scheduled meeting by selecting the “Calendar” tab from the left menu, then finding and left clicking on your meeting and clicking join for the Classic Teams Experience, or simply press “Join” on the New Teams experience
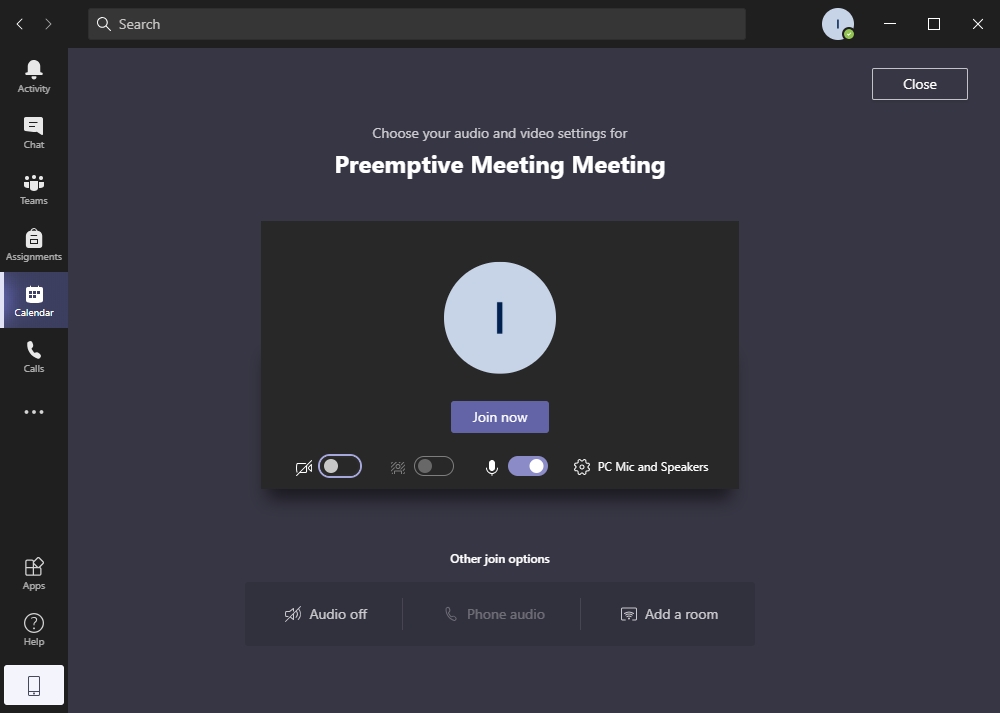
Select your video and microphone options, then left click “Join Now”
Classing Teams – Join Meeting Options
New Teams – Join Metting Options
Join
Depending on the Metting owner’s settings, you may receive a message that you are waiting for the host to let you into the meeting. You will remain on the Join Meeting Options Screen until you are admitted into the meeting.
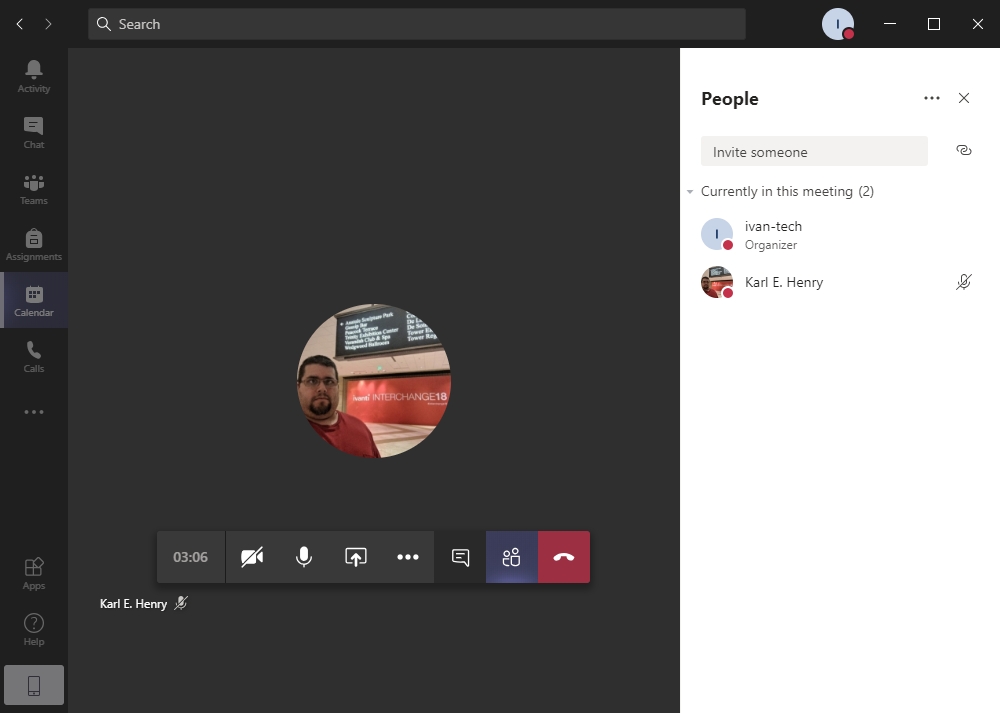
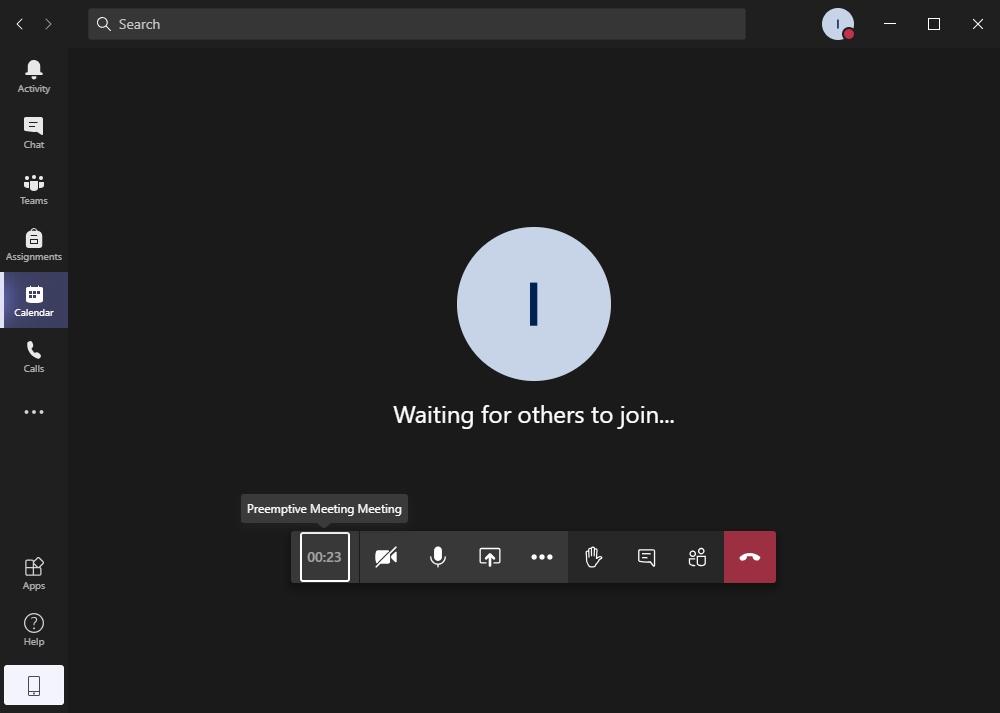
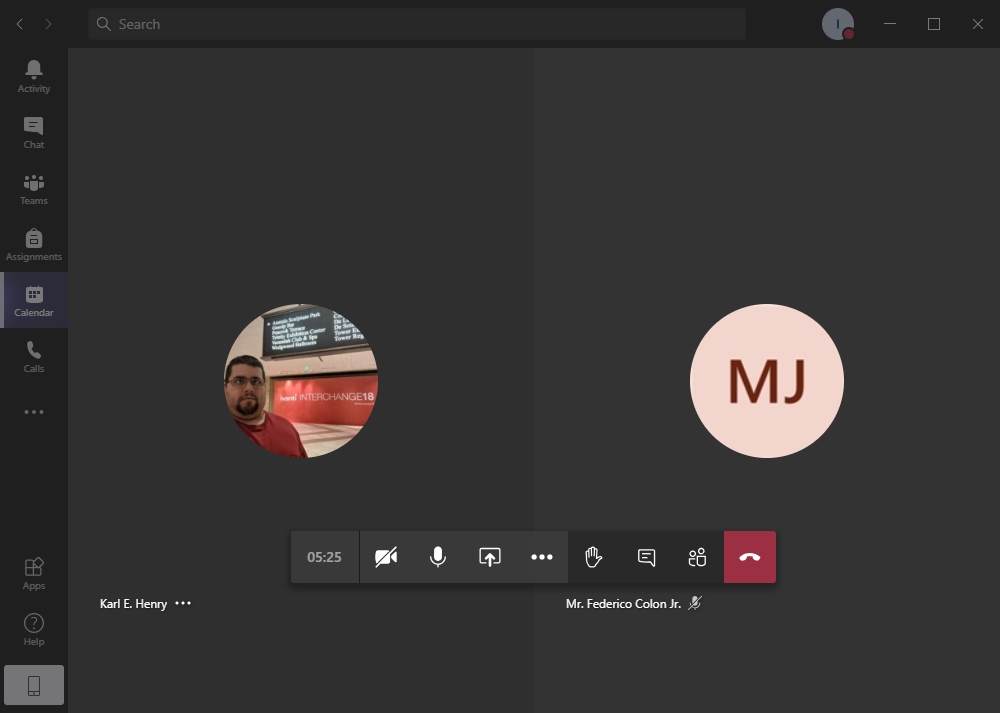
If you are the first participant that joined the meeting, you will see a black screen informing you that you are waiting for other members to join. As people join the meeting they will show up on the screen. If you are the host and your meeting has the lobby opened, you will have to admit everyone who joins the meeting
Classic Teams – Waiting in Meeting
New Teams – Person in Lobby Prompt
When you are done with the meeting, close it by pressing the red telephone icon to “Hang up” the call
Due to Office 365 calendar integration, scheduling video and voice meetings on Microsoft Teams is simple and convenient.
Select the “Calendar” tab from the left-hand side of the screen. This screen displays your entire FDU Office 365 calendar. Next, press “New Meeting” button on the top right of the window
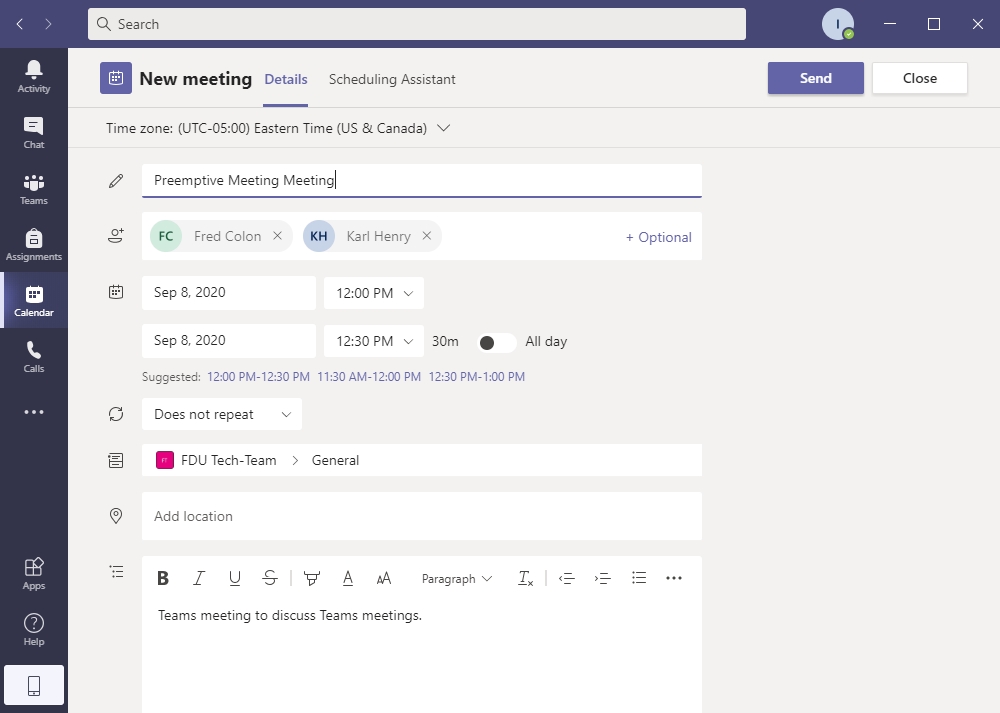
You will notice that the New Meeting window offers 2 tabs: “Details & Scheduling Assistant”
From the “Details” tab, enter the following information about your meeting:
Title
Required Attendees
Note
You can also add optional attendees by pressing + optional button
Time
Specify whether the meeting reoccurs
Add Channel is optional and lets you specify an entire Teams channel to receive a meeting notification
Add location is optional and enables you to select a physical location for members to meet at
Add details like the topic of discussion, meeting outline, etc
Classic Teams – Meeting Invitation Request
New Teams – Meeting Invitation Request
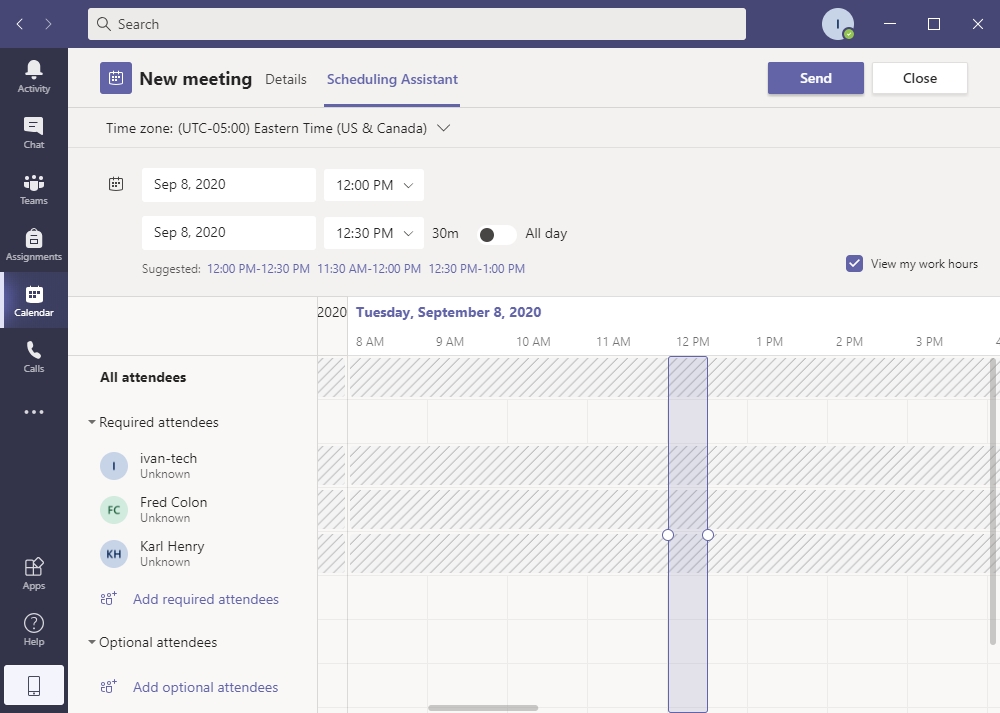
The “Scheduling Assistant” tab allows you to view the calendar of all attendees to check for availability. It is possible to adjust the meeting time on this tab
When finished, press the “Send” button on the top of the page. The meeting will be posted on the channel you selected, and invites will be emailed to all requested attendees. The meeting will also show up on the calendar of the people who have accepted the meeting invitation
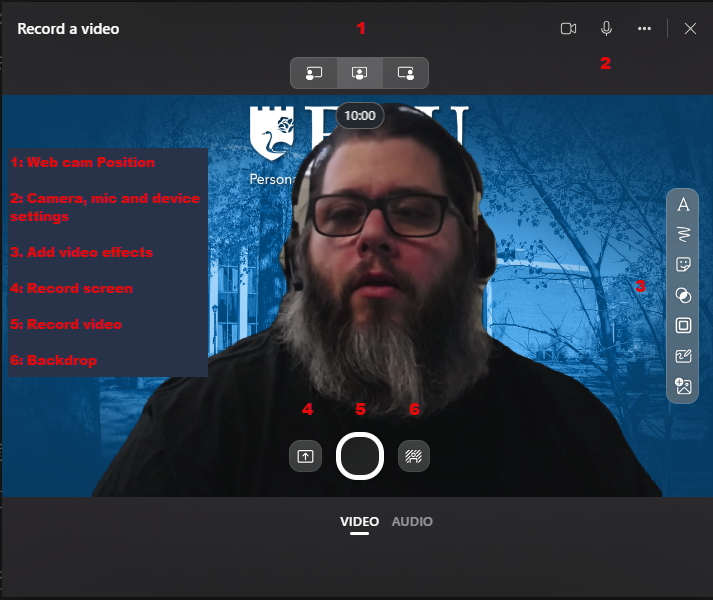
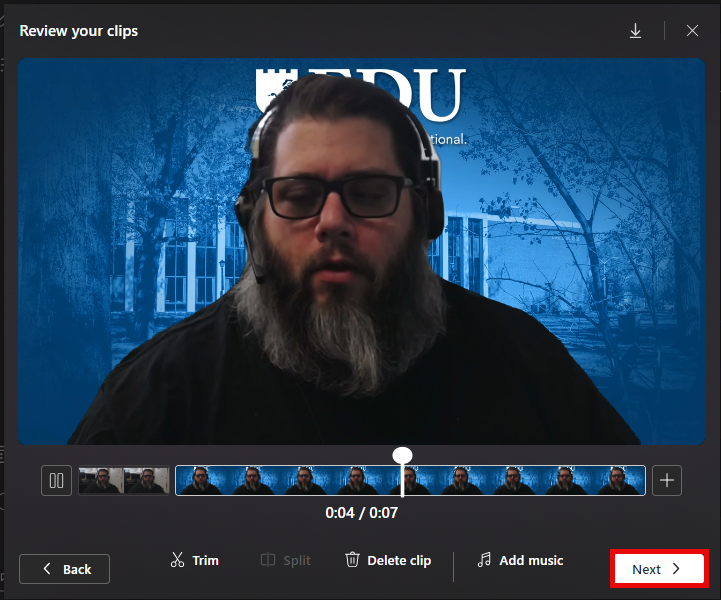
Microsoft has acquired Flipgrid for video submissions for Classroom Assignments. This feature is only available from within a Classroom Team for assignment posting and submission.
Faculty can request a classroom team by using the following SAMI Support form:
The description must state that a classroom team is required.
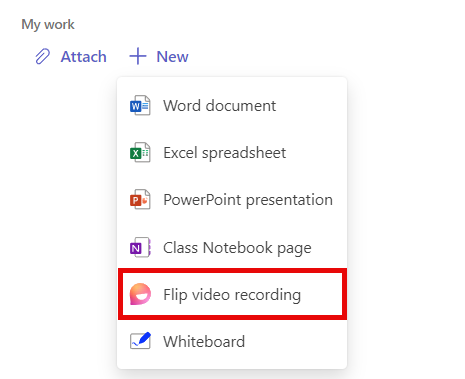
After the new classroom team is created, the requesting faculty member can assign students to the classroom team. Students can only access the Flipgrid video submission button within the classroom team.
After you have created assignments or posted to an assignment, A new app tab will be displayed within your Teams app list labeled Assignments.
Self-Service is an interactive web application that enables students, faculty, and staff to view their individual information contained in FDU’s student information system. Students can use Self-Service to do things like view their financial aid, pay their bills, and register for classes. Likewise, faculty will use Self-Service to verify enrollment and enter grades.
To navigate the Tutorial, scroll down to the Index. From there you can navigate to any portion of the Tutorial by clicking on any “Part”.
What is Degree Audit? Degree Audit is an online version of your check sheet, which allows you to track your academic requirements. On Degree Audit you can see what degree requirements you’ve completed, which are in progress, and which courses you have left to complete your degree.
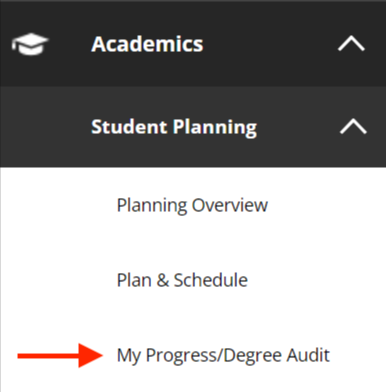
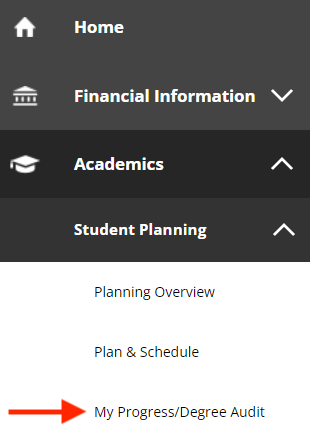
On the left-hand side of the page, you will find your menus. Click on the menu called “Academics” and then click on “Student Planning.” Navigate to “My Progress/Degree Audit”
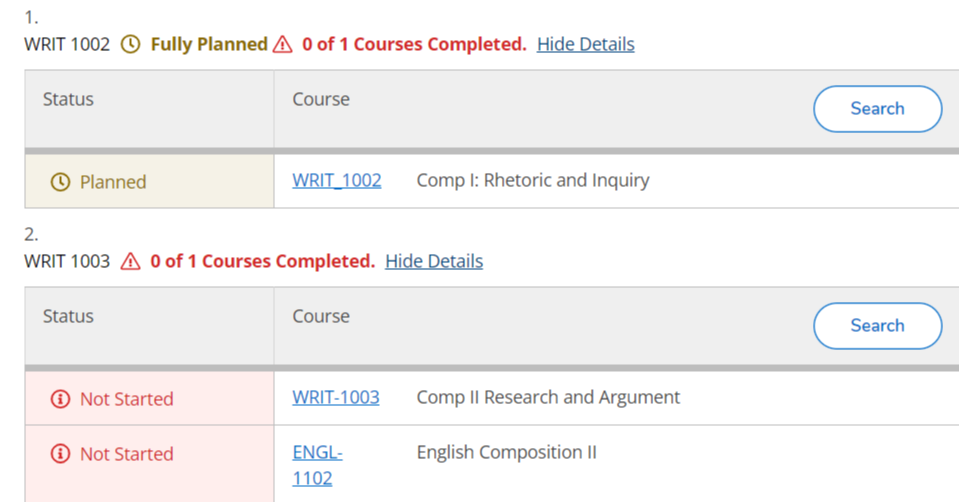
Click on “Expand All” if you’d like to see all the requirements for your degree
Any action you have taken towards completing each requirement will be noted in the “Status” column
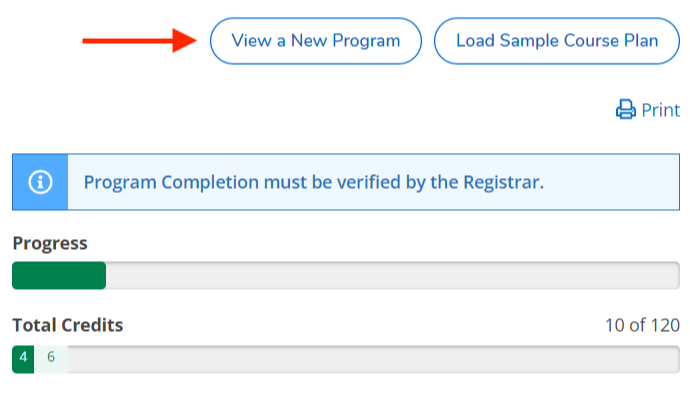
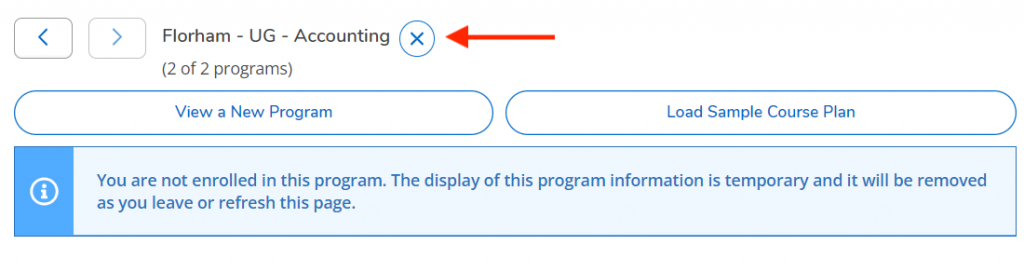
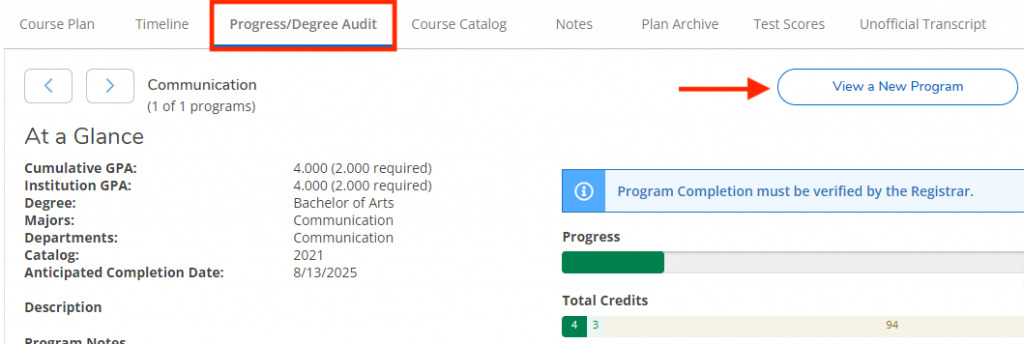
If you would like to see what it would look like if you switched to a different program, then click on “View a New Program” at the top of your Degree Audit
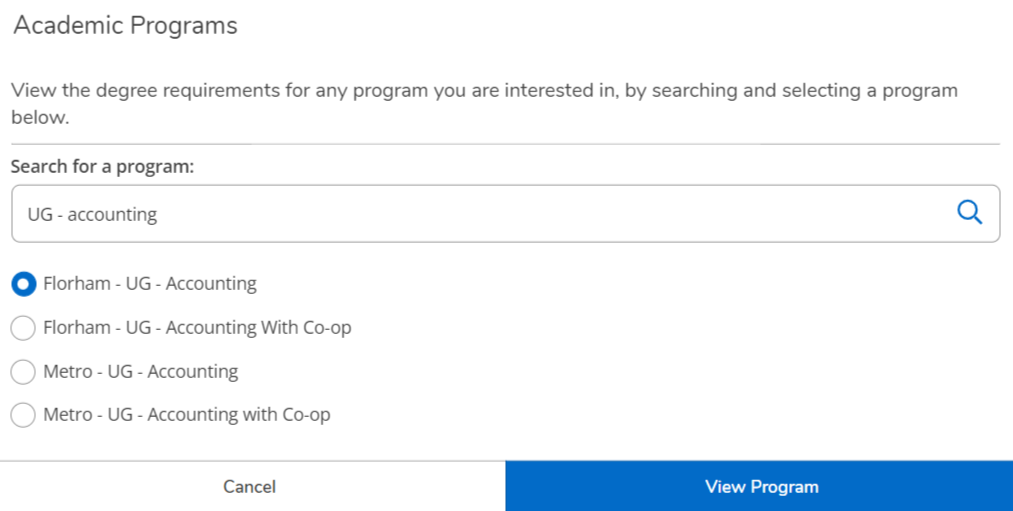
Use the search bar to find the program you are interested in. Select the program and click “View Program
If you no longer want to view this program, click the “X” to remove it
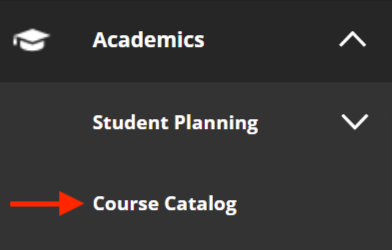
On the left-hand side of the page, you will find your menus. Click on the menu called “Academics” and navigate to the “Course Catalog”
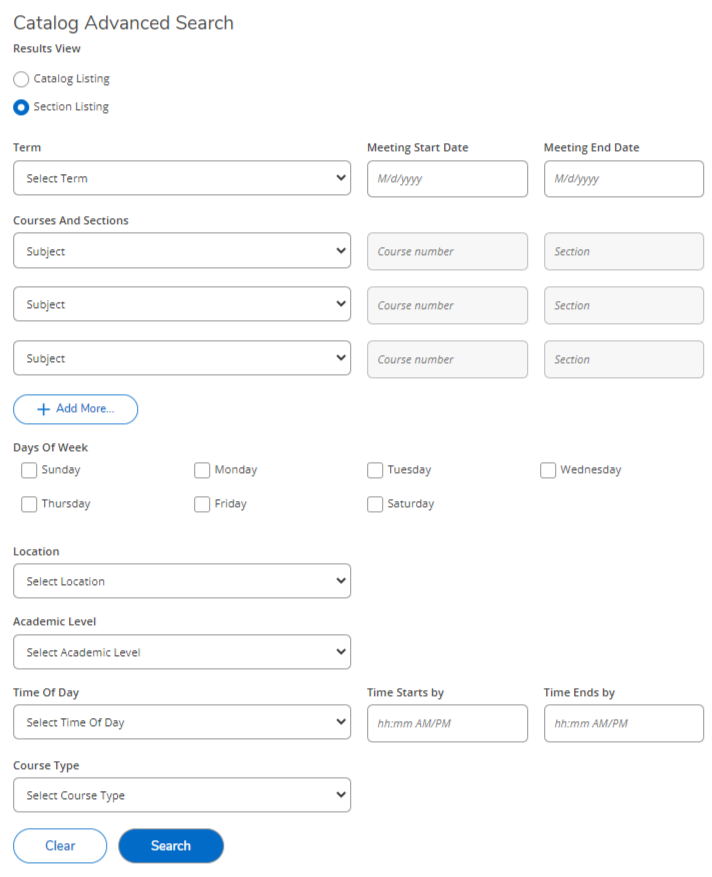
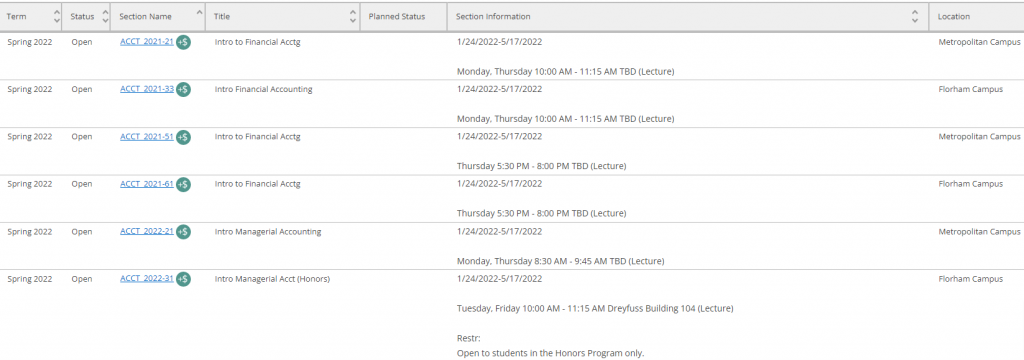
Fill in as many fields as you’d like for your course search. It is suggested that you at least select a term and a subject. Click the blue “Search” button to get your results
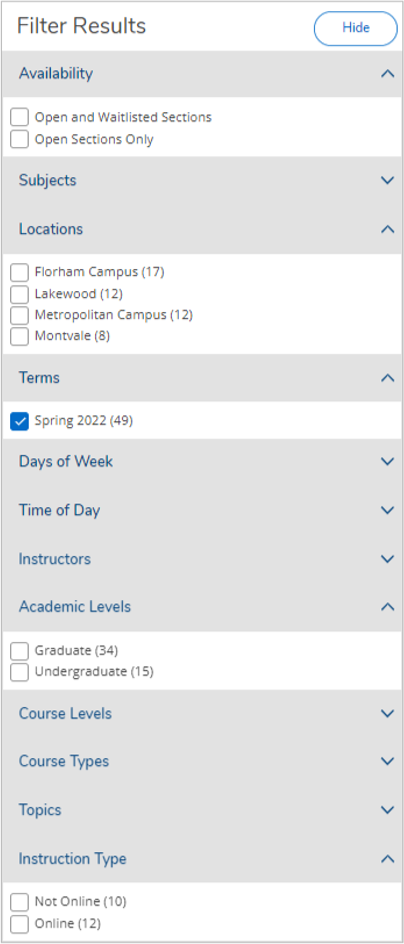
You can narrow down your results further using the filters on the left-hand side
Click on the “Hide” button to hide the filter menu and allow the results to fill your screen
You can click on the arrows in the header row to change how the results are sorted
Note
Section notes and restrictions can be found in the “Section Information” column.
You can search for courses by using the Course Catalog or your Degree Audit page. In this article, we will use the Degree Audit page method
Go to the menu on the left, select “Academics” from the options, and expand the “Student Planning” from the dropdown. Press “My Progress/Degree Audit”
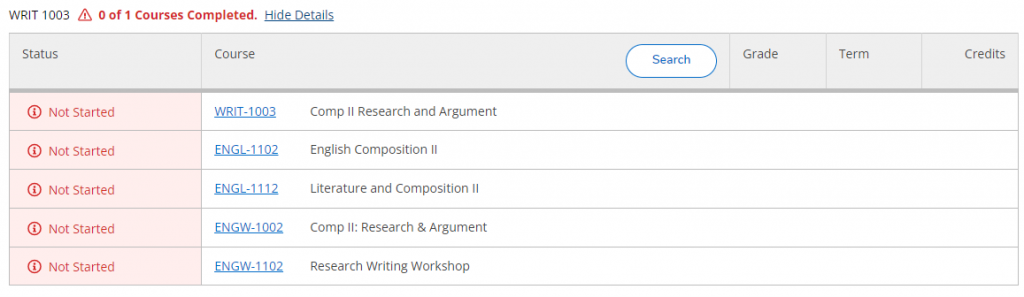
Find the requirements you are looking to fulfill. Press on the “Search” button to find sections for every course that will meet this degree requirement
Note
If you know exactly which course you are interested in, then you can click directly on that course code to view its sections.
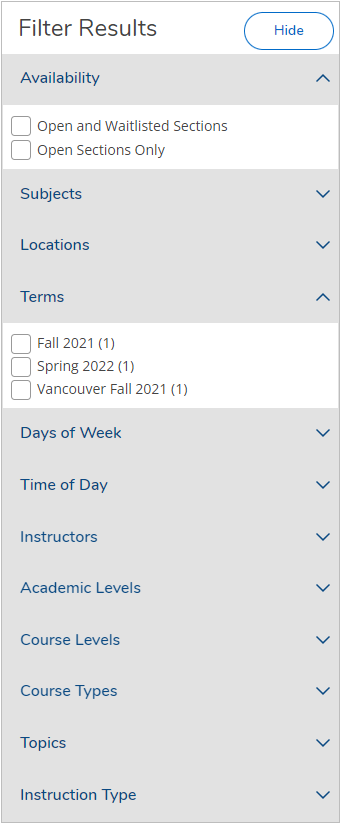
Narrow down your results using the filters on the left-hand side.
Tip
Make sure to choose the correct semester.
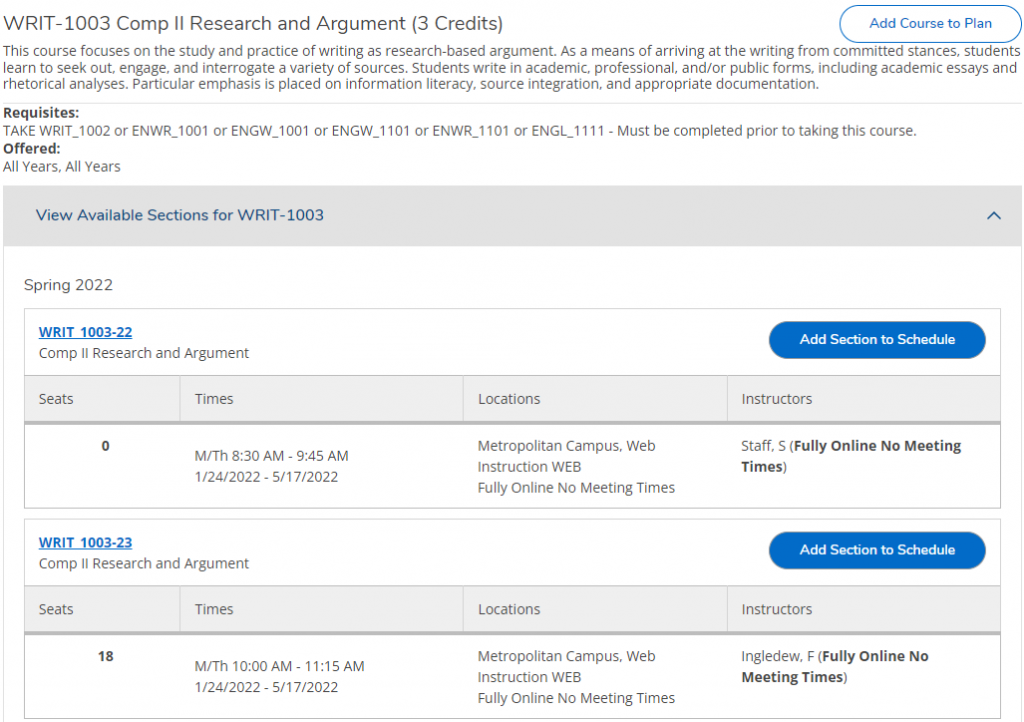
Within the results, click on the grey bar that says “View Available Sections” for the course you’d like to add to your schedule. Find a section that fits on your schedule and click “Add Section to Schedule”
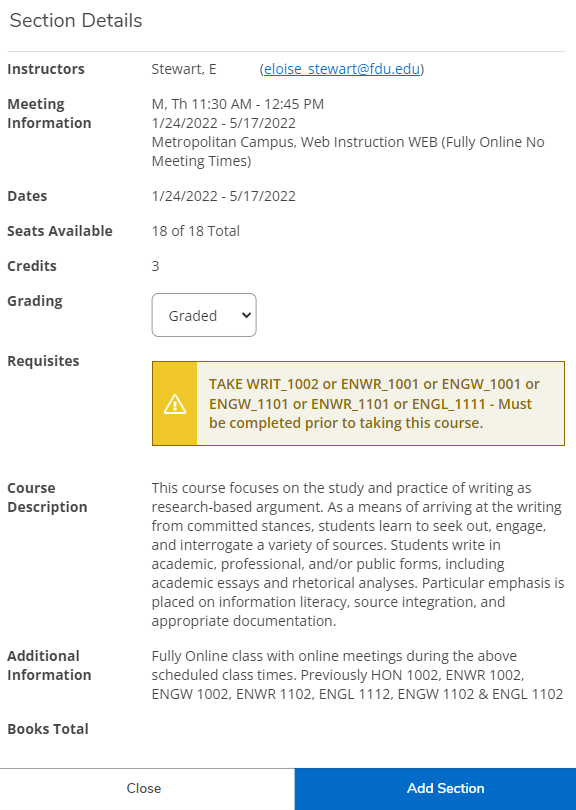
Review the Section Details that pop up. If you still wish to add this section to your schedule, then click “Add Section”
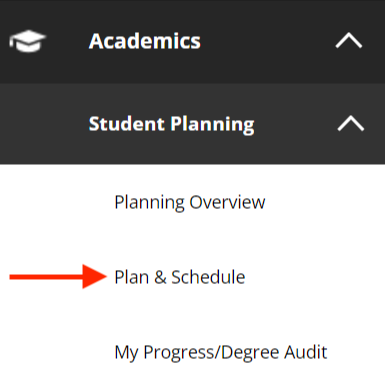
To confirm the section appears on your schedule, navigate to the “Plan & Schedule” page
To confirm the section appears on your schedule, navigate to the “Plan & Schedule” page
Tip
Sections can be removed by clicking on the “x” in the top right corner of the section.
Repeat this process to add more courses to your schedule in preparation for priority registration
Important
Planning a section does not guarantee you have a spot in that section.
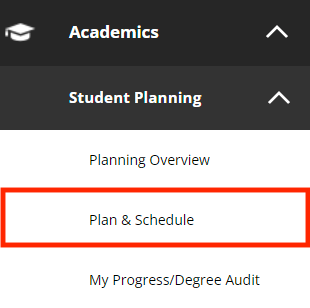
On the left-hand side of the page, you will find your menus. Click on the menu called “Academics” and then click on “Student Planning.” Navigate to “Plan & Schedule
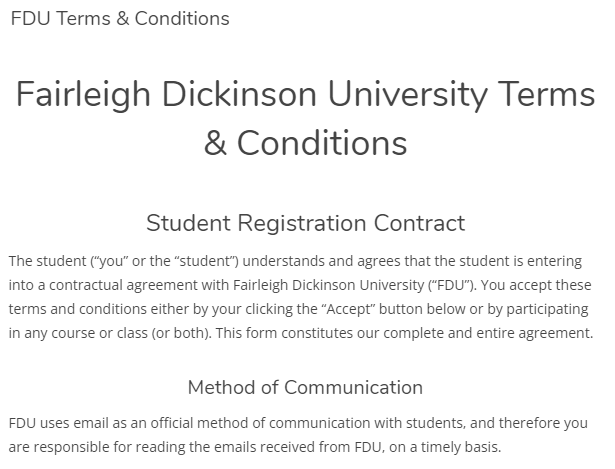
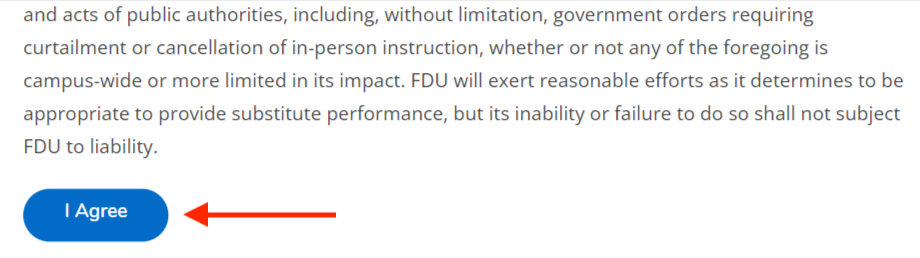
The first time you come to this page for a given semester, you will be presented with the FDU Terms and Conditions Student Registration Contract. Scroll down to agree. You only need to do this once per term
Scroll all the way down to the “I Agree” Button
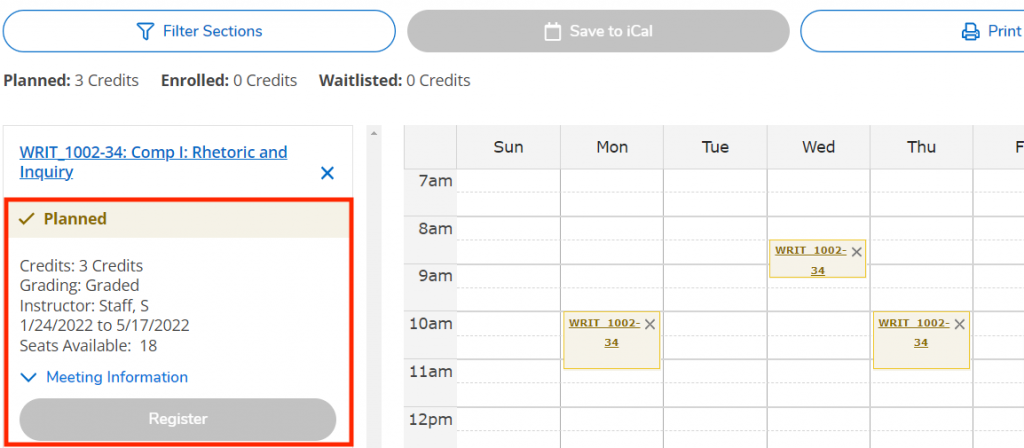
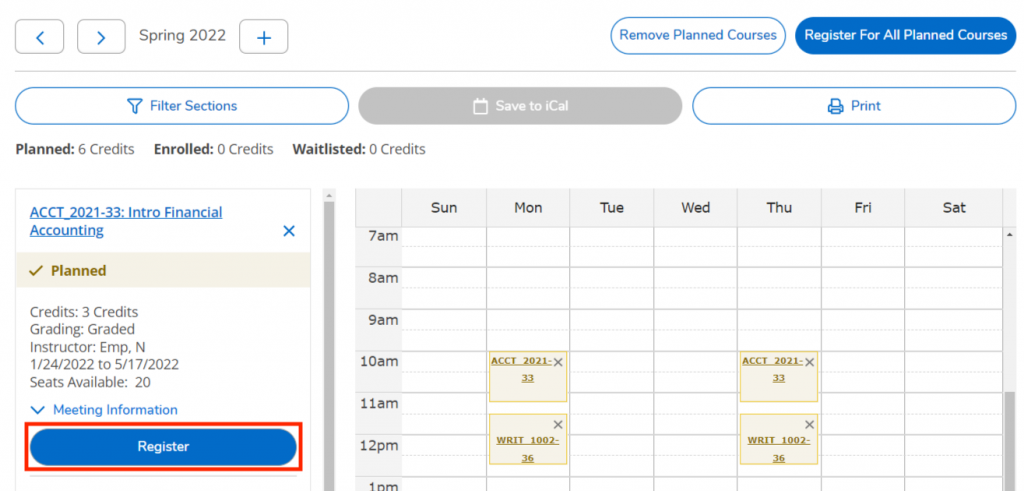
Your planned courses will appear on the Plan & Schedule page and will be color-coded in yellow. If you have not planned your courses, please review how to in Section 1 – Part 3 “How to Plan Your Schedule Using Self-Service”
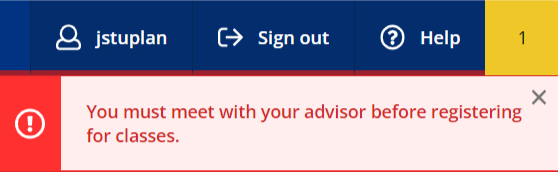
If you have any holds, then they will appear in the top right corner of the page. You will need to resolve your holds before you can register for classes
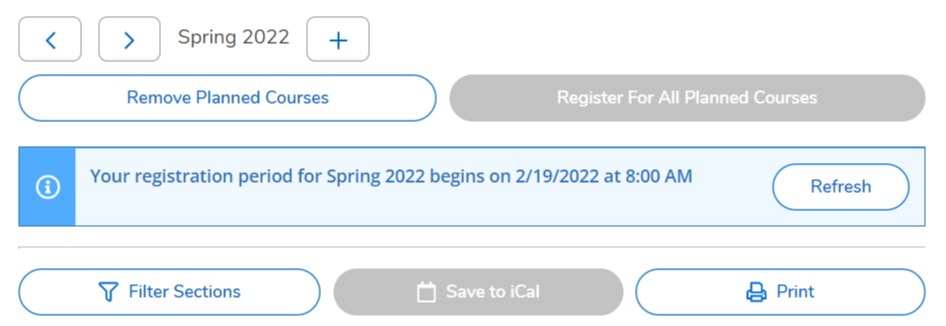
You will need to be mindful of your priority registration date. You will find a banner above your planned schedule informing you of the date and time you can register for classes
Once all holds have been resolved and your priority registration date/time has arrived, you can register for all your courses by clicking on “Register For All Planned Courses.” If you would like to register for each course one at a time, then click on “Register” within each course tile
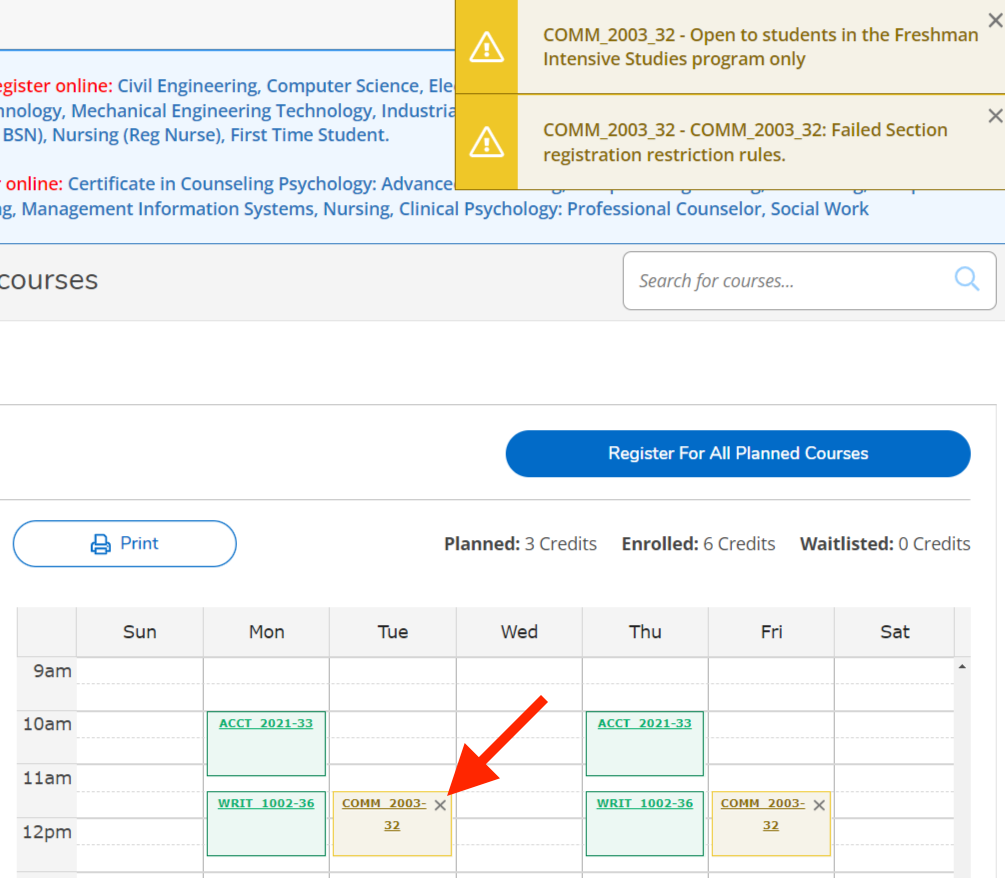
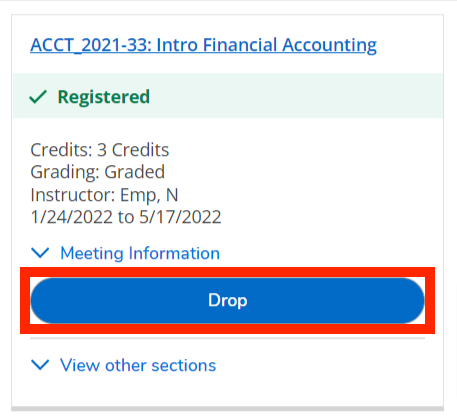
Successful registrations will turn green and say “Registered”
If you are ineligible for any of your planned sections, then the course will remain yellow and planned. You will get an alert in the top right corner explaining why you were unable to register for that section
Click “x” on the section to remove it from your schedule
If you need to drop a course during Priority Registration or Add/Drop, then click on “Drop” within the course tile
On the left-hand side of the page, you will find your menus. Click on the menu called “Academics” and click on the “Unofficial Transcript” button
Select the transcript you wish to download by clicking on its text
Important
These documents are unofficial and do not replace official signed and sealed transcripts. To order official transcripts you must go to www.getmytranscript.org.
After clicking on the transcript text, a pdf document will download. Open this document to view your unofficial transcript.
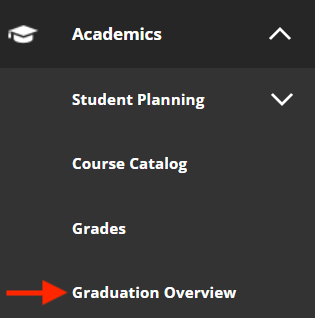
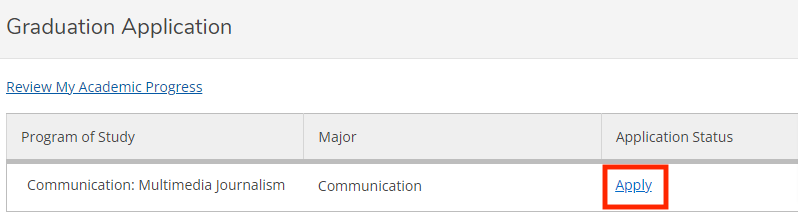
On the left-hand side of the page, you will find your menus. Select “Academics” from the side menu and then select “Graduation Overview”
Press “Apply” next to the program from which you wish to graduate
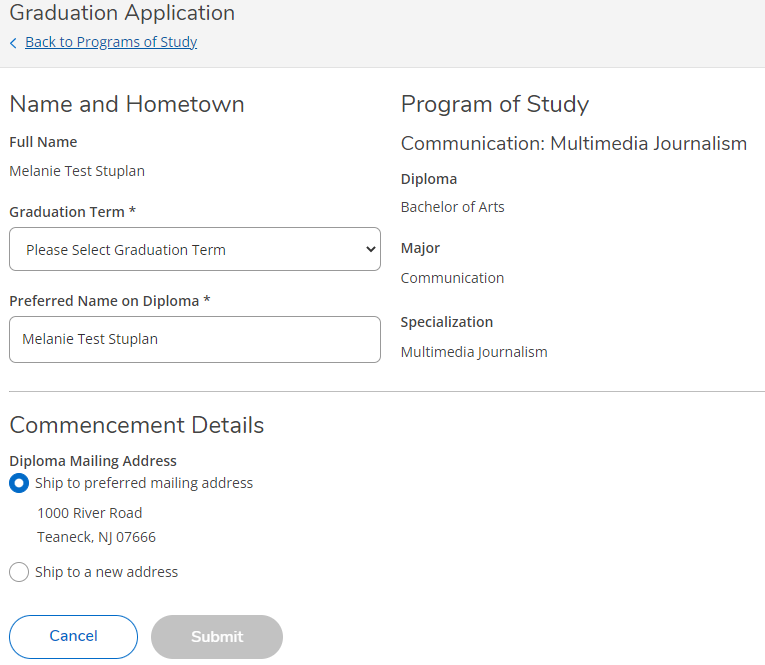
Select your “Graduation Term” and type in your “Preferred Name on Diploma.” Select the address you would like your diploma sent to. Once these fields are filled in, you must confirm everything is correct and press “Submit”
Important
Upon submitting the graduation application, students will be charged the appropriate fee in accordance with the degree they are seeking. Please do not apply more than once.
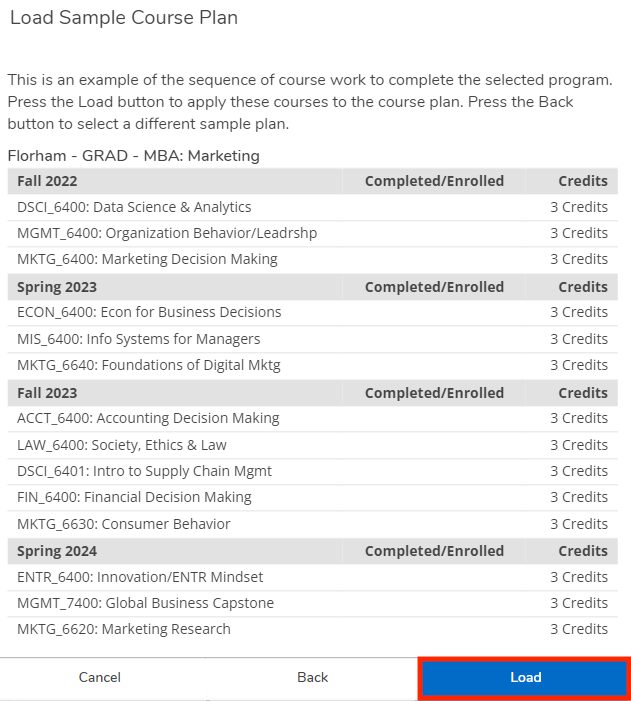
What is a course plan? A course plan is an example of the sequence of coursework you need to complete for your selected program. This will load courses onto your plan for current and future semesters. This will allow you to map out the courses you must take for your degree.
Note
Not every program has a course plan available.
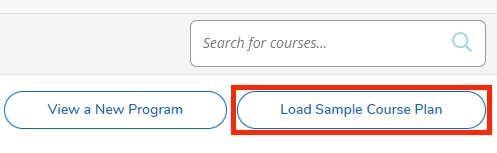
On the left-hand side of the page, navigate to “Academics.” Within the “Student Planning” dropdown menu, press “My Progress/Degree Audit”
On the top right side of the page, press “Load Sample Course Plan”
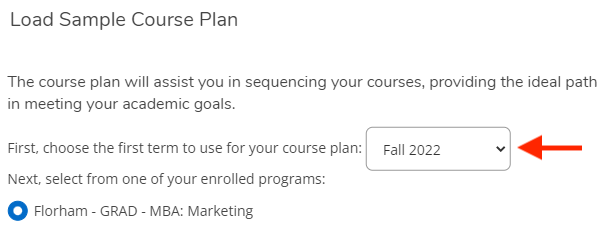
Select your first term from the drop-down menu and select your program using the first radio button
Press on “Preview Plan” at the bottom of the window
Review the sample course plan and press “Load”
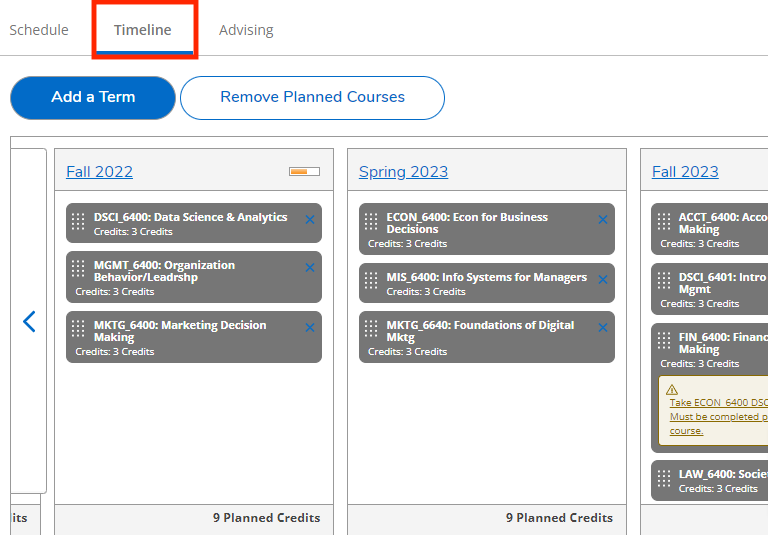
Use the Timeline tab to view the courses that were loaded onto your plan. Make any adjustments, if needed
On the left-hand side of the page, you will find your menus. Click on the menu called “Academics.” Within the “Student Planning” menu, click on “Plan & Schedule”
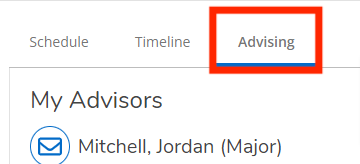
Go to the “Advising” tab. Here you will see the names of your advisors
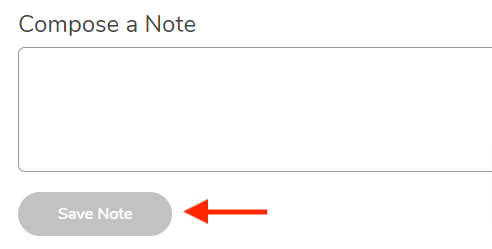
You can leave a message for your advisor by typing in the “Compose a Note” box and clicking “Save Note“
Click “Request Review” to have your advisor notified that your schedule is ready to be reviewed and approved
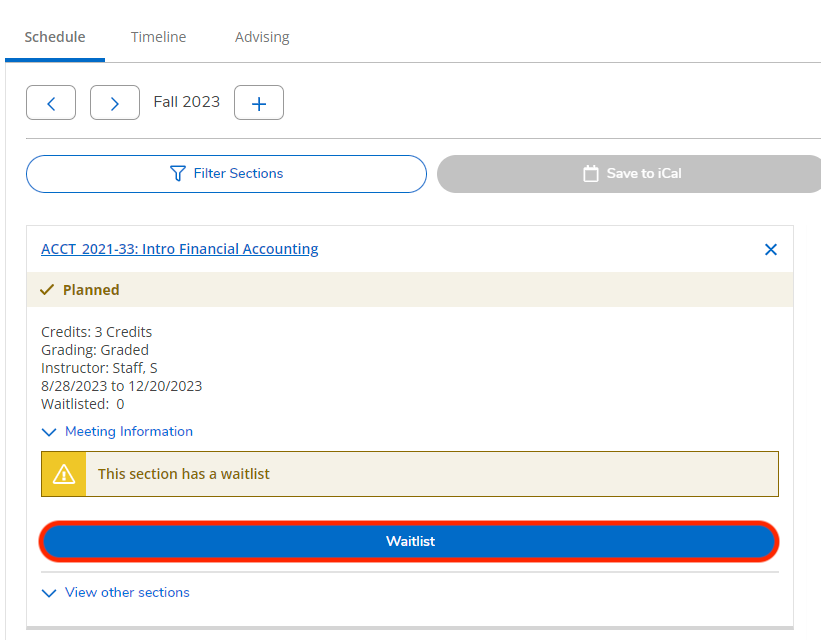
If a class you have planned is full and has a waitlist enabled, then follow these steps to join the waitlist. Please note that there is no guarantee that you will get a spot in the course section.
Note
Students have the option to place themselves on the waitlist to see if a seat becomes available in the course section. For a course that offers waitlisting as an option, plus-ins are no longer a standard practice; neither an advisor nor a professor can approve a plus-in for a class. All registration rules and restrictions apply to waitlisting, so you may not be able to place yourself on a waitlist if you are not eligible. If you encounter difficulties adding yourself to a waitlist due to restrictions, you should reach out to your Academic Advisor for assistance.
Go to the “Academics” menu, click on “Student Planning,” and navigate to “Plan & Schedule“
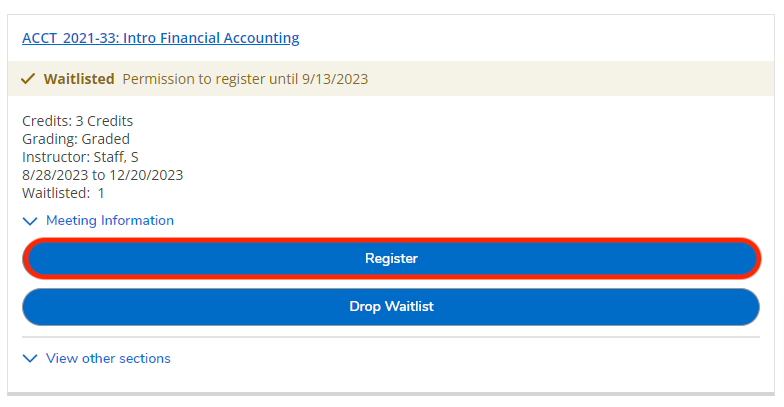
Find the section that is full. If the waitlist is active, you will see a “Waitlist” button
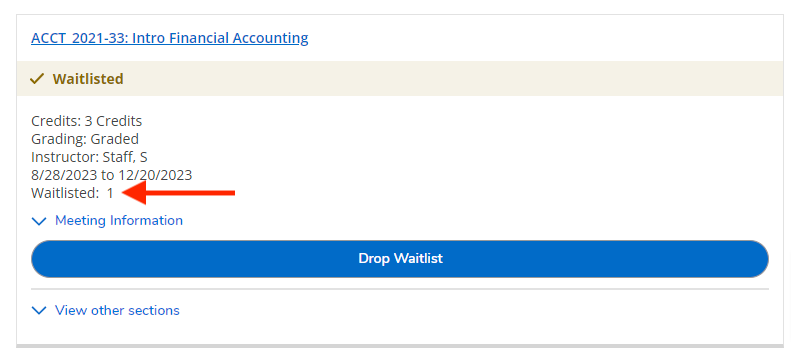
Once you’ve joined the waitlist, the number of waitlisted students will increase by one and you will have the option to drop off the waitlist
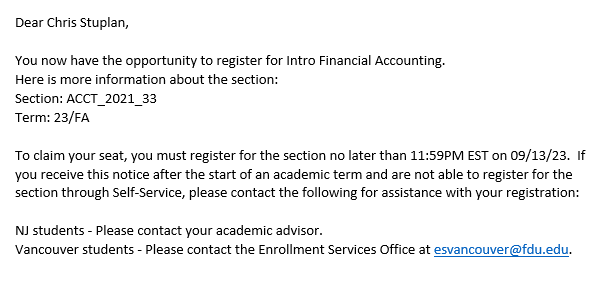
When a spot opens in the section, you will get a notification sent to your FDU email address
Note
You will only have until 11:59 PM EST on the day specified in the email to register for the section. If you do not register on time, the spot will be offered to the next person on the waitlist.
There will now be a “Register” button on the section within the Plan & Schedule page. Click on it to register for the waitlisted course
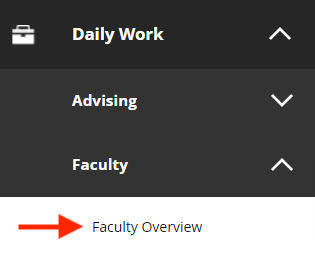
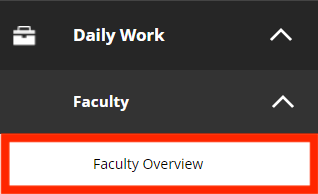
On the left-hand side of the page, you will find your menus. Click on the toolbox icon, called “Daily Work”, and navigate to the “Faculty” submenu. Within this submenu, click on “Faculty Overview”
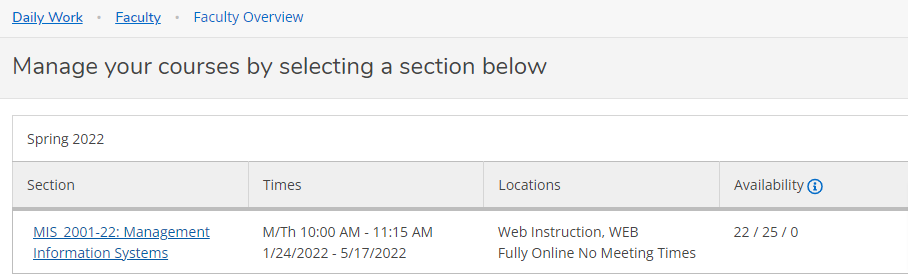
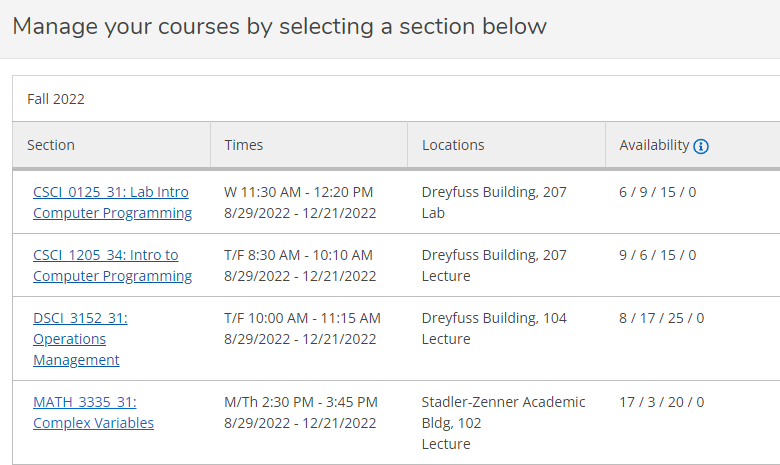
Click on the row of the course you wish to verify the enrollment
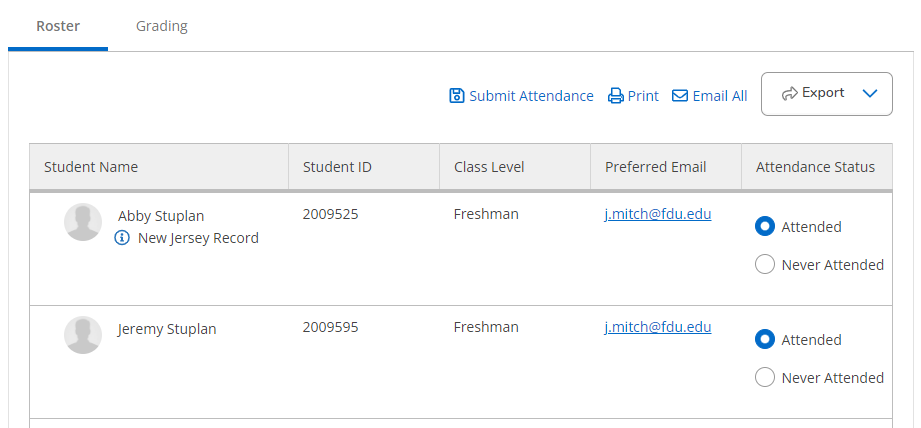
Within the “Roster” tab, you will see the list of students currently enrolled in the course. Use the radio buttons to select whether the student has “Attended” or “Never Attended”
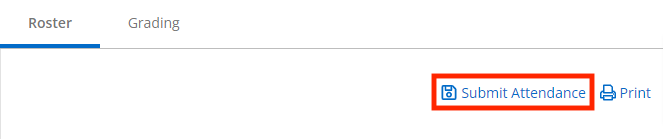
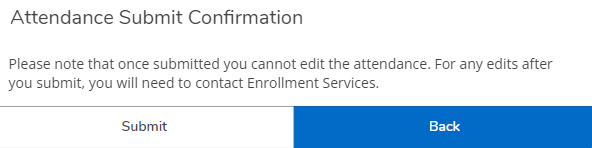
Once you have completed verifying enrollment, you must click on “Submit Attendance“
Click on “Submit” in the pop-up window to complete the process
Important
Once you’ve submitted attendance, you cannot make any changes in Self-Service. If you need to make a change, you must contact Enrollment Services: Metro Campus – esteafdu@fdu.edu AND/OR Florham Campus esmadfdu@fdu.edu.
After you’ve submitted the enrollment verification, you will see a green notification at the top of the page letting you know you were successful
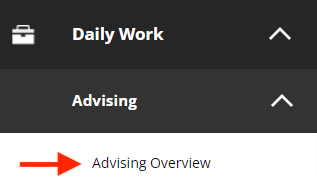
On the left-hand side of the page, you will find your menus. Click on the toolbox icon, called “Daily Work”, and navigate to the “Advising” submenu. Within this submenu, click on “Advising Overview“
Find the student you wish to advise using the prepopulated table of assigned advisees or by searching for their name or ID number in the search bar.
Note
You can search for any student, whether you are their advisor or not, by using the search bar.
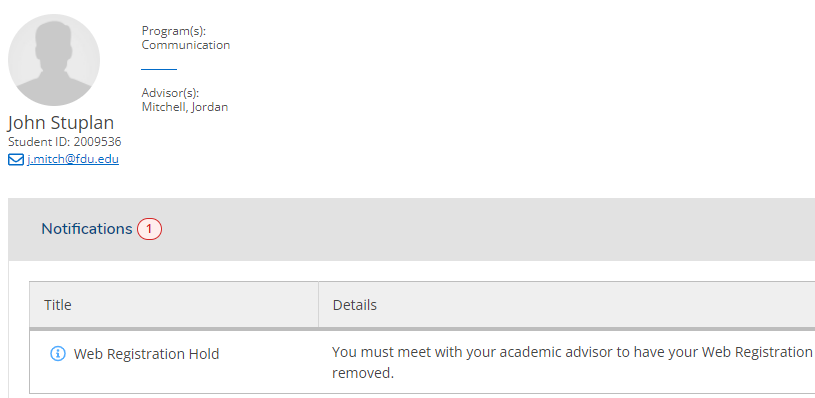
Click on the “View Details” button for the record of interest
Click on the “Notifications” bar to expand it and view any holds on the student’s account
Underneath the “Notifications” bar, you will find all the tabs you can use to gain a well-rounded view of the student’s academic progress
Click on “Course Plan” to view the courses the student has registered for or is planning to register for
Click on “Progress/Degree Audit” to view the student’s Degree Audit. Within this tab, you can click on “View a New Program” to see what it would look like if this student switched programs
Click on “Test Scores” to see any official test scores that have been submitted to FDU and recorded in Colleague
Click on “Grades” to view the student’s midterm and final grades broken down by semester
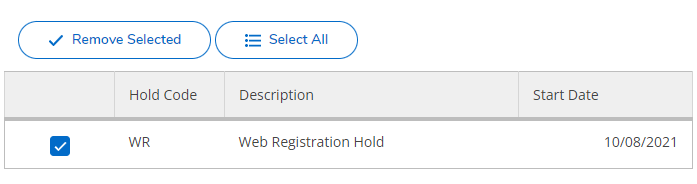
Click on “Remove Hold” to remove the web registration hold from the student’s account. You will need to select the hold you wish to remove and click on “Remove Selected”
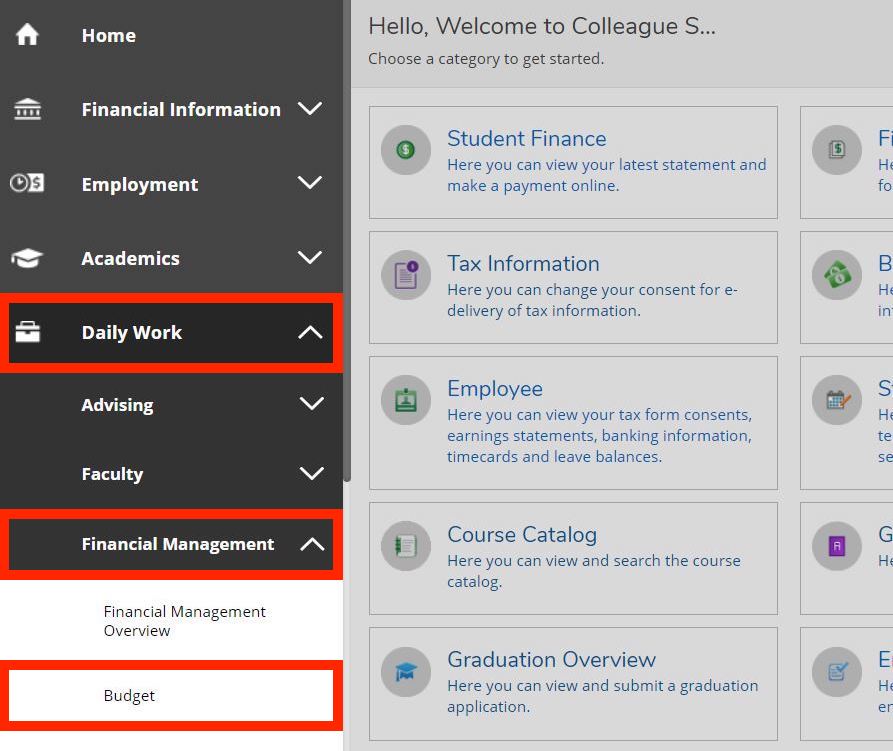
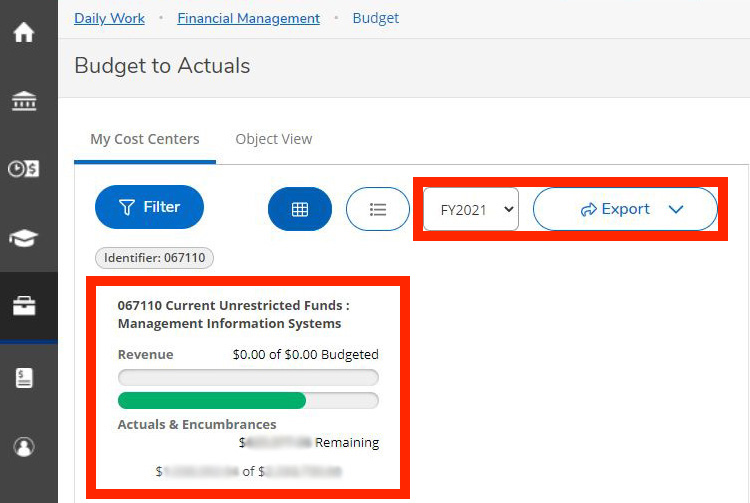
On the left-hand side of the page, you will find your menus. Click on the toolbox icon, called “Daily Work”, and navigate to the “Financial Management” sub-menu. Within this sub-menu, click on “Budget”
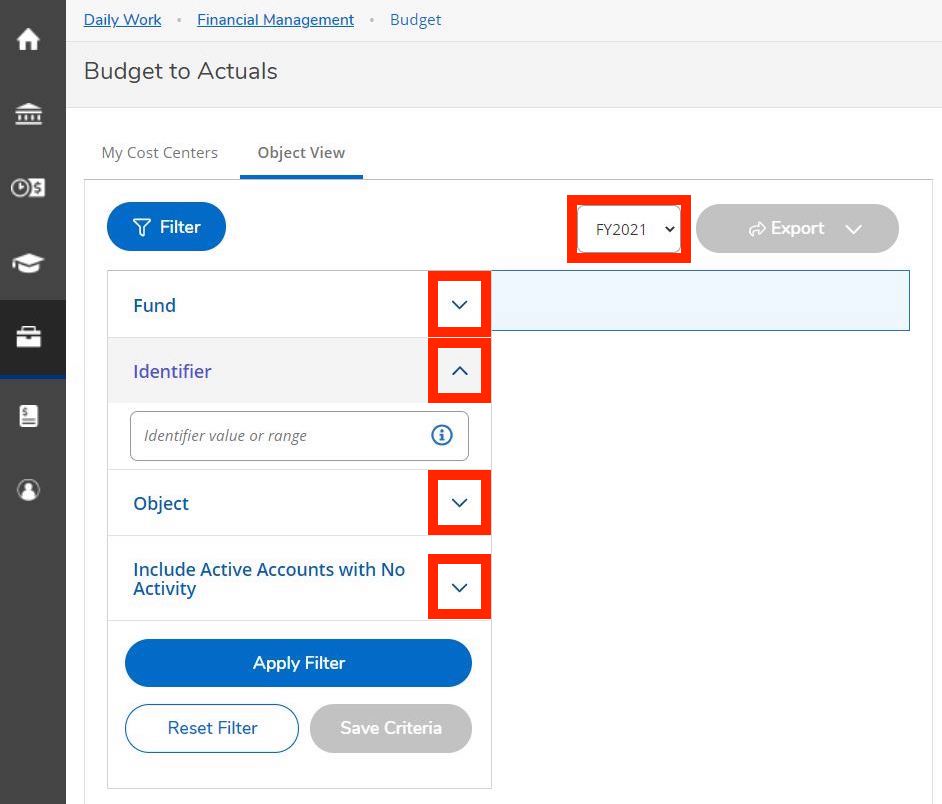
On the “Budget to Actuals” page, there will be options to filter your reports. By clicking on any of the arrows, you can expand or collapse the filter options. Once expanded, a field will appear where you can type the criteria you would like to search for. Additionally, you can change the Fiscal Year using the drop-down menu at the top of the page
Using “Identifier” as an example, you can type in your value(s) in the following ways. Hit “Enter” after each value to include in the search
Type in the individual identifier, ex: 067110
Type in the range of identifiers, ex: 067110-067115
Type in the identifiers separated by commas, ex: 067110, 067111, 067115
Click “Apply Filter” when done entering values. Your results will appear to the right of your filter menu
If you need to change your filters:
Open up the filter options by clicking on the blue “Filter” button
You can add more values by typing them into the field, hitting “Enter”, and applying the filter again
You can remove individual values by clicking on the “X” next to the value
You can start over completely by clicking “Reset Filter”
If you are satisfied with your filter options and would like to detail in on a specific budget, then click anywhere on the budget you would like to view
Click anywhere within a row to view more details. The “Financial Health” column will display a yellow alert symbol if the budget is over 85% spent
Continue to click on rows or documents to view more details. Download any page with an “Export” icon if you need to view it in Excel. You can click Back in your browser to go back a page
On the left-hand side of the page, you will find your menus. Click on the toolbox icon, called “Daily Work”, and navigate to the “Financial Management” sub-menu. Within this sub-menu, click on “Budget”
On the “Budget to Actuals” page, there will be options to filter your reports. By clicking on any of the arrows, you can expand or collapse the filter options. Once expanded, a field will appear where you can type the criteria you would like to search for. Additionally, you can change the Fiscal Year using the drop-down menu at the top of the page
Using “Identifier” as an example, you can type in your value(s) in the following ways. Hit “Enter” after each value to include in the search
Type in the individual identifier, ex: 067110
Type in the range of identifiers, ex: 067110-067115
Type in the identifiers separated by commas, ex: 067110, 067111, 067115
Click “Apply Filter” when done entering values. Your results will appear to the right of your filter menu
If you need to change your filters:
Open up the filter options by clicking on the blue “Filter” button
You can add more values by typing them into the field, hitting “Enter”, and applying the filter again
You can remove individual values by clicking on the “X” next to the value
You can start over completely by clicking “Reset Filter”
If you are satisfied with your filter options and would like to detail in on a specific budget, then click anywhere on the budget you would like to view
Click anywhere within a row to view more details. The “Financial Health” column will display a yellow alert symbol if the budget is over 85% spent
Continue to click on rows or documents to view more details. Download any page with an “Export” icon if you need to view it in Excel. You can click Back in your browser to go back a page
Note
Anytime you see the FY drop-down menu at the top of the page, you can change the FY you are viewing. Likewise, whenever you see the Export drop-down menu, you can download the information in your current view into a CSV file and open in Excel.
Go to the “Daily Work” menu, click on “Faculty,” and then click on “Faculty Overview“
Select the course for which you need to enter midterm grades
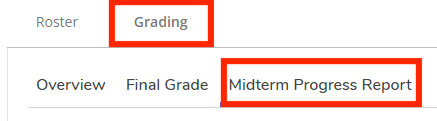
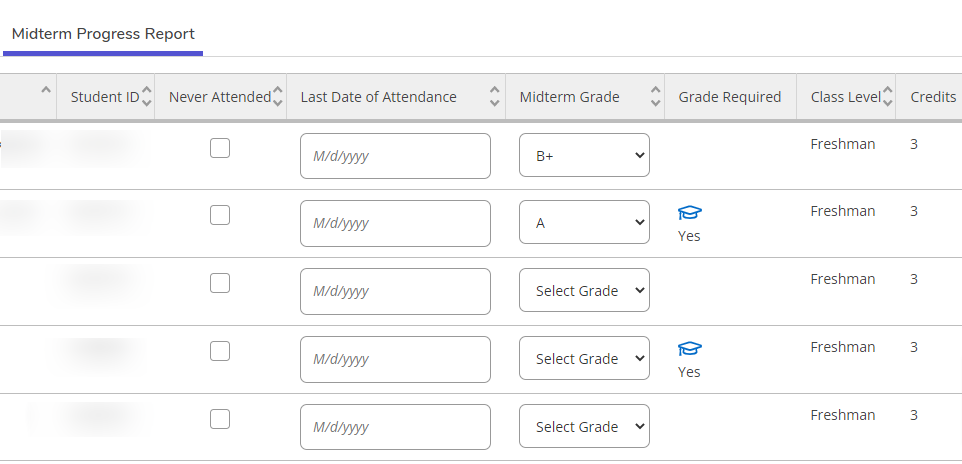
Within the “Grading” tab, select the “Midterm Progress Report” tab
Use the drop-down menu to select the grade for each student
Note
The “Grade Required” column will indicate which students MUST be given a midterm grade.
Note
There is no Submit button for Midterm grading. Grades are automatically saved when selected from the drop-down. Midterm grades may be changed at anytime, if needed.
Go to the “Daily Work” menu, click on “Faculty,” and then click on “Faculty Overview“
Select the course for which you need to enter final grades
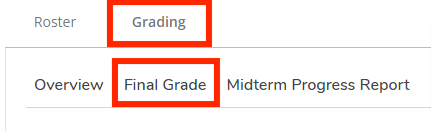
Within the “Grading” tab, select the “Final Grade” tab
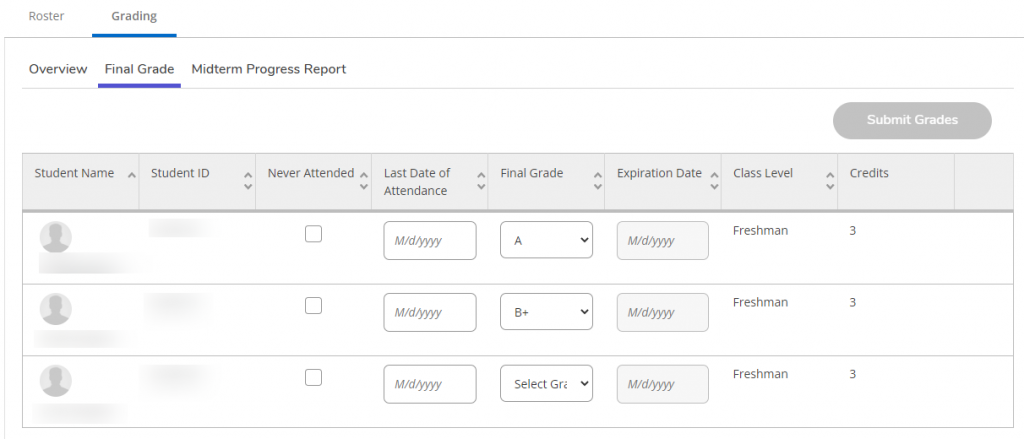
Use the drop-down menu to select the grade for each student
Note
A grade must be entered for every student in order to submit grades.
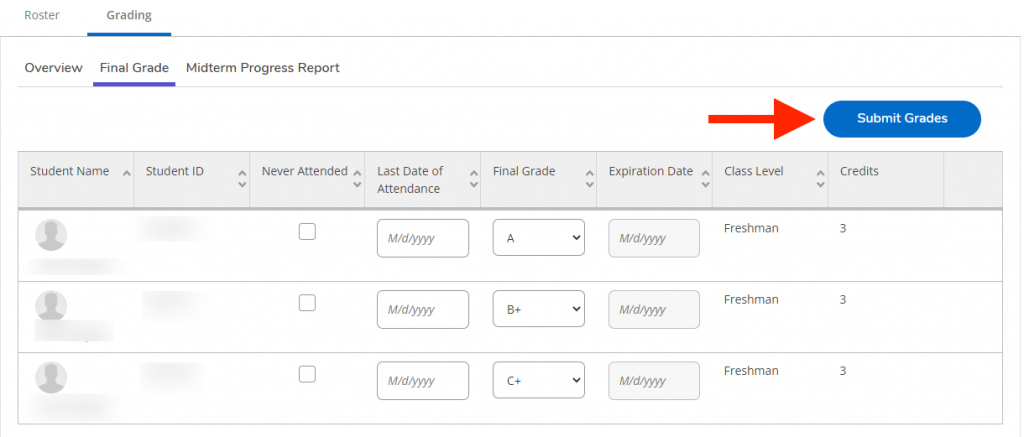
Once all grades have been entered, you must click the “Submit Grades” button to save and submit your work
Note
You have a short window where you can change grades and resubmit in Self-Service. However, once grades have been verified in Colleague, you will no longer be able to make a change in Self-Service. You will then need to go through the Change of Grade process.
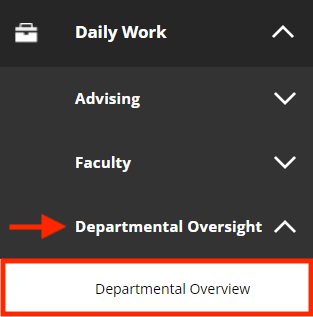
Go to the Daily Work menu and click on “Departmental Oversight“. Within this menu, click on “Departmental Overview“
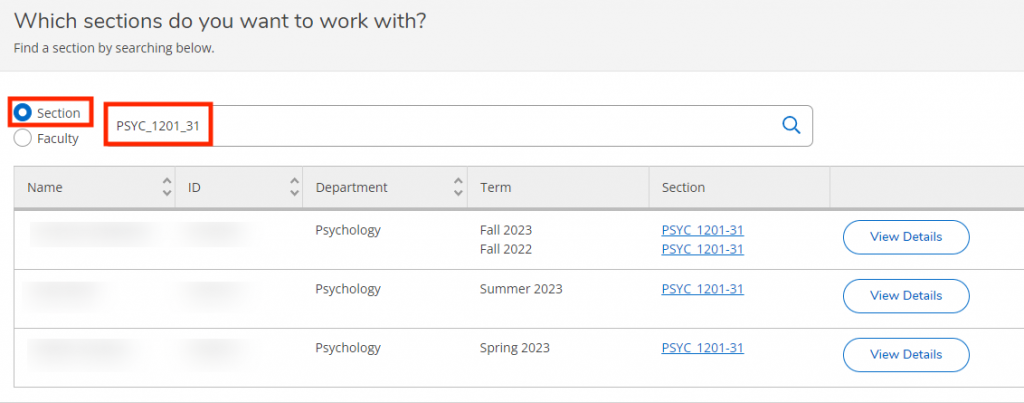
To search for a section by course code, click on the “Section“radio button. Type in the section information using the following valid formats only:
Subject Code Only – Ex: PSYC
Catalog Number – Ex: PSYC_1201
Specific Section – Ex: PSYCH_1201_31
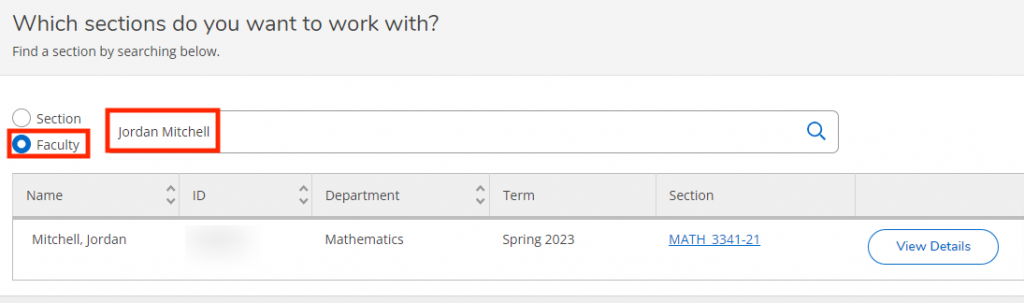
To search for all the sections being taught by a specific faculty member, click on the “Faculty” radio button. Type in the faculty member’s name using the following valid formats only:
First Name Last Name – Ex: Bob Smith
Last Name, First Name – Ex: Smith, Bob
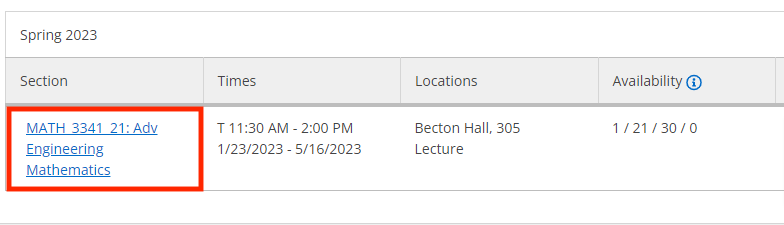
Once you’ve found the section or faculty member you searched for, click on “View Details“
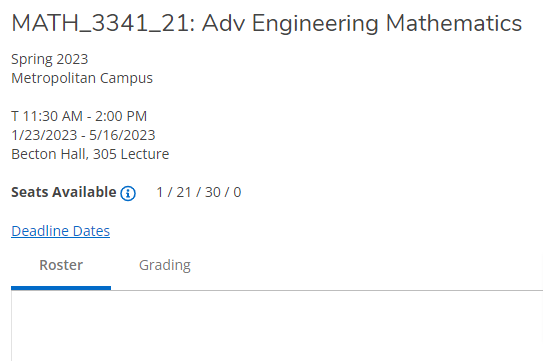
To view the Enrollment Verification or Midterm/Final grades associated with a specific section, click on the section name
Enrollment Verification can be found in the Roster tab and Midterm/Final grades can be found in the Grading tab
Note
You will not be able to submit grades on behalf of a faculty member. You can only view the grades that have been submitted.
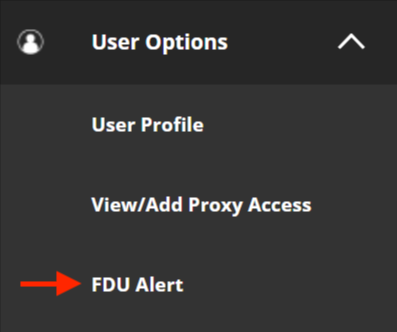
On the left-hand side of the page, you will find your menus. Click on the menu called “User Options” and then click on “FDU Alert”
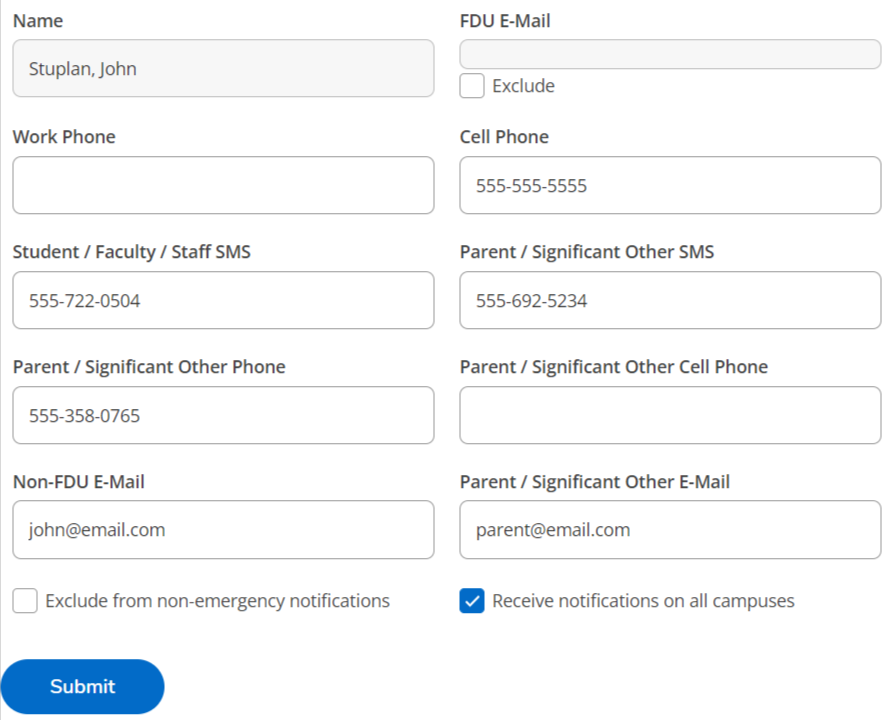
Fill in the alert information presented on the page. If information already exists in these fields, make sure the information is up to date. Click “Submit” when finished
What is a Proxy? A Proxy isa person to whom you grant permission to sign into your Self-Service account to access selected student records.
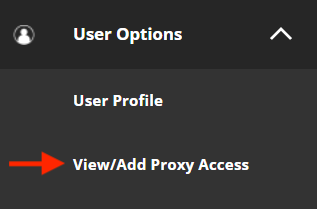
On the left-hand side of the page, you will find your menus. Press on the menu called “User Options” and then press on “View/Add Proxy Access”
Use the drop-down to add a proxy. If you see the person’s name, select them from the list and confirm their information. If you do not see their name, click on “Add Another User”
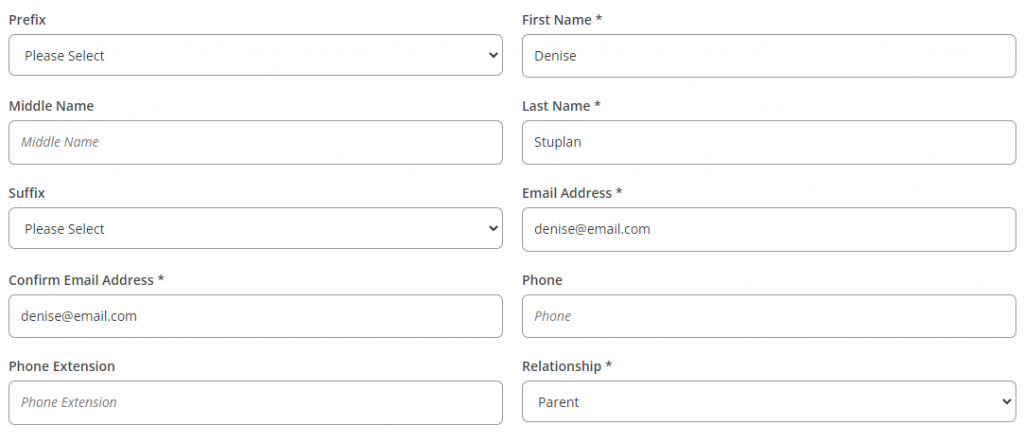
You must fill in the personal information for the proxy
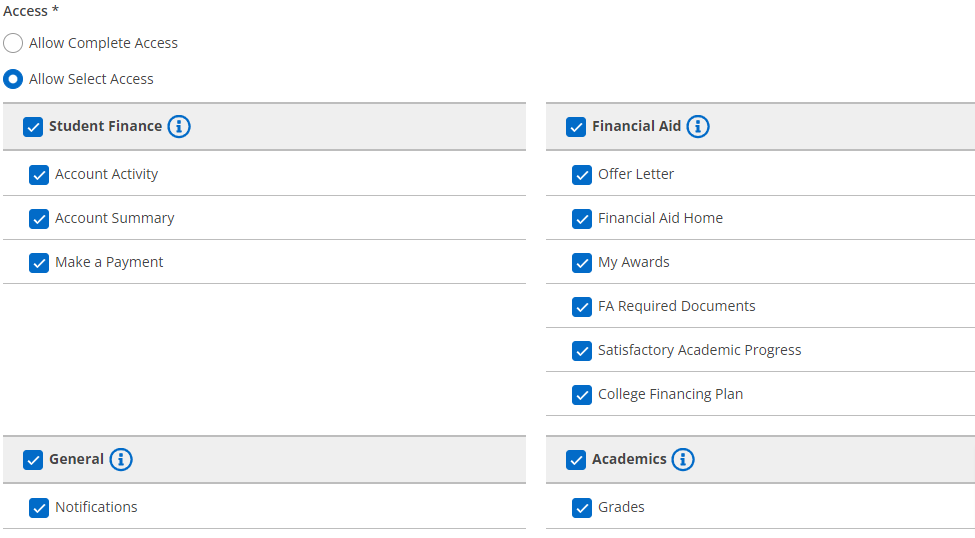
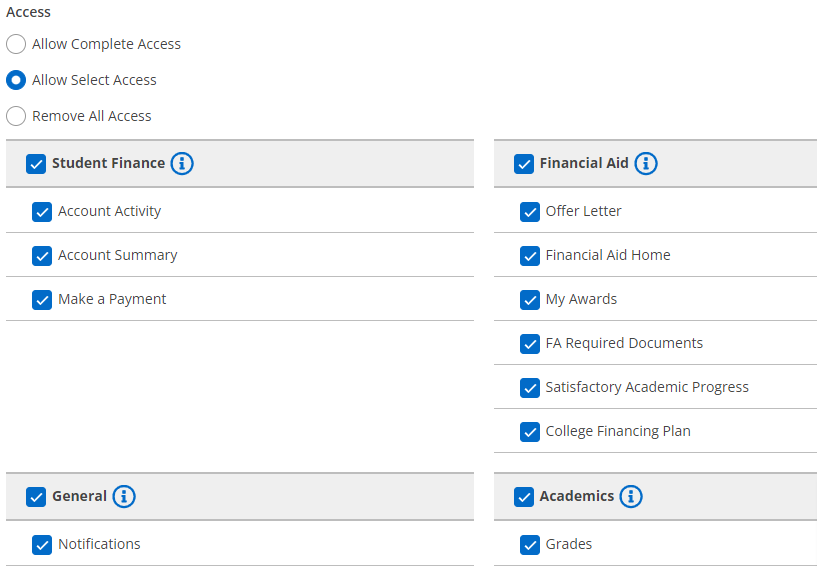
You can pick and choose what access you want to give to this proxy
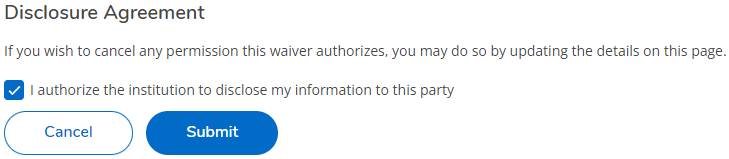
You must agree to the Disclosure Agreement and press “Submit”
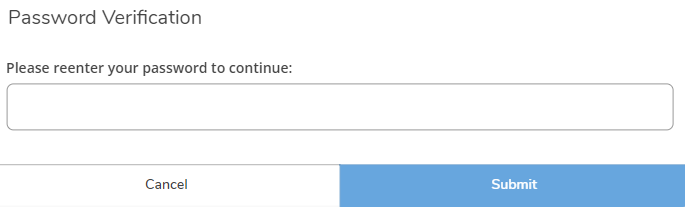
You will be prompted to enter your Single-Sign-On password again and press “Submit”
If you add a new user, you might get the following pop-up message. If you do, press “Continue“
Now your proxy will be listed on the “View/Add Proxy Access” page
Note
Proxies will receive an email any time access is granted or revoked.
If you want to change a proxy’s access at any time, simply click on the pencil next to their row
Add or remove access by selecting the appropriate checkboxes. You can also remove all access entirely by selecting the “Remove All Access” radio button. Click “Save” to submit your changes
Important
If you are giving a proxy access to “Make a Payment” you must also make them an authorized user in TouchNet.
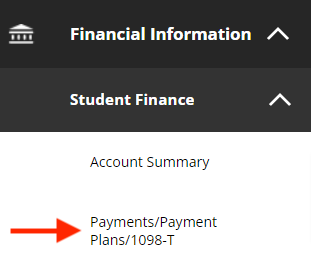
To give access to Make a Payment via an authorized user, click on “Payments/Payment Plans/1098-T” within the “Student Finance” menu
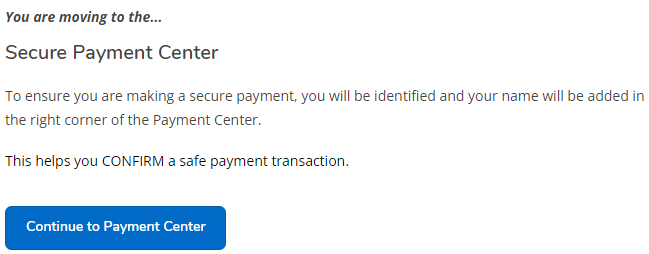
Click on “Continue to the Payment Center” to navigate to TouchNet
Click on “Authorized Users” to add your proxy as an authorized user to pay your bill. Follow the instructions to add the authorized user
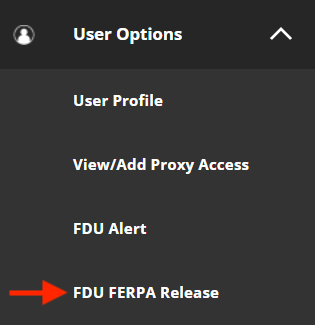
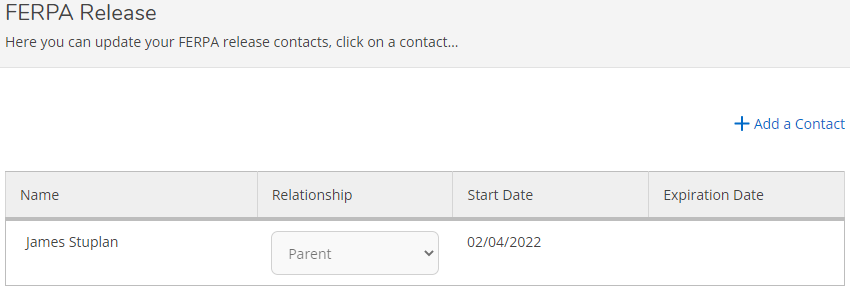
On the left-hand side of the page, you will find your menus. Click on the menu called “User Options” and then click on “FDU FERPA Release”
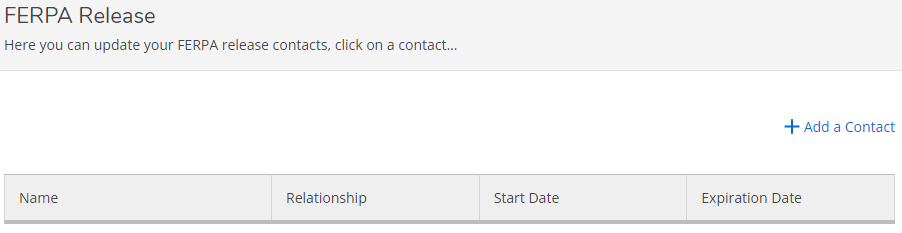
Click on “Add a Contact” to add a new contact, a person to whom you want to grant access to your information
Important
By completing the information on this page, you are authorizing administrators, staff, and faculty members of Fairleigh Dickinson University to release information pertaining to academic records, financial aid, student bill/account and disciplinary records to the contacts you have noted. This waiver remains in effect throughout your tenure as a student at the University. If you wish to cancel the permissions this waiver authorizes, you may do so by updating the details on this page. Please be advised that this waiver DOES NOT apply to services provided by Health and Counseling services. All records pertaining to medical care and psychological services remain confidential.
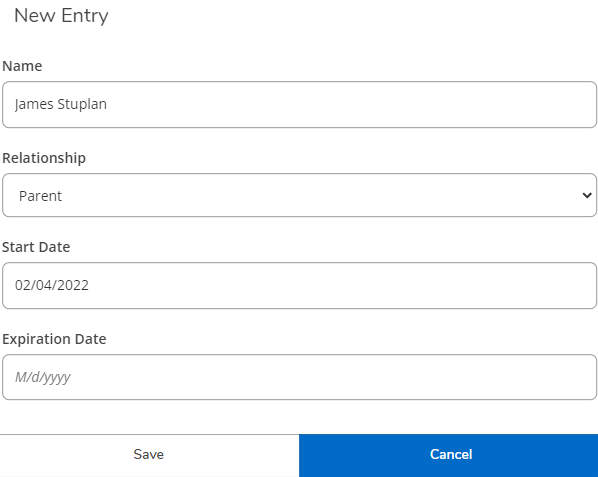
Adding a contact: Fill in the contact’s name, relationship, and the start date (the date that this will become effective). The expiration date is optional and can be changed at any point. Click “Save”
You will now see this contact listed on the FDU FERPA Release page
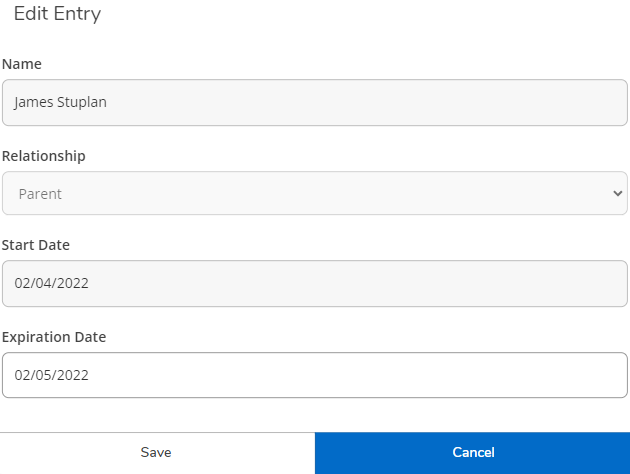
If you want to end the permissions of a contact, press on the row containing their name
Fill in an expiration date to end their permissions on that date. Press “Save”
Repeat the steps above to add or change your contacts
The phone numbers the University has on file to communicate with you are displayed in your User Profile in Self-Service. If the information is incorrect in any way, you can update your contact data using the steps below.
Faculty/Staff
Please note that the phone number you enter under the ‘Work’ phone type will be publicly available in the FDU Faculty/Staff directory. Ensure that the number you provide for ‘Work’ is the one you want colleagues, students, and others to use to contact you.
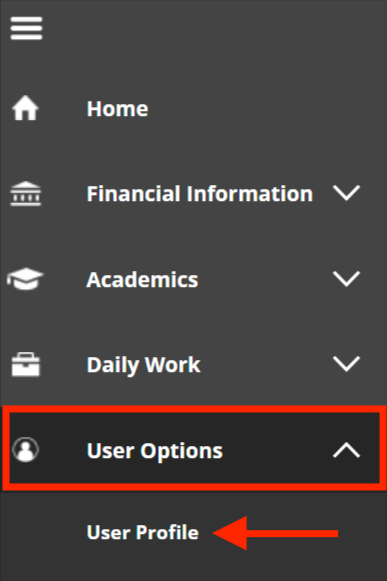
Go to the “User Options” menu and press on “User Profile”
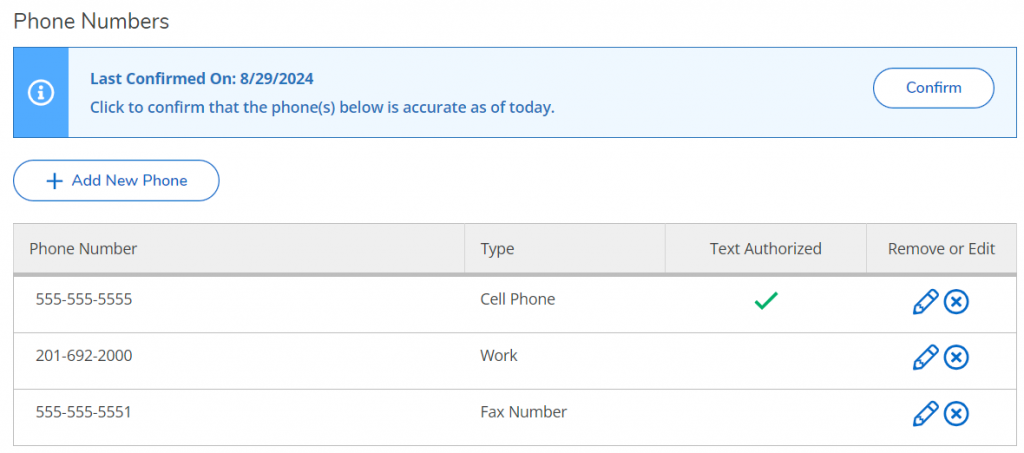
Scroll down to the “Phone Numbers” section
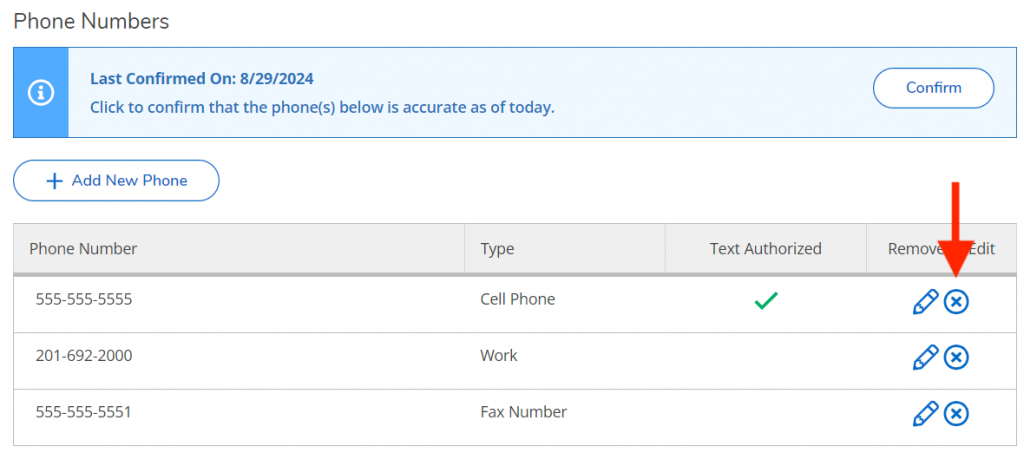
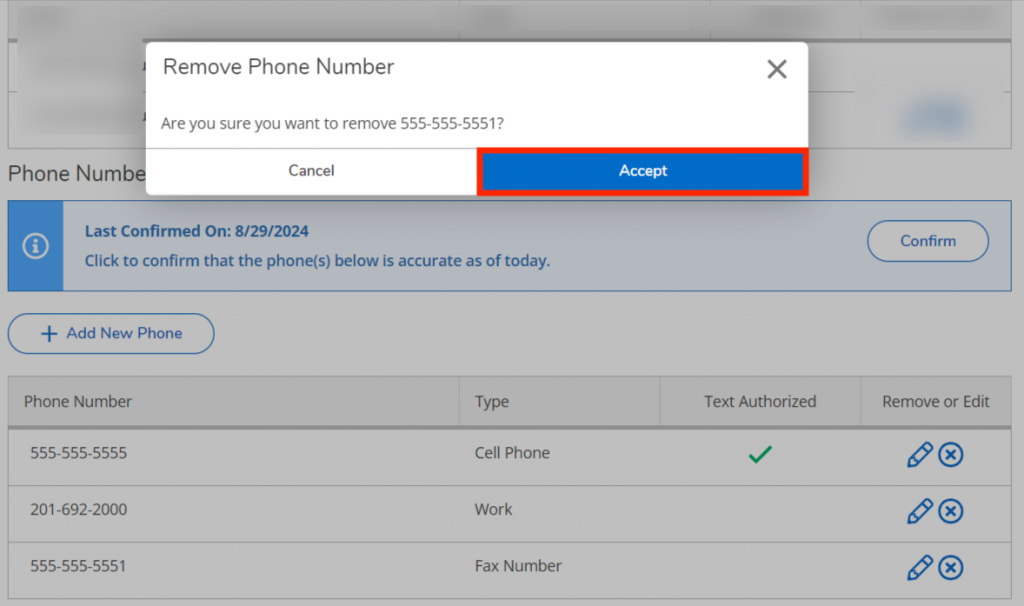
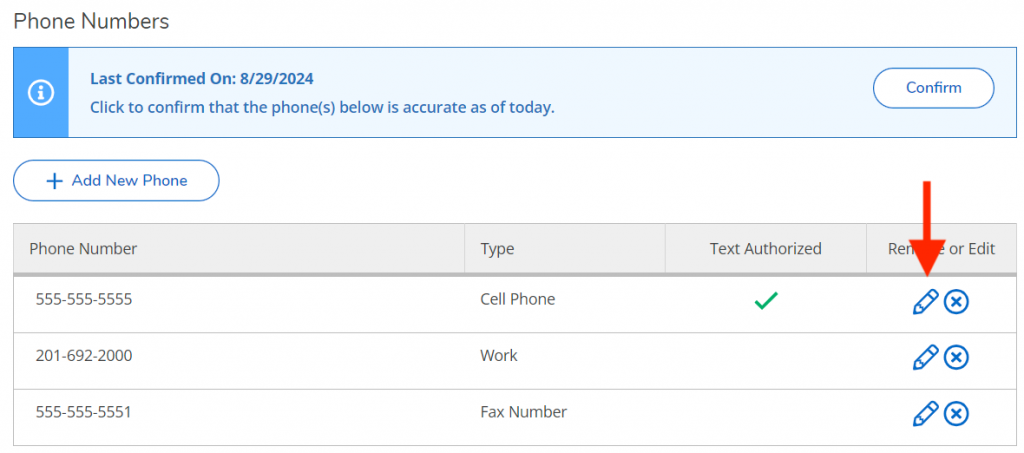
If any of the phone numbers listed are no longer yours, you can press the “X” icon in the Removeor Editcolumn to delete them. Press “Accept” to confirm the deletion
If any of the numbers listed need to be corrected or updated, press the “Pencil” icon. Change the information that appears in the pop-up window and press “Update Phone”
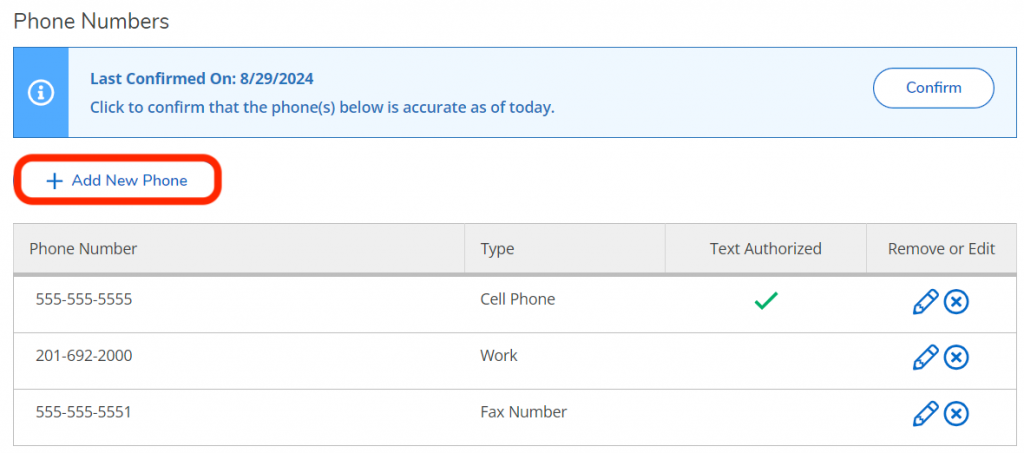
If you need to add a new phone number to your record, press “+ Add New Phone”. In the pop-up window, fill in the number, and extension (if applicable), type, and select if you allow this number to be texted. Then press “Add Phone”
Sign in to the FDU Single-Sign-On (SSO) page using your FDU NetID credentials
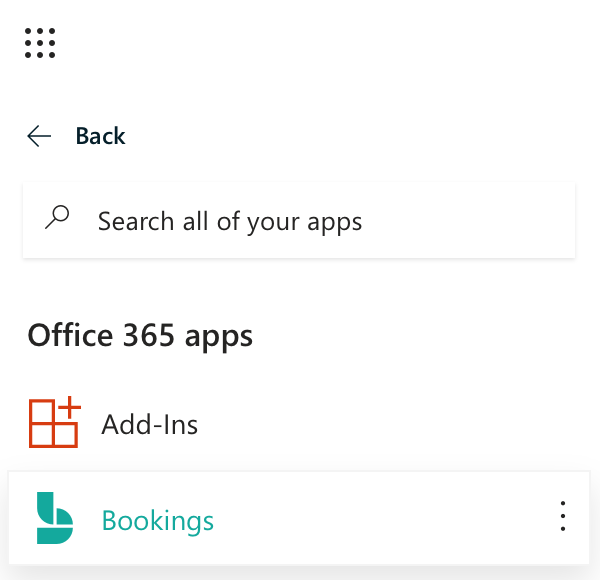
In the upper left corner, click the dotted square and select All Apps
In the All Apps menu, choose Bookings
Microsoft Bookings will open. Click the Get it Now button to begin
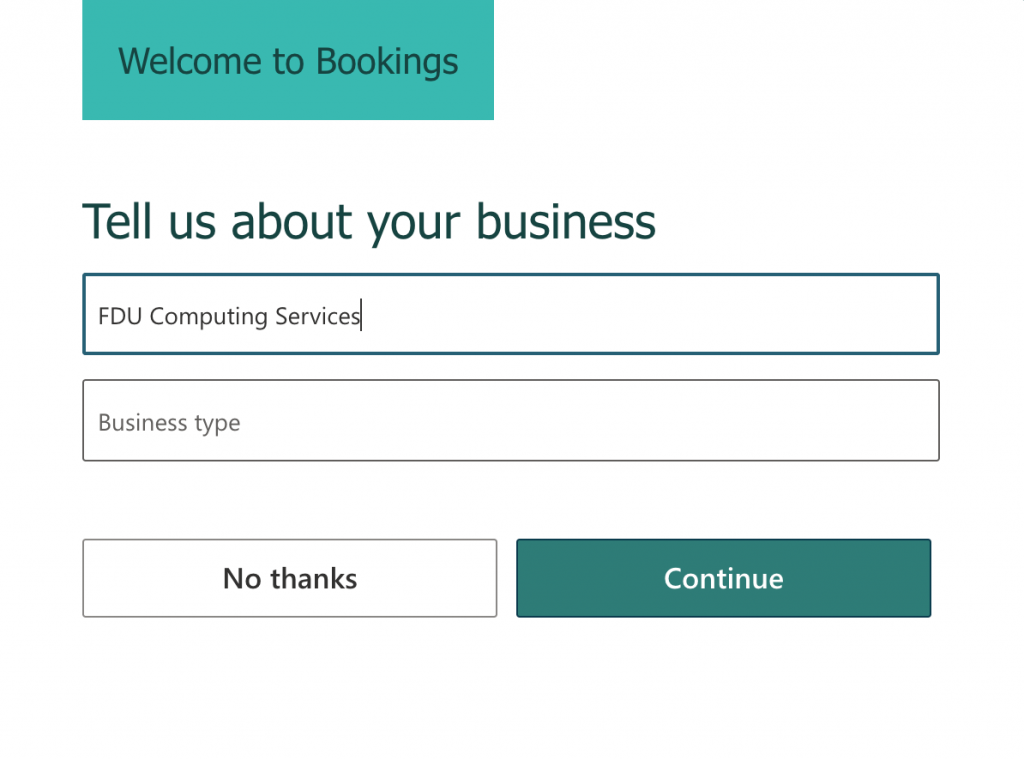
The next page will ask for two pieces of information: Business nameandBusiness type. Enter your Department name or your First and Last Name. Click Continue
Note
Designating a Business Type is not required to be able to Continue.
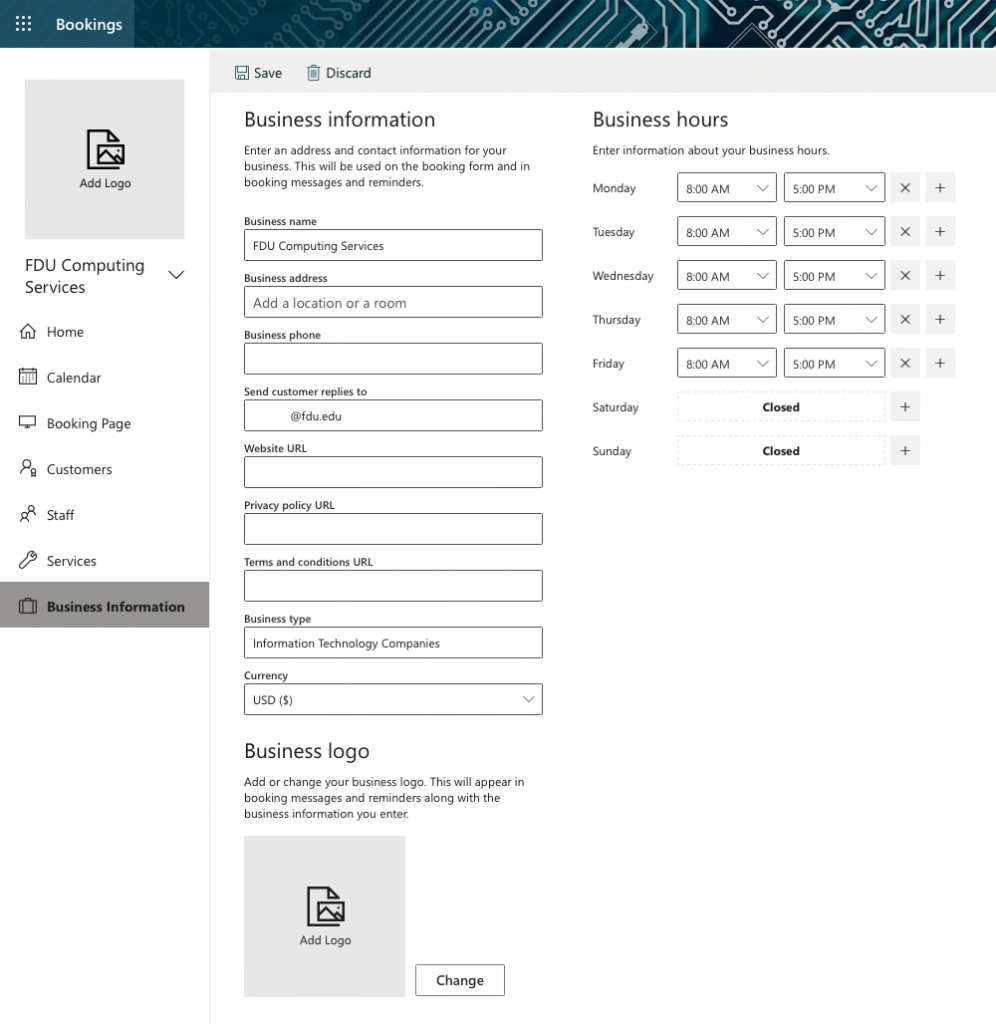
Once your Bookings page loads, the first section you should complete is Business Information. Click Business Information in the left menu
On the Business Information page, you can enter your business or department address, other contact information, upload a business logo, and set up your business hours
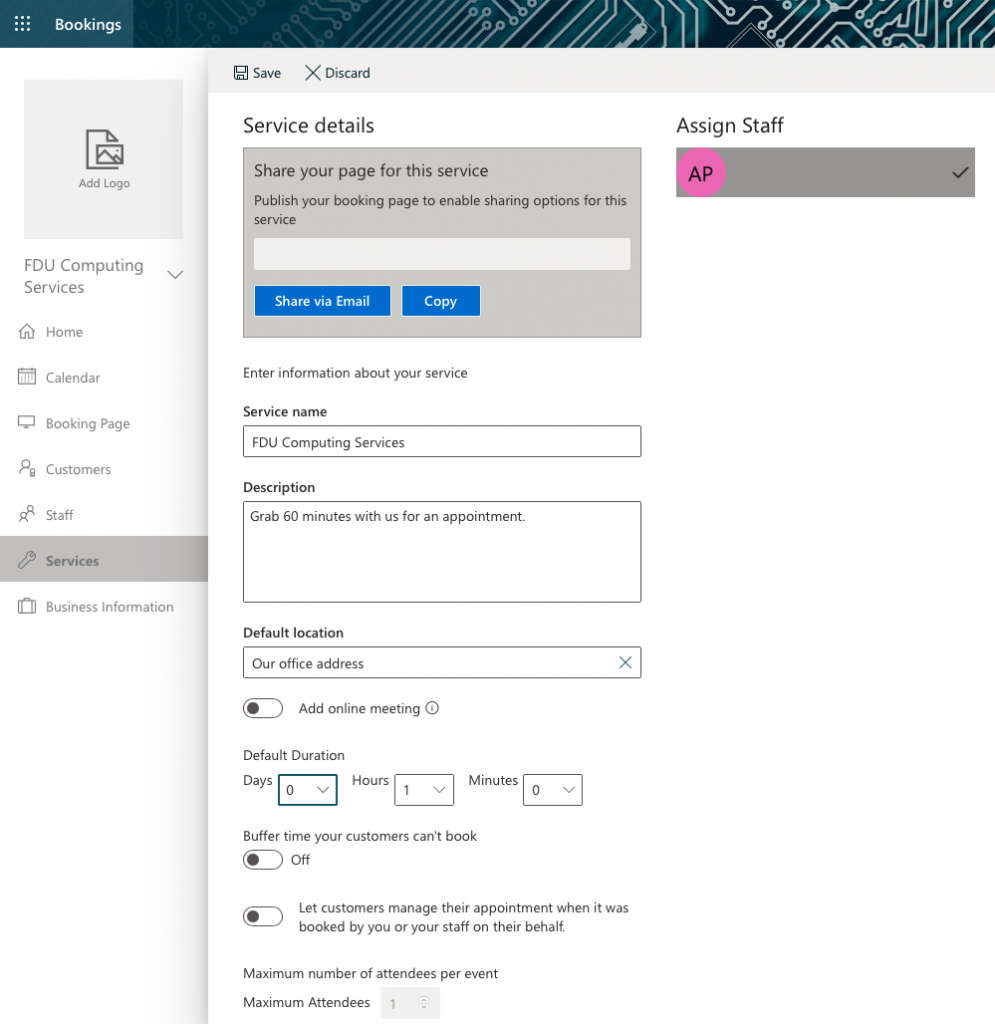
Next, set up your service offerings. Click Services from the left menu
Note
By default, Microsoft Bookings will add a service called “Initial Consult.” You can click the pencil next to this service and make it your own, OR you can add a new service by clicking Add a service at the top of the screen.
Once you’re on the service-editing page, enter your service details, including name, description, and location. When you start typing an address in the default location, suggested locations will populate. Below are explanations for the other fields on the service-editing screen:
Duration: You can enter how long you want the duration to last in days, hours, minutes, and set a buffer time when customers cannot book.
Reminders: You can have the system send customers email reminders before their scheduled appointment. Click the pencil to edit the text.
Leave Publishing options checked.
Online Scheduling Options: This is where you can manage the settings for when customers can book services.
You can choose to use the default scheduling policy by leaving the option checked, OR
You can manage the settings for your scheduling policy by unchecking the option. If you choose this option, we recommend setting the Minimum lead time to 24 and the maximum lead time to 30 days.
Don’t forget to click Save at the top of the Service details page
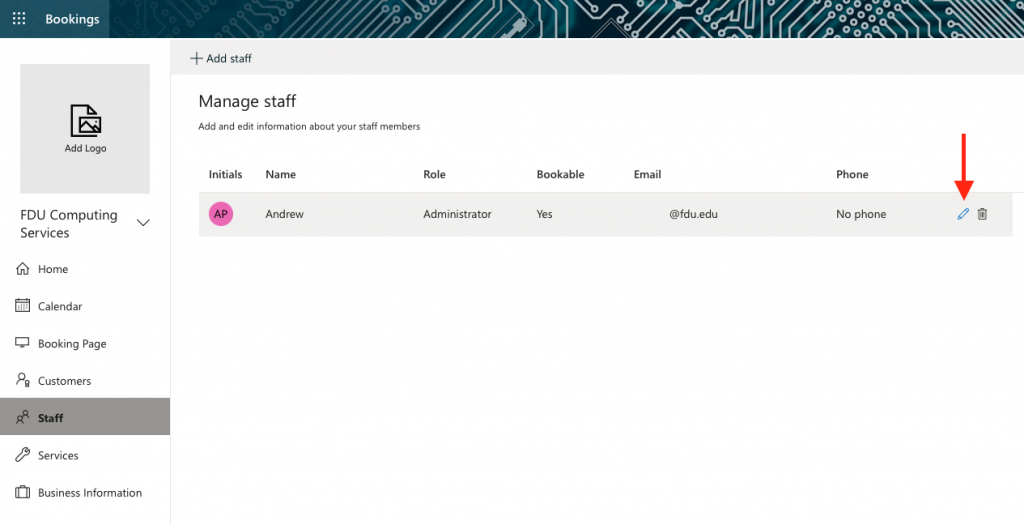
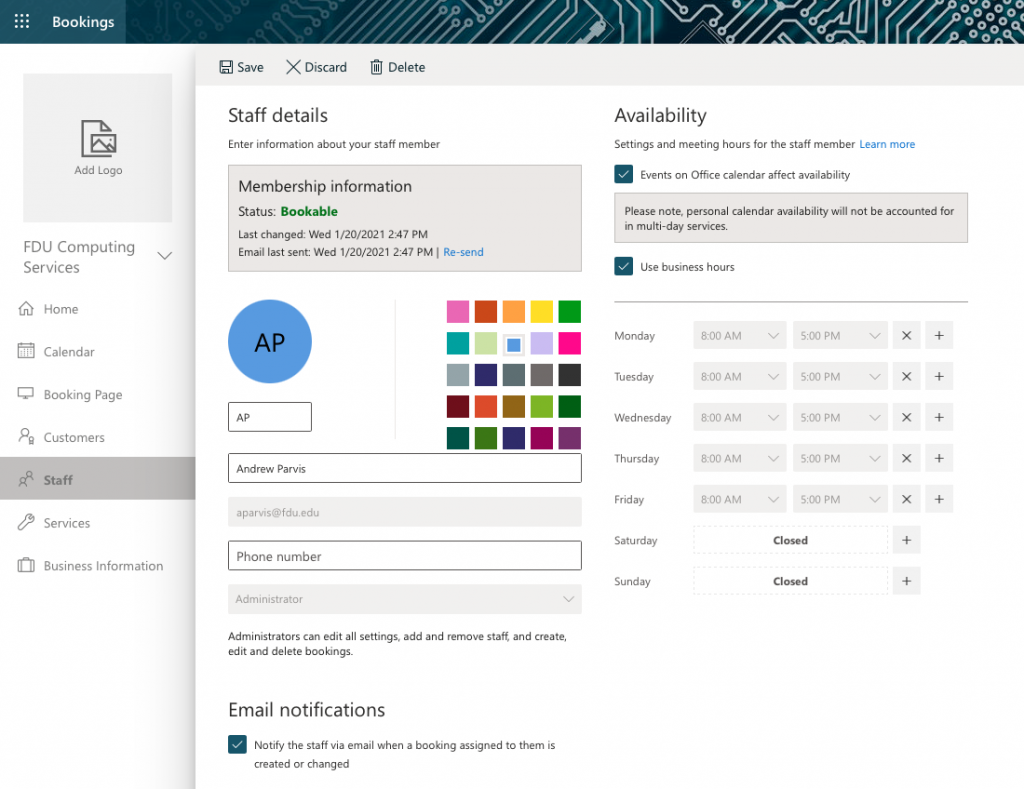
Next, click Staff from the left menu. Click the pencil next to your name to edit your information. Also, you may add any staff or faculty members in your department by clicking the + Add staff button
On this page, you can add information about yourself, including your office or department phone number and whether to receive email notifications (we recommend keeping this option checked). Click Save when finished
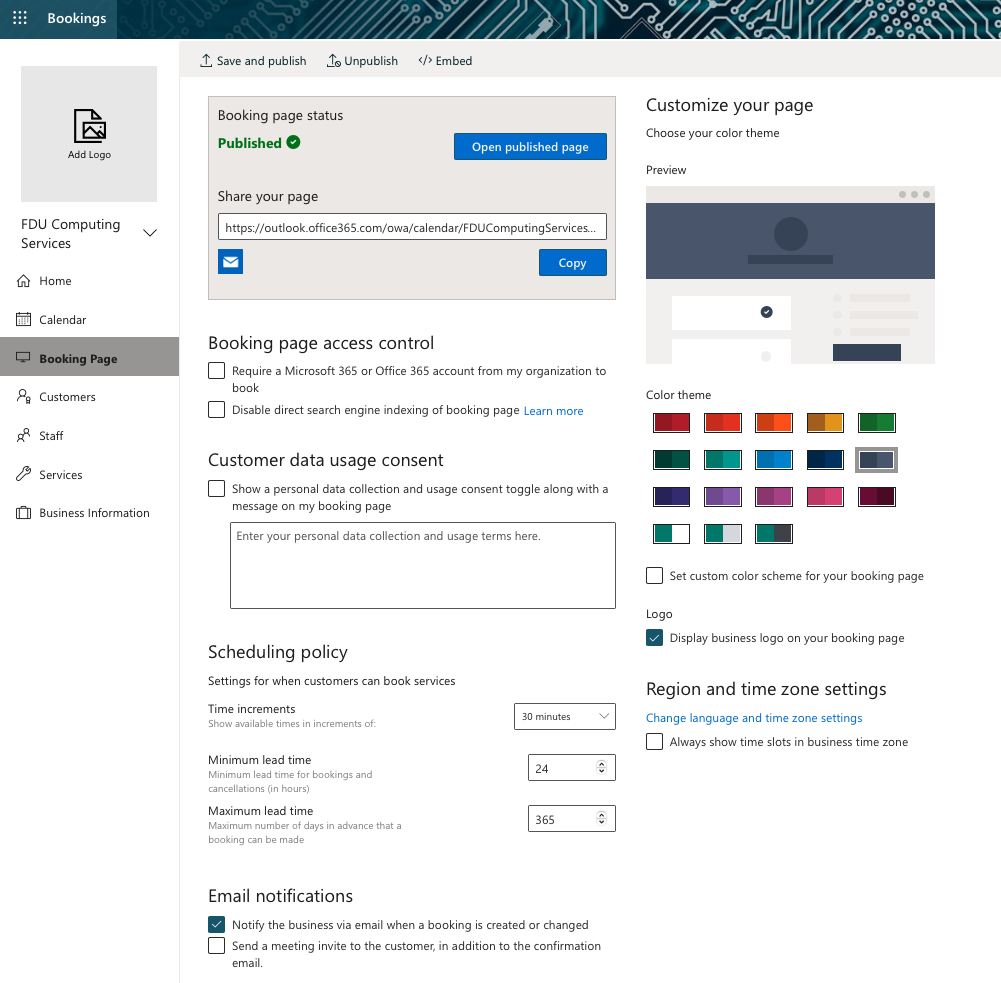
Next, select Booking page from the left navigation pane.
Booking page Status: Since this is the first time you are setting up your Bookings page, your status is set to Not published. Once you finish customizing your page and clicking Save, the status will change to Published.
Customer data usage consent (optional): Where you can customize a message for your visitors to consent to your site collecting their personal data.
Scheduling Policy: Where you can set site-wide scheduling policies. We recommend the following settings:
Minimum lead time: 24
Maximum lead time: 30
Email Notifications: Notifies you when an appointment is made.
Staff: You can allow customers to choose who they want to meet with. However, you can uncheck this option if you do not have any staff.
Customize your page: Choose a color theme for your bookings page.
Lastly, click Save and Publish
Once you click Save and publish, your Bookings site is now live! You can view your published page by clicking Open published page and share your page with others by copying the link
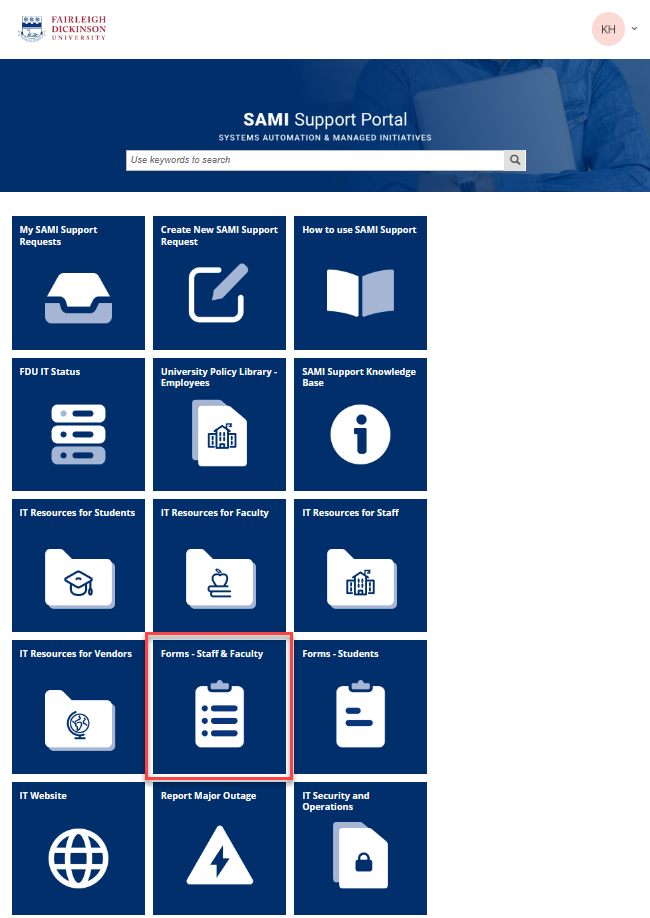
To access Forms, you will be directed to our SAMI Support Portal where you will be asked to log in using your NETID and authenticate using Duo. Once you click “Next,” you will be forwarded to samisupport.fdu.edu in a new window or tab.