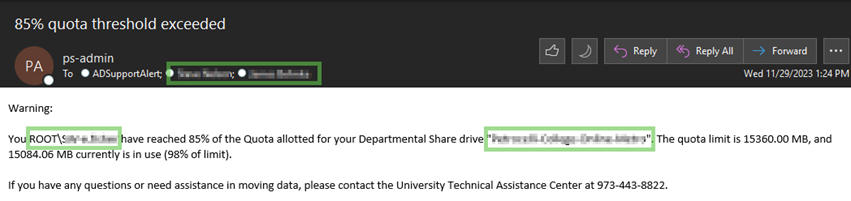
Home drives and departmental shared drives come with a limited capacity of data storage, known as a quota. When a drive reaches 85% of that quota, both the departmental shared drive manager as well as the user uploading the content that puts a drive over that threshold will receive a message from psadmin@fdu.edu as seen below.
By informing the share manager and providing the name of the share affected, the share manager has an opportunity to respond to the notification prior to any disruptions to day-to-day workflows.
Upon receiving this email, the share owner should:
Review and confirm that all uploaded content is required for current business purposes
Review and consolidate any duplicated items
Remove any documents, files, or pictures no longer needed
Note
Shared drives are not intended for archival purposes. We ask that the share manager please remove documents, files or pictures that are no longer actively required.
These measures will resolve most shared drive quota issues. If the shared drive is still nearing its storage quota, please fill out the Home/Department Share Management Form using the link below:
A shared mailbox makes it easy for a group of people to read and send emails from one public email address, like info@fdu.edu. When a person in the group replies to a message sent to the shared mailbox, the email appears to be from the shared address, not from the individual user. Shared mailboxes can also be used to provide a shared calendar, allowing multiple users to schedule and view calendar tasks.
Request Access to an FDU Shared Mailbox
Users can request a new shared mailbox by completing and submitting the “Distribution Group/Shared Mailbox Request” form found below. Users needing access to a specific FDU shared mailbox account may request access by reaching out to the shared mailbox owner. To fulfill this request, the shared mailbox owner will open a support case with the SAMI Service Desk.
The shared mailbox should automatically display in your folder pane on the left-hand side of your Outlook application within 24 hours of its creation. Closing and restarting the Outlook application maybe necessary if you do not see it after 24 hours
Note
Before you can use a shared mailbox, the Microsoft 365 admin for the university has to add you as a member.
If you cannot open a shared mailbox, please contact the SAMI Service Desk and open a support request.
close
macOS
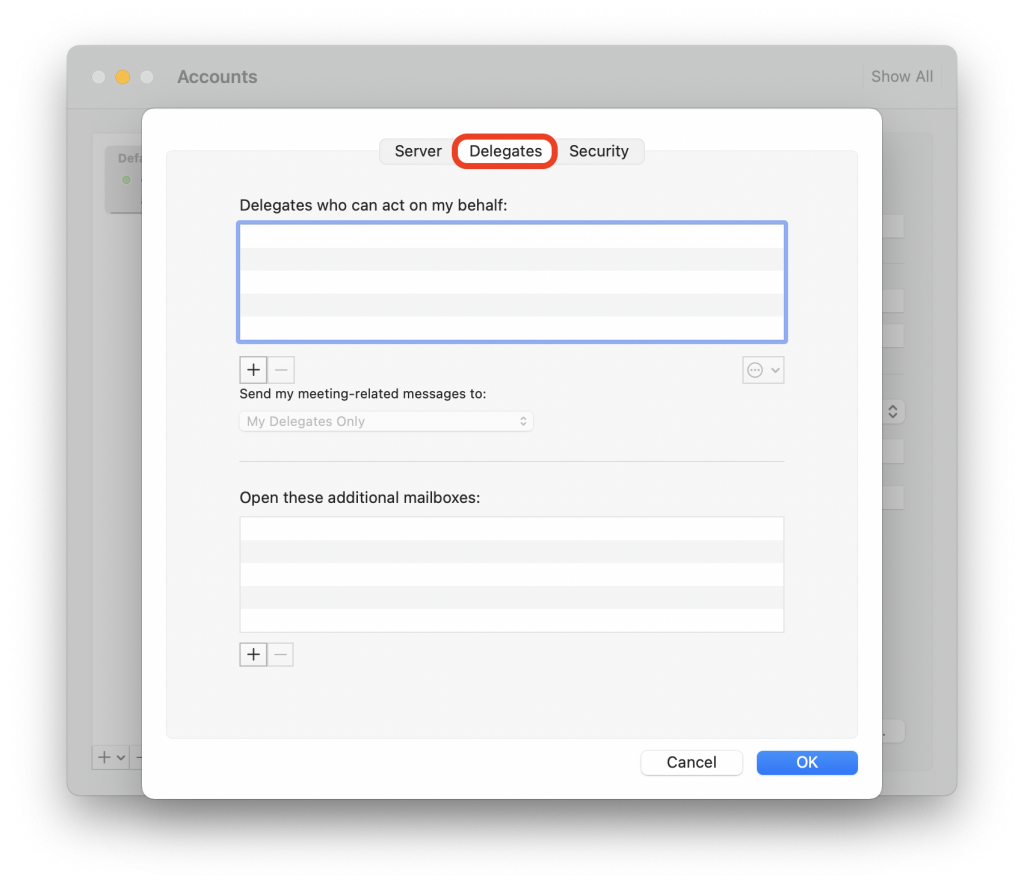
Select Tools from the Outlook menu bar at the top of the screen, then choose Accounts
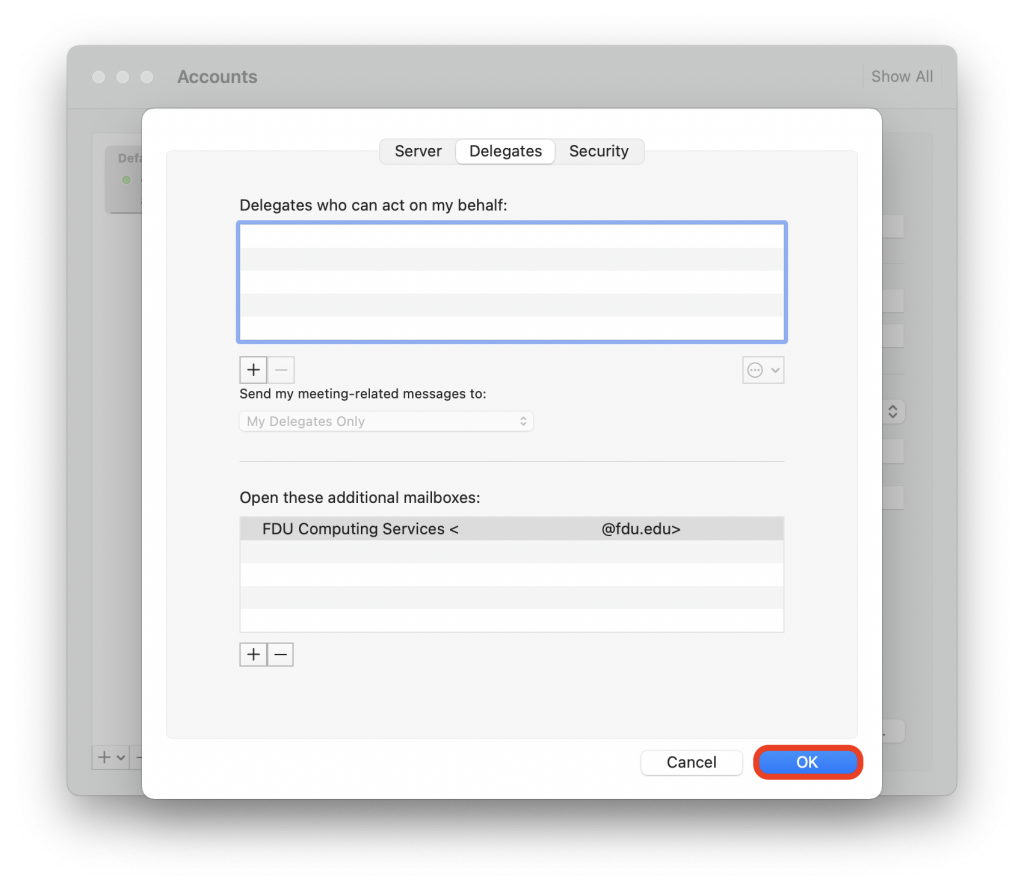
Select the Advanced… tab
Select the Delegates tab
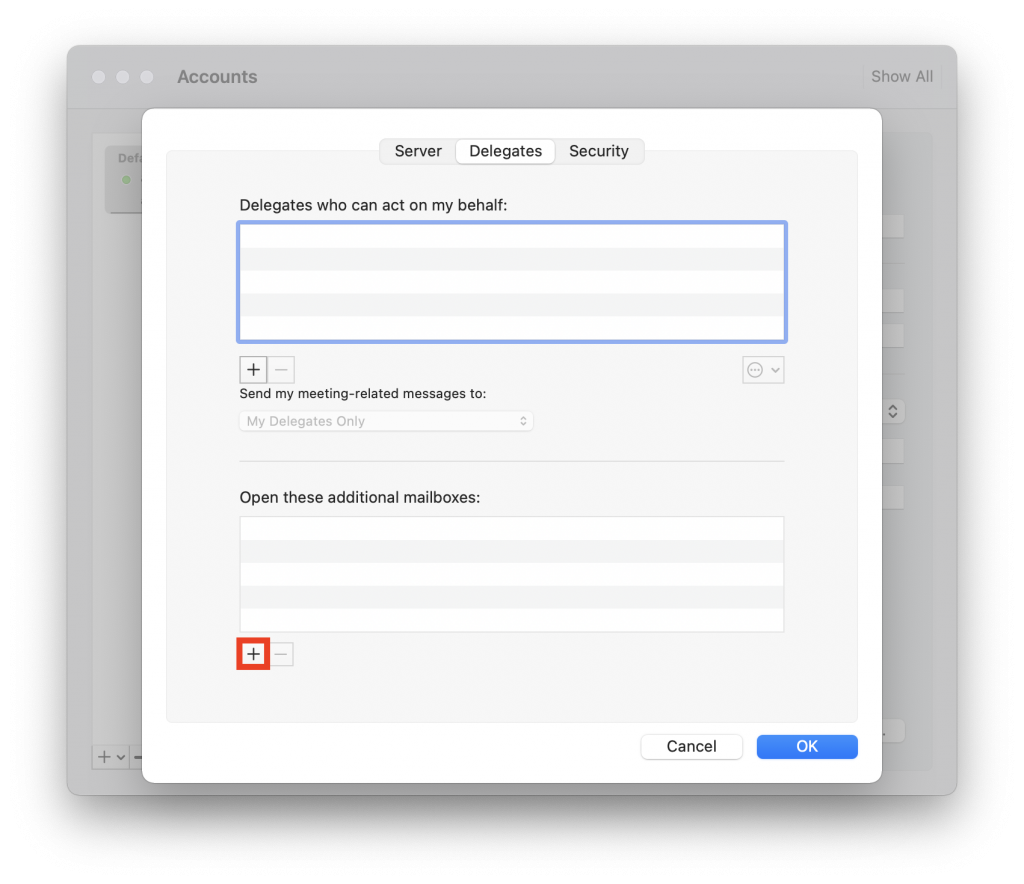
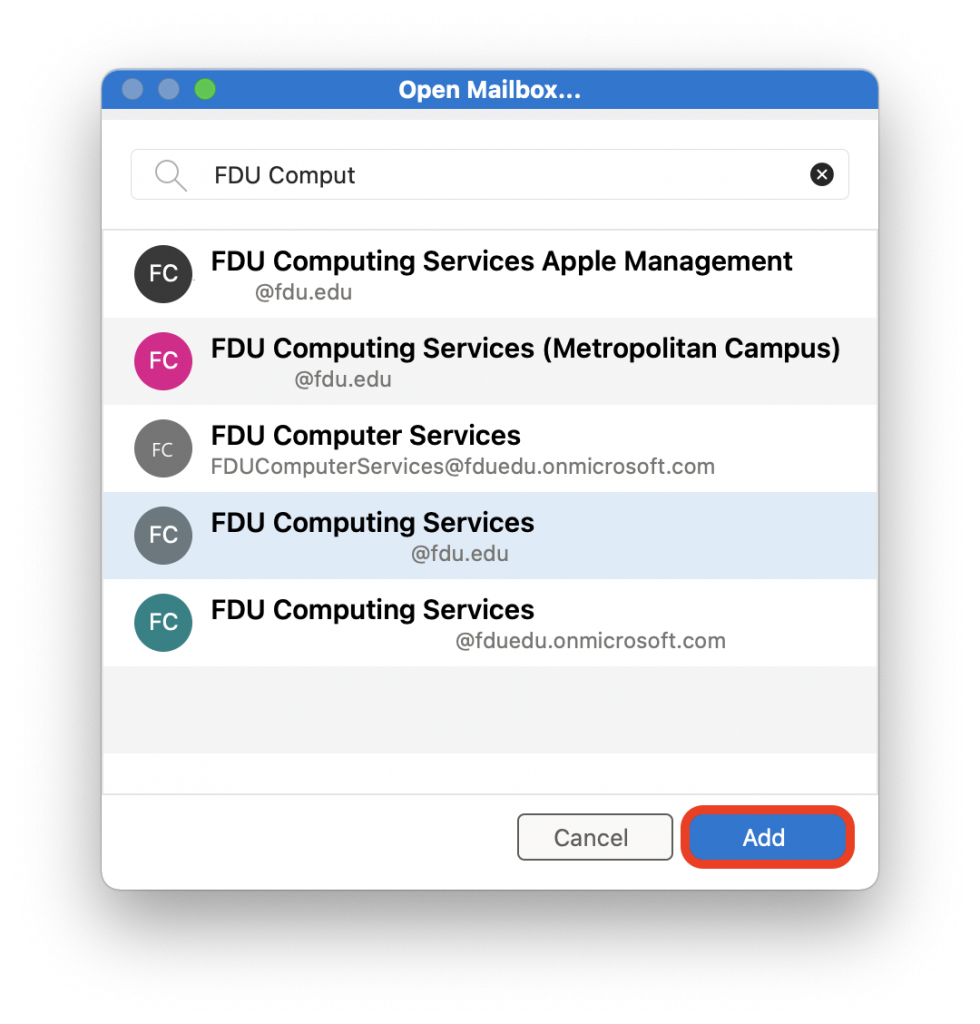
Click the + button, located under Open these additional mailboxes:
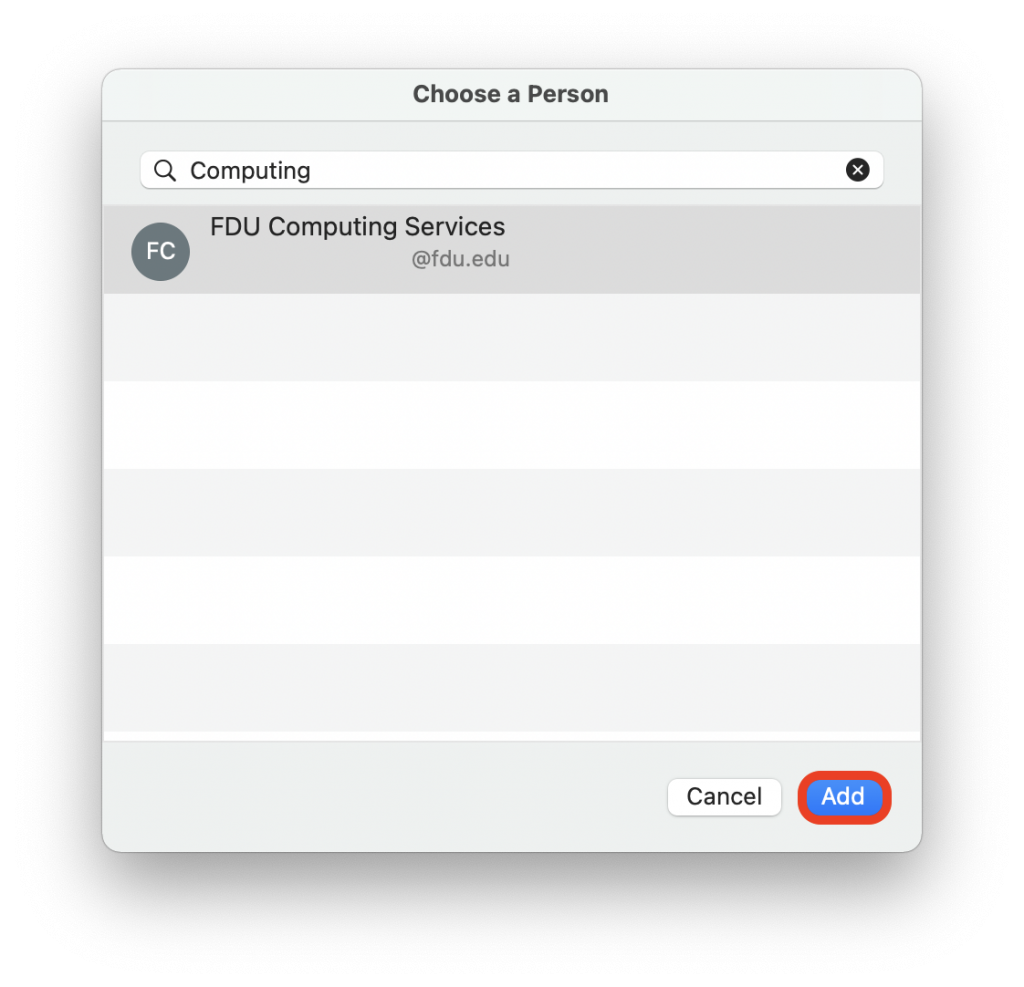
Type or select your correct shared mailbox, and then select Add
Select the OK tab
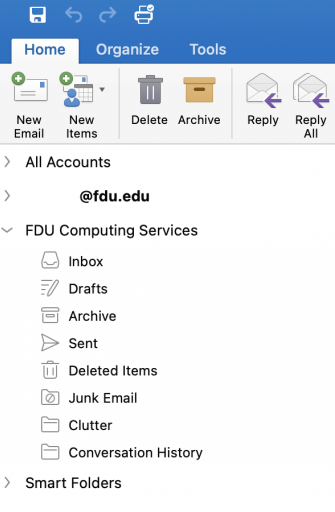
You should now see your shared mailbox listed on the left-hand side of your Outlook email application window
Note
This is a one-time process only. You do not need to follow the above steps to add this to Outlook on your macOS device again.
If you cannot open a shared mailbox, please contact the SAMI Service Desk and open a support request.
New Outlook version on macOS
Some macOS users may take advantage of the “New Outlook” version of the Outlook application. You can identify which Outlook version you are using by locating the “New Outlook” slider tab button on the top right of the application.
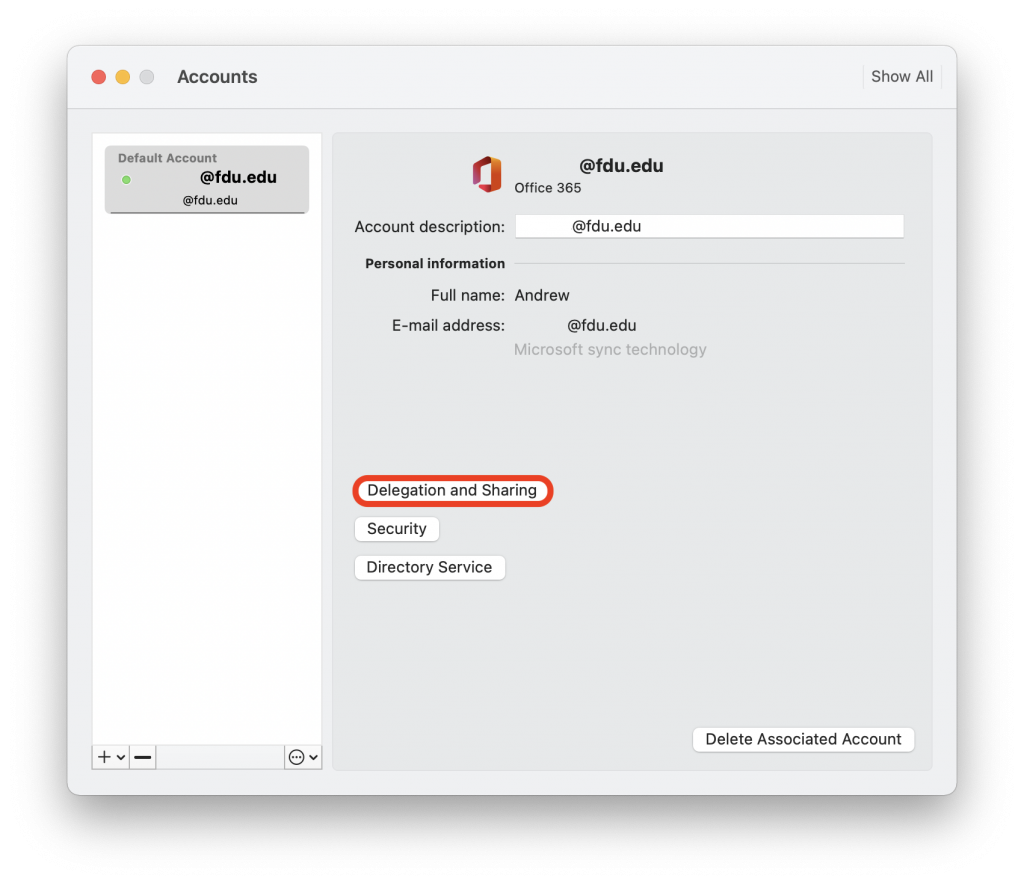
Select Tools from the Outlook menu at the top of the screen, then choose Accounts
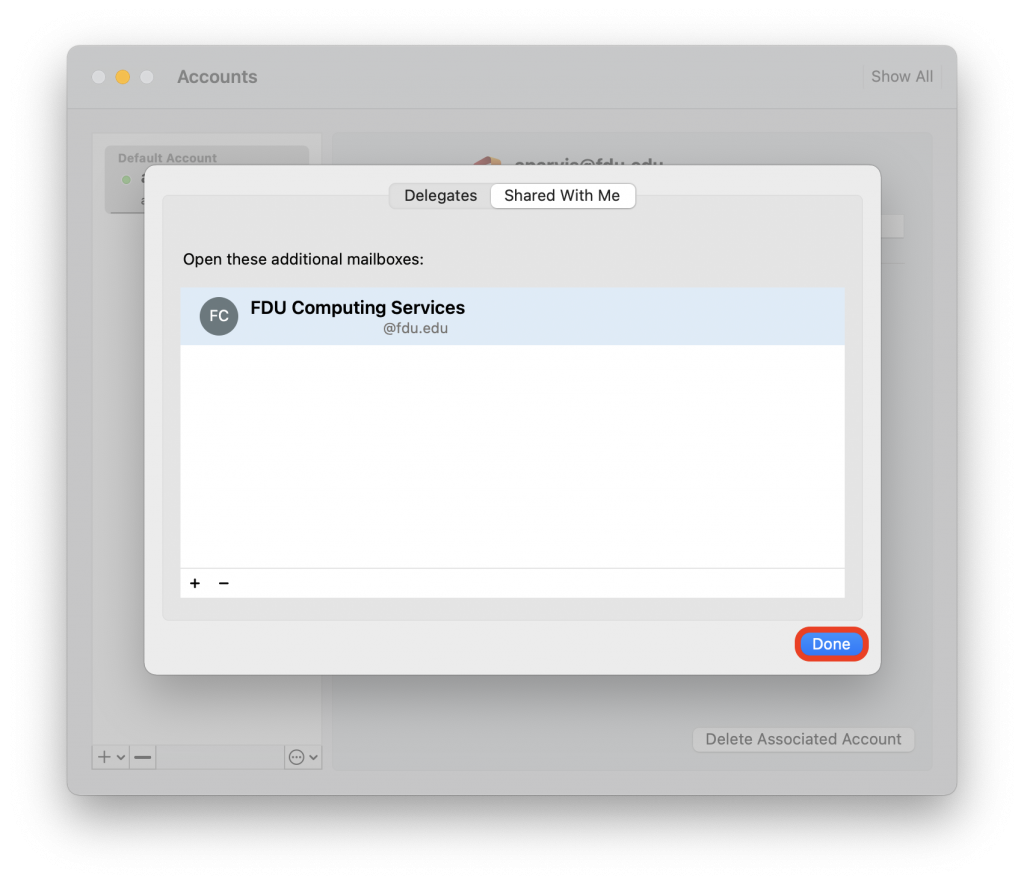
Select the Delegation and Sharing tab
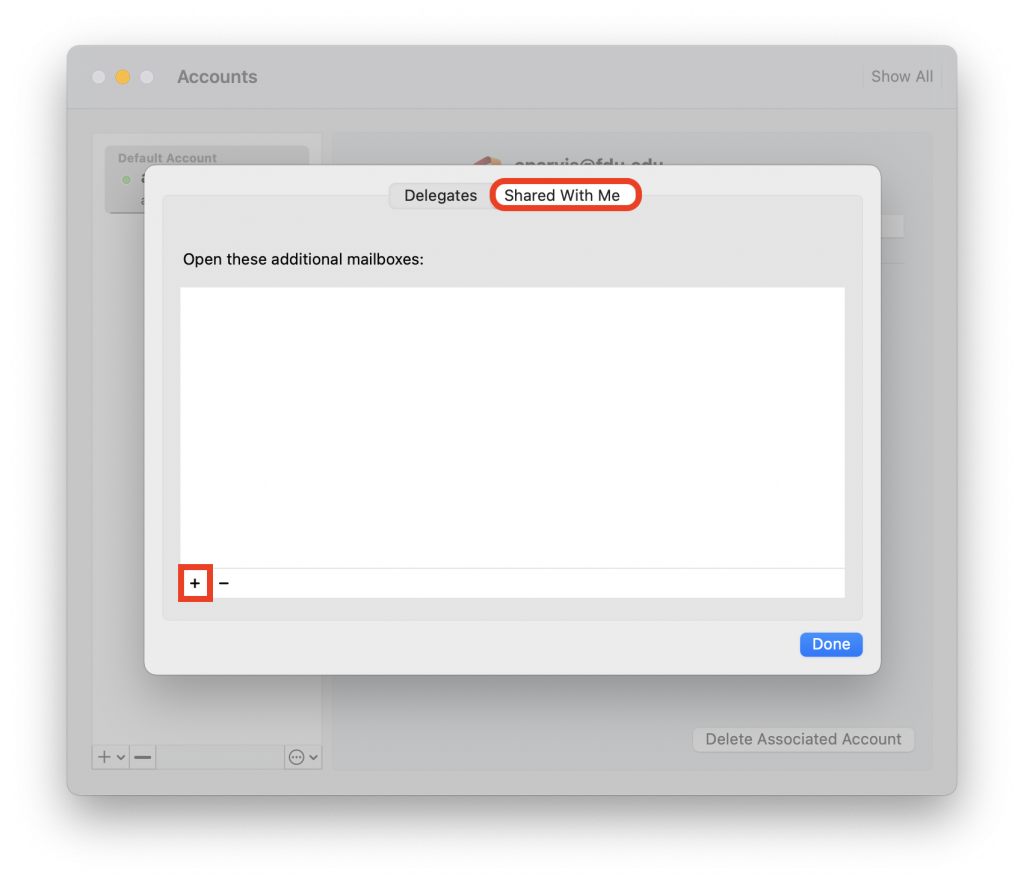
Choose the Shared With Me tab and then select the + button
Begin to type the shared mailbox name or its email address, choose the correct shared mailbox before selecting Add, and finally Done when finished
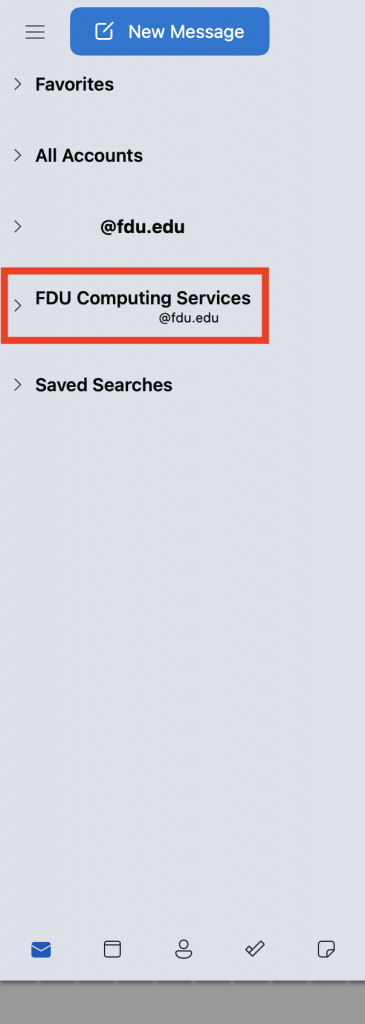
You should now see your shared mailbox, located on the left-hand side of your Outlook application window
Note
This is a one-time process only. You do not need to follow the above steps to add this to Outlook on your macOS device again.
If you cannot open a shared mailbox, please contact the SAMI Service Desk and open a support request.
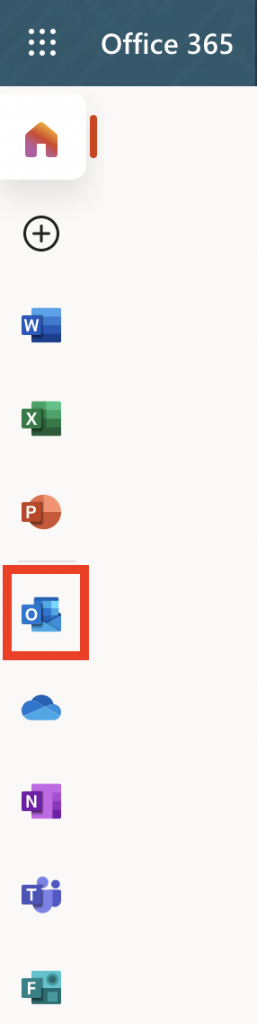
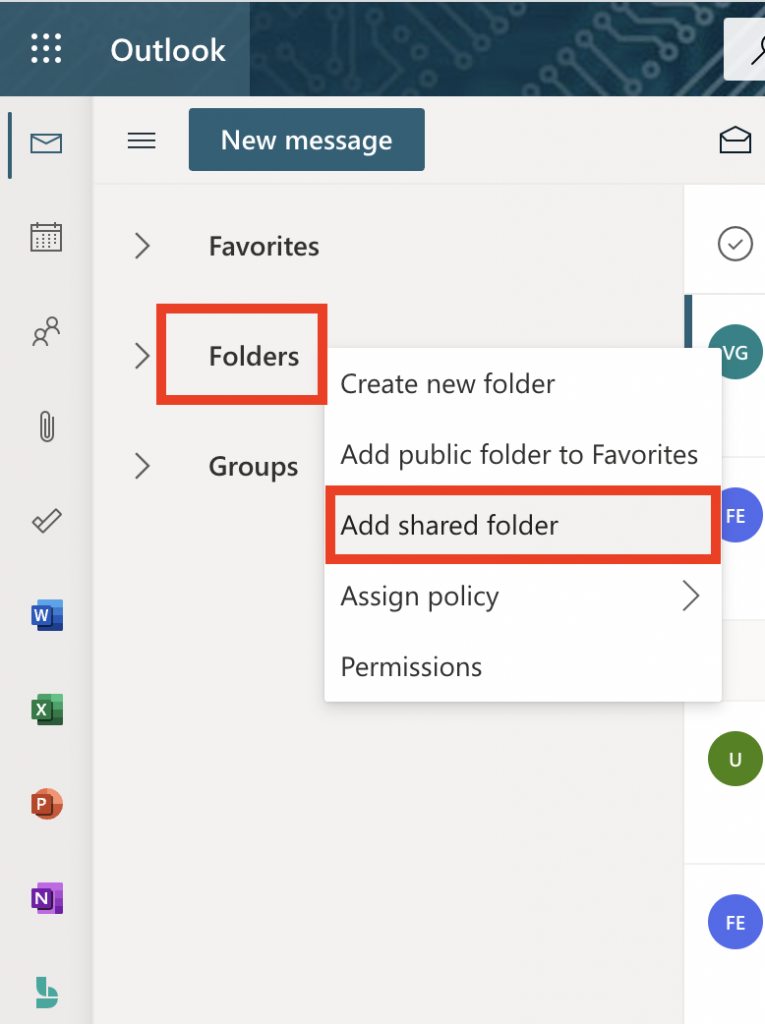
Select the Outlook web app icon, located on the left-hand side of your display
Right-click on the Folders option located on the left side of the menu; a small drop-down menu should display. Select Add shared folder
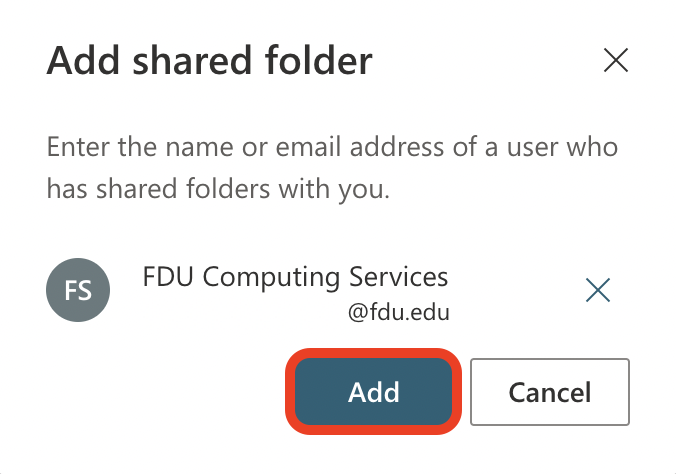
Begin typing the email address for the shared mailbox, auto-populated suggestions will be displayed. Select the correct shared mailbox address and click Add
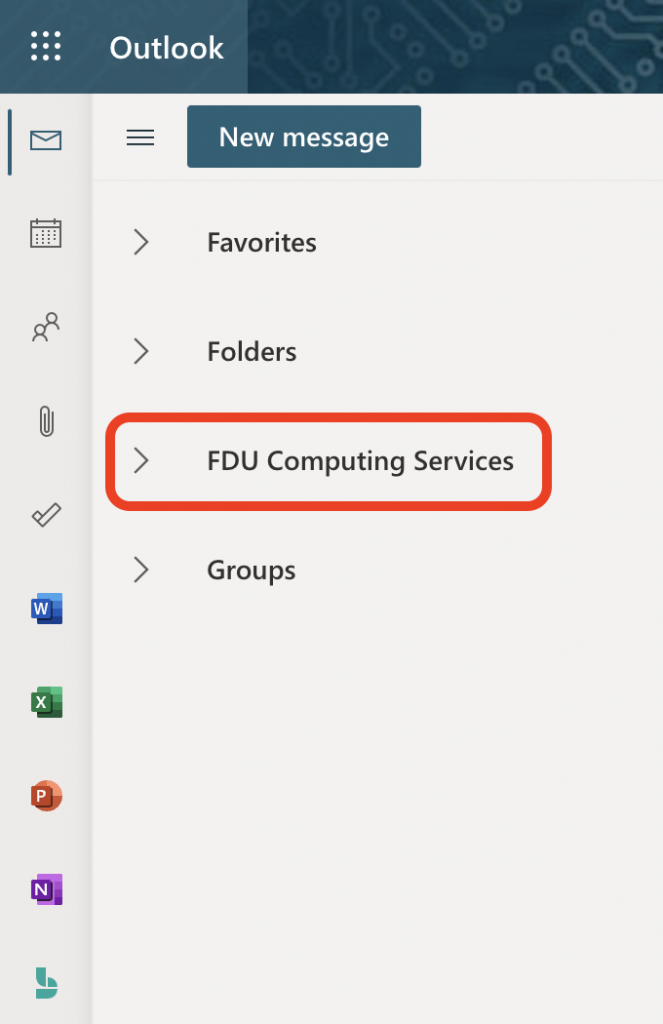
You should now see the added shared mailbox located on left side of your Outlook web email window
Note
This was a one-time process. You do not need to follow the above steps to add this to your account again. You will automatically see the shared mailbox when you sign in to your account next time.
If you cannot open a shared mailbox, please contact the SAMI Service Desk and open a support request.
close
Android and iOS
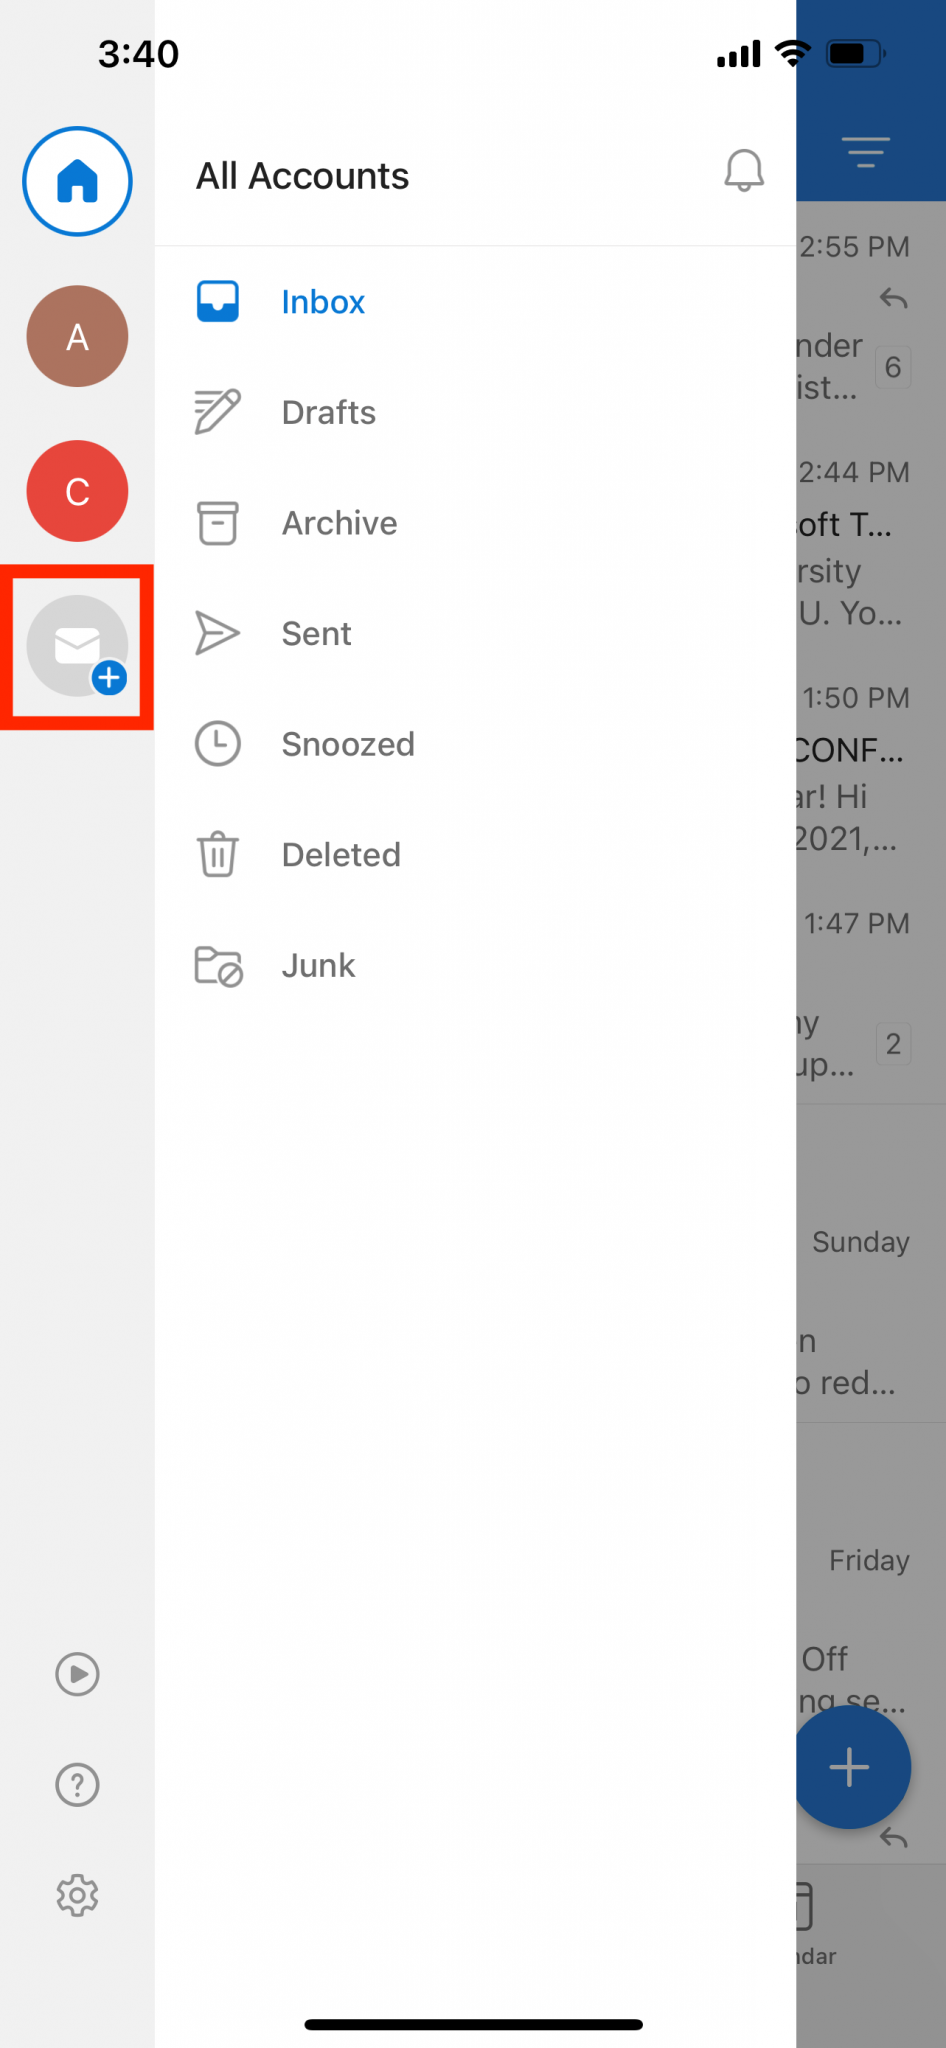
Sign in to your primary FDU email account in the Microsoft Outlook for Android or iOS app
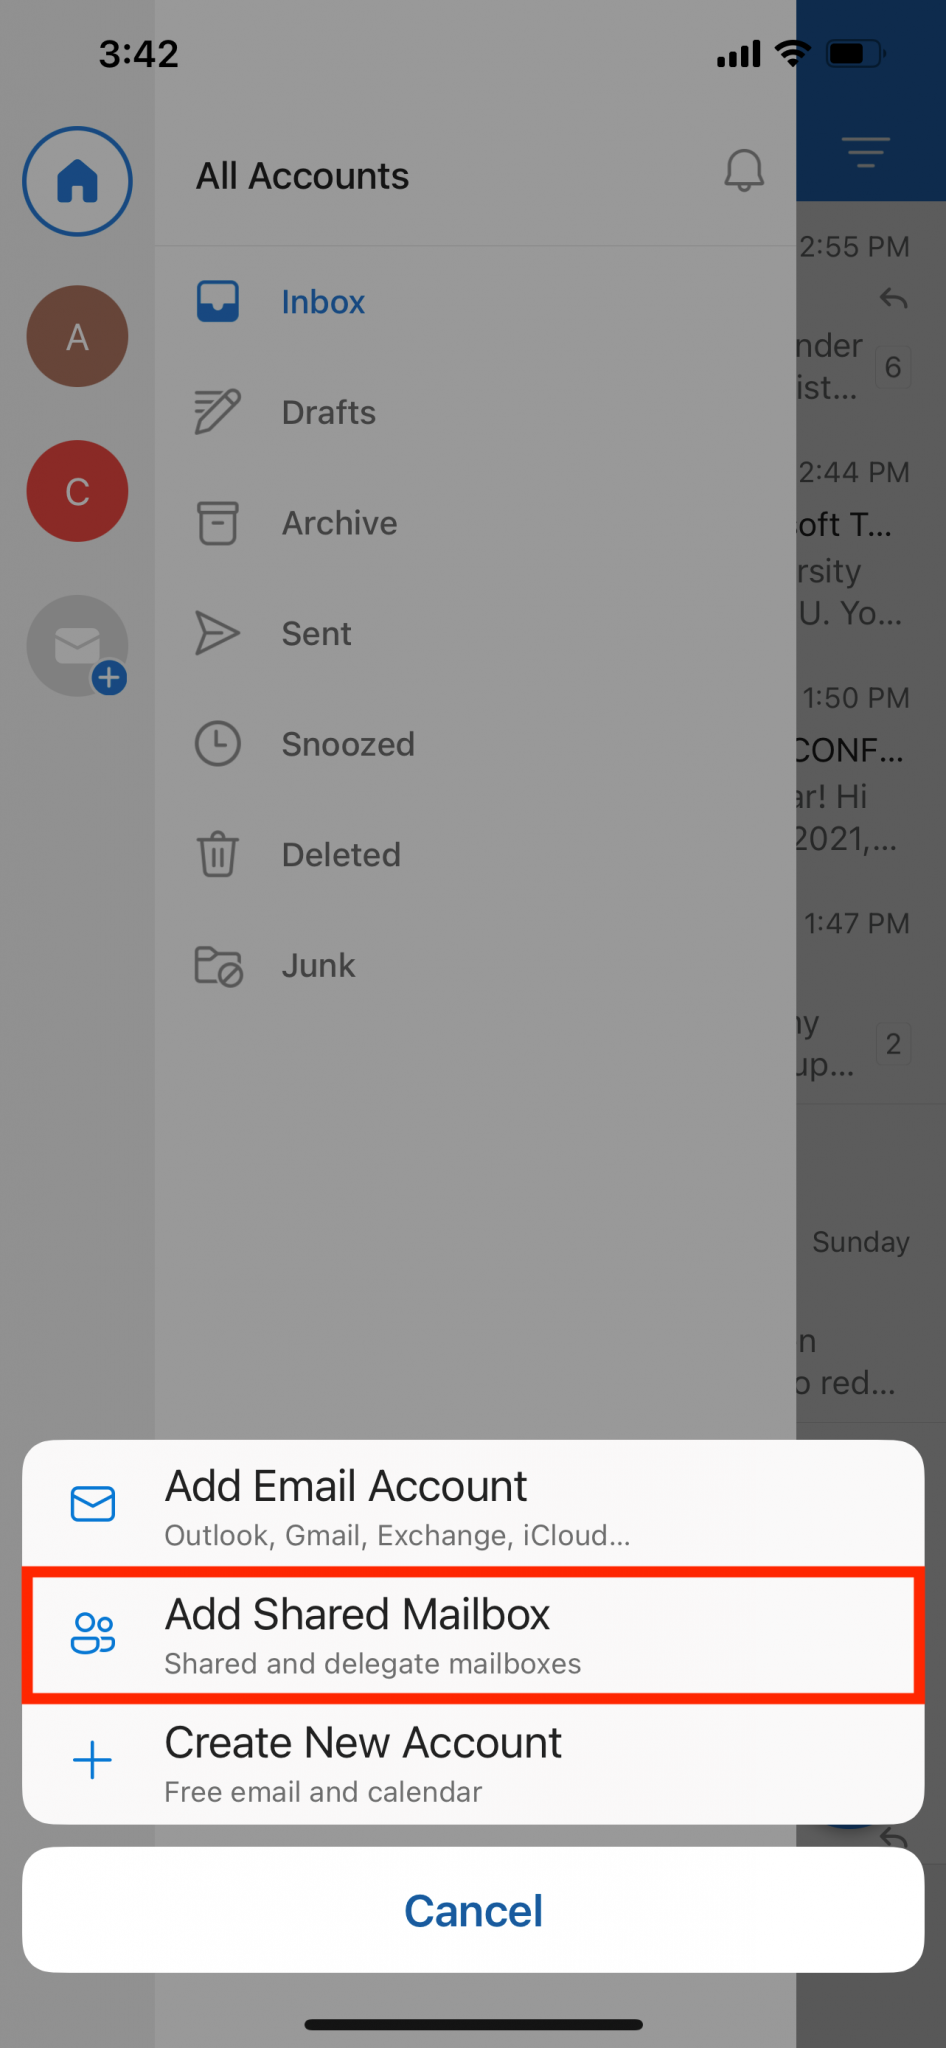
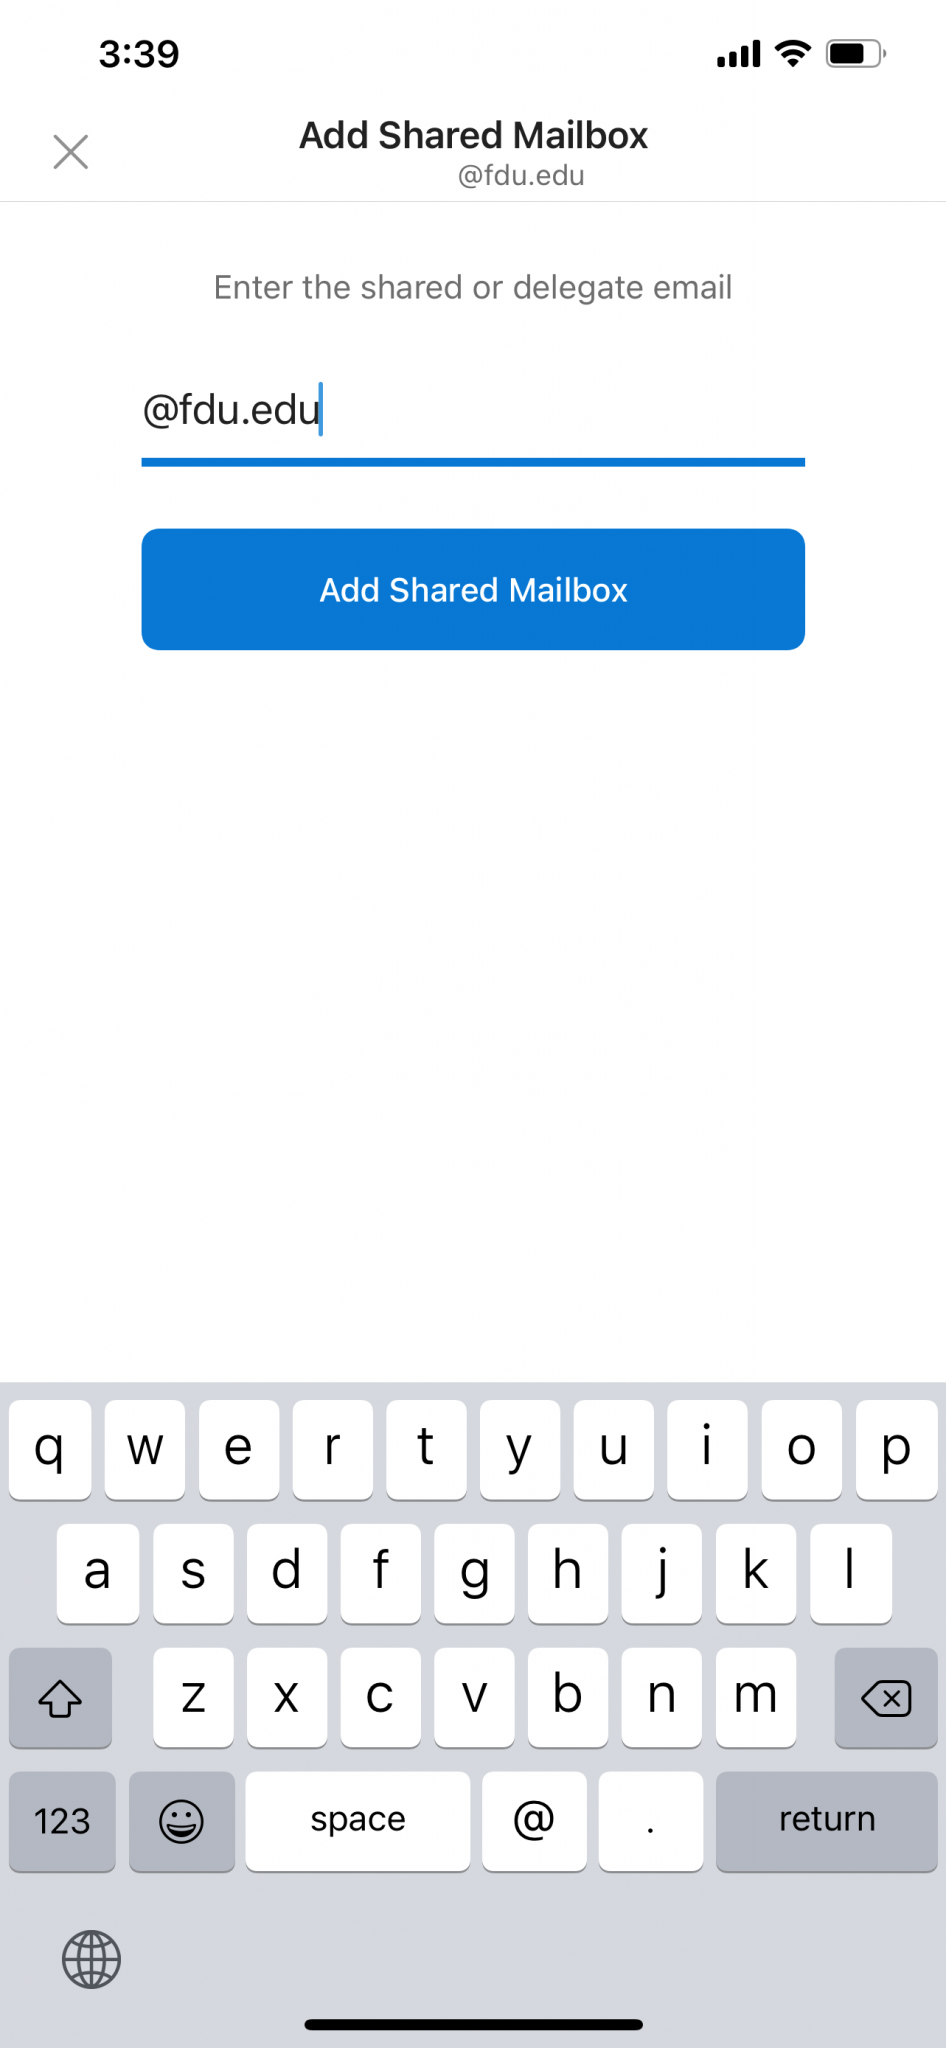
Tap the Add Account button in the left navigation pane, then tap Add Shared Mailbox
Enter the name of the shared mailbox and tap Add Shared Mailbox when finished
Note
If you have multiple accounts in Outlook Mobile, select the account that has permissions to access the shared mailbox.
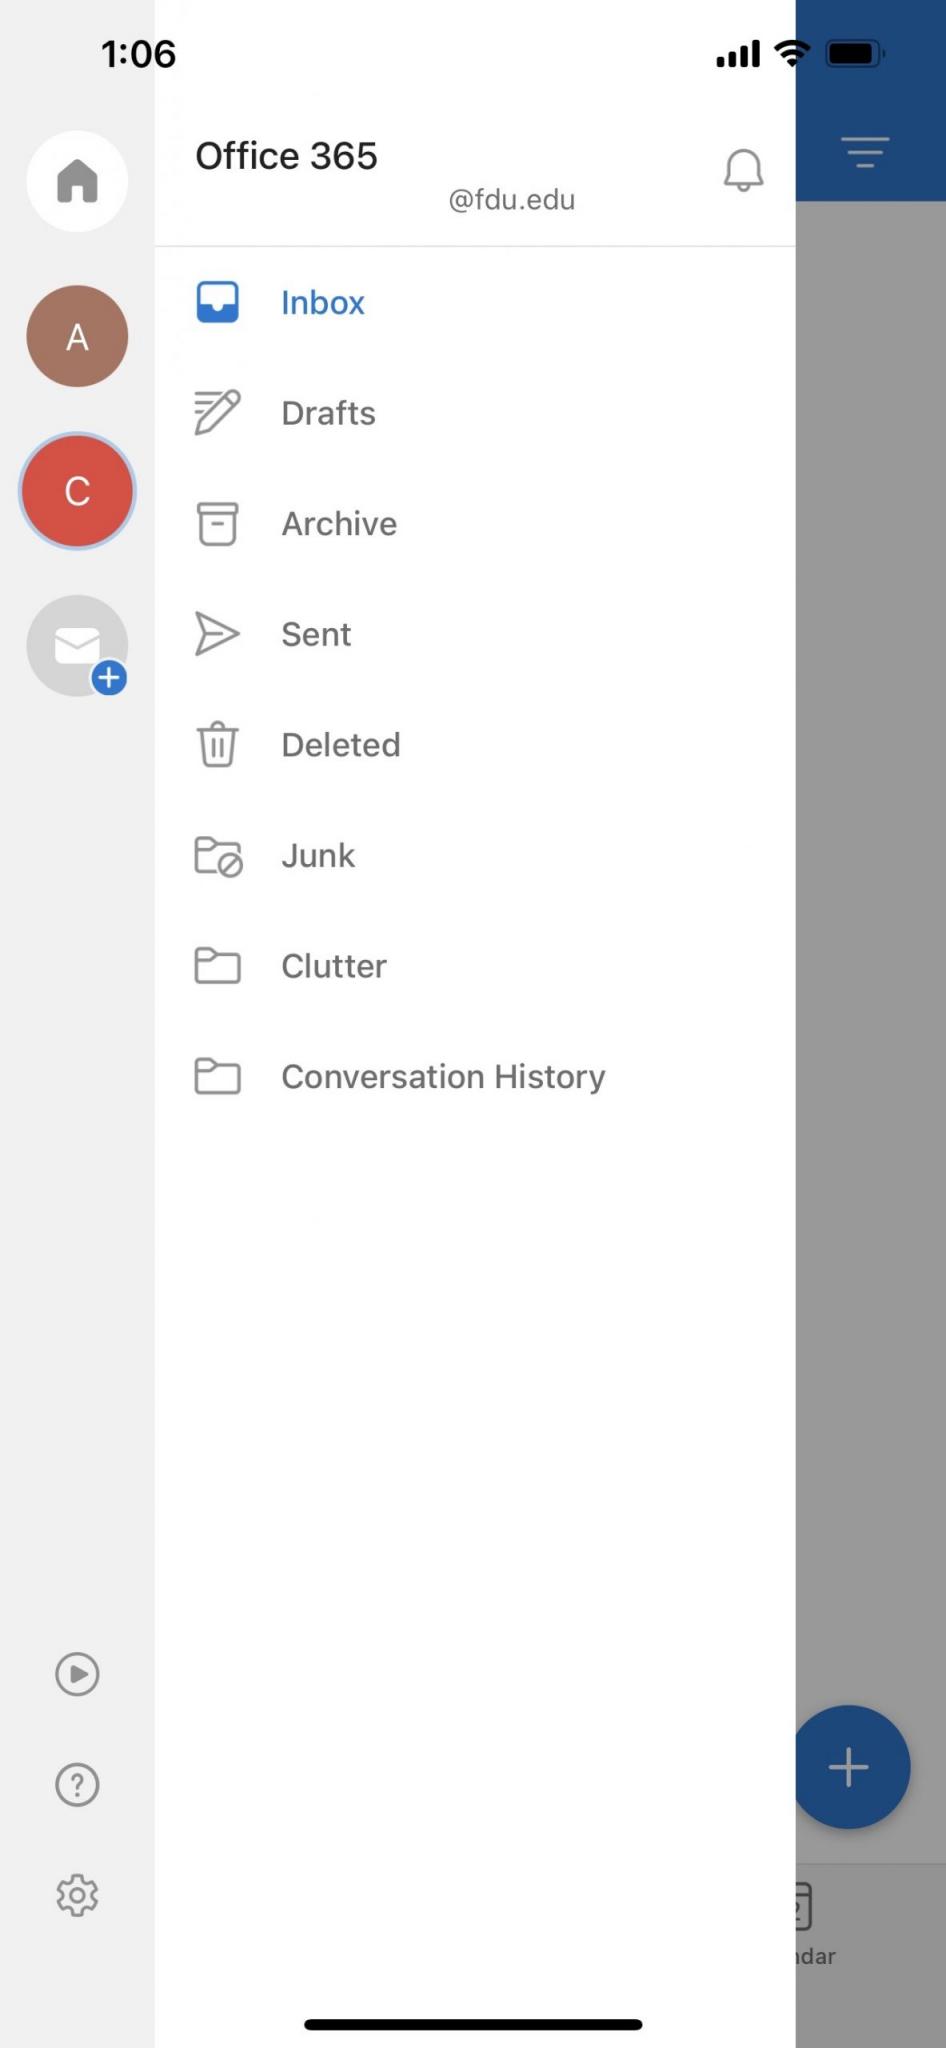
After the account setup process completes, the shared mailbox will display in your account list within the Outlook for Android or iOS app
Tip
To remove a shared mailbox, go to Settings > Accounts. Then tap on the shared mailbox and select Delete Account.
close
Send Email from a Shared Mailbox
Windows / macOS
Open Outlook
Choose New Email to start a new message
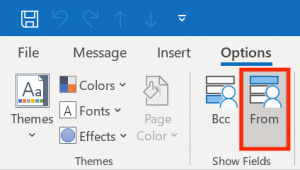
If you don’t see the From field at the top of your message, choose Options, and select the From tab
Click From in the message, and change to the shared email address
Note
If you don’t see your shared email address displayed, choose “Other email address…” Enter the full email address for the shared mailbox in the blank or search for the email address by clicking “From” tab. Click “OK” when finished.
Finish typing your message and then choose Send
Note
From now on when you want to send a message from your shared mailbox, the address will be available in your “From” drop down list.
Whenever you send a message from your shared mailbox, your recipients will only see the shared email address in the message.
close
office365.fdu.edu / Outlook Web App
Choose New Message
Choose From and change to the desired shared email address
Note
If you don’t see your shared email address displayed, choose “Other email address…” Enter the full email address for the shared mailbox, then select the appropriate shared email address from the auto populated list when finished.
This document provides information about the use of the FDU Shared Drive Management Portal. It describes navigation of the website in detail to facilitate proper use of this resource.
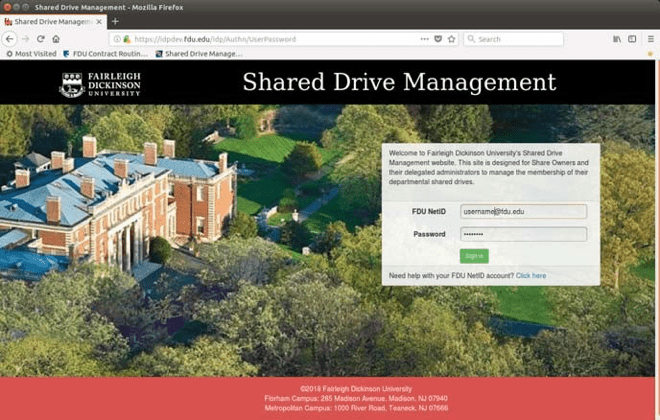
Logging In
To access the Shared Drive Management Portal, navigate to this URL to login: sharemanagement.fdu.edu
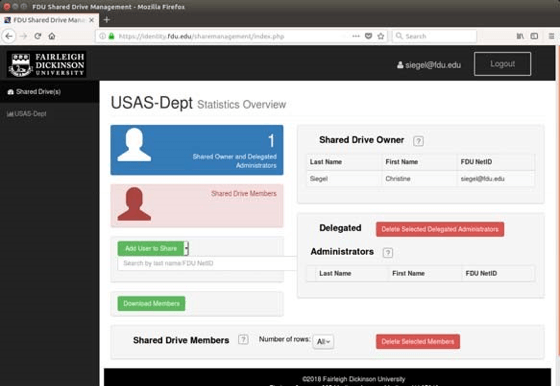
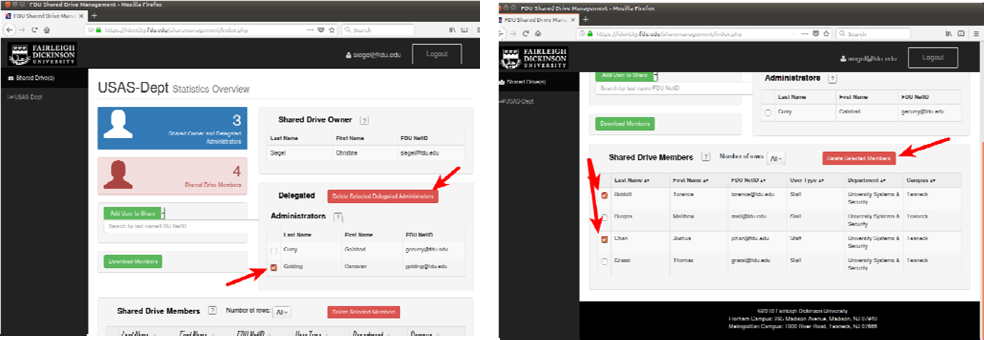
Once you have logged in with your NetID, you will see a list of the shares you own or have been given authorization to manage in the left‐hand column. If you are the owner of the share, your name will appear in the panel on the right side under “Shared Drive Owner”. If you are not the share owner, your name will be listed on the right side panel under “Delegated Administrator”. To switch between shares you manage, select the appropriate share name from the list in the left side panel.
Note
Underneath the Shared Drive Owner information, you will see an area for Delegated Administrator information. Delegated Administrators are people you wish to grant the ability to add and/or delete Shared Drive Members. It is important to understand that while a Share Owner can delegate membership responsibilities to others, the Share Owner is always the primary person responsible for the management of any Personal Information or Protected Health Information contained within that share. The Share Owner has the sole accountability for the data managed and viewed within their share.
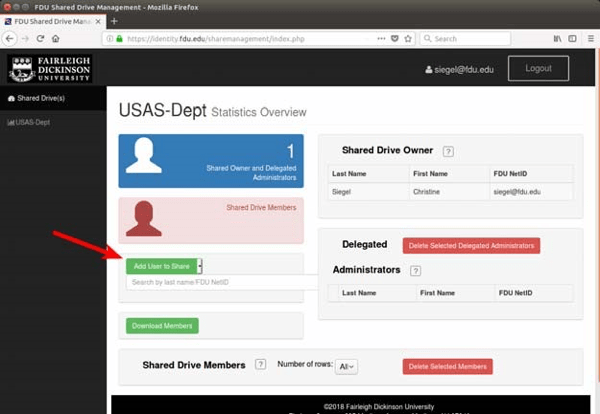
Adding Members and Delegated Administrators
To add a member to the share, click on the down‐arrow at the right of the “Add User to Share” button and choose the type of user you would like to add from the drop‐down menu. You can choose from Employee, Administrator, or Student. Then, enter either the last name or the FDU NetID of the person you would like to add into the text box. If more than one name appears, choose the person you want to add.
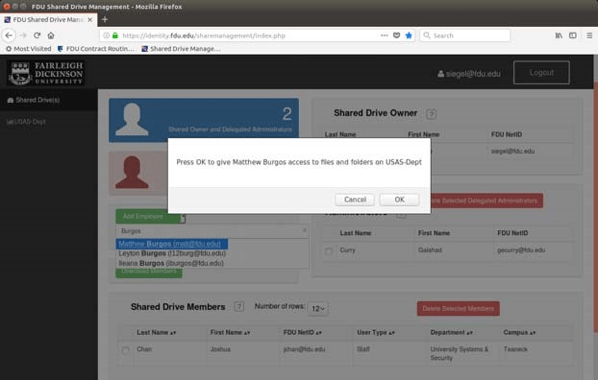
A pop‐up window will appear asking you to confirm or cancel the add.
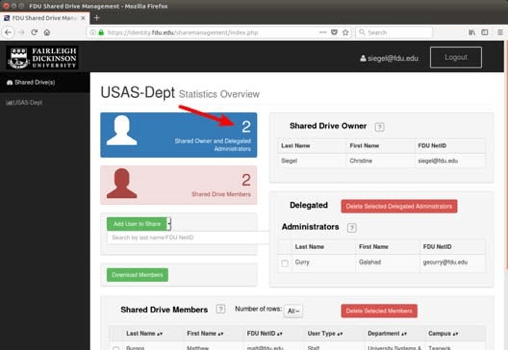
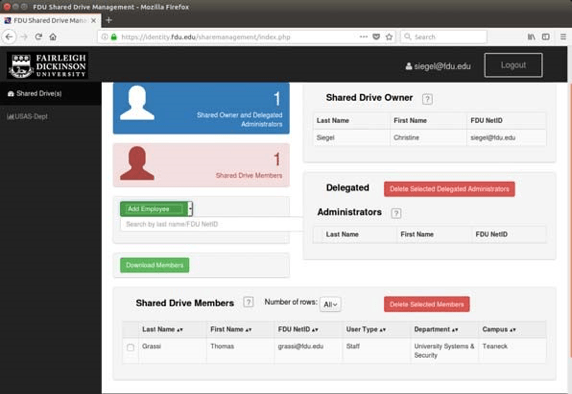
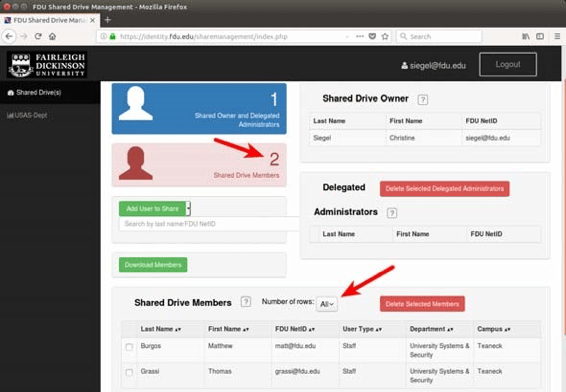
The individual’s information will be added to the list of members at the bottom of the page. When you add Delegated Administrators, they will appear in the list to the right, and the Owners/Administrators count will increase. It is important to note that Delegated Administrators can not add additional Delegated Administrators.
As you add more members or Delegated Administrators, the count of members for each will increase. When viewing members of a share, the “Number of rows:” menu can be used to select 12, 24, 36, or All rows to view.
Currently, all Shared Drive Members are granted Read/Write access to the contents of the Share. Future updates to this application will allow you to choose Read Only or Read/Write access rights to each new Member. Meanwhile, the Share Owner can contact University Systems and Networking at help@fdu.edu to request Read Only access for a new member.
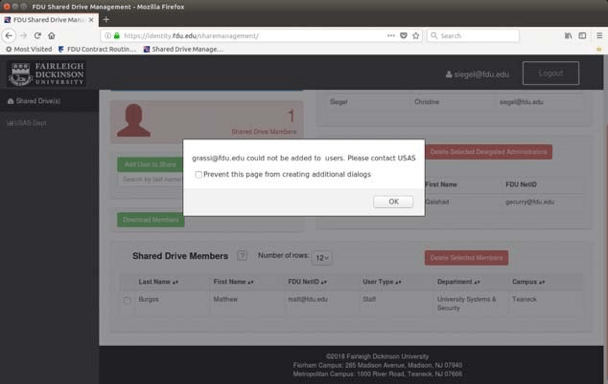
From time to time, a Share Owner or Delegated Administrator might try to add a new member to a drive to which an existing drive letter cannot be assigned. If that happens, the following message will appear, and the Share Owner or Administrator will need to contact the SAMI Service Desk to have that member added.
Deleting Members
You will notice a check‐box to the left of each Administrator and Member of the share. To delete an Administrator or a Member, click the check‐box next to it. You can click on multiple check‐boxes. When you have selected all the Members or Delegated Administrators you wish to delete, click on the “Delete Selected Delegated Administrators” or “Delete Selected Members” button to delete all the selected Administrators/Members. The lists and the counters will be updated to reflect the change. It is important to note that Delegated Administrators can not delete other Delegated Administrators.
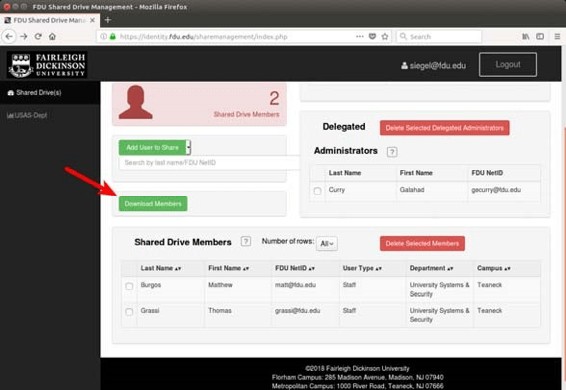
Downloading Members
To download a list of Shared Drive Members in .csv format, click on the “Download Members” button.
A new file will be placed in your Downloads folder called “ShareDriveMembers.csv”. When imported into a spreadsheet application, it will look similar to this (you will see the actual FDU NetID).
Requesting a New Shared Drive
To request a new Shared Drive, please follow the link below:
To access Forms, you will be directed to our SAMI Support Portal where you will be asked to log in using your NETID and authenticate using Duo. Once you click “Next,” you will be forwarded to samisupport.fdu.edu in a new window or tab.