As technology evolves and new features are offered, there may be times when unwanted or unexpected things happen. This page is dedicated to providing some tips, tricks, and recommendations to circumvent these undesired circumstances.
Normalize Sound Levels – Windows
Microsoft Windows 10 automatically adjusts audio levels between different applications. This can affect the level of sounds from various applications depending on what program is currently being used. This feature can be turned off using the instructions below.
Instructions
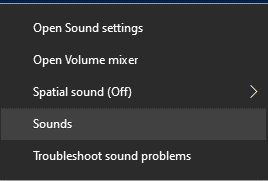
From the Sound Icon in your task bar, single right-click
Click “Sounds“
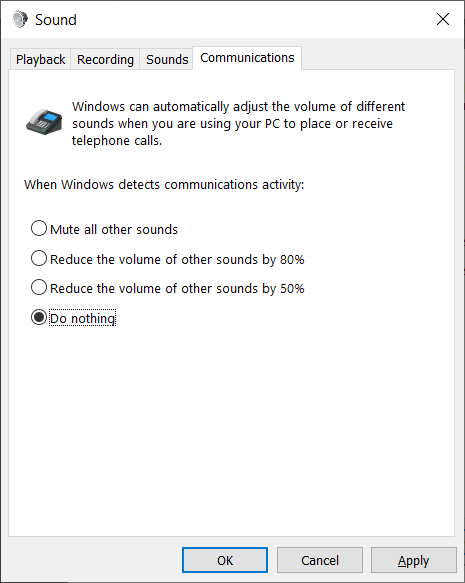
Click “Communications” tab.
Select the “Do nothing” radial button
Click “Apply”
Click “OK”
close
Adjust Microphone Settings – Windows
To ensure clear and audible audio in virtual meeting applications, such as Zoom, please follow the instructions below.
Instructions
Right-click the Audioicon in the system tray portion of the task bar
Click “Sounds”
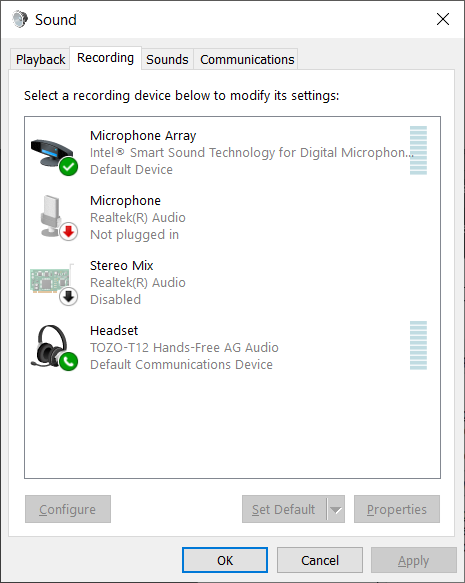
Click “Recording”
Note
Not all options may be visible.
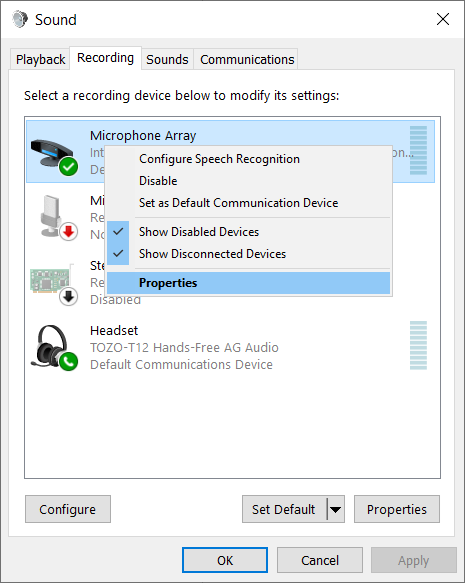
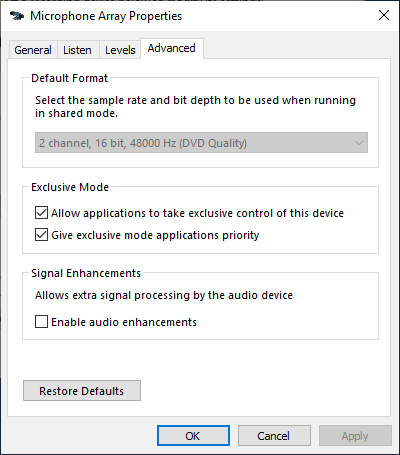
Right Click on “Microphone Array” and select “Properties”
Click the “Advanced” and un-check “Enable Audio Enhancements”
Click “Apply”
Click “OK”
close
Adjust Power Options – Lenovo Laptops
Default power profiles in Windows 10 are configured to balance performance and battery life. To change these settings, please follow the steps below.
Instructions
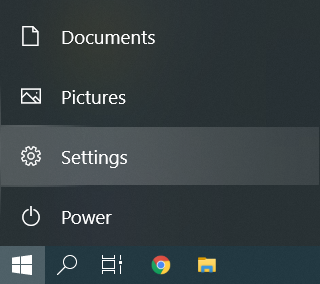
Click on Start, and then click “Settings“
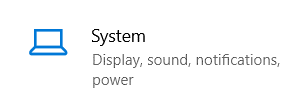
Click on “System“
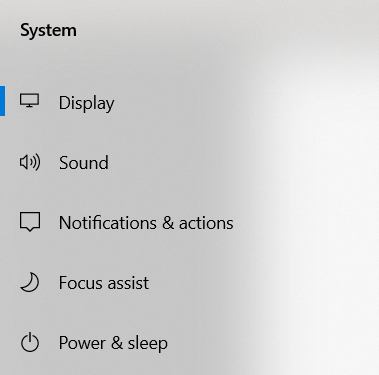
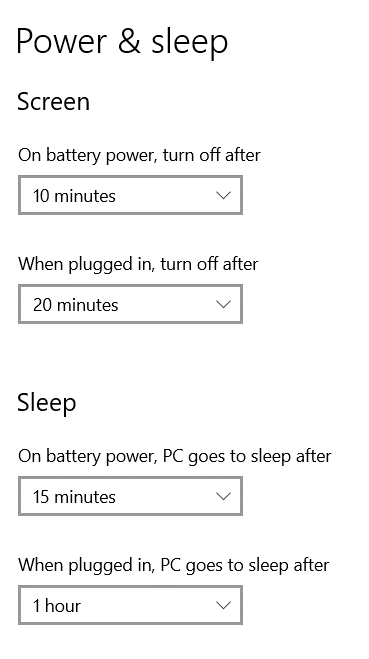
Select “Power & Sleep“
To modify power settings while the laptop is plugged in or on battery power, modify the below options
Note:
Selecting higher times may result in shorter battery life
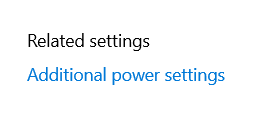
For additional power settings, such as the laptop lid and power button settings, click Additional power settings
Note
Depending on window size, this option may be located towards the bottom or on the right side of the screen.
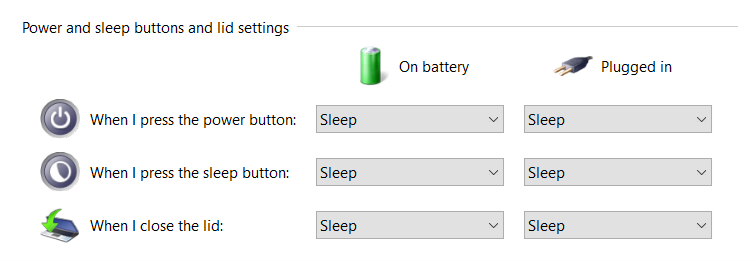
Select either “Choose what the power buttons do” or “Choose what closing the lid does“
The options below will allow modifying the effects of pressing the power button and closing the lid
Note
Setting DO NOTHING when closing the lid can lead to drastically less battery life as well as overheating when the laptop is placed inside a bag or briefcase.
close
Restarting A Computer
Rebooting a device is highly encouraged as it will help keep the system running at peak performance. The benefits of a weekly reboot include:
Mitigate vulnerabilities to cyber-attacks by applying critical updates
Prevent performance degradation
Prevent application memory faults
Effectively apply system policies
To restart a device, follow the instruction below.
Tip
Make sure any open application is saved and closed before a restart is performed. This includes applications like Outlook, Word, Excel and any other applications that may be opend.
Instructions for Windows
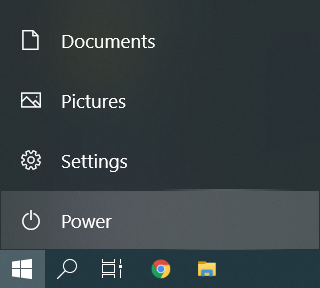
Click the Start bottom on the bottom left hand side of the task bar
Click the “Power” button
Click “Restart”
Note
Clicking “Shutdown” will not always properly apply updates or produce the desired effect. Clicking “restart” is the recomended option.
close
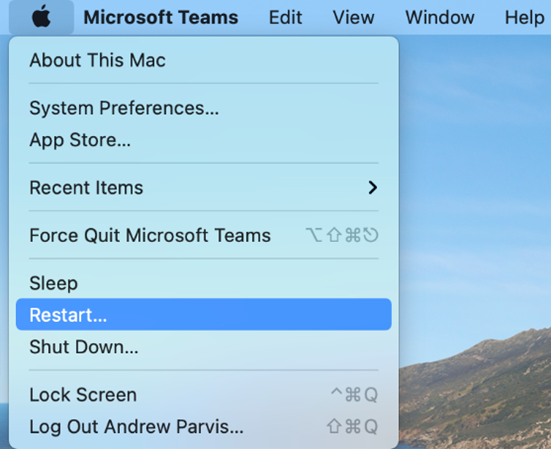
Instructions for macOS
Click the “Apple” at the top left-hand side of your screen
To help protect the University’s computers and networks from cyber threats, FDU OIRT is implementing Application Control with privilege management. This feature provides all users with privileged rights to install applications as needed while continuing to protect resources from unknown and malicious risks.
All software is typically installed from a setup file. Any setup file for an application should only be downloaded from the developer’s official site. For example, to install Google Chrome, the setup file should only be downloaded from Google’s official site.
Any setup file on a USB drive, CD drive, or other removable media should only be installed if provided directly by the developer or other credible source.
Windows
By default, the setup file will be located within theDownloads folder:
C:\users\yourusername\downloads\
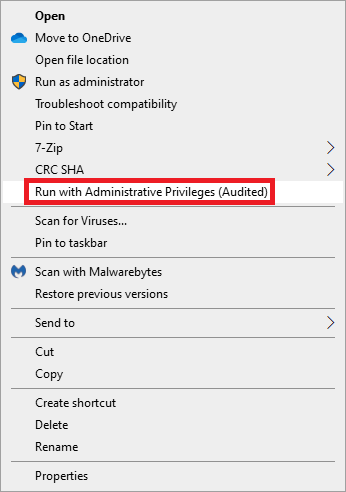
To install software on a university laptop with Windows, follow the process defined below:
Right-click the setup file for the application to be installed
Click “Run with Administrative Privileges (Audited)” on the setup file
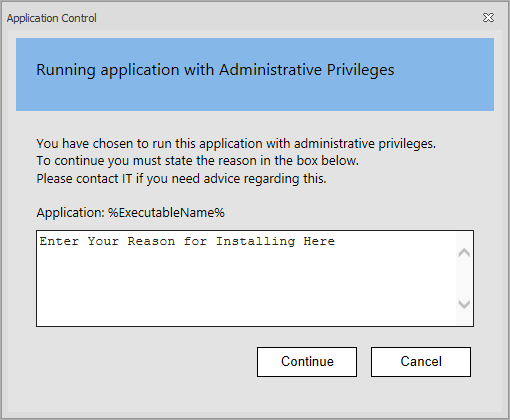
Provide a valid reason for installation and use of the application in the space provided and press “Continue”
The application will now be installed with administrative privileges.
Note
While off-campus, the option to “Run with Administrative Privileges (Audited)” may not be present. Please connect to FDU VPN, lock the machine by pressing “Window Key” + L and re-login. The feature should then be available. If this feature is not available while on-campus, please click the “Support” button above for further assistance.
close
macOS
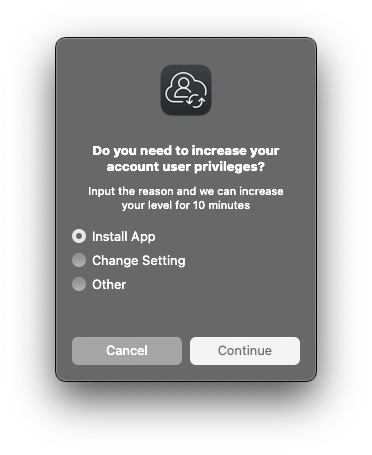
Click on “Jamf Connect” located on the top right menu bar app (where you log in to sync your password) and click “Request Admin Privileges“
Select the reason from the dialog box: Install App, Change Setting, or Other for the elevation, and click “Continue“
You will be notified when you are elevated and can begin installing a new application or making changes to your settings
A countdown will appear in your menu bar, showing how much time remains for your administrator access. Complete the installation before the countdown ends
You will return to your normal permissions when the countdown reaches zero
Special-use elevations will still be handled through the existing workflow.
This document outlines how the help desk should handle issues regarding supporting personal hardware.
All support tickets for personal hardware will need to be created and supported by the help desk. Limited support will be provided by completing basic troubleshooting and diagnostics.
This includes:
Laptops and Desktops
iMacs and MacBooks
Docking Stations, Monitors, and Peripherals
Mobile phones and Tablets
Note
The SAMI Service Desk should communicate directly to the users that limited support can be provided for personally owned devices, the service desk will assist by providing the below troubleshooting steps. Escalation of the request to Computing Services can be performed. If additional support is needed Computing Services will direct the user to contact their hardware manufacturer for additional support directly if needed.
The following basic troubleshooting steps can and should be performed when any of the above hardware is having issues:
The device should be power cycled and/or rebooted to ensure all device resources have been refreshed.
If the machine or device is frozen locate and hold the power button for a minimum of 60 seconds until the device has powered down and then have the user power on the device and attempt to use the equipment.
The help desk can check and confirm if any updates have recently been loaded on the workstation that may be pending a machine reboot to complete the installation.
The following should not be performed on any personal machines:
Upgrading or downgrading of any Microsoft or Apple operating system.
Removing and/or reinstalling any licensed software such as but not limited to Microsoft Office, Microsoft Visio, Microsoft Project, Adobe Creative Cloud, etc.
Other software such as antivirus, games, or manufacturer-issued diagnostic utilities.
Regarding the troubleshooting of issues related to personal docking stations, monitors, peripherals, mobile phones and tablets. The basic functions of unplugging the power cable and/or power cycling the equipment will be the acceptable troubleshooting necessary.
We do not want to perform any updates for devices operating systems such as mobile phones or tablets. The steps involved in completing these kinds of updates require a more extensive timeframe to be available to successfully be completed.
If you have any questions or require additional information, please contact the FDU Director of Computing Services Peter Mannarino via email p.mannarino@fdu.edu
Fairleigh Dickinson University’s Acceptable Use Policy for Computer Usage states, “All computers and mobile devices accessing any FDU resource must run an operating system and configuration that is supported by its vendor with regard to security patches and updates.”
This guide defines the lifecycle of our support for different operating systems.
Note
Apple does not publish official End of Life dates, but typically provides security updates for the current release of macOS, as well as the previous two releases.
Support Status Descriptions
Active (Default)
This platform is supported by FDU Computer Services & University Systems and Networking and new machines will be built with this platform unless otherwise requested.
Active
This platform is supported by FDU Computer Services & University Systems and Networking and will be installed on request.
Containment
This platform is currently supported by FDU Computer Services & University Systems and Networking but no new machines will be built with this platform. Platforms in containment will receive security updates and patches for the FDU supported software components. FDU Computer Services & University Systems and Networking Facilities will not provide new software or major revisions to existing software for these platforms.
Phasing Out
FDU Computer Services & University Systems and Networking is actively working to migrate assets away from this platform. Platforms go in to this status automatically 6 months before the FDU End of Support Date. Platforms may be placed in this status before that time.
EOL
This platform is no longer supported by FDU Computer Services & University Systems and Networking. Software support will be dropped from any asset running this platform. Other levels of support may be dropped as circumstances warrant. A valid reason is required to maintain an asset running this platform past the End of FDU Support date. All exceptions must be logged and periodically reviewed.
Supported Operating Systems
Desktop
OS Family
Operating System
Latest Release
FDU Support Status
Vendor Release Date
Start of FDU Support
End of FDU Support
Latest Vendor EOL Date
macOS
Tahoe
26
Active (Default)
Sep-2025
Nov-2025
Jun-2028
~2028
Sequoia
15
Active (Default)
Sep-2024
Nov-2024
Jun-2027
~2027
Sonoma
14
Phasing Out
Sep-2023
Nov-2023
Jun-2026
~2026
Windows
Windows 11
25H2
Active (Default)
Sep-2025
Nov-2025
Sep-2028
Oct-2028
24H2
Phasing Out
Oct-2024
Jun-2025
Sep-2027
Oct-2027
23H2
Phasing Out
Oct-2023
Jul-2024
Oct-2026
Nov-2026
Windows 10
22H2
EOL
Oct-2022
Dec-2022
Oct-2025
Oct-2025
Mobile
OS Family
Operating System
Latest Release
FDU Support Status
Vendor Release Date
Start of FDU Support
End of FDU Support
Latest Vendor EOL Date
Apple
iOS
26
Active (Default)
Sep-2025
Nov-2025
Oct-2028
~2028
18
Phasing Out
Sep-2024
Nov-2024
Oct-2027
~2027
17
Containment
Sep-2023
Nov-2023
Oct-2026
~2026
Android
Baklava
16
Active (Default)
Jun-2025
Dec-2025
~2028
~2028
Vanilla Ice Cream
15
Active
Sep-2024
Dec-2024
~2027
~2027
Upside Down Cake
14
Active
Oct-2023
Dec-2023
~2027
~2027
Tiramisu
13
Phasing Out
Aug-2022
Oct-2022
~2026
~2026
Snow Cone V2
12.1
Phasing Out
Mar-2022
Jul-2022
~2026
~2026
Latest Release
The latest release for desktop operating systems includes all minor and incremental updates.
End of Life
Any operating system not listed above is considered EOL (End of Life) and will not be supported. Examples of EOL Operating Systems include:
Windows: 95,98, XP, ME, VISTA, 7, 8, 8.1, & 10
macOS: Yosemite, El Capitan, Sierra, High Sierra, Mojave, Catalina, Big Sur, Monterey, & Ventura
The following PC laptop accessories for university-owned Apple MacBook Pro and Dell laptops may be purchased from our approved vendors. Please use the following PC laptop accessories list and vendor contact information below to help guide you when obtaining optional laptop accessories.
Dell Pro 14 Plus PC Laptop Accessories
A/C Adapters
Only one A/C adapter will be provided with the new Dell laptops. If a user needs a second A/C adaptor, they will need to order the part below.
Accessory
Description
Manufacturer Part Number
CDW Part Number
Cost
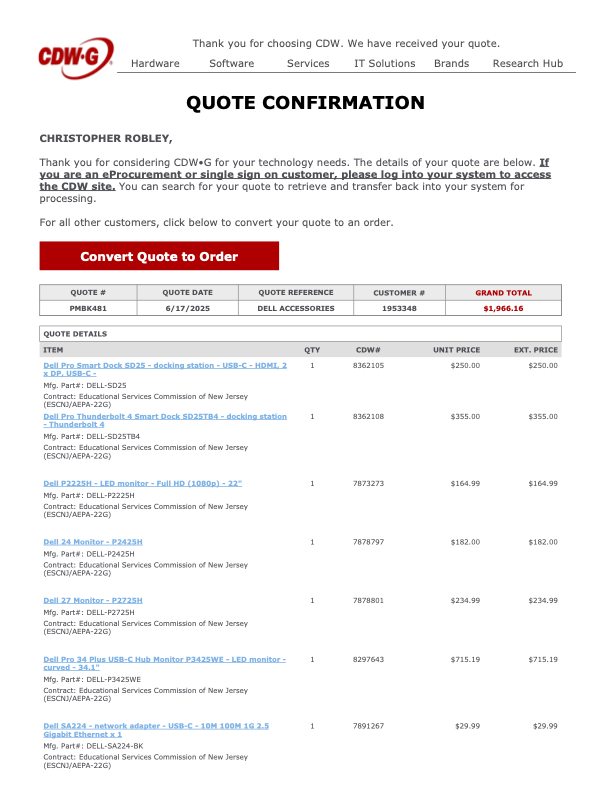
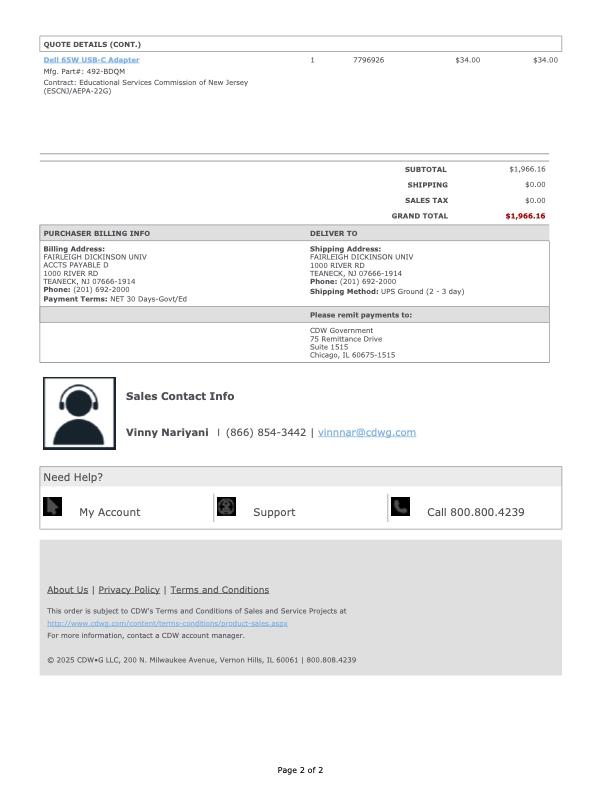
Dell 65W USB-C Adapter
Dell AC Power adaptor (USB-C)
492-BDQM
7796926
$34.00
*Prices are noted as of July 2025
close
Docking Stations
Accessory
Description
Manufacturer Part Number
CDW Part Number
Inputs
Cost
Multi-Monitor Docking Station
Dell Pro Smart Dock SD25 – docking station – USB-C – HDMI, 2 x DP, USB-C – 1GbE, 2.5GbE
DELL-SD25
8362105
1 HDMI 2 DisplayPort 1 USB-C
$250.00
Multi-Monitor Docking Station
Dell Pro Thunderbolt 4 Smart Dock SD25TB4 – docking station – Thunderbolt 4 – HDMI, 2 x DP, 2 x Thunderbolt 4, USB-C
DELL-SD25TB4
8362108
1 HDMI 2 DisplayPort 2 Thunderbolt 4 1 USB-C
$355.00
*Prices are noted as of July 2025
close
Keyboards
Keyboards will not need to be replaced for users that already have them. Users that are new to the PC laptop docking station setup may want to buy a wired USB keyboard. There are no IT requirements for purchasing keyboards; however, if users want to go with a basic model, they can order the below part number.
Accessory
Description
Manufacturer Part Number
CDW Part Number
Cost
Wired USB Keyboard
Dell KB216 – keyboard
KB216-BK-US
4306011
$22.93
*Prices are noted as of July 2025
close
Mice
There are no IT requirements for purchasing external wired USB mice; however, if a user wants to go with a basic model, they can order the below part number.
Accessory
Description
Manufacturer Part Number
CDW Part Number
Cost
Wired USB Mouse
Dell Optical Wired Mouse – MS116
MS116-BK
3938481
$22.93
*Prices are noted as of July 2025
close
Monitors
For users who already have a monitor and wish to use it with one of the new docking stations, your existing monitor must have either an HDMI or DisplayPort (DP) input connection. If your monitor only has a DisplayPort (DP) connection, you will need an HDMI to DisplayPort (DP) adapter. Users should check their current monitor connections for compatibility; if new monitors are required or desired, please choose from the list below.
Accessory
Description
Manufacturer Part Number
CDW Part Number
Inputs
Features
Cost
24″ External Monitor
Dell P2425H 24-inch Full HD LED Monitor
DELL-P2425H
7878797
1 HDMI 1 DisplayPort 1 VGA
Built-in Camera: No
Built-in USB Hub: Yes
$182.00
27″ External Monitor
Dell P2725H – LED monitor – Full HD (1080p) – 27″
DELL-P2725H
7878801
1 HDMI 1 DisplayPort 1 VGA
Built-in Camera: No
Built-in USB Hub: Yes
$234.99
34″ External Monitor
Dell Pro 34 Plus USB-C Hub Monitor P3425WE – LED monitor – curved – 34.1″
There are no IT requirements for purchasing an external wireless keyboard and mouse combo set; however, if a user would like to go with a basic model, they can order the below part number.
Accessory
Description
Manufacturer Part Number
CDW Part Number
Cost
Wireless Keyboard & Wireless Mouse
Logitech MK850 Performance Keyboard and Mouse (wireless)
920-008219
4540578
$67.07 from CDW-G
*Prices are noted as of July 2025
close
Lenovo Desktop PC Accessories
Keyboards
Keyboards will not need to be replaced for users that already have them. Users that are new to the PC laptop docking station setup may want to buy a wired USB keyboard. There are no IT requirements for purchasing keyboards; however, if users want to go with a basic model, they can order the below part number.
Accessory
Description
Part Number
Cost
Wired USB Keyboard
Lenovo Preferred Pro II USB Keyboard – US English
4X30M86879
$26.17 from CDW-G
close
Mice
There are no IT requirements for purchasing external wired USB mice; however, if a user wants to go with a basic model, they can order the below part number.
Accessory
Description
Part Number
Cost
USB Mouse
Lenovo Essential USB Mouse
4Y50R20863
$18.80 from CDW-G
close
Monitors
Accessory
Description
Part Number
Inputs
Features
Cost
24″ External Monitor
Lenovo ThinkVision T24v-30 – LED monitor – Full HD (1080p) – 23.8″
63D8MAR3US
HDMI, DisplayPort, VGA
Built-in Camera: Yes
Built-in USB Hub: Yes
$324.38 from CDW-G. This monitor is the preferred 24″ model to purchase if the the user requires a built-in web camera.
27″ External Monitor
Lenovo ThinkVision T27hv-30 – LED monitor – QHD – 27″
63D6UAR3US
HDMI, DisplayPort, USB-C
Built-in Camera: Yes
Built-in USB Hub: Yes
$628.58 from CDW-G. This monitor is the preferred 27″ model to purchase if the the user requires a built-in web camera.
close
Wireless Keyboard and Mouse Combo
There are no IT requirements for purchasing an external wireless keyboard and mouse combo set; however, if a user would like to go with a basic model, they can order the below part number.
Accessory
Description
Part Number
Cost
Wireless Keyboard
Logitech MK850 Performance Keyboard and Mouse (wireless)
920-008219
$67.07 from CDW-G
close
Apple MacBook Pro Laptop Accessories
A/C Power Adapters for 14-inch & 16-inch MacBook Pro
Accessory
Description
Part Number
Cost
A/C Power Adapter
Apple USB-C – Power Adapter – 96 Watt
MX0J2AM/A
$63.19 from CDW-G
A/C Power Adapter
Apple Power Cable – 24 pin USB-C to MagSafe 3 – 6.6 ft
MLYV3AM/A
$41.65 from CDW-G
close
Docking Stations
Accessory
Description
Part Number
Inputs
Cost
Single Monitor Docking Station or Hub
HyperDrive Ultimate USB-C Hub – This model supports a single external monitor setup. One HDMI port supports video resolutions up to 4K at 30 Hz. Featuring three USB 3.1 Gen 1 Type-A ports, 1 USB Type-C Power Delivery port, one ethernet port, and one 3.5mm audio jack, plus SD and microSD card readers.
HD30FGRAY
1 HDMI, 1 Mini DisplayPort, 1 VGA
$89.99 from B&H.com. This model is the preferred single monitor hub to purchase
Dual-Monitor Docking Station or Hub
HYPER HyperDrive Viper 10-in-2 USB Type-C Hub (Space Gray) – This model is essential for connecting up to two external monitors. This hub provides two HDMI and three USB 3.1 Gen 1 Type-A ports, as well as ports for Gigabit Ethernet, 3.5mm audio, and USB Type-C with 60W of power delivery. UHS-1 SD and microSD card readers are also present.
HD392-GRAY
2 HDMI
$129.99 from CDW-G. $129.99 from B&H.com. This model is the preferred dual-monitor hub to purchase
Single Monitor Docking Station or Hub
HYPER Hyperdrive 4-In-1 USB Type-C Hub – This model supports a single external monitor setup. Supports a single 4K display at 60 Hz via the one HDMI port. Featuring two USB 3.2 Gen 1 Type-A ports and one USB Type-C port to deliver up to 100W of pass-through power to your laptop or tablet.
HD41
1 HDMI
$59.99 from B&H.com. This model does not contain an ethernet port
Single Monitor Docking Station or Hub
HyperDrive 5-Port USB Type-C Hub – This model supports a single external monitor setup. Supports a single 4K monitor at 60 Hz via the one HDMI port. Features two USB Type-A ports, one ethernet port, and one USB Type-C port to deliver up to 86W of power to your laptop or tablet.
HDMB2
1 HDMI
$84.59 from CDW-G
Single Monitor Travel Hub or Docking Station
Lenovo Powered USB-C Travel Hub – This model supports a single external monitor setup. Features one ethernet port, one USB Type-A port, one USB 3.1 Gen 1 Type-A port, and one USB-C power port.
4X90S92381
1 HDMI, 1 VGA
$82.28 from CDW-G
close
Monitors
Accessory
Description
Part Number
Inputs
Features
Cost
24″ External Monitor
ASUS ProArt PA247CV – LED monitor – Full HD (1080p) – 23.8″
PA247CV
HDMI, DisplayPort, USB-C
Built-in Camera: No Built-in USB Hub: Yes
$201.69 from CDW-G
You may also refer to the Lenovo Desktop PC Accessories – Monitors section above to select an external monitor for the Apple MacBook Pro.
close
Accessories
USB Flash Drives
There are no IT requirements for purchasing USB flash drives. USB 3.0 is recommended. Users are reminded about adhering to the Written Information Security Program (WISP). No WISP-protected data may be placed on external devices without specific authorization, as indicated in the policy.
close
External Hard Drives
There are no IT requirements for purchasing external hard drives. USB 3.0 is recommended. Users are reminded about the Written Information Security Program (WISP). No WISP-protected data may be placed on external devices without specific authorization as indicated in the policy.
close
Printers / Scanners
For a current list of approved printers and scanners, please reach out to the Purchasing Department. Please remember that most printers don’t have USB printer cables included upon purchase.
Note
While most modern printers support wireless connectivity, wireless printing capabilities may not be enabled on any printer without the explicit authorization of the Director of Networking.
close
Purchasing
FDU Purchasing
To purchase any of the laptop accessories listed above, please submit a PO to the Purchasing Department. Users need to get a quote from either vendor through the contact information below. Please reference the item numbers from the attached quotes. Unless stated otherwise, the products listed are currently available. Prices may vary. Other University approved vendor reseller information and common products that departments may be interested in purchasing can be found by visiting:
Departments should consolidate orders as much as possible. There is no additional discount for quantity. Departments should designate the ‘ship to’ to their respective department. Vendors’ contact information is listed below.
close
Sample Purchase Order (PO) Quotes
Tip
View the Sample PO quotes to help guide you when obtaining your own quote prior to submitting to the Purchasing Department.
To access Forms, you will be directed to our SAMI Support Portal where you will be asked to log in using your NETID and authenticate using Duo. Once you click “Next,” you will be forwarded to samisupport.fdu.edu in a new window or tab.