password

Authorization, Authentication and Access Management Policy

Resources for:
icon Close

Revision Date: New Policy
Effective Date: 11/1/2023

Section A – University Systems and Applications

I. Purpose

The purpose of this policy is to establish information security standards for individuals receiving credentials to Fairleigh Dickinson University (“FDU” or “University”) resources and how those resources are accessed.

II. Scope and Applicability

This policy applies to all university system resources. All Users are responsible for adhering to this policy.

III. Definitions

Capitalized terms shall have the meaning ascribed to them herein and shall have the same meaning when used in the singular or plural form or any appropriate tense.

  1. Account: An established relationship between a User and a computer, network, or Information System which is assigned a credential such as a username and password.
  2. System Administrative Account: An Account with elevated privileges intended to be used only when performing management tasks, such as installing updates and application software, managing user accounts, and modifying operating system and application settings.
  3. Entitled Account: A user who has met the minimum requirement to be granted authorization to access electronic Fairleigh Dickinson University Resources.
  4. Authorized User: A User who has been granted authorization to access electronic Fairleigh Dickinson University Resources and is current and active in their privileges.
  5. Contractor or Vendor: A person or a company that undertakes a contract to provide materials or labor to perform a service.
  6. Employee: University staff faculty and adjunct, including nonexempt, exempt, and overseas staff and collegiate faculty.
  7. Multi-Factor Authentication (MFA): Authentication using two or more different factors to achieve authentication. Factors include something you know (e.g., PIN, password); something you have (e.g., cryptographic identification device, token); or something you are (e.g., biometric).
  8. Privileged Account: An Account that is authorized to perform security-relevant functions that an ordinary Account is not authorized to perform.
  9. Single Sign-On (SSO): An authentication process that allows an Authorized User to access multiple applications with one set of login credentials. SSO is a common procedure in enterprises, where a client accesses multiple resources connected to a local area network (LAN).
  10. User: A member of the University community, including but not limited to Staff and Faculty, and other individuals performing services on behalf of University, including Contractors, volunteers and other individuals who may have a need to access, use or control University Data.

IV. Authentication

  1. Any service, application or Information System, whether on-premise or in the cloud, that contains WISP protected information, especially PI or PHI; OR is accessed by a large group of employees (20 or more), must use Single Sign-on authentication.
    • If the service or application is being provisioned by a business unit, the unit must engage University Systems to work with the provider to enable SSO.
    • If SSO is not supported by the service or application, it will not be approved for use by the university.
    • See Section V for exceptions.
  2. Multi-factor authentication (MFA) must be used to access University resources.
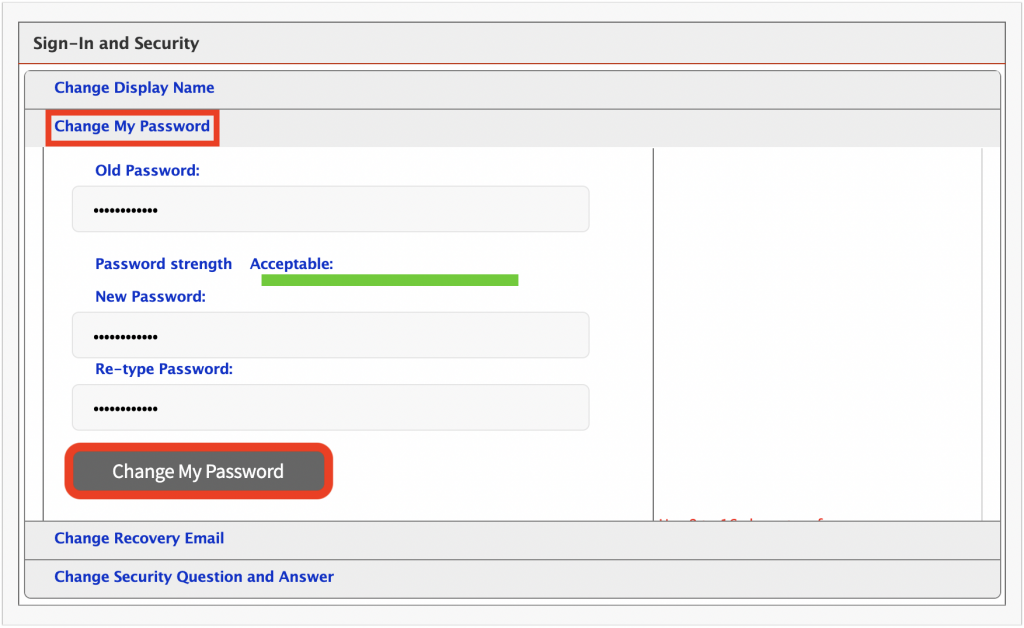
  3. Passwords must be constructed in accordance with the minimum requirements as listed below:
    • Authorized User Account passwords must meet a minimum length of 8 characters.
    • Administrative and Privileged Account passwords must meet a minimum of 10 characters.
    • Passwords must contain a mix of alphanumeric characters. Passwords must not consist of all digits, all special characters, or all alphabetic characters.
    • Automated controls must ensure that passwords are changed at 90-day intervals for both general users and administrative-level accounts.
    • NetIDs associated with a password must be disabled for a period of time after 10 consecutive failed login attempts. A minimum of 30 minutes is required for the reset period.
    • Passwords must not be the same as the NetID.
    • Passwords must not be displayed on screens.
    • Users must not share passwords.
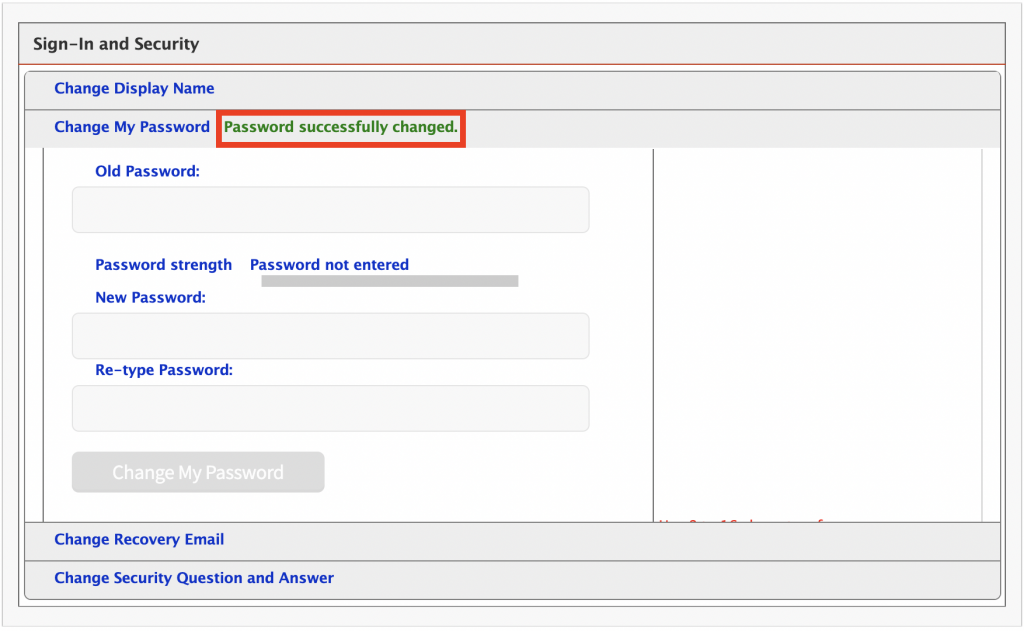
    • Initial passwords and password resets must be issued pre-expired forcing the user to change the password upon first use.
    • Password reuse must be limited by not allowing the last 10 passwords to be reused. In addition, the password must be at least 2 days old in order to be voluntarily changed.
    • Access will be disabled 90 days past the date that a password expired if not changed.
    • Access will be disabled after 30 days of creation if NetID is not claimed.
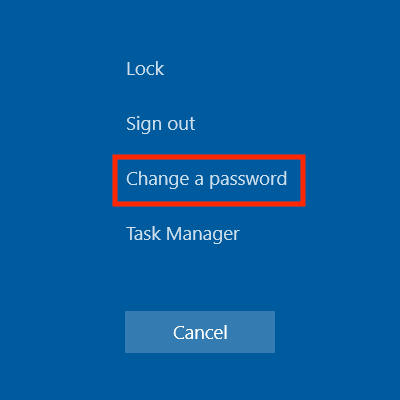
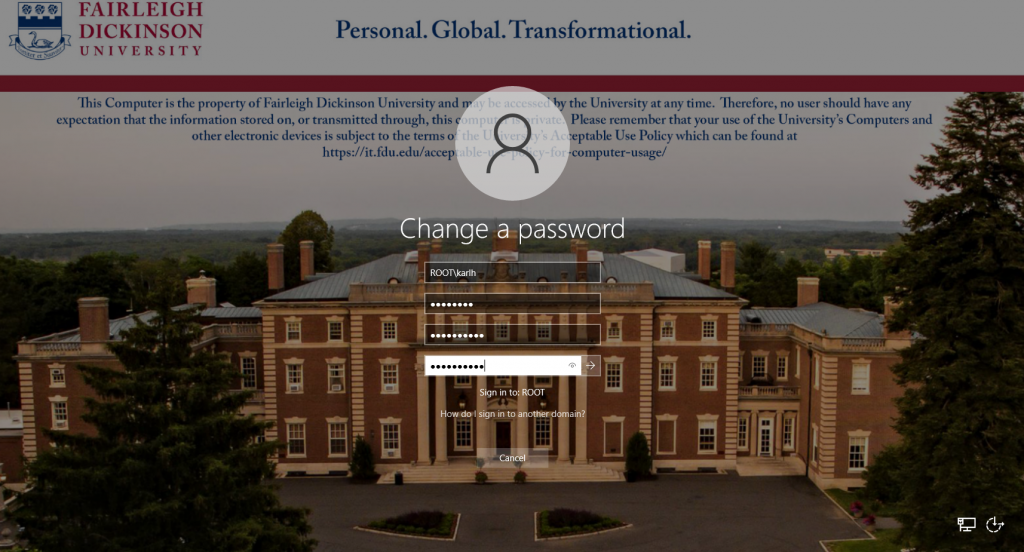
    • Expired passwords must be changed before any other system activity is allowed.
  4. Server Password Protocol
    • If, at any time, a member of the Community is granted permission to install a server, and access to that server is restricted via Login, and if that process is granted SSO exception through section VII., that system can not hold passwords in clear text. That system must use an approved irreversible cryptographic transform to protect its users’ passwords.

VI. Enforcement

  • This policy will be enforced by technical controls wherever feasible; otherwise, this policy will be enforced by OIRT under the direction of the CIO. All members of FDU’s faculty and staff have a responsibility to promptly report any known instances of noncompliance to AVP of University Systems and Networking or the Director of Systems.
  • Failure to comply with this policy can result in disciplinary action. Any such discipline shall be in accordance with processes and procedures of Human Resources and subject to any protections afforded under the University’s agreement with “Office & Professional Employees International Union”, the “Faculty Handbook”, and similar documents. Third parties who violate this Policy may have their relationship with the University terminated and their access to campus restricted.

VII. Exceptions

  • Exceptions to this policy should be submitted to the AVP, USAN for review. Approval of the Chief Information Officer (CIO) or Data Security Incident Response Team (DSIRT) may be required.

Last Modified:

Ellucian COLLEAGUE Password Information

Resources for:
icon Close

Accessing Ellucian COLLEAGUE

COLLEAGUE uses single sign-on protocol for users to login. The login or user ID consists of the first part of the FDU NetID up until the @ sign in the NetID.

For instance, if your NetID webmail address is john.q.public@fdu.edu your COLLEAGUE login ID would be “john.q.public

The password would be the exact same one that you use with your FDU NetID.

Last Modified:

How To Change Your FDU NetID Password and Display Name

Resources for:
icon Close

There are a few different ways to change your University NetID password. However, Computing Services strongly urges everyone to change their FDU NetID password using a provided Apple or Windows university computer.

The process for changing your FDU NetID password on a macOS device differs from a Windows device, so please follow the instructions provided for macOS computers below.

If you do not have a university-owned Apple or Windows laptop/desktop and cannot use a University lab computer, please follow the procedures described in “Using identity.fdu.edu Web Portal to Change your FDU NetID Password” below.

Please click on one of the links below for instructions on how to change your FDU NetID password:

Changing a FDU NetID Password on a FDU-owned Windows Computer

Note

To change your password, you must be logged into the machine and either on campus or connected to the Cisco AnyConnect VPN.

  1. On FDU-issued laptops, desktops, and lab machines, the FDU NetID password can be changed by pressing the “Ctrl+Alt+Del” button combination on the keyboard from any screen and selecting “Change a Password
  1. Now enter the following:
    • Your old or current password
    • Type in a new password
    • Retype the new password to confirm
    • Press the “Right Arrow” button to continue

Tip

The newly created FDU NetID password must meet the complexity requirements.

Use 8 to 16 characters for your new password. Passwords must include all of the following 4 character types: Upper case letters, lower case letters, numbers, and special characters. Allowed special characters are: ! # $ @ _ + , ? [ ] . – ) ( ` ~ % ^ & * = { } | : ? , / and a dot. Please refrain from using portions of your name or email address within the password. Please refrain from using a password that you have already used.

  1. Once this has been done, you must lock and unlock the machine once to complete updating your password:
    • Press the “Ctrl+Alt+Del” keys combination again
    • Click “Lock
    • Then log back in with your new password

Your FDU NetID password was changed successfully!

Note

Your new password will need to be updated in all web browsers with saved passwords and email clients across all devices. Examples include faculty and staff e-mail accounts synched to their iPad, iPhone, and or Android device. FDU-Secure Wi-Fi network access is also attached to your FDU NetID username and password and will need to be updated on devices that use it.

close
Changing and Syncronizing your FDU NetID Password on a FDU-owned Apple Computer

To change and/or synchronize your FDU NetID password with your FDU Issued Apple computer, please follow the directions provided in the following article:

close
Using “identity.fdu.edu” Web Portal to Change your FDU NetID Password

Adjunct professors, students, and anyone with a personal laptop/desktop/tablet device will use the FDU Identity Web Portal to change their NetID password.

  1. Open a web browser (e.g., Google Chrome, Mozilla Firefox, Internet Explorer, Safari) and navigate to the following URL:

FDU Identity Web Portal

  1. Click on “Account Maintenance” on the top right hand of the web page
  1. You will be redirected to the FDU Single-Sign-On login page. Enter your FDU NetID email and password in the corresponding text boxes and click “Sign In.” Complete the FDU 2fa Duo push notification to proceed
  1. Under Sign-In and Security, select “Change My Password
    • Enter your current password
    • Enter a new password
    • Retype your new password to confirm
    • When finished, select “Change My Password

Tip

The newly created FDU NetID password must meet the complexity requirements.

Use 8 to 16 characters for your new password. Passwords must include all of the following 4 character types: Upper case letters, lower case letters, numbers, and special characters. Allowed special characters are: ! # $ @ _ + , ? [ ] . – ) ( ` ~ % ^ & * = { } | : ? , / and a dot. Please refrain from using portions of your name or email address within the password. Please refrain from using password that you have already used.

  1. Password successfully changed” will be displayed if your FDU NetID password was successfully changed

Note

Your new password will need to be updated in all web browsers with saved passwords and email clients across all devices. Examples include faculty and staff e-mail accounts synched to their iPad, iPhone, and or Android device. FDU-Secure Wi-Fi network access is also attached to your FDU NetID username and password and will need to be updated on devices that use it.

close
Using “identity.fdu.edu” Web Portal to Change your FDU NetID Display Name

You also have the option to change the name that is displayed on your NetID account.

  1. Open a web browser (e.g., Google Chrome, Mozilla Firefox, Internet Explorer, Safari) and navigate to the following URL:

FDU Identity Web Portal

  1. Click on “Account Maintenance” on the top right hand of the web page
  1. You will be redirected to the FDU Single-Sign-On login page. Enter your FDU NetID email and password in the corresponding text boxes and click “Sign In.” Complete the FDU 2fa Duo push notification to proceed
  1. Under Sign-In and Security, select “Change Display Name
    • Enter your New Display Name
    • Click on “Change Display Name
  1. Display Name successfully changed” will be displayed if your Display Name was successfully changed
close
Last Modified:

SAMI Support Public Request Form

Resources for:
icon Close

The SAMI Support portal requires a valid NetID and password, along with DUO multi-factor authentication, for access. Upon entry, users can create new tickets, review open or closed requests, and explore the IT Knowledgebase for solutions to common issues. Access the support portal using the button below:

SAMI Support Portal

If you need to open a request and cannot access SAMI Support for any of the reasons below, fill out the SAMI Support Public Request form to contact the SAMI Service Desk. A member of the service desk will assist you via phone call or email.

  • I do not have a valid University issued NetID
  • I am not able to authenticate through DUO
  • I have not set up my DUO account
  • I am a vendor without a University issued NetID
  • I am an admitted student
  • I am a newly hired employee or adjunct
  • My FDU account is locked
  • I need my Net ID password reset and have already attempted to do that through identity.fdu.edu

Tip

The form below is not compatible with Dark Mode. For an optimal experience, disable Dark Mode either in your device’s system settings or directly from the FDU IT website menu bar.

SAMI Support Public Request

Last Modified:

Sending an Encrypted File Using Email

Resources for:
icon Close

According to FDU’s Written Information Security Program (WISP), in no case should they be sending or storing WISP protected information without the explicit authorization of the Chief Information Security Officer (CISO). If approved, these instructions will provide you with guidance on the methodology.

Instructions for Windows

If you do not have a university issued laptop or desktop, you must download and install 7-Zip on your computer in order to proceed with the instructions. Please follow the following steps in order to download and install 7-Zip on to your personal device:

  1. Download 7-Zip:
  1. Launch the 7-Zip installer “7z1900-x64.exe” or “7z1900.exe

NOTE: The Installer file name may change as newer versions are released.

  1. Click “Yes” if asked to run an unknown app from User Access Control
  2. Click “Install” on the setup screen
  1. 7-Zip will now install, when completed, click “Close

Preparing an Encrypted 7-Zip File

  1. Single “Right” click on the file
  2. Highlight “7-Zip
  3. Navigate and “Left” click on “Compress and Email…
  1. Change Archive Format to “ZIP
  1. Enter and Retype a password in the “Encryption Section” and check the box to “Encrypt file names
  2. Change the Encryption Method to “AES-256

NOTE: The password must be a complex password that contains the following:

  • At least one capital letter
  • At least 2 numbers 0-9
  • At least 1 special character (%, ^, &, ! , @ , !, ….)
  • Be at least 8 characters long
  1. Click “OK

NOTE: A progress bar will open to encrypt and zip the file. Depending on the size of the file, this may take a few minutes.

  1. An email message to compose your new email with the compressed and encrypted file will appear
  1. Address and compose your email as desired

CAUTION: Never send an email that contains both the password and file together. These must be sent separately.

  1. Compose and send a separate email, or place a phone call, to the receiving parties which contains the password for the compressed file for them to read

NOTE: Without the password, the receiving party will not be able to open and view the file.

Opening an Encrypted 7zip File

  1. Open the email that contains the encrypted file
  2. Click the arrow “V“’ and select “Save As
  1. From the saved location open the encrypted file
  2. Enter the password provided to you from the sender

Once the password is entered correctly, the enclosed document will then load, and you can make any changes and save inside the protected file. If needed, the file can be returned to the sender with needed information.

NOTE: The Archive Window must not be closed if making any changes that need to be saved.

IMPORTANT: After the document is no longer needed, the encrypted file should be SECURELY DELETED from your hard drive. At no time should this be saved for later use.

Instructions for macOS

  1. Download Keka:
  1. Open Keka Preferences and check the box next to Use AES-256 when encrypting ZIP files (less compatible)
  1. Set a password for the file
  1. Drag your file onto Keka to compress and encrypt. The encrypted file will be placed next to the original file
  2. If you need to extract an encrypted file, simply drag it onto the Keka window and enter the file password in the prompt. The file will be extracted in the same location as the original
Last Modified: