University Systems and Networking (USAN) oversees the University's Data Centers and Wired / Wireless Network. We support both the Metropolitan and Florham campuses, as well as our international campuses in Vancouver and Wroxton. USAN enables the access, flow and storage of information within the University while defending our network against all threats and maintaining the integrity of our data.
FDU-Secure uses current encryption standards to connect to the FDU network via secure wireless traffic. As a result, FDU-Secure is the preferred method of accessing the on-campus Wireless network if you are Faculty, Student, or Staff member. To connect to the FDU-Secure Wireless Network, you will need an FDU NETID (username@fdu.edu or username@student.fdu.edu).
Below are the necessary steps to connect to the FDU-Secure Wireless Network, specified for various device types:
Windows
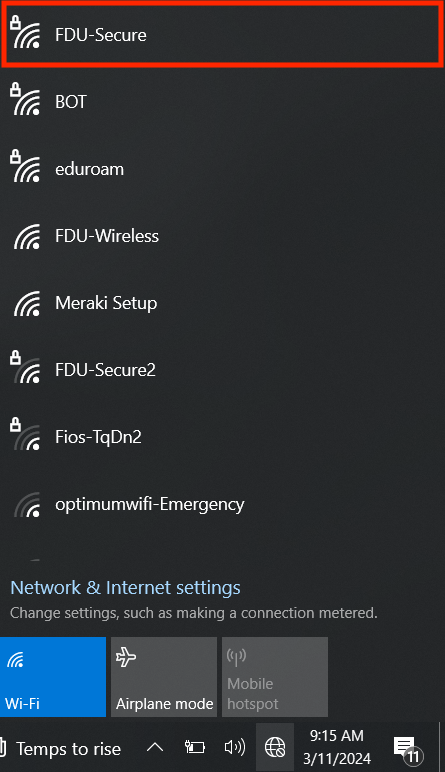
Select the “Internet Symbol” located at the right-hand side of the “task bar”
Select “FDU-Secure” from the pop-up menu
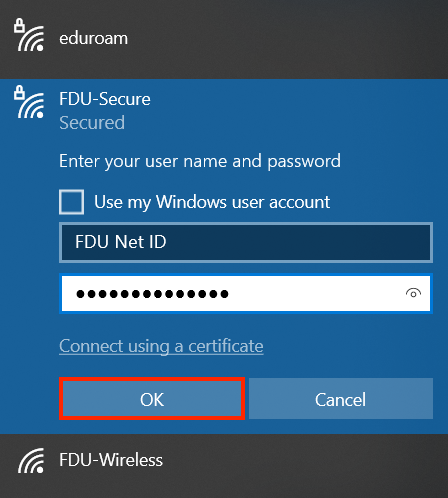
Enter “FDU Net ID and Password” and press “OK”
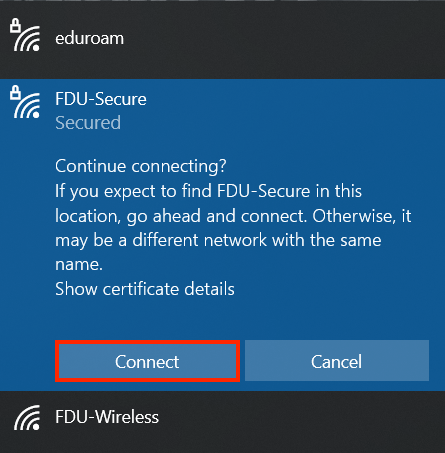
When prompted with “Continue connecting?” press “Connect”
close
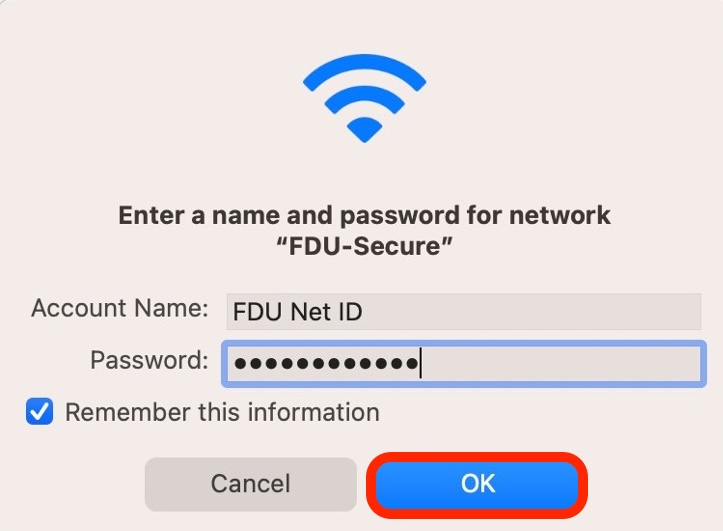
macOS
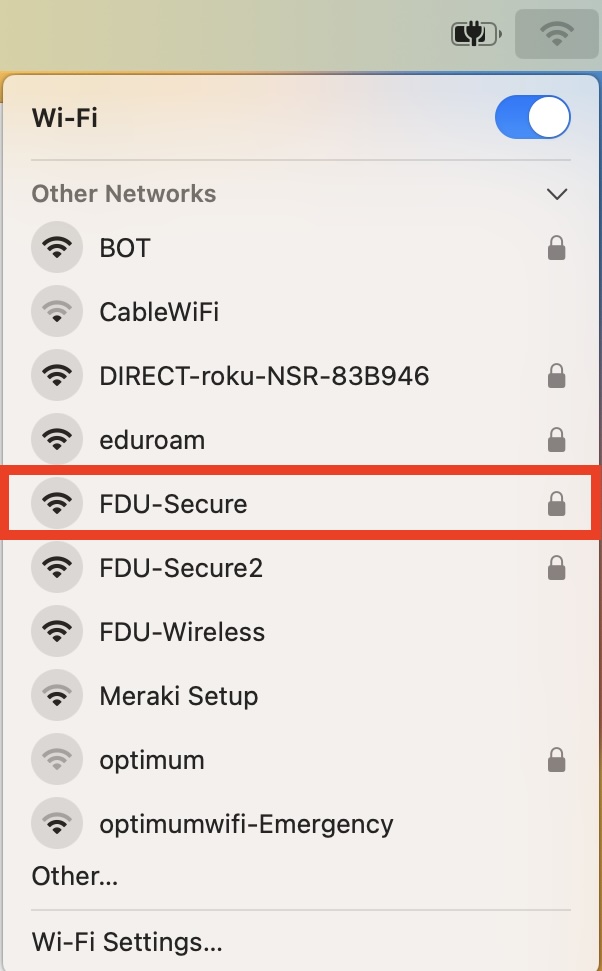
Select the “Wi-Fi Symbol” located at the right-hand side of the “menu bar”
Select “FDU-Secure” from the drop-down menu
Enter “FDU Net ID and Password” and press “OK”
When prompted with “Verify Certificate” press “Continue”
close
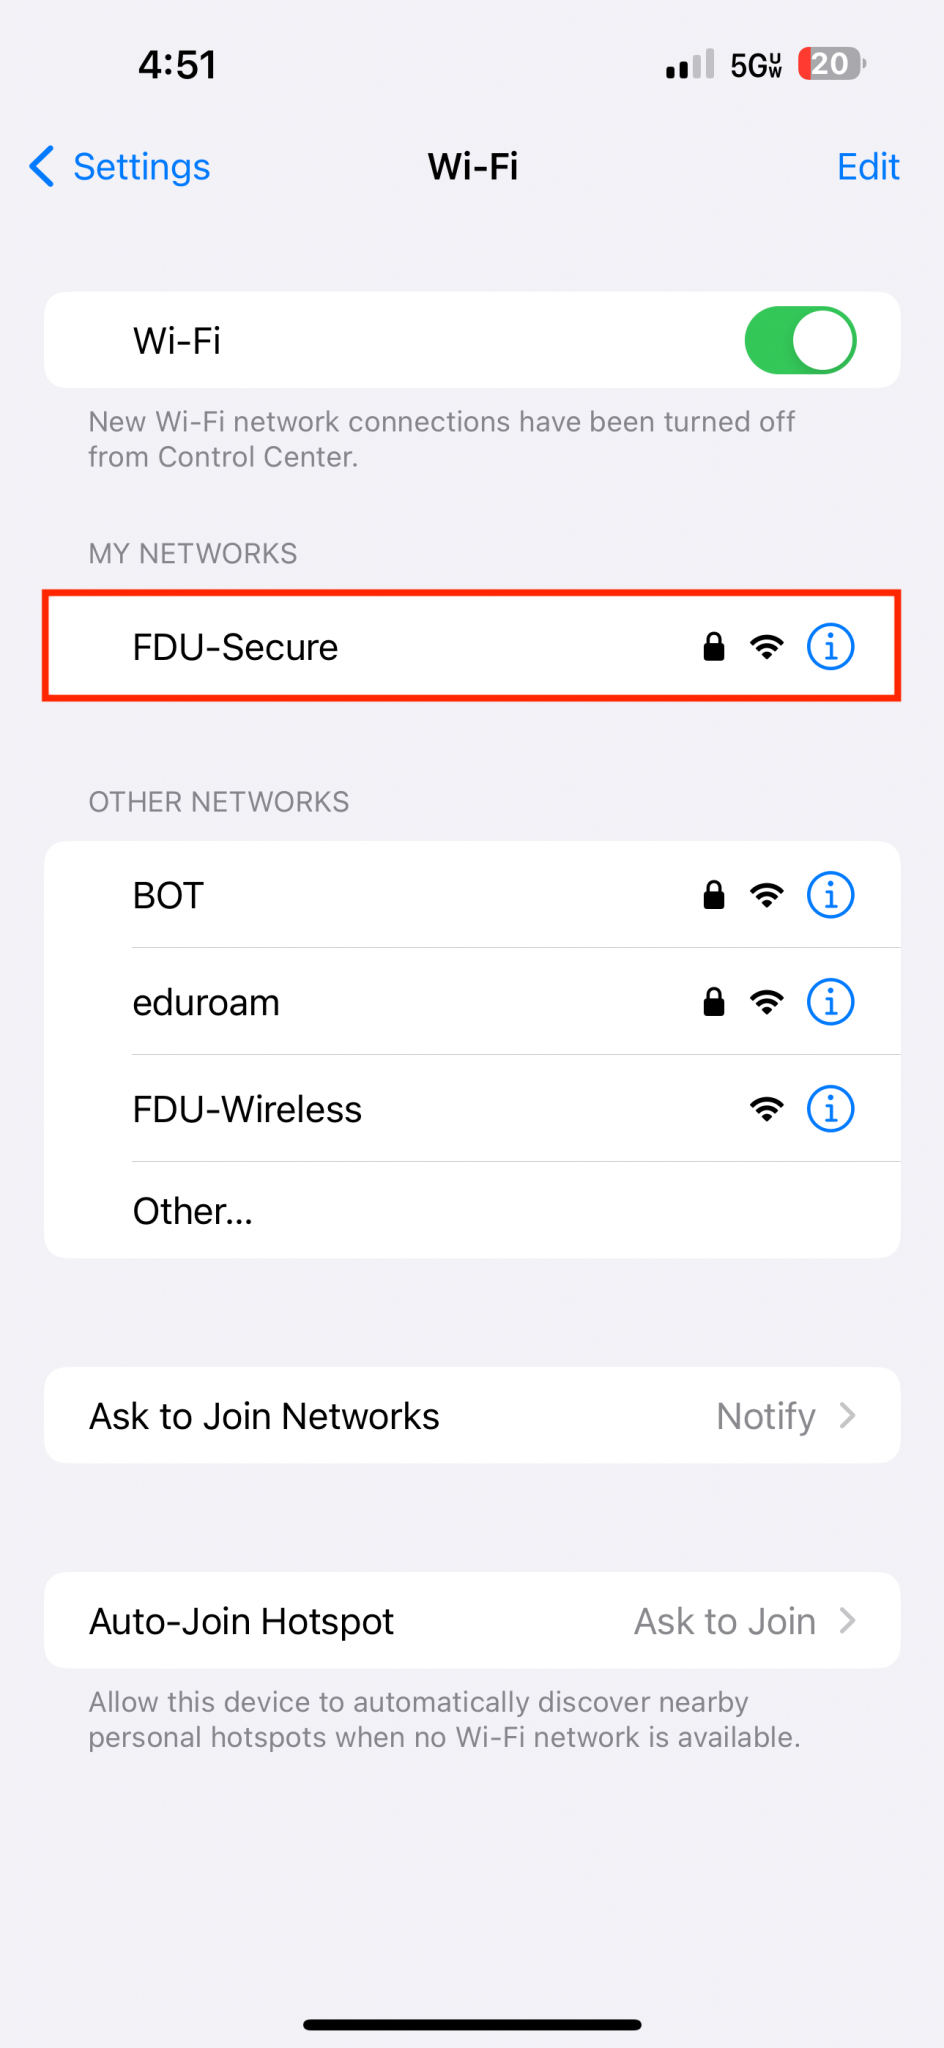
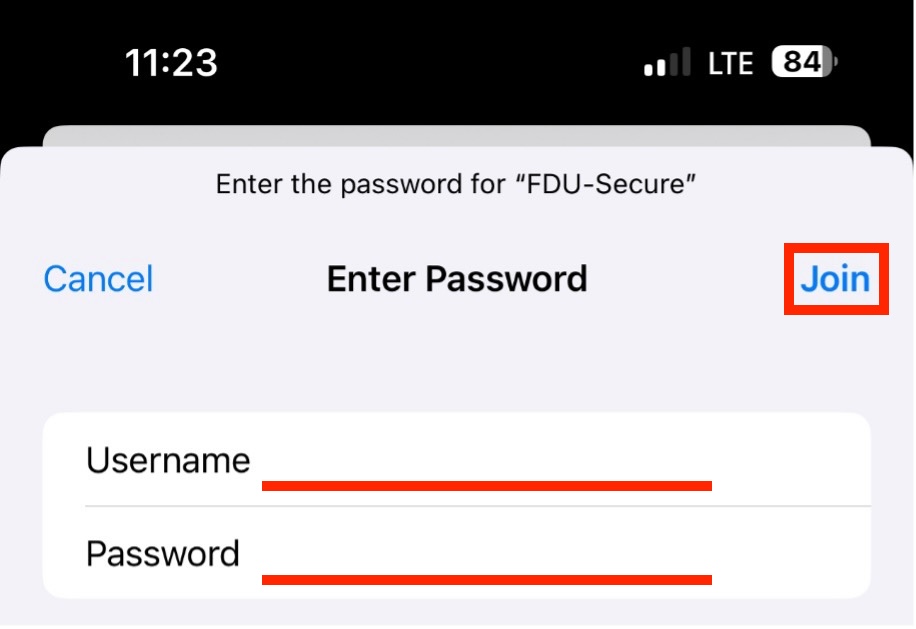
iOS
Select the “Wi-Fi” tab located in the “Settings” app
Select “FDU-Secure” from the list of available networks
Enter “FDU Net ID and Password” and press “Join”
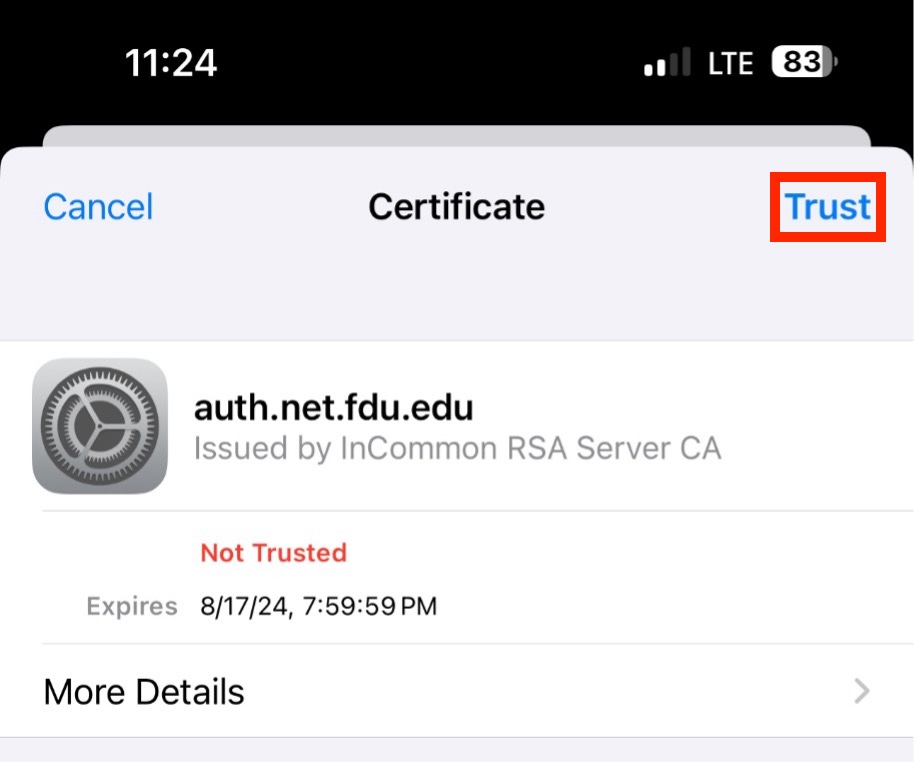
When prompted with “Certificate” press “Trust”
close
Android
Select the “Connections” tab located in the “Settings” app
Press “Wi-Fi”
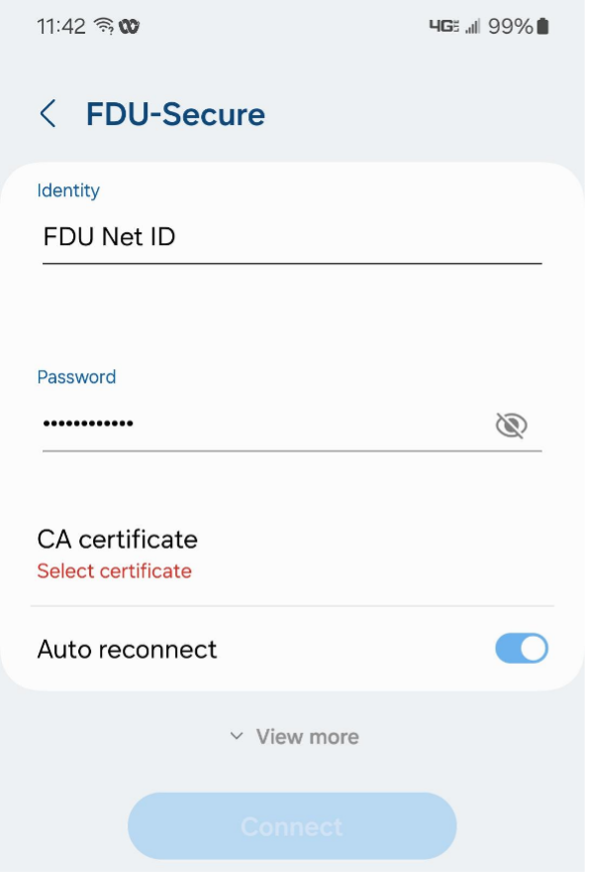
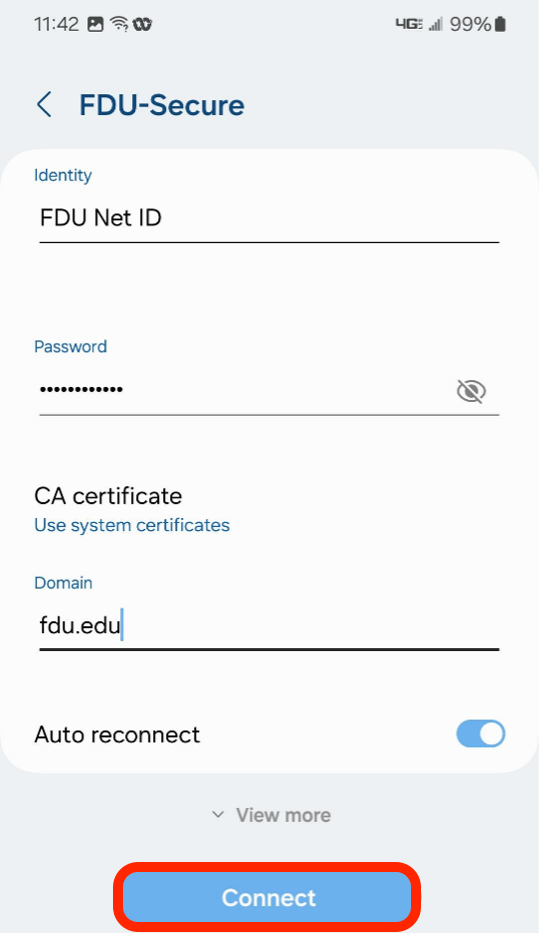
Select “FDU-Secure” from the list of available networks
Enter “FDU Net ID and Password”
Press “CA certificate” then press “Use System Certificates” drop the drop down menu
Input “fdu.edu” in the domain field and press “Connect”
The following guides provide an overview of connecting to Fairleigh Dickinson University’s wireless network. Whether you’re a guest, staff, or student, using FDU-owned or personal devices, these articles provide essential steps for secure and efficient connectivity across various equipment, including non-PC and mobile devices.
Connect to FDU-Secure Wi-Fi
Follow these steps to connect to the FDU-Secure wireless network, which adheres to the latest encryption standards.
Fairleigh Dickinson University vigorously enforces United States copyright law. When utilizing the FDU Local Area Network or FDU provided Internet Access, you are required to adhere to all existing US copyright laws.
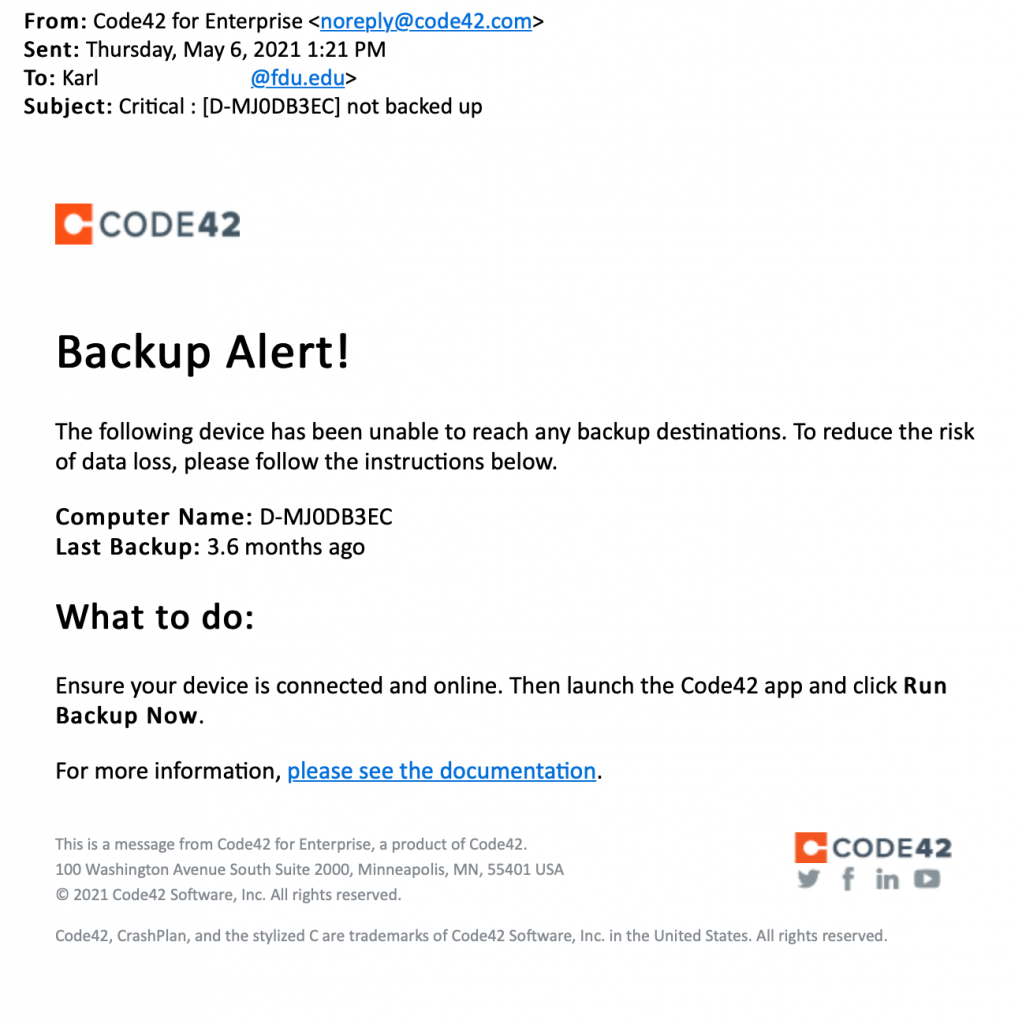
CrashPlan Backup will send users an email alert notifying them of any incomplete backups of their devices.
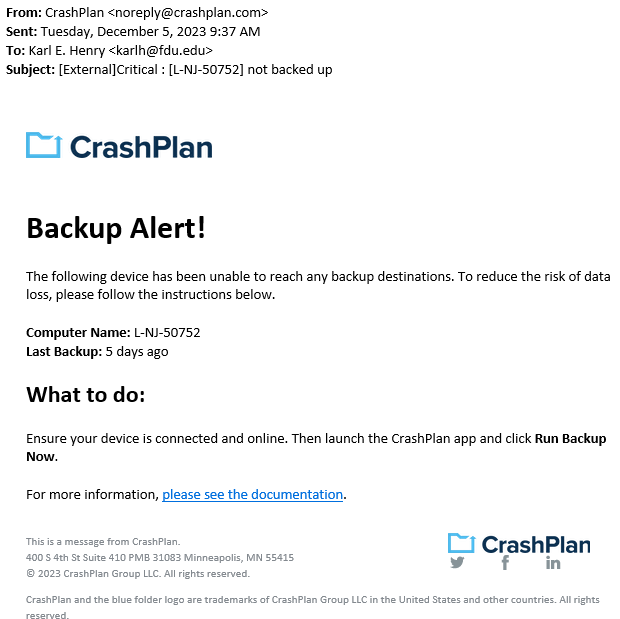
The CrashPlan Backup email alert will be sent from “CrashPlan <noreply@crashplan.com>”
The Subject line of the email will be labeled with: “[External]Critical: [Name of Device] not backed up“
Backup Alert
You will receive an alert when your computer hasn’t backed up to CrashPlan for 5 calendar days. The email will look like the example below:
CrashPlan Backup Alert Email Notification
What to do if you get a backup alert
After receiving a CrashPlan Backup alert email, you should locate the device the email specifies in need of backup. The CrashPlan Backup device name will be listed in the Subject: line and Computer Name: line of the CrashPlan backup alert email.
For Windows Devices
To locate the name of a CrashPlan Backup device:
Click the CrashPlan Backup icon in the Windows System Tray, also referred to as the notification area.
CrashPlan Backup icon
Click “Run Backup now“
Tip
The Windows System Tray or notification area is usually located on the bottom right of the Windows taskbar, next to the displayed digital clock.
Ensure the CrashPlan backup application displays the same name as the CrashPlan Backup alert email you received.
close
For macOS Devices
After locating the correct specified device stated in the CrashPlan backup alert email, force a backup of the device by performing the following:
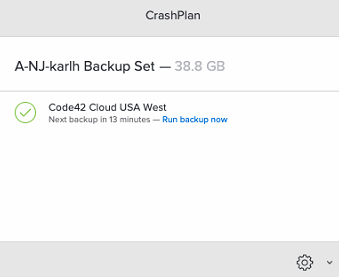
Click the “CrashPlan Backup” System Tray or macOS menu bar Icon
CrashPlan Backup Icon
Click “Run Backup now“
Note
The backup may take some time to complete. This depends on the length of time since CrashPlan Backup’s last completed backup and the amount of new data that needs to be backed up.
CrashPlan is a backup agent that will back up all data on a university device under the primary owner’s profile. The backup sets can be used for restoring data to a machine, whether it has been reformatted, replaced, or compromised. This document will outline the steps needed to install, activate, and restore data to a new or existing device.
CrashPlan is required on all University provided desktops and laptops to backup all University Business data to prevent data loss.
Who Can use CrashPlan?
CrashPlan is presently licensed for full-time faculty and full-time staff only. The University mandates CrashPlan for proper data security practices. If a user has personal data that they wish to exclude from being backed up, a folder labeled “Personal Documents” can be found and utilized in your “Documents” folder. This folder and its contents will be ignored by CrashPlan when your system is being backed up.
Personal Documents folder locations:
Windows PC
C:\users\username\Documents\Personal Documents\
macOS
/users/username/documents/Personal Documents/
Tip
If the Personal Documents folder does not exist in your Documents folder, you can manually create it and the folder will be automatically ignored by CrashPlan.
Is My Data Secure?
CrashPlan uses AES-256 encryption is used when storing your backups and can only be accessed by theCrashPlan account owner and administrators.
What is Backed Up?
All data found in a user profile will be backed up by CrashPlan.
Location of User Profile:
Windows PC
C:\users\UserName\
macOS
/users/username/
Warning
Any data not stored in the user profile will NOT be backed up by CrashPlan. It is highly encouraged to store university business data within your user profile.
To install CrashPlanon your Windows PC, please follow the instructions below.
Note
CrashPlan is being automatically deployed to all systems owned by Faileigh Dickinson University.
Before Installing CrashPlan, you must be logged in as the owner of the machine using your NetID Credentials.
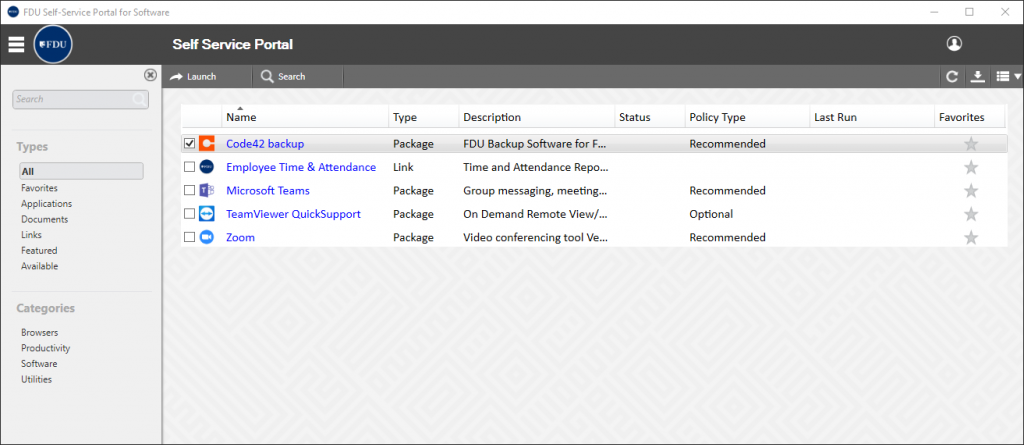
Open FDU Self Service Portal for Software on your University PC
Click on CrashPlan Backupand then click “Install” on the right-hand side
Note
It could take several minutes for the client to make the first connection and start the first backup.
The entire process will take approximately 5-7 minutes, depending on your internet speed. Once CrashPlanis installed, your account is automatically provisioned in the CrashPlansystem, and your backup will begin shortly.
To install CrashPlan on your macOS device, please follow the instructions below.
Note
CrashPlan is being automatically deployed to all systems owned by Faileigh Dickinson University.
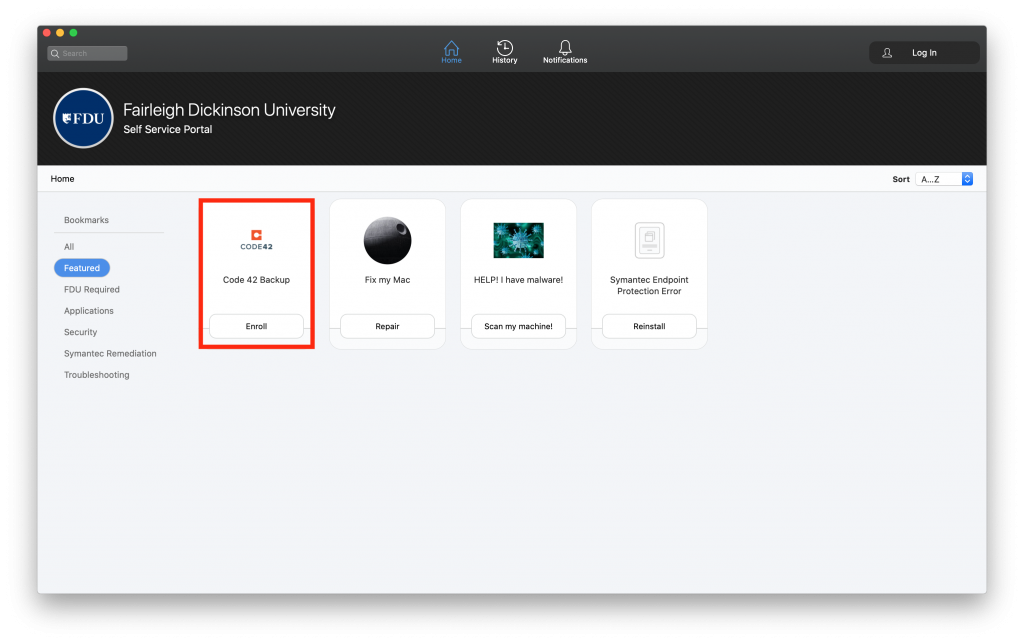
Locate the FDU Self Service Portal in your applications folder or locating the icon on your dock
Locate CrashPlan Backup and click “Enroll”
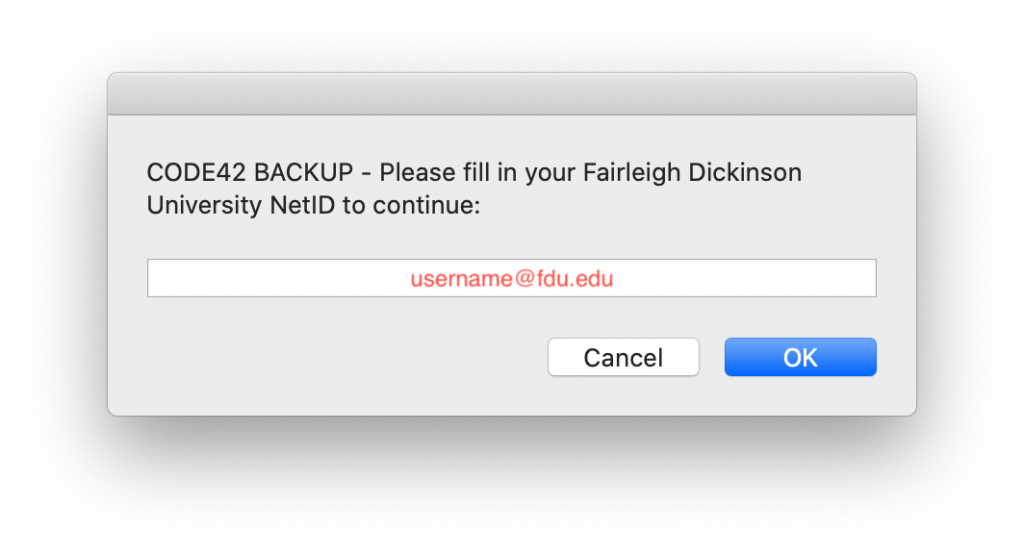
After the package installs, you will be prompted to enter your FDU email address and then click “OK“
Note
It could take several minutes for the client to make the first connection and start the first backup.
The entire process will take approximately 5-7 minutes, depending on your internet speed. Once CrashPlan is installed, your account is automatically provisioned in the CrashPlan system, and your backup will begin shortly.
This process is used when someone will be assigned a second device and wishes to have it backed up or if the CrashPlan needs to be re-installed on the same device. Because an account already exists, it cannot be provisioned automatically. It must be manually setup either to replace an existing device or create a new backup set on the second computer.
Note
In order to proceed, CrashPlan must be installed prior to continuing, please refer back to the Install instructions for your operating system from the CrashPlan User Guide. A link is found at the bottom of this page.
Tip
A backup set is CrashPlan’s way of describing the backup configuration and what files are being backed up.
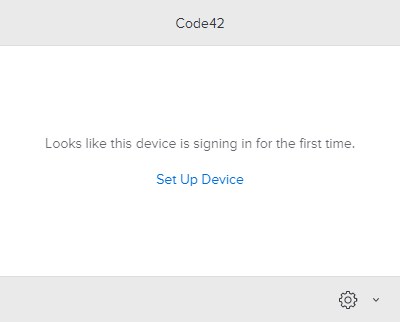
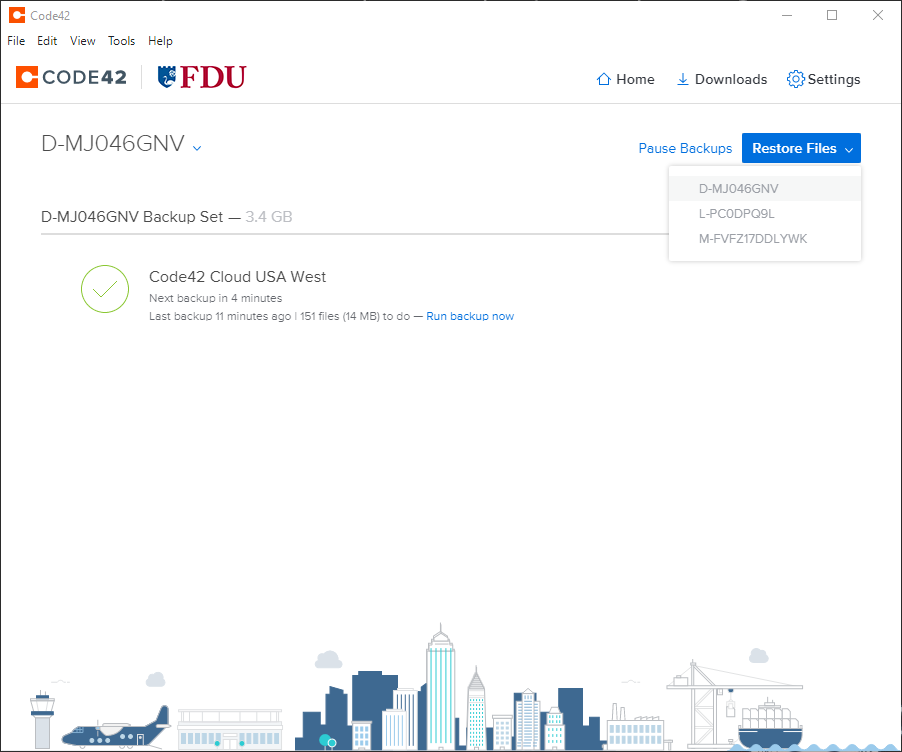
Click on the CrashPlan app in the system tray (PC) or Menu bar (macOS) and then click “Setup Device”
If prompted, log in to the FDU NetID Portal and proceed through the FDU single sign-on process
Click “Replace Existing”
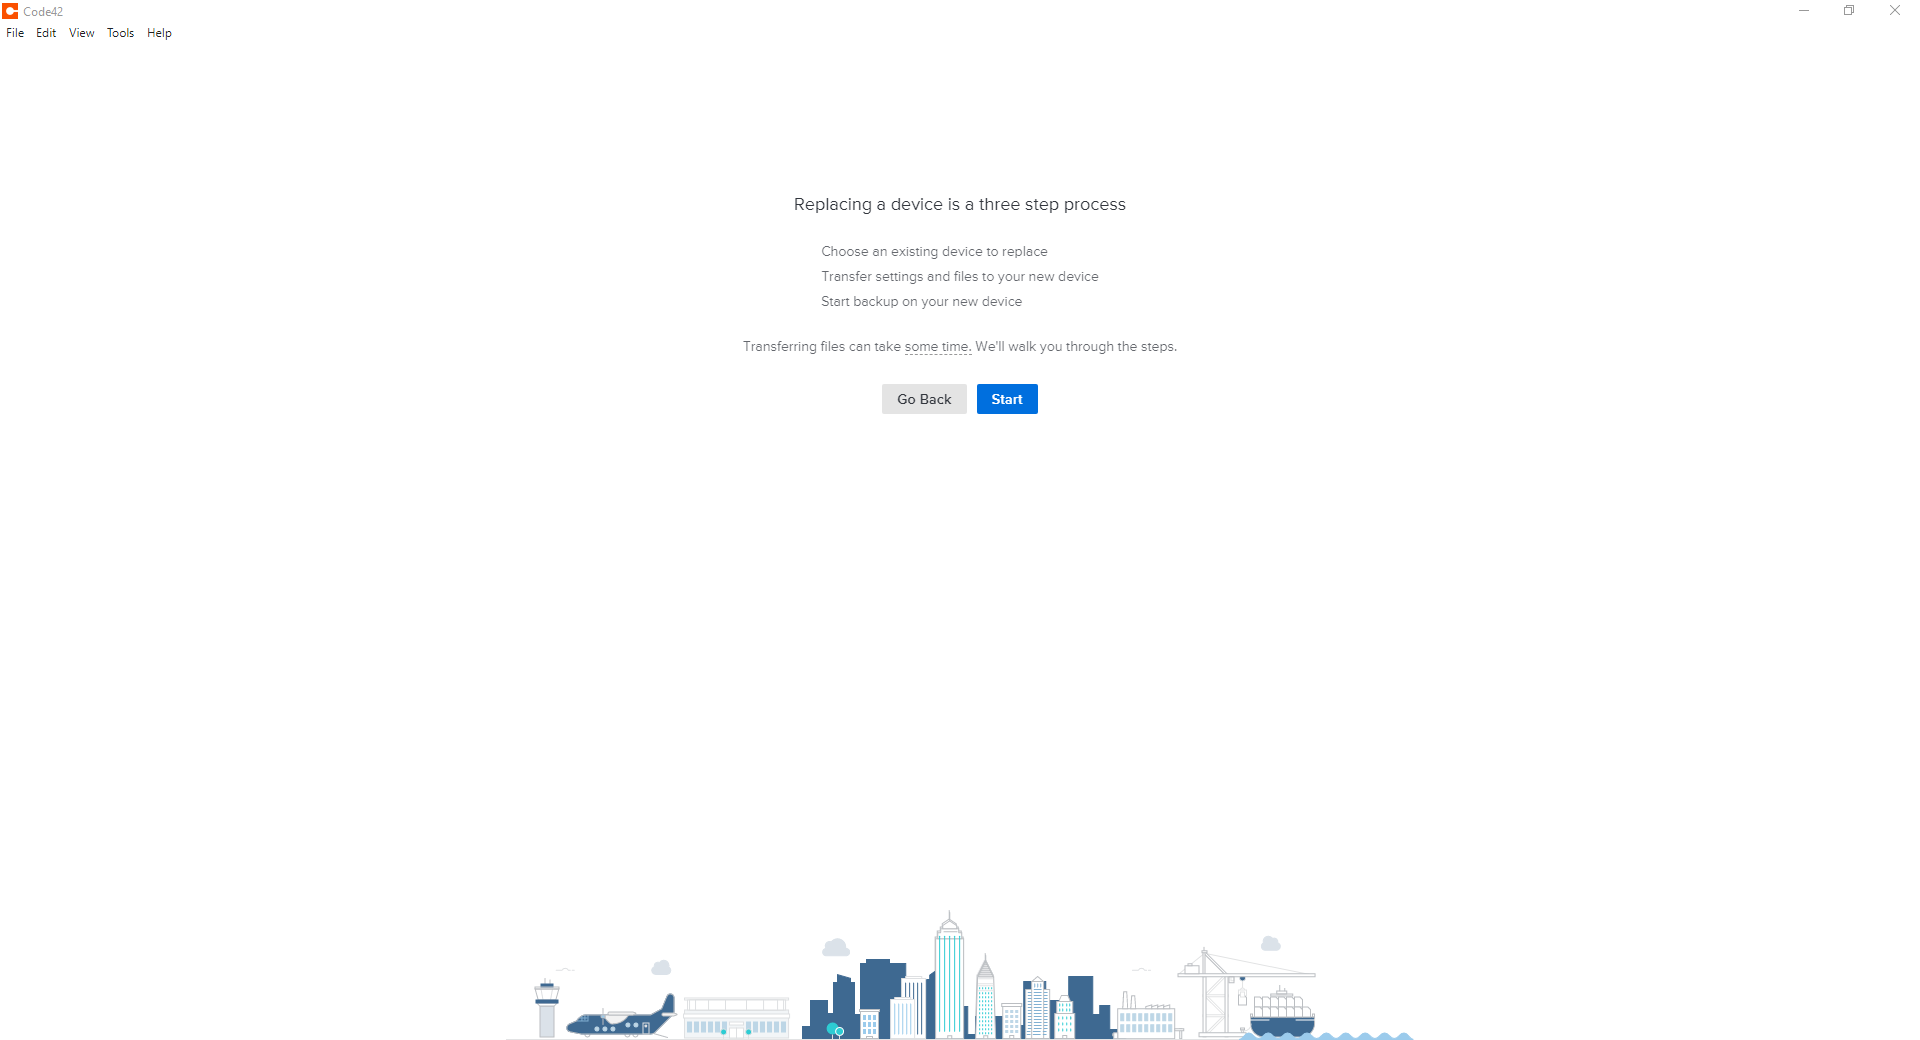
Click “Start” to continue with the replace existing device process
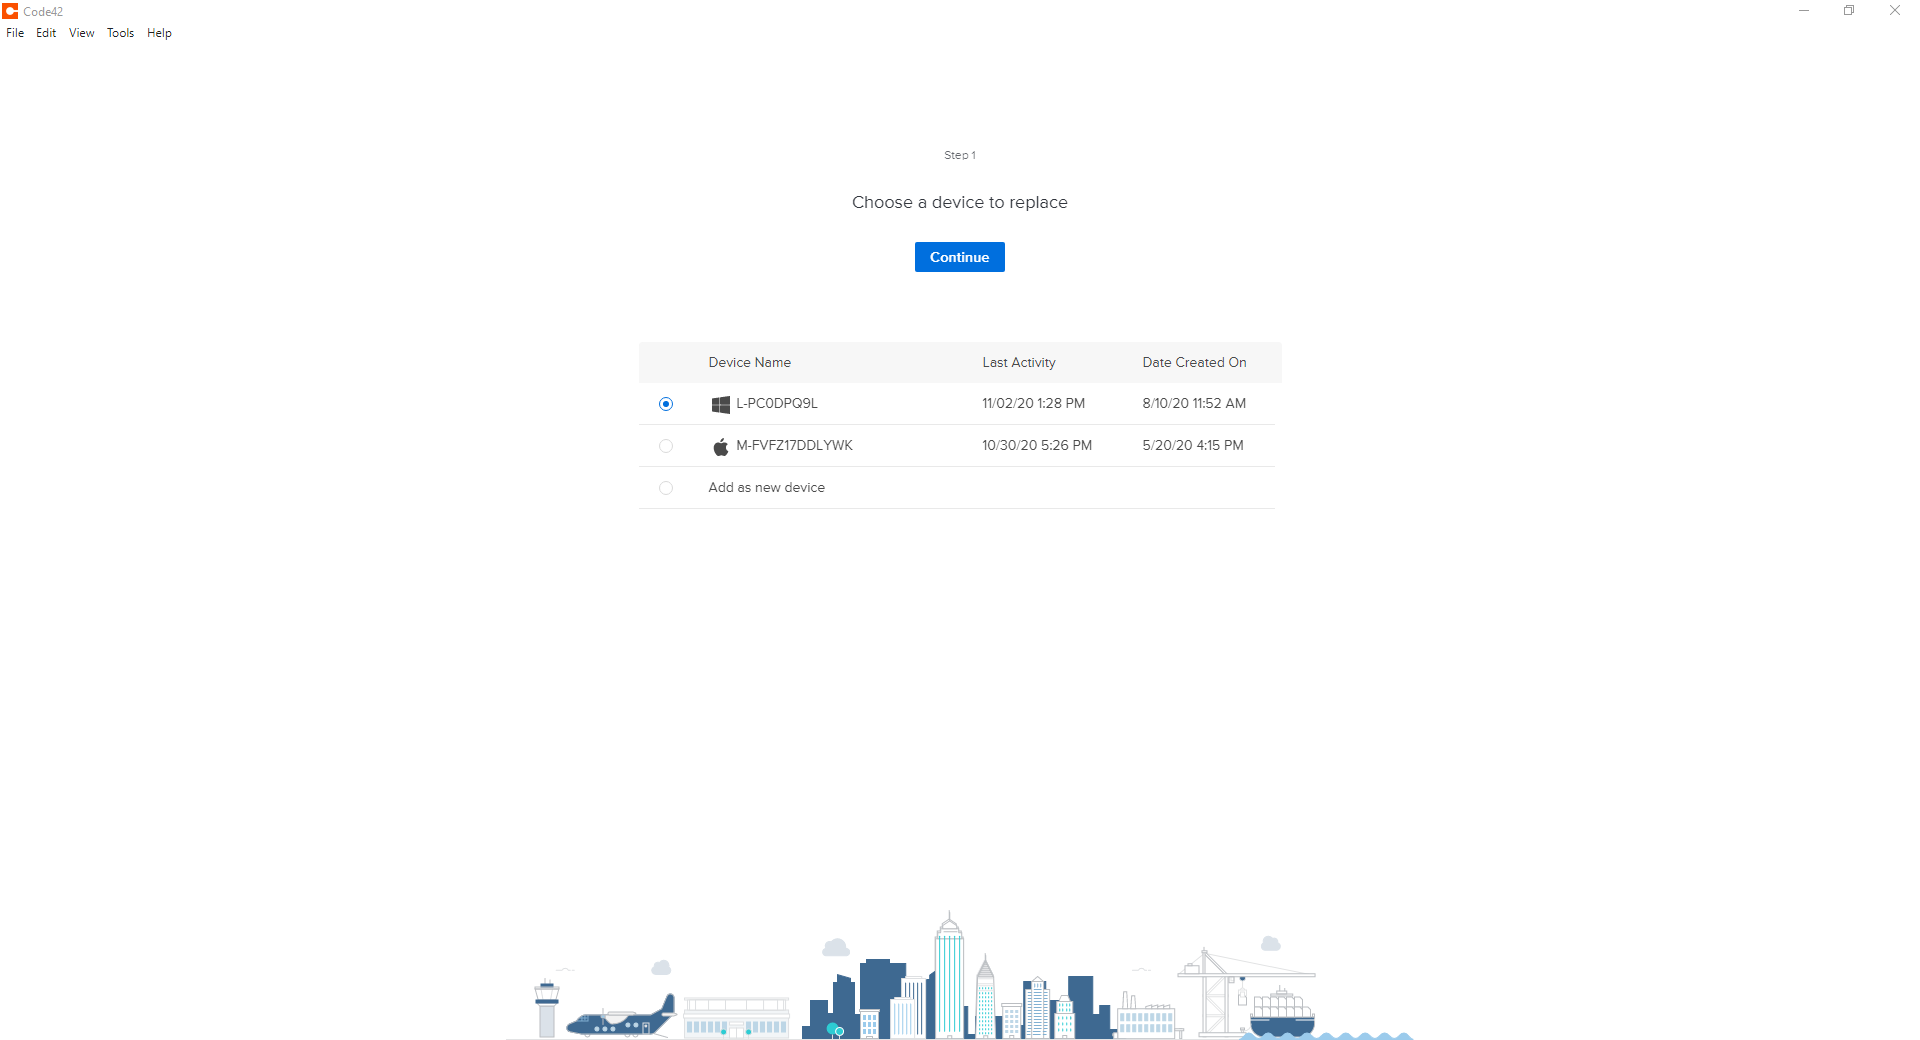
Select the device from the list you are replacing and click “Continue”
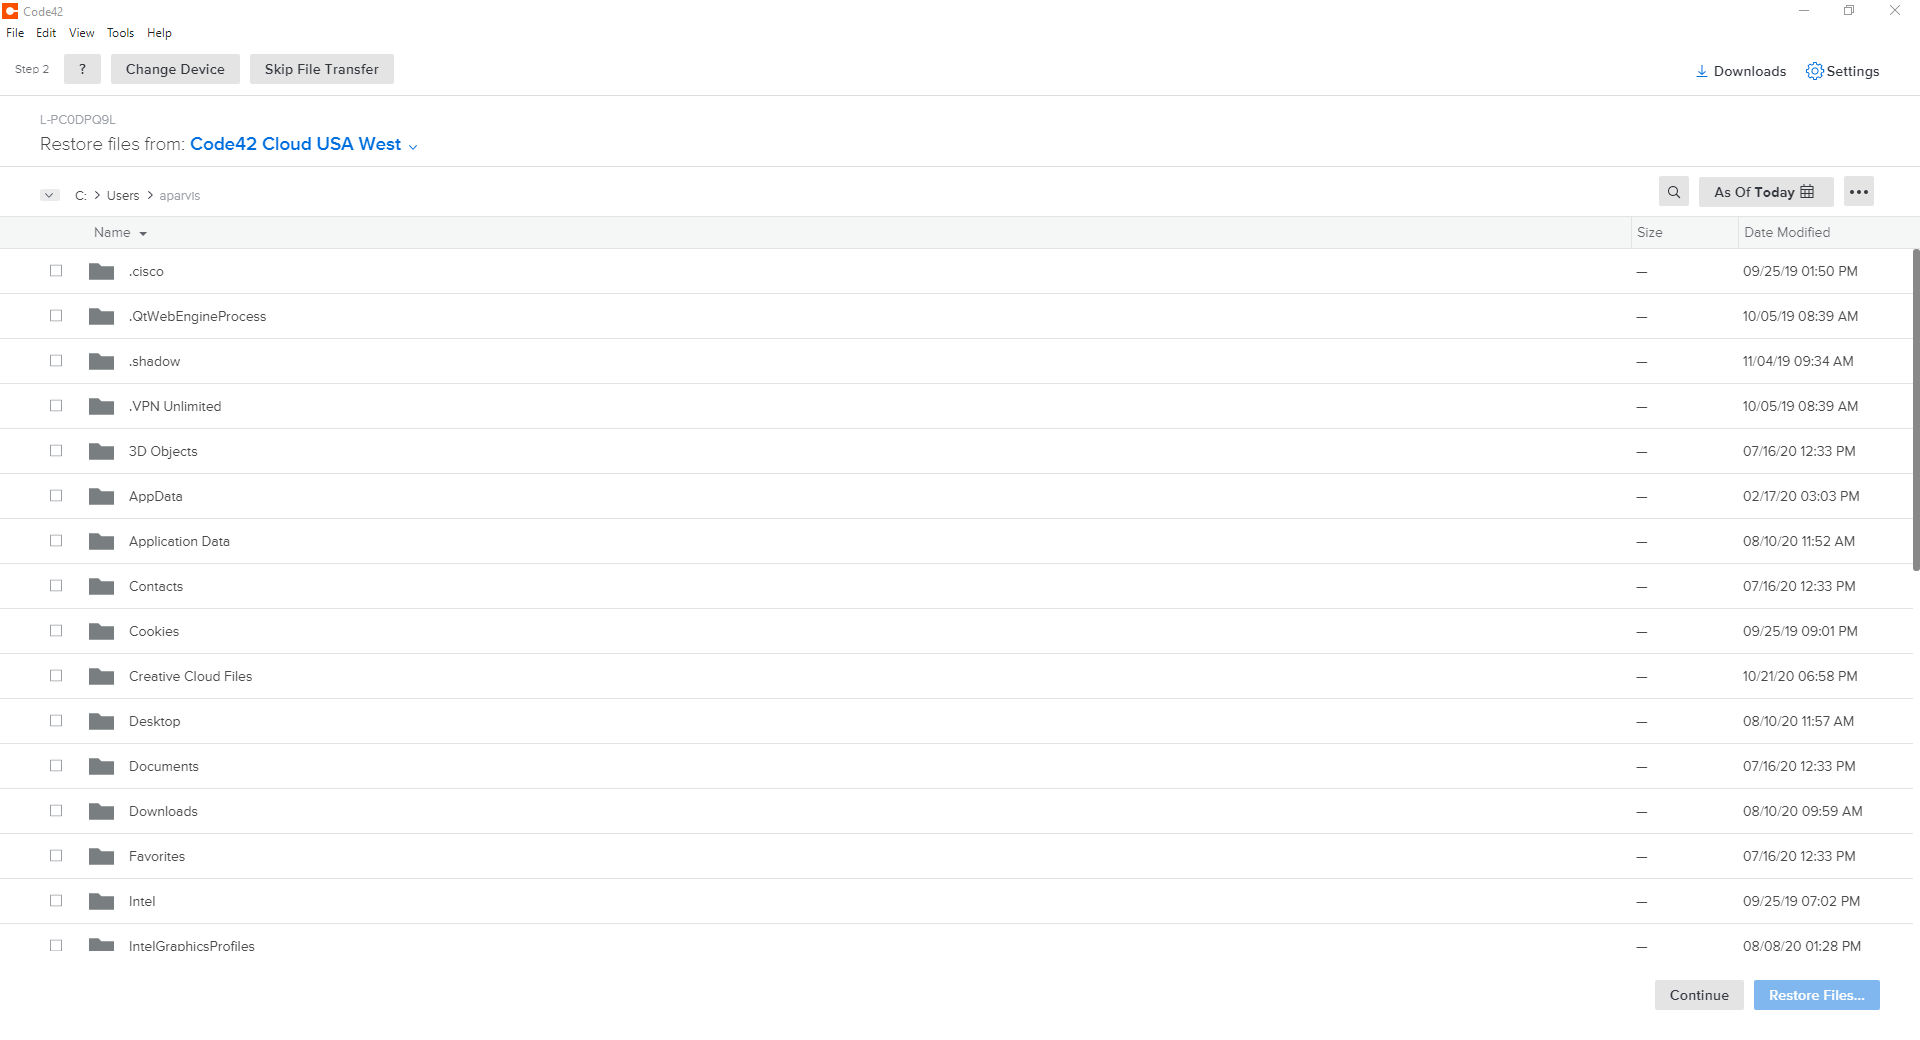
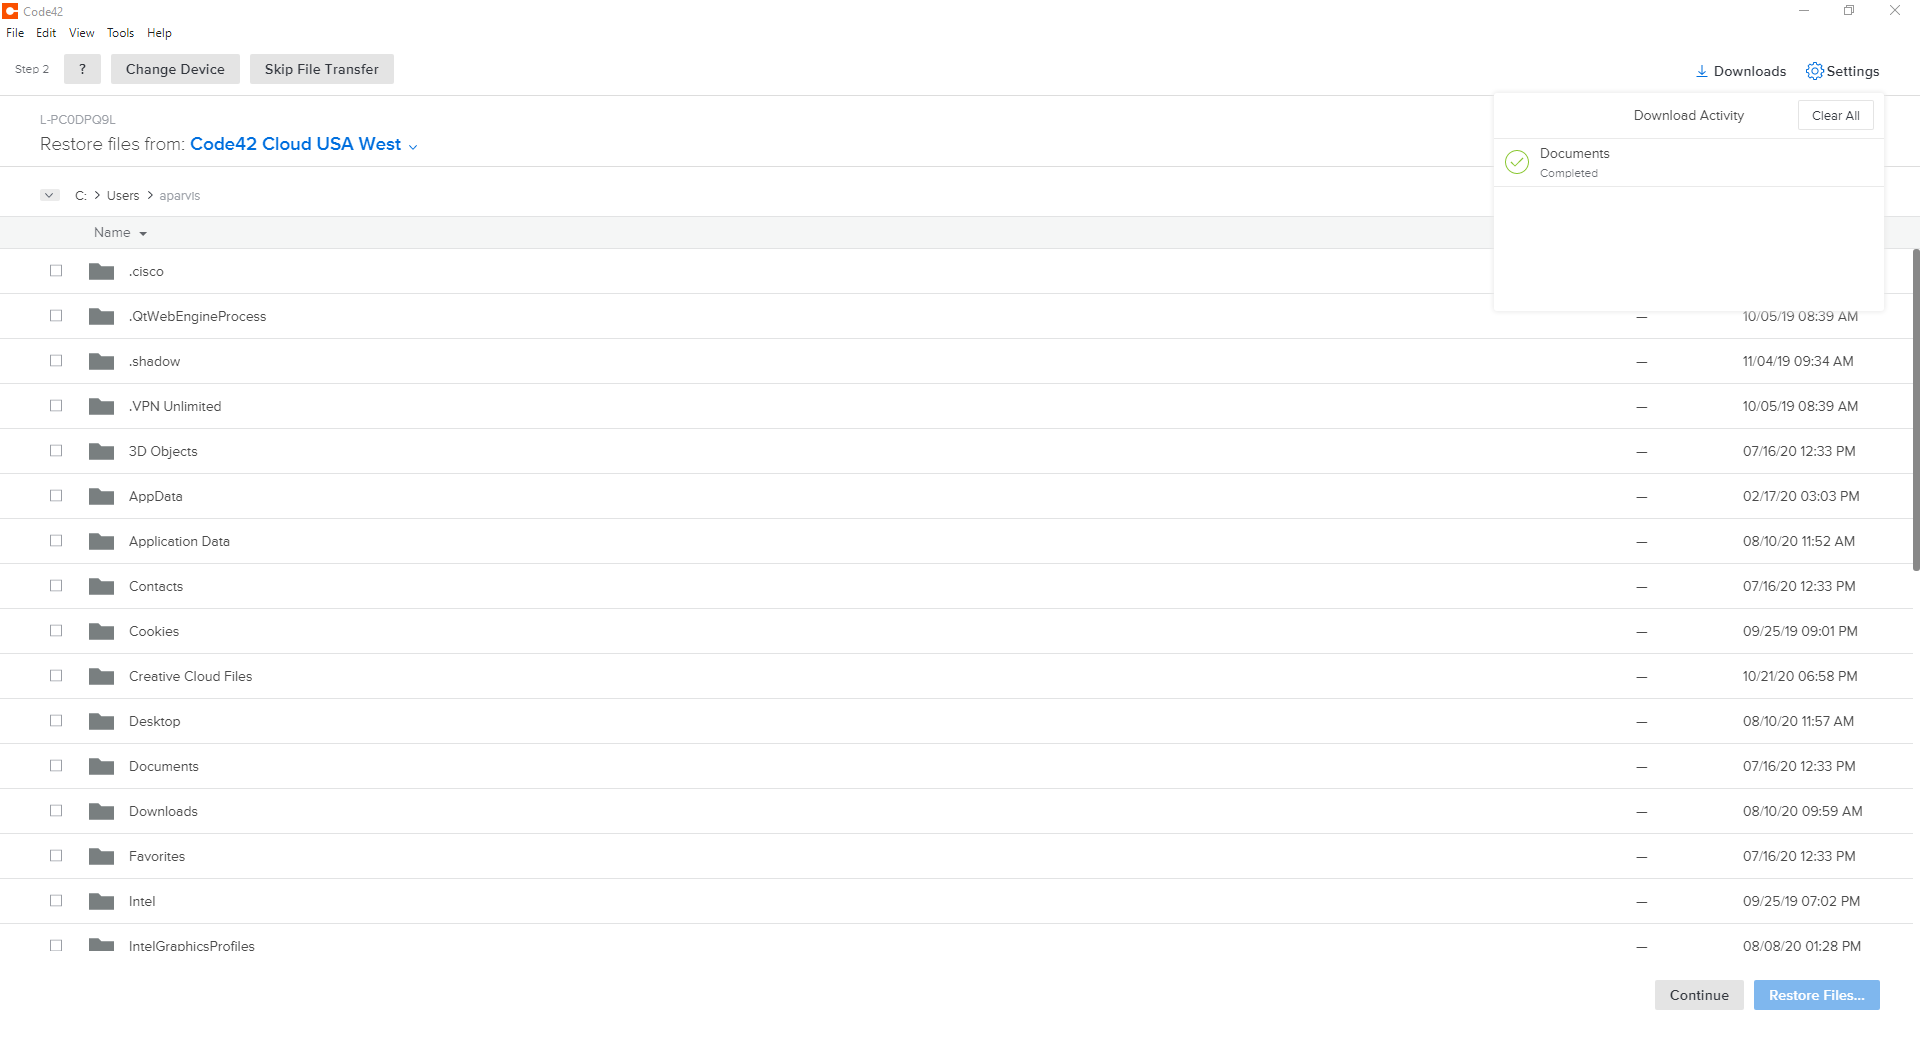
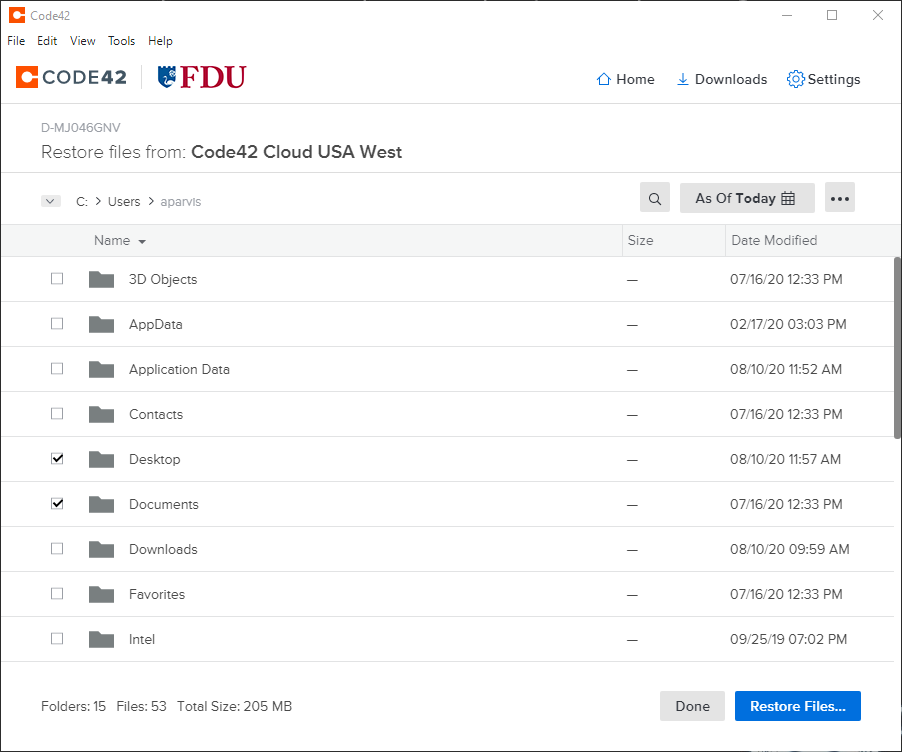
Click “Select Files” on the following window
Select and Choose which files you wish to replace by placing a checkmark next to each. When finished, click “Restore Files”
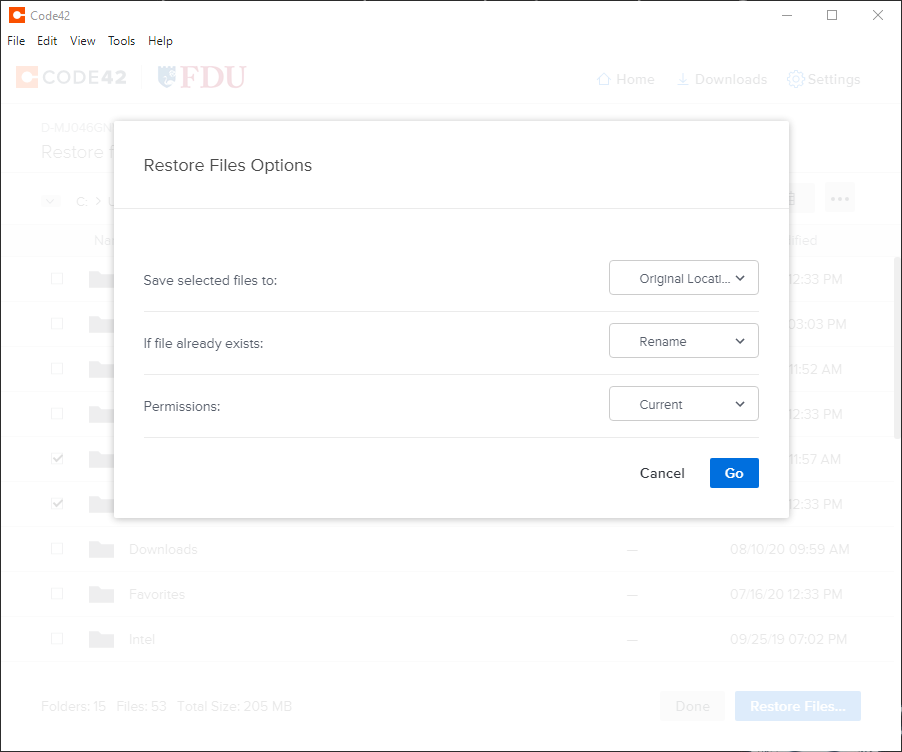
The next window will allow you to select how you wish to restore your files. Make your selections and click “Go”
The next window will display download progress for the restore process. You can continue forward by clicking “Continue” at the bottom
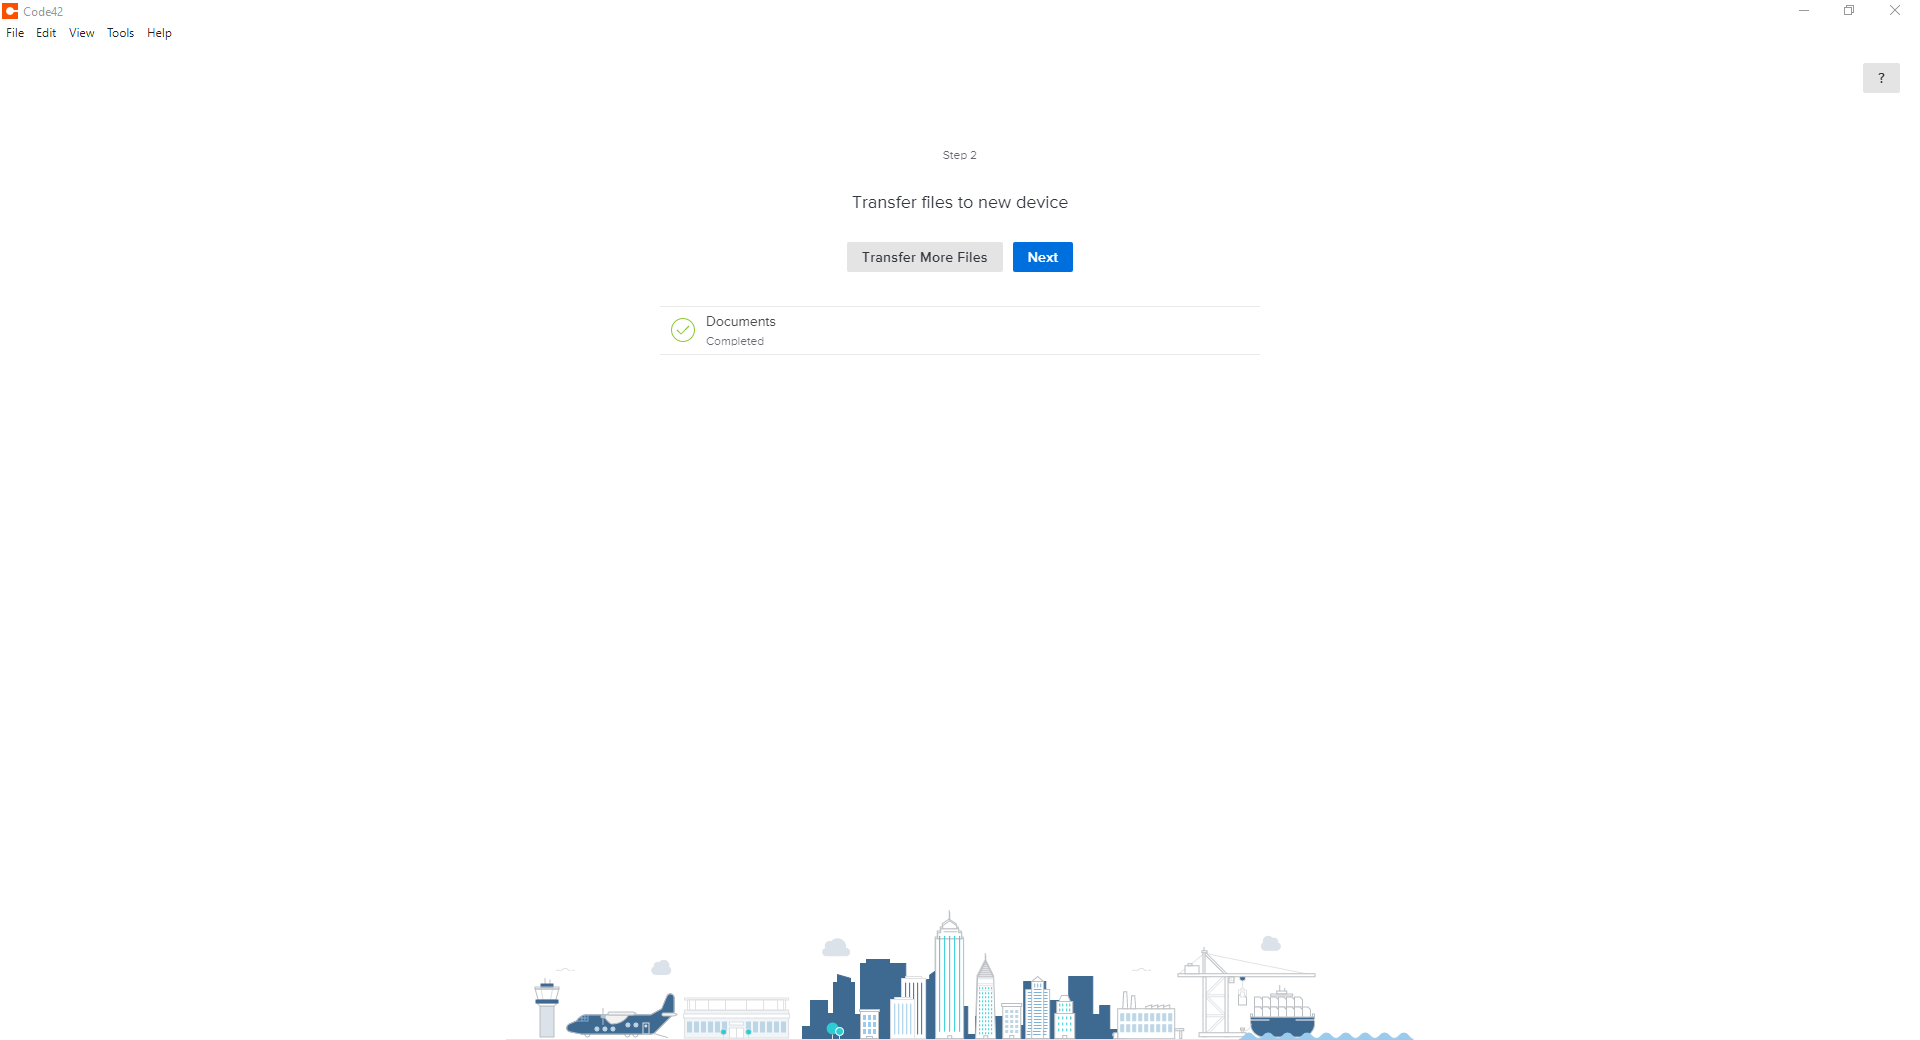
The next window Downloads the Files to your device. When the transfer is completed, click “Next”
Tip
You can close this window and continue working or you can click transfer more files and repeat the steps for additional files. This will extend the time it needs to restore.
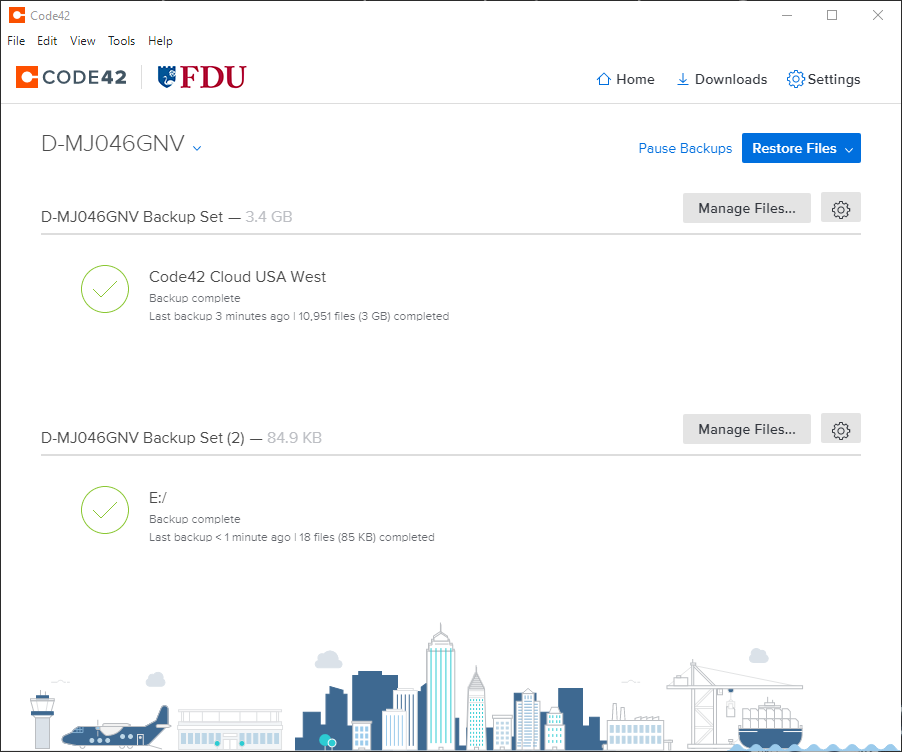
If you are unsure if you have CrashPlan installed and backing up your system, this quick guide will help give you some comfort.
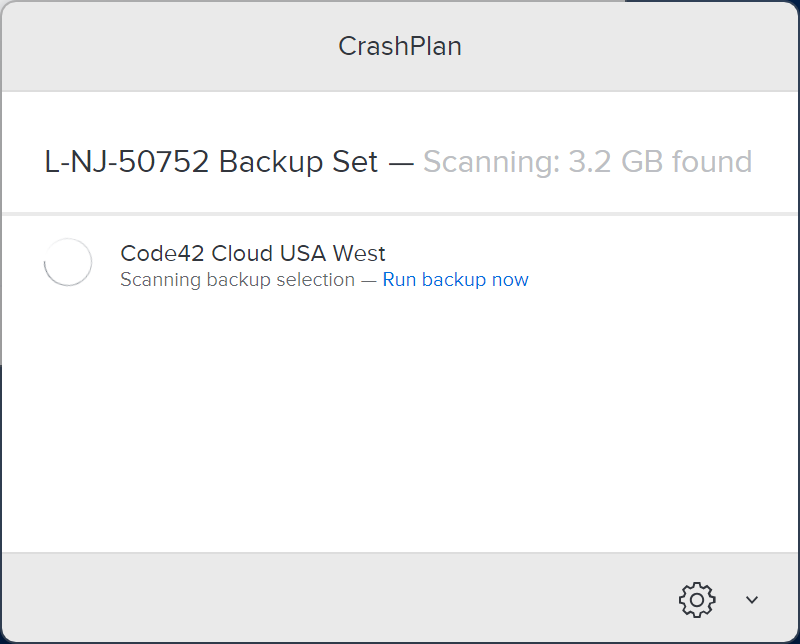
Click on theCrashPlan icon from the system tray on Windows and the menu bar on macOS
CrashPlan Icon
The Progress will be displayed like in the Figure below
Note
Depending on your backup size, this could take anywhere from a few minutes to a few days. CrashPlan will continue to run and backup in the background. After the first successful backup, incremental backups will occur.
CrashPlan allows you to manage your backup sets. If you want to review your backup set or request assistance, please contact the SAMI Service Desk to initiate a support request.
Accidentally deleted or unable to find a file? CrashPlan can help. Please follow the following guidelines in restoring lost or previous versions of files.
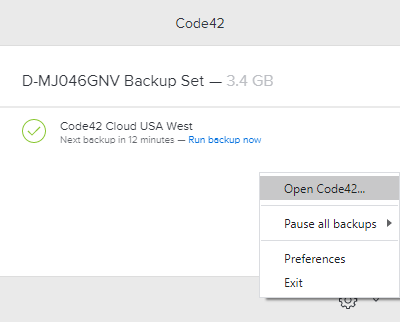
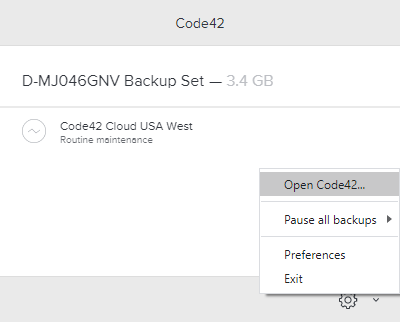
Click the CrashPlan System Tray or macOS menu bar Icon
CrashPlan Icon
Left-click on the gear symbol and left-click on “Open CrashPlan….”
If prompted, log in to the FDU Single sign-on Portal and proceed through the FDU DUO Multifactor authentication procedures
Click “Restore Files”
Select the device you wish to restore from
Note
If you have more than one backup device, please select the device from where you want to restore the file from.
You can select a date range from when you wish to restore from on the right-hand side
Navigate to the folder(s) and/or file(s) you wish to restore and place a check next to each one
Click “Restore Files”
Select how CrashPlan will restore your files. Click “Go” when finished
Note
Above are the recommended options for restoring files, this will help you find them more easily.
The time it takes to restore your files will depend on how much data is being restored, available system resources, and available bandwidth.
Using CrashPlan you can create backup sets that will back up your data to additional devices utilizing a schedule. This is useful to have immediate access to critical files in the event of data loss.
This guide is only needed if you wish to have a local backup of your data.
Note
If you schedule multiple backup sets to run at specific times and the backup sets go to the same destination, ensure that these times do not overlap. This ensures good backup performance.
Click the CrashPlan System Tray or macOS menu bar Icon
CrashPlan Icon
Left-click on the gear symbol and left-click on “Open CrashPlan….”
If prompted, log in to the FDU Single Sign-on Portal and proceed through the FDU DUO Multi-factor authentication procedures
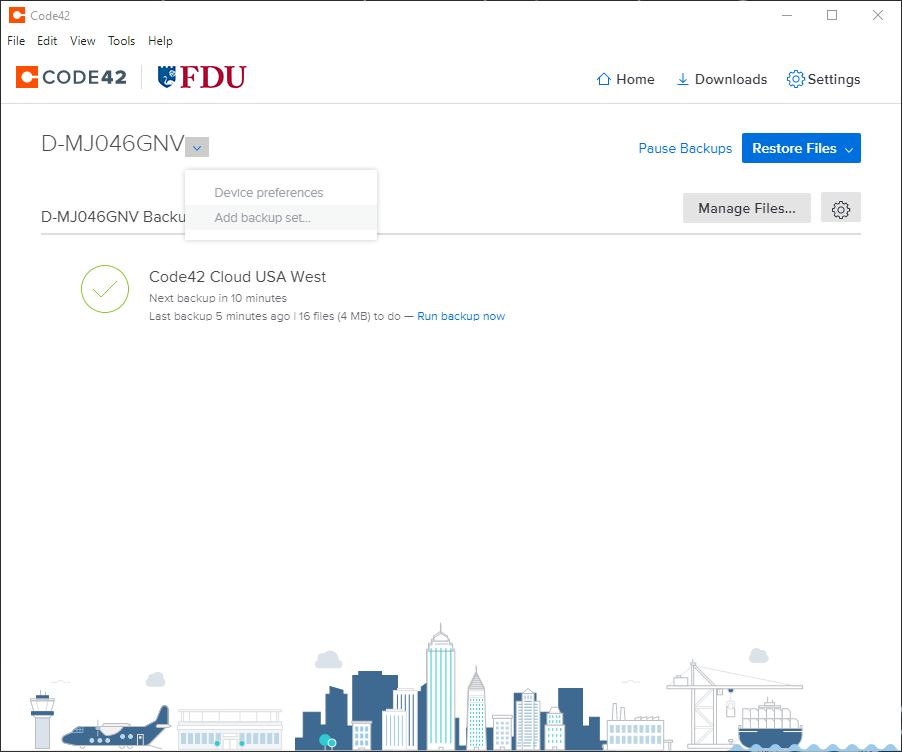
From the CrashPlan console window, click the “Dropdown Arrow” symbol next to your device name to drop down a menu, then click “Add Backup Set…”
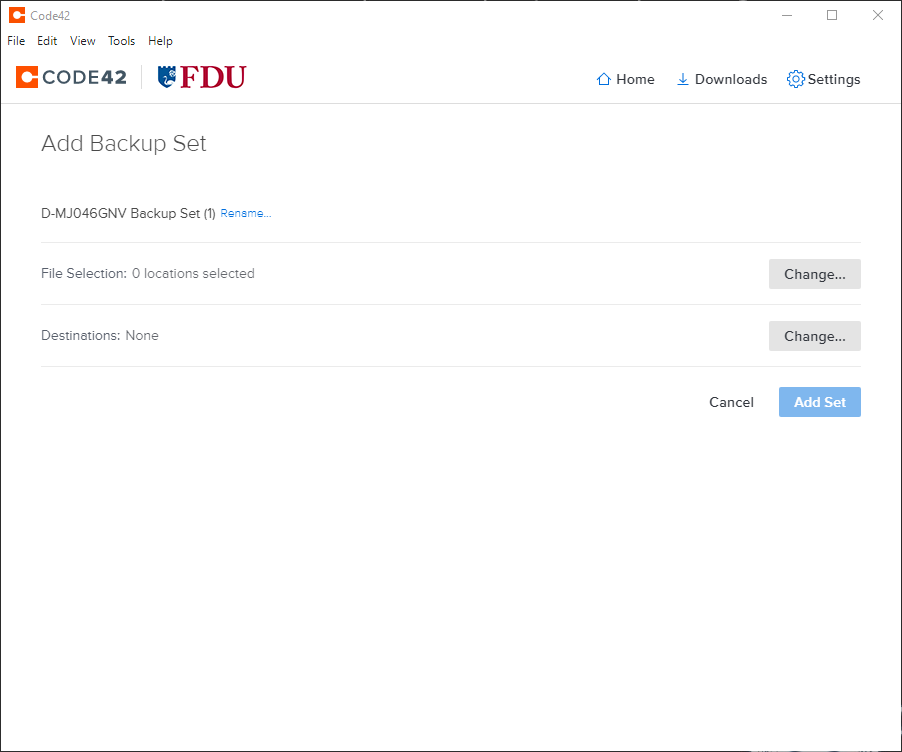
The next window will be the Add Backup Set configuration window.
Note
The “Add Set” button will be un-clickable until it is completely configured.
Click “Rename” to label your backup set
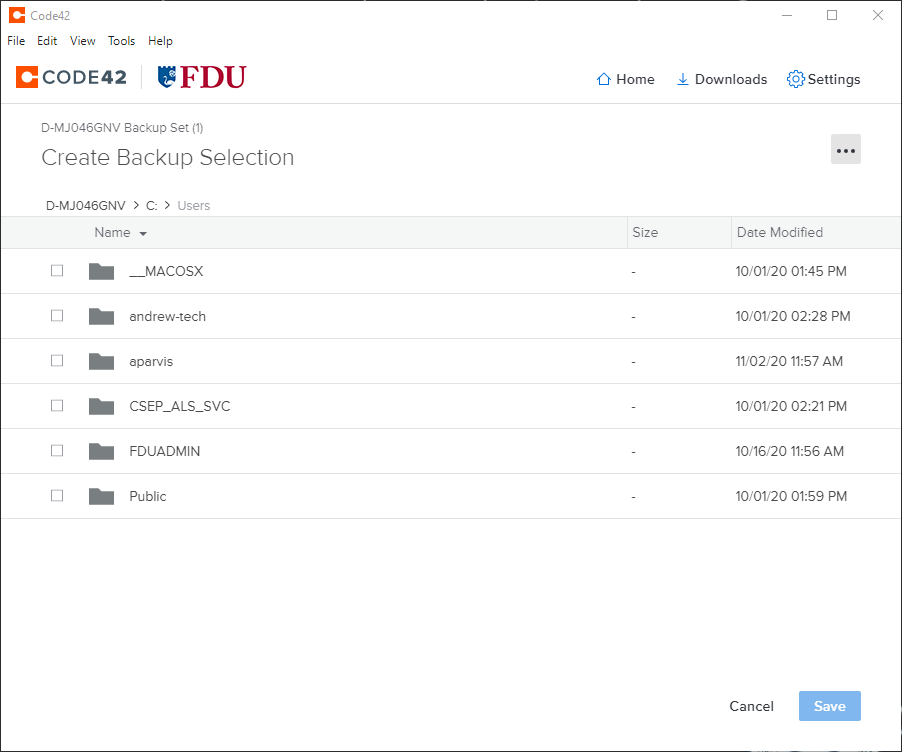
Changing Selected Files, click “Change”, and select the files and folders you wish to backup to a local destination
When finished click “Save“
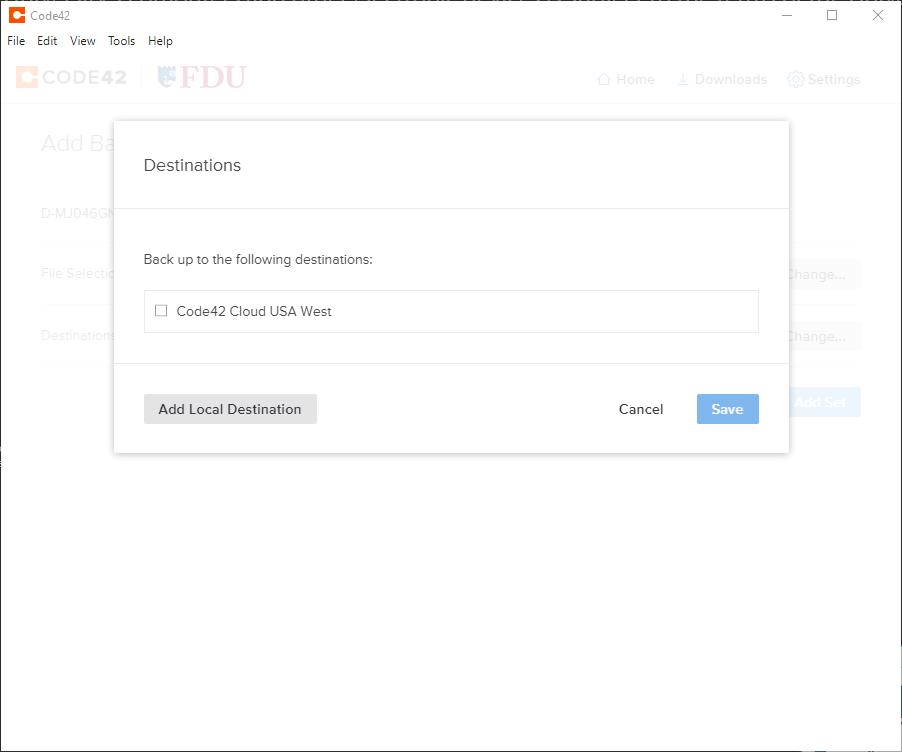
Click “Change” to set your destination for your backup
Select your destination by clicking “Add Local Destination (usually an external hard drive) and click “Save“
Click “Add Set” to finalize the setup and start backing up to a local location
Your new back upset is finished and will begin backing up as configured.
CrashPlan will send users an email alert notifying of any incomplete backups of their devices.
The CrashPlan email alert will be sent from CrashPlan for Enterprise <noreply@crashplan.com>
The Subject line of the email will be labeled with: Critical: [Name of Device] not backed up
Backup Alert
You will receive an alert when your computer hasn’t backed up to CrashPlan for 5 calendar days. The email will look like the example below:
CrashPlan Backup Alert Email Notification
What to do if you get a backup alert
After receiving a CrashPlan backup alert email, you should locate the device the email specifies in need of backup. The CrashPlan device name will be listed in the Subject: line and Computer Name: line of the CrashPlan backup alert email. To locate the name of a CrashPlan device, left-click the CrashPlan “C” symbol icon in the Windows System Tray, also referred to as the notification area.
Tip
The Windows System Tray or notification area is usually located on the bottom right of the Windows taskbar, next to the displayed digital clock.
For macOS users left-click CrashPlan symbol icon on the macOS icon menu bar. The CrashPlan device name will be displayed in the console. Ensure the CrashPlan application displays the same name as the CrashPlan backup alert email you received.
CrashPlan Symbol Icon
CrashPlan Device Name
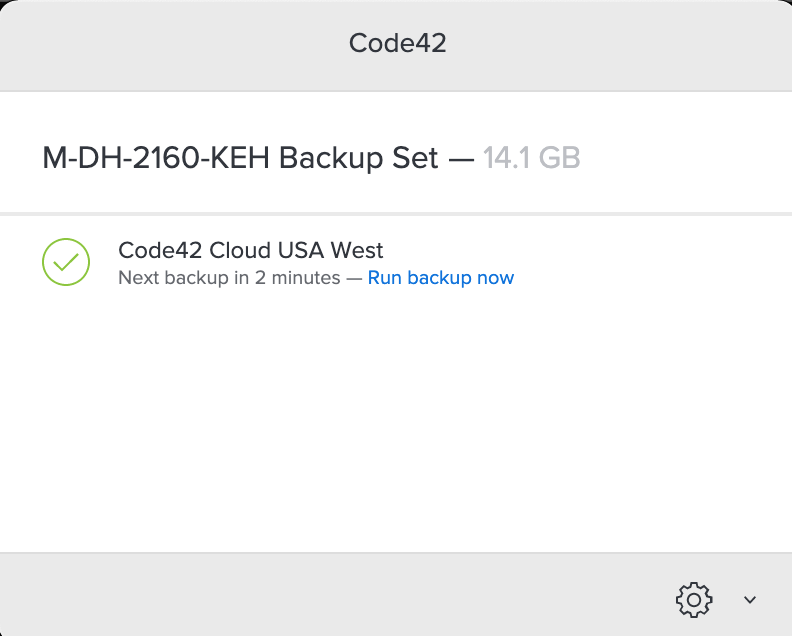
After locating the correct specified device stated in the CrashPlan backup alert email, force a backup of the device by performing the following:
Left-click the “CrashPlan” System Tray or macOS menu bar Icon
CrashPlan Icon
Left-click “Run backup now“
Note
The backup may take some time to complete. This depends on the length of time since CrashPlan’s last complete backup and the amount of new data needed to be backed up.
Whether you’re working at home or the office, OneDrive makes it easy to create new documents and share your files. You can even collaborate with others on a document.
In the following external article, you’ll learn how to create documents and folders. It will go over how to share your files with different groups of people, as well as the various collaboration tools available in Office 365.
Generative Artificial Intelligence (GenAI) is a technology capable of generating new text, images, video, and other data by analyzing and modeling existing datasets. This policy ensures that all members of the FDU Community understand that entering information into publicly available GenAI applications may contribute that data to the application’s training models, potentially making it accessible beyond the university and exposing confidential information.
Additionally, this policy defines the responsible use and data security requirements for GenAI by University faculty, staff, and students. These requirements supplement existing data security policies established by OIRT. Accordingly, diligence must be maintained to protect the confidentiality, integrity, and availability of Administrative Data and Education Records that may be accessed, processed, or generated through GenAI applications.
Confidential, Restricted, or Official Use Only Information must not be entered into any publicly available or commercial GenAI application unless an approved agreement is in place with the Chief Information Security Officer (CISO) or the Chief Information Officer (CIO). This agreement must include appropriate data security requirements in compliance with university policies.
WISP protect information shall not be entered into any private GenAI application without prior approval from the Chief Information Security Officer (CISO) or the Chief Information Officer (CIO). Additionally, if the application is not owned and administered by Fairleigh Dickinson University, an approved use agreement must be executed with the application provider and must include appropriate data security requirements in compliance with university policies.
Each GenAI application handling Confidential, Restricted, or Official Use Only Information must have an Acceptable Use Policy (AUP) defining its terms of use, data collection policies, and user responsibilities. Faculty may include the AUP in course syllabi if GenAI is permitted for use in the course.
Output from a GenAI application must be reviewed by the submitter of the request for confidentiality, integrity, accuracy, fairness, regulatory compliance, and academic attribution with unintended bias before publication or ingestion into another University system in accordance with current FDU Information Security policies located on IT.FDU.EDU.
Confidential, Restricted, or Official Use Only Information must not be retained within GenAI systems after processing, particularly in products and services not hosted by FDU. If the GenAI system allows data deletion, the data must be securely removed once processing is complete unless retention is legally or regulatory required. If deletion is not feasible due to system limitations, alternative measures must be implemented to ensure data confidentiality, such as anonymization or eliminating sensitive data before inputting it into the system.
A disclaimer must clearly indicate when GenAI is used to generate data or influence decision-making. This ensures transparency regarding the nature and origin of the information provided.
In the event of a suspected or confirmed data security incident involving a GenAI system, users must immediately report the incident to the Data Security Incident Response Team (DSIRT) by creating a SAMI Support ticket. If you are unable to log into SAMI Support via your Net ID username and password, use the public form.
Appendix I
Key AI Definitions
Submitter—End user (student, faculty member, staff) inputting a query or prompt into an AI tool or product
Generate— the process of creating new content such as text, images, audio, video, or other forms of data based on patterns and information learned from existing datasets
Generator–A system, tool, or mechanism that creates new content
Ingestion— the process of inputting, integrating, and processing data into a system
Appendix II
DATA SECURITY INCIDENT RESPONSE TEAM (ROLES AND RESPONSIBILITIES)
The Data Security Incident Response Team membership includes the Chief Operating Officer, the Chief Information Officer, the Chief Information Security Officer, the Chief Academic Officer, the University General Counsel and the University Risk Manager. Each member of the Data Security Incident Response Team (DSIRT) has responsibilities related to the security of all the organization’s sensitive information. The DSIRT members listed below have specific responsibilities regarding the reporting and handling of data security incidents. Note that one person may serve in multiple roles.
Senior Vice President and Chief Financial Officer: Frank Barra Office: 201-692-2237; Email: fbarra@fdu.edu
Chief Information Officer (CIO): Neal Sturm Office: 201-692-8689; Email: sturm@fdu.edu
Chief Information Security Officer (CISO): Kimberley Dawn Dunkerley Office: 201-692-7672; Email: ddunkerley@fdu.edu
Privacy Officer: Kimberley Dawn Dunkerley Office: 201-692-7672; Email: ddunkerley@fdu.edu
Senior Vice President and University Provost: Benjamin Rifkin Office: 201-692-7093; Email: brifkin@fdu.edu
Office of the General Counsel: Steve Nelson Office: 201-692-2466; Email: snelson@fdu.edu
University Risk Manager: Gail Lemaire Office: 201-692-7083; Email: lemaire@fdu.edu
Vancouver Campus Executive: Wilfred Zebre Office: 604-648-4462; Email: wilfred_zerbe@fdu.edu
Associate Vice President for MIS: Saul Kleinman Office: 201-692-2065; Email: saul@fdu.edu
In an effort to maintain the reputation, security, continuity, and technical oversight of university assets considered part of our overall catalog of services, the Office of Information and Resource Technology is issuing a new policy concerning domain names affiliated with Fairleigh Dickinson University. Affiliation with FDU is determined by OIRT in conjunction with the Offices of General Counsel and Communications and Marketing.
II. POLICY
All domain registrations that have an affiliation with the University must be registered through OIRT. An affiliation is defined as a domain that identifies the University as part of its naming nomenclature and houses content specific to the University or any function, whether administrative, academic, or student related to the University. To request a new domain, please complete the following:
You may also try emailing your questions to domainregistrar@fdu.edu.
In addition to the domain registration, ongoing certification renewals and any backend technical configurations will be managed by OIRT. All costs associated with the domain will be charged back to the department.
Any department that today independently manages/operates a University domain as defined above or has obtained a domain with any affiliation with FDU must notify OIRT of the existence of that domain so ownership can be moved over to OIRT management. Please contact OIRT by sending all available information to domainregister@fdu.edu. A member of OIRT will work with the department to move the ownership over properly. All content of any domain, as well as plug-ins or any other functionality of the domain, will be reviewed by OIRT but are the responsibility of the individual departments.
III. IN CASE OF QUESTIONS
All questions relating to the Domain Registration Policy can be addressed to the VP & CIO of Fairleigh Dickinson University.
This guide is designed to assist you in mastering both the classic and updated versions of the DUO Device Management Portal. It simplifies the process of modifying existing devices and integrating new ones into your multi-factor authentication setup.
Legacy DUO Device Management Portal
Accessing the legacy DUO Management Portal
In a Desktop or Laptop browser visit the “DUO Management Portal“. You will be prompted to authenticate through SSO and complete the Multi-factor Authentication process
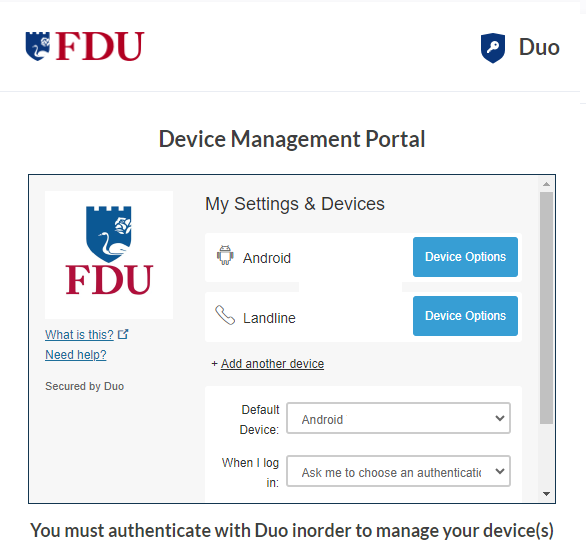
After authenticating you’ll see the DUO Management Portal. This is where you can enroll new devices, reactivate, edit, or delete your existing devices
close
Default Authentication Options
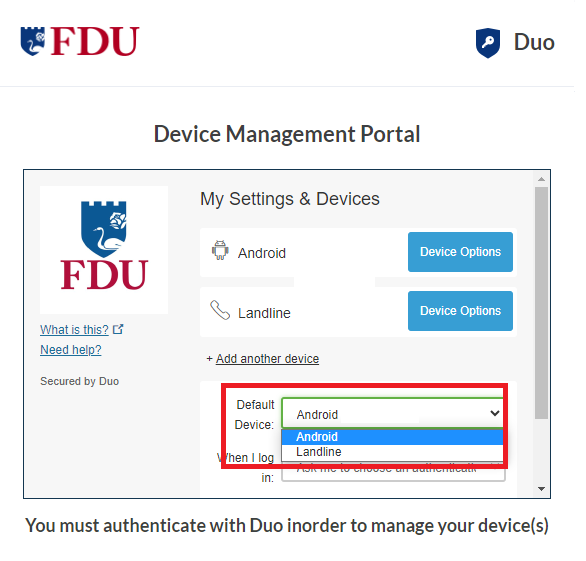
If you authenticate with more than one device, you can specify which you would like to be the default.
Click the “Default Device” drop-down menu and pick your default device for authentication. Click “Save” if you’re done making changes
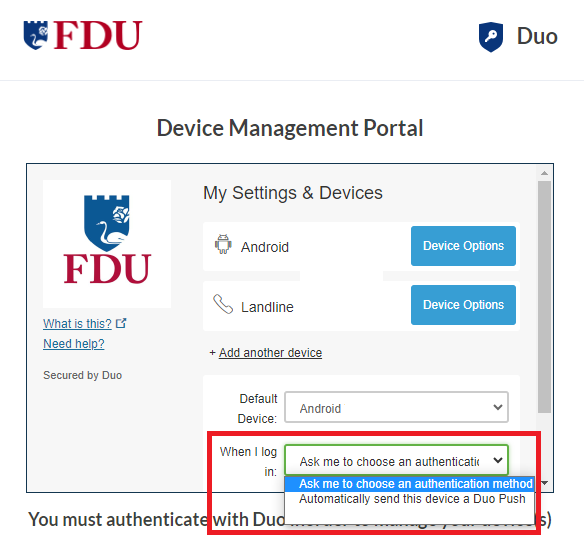
You can choose which authentication method you prefer to use when logging in by clicking on the “When I log in” drop-down menu
Ask me to choose an authentication method: it will prompt you to select an option every time you log in
Automatically send this device a DUO Push: it will automatically send a DUO Push to your default device
close
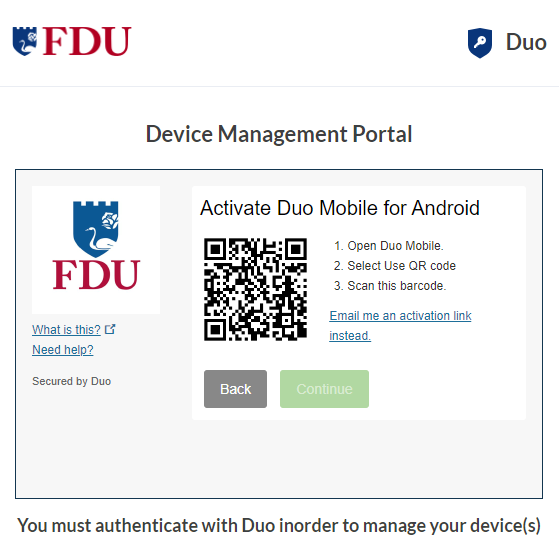
Reactivate Duo Mobile
Click on “Reactivate DUO Mobile” if you need to get DUO Push working on your phone, for example, if you replaced your phone with a new model but kept the same phone number.
After answering some questions about your device, you’ll receive a new QR code to scan with your phone, which will complete the DUO Mobile activation process
close
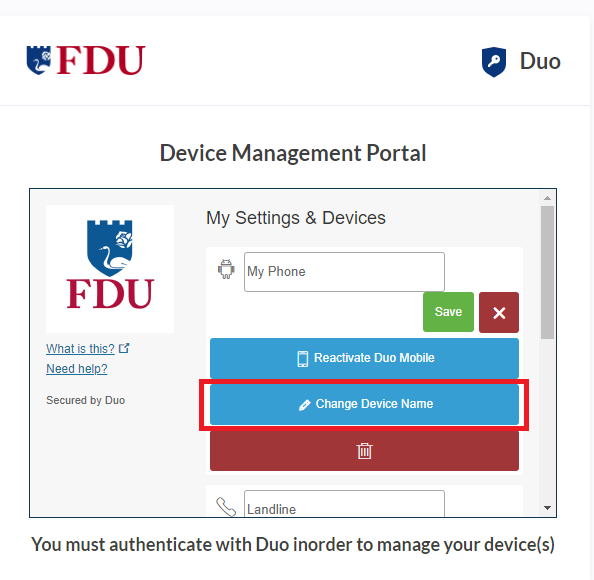
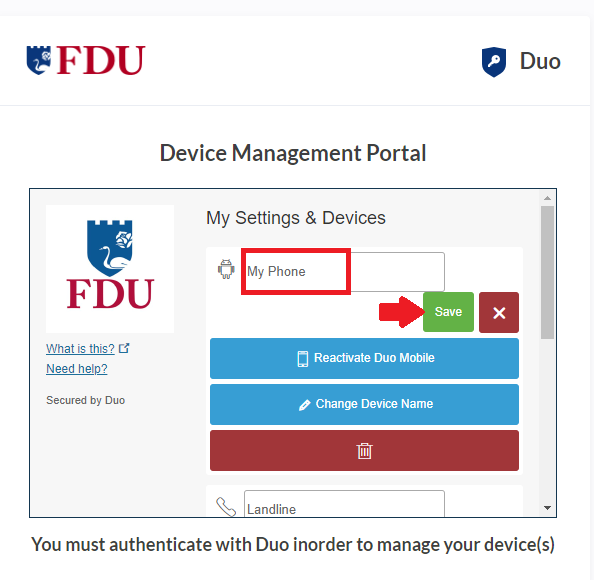
Change Device Name
Click on “Change Device Name” to open up an interface to change the display name of your phone
Type in the new name and click “Save“
close
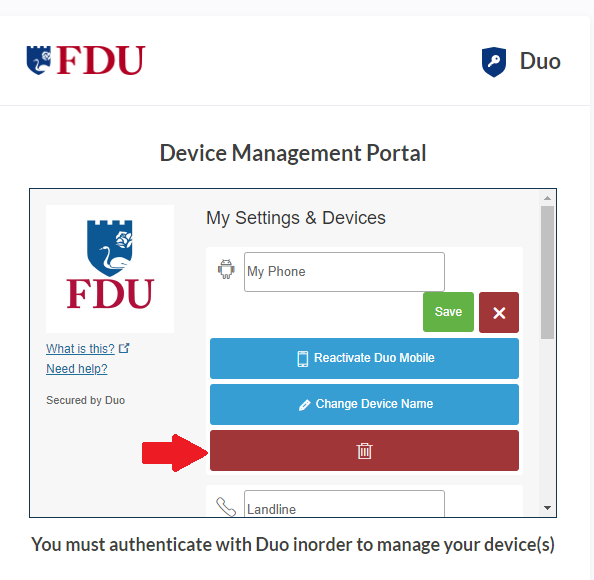
Remove Device
Click the “trash” icon button to delete a device
Confirm that you want to remove the device by clicking on “Remove“. The device will be deleted. It will no longer be able to approve DUO authentication requests.
Note
You may not remove your last device. If you wish to remove it, first add another, then delete the original. If you are unable to delete a device, contact your administrator to have it removed.
close
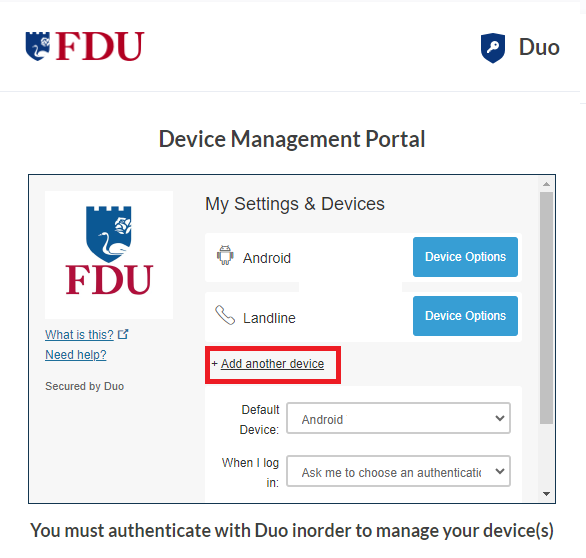
Add New Device
To add a new authentication device, click “Add another device” link on the right side of the DUO Prompt. You’ll be taken to the new device enrollment prompt
You can use the DUO Quick Start Guide for instructions on how to enroll a new device
Accessing Updated Device Management in the DUO Universal Prompt
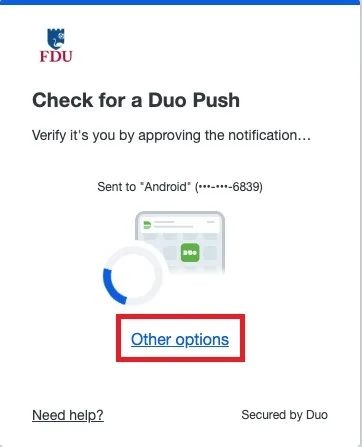
You can add additional verification methods, manage your existing devices, or reactivate DUO Mobile for DUO Push from the DUO Universal Prompt.
When logging in to an application with the Universal Prompt Click the “Other Options” link on the authentication page to view your list of available methods
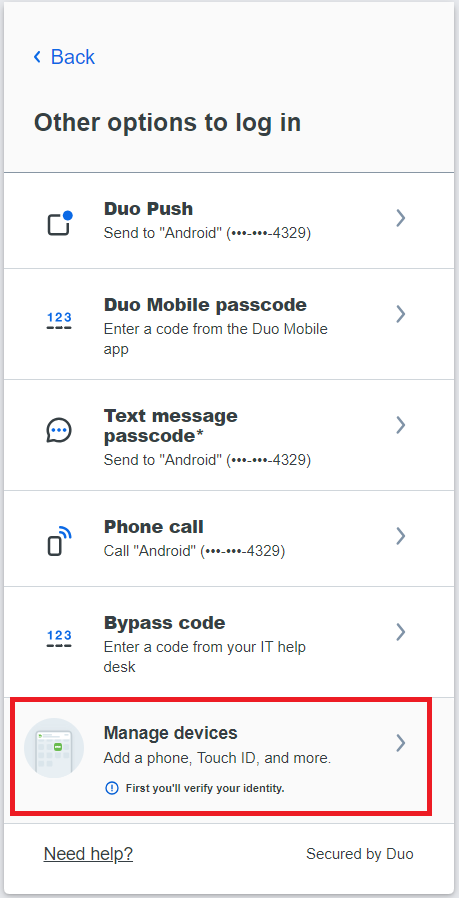
Click on “Manage devices” at the end of the list to enter the device management portal
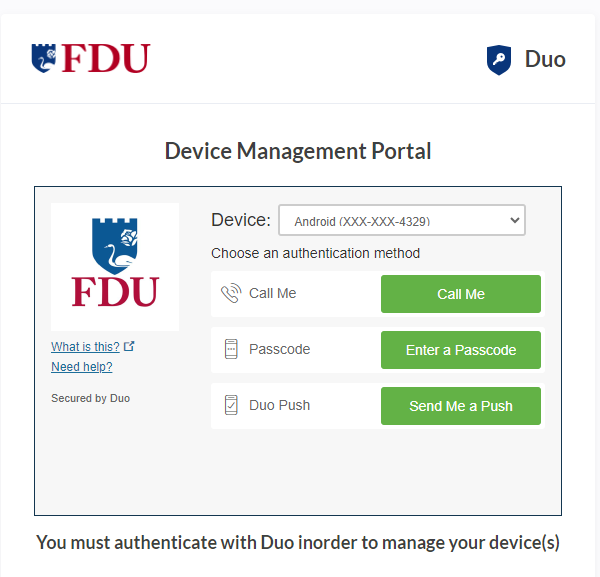
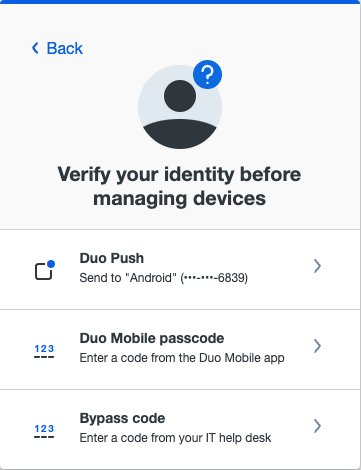
You will be prompted to verify your identity by completing the DUO Multifactor Authentication process. Select your preferred authentication method from the listed options to continue
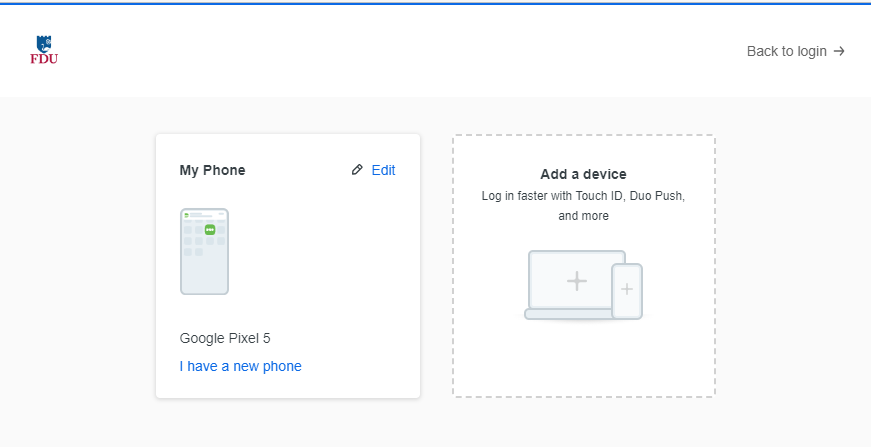
After approving a DUO authentication request you can see the Device Management Portal with all your registered devices.
close
Add New Device
To add a new method of verifying your identity in DUO, click “Add a device” and follow the enrollment process described in the DUO Quick Start Guide, starting on Step 3.
The difference between adding a new device from the Device Management Portal and during first-time enrollment is that when you have finished enrolling the new device you return to the Device Management Portal to view all your registered devices, including the new one, instead of continuing to log into an application.
close
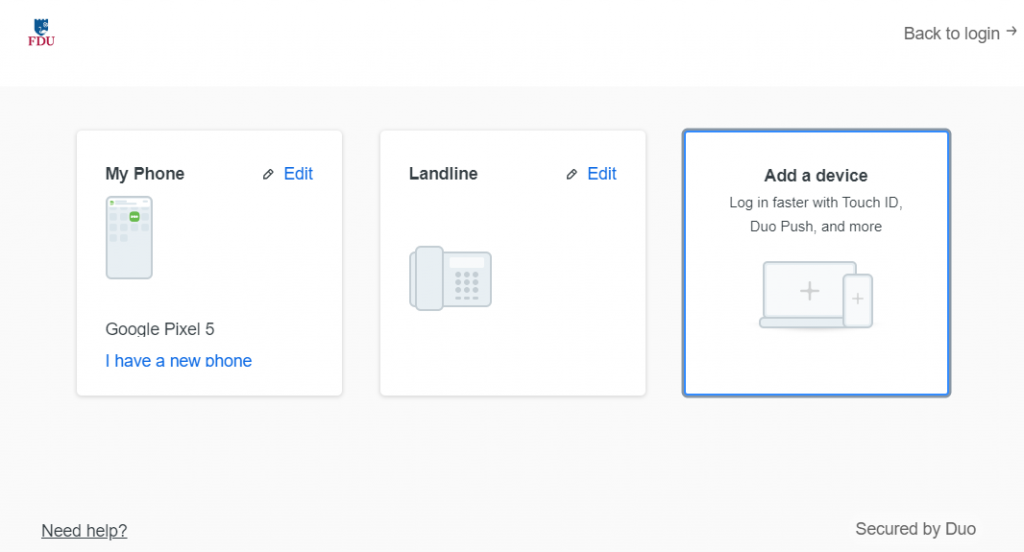
Rename or Remove a Device
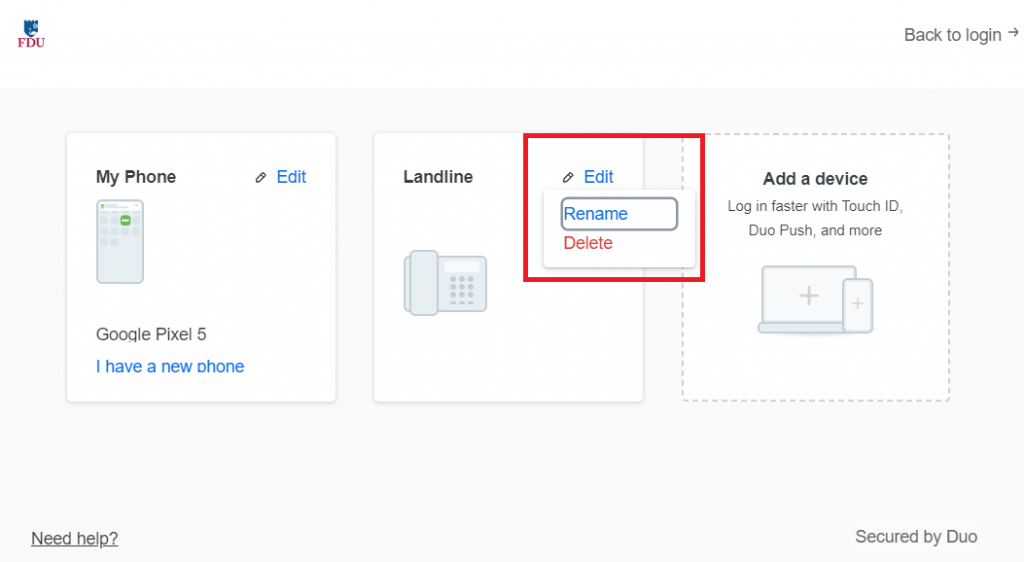
Click the “Edit” button on the device you would like to rename or remove to view the drop down menu
Then click either “Rename” or “Delete“
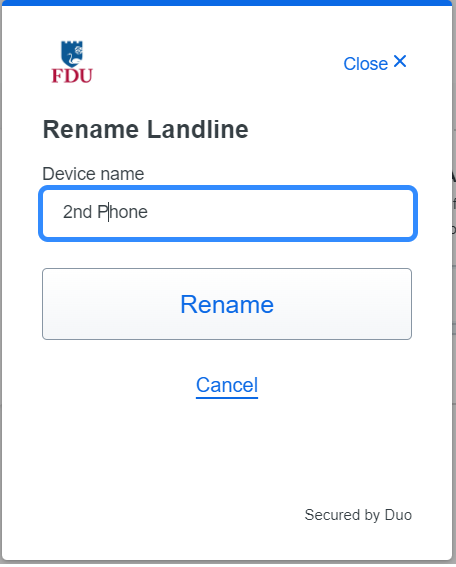
When renaming a device, type the new name for your device, then click on “Rename” to save your changes
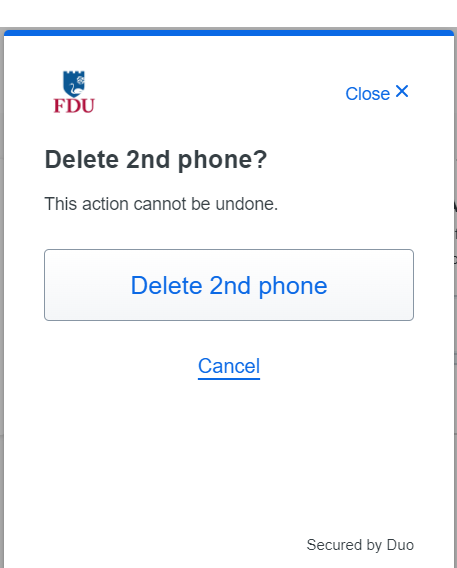
When Deleting a device, confirm your selection to delete
close
Reactivate DUO Mobile for an Existing Device
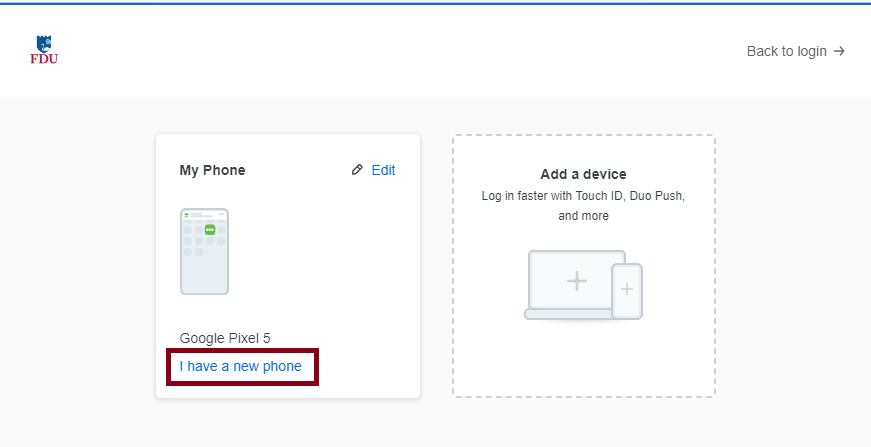
If you have replaced the phone you activated for DUO Push, you can reactivate DUO Push if you have the same phone number.
Click on “I have a new phone” for the device you want to reactivate
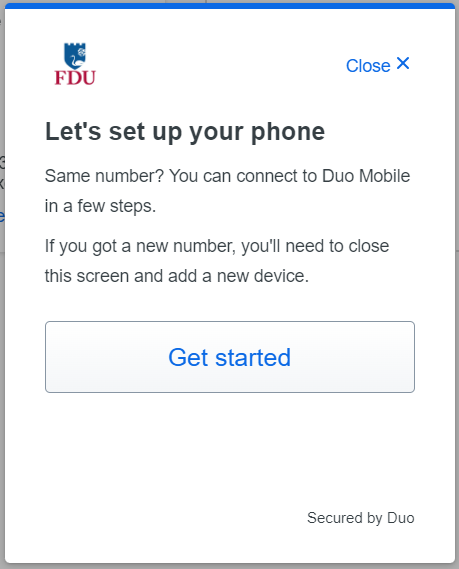
Click “Get Started” to continue
Click on “Send me a passcode” or “Call my phone” then proceed to follow the instructions prompted to complete the reactivation process
close
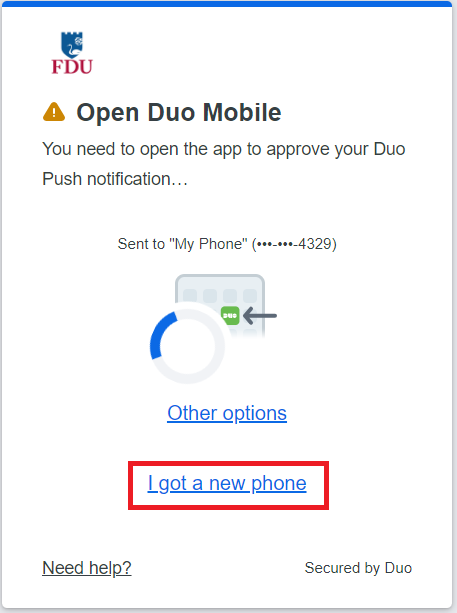
Reactivate DUO Mobile outside of the Device Management Portal
Let the DUO Push authentication time out
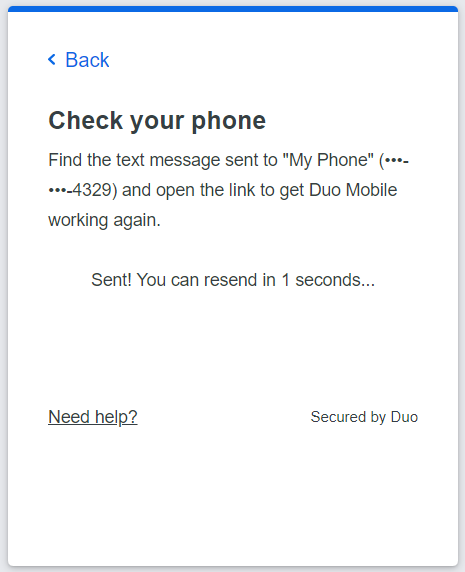
Click on the “I got a new phone” link shown in the Universal Prompt
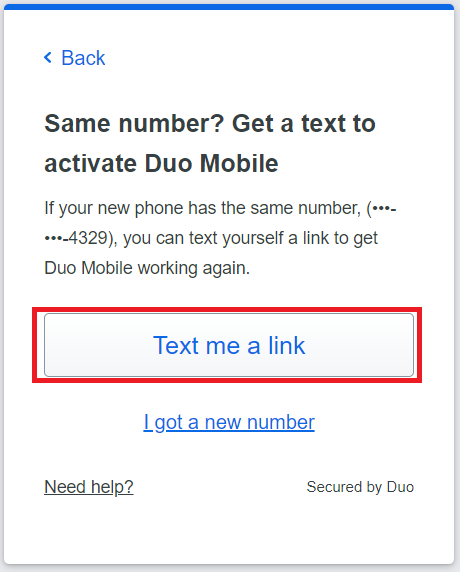
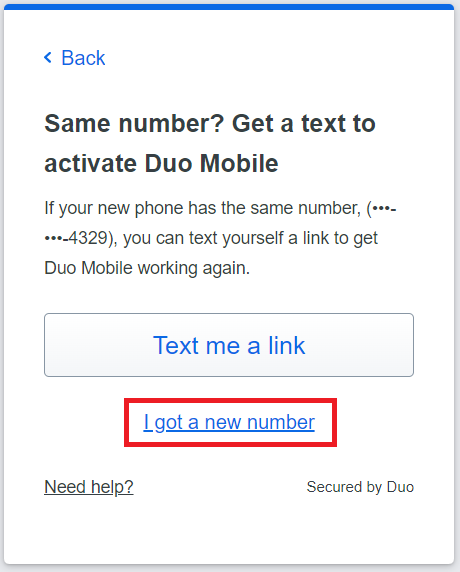
If you still use the same phone number as you did when you first set up the phone to use DUO Push, then click or tap the “Text me a link” button
When the text message with the link arrives on your phone, tap it to automatically reactivate DUO Mobile on your phone to use DUO Push again. If you don’t have DUO Mobile installed be sure to install it before you try to open the activation link in the text message.
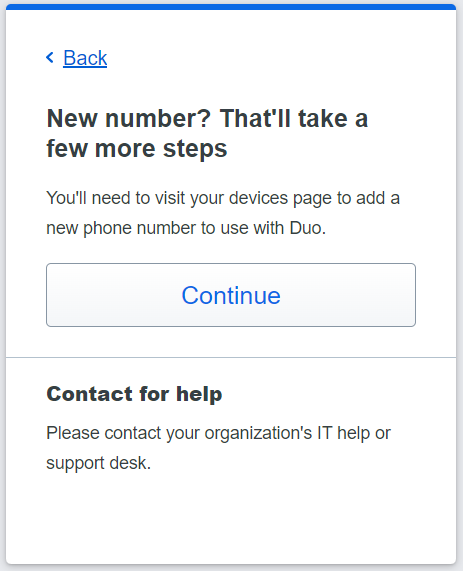
If you are using a different phone number than the one you first set up, then press on “I got a new number“
Press “Continue” to proceed to the DUO Device Management Portal, where you can complete the steps to “Adding a New Device“and set up DUO Push on the new phone
Note
You will need to verify your identity with a different DUO verification method, so if you don’t have one available you will need to contact the SAMI Service Desk for help.
Two-factor authentication also referred to as multi-factor authentication, provides an additional layer of security when logging in to a website. Two-factor authentication is becoming the standard in cybersecurity. Google, Apple, and other services all have their two-factor authentication methods. In short, passwords are no longer sufficient in protecting our sensitive data; we’ve got to add another layer of security to our accounts.
DUO Push – if you have the DUO Mobile App installed on your smartphone or tablet, you can receive a push notification. From the app, you can approve or deny the login attempt.
Passcodes via DUO Mobile App – If you have the DUO Mobile app installed, you can receive a single passcode by tapping the FDU logo in the mobile app. This code must be used immediately.
Passcodes via SMS (Faculty/Staff Only) – users can receive a one-time use code via text message. To get you a one-time code, click Enter Passcode, then click on the blue button “Text me new codes.” These codes do not expire, and they are valid until used. You do not have to have a smartphone for this option.
Phone Call (Faculty/Staff Only) – you can receive a phone call on your mobile phone or landline phone. The call will give instructions on approving or denying the login attempt.
If you opt-out of the DUO Mobile Application push notifications, there are a variety of passcode options to utilize as your second verification method.
Passcodes via DUO Mobile App – If you have the DUO Mobile app installed, you can receive a single passcode by tapping the FDU logo in the mobile app. This code must be used immediately.
Passcodes via SMS(Faculty/Staff Only) – users can receive a one-time use code via text message. To get you one-time code click Enter Passcode, then click on the blue button “Text me new codes.”These codes do not expire, and they are valid until used. You do not have to have a smartphone for this option.
Temporary Passcodes –If you do not have your device with you, you can obtain temporary passcodes by calling the SAMI Service Desk. Each of the passcodes can only be used once, and will expire in 7 days.
Selecting this option will allow you to bypass DUO authentication for the next 60 days. This only works if cookies are enabled, and you are logging in from the same computer and browser. You will still be prompted to verify once – with your username and password. You will not be able to access your settings on that particular browser during the 60 days. Please note that if you have tools or policies running that regularly delete or clean cookies, the remember me feature will not work. If you do need to access your settings (perhaps to add another device), just try another browser or visit the FDU Self-Service Portal. Remember me will not work if your browser is set to private browsing mode.
The remember me feature relies on browser cookies. For remember me to work, your Internet browser must allow cookies to be stored. Visit your browser content settings to ensure cookies are being stored. Some departments on campus do not allow cookies to be stored. If the remember me feature does not work on your browser, check with desktop support in your area.
If you do not have your device with you, you can obtain a batch of temporary passcodes. To obtain a temporary passcode, call the Fairleigh Dickinson University Technical Assistance Center (UTAC). Each of the passcodes can only be used once and will expire in 7 days.
NOTE: If you have lost your device, please report it to the SAMI Service Desk.We want to ensure someone else does not maliciously authenticate your account with your device.
Yes, the passcode option on the DUO app does not require WiFi or cellular connectivity, it even works on airplane mode. To use this option, visit the DUO app on your smartphone, and tap the key icon to obtain a passcode. Enter the passcode into the DUO prompt when logging into any website that requires DUO authentication.
DUO Authentication is required by any application the utilizes the university Single Sign-On (SSO) service. Examples of some websites that require DUO authentication are listed below.
You may have trouble receiving push requests if there are network issues between your phone and Duo’s service. Many phones have difficulty determining whether to use the Wi-Fi or cellular data channel when checking for push requests and simply turning the phone to airplane mode and back to normal operating mode again often resolves these types of issues, if there is a reliable internet connection available. Similarly, the issue may be resolved by turning off the Wi-Fi connection on your device and using the cellular data connection.
Check the time and date on your phone and make sure they are correct. If the date and time on your phone are manually set, try changing your device’s configuration to sync date and time automatically with the network.
iOS users can run a troubleshooting tool from within Duo Mobile version 3.32.0 or later. To run the tool:
Open the Duo Mobile app on your iOS device and tap the Edit button in the top left of the accounts list screen, then tap the name of the account for you aren’t receiving push requests.
Next, tap the Get Started button in the “Missing Notifications?” section of the “Account Details” screen.
Duo Mobile performs the test. If any step fails, you’ll receive further troubleshooting suggestions. After taking the suggested actions, press “Run test again” to retry.
The steps that Push Troubleshooting performs automatically are as follows:
Check device settings.
Check internet connectivity.
Check that the device can contact Duo’s cloud service.
Attempts to send a test Duo Push notification.
Should none of these actions help, see the Duo Knowledge Base for additional iOS and Android troubleshooting steps.
If you can’t get Duo Push working on your own, you can log in with a passcode generated by the Duo Mobile app and send a new activation link to your phone.
If you’ve tried the suggestions here but can’t get Duo Push working or reactivate your device yourself, please contact the SAMI Service Desk.
NOTE: Google Play Services are required to receive push notifications on Android. Users without Google Play Services installed will have to “fetch” by swiping down in the DUO Mobile app.
If your phone number has not changed, login to FDU Self-Service Portal then choose the “Call my Phone” option.
Choose your device from the list, and then click “Device Options” next to your phone.
Next click the “Reactivate Duo Mobile” button (you will need to install the Duo app on your phone to proceed). Then follow the instructions to activate DUO Mobile on your new device.
If you have a new phone number, you will first need to obtain a temporary passcode (see the ‘What are Passcodes?’ section above).
Yes, you can add devices by visiting your DUO settings. When you see the DUO prompt with the three notification options, click “Settings” at the top right.
NOTE: If you are using the Remember Me for 60 days feature, you will need to visit FDU Self-Service Portalaccess your settings.)
After you click Settings, click “Add a New Device“. You can register smartphones, cell phones, tablets, and landline phones.
The DUO smartphone application serves only to provide two-factor authentication. It does not access any personal information on your device, nor does it track your location. Learn more about DUO’s commitment to privacy on its website.
A “bypass code” is a temporary passcode created by an administrator for a specific user to access a Duo-protected application. These are generally, used as “backup codes,” so that enrolled users who are having problems with their mobile devices (e.g., mobile service is disrupted, the device is lost or stolen, etc.) or who temporarily cannot use their enrolled devices (on a plane without mobile data services) can still access their Duo-protected systems.
A user must have a valid Duo authentication device enrolled (like a phone or iPad) to use a bypass code to authenticate. Bypass codes are not intended as a user’s only 2FA method.
Bypass codes expire after being used the allowed number of times, or after an administrator-defined amount of time. Once a bypass code is created, the timeout and allowed uses cannot be extended.
If you need a Bypass code please visit SAMI Service Desk, where you can request additional information or search our extensive IT knowledge base. While SAMI Support provides the quickest and easiest access for IT support, you can always contact the SAMI Service Desk at SAMISupport.fdu.edu.
An alias is an additional email address that will direct mail to your FDU email account. Creating an alias for your account can be a useful strategy. For instance, if you are spearheading a project, it may be easier to solicit replies to an address that contains the name of the project than it would be to garner responses to your existing email address. If this solution interests you, please fill out the Email Alias form.
Due to the cavernous email storage offered on the Office365 platform, there has been little to no demand for FDU staff and faculty members to request an increased mail quota. Office365 email provides enough capacity for even our most prolific users. However, if special circumstances make you the exception to this rule, you can request a quota increase by completing the Quota request form.
FDU’s Acceptable Use Policy prohibits running software that accepts incoming connections from other computers. Programs such as BitTorrent or other P2P file sharing hosting program all contain server components that allow others to connect to your computer and retrieve files from your system. In addition to the legal implications of sharing copyrighted materials, file sharing software creates a security concern. Improper use of these programs could result in the compromise of your private files and may leave your system open to attacks from other computers.
Phishing involves the use of e-mail messages that appear to come from your bank or another trusted business in an attempt to scam the user into surrendering private information that will be used for identity theft. The phishing e-mail typically ask you to click a link to visit a Web site, where they are asked to update personal information, such as passwords and credit card, social security, and bank account numbers
Scammers have become increasingly sophisticated in creating fraudulent emails and Web sites that look authentic. These emails and Web sites often appear to be from legitimate companies and include images and logos of these organizations.
The Network ID (NetID) is a Windows Active Directory account uniquely assigned to each student, faculty & staff. It serves as your login to many computing and networking services including FDU Email.
In order to provide a safe and stable computing environment, the FDU-Wireless and FDU-Secure wireless networks require NetID authentication. However, in certain instances our students, staff and faculty members will need to work on campus with people from outside of our community. This can include vendors, contractors, visiting scholars, or even a visiting family member or friend. In these instances, the FDU community member can sponsor a guest for temporary wireless access. The sponsor of a guest account will be responsible for the actions of his or her guest. Please ensure that your guest(s) follow FDU’s Acceptable Use Policy for Computer Usage.
In order to provide a safe and secure network environment, FDU IT requires devices to authenticate to the FDU network before connecting. This works well for computing devices such as desktop computers, laptop computers, and mobile devices such as tablets and phones. Most other electronics, including gaming consoles and streaming video boxes, cannot properly authenticate to the network. In these instances, we ask you to register the device using the online form below. Please note that each user on our network is entitled to register up to 5 devices.
To access Forms, you will be directed to our SAMI Support Portal where you will be asked to log in using your NETID and authenticate using Duo. Once you click “Next,” you will be forwarded to samisupport.fdu.edu in a new window or tab.


 Email
Email 

