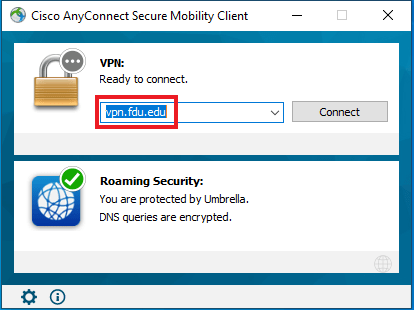
Microsoft has released a new version of Outlook that will eventually replace the classic version. The new Outlook for Windows brings the latest features, intelligent assisted capabilities, and a new modern and simplified design to your Outlook app. The New Outlook has many features and is vastly different visually from the classic version of outlook presently installed on all university owned computers.

Index
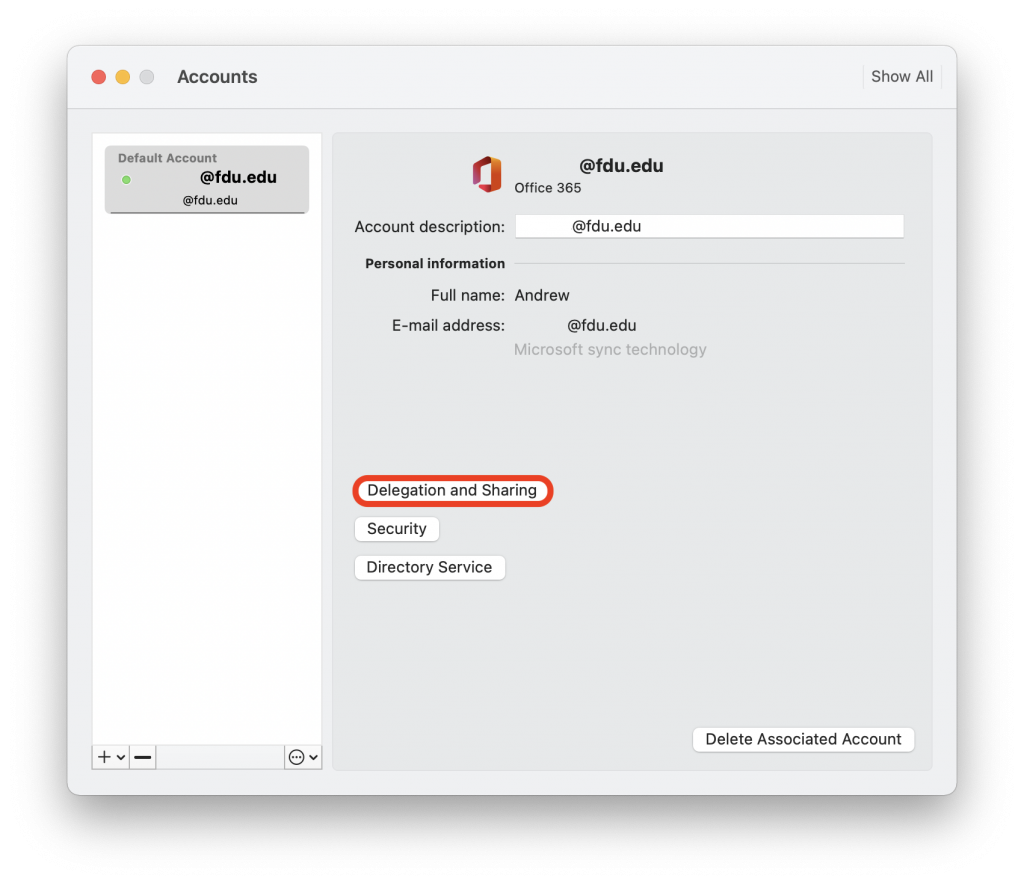
The New Outlook is compatible fully with all Office365 functions but because there are some features missing that presently exist in the classic Outlook, FDU IT highly recommends NOT switching to the new Outlook currently, especially since not all features are present and Microsoft is still developing the new Outlook.
Some of the features not available in the New Outlook are:
- Existing Offline Outlook files called PST files stored locally on your computer
- Virtru Email Encryption Client: While the Add-on is not supported, you can still send and receive encrypted email using the “#secure# tag in the subject line of the email
- Adobe Acrobat and/or Foxit PDF Professional Outlook using the COM-Add-ins platform
- Zoom Outlook Plugin or any other Meeting platform using the COM-Add-ins platform
- Any other third-party COM-Add-in
- Custom Macros or Custom Visual Basic functions manually added
- Many Rule templates and options are not available
Note
The New Outlook has already been deployed to university owned macOS devices, due to the number of enhancements it provides, and that COM-Add-in platform was a Windows only feature.
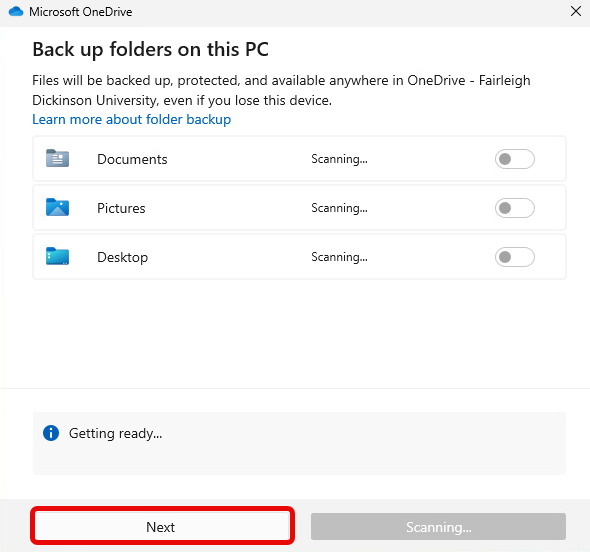
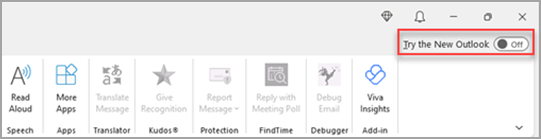
- Turn on the toggle “Try the new Outlook” which will begin downloading the New Outlook
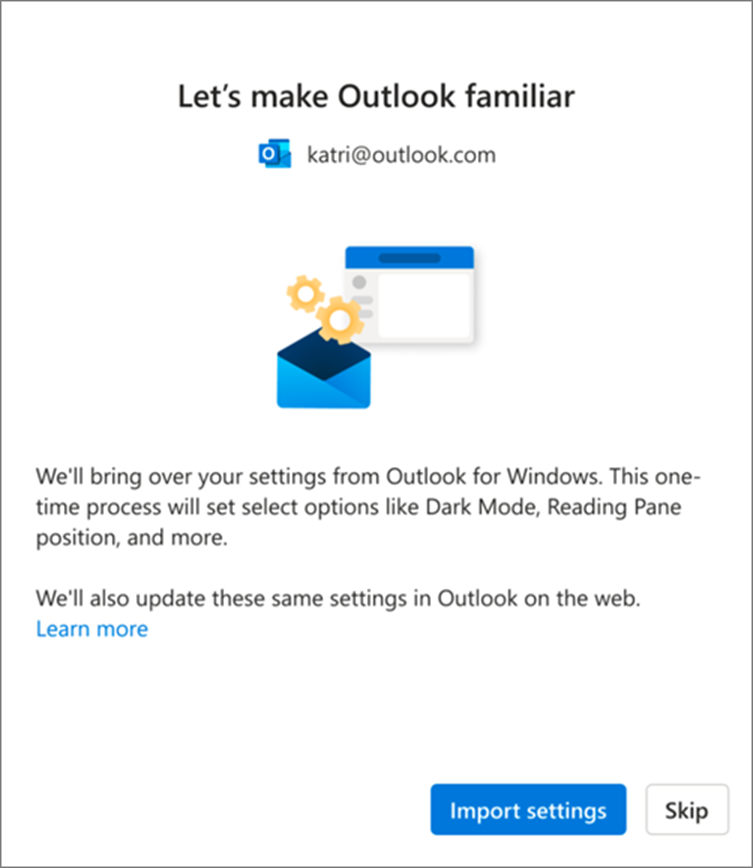
- From the Success window, select “Switch”. This will close the current version of Outlook and New Outlook will sign you in automatically. Select “Next” to accept the privacy settings
- Select an option about sending optional data, and then select “Accept”. Review the privacy information about connected experiences, and then select “Continue”
- Select “Import Settings” to bring over your settings from classic Outlook. New Outlook will begin adding your accounts
- The new Outlook for Windows will open once the setup is complete, and you can start reading and sending emails immediately.
New Look
This is the new Outlook mail icon. It might also include the word NEW.
When you open new Outlook, you’ll see the following tabs on the ribbon: Home, View, and Help. This version includes Settings which is available in the navigation header. Settings is where you can customize your Outlook experience.
Note
If you are using the new outlook and never created an account using the Classic Outlook, you will have to create a ticket using FDU SAMI Support by clicking the Support button at the bottom of this page.
If you switched from the classic Outlook for Windows, you’ll have the option to migrate some of your settings, which you can learn more about on following the link below:
Microsoft Learn
However, it’s still good to familiarize yourself with the latest options.
You’ll find Settings in the gear icon in the upper right corner. You can also make quick updates to certain settings by clicking on the View tab.
Changes you make to settings in the New Outlook for Windows will also be reflected in Outlook on the web.
Become Familiar with The New Ribbon
The top bar of the app should be familiar if you’ve used any apps like Word or Excel before, including the classic Outlook for Windows.
Known as the ribbon, it is the place to find the commands you need to manage your inbox or format emails. You can make the ribbon larger (the classic experience) or smaller (the simplified experience) using the dropdown arrow on the right side of the bar. If you want to personalize the commands you see in the simplified ribbon, select Customize.
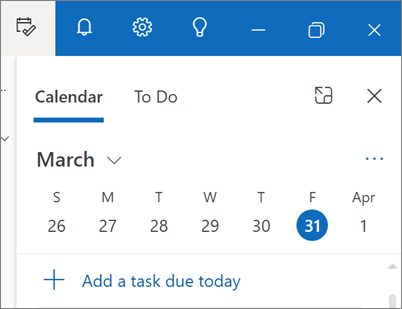
On the left side you’ll see the navigation bar, which makes it simple to switch to Calendar, Contacts, or any other app you frequently use. For quick access to your calendar or tasks without leaving the inbox, you can use My Day by selecting the icon in the upper right.
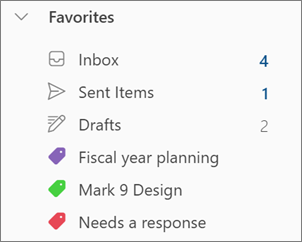
Pin Emails
Do you ever have trouble tracking down that key email thread you’re actively responding to? Or is there an email with key information you frequently refer to? Now, simply right-click any message and choose. Pin and that email will appear at the top of your inbox, saving you time from having to go back and search for it.
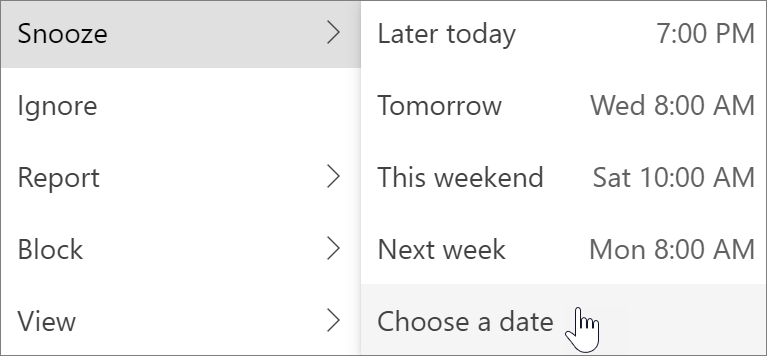
Snooze an Email
Sometimes email is very important, but not yet. With the Snooze feature, you can schedule a time for the email to be re-delivered to your inbox, appearing at the time you want it to, so you can handle it when it’s the right time for you. Just right-click any message and choose Snooze, or select Snooze from the ribbon. Then choose the time you want it to be delivered.
Scheduling Poll (Formerly Find Time)
Schedule an Email
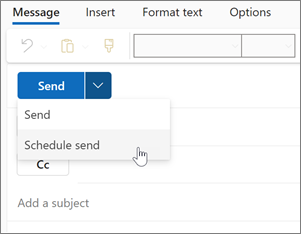
In today’s hybrid work world, your day might be someone else’s night, so you don’t want to send an email to someone in the middle of the night. With the new Outlook, it’s simple to send an email when you want to. Just select the dropdown arrow next to Send and choose Schedule send.
You might be familiar with categories, but they’ve been significantly upgraded. See the category names and colors directly on your messages in your inbox. Want to see everything you’ve tagged with that category? Just click it right on your message. You can even add a category to your Favorites.
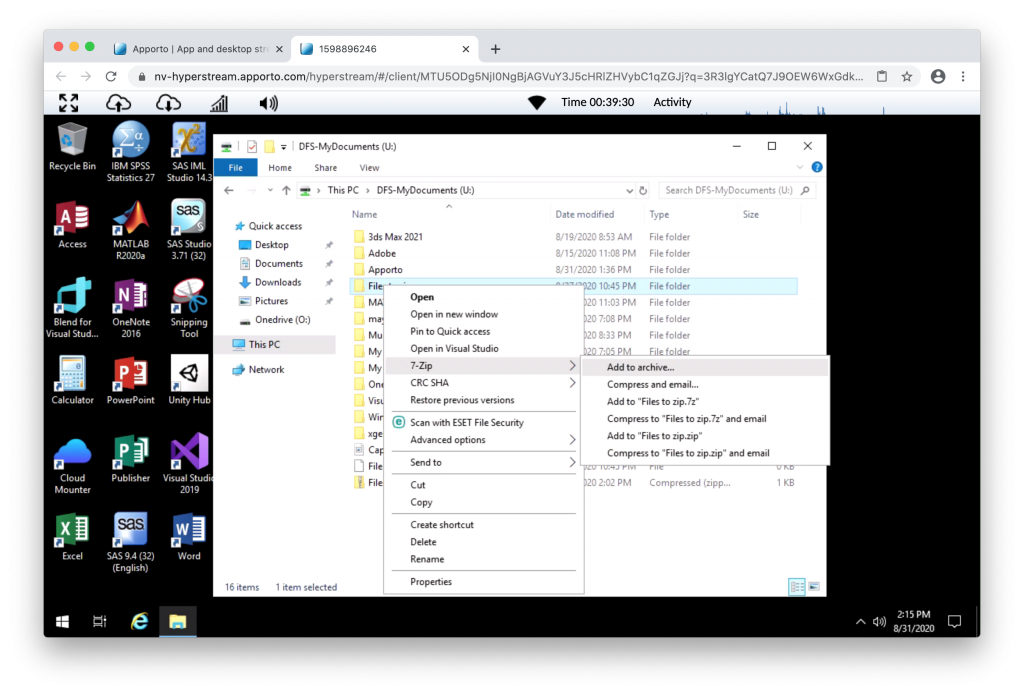
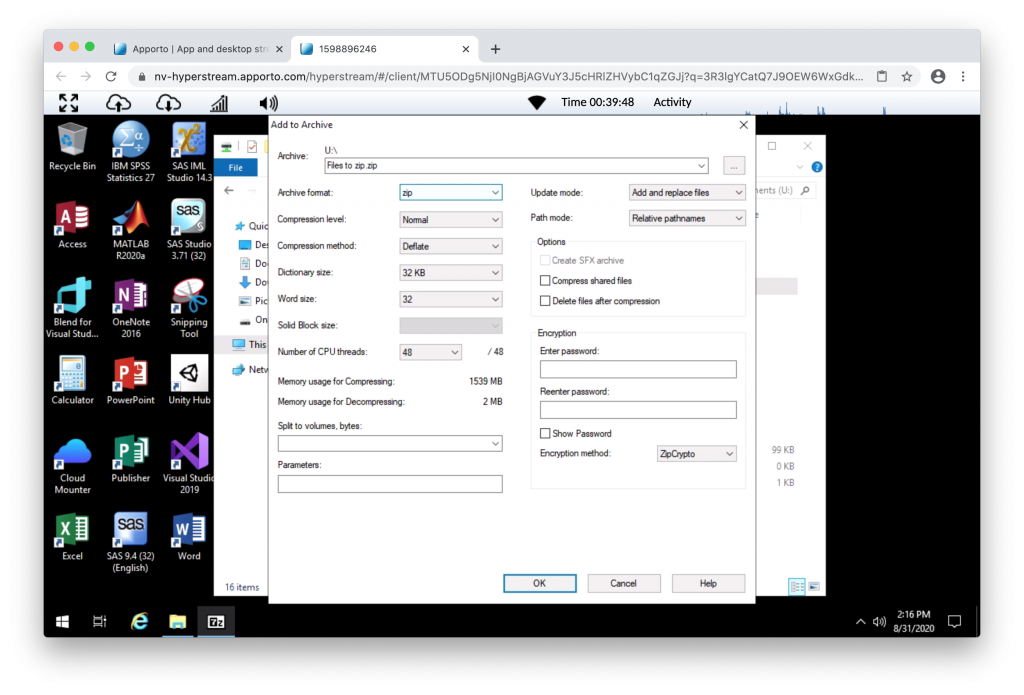
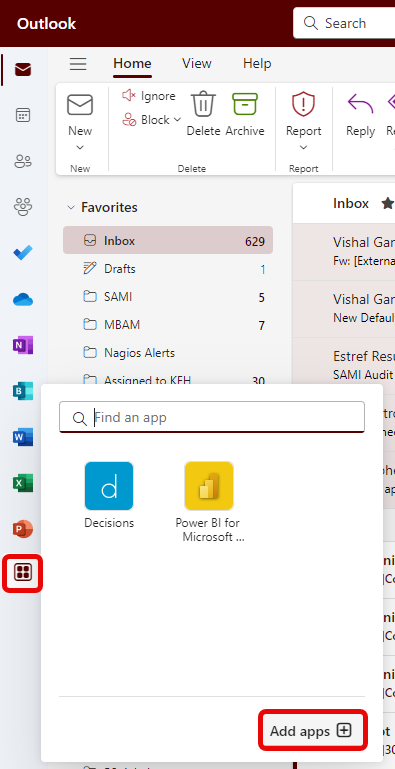
Install an Add-in from The Office Store
- In Outlook, go to the navigation bar and select “More Apps > Add apps”
Tip
You can also access the Store from the Apps button to install an add-in directly from a message or appointment.
Note
Only Approved Addons will be allowed to be installed. To request an Addon, Open a Sami Support Ticket.
For guidance on how to locate the Apps button to access add-ins while reading or composing a mail item, see Use an add-in in Outlook following the link below:
Using an Add-in in Outlook
- In the “Apps” page, search for the add-in you want from the available list. Alternatively, if you’re after a specific add-in, enter its name in the search box. When you find the add-in you want to install, select it to learn more about the add-in and review its privacy policy
- When you’re ready to install the add-in, select “Add”
Add-ins Installed by your IT Admin
If you’re part of an organization and a new add-in is installed for you by your IT admin, the add-in will be available on the read or compose surface where it’s designed to work. For guidance on how to access an add-in, follow the link below:
Use an add-in in Outlook
Using an Add-in
The location of where an Add-in is installed depends on whether you’re reading or composing a mail item.
Tip
If you moved from classic Outlook for Windows to the new Outlook for Windows, note that the location of add-ins is different. While add-ins are accessed from the ribbon or app bar in classic Outlook, access to add-ins in new Outlook for Windows depends on whether you’re reading or composing a mail item.
For guidance on how to use Add-ins in classic Outlook, visit the link below:
Use an add-in in Outlook
Using an Add-in While Reading a Message
- Select a message in the Reading Pane or open a message in a separate window
- From the action bar of the message, select “Apps”
- Select the “Add-in” you want to use
Tip
Customize your action bar to quickly access your add-ins. In the message action bar, select the ellipsis button (•••), then choose Customize actions. In the Addins section, check the boxes for the add-ins you want to see in the action bar.
Use an Add-in While Composing a Message
- Create a new message or reply to an existing one
- From the ribbon, select the “Message” tab, then choose the Add-in you want to use. If the Add-in doesn’t appear in the ribbon, select “Apps” to view your installed add-ins
Use an Add-in While Viewing or Scheduling a Meeting or Appointment
- Open an existing appointment or create a new one
Tip
If you want to use an add-in on an existing meeting or appointment, you must open the meeting or appointment in a pop-up window to view the ribbon.
- From the ribbon, select the “Add-in” you want to use
Delete an Add-in
- Go to the navigation bar and select “More Apps” then “Add Apps”
- On the “Apps” page select “Manage your Apps”
- Under “Manage your Apps” find the app you want to delete and select “More options” then “Remove”
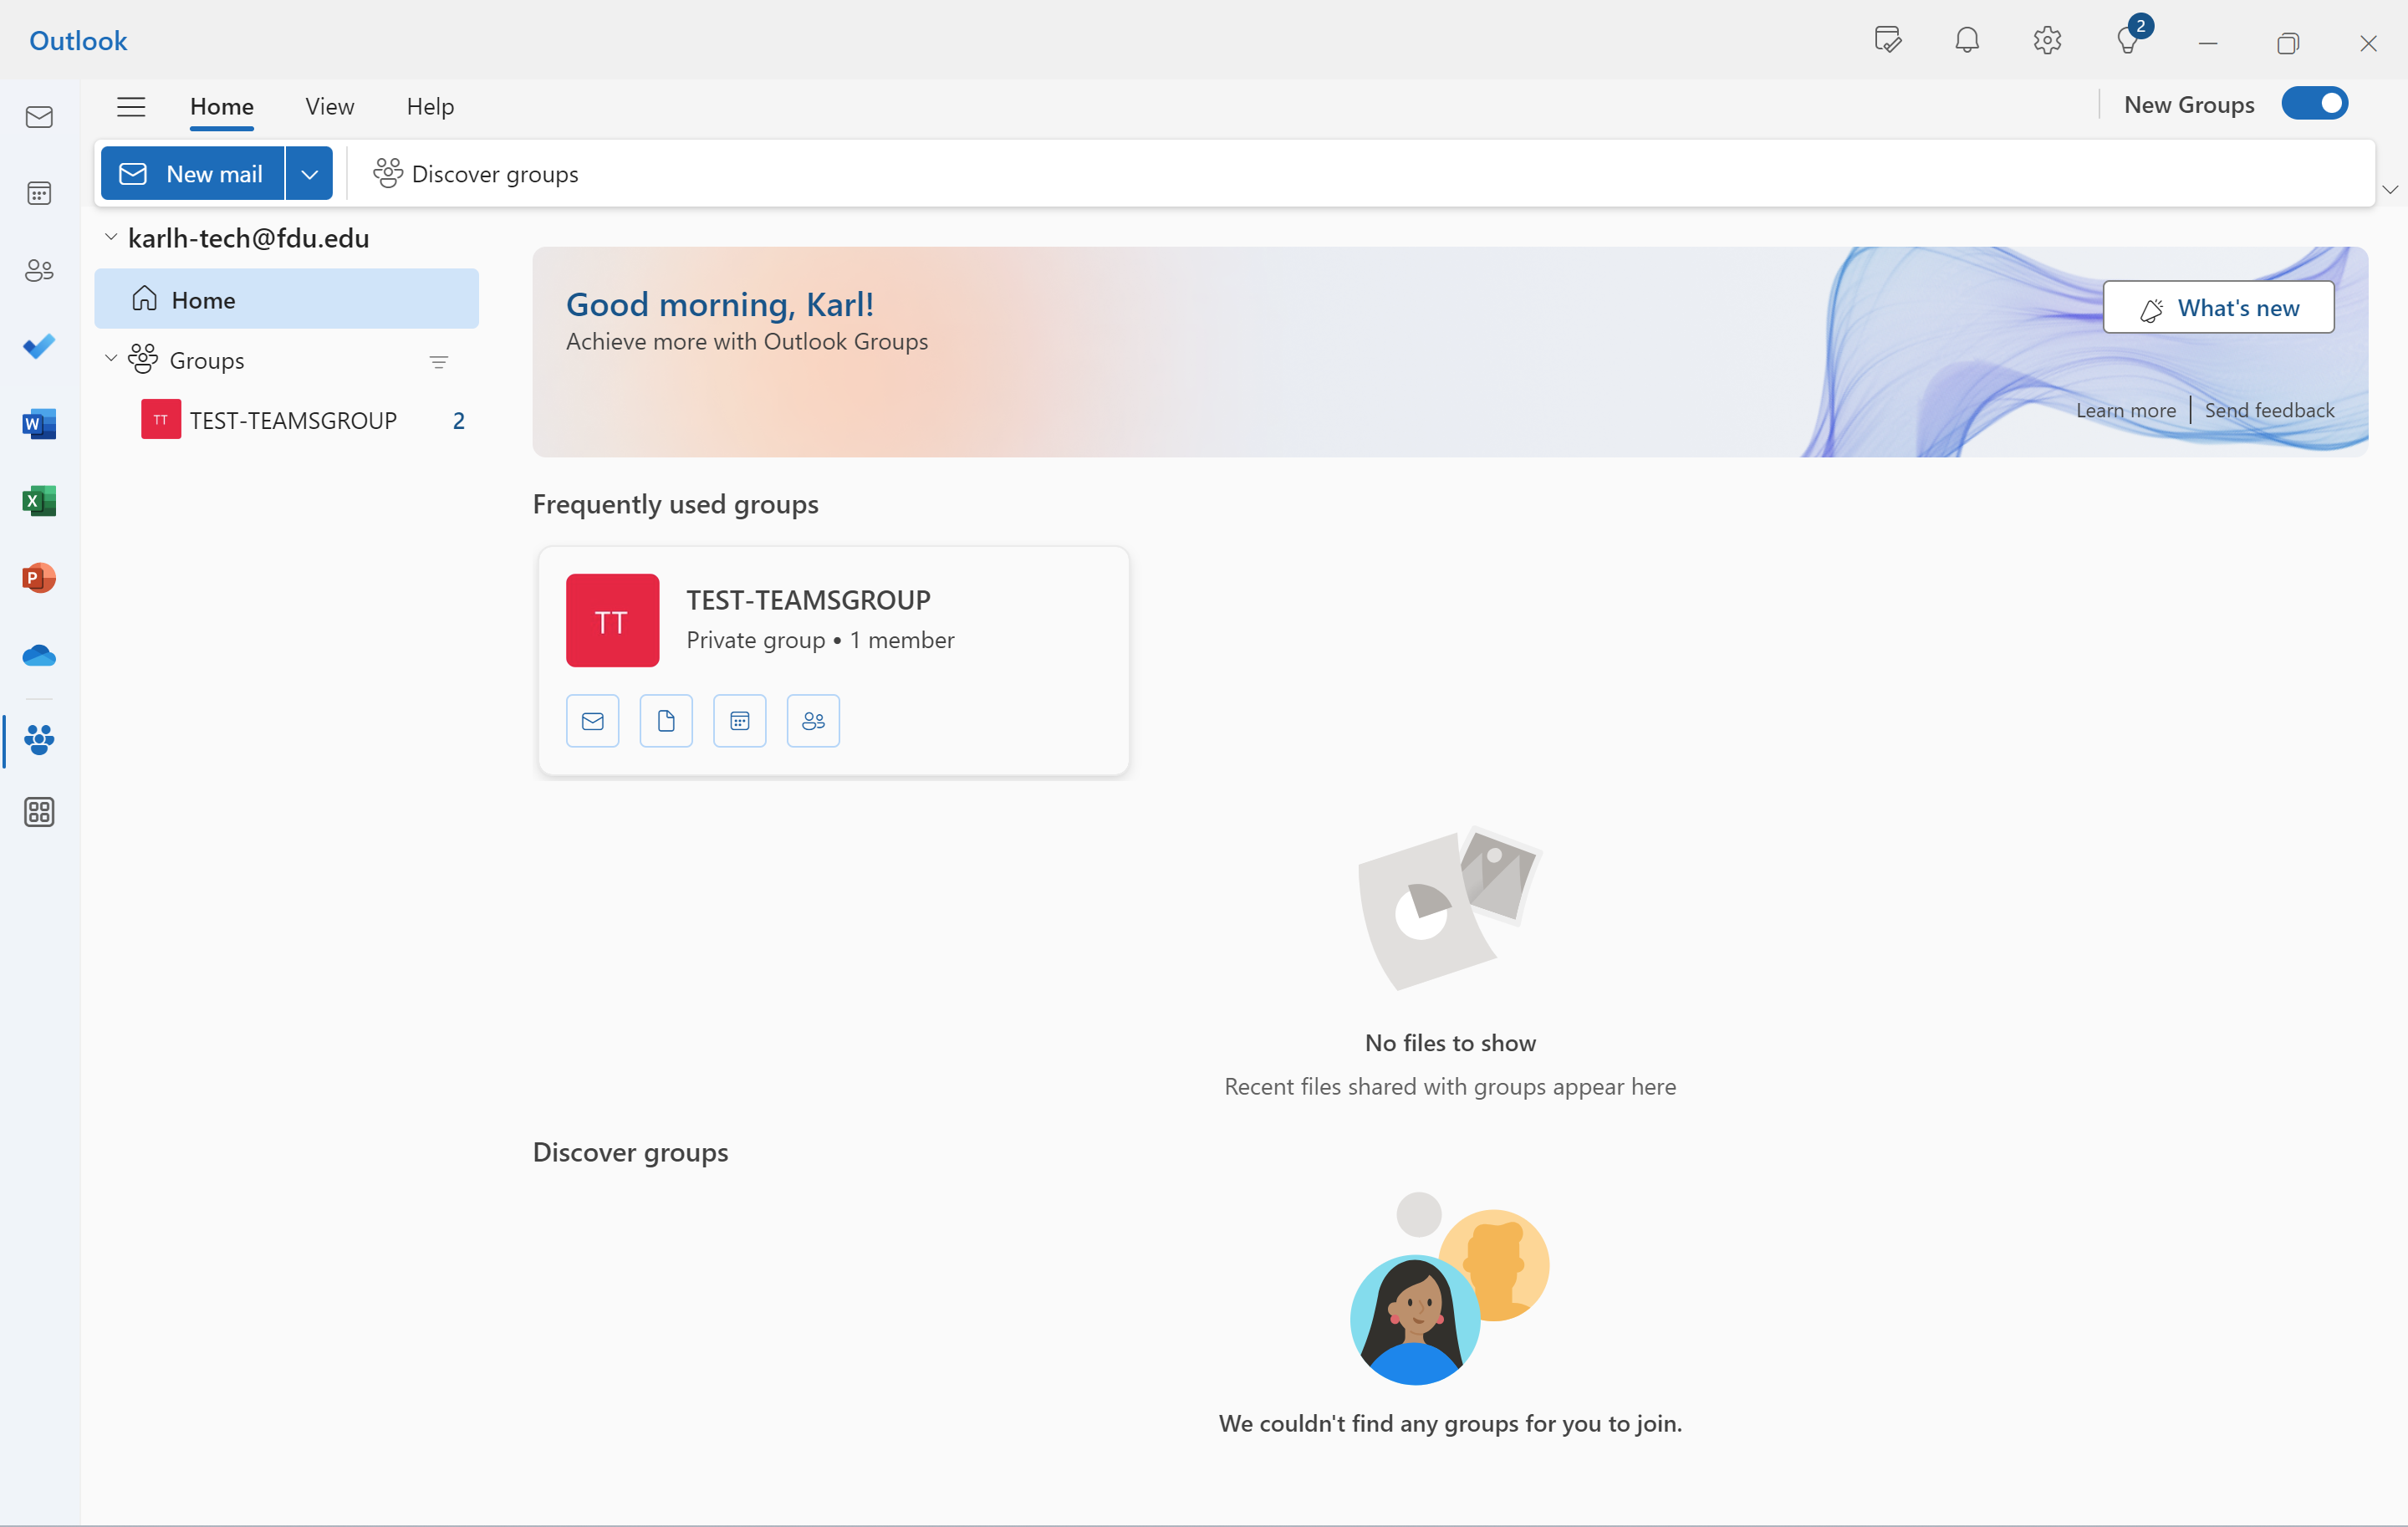
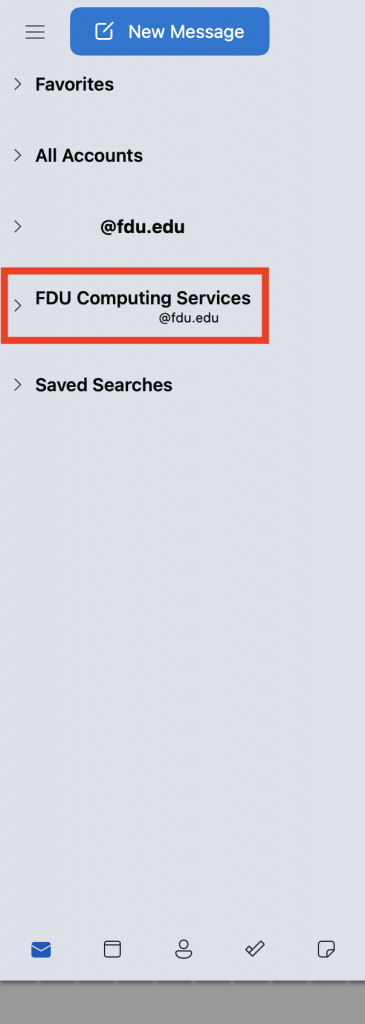
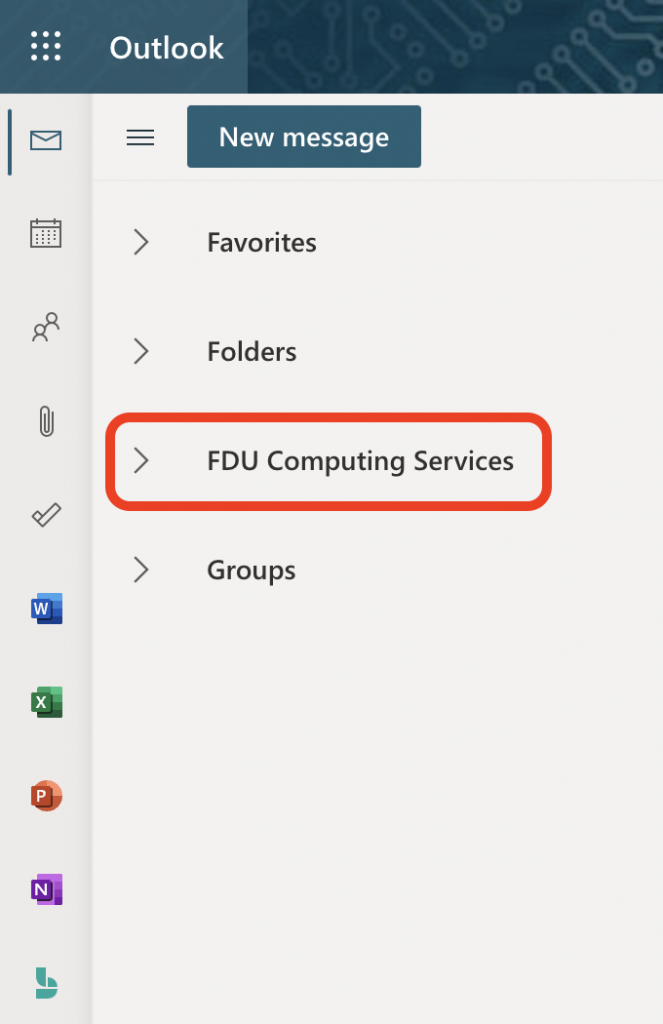
As of November 2023, the Microsoft 365 Groups experience in Outlook is generally available for Outlook on the web and new Outlook for Windows. Access new Groups by selecting Groups on the navigation bar.
Tip
New Groups in classic Outlook is available in Build Version 16.0.16714.10000 or later. To access new Groups in classic Outlook, from the navigation bar select More Apps > Groups.
New Outlook Groups
Groups in Microsoft 365 let you choose a set of people that you wish to collaborate with and easily set up a collection of resources for those people to share. Resources such as a shared Outlook inbox, shared calendar or a document library for collaborating on files.
Outlook now has a new home for Microsoft 365 Groups - one place to connect, communicate, and collaborate with your team. Groups Home provides a central destination to get critical information from all the different groups you may be part of.
Benefits of the new Groups experience include:
- Group Home landing page – Stay updated on your groups, including recent files across all your groups. From Home, you can access frequently used groups and find new ones based on your interests.
- Recent groups and Recent files – Find recent active groups and quick links to get to files, emails, events, and member management from the Groups Home landing page.
- Revamped individual Groups experience – Create, consume, and share information related to a particular group, as well as manage events and members efficiently in fewer clicks.
Accessing New Groups
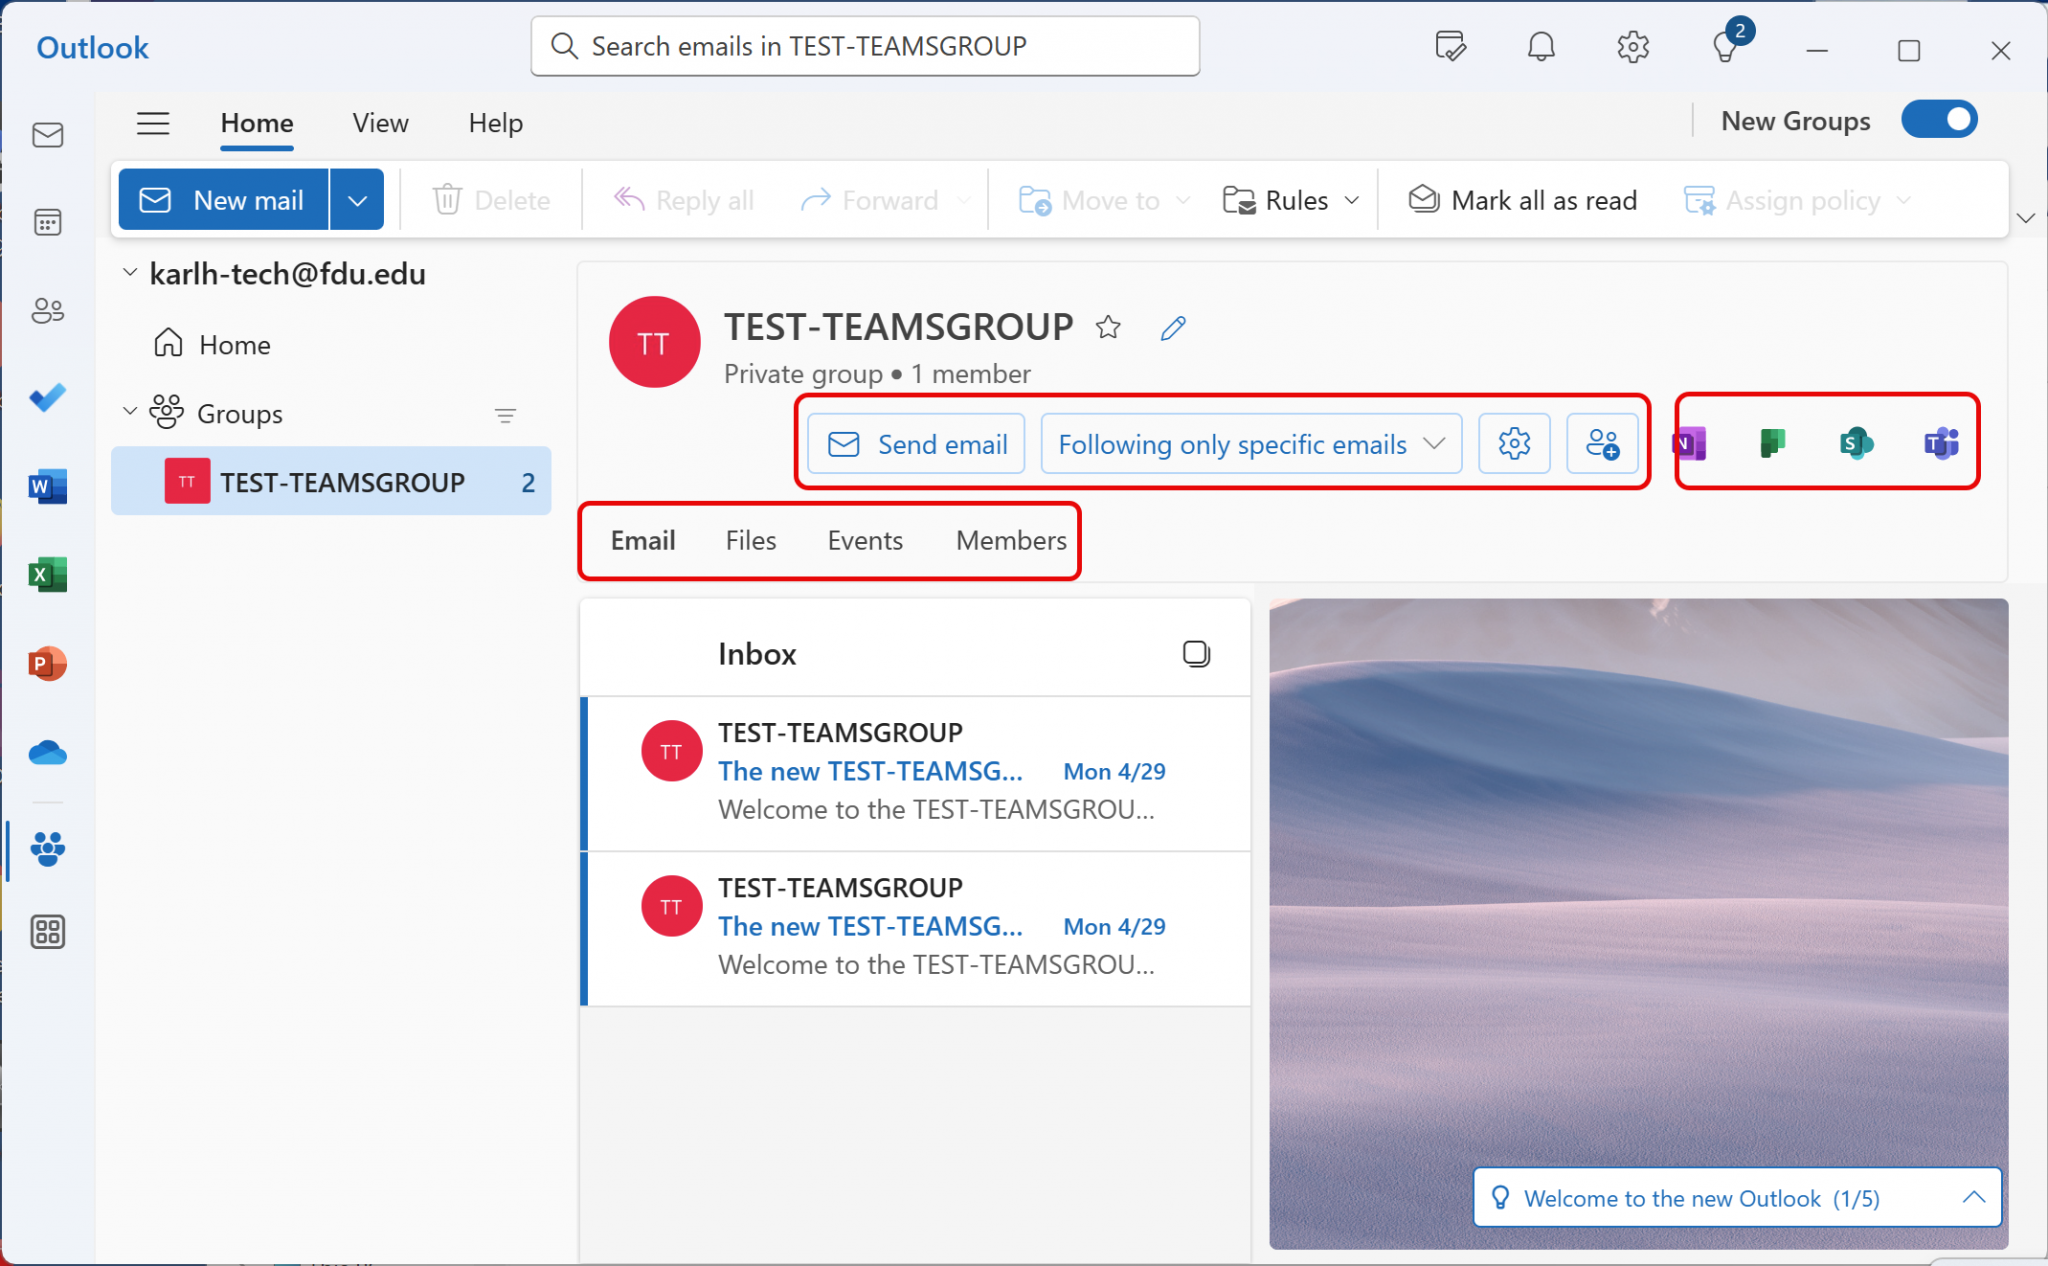
In the New Outlook, from the navigation bar select “Groups”. This takes you to Groups Home.
In the Classic Outlook, from the navigation bar select “More apps” then “Groups”.
Tip
To pin, right-click Groups and select Pin.
From Groups Home you can see all your groups at once. Or, when you select an individual group, you can:
- Send an email to the group, access and edit your group settings and preferences, and manage group membership as needed.
- Access the group email, files, events, and members by selecting the respective tab.
- Access connected apps like Teams, SharePoint, OneNote, and Planner.
Talk
Conversations in Microsoft 365 Groups in Outlook happen in the shared inbox for the group. Users can read and reply to messages, and members can easily search or scroll back through the message history to get caught up on what’s been discussed before. The shared inbox looks a lot like the personal inbox that Outlook users are familiar with. Each conversation appears separately in the message list at the left and clicking on one will open it in the reading pane. If a user marks a message, or conversation, as read it doesn’t affect how the messages appear for other members of the group so you don’t have to worry that other members may miss an important message.
The shared inbox for your Office 365 group is where conversations occur.
Tip
A recent change in the way messages are displayed, and counted, in Outlook may have reset the number you see next to your group name in the Outlook navigation pane. If you want to reset that number to zero you can right-click the group and select Mark all as read.
Now that you’ve got your group created, let’s start a new conversation. You can post a new message by opening the shared inbox for the group and clicking New Conversation on the Ribbon. Or you can simply send an email to the group’s alias. All members of the group will be able to read the new message you’ve posted and any members who follow the group will get a copy of your message in their personal inbox.
Share Files
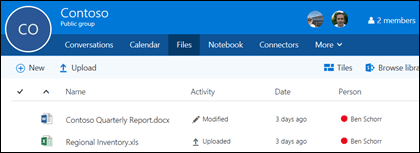
Each Microsoft 365 Group gets a shared files library where you can store, share, and collaborate on documents, workbooks, presentations, or just about any kind of file.
Access the files library by going to your group in Outlook (on the left navigation pane) and click Files on the Ribbon. The files library will open in a browser and from here you can create new files, upload files from your computer and do just about anything else a SharePoint document library can do. Think about what kind of files would be useful to share with your group, and don’t feel limited to Microsoft Office files. You can also share PDFs, photos or just about any other kind of file that your group would find useful.
To download or delete a file just select it and those options will appear on the toolbar at the top.
Collaborate
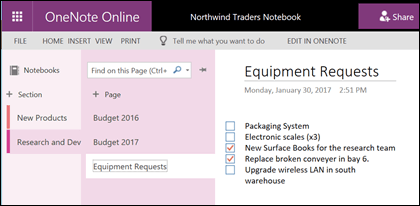
Each Microsoft 365 Group gets its own shared OneNote notebook where they can gather ideas, collaborate and store research.
Go to your group in Outlook by finding it on the left navigation pane, or in Outlook on the web by going to the People tile. Once you’re there click Notebook on the Ribbon to open the group’s shared notebook.
The first time you open the group’s shared notebook it will open in the browser in OneNote for the web. You can make edits there, or if you have OneNote 2016 and you’d prefer to use that just click Edit in OneNote from the Ribbon. Once you’ve opened it in OneNote the notebook will sync to your list of open notebooks and you can access it directly from within OneNote without having to go to the group first.
Try going to your group’s OneNote notebook and think about what might be useful for the group to collect ideas and collaborate on. For example you might have a section that you use to gather and comment on web content that is relevant to your team.
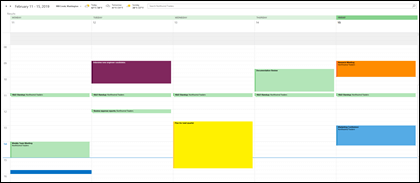
Plan Events
Chances are good that your group has events, meetings, milestones or other items that would benefit from a shared calendar. Each Microsoft 365 Group has a shared calendar that all members can see and contribute to.
Working with the calendar of your group is no different than working with your personal calendar. If you select the calendar button on the navigation pane, you’ll see your personal calendar, plus the shared calendars of any groups you’re a member of. You can check the boxes next to each calendar you want to see and view them side by side or overlapped.
Adding an item to the shared calendar works just as it does on your personal calendar. Any meeting you add to the shared calendar will invite the other members of the group to that event as well, so they can have it on their own calendars. Appointments added to the shared Group calendar do not appear on the personal calendars of other members.
Now that you’ve got your shared calendar try adding any upcoming meetings or events that your group might be participating in.