
Zoom comes equipped with numerous security features to help control online classrooms, prevent disruptions, and support educators in teaching remotely. Below are best practices for securing your virtual classroom using Zoom.

FDU provides remote access to many of the software applications typically found in university computer labs.
Index
What is FDU Anywhere?
FDU provides remote access to many software applications typically found in university computer labs. This new Virtual Desktop Infrastructure (VDI) gives users access to a Windows desktop environment along with many General Lab Software, without requiring downloading and installing programs on a user’s personal equipment. The service, called FDU Anywhere, is powered by University Systems and Networking (USAN) and can be found at anywhere.fdu.edu.
Using FDU Anywhere is like walking into one of FDU’s computer labs. Upon logging in with your FDU NetID and password, you will have access to the virtual platform. To find a list of currently available software on FDU Anywhere, use the FDU Software Catalog. A listing of available Free and Open Source software can also be found by visiting the FDU Software Catalog.
The FDU Software Catalog provides an up-to-date catalog of software available to Faculty, Staff, and Students at the university:
System & Network Requirements
System Requirements
FDU Anywhere is a powerful resource with a lightweight footprint. In order to utilize FDU Anywhere, you must have the following:
- Any device with a browser that supports HTML 5 will work. HTML 5 is supported by almost all desktop and mobile browsers including Google Chrome, Apple Safari, Microsoft Edge, and Mozilla Firefox
- An internet connection
- FDU NetID credentials
Tip
Your system hardware specifications may impact the performance of FDU Anywhere, such as systems with less than 8GB of memory.
Network Requirements
For the best experience, while using FDU Anywhere, your network should:
- Have a download speed of at least 5Mb/s or more
- If your download speed falls below 5Mb/s, the connection could become unstable and cause issues with your stream
- Have an upload speed of 5Mb/s or higher
- An upload speed of 5Mb/s is enough to use a basic mouse, keyboard, and controller. More bandwidth-heavy devices such as webcams, microphones, and external storage devices can use up to 100Mb/s
- Wired network connections are preferred over Wi-Fi network connections whenever possible
- Wired network connections are more stable and offer more bandwidth over Wi-Fi
For graphics-intensive applications, like Adobe Creative Cloud and Autodesk, we recommend using a wired network connection instead of Wi-Fi, ideally with a bandwidth of 5 Mbp/s.
Wi-Fi networks with 5Ghz rated wireless connections are preferred over 2.4Ghz wireless routers and provide better performance.
VPN Applications and Connections
 Warning
The use of any VPN Software within FDU Anywhere is not allowed. Using a VPN client in FDU Anywhere may interrupt your session and disable your access for approximately 15 minutes.
Testing your Connection
Your experience with FDU Anywhere greatly depends on your internet connection. Testing your connection can help you identify and correct most issues.
To test your Internet connection speed, click the link below:
Using FDU Anywhere
FDU Anywhere is available to all students and accessible by following the instructions below:
Accessing FDU Anywhere
- From any web browser, visit “anywhere.fdu.edu“
Tip
For the best overall experience using FDU Anywhere, Google Chrome is the browser of choice.
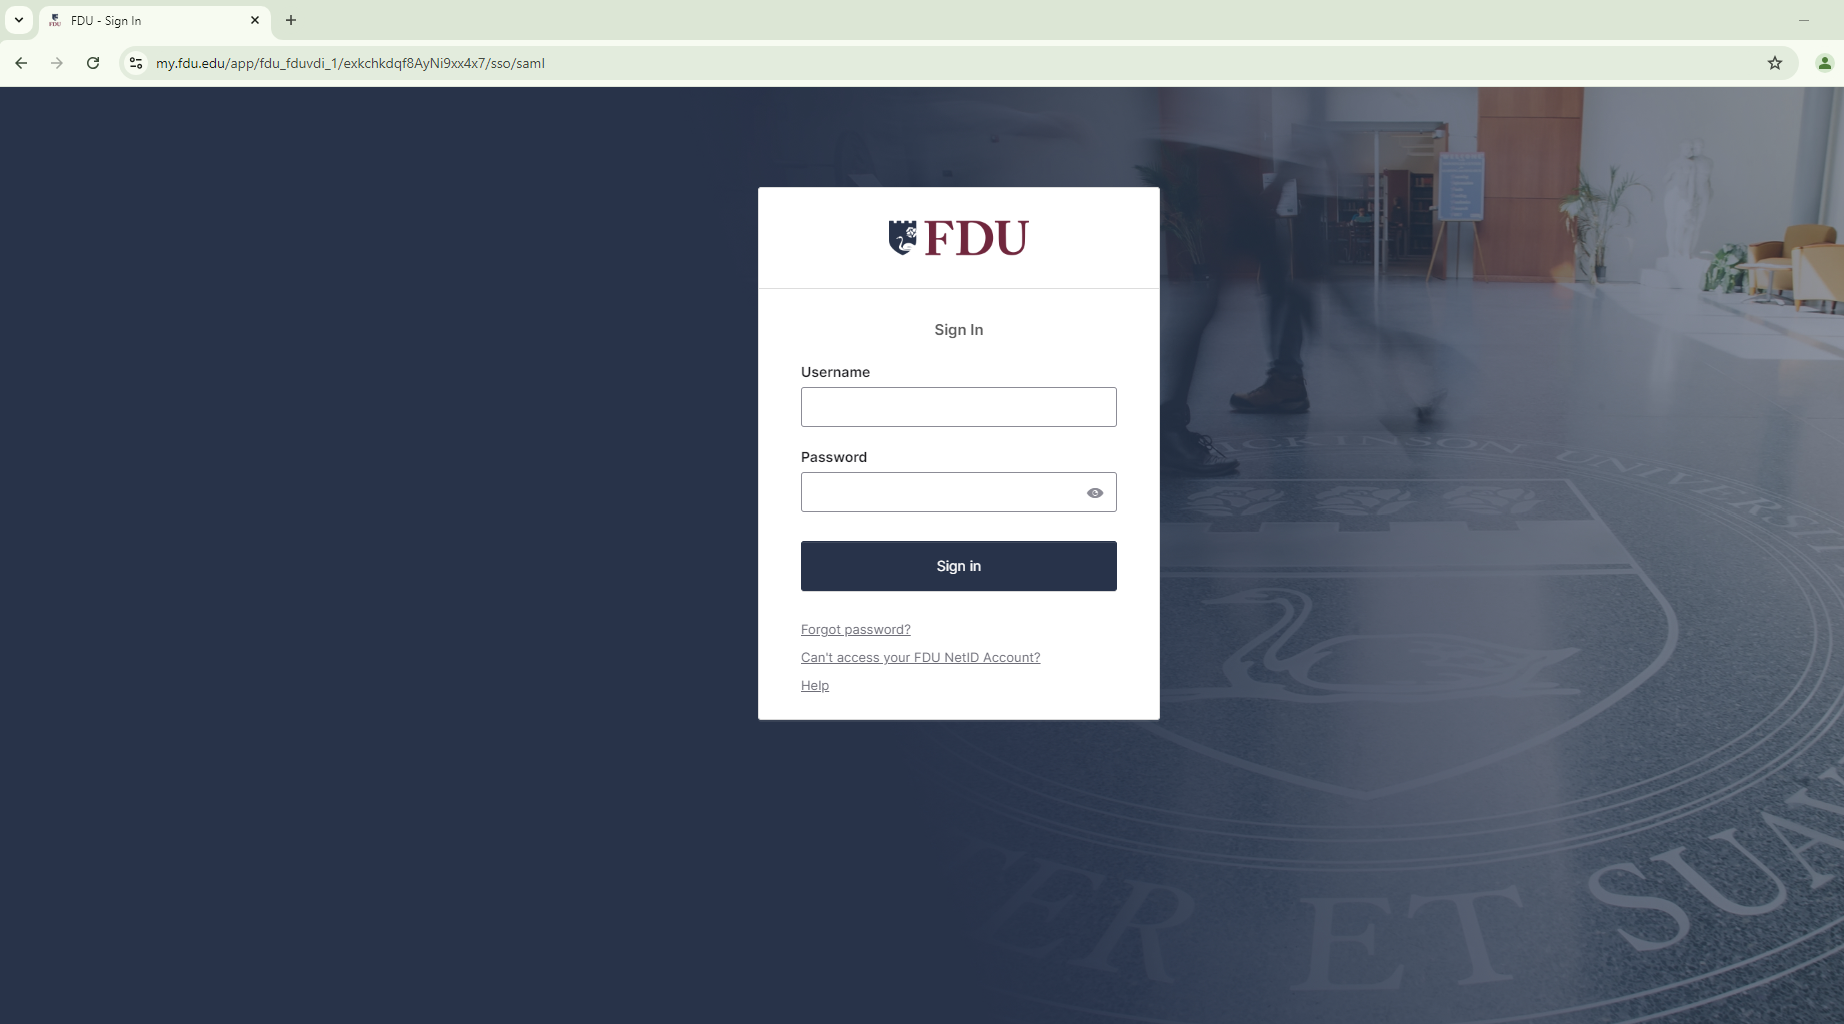
- Use your FDU Credentials (NetID and associated password) to complete the login to the FDU Anywhere
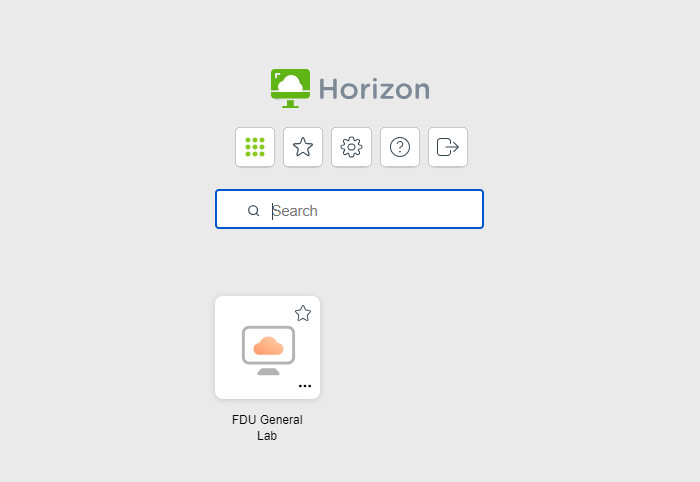
General Lab
Note
When you login to the General Lab experience, it may take about 60 seconds to get to the desktop. This is because your profile is being created or loaded.
- The selected app or desktop opens in a new browser tab

Note
Depending on your screen resolution, your desktop experience view may differ from the picture above.
Log Out of FDU Anywhere
Logging out is a critical step in making sure others continue to be able to easily access FDU Anywhere services. To log out of FDU Anywhere, follow these steps:
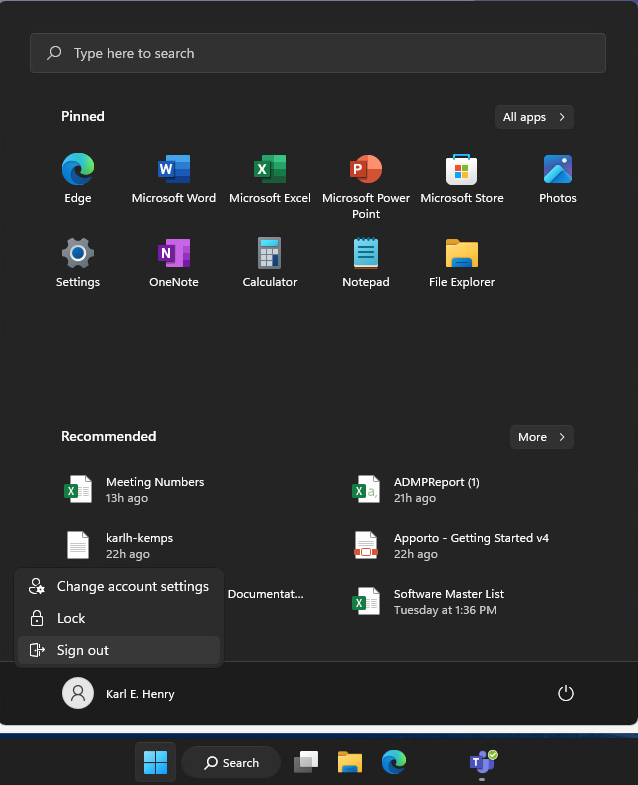
- Click the Windows “Start” button
- Click your “Name“
- Click “Sign Out“
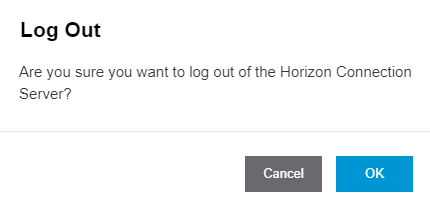
- On the upper left-hand side, click the “Hamburger” menu icon

- Click “Log Out“

- Click “OK” to confirm Logout
Automatic Session Logout Policy
To help make FDU Anywhere as available as possible to all students, accounts that have been inactive (or idle) for 15 minutes will automatically be logged out.

Accessing and Using OneDrive
There are many ways in which you can access and save files within FDU Anywhere. Fairleigh Dickinson University highly recommends saving all files on your FDU Microsoft 365 OneDrive which is accessible within FDU Anywhere. There will be a first-time setup and initialization process required to use OneDrive within FDU Anywhere.
Setup and Initialization Process
Accessing your Microsoft 365 OneDrive account is done easily by following these instructions:
- From the FDU Anywhere General Lab, single click on the “OneDrive” icon found on the Windows desktop

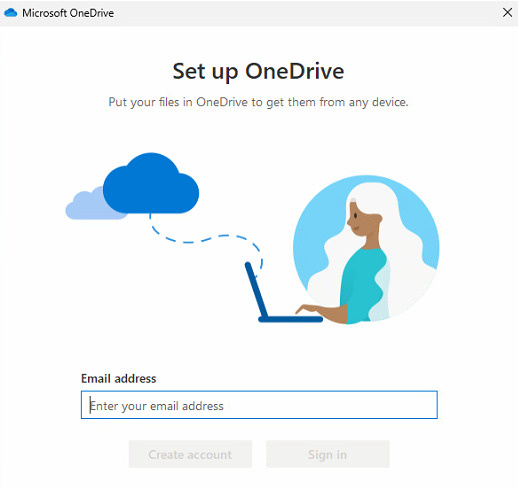
- Enter your FDU NetID and click “Next”
- Follow the FDU standard single sign-on prompts to complete the login process
Note
Your FDU NetID may already be filled in, just click Sign in.
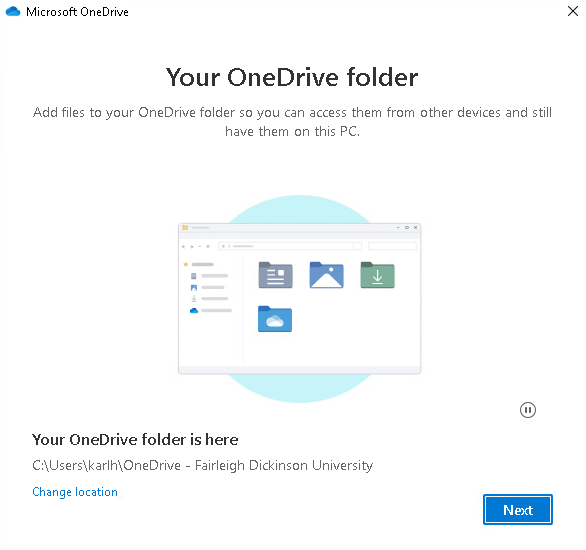
- You have successfully logged into OneDrive, click “Next“
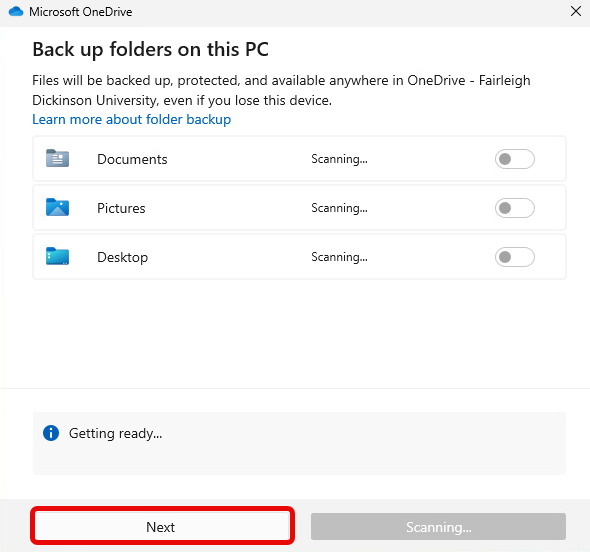
- Microsoft OneDrive may prompt you to backup your folders, click “Next” to skip this step
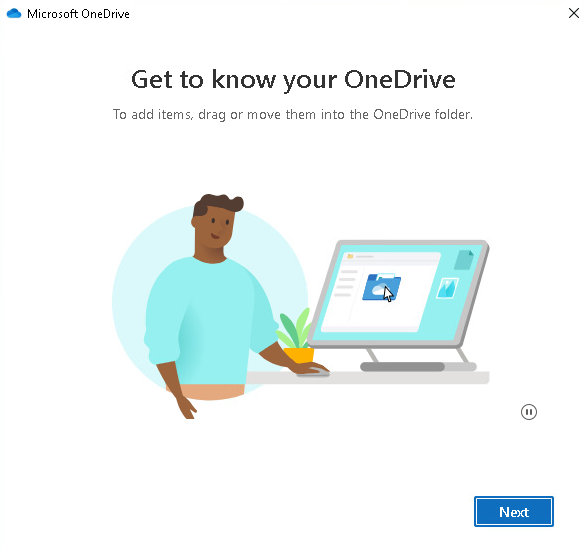
- A brief overview will be given on OneDrive, to begin, click “Next“
- When the tutorial is finished, click “Later“

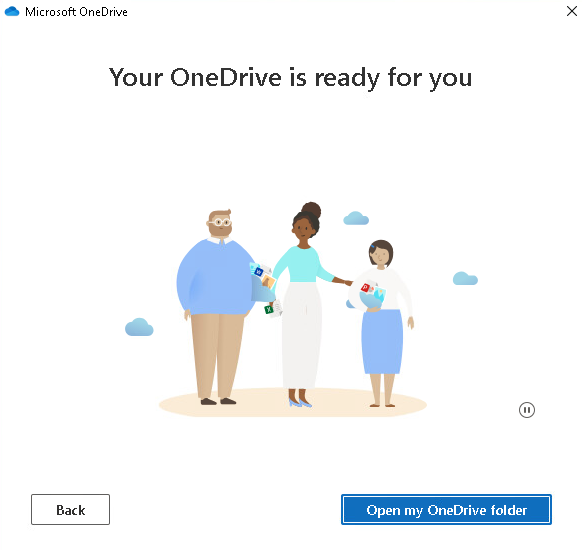
- OneDrive setup is complete and ready to use. Click the “X” to close the window or “Open My OneDrive Folder” to access files
Using OneDrive
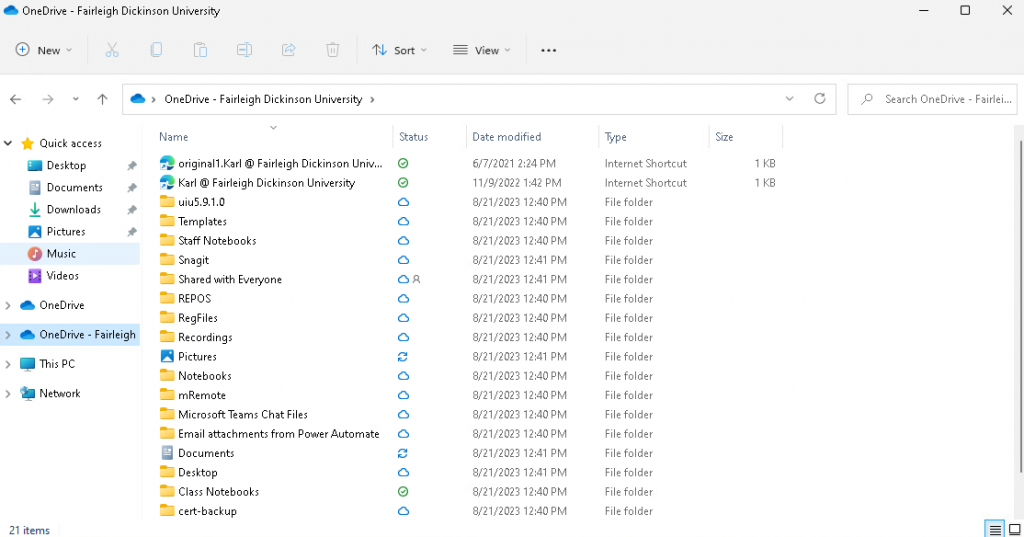
Using Microsoft OneDrive within FDU Anywhere is very similar to accessing, saving, and opening files on a computer. Just open up File Explorer and look for OneDrive – Fairleigh Dickinson University.
Working With Files
Zipping Files
if you need to zip files to submit them to Webcampus, please follow these instructions:
- Click the file or folder
Note
For macOS users, you can use the “Two Finger” click method on the trackpad in order to initiate the right click. For additional information, please see the link below for “FDU Anywhere – Keyboard Shortcuts”.
- Click on 7-zip then click “Add to Archive“
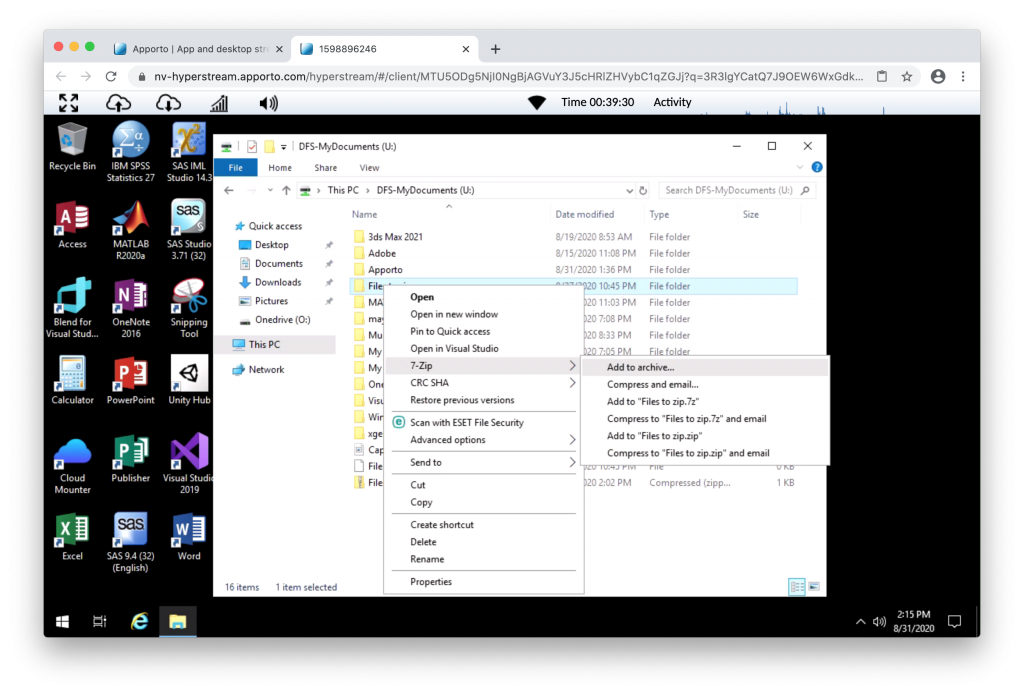
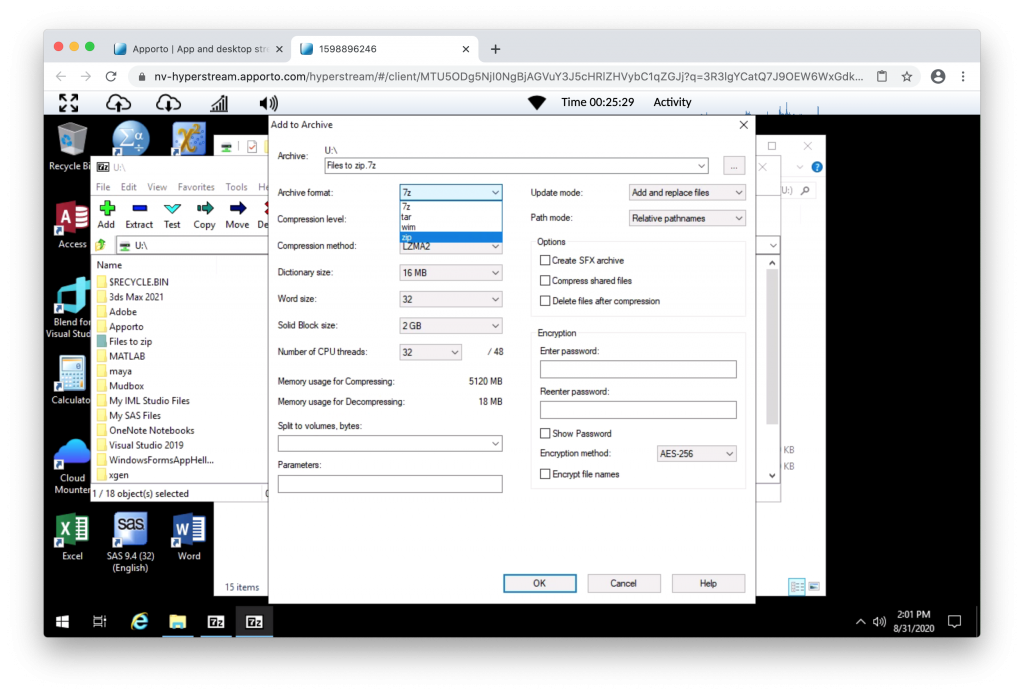
- Change Archive Format to “zip” like in the picture below, then click “OK” to zip your files
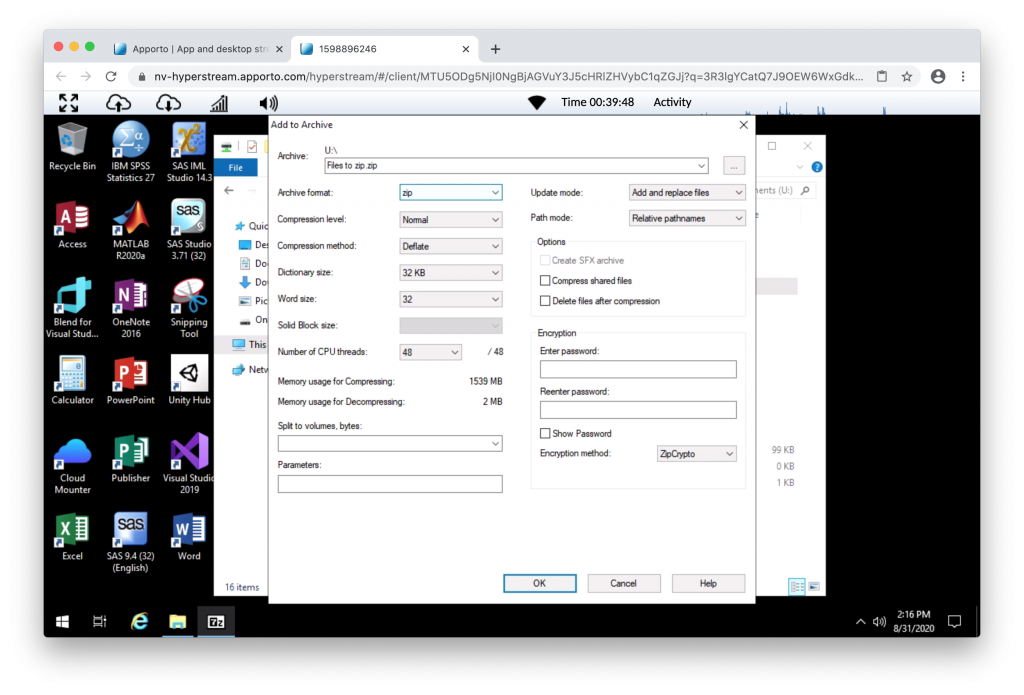
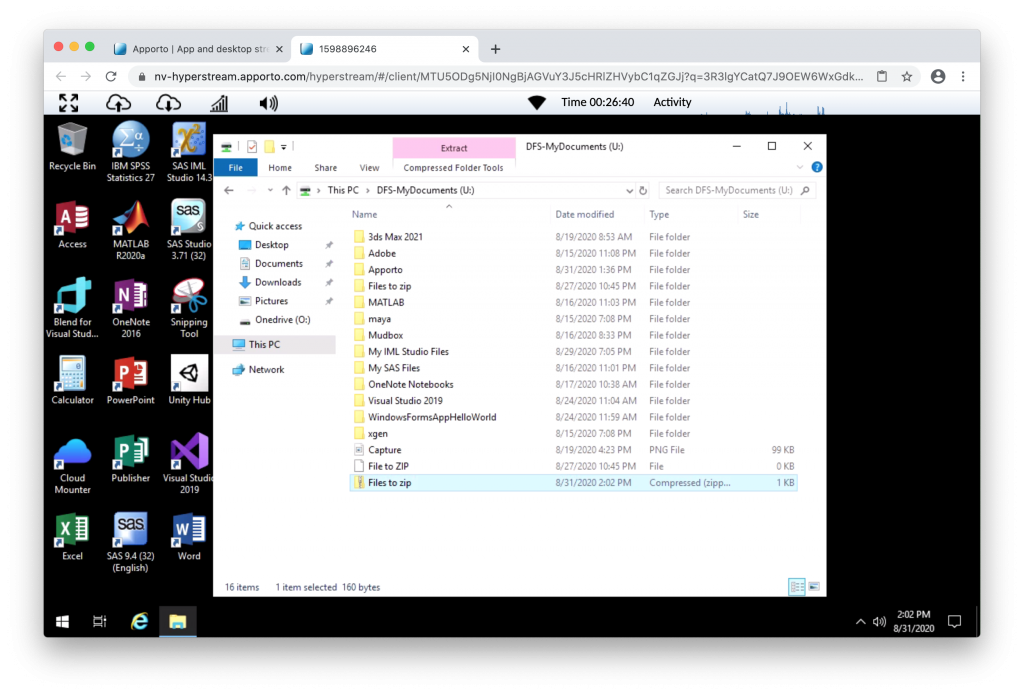
The zip archiving process could take some time depending on the size of the file. Once completed, the file will be in the same location as the folder. You can then email or upload your file to your professor.
Alternate Way to Zip Files
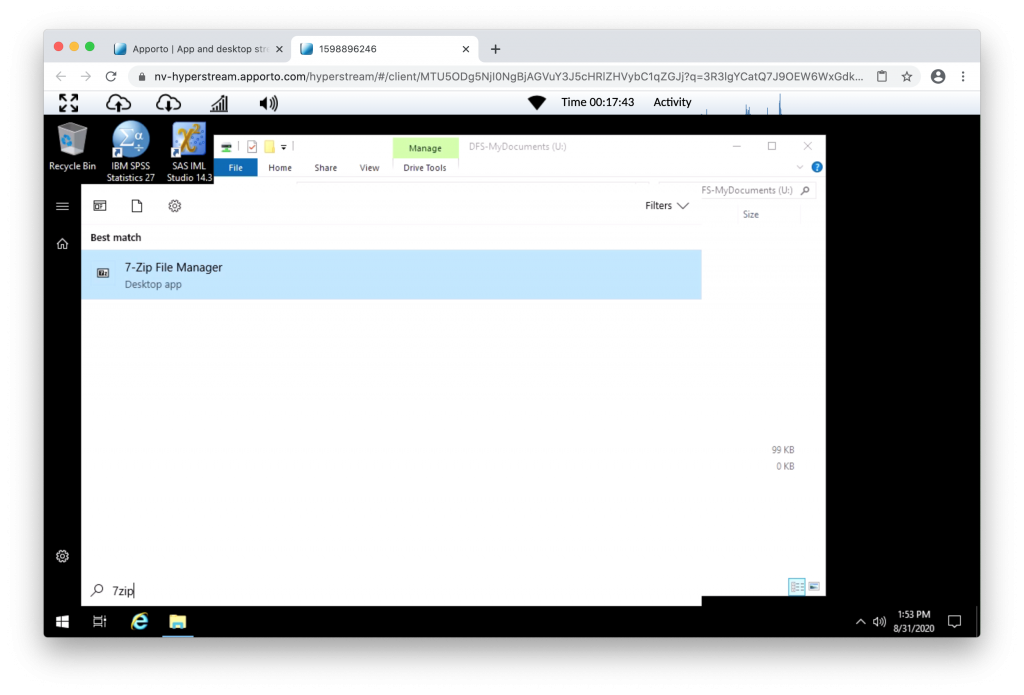
- Click “Start” on the taskbar on the left-hand side
- Type “7zip” and click on 7-zip File Manager that appears
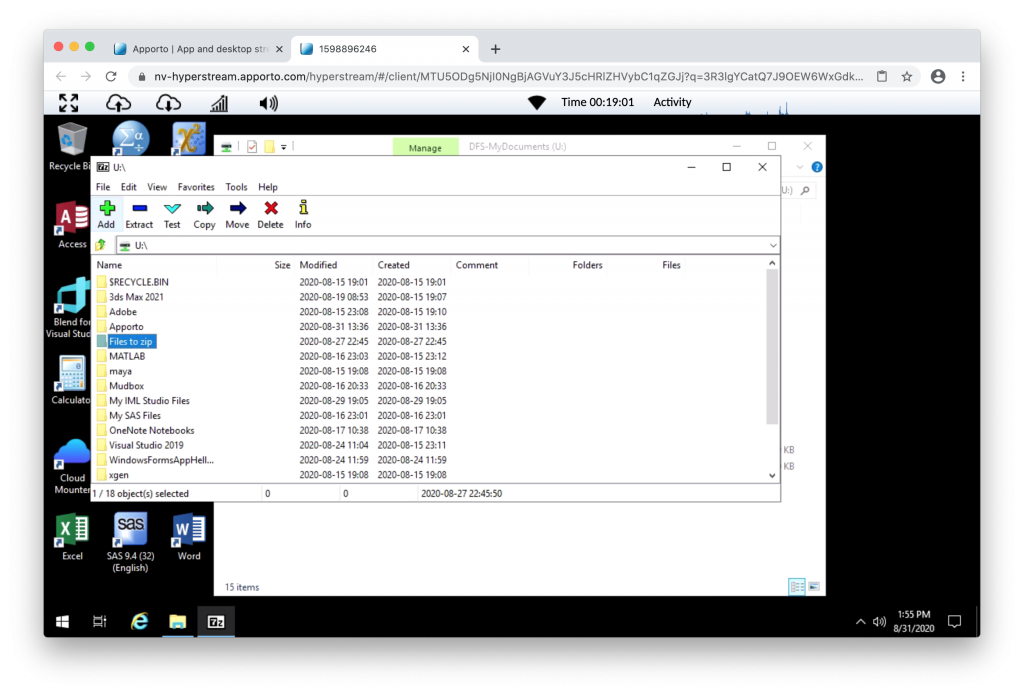
- Navigate to the location of your saved file/folder and click to highlight, then click the “Add” button at the top
- Change “Archive Format” to “zip” and then click “OK” to zip your files
The file will now be zipped and you will find your file in the same folder as the project folder or file you wanted to zip.
Note
The zip archive could take some time depending on the size of the file. Once completed, the file will be in the same location as the folder is. You can then email or upload your file to your professor.
Submitting Files to WebCampus
To successfully submit your coursework to WebCampus, it is best to use the Google Chrome, Mozilla Firefox, or Microsoft Edge web browser located on the desktop of FDU Anywhere.
To submit your coursework to Webcampus, you can log on from within FDU Anywhere. For more information on Webcampus visit:
Keyboard Shortcuts
Sometimes you may want to copy and paste content from your own computer to an FDU Anywhere desktop or application. You can do this using the copy-and-paste menus or keyboard shortcuts, for example, “Ctrl+C” and “Ctrl+V“.
Note
FDU Anywhere only allows copying from your personal computer into the FDU Anywhere desktop.
If you cannot copy and paste for any reason, we recommend using our FDU OneDrive service to access any files not found in FDU Anywhere.
Copy files from Windows OS Devices
Windows OS to FDU Anywhere
- Highlight the text you want to copy from your computer
- Press “CTRL+C” to copy the selected text
- Move the cursor to the paste location in FDU Anywhere
- Press “CTRL+V” to paste the text
close
Copy Files from Apple OS Devices
Your macOS to FDU Anywhere
- Highlight the text you want to copy from your computer
- Press “COMMAND+C “to copy the selected text
- macOS also supports “CTRL+C“
Tip
You may find it easier to use CTRL + C when copying content to FDU Anywhere, so you don’t have to switch back and forth between COMMAND + CTRL.
- Move the cursor to the paste location in “FDU Anywhere“
- Press “CTRL+V” to paste the text
close
Note
The copy and paste functions DO NOT work across all applications and browsers, including the copying and pasting of images. This is a limitation inherent in browser clipboards. We recommend the Google Chrome web browser for optimal clipboard capabilities.
Getting Support
For additional support, open up a support request by clicking the link below:
Network Optimization
If you are experiencing issues while using FDU Anywhere, please use the following tips as guidelines to help improve your experience.
Power-cycle your Modem/Router
Power cycling your modem and router allows them to reset and re-establish a connection to your Internet Service Provider (ISP). Shut down your computer and unplug your modem/router. Plug them back in after 60 seconds and watch the lights on your modem/router. Once the lights are on and steady, start your computer.
Keep all your Local Components Up-to-date
Check that your modem/router and your local computer are totally up to date. This includes the operating system, driver, and browser updates.
Disconnect/Turn off any Devices that are not in use
Some devices could be using bandwidth while on standby. Gaming consoles, for example, might download and install updates. Turn off these devices to keep your bandwidth free.
Use an Ethernet Cable
Using a wired Ethernet connection will make your connection more stable and eliminate additional latency compared to a wireless connection.
Change your Wi-Fi Configuration
If a wired Ethernet connection is not possible or your device requires a wireless connection:
- Connect to a 5GHz wireless network. Some routers offer both 2.4GHz connections and 5GHz
- Place your devices (such as a computer or smartphone) and your router closer to each other
Note
You may need to contact your internet service provider for help with rebooting your router and/or to configure your wireless settings correctly.
See also
When preparing for a Zoom class, the 15 minutes before it begins are crucial for setting yourself up for success. In these final moments, finding a quiet, well-lit space with a strong internet connection is key. Ensuring your camera, microphone, and environment are ready will help you avoid any distractions or technical difficulties during class. With everything in place, you can focus on fully engaging in the session, confident that you’re ready to participate seamlessly.
15 Minutes Before Class Starts
- 15 minutes before class starts, find a quiet place with strong internet that is free of distractions. Remember that everyone in the class will be able to see you! Find an appropriate background and make sure the room is well-lit. Make sure that you have your device plugged in so you don’t need to worry about battery issues mid-class
- Open Zoom. You can open Zoom by clicking the link your professor sends you or downloading the Zoom app or program on your device. If you have headphones, plug them in now
- Test your microphone and camera
- To test your microphone, click “Test Computer Mic & Speakers” in the pop-up window that appears when first opening a test meeting or beginning your scheduled meeting
- To test your camera, just look at the Zoom window to see that you are visible, non-pixellated, and can move and speak without noticeable delays
- You may need to permit Zoom to access your camera and microphone beforehand. Typically, the request for permission will appear in a pop-up window the first time you open a Zoom Meeting, and will carry over to future meetings. If you declined permissions in the past, you will need to go into your PC or Mac’s settings to allow Zoom to access your camera and microphone
- To test your microphone, click “Test Computer Mic & Speakers” in the pop-up window that appears when first opening a test meeting or beginning your scheduled meeting
- Close any windows or programs open on your device that are unrelated to class.
During Class
- Click Start Video to begin broadcasting from your webcam
- Use the Chat bubble as appropriate. You can chat with everyone in the meeting, the professor, or a specific person
- Find out who else is in the meeting by clicking Participants. This is also where you can “raise your hand” to ask or respond to a question
- Be prepared to share your screen with the class (If you do so, we will see all tabs you have open. We could also see your email, messages, etc. Please ensure that anything you would like to keep private is closed before class begins)
The Zoom Menu
The Zoom menu contains several features that can be used during class meetings. For laptops, PCs, and Macs the menu can be found by hovering over the bottom of the Zoom window. In the Zoom app, the menu can be accessed by tapping the bottom of the app window. Here is a picture of the menu bar.

- Mute: Silences and unsilences your microphone. Your professor will “Mute” the whole class to reduce background noises, but if you’d like to speak, you need to click “Unmute” first
- Share Screen: Allows you to share a variety of windows and applications. Participants can share views of their desktops and specific windows currently open on their computer, write on a digital whiteboard, and even share a screen directly from their iPhone or iPad
- Chat: You can send messages to everyone, just the professor, or a specific person
General Zoom Etiquette
- Getting a clear video is a lot like taking a good selfie. Light your face more brightly than the background to make it easier to see you
- Remember that everyone else can see you
- Be yourself, move physically, and make facial expressions
- Microphones pick up all ambient noise, so keep your mic muted until it’s your time to speak.
- Remember that when on camera, other activities such as eating, drinking, shuffling papers, etc are extremely distracting
If you’re having trouble joining a Zoom meeting or class, refer to the article below for troubleshooting tips.
See also
Fairleigh Dickinson University provides an extensive array of technological resources and services tailored for our students. This guide is designed to assist students in navigating and utilizing these tools effectively, ensuring they can easily set up, access, and manage their accounts, while also offering comprehensive information on each service.
ID and Email
FDU NetID
Your FDU NetID verifies who you are and ensures the privacy of your personal information. Your FDU NetID and your NetID password will provide access to a variety of IT resources including your Self-Service, WebCampus, Office365, and Email.
To obtain your NetID, follow the guide below:
close
Changing your FDU NetID Password
To protect the University and our Students from cyber attacks and other malicious activity, we require that everyone in our community to periodically change their password.
To change your password, follow the guide below:
close
DUO Multi-factor Authentication
To successfully use your NetID to access your accounts, you will need Two-Factor Authentication with Cisco DUO MFA.
Two-factor authentication adds a second layer of security to your FDU NetID. It requires two factors to verify identity. These factors include something you know – your FDU NetID and password, and something you have – a phone or passcode, to authenticate and gain access to your account on FDU services. Passwords alone no longer provide adequate protection against cyber hacking. DUO is required for all current FDU students.
To set up your mobile device with DUO MFA, follow the guide below:
Additionally, refer to our FAQ for commonly asked questions about DUO:
close
Email and Office 365
Students can access their emails through any Web browser using their NetID and password to log in. To access our email, visit the Office 365 Portal:
Students can also access their FDU Email accounts on their mobile devices by installing the Outlook app. For instructions to setting up your FDU Email account in the Outlook app, follow the guide below:
Current students who are registered for classes for the current term, or a future term have access to Microsoft Office 365 Suite applications. For more information, visit the links below:
close
Academic Systems
Webcampus
Webcampus is a course content management system. FDU’s Webcampus is also known as the Blackboard System. On-line courses are taught through this system which also allows for interaction between the student and faculty member as well as on-line class discussions.
To learn more about how to access Webcampus, review the guide below:
close
Self-Service
Self-Service is an interactive web application that enables students to view their individual information contained in FDU’s Student Information System. Students can use Self-Service to do things like view their financial aid, pay their bills, and register for classes.
Review the Tutorial below to learn how to use Self Service:
close
Connectivity
Connecting to the FDU Wireless Network
Using your FDU NETID, you can connect to the FDU Wireless Network. For instructions view the links below:
close
Security
Security Resources
Understanding and implementing cybersecurity measures is crucial for protecting your personal and institutional information. This section provides essential resources to help you navigate the landscape of cyber threats.
Stay safe online by reviewing the articles below:
close
Software
Available Software for FDU Students
Fairleigh Dickinson University has both licensed and open-source software, that is offered for academic and/or personal use for students. The links below point out to commonly used software, both licensed and open source, that are offered for academic and/or personal use to all Fairleigh Dickinson University faculty, staff and students.
In our digital learning environment, mastering online tools is essential for academic success. These resources are designed to guide you through the process of engaging in classes virtually via Zoom and accessing your files on OneDrive.
close
Printing and Labs
Computer Labs and Printing
Computing Services has multiple computer labs available on both New Jersey Campuses for classroom instruction and student use.
close
Virtual Labs
FDU also provides remote access to many of the software applications typically found in university computer labs through our platform FDU Anywhere. You can access it using your FDU NetID credentials using the link below:
Review the FDU Anywhere Tutorial below to learn how to use our virtual labs:
close
For any IT related questions and support, contact the SAMI Service Desk:
See also
If you are scheduled to attend class using Zoom and you run into technical difficulties, here are some steps you can take.
Common Fixes for Zoom Connection Issues
- Do. Not. Panic. This shift to distance learning is a sudden change. We will do everything we can to support your learning
- Try your best to progress through the steps and troubleshooting resources below. Join when you are able. You can use the chat or hand-raising function once you join the class to let the faculty know if you have questions.
- Try to exit Zoom and open it again
- Try to restart your device and re-open Zoom
- Check that you do not have pop-ups blocked. Also check that you have “allowed” the Zoom browser extension to operate, if needed
- Try on a different device, if you have access to one. If you do not have access to a different device, proceed to step 6
- If you still cannot access Zoom after taking these steps, please contact the SAMI Support Desk with a description of the problem (e.g., error message that you received). Please also bring the issue to the attention of your instructor so they can let you know what you missed in the class session that you were unable to attend
More Resources for Troubleshooting with Zoom
The following troubleshooting guide gives support for all devices that Zoom supports.
See also
Zoom experts host free and interactive live training webinars daily. Get up to speed in less than an hour. Please select the time zone that fits best for you when registering for one of our live training webinars.
See also
Fairleigh Dickinson University has designated Zoom Rooms that support hybrid in-person and remote learning. On this page, you will find links to the locations of Zoom Rooms on both New Jersey campuses, instructions for using the Zoom Rooms, and details about the equipment for installed rooms, cart rooms, and connecting with ITV rooms.
See also
Zoom is a web-based video conferencing tool that allows users to meet online, with or without video. Zoom users can choose to record sessions, collaborate on projects, and share or annotate on one another’s screens, all with one easy-to-use platform. It offers quality video, audio, and a wireless screen-sharing performance across Windows, macOS, Linux, iOS, and Android. Zoom has a feature-rich, mobile app for both iOS and Android, allowing you to virtually connect from anywhere with an Internet connection.
Installing the Zoom Browser Client
- The web browser client will download automatically when you start or join your first Zoom meeting, and is also available for manual download.
- Once downloaded, you can go to the Zoom folder in your “START” menu and click “Start Zoom” on a PC or click on the “Zoom.us” app located in the applications folder on a Mac. Alternatively, you can open the application by searching for Zoom in your computers search bar.
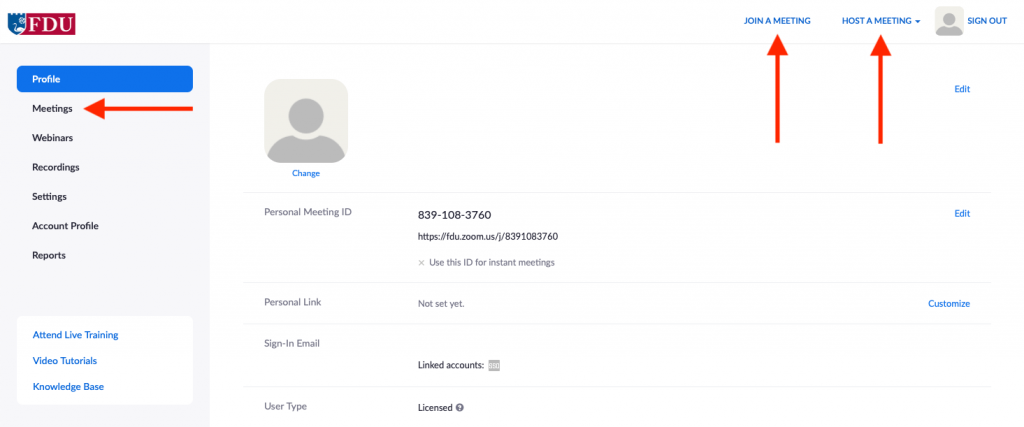
- Click on “Sign In” at the top-right corner of the page and type your FDU NetID credentials

- After logging in, you will see your profile information.
- Joining a meeting – Click on the link and enter the meeting ID number provided by the host.
- Hosting a meeting – You can host a meeting with or without video. Click on the option that you need and the meeting should start automatically.
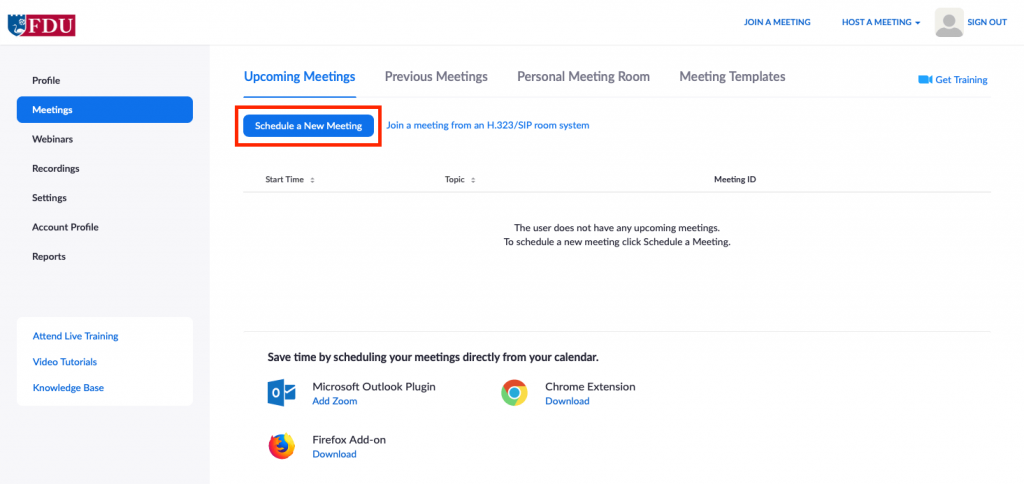
- Scheduling a meeting – Click on Meetings on the left navigation area and then click on Schedule a New Meeting.
close
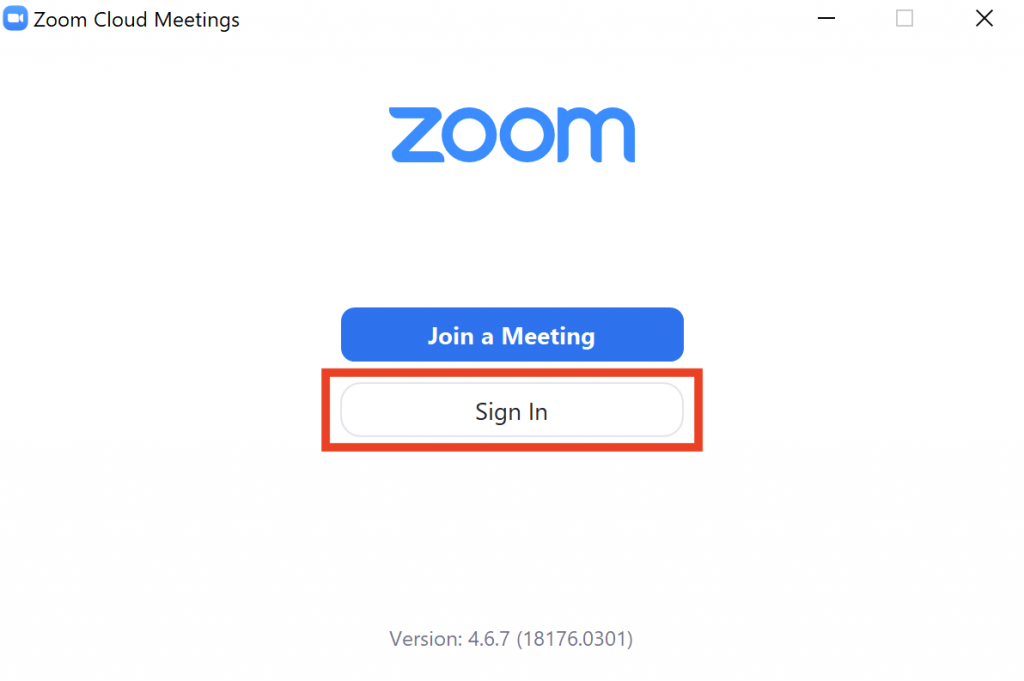
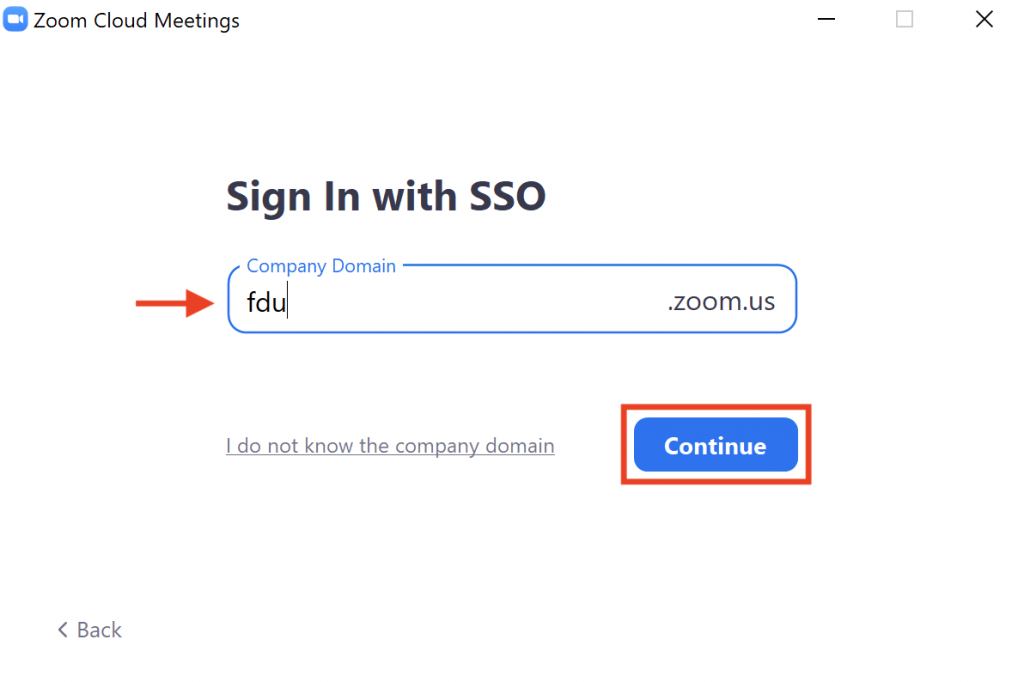
Installing the Zoom Native Client
The following steps are for users who have already downloaded the Zoom desktop client or are planning to use the client. These instructions are NOT for users who will be using the web browser to participate in a Zoom meeting.
- Launch the Zoom Desktop client
- Click on “Sign In“
- Click “Sign In with the SSO“
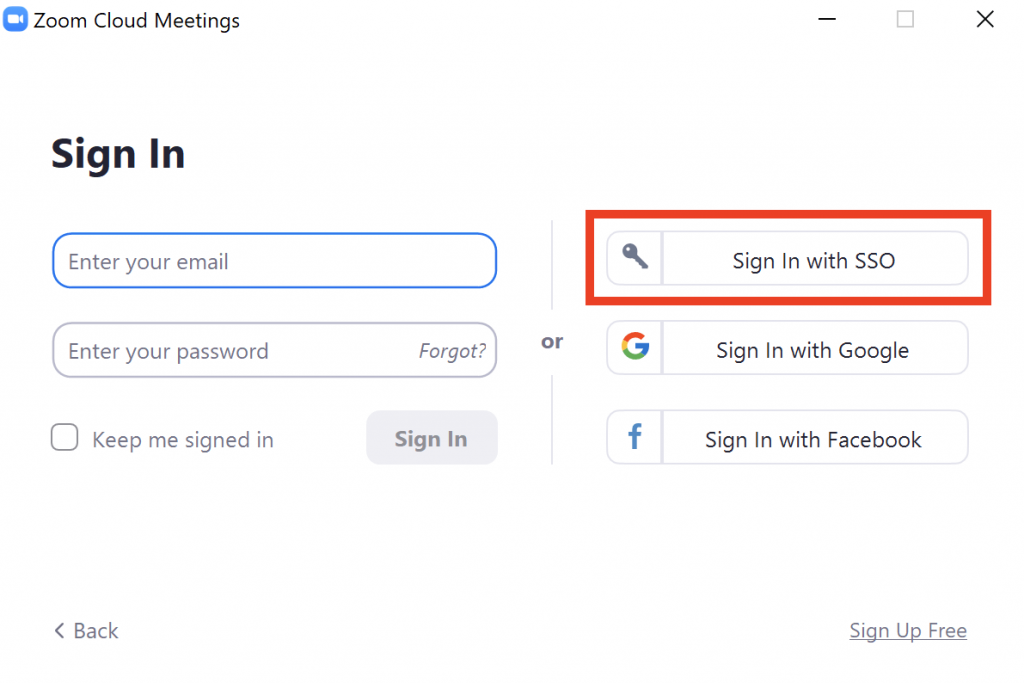
- Type “FDU” in the company domain field and click “Continue“
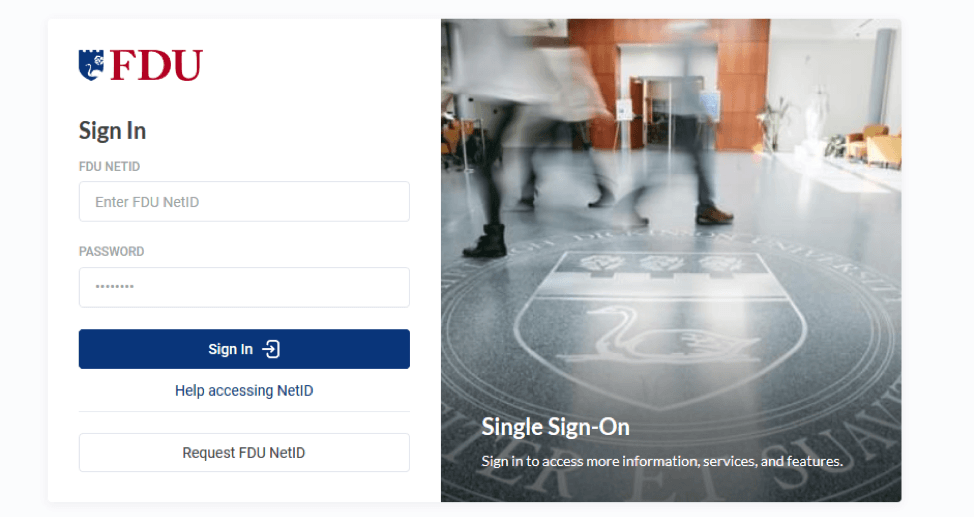
- You will be redirected to a page where you will be asked to login using your FDU NetID credentials
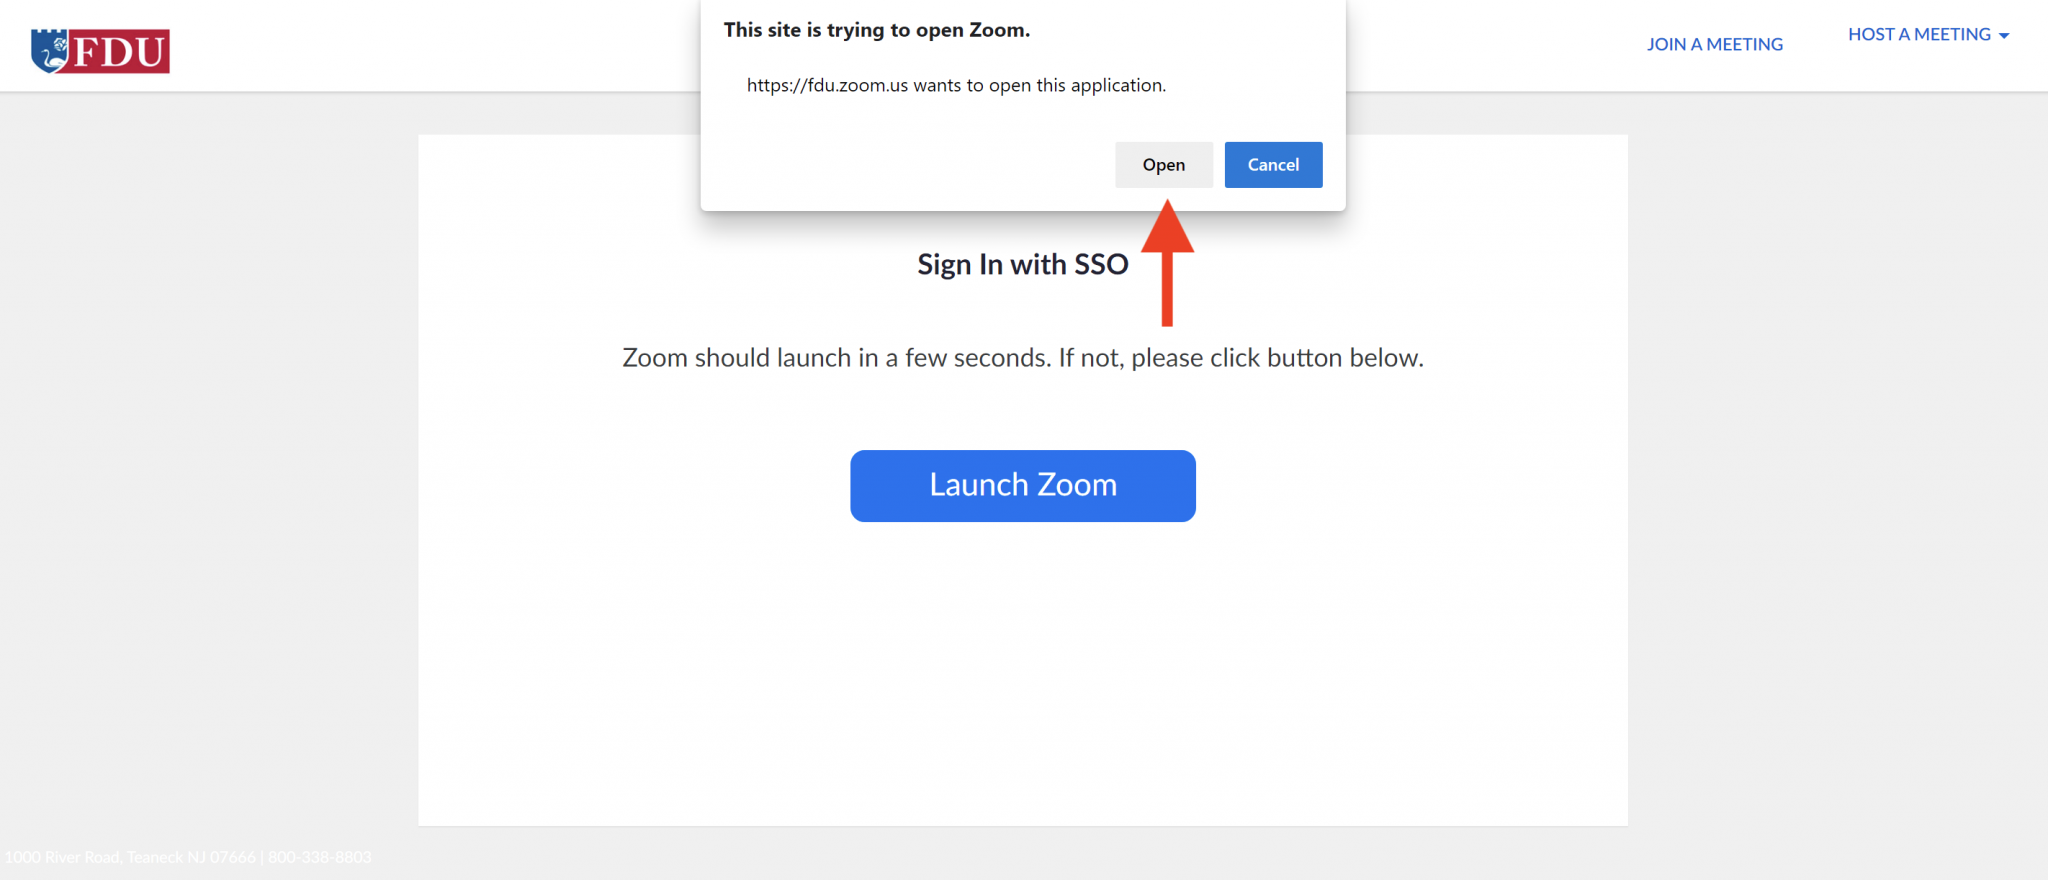
- After signing in click “Open Zoom Meetings“
close
Zoom Mobile Apps and Plugins Install Links
Outlook Plugin
Mobile Apps
close
Resources for Troubleshooting Issues with Zoom
The following troubleshooting guide gives support for all devices that Zoom supports.
See also

To get the most out of your Zoom experience at FDU, visit Zoom’s official support site to learn how to join meetings, connect to audio, turn on your video, use virtual backgrounds, share your screen, chat with others, and view captions. These tools help you fully participate in classes, meetings, and virtual events.


