DUO two-factor authentication adds a second layer of security to your FDU NetID. It requires two factors to verify identity. These factors include something you know – your FDU NetID and password, and something you have – a phone or passcode, to authenticate and gain access to your account on FDU services. Passwords alone no longer provide adequate protection against cyber hacking. DUO is required for all current FDU students.
Install DUO Mobile App
The DUO app is available for mobile phones and tablets. You can directly access the DUO Mobile Security App using these links:
Activate your DUO Account
Note
This step requires a Desktop or Laptop browser.
- In a Desktop or Laptop browser visit the DUO Management Portal to begin the activation process by enrolling your device. Activation requires scanning a QR code with the DUO app’s built-in scanner
- Duo prompts you to enroll the first time you visit the DUO Management Portal using a browser or a client application that shows the interactive Duo web-based prompt
Supported Browsers: Chrome, Firefox, Safari, Edge, Opera, and Internet Explorer 8 or later. Some browsers do not support all of DUO’s authentication devices (for example, Security Keys won’t work with Internet Explorer). For the widest compatibility with DUO’s authentication methods, we recommend recent versions of Chrome and Firefox.
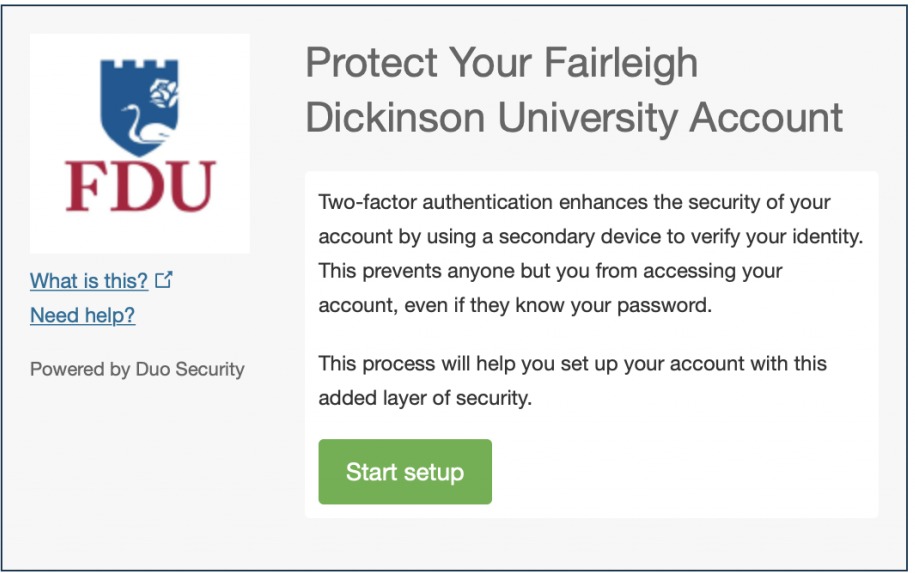
- Click “Start setup” to begin enrolling your device
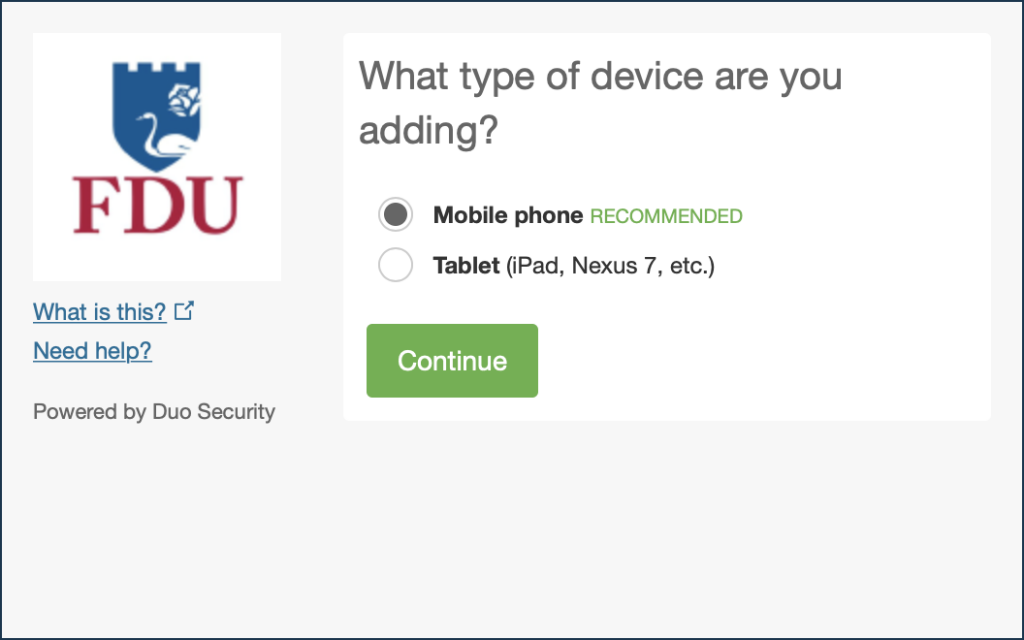
- Select the type of device you’d like to enroll and click “Continue“. We recommend using a smartphone for the best experience, but you can also enroll iPadOS and Android tablets
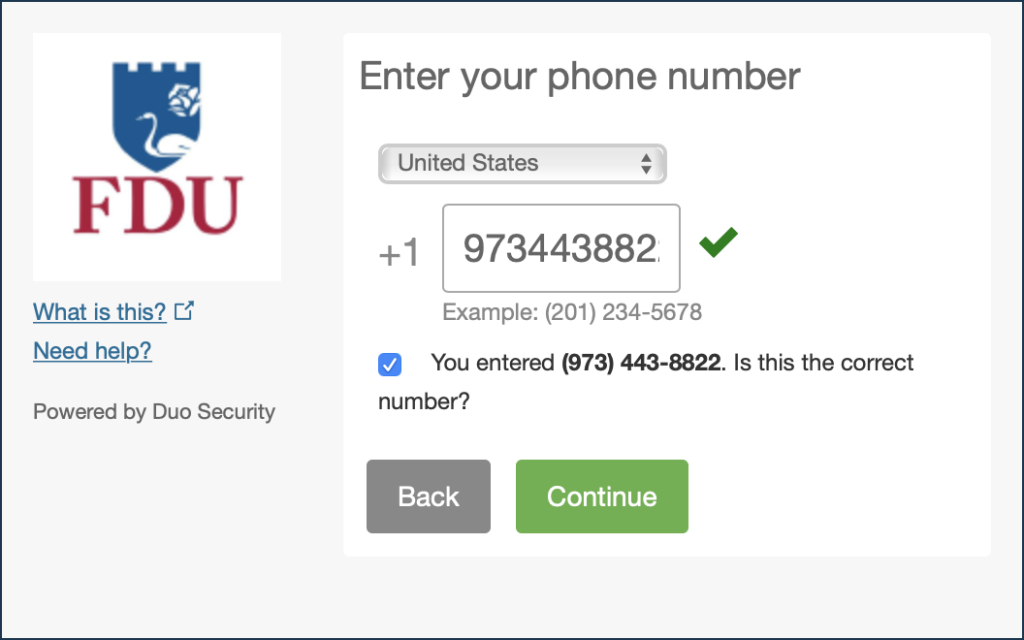
- Select your country from the drop-down list and type your phone number. Use the number of your smartphone or cell phone that you installed the DUO Mobile Security App on in the Step 1
- Double-check that you entered it correctly, check the box, and click “Continue“
Note
If you’re enrolling a tablet you aren’t prompted to enter a phone number.
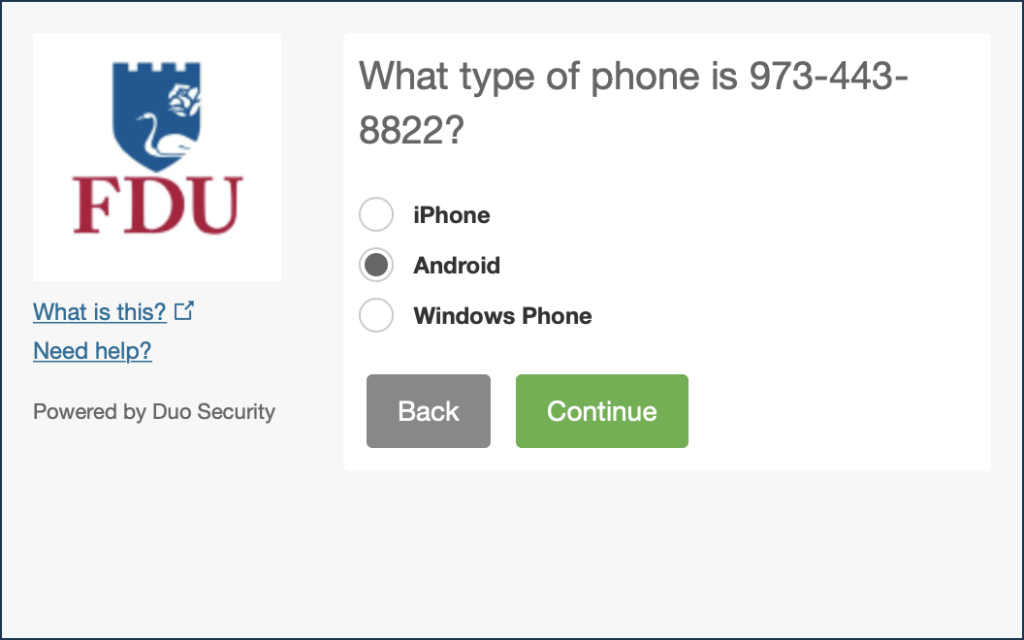
- Choose your device’s operating system and click “Continue“
- Click “I have DUO Mobile installed”
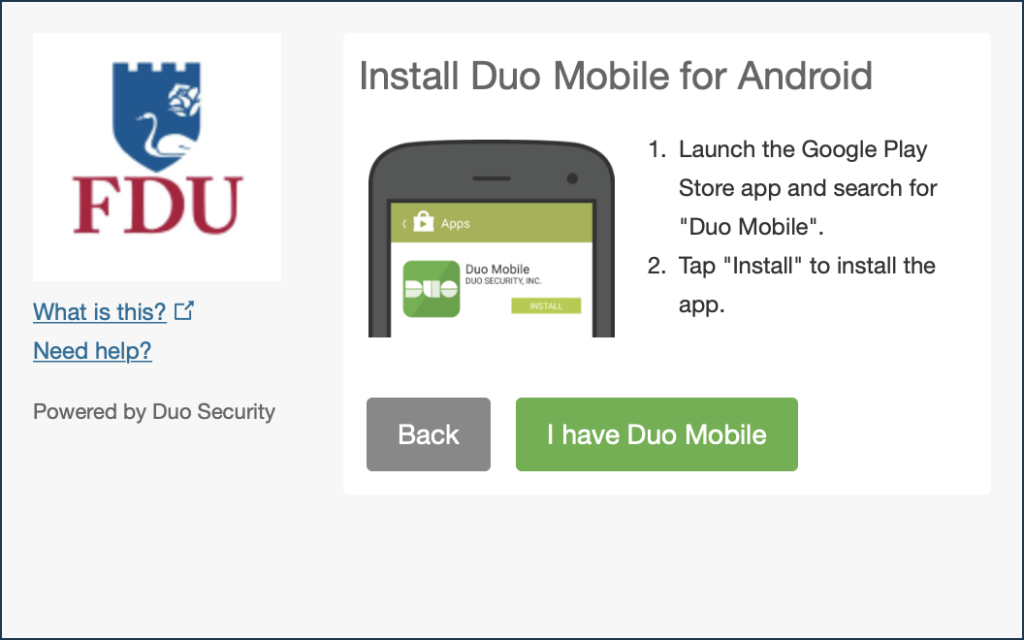
- If you have not completed installing the DUO Mobile App in Step 1 please complete now by following the platform-specific instructions on the screen. After installing the app return to the enrollment window
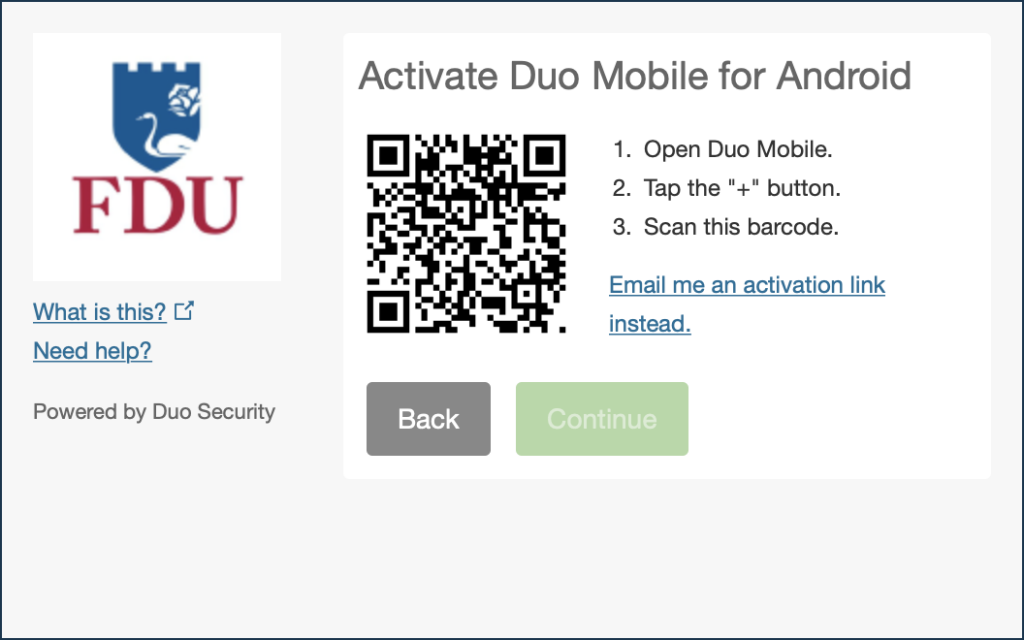
- Activating the app links it to your account so you can use it for authentication
- On iPhone or Android, activate DUO Mobile by scanning the barcode with the app’s built-in barcode scanner. Follow the platform specific instructions for your device:
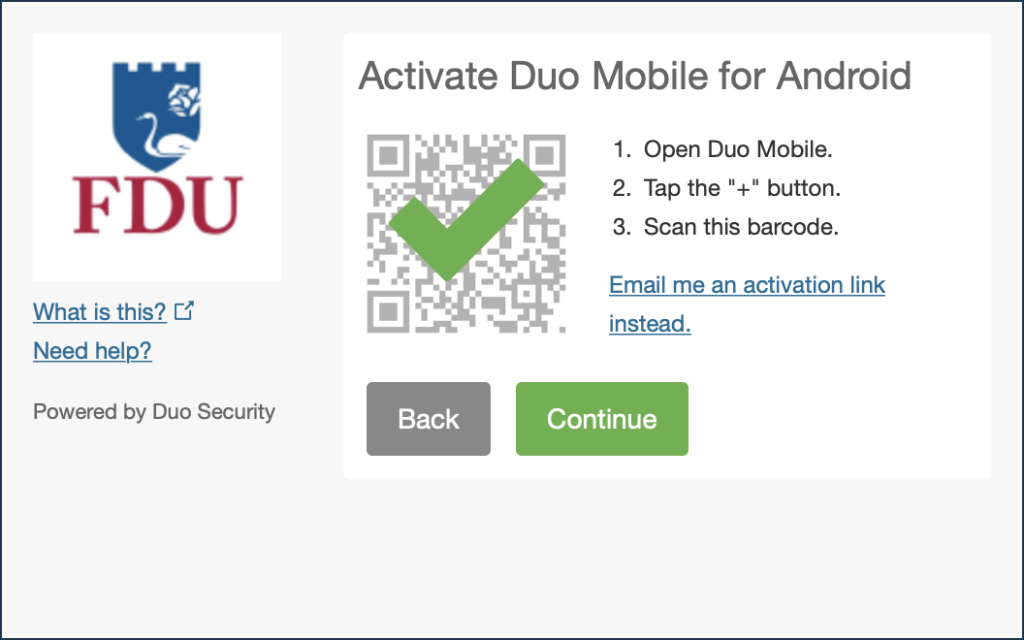
- The “Continue” button is clickable after you scan the barcode successfully
- Can’t scan the barcode? Click “Or, have an activation link emailed to you instead” and follow the instructions
- Once activated click “Continue” to complete registration
Configure Device Options (Optional)
- You can use Device Options to give your phone a more descriptive name, or you can click “Add another device” to start the enrollment process again and add a second phone or another authenticator
- If this is the device you’ll use most often with DUO then you may want to enable automatic push requests by changing the “When I log in:” option and changing the setting from “Ask me to choose an authentication method” to “Automatically send this device a DUO Push” and click “Save“. With one of the automatic options enabled DUO automatically sends an authentication request via push notification to the DUO Mobile app on your smartphone.
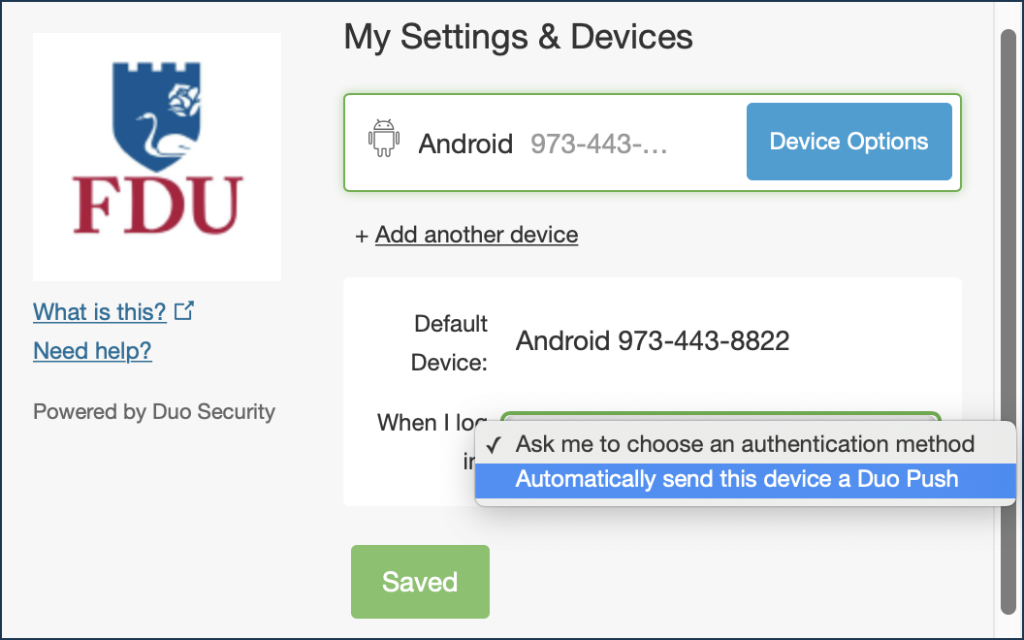
- Your device is ready to approve DUO push authentication requests. Click “Send me a Push” to give it a try. All you need to do is tap “Approve” on the DUO login request received at your phone
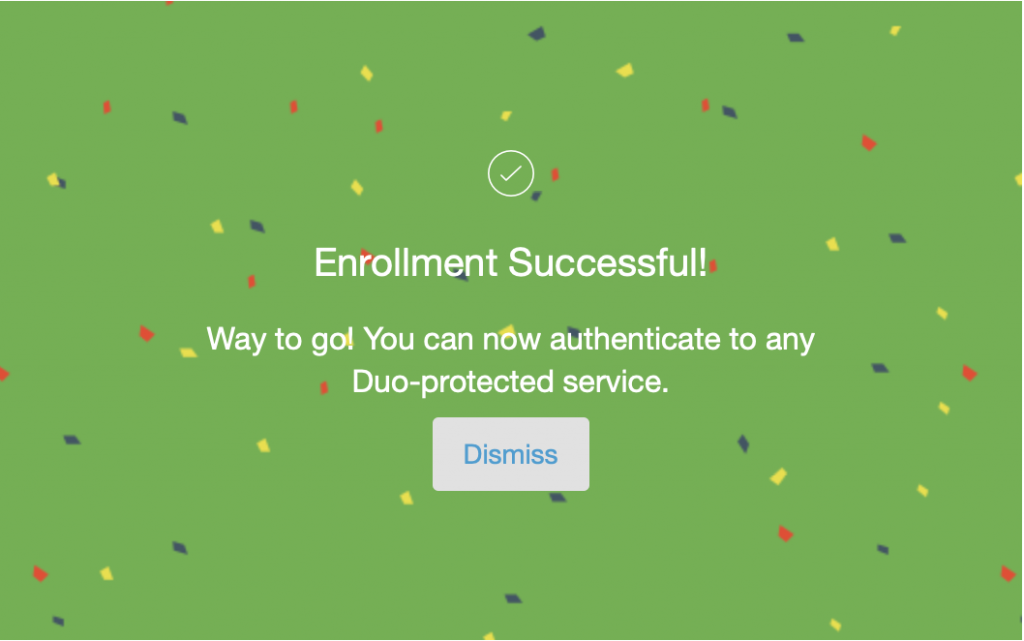
With DUO activated on your account, and with your device enrolled, you are ready to use DUO. When logging in, you will have two authentication options. Review the options below to determine what works best for you.
Tip
We recommend the push notification to your smartphone, it’s the easiest. You can also check the box “Remember Me for 60 Days” to only perform the authentication once every two months on that device.
Note
This step requires a Desktop or Laptop browser.
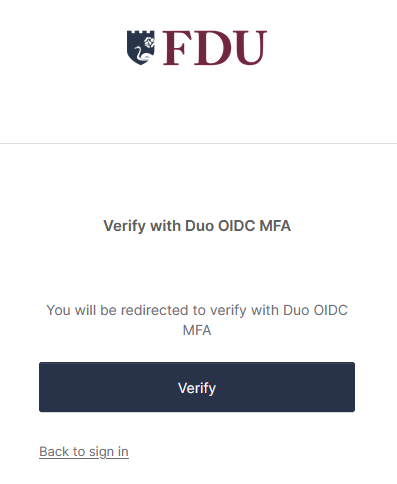
FDU NetID users who are logging into OKTA for the first time will be prompted to enroll using a browser or a client application that shows the interactive Duo web-based prompt.
- Click on “Enroll” to continue

- You will be redirected to verify with DUO MFA. Click on “Set up” then “Next” to continue

Supported Browsers: Chrome, Firefox, Safari, Edge, Opera, and Internet Explorer 8 or later. Some browsers do not support all of DUO’s authentication devices. For the widest compatibility with Duo’s authentication methods, we recommend recent versions of Chrome and Firefox.
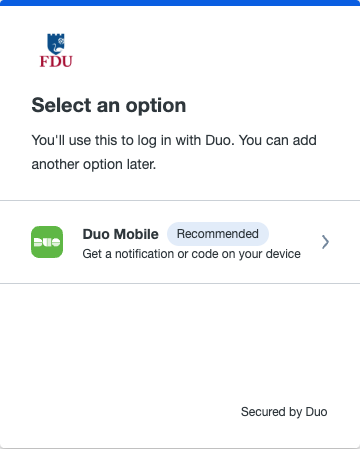
- Choose “DUO Mobile” as your verification method
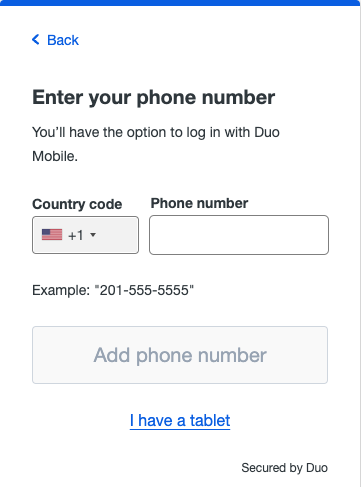
- Select your country from the drop-down list and type your mobile phone number. Use the number of your smartphone or cell phone that you installed the DUO Mobile Security App. Click on “Add phone number” to continue
Note
If you’re enrolling a tablet, don’t enter a phone number and click on “I have a tablet” instead
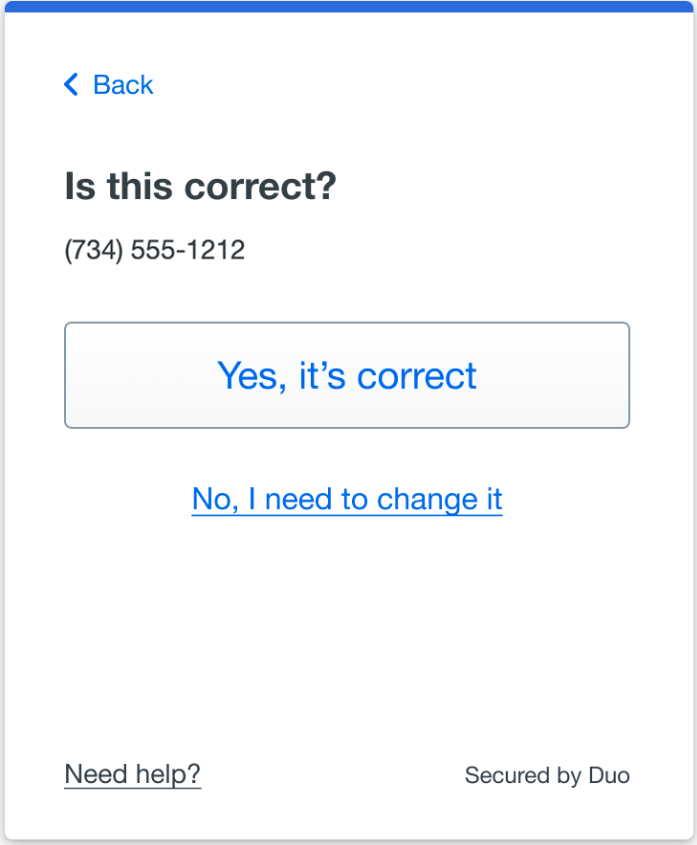
- Double-check that you entered your information correctly. Click on “Yes, it’s correct” to continue if the information is correct
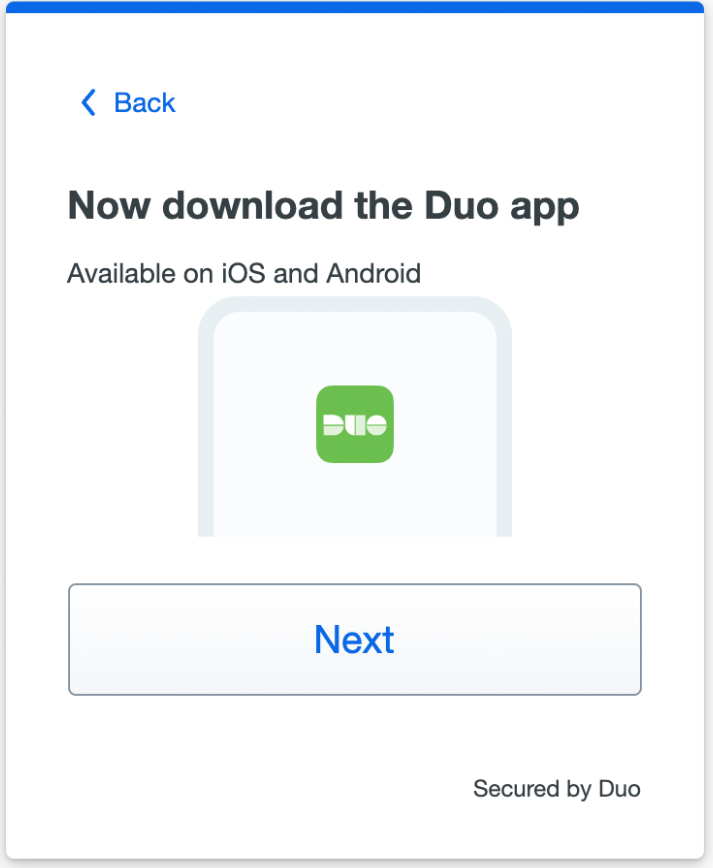
- Click “Next” if you downloaded the DUO app as instructed in the first step
- If you have not completed installing the DUO Mobile App please complete now by following the platform-specific instructions on the screen. After installing the app return to the enrollment window
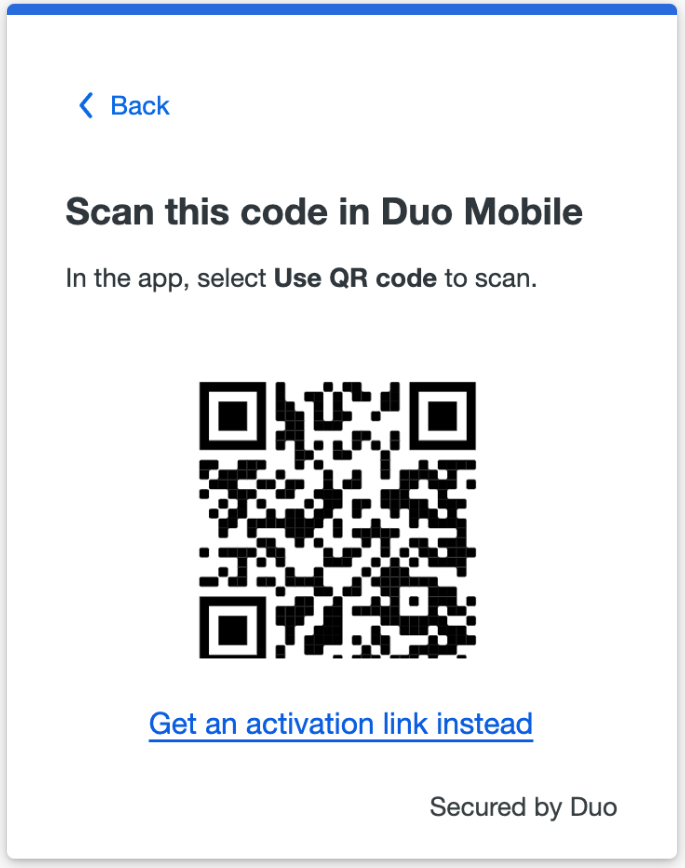
- Open the DUO Mobile app on your phone or tablet and add this account by scanning the QR code shown on-screen
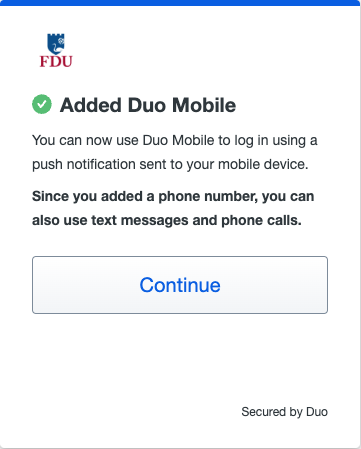
- When you receive confirmation that DUO Mobile was added click “Continue“
Note
If you aren’t able to scan the QR code, click on “Get an activation link instead” and then enter your email address to send the activation link to yourself. Open your email address on your Mobile device where you installed DUO Mobile. Follow the instructions in the email to activate the new account in DUO Mobile.
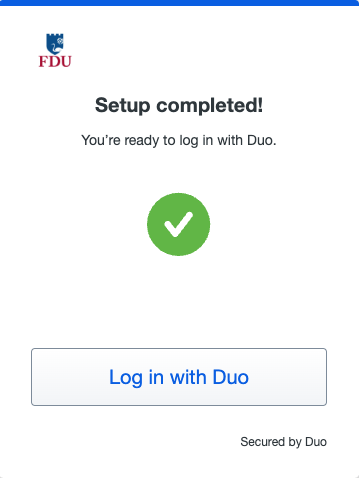
- Once the setup is completed, click on “Log in with DUO“
Authentication Options
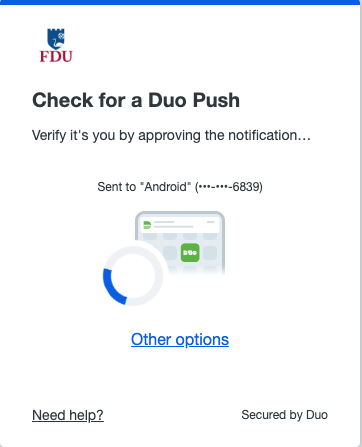
With DUO activated on your account, and with your device enrolled, you are ready to use DUO. When logging in, you will automatically receive a DUO Push but will also have the choice to select from “Other Options“. Review the options below to determine what works best for you.
Tip
We recommend the push notification to your smartphone, it’s the easiest form of authentication.
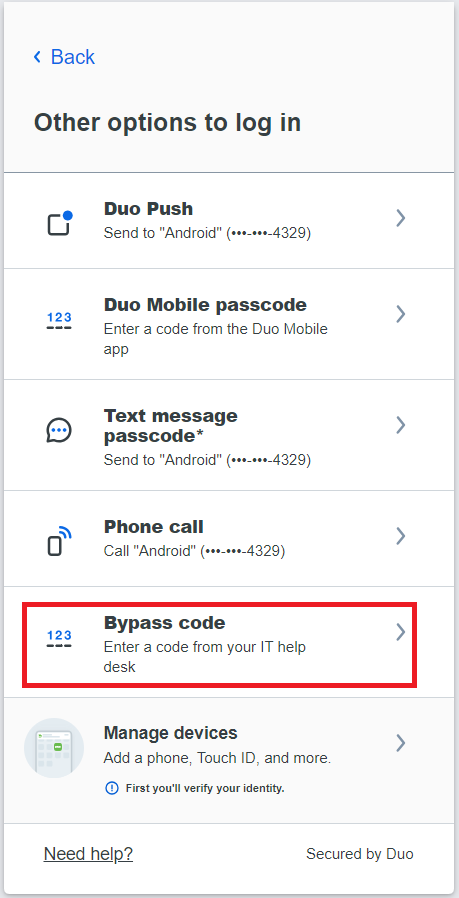
These are the different ways in which you can use DUO:
Once you have activated DUO Authentication, Duo will automatically send a DUO Push to your registered device. Open the notification on your device, and you’ll see a green checkmark and a Red “x“. Simply tap the “Green Checkmark” to approve the authentication request and gain access to your account.
VPN users select the number corresponding to Push or type “push“. Users with multiple devices will need to include a number indicating desired device i.e. push2.
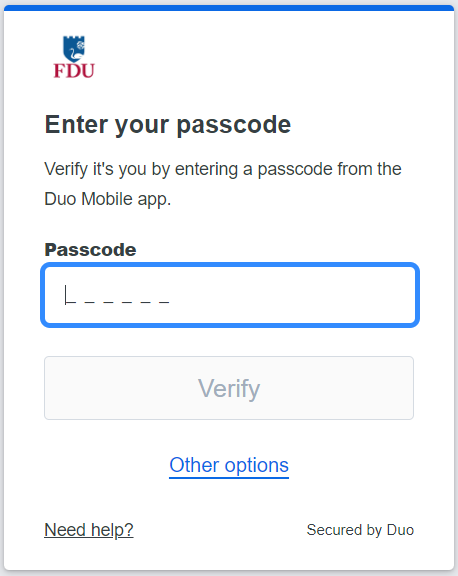
Once you have activated Duo Authentication, you can use the DUO mobile app to generate passcodes. This option does not require wifi or data, so this is a great option if you’re traveling or if you have limited or no cell/Internet service. Open your DUO mobile app, tap the FDU logo and it will reveal a passcode. During login, choose the enter a passcode option, enter the code and you’re in.
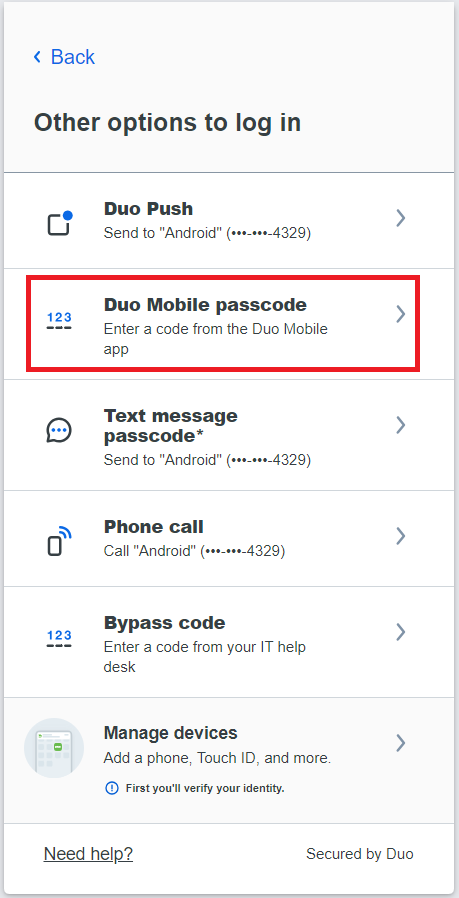
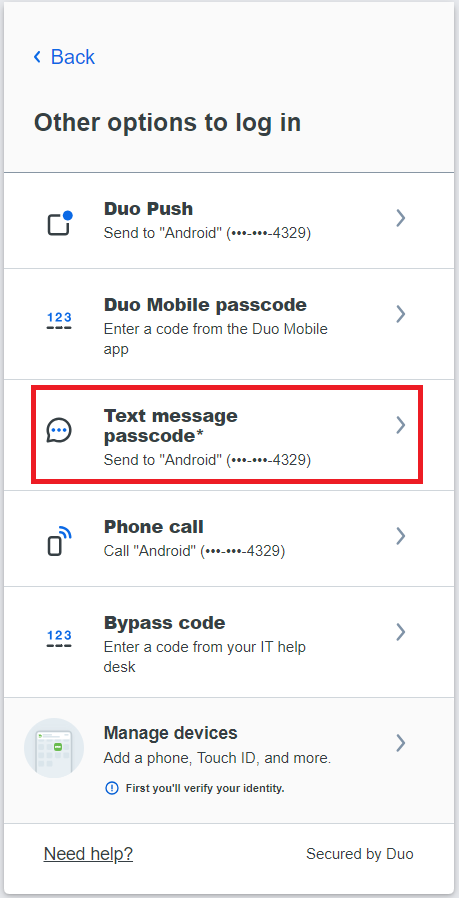
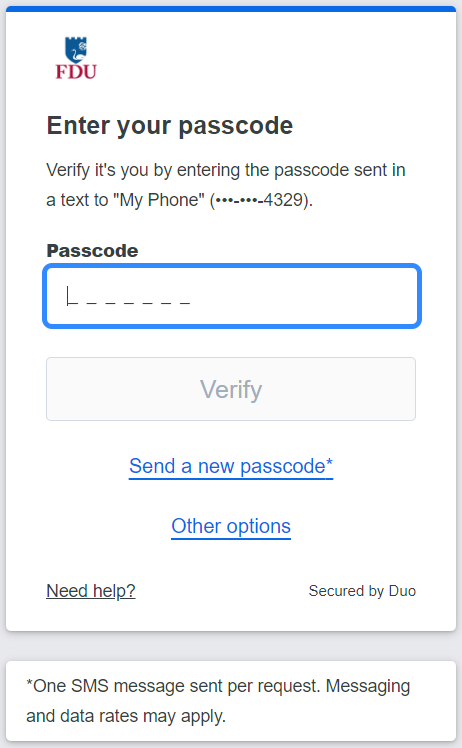
You can receive a one-time use code via text message. To get your one-time code click on “Text message passcode“. When you land on the text message page, it will show that a text message was just sent to you with a passcode.
VPN users select the number corresponding to SMS passcode or type “SMS“. Users with multiple devices will need to include a number indicating desired device i.e. sms2.
Note
These text message passcodes do not expire, and they are valid until used. You do not have to have a smartphone for this option.
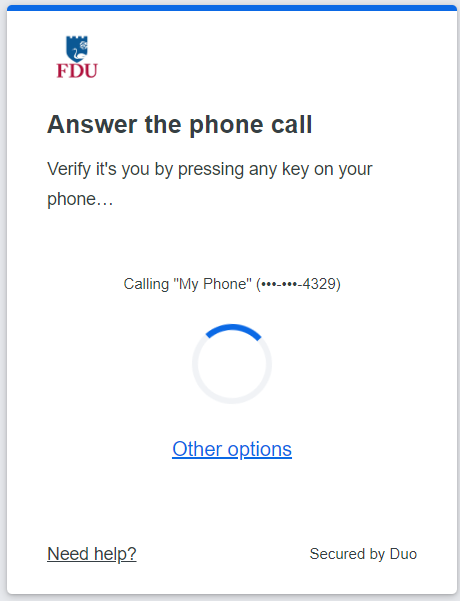
Click the “Phone call” option and DUO will call your phone. Answer the phone call from DUO and follow the voice instructions to log in to the application.
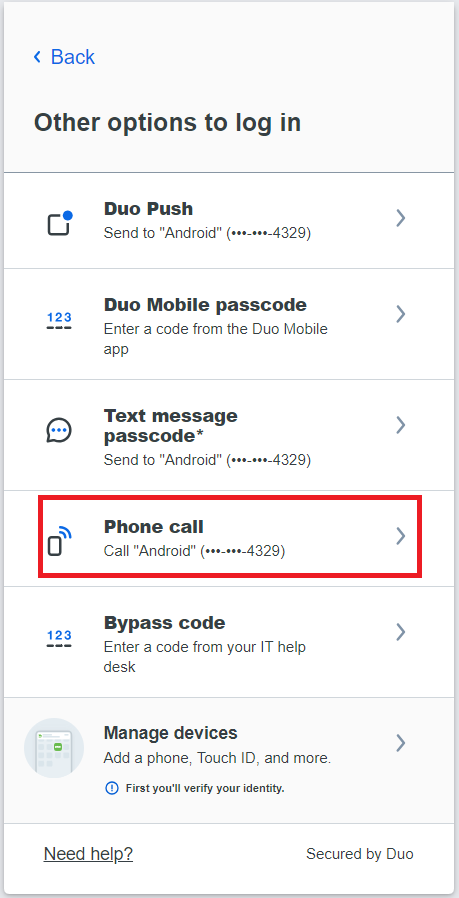
VPN users select the number corresponding to Phone Call or type “phone“. Users with multiple devices will need to include a number indicating desired device i.e. phone2.
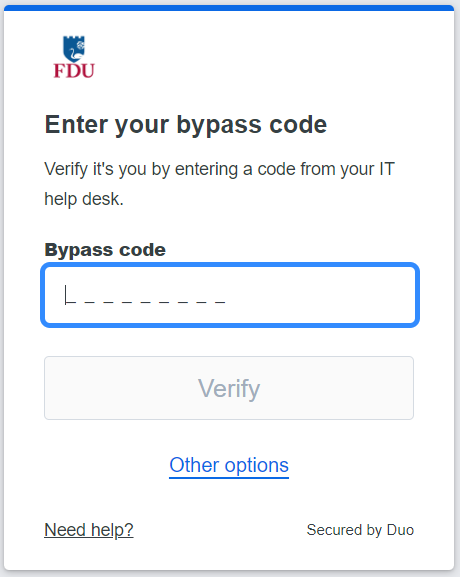
If you do not have your device with you, don’t worry. You can contact the Fairleigh Dickinson University Technical Assistance Center (UTAC) for a temporary passcode. These passcodes can be entered in the DUO prompt on your computer.
How Do I Change Settings or Enroll Another Device?
You can use the DUO Management Portal to easily edit and add new devices. For instructions on how to access the DUO Management Portal, follow the steps using the link below: