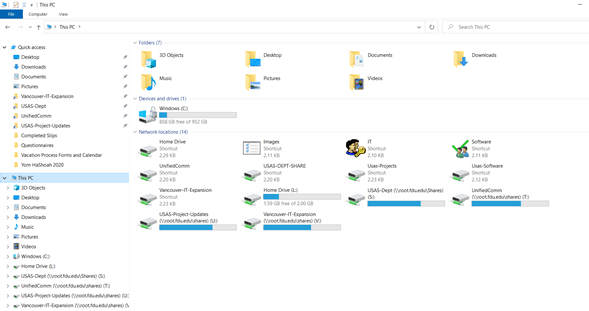
Once you have connected via the VPN, open your File Explorer.
Windows File Explorer Icon
Halfway down the left panel, click on “This PC“. Your available Network Locations will appear in the center of the screen.
To access any of your drives, simply double click on the icon next to Drive description.
Note:
If you see a red X on the drive icon, please ensure you have successfully logged into the VPN. If so, click on the red X and your drive should appear and the red X will go away.
close
macOS
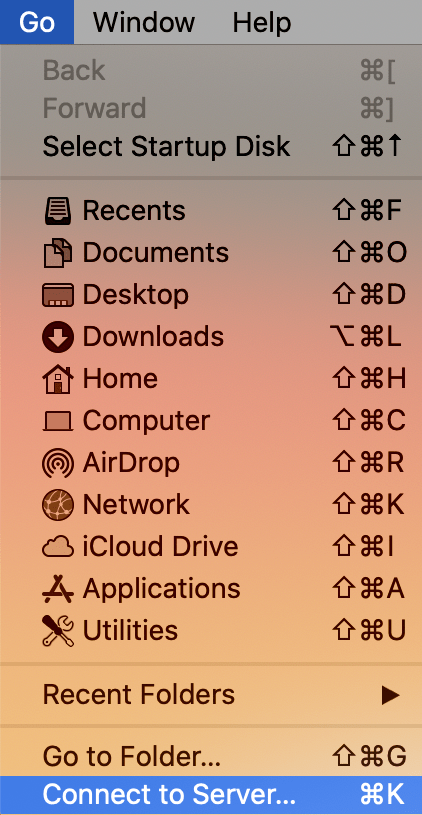
Go to your Finder app
Finder App Icon
On the menu bar on top, click “Go” and select the last option “Connect to Server…” or alternatively on your keyboard press and hold “command” then press “K“
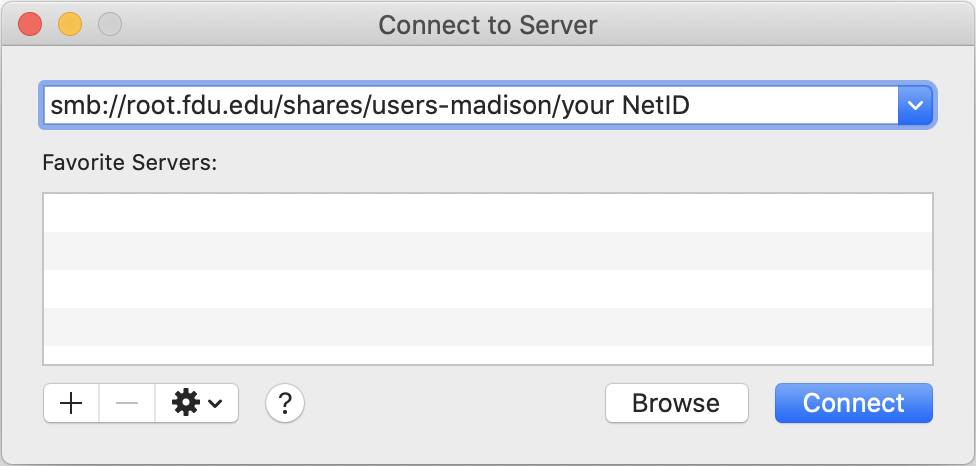
In the Connect to Server window enter SMB:// followed by the path of your network share
In the case of your home drive this will follow the convention of:
smb://root.fdu.edu/shares/users-madison/your NetID for Florham users
smb://root.fdu.edu/shares/users-metro/your NetID for Metro users
smb://root.fdu.edu/shares/users-vancouver/your NetID for Vancouver users
Pressing the “+” will add this to your list of Favorite Servers.
There are a few different ways to change your University NetID password. However, Computing Services strongly urges everyone to change their FDU NetID password using a provided Apple or Windows university computer.
The process for changing your FDU NetID password on a macOS device differs from a Windows device, so please follow the instructions provided for macOS computers below.
If you do not have a university-owned Apple or Windows laptop/desktop and cannot use a University lab computer, please follow the procedures described in “Using identity.fdu.edu Web Portal to Change your FDU NetID Password” below.
Please click on one of the links below for instructions on how to change your FDU NetID password:
Changing a FDU NetID Password on a FDU-owned Windows Computer
Note
To change your password, you must be logged into the machine and either on campus or connected to the Cisco AnyConnect VPN.
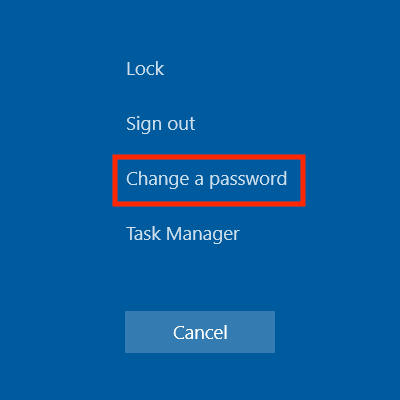
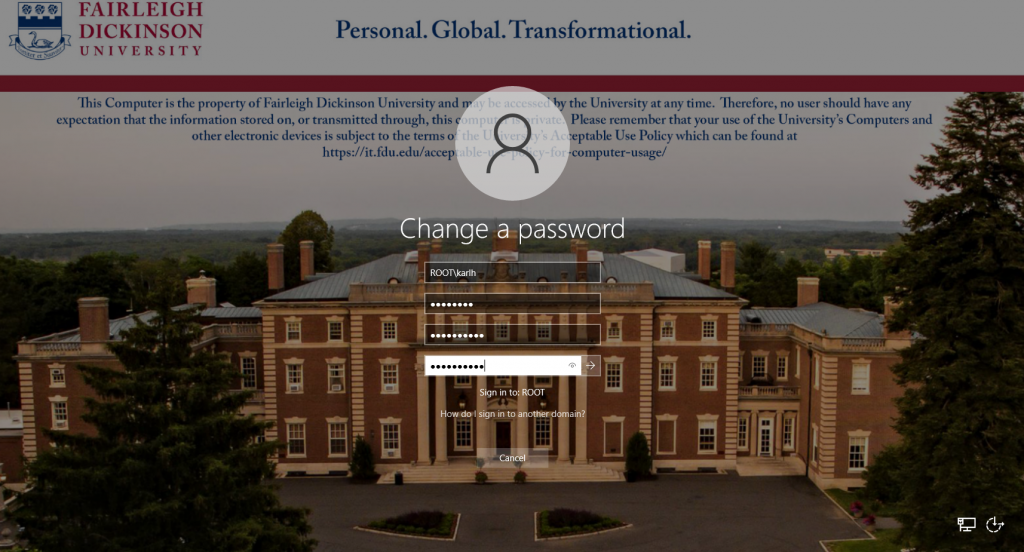
On FDU-issued laptops, desktops, and lab machines, the FDU NetID password can be changed by pressing the “Ctrl+Alt+Del” button combination on the keyboard from any screen and selecting “Change a Password”
Now enter the following:
Your old or current password
Type in a new password
Retype the new password to confirm
Press the “Right Arrow” button to continue
Tip
The newly created FDU NetID password must meet the complexity requirements.
Use 8 to 16 characters for your new password. Passwords must include all of the following 4 character types: Upper case letters, lower case letters, numbers, and special characters. Allowed special characters are: ! # $ @ _ + , ? [ ] . – ) ( ` ~ % ^ & * = { } | : ? , / and a dot. Please refrain from using portions of your name or email address within the password. Please refrain from using a password that you have already used.
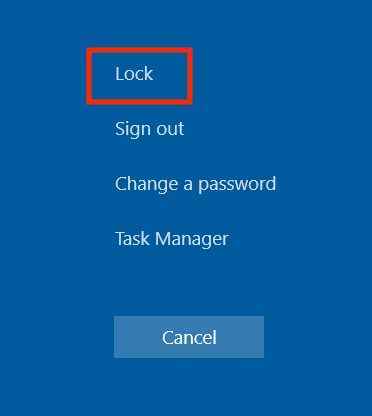
Once this has been done, you must lock and unlock the machine once to complete updating your password:
Press the “Ctrl+Alt+Del” keys combination again
Click “Lock”
Then log back in with your new password
Your FDU NetID password was changed successfully!
Note
Your new password will need to be updated in all web browsers with saved passwords and email clients across all devices. Examples include faculty and staff e-mail accounts synched to their iPad, iPhone, and or Android device. FDU-Secure Wi-Fi network access is also attached to your FDU NetID username and password and will need to be updated on devices that use it.
close
Changing and Syncronizing your FDU NetID Password on a FDU-owned Apple Computer
To change and/or synchronize your FDU NetID password with your FDU Issued Apple computer, please follow the directions provided in the following article:
Using “identity.fdu.edu” Web Portal to Change your FDU NetID Password
Adjunct professors, students, and anyone with a personal laptop/desktop/tablet device will use the FDU Identity Web Portal to change their NetID password.
Open a web browser (e.g., Google Chrome, Mozilla Firefox, Internet Explorer, Safari) and navigate to the following URL:
Click on “Account Maintenance” on the top right hand of the web page
You will be redirected to the FDU Single-Sign-On login page. Enter your FDU NetID email and password in the corresponding text boxes and click “Sign In.” Complete the FDU 2fa Duo push notification to proceed
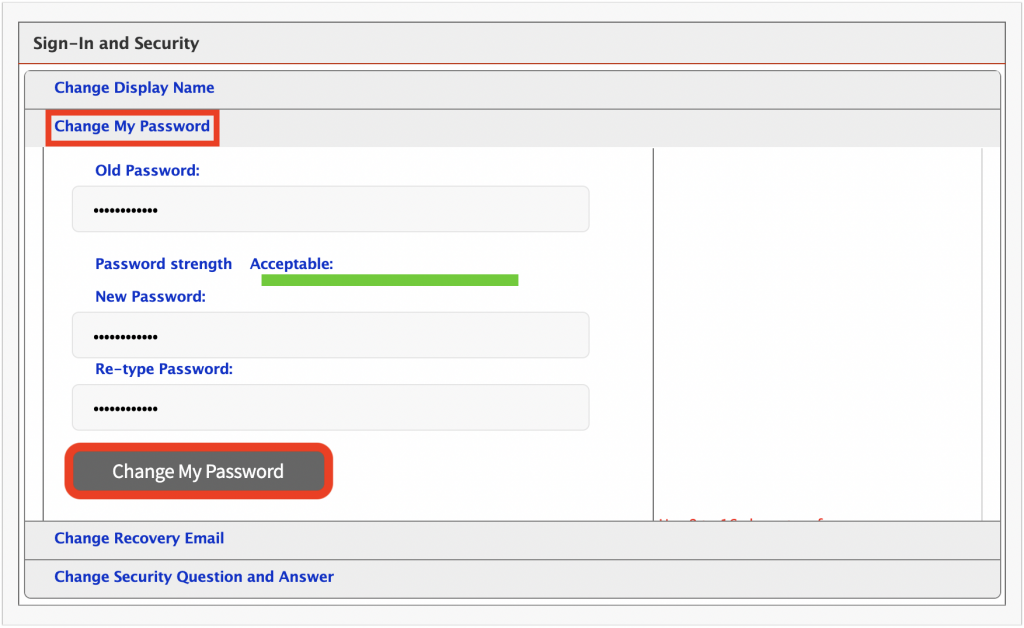
Under Sign-In and Security, select “Change My Password”
Enter your current password
Enter a new password
Retype your new password to confirm
When finished, select “Change My Password”
Tip
The newly created FDU NetID password must meet the complexity requirements.
Use 8 to 16 characters for your new password. Passwords must include all of the following 4 character types: Upper case letters, lower case letters, numbers, and special characters. Allowed special characters are: ! # $ @ _ + , ? [ ] . – ) ( ` ~ % ^ & * = { } | : ? , / and a dot. Please refrain from using portions of your name or email address within the password. Please refrain from using password that you have already used.
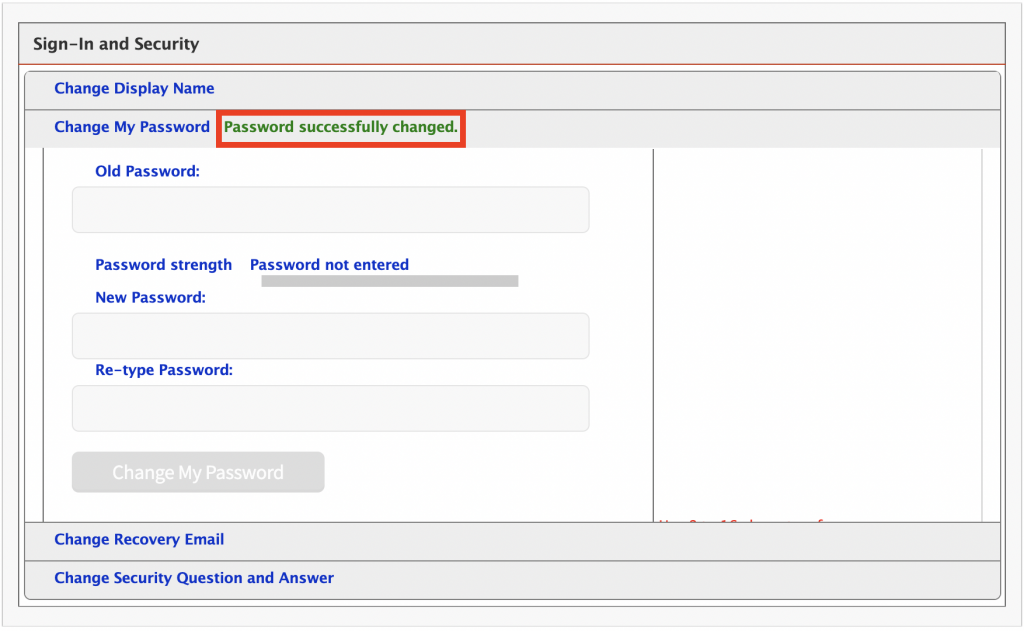
“Password successfully changed” will be displayed if your FDU NetID password was successfully changed
Note
Your new password will need to be updated in all web browsers with saved passwords and email clients across all devices. Examples include faculty and staff e-mail accounts synched to their iPad, iPhone, and or Android device. FDU-Secure Wi-Fi network access is also attached to your FDU NetID username and password and will need to be updated on devices that use it.
close
Using “identity.fdu.edu” Web Portal to Change your FDU NetID Display Name
You also have the option to change the name that is displayed on your NetID account.
Open a web browser (e.g., Google Chrome, Mozilla Firefox, Internet Explorer, Safari) and navigate to the following URL:
Click on “Account Maintenance” on the top right hand of the web page
You will be redirected to the FDU Single-Sign-On login page. Enter your FDU NetID email and password in the corresponding text boxes and click “Sign In.” Complete the FDU 2fa Duo push notification to proceed
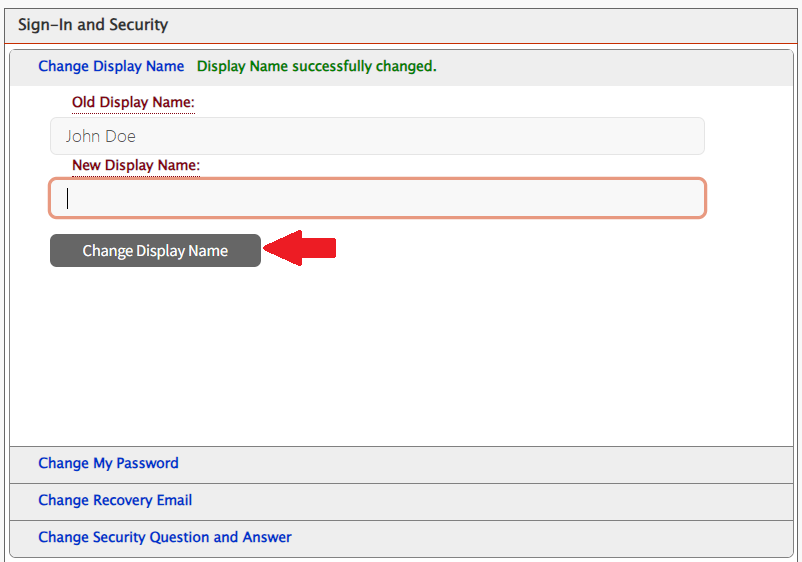
Under Sign-In and Security, select “Change Display Name”
Enter your New Display Name
Click on “Change Display Name“
“Display Name successfully changed” will be displayed if your Display Name was successfully changed
Lab reservation requests for the entire semester, (i.e. January through May or September through December are processed by the Office of Enrollment Services. To make a lab reservation request for the Summer, Winter, Fall, or Spring semesters, please contact the Scheduling Officers in Enrollment Services for the Florham and Metropolitan campuses. The phone and fax numbers are listed below:
Metropolitan Campus Ph. (201)-692-2217 / 2517
Florham Campus Ph. (973)-443-8600
Reserving a Computer Lab for Specific Dates within a Semester
Once logged into the support website, locate ‘Forms for Faculty & Staff’ and click on the “Computing Services – Lab Reservation & Lab Software Request (Faculty & Staff NJ Only)” option.
You will be directed to a reservation request form. Please provide the necessary details, such as the desired date, time, and location of the lab reservation. Additionally, please include any specific requirements or equipment you may need for your session.
After completing the form, you can submit your request by locating and clicking the submit button.
Once your request has been submitted, the Lab & Operations Manager will review and confirm the details of your request. You will receive written confirmation of your request.
Should you require any further assistance, please feel free to reach out to the Lab & Operations Manager, Genesis Lopez (g.lopez@fdu.edu).
Any changes including cancellations to your request should be submitted by using the SAMI support link to locate the ‘My SAMI Support Request’ tile and browse for your lab related request ticket. All updates can be entered directly into the ticket.
Thank you for choosing Computing Services for your lab reservation needs. We look forward to providing you with a seamless and efficient experience.
XMedius Fax is an electronic fax (eFax) cloud-based solution that allows users to send and receive faxes. The XMedius Fax service is available as an on-campus resource only. Access to the efax.fdu.edu site is restricted to on-campus networks and FDU VPN users.
This document provides instructions on how to use of the FDU Xmedius Fax Service. It describes notifications and navigation of the website in detail to facilitate the proper use of this resource.
Notifications
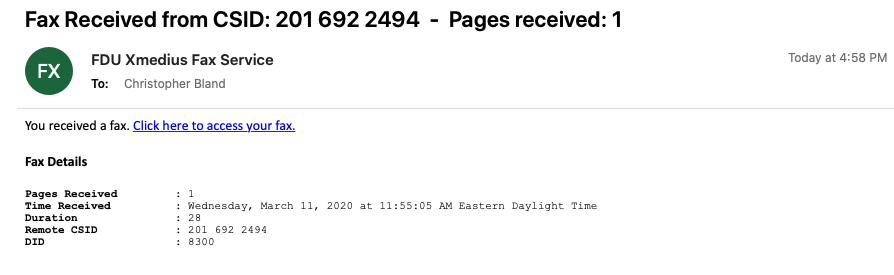
Each user given access to view incoming faxes will receive an email notification from the FDU Xmedius Fax Service
The email will look as follows:
Within each email will be a “Click here to access your fax” web link to the Xmedius Fax Server for quick access.
close
Logging In
To access the FDU Xmedius Fax server you can visit efax.fdu.edu or click the “Click here to access your fax” link provided in the fax notification email (The efax website is only accessible if you are located on-campus or connected to the FDU VPN). Once loaded in your web browser you will be prompted for a username and password. Please enter your full FDU NetID and password.
close
Accessing Faxes
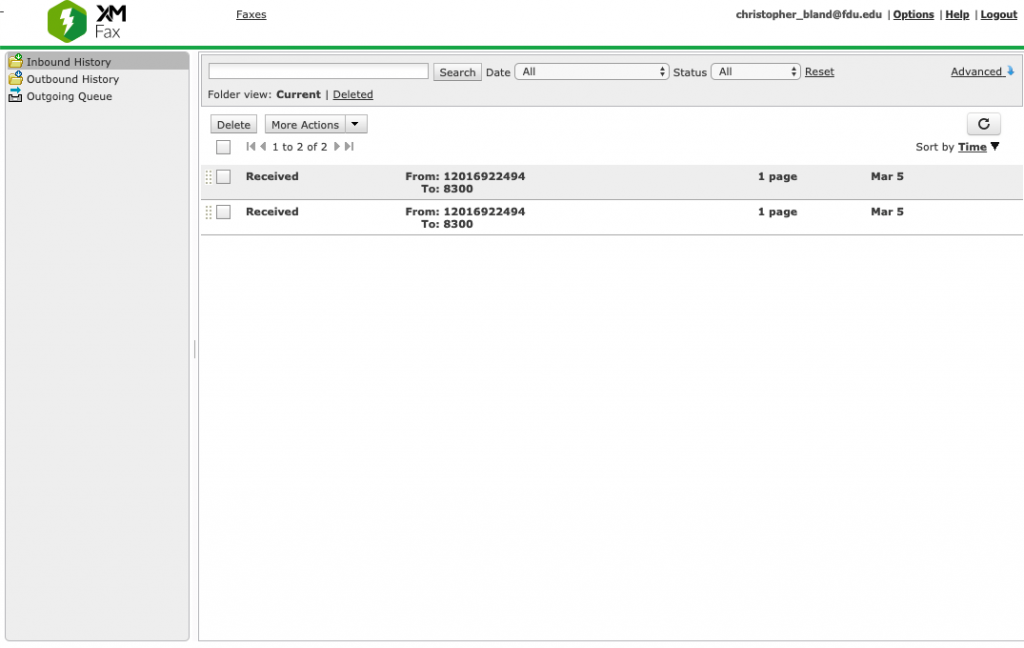
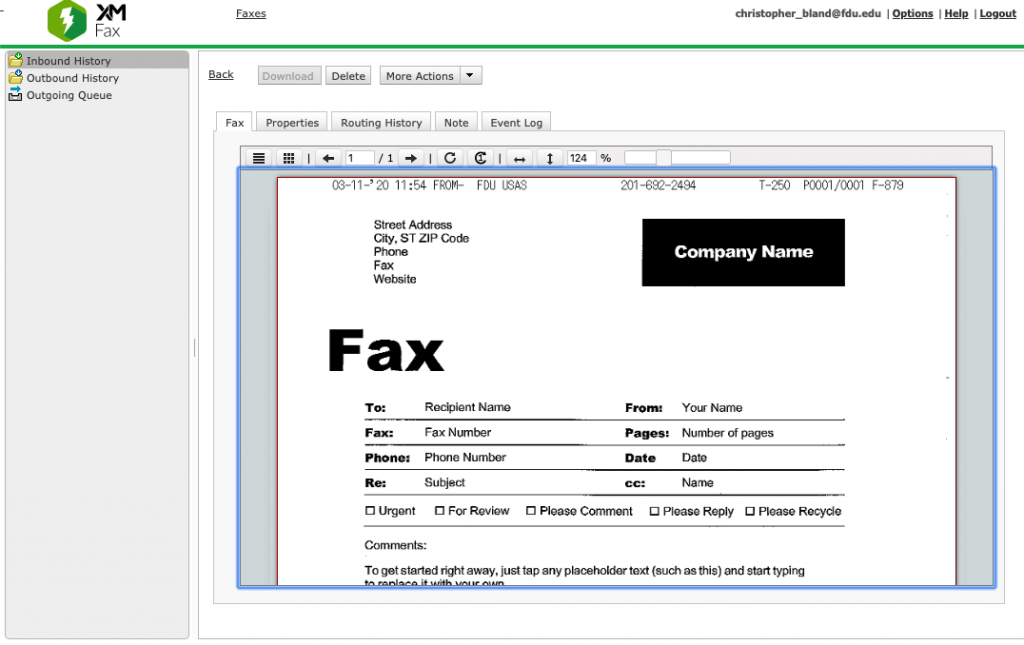
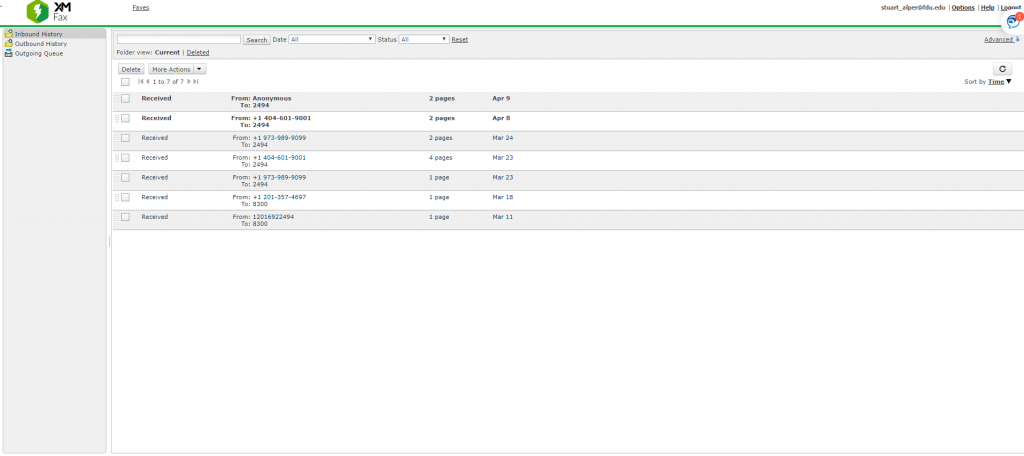
Once authenticated you will see all of your incoming faxes (Unread faxes will appear in bold type).
Note:
If you receive faxes on more than one campus they will all be shown in your Inbound History.
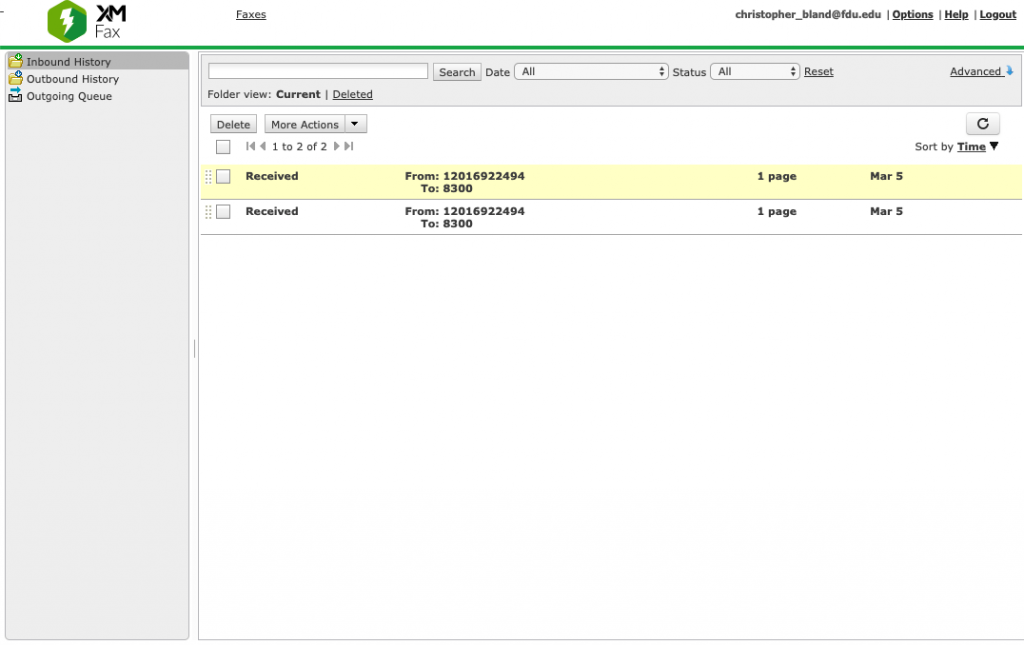
To view a fax simply move your mouse to the fax you want to view. The fax will turn yellow as your mouse hovers over it, click it
The fax will automatically open to the Fax tab showing the incoming fax
close
Printing Faxes
Users can print a fax to a local or networked printer, and can send a document to Perceptive Content by printing to the Perceptive Content printer. Below are the steps necessary to print a fax.
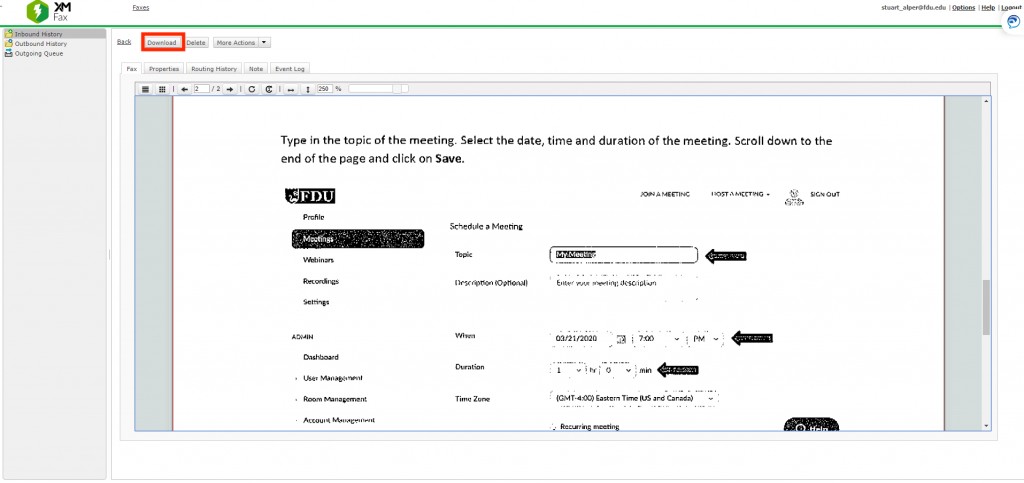
First, find the fax to be printed by scrolling over it with your cursor until the fax is highlighted yellow, then click on it
Once the fax is opened, locate the Download icon on the top left side of the screen, and click to download
Note
This will not actually download the file to your computer.
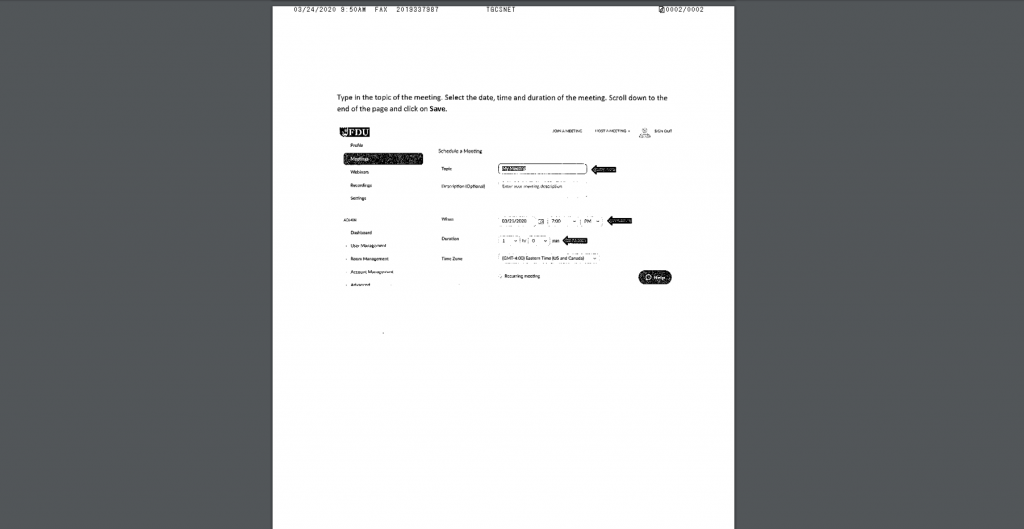
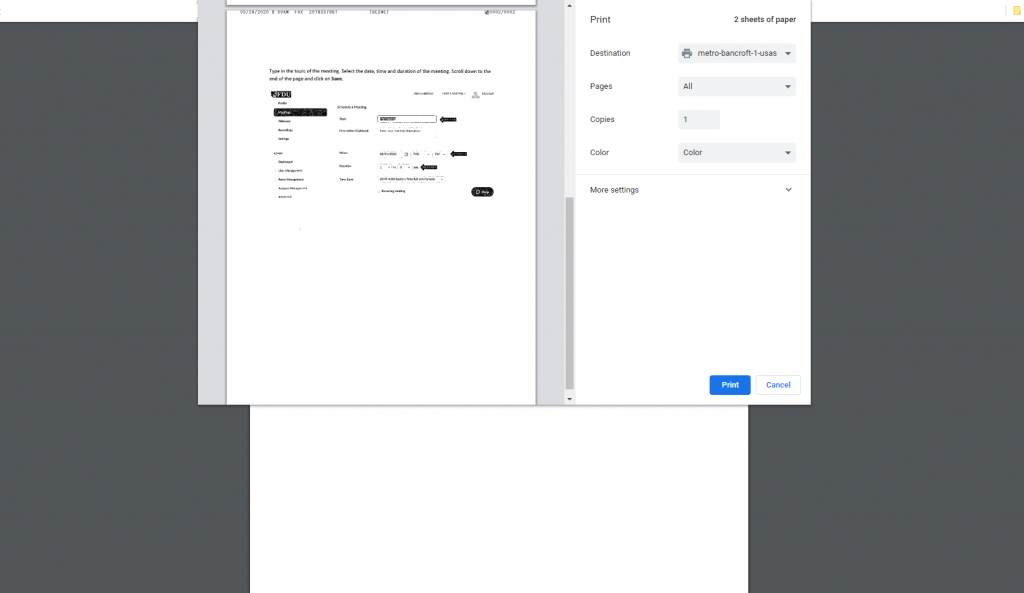
A new browser screen will open and the fax to be printed will appear
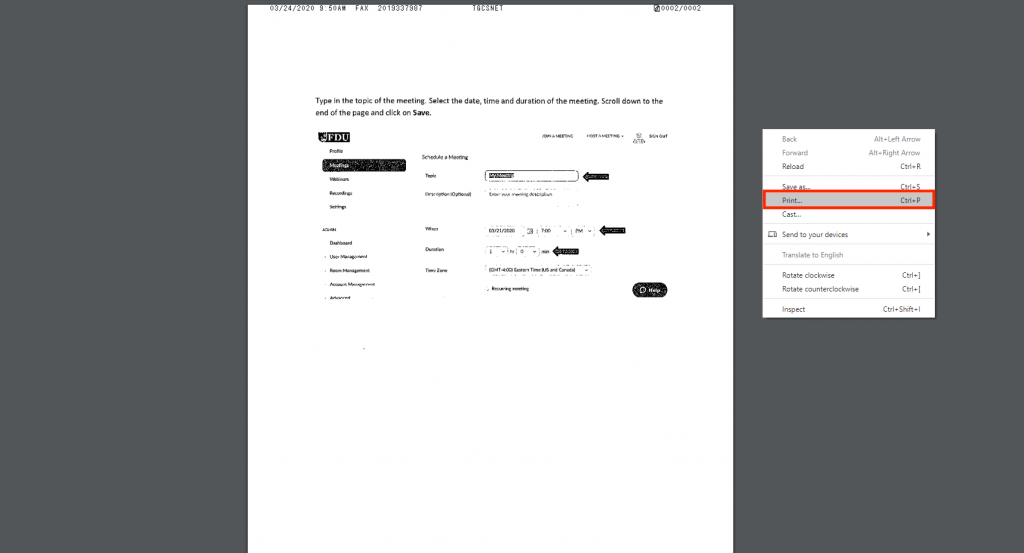
Right-click your mouse from anywhere on the page, and a second panel will be presented. Hover your cursor over the word Print, and left-click your mouse
Next to Destination, select the printer you wish to send the fax to, or the Perceptive Content Driver if you wish to move the fax to Perceptive Content. Then click on the Print icon at the bottom of the screen
close
Managing Faxes through Notes
Faxes can be stored in both the current Folder view and the Deleted Folder view. You can move faxes between the folders by clicking the Delete button from the Current view or the Restore button from the Delete view. To delete a fax from the portal, click on the Delete button while the fax is in the Delete view.
If faxes need to be stored and retrieved over a period of time, the number of faxes that might appear in either the Current or Deleted view could build up, and retrieving a fax could prove difficult. Using the Notes capability will make searching for archived faxes much easier. The Notes and search functions work in both the Current View and Deleted view.
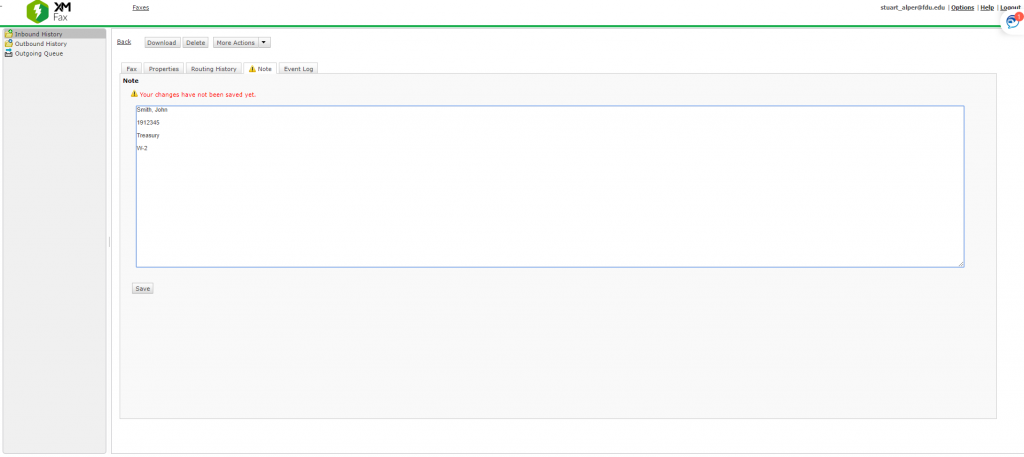
In the portal, open the fax you wish to Note
Then click on the Note button
Start typing your note. You will notice a warning appear immediately letting you know the Note has not been saved yet. You can use multiple lines, and best practice would be to put a unique data point on each line. In the example below, Student Name, Datatel ID, the purpose of the fax, and the document type appear on separate lines
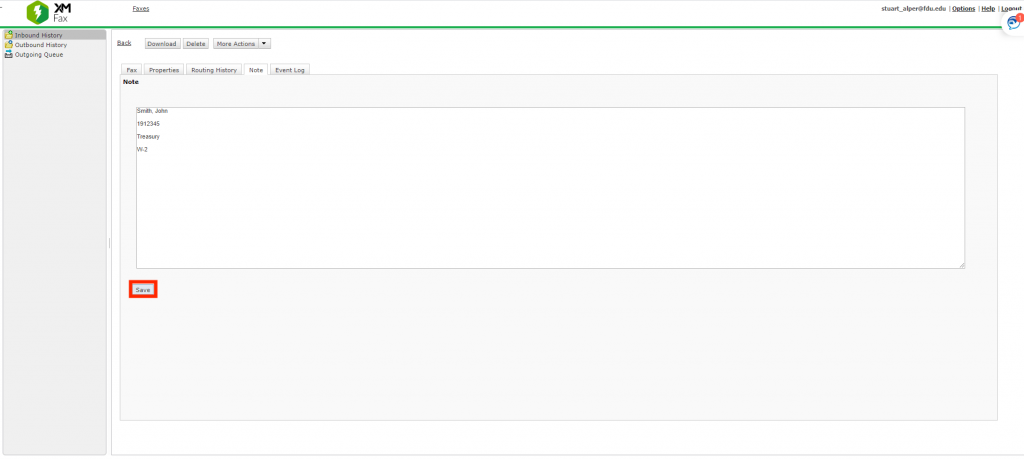
When done adding the Note, click Save at the bottom of the screen
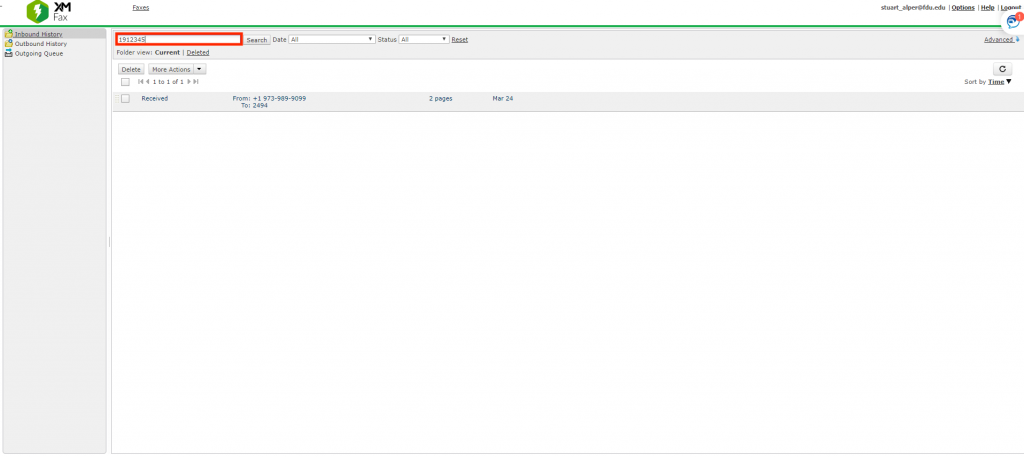
To search for a particular fax, or series of faxes, from the Current or Deleted view of the portal, type in the search criteria in the bar to the left of the search button, and then click the Search button. All faxes that meet that criteria will then appear
Note
From the example above, that if the search was for W-2’s, all faxes that contain W-2 would appear. If the search was for a Datatel ID, all documents received with that Datatel ID would appear. It is strongly suggested that departments standardize on how to use the Note area prior to implementing the eFax solution.
close
Managing Faxes through the Event Log
From time to time, it might be important to know more details about a particular fax, like who received it, who viewed it, who printed it or notated it. All that information, for each fax, can be found in the Event Log.
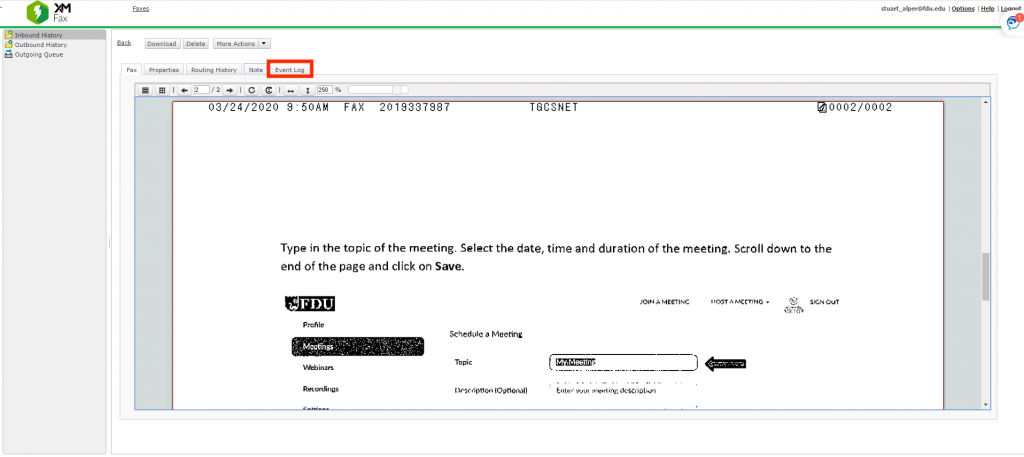
To view the event log from within a fax, simply click the Event Log tab.
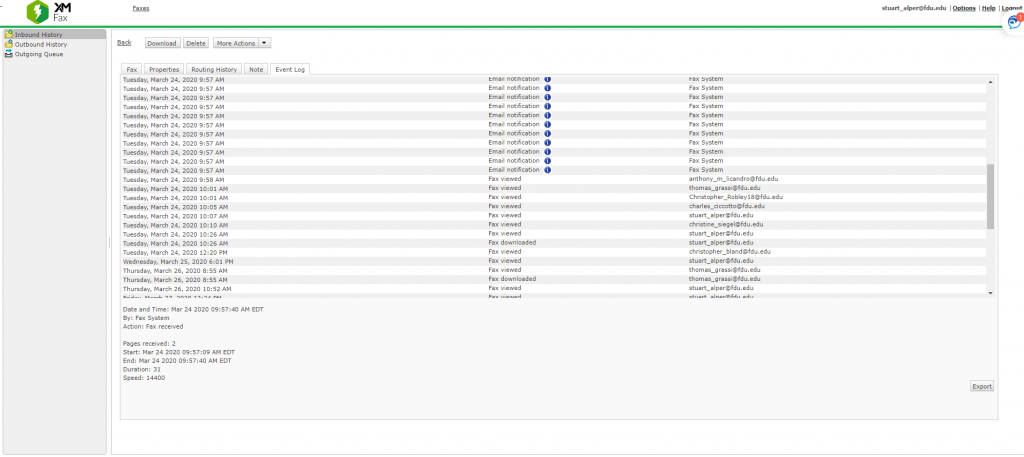
The event log will provide details of every action taken upon that Fax. Those actions include:
Routed to User – The Fax appears in that person’s Portal
Email Notification – An auto-generated email was sent to that person
Fax Viewed – The fax was opened by a specific user (if several people are assigned to retrieve faxes, you can see who viewed the fax and at what date and time)
Fax Downloaded – who downloaded the Fax for Printing
Fax Deleted – Who moved the fax from Current View to Deleted View
Note Saved – Who added a Note to the Fax
All this information can be very useful in a department where several individuals are responsible for managing and disseminating faxes.
close
Composing a Fax
From the eFax portal, users can send faxes with cover sheets and attachments. Below are the steps to compose and send a fax.
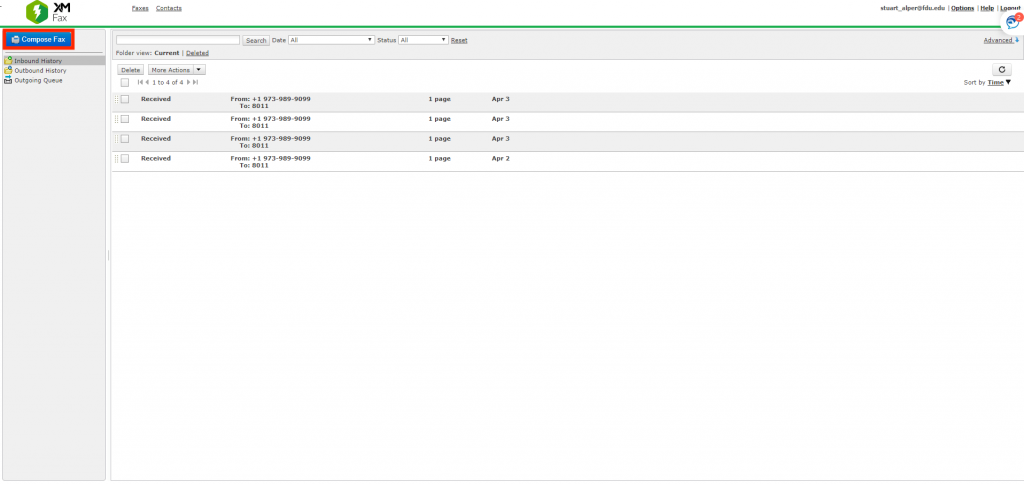
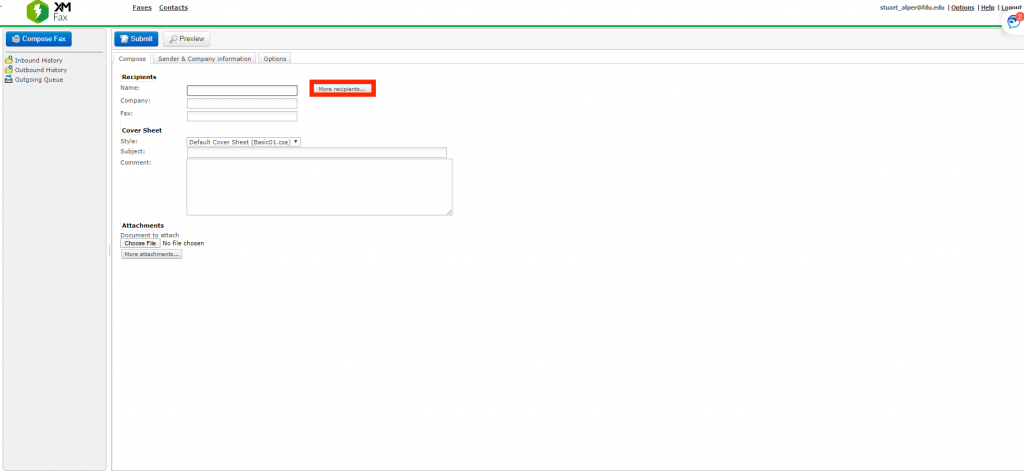
First, click on the Compose Fax icon colored blue
Enter in the recipient’s information, including Fax Number starting with a 3. If you are faxing within FDU, you only need to use the four-digit fax extension. If the Fax is going to more than one fax machine, click on More Recipients
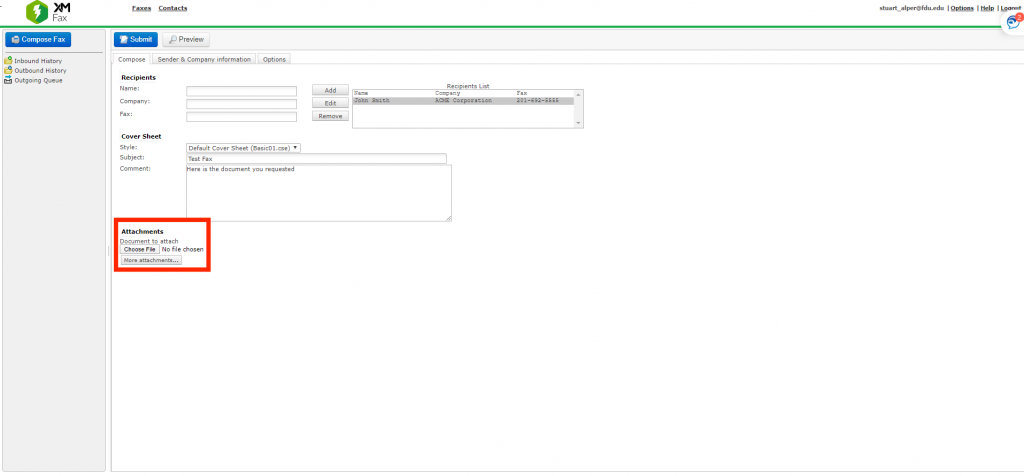
Add the additional recipients’ information, and click Add. Type in a Subject for the fax, and any comments needed for the cover sheet. If a document needs to be attached, click on the Choose File icon at the bottom left of the screen, and choose the file you wish to attach. It is recommended that files be converted to .PDF if at all possible
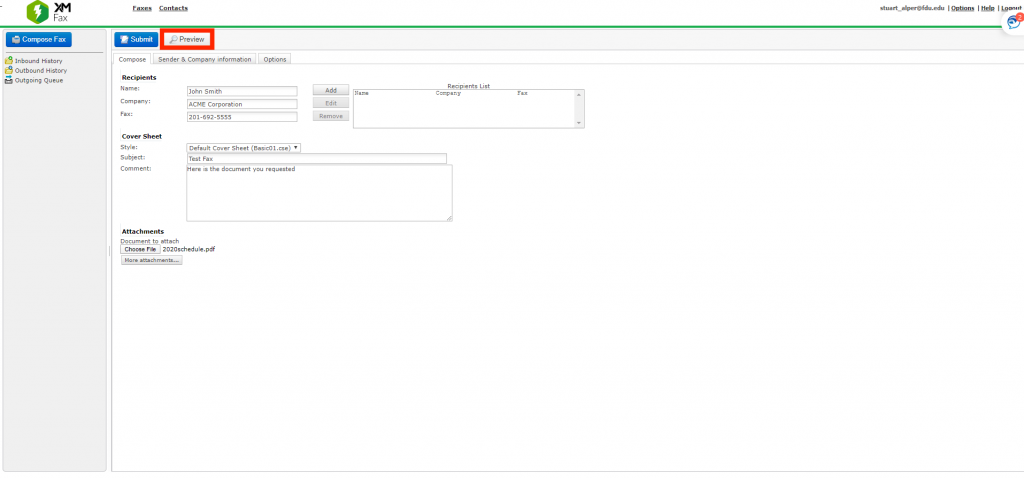
When complete, the file name will appear next to Choose File. You can repeat for as many files as needed. When you are ready, click the Preview button to review the appearance of your fax
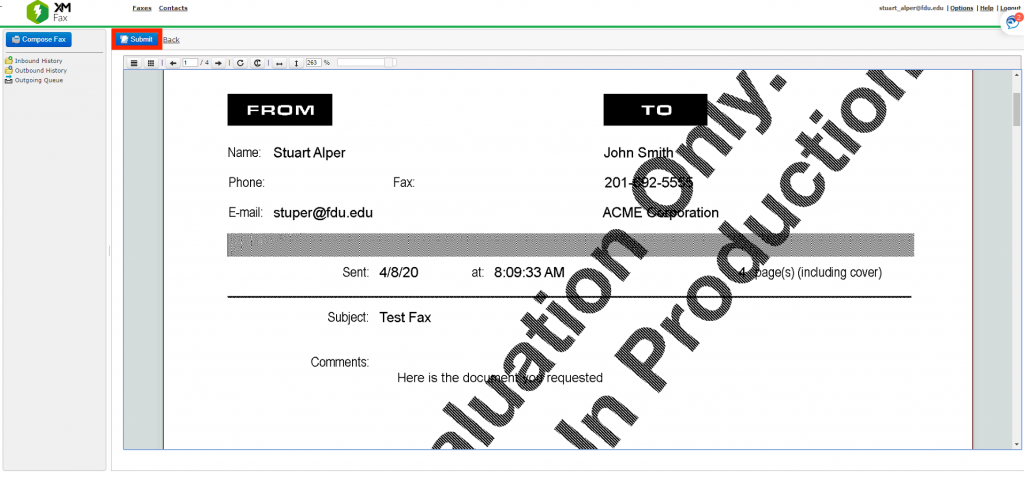
From here, you can view all the pages of your fax. If you are not satisfied with your fax, click the back button to go to the Compose screen, and click the Choose File button to either remove or re-attach a file. When ready, click Submit
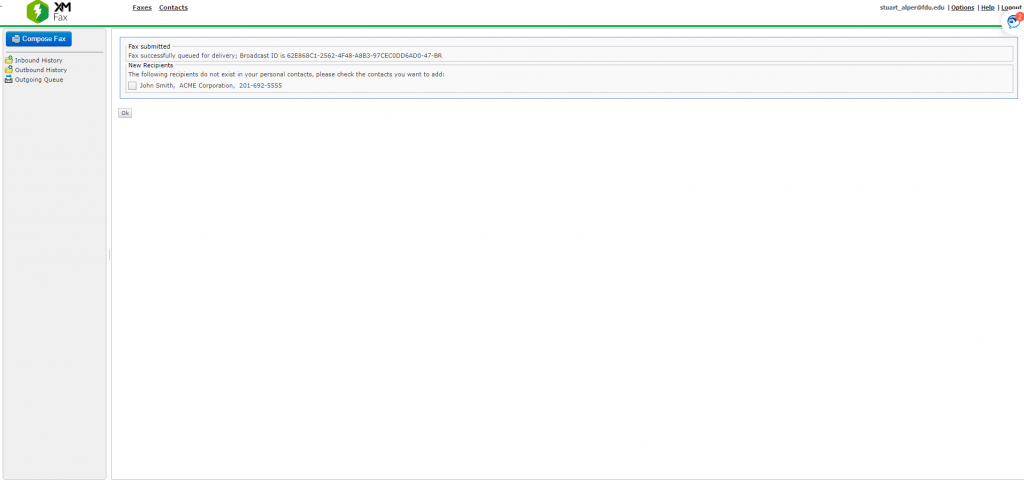
If successful, a Fax Submitted message will appear. There will be an opportunity to add the recipient to your xFax contact list if they are a frequent user. Click OK
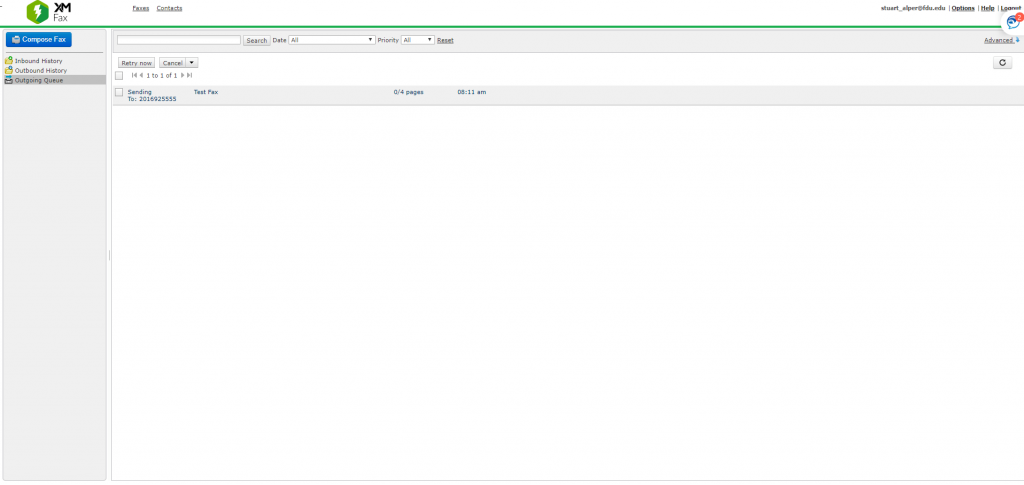
You will then see the fax in your Outbound Queue, in a Sending Status
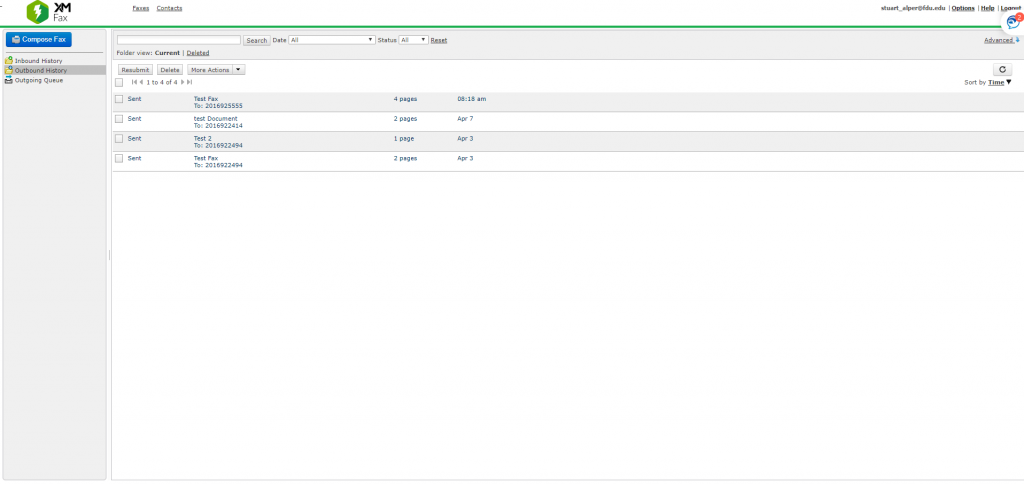
Finally, the fax information will be moved to the Outbound History File
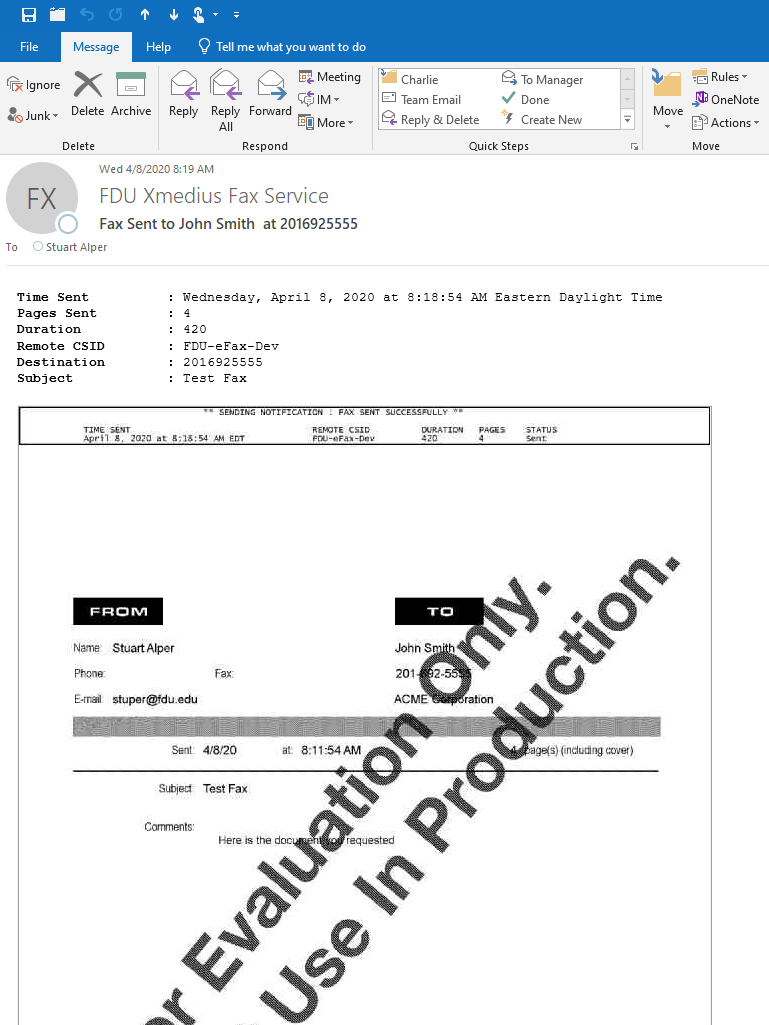
Once the transmission has been completed, an email will be sent to the user confirming the successful receipt of the fax by the receiving fax machine
close
Deleting Faxes
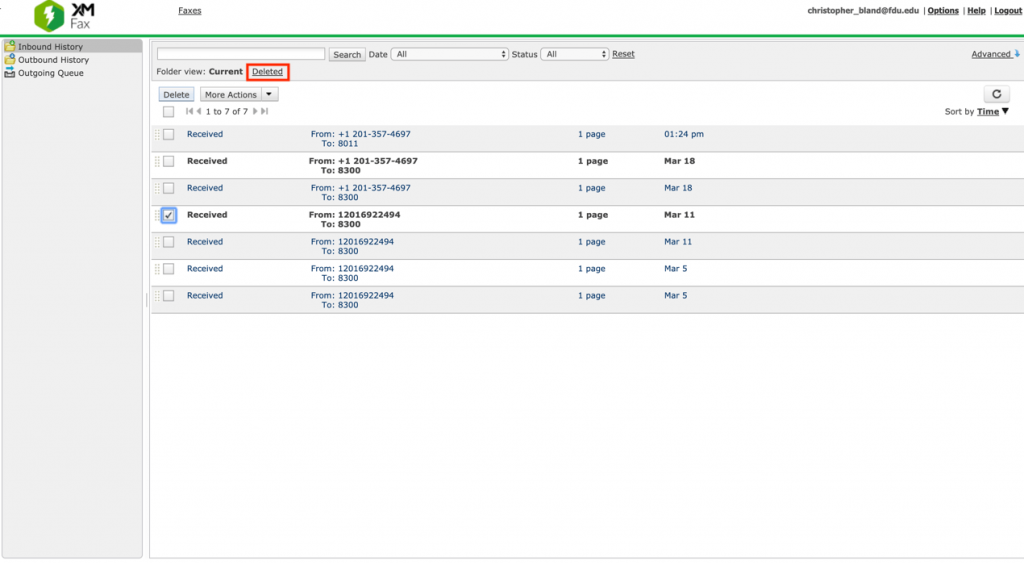
Users can remove faxes from their Inbound History by checking the box next to the fax they want to delete and then clicking the Delete button
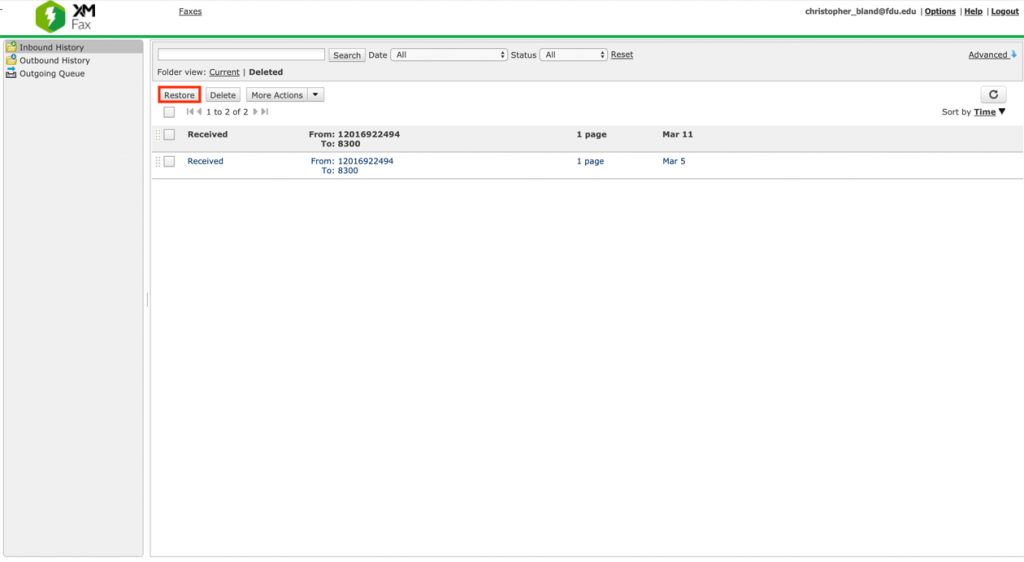
Once deleted, faxes are visible by clicking the Deleted folder view
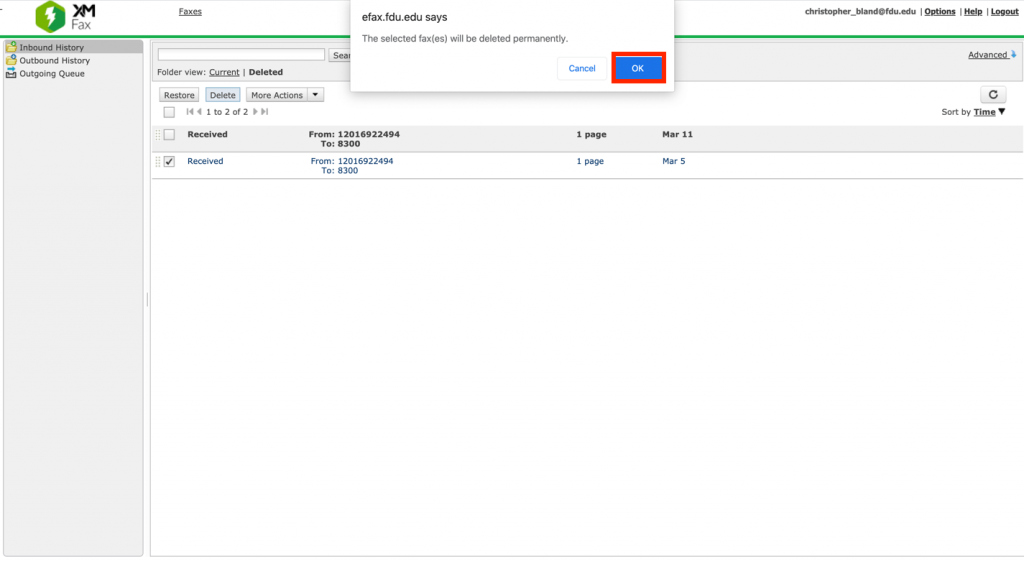
Users will then have the ability to restore the fax to their Inbound History by clicking the Restore button. Alternately, faxes can be permanently deleted by pressing the Delete button. A final confirmation screen will be shown before permanently deleting fax
close
Centralize Portal Option
Each member of the Fax group in which you are the owner manages faxes within their own portal. In other words, if there are 5 employees (including yourself) that can access your fax #, each of you receives all the faxes sent to that # individually and manages those faxes independently.
However, if you desire a centralized portal, where there is one view, one fax, and, for example, if you delete a fax, it’s removed from view for all members of that group.
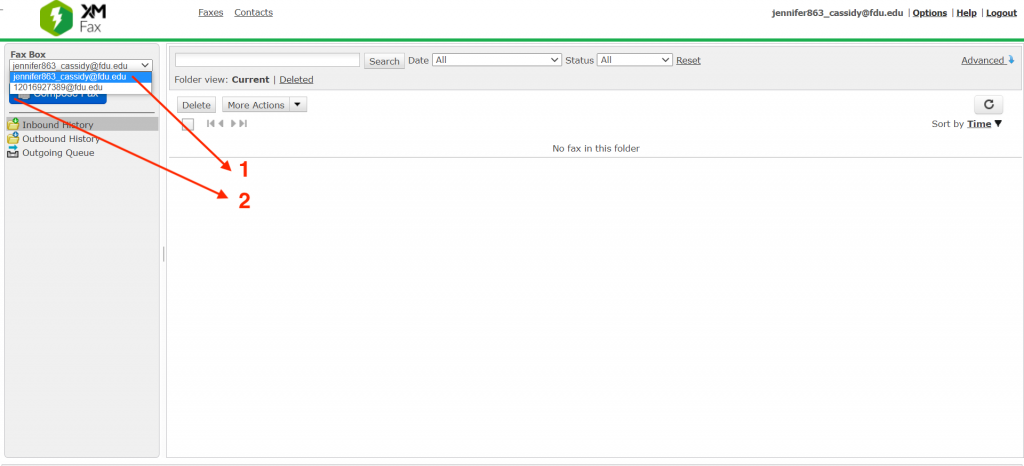
Individually Managed Faxes: Still available to view if necessary
Shared Centralized eFax Box: Users with the option to have the ability to manage the faxes for all individuals set up in the shared option. For Example: When deleting a fax it removes it from all the users set up to have access to this particular fax line.
To help protect the University’s computers and networks from cyber threats, FDU OIRT is implementing Application Control with privilege management. This feature provides all users with privileged rights to install applications as needed while continuing to protect resources from unknown and malicious risks.
All software is typically installed from a setup file. Any setup file for an application should only be downloaded from the developer’s official site. For example, to install Google Chrome, the setup file should only be downloaded from Google’s official site.
Any setup file on a USB drive, CD drive, or other removable media should only be installed if provided directly by the developer or other credible source.
Windows
By default, the setup file will be located within theDownloads folder:
C:\users\yourusername\downloads\
To install software on a university laptop with Windows, follow the process defined below:
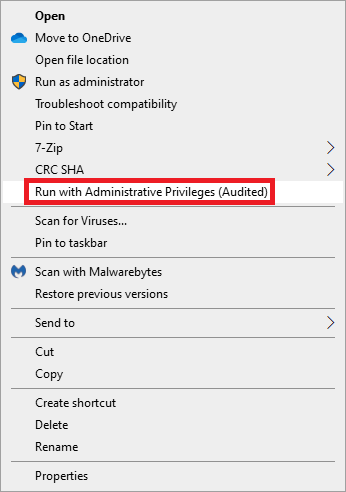
Right-click the setup file for the application to be installed
Click “Run with Administrative Privileges (Audited)” on the setup file
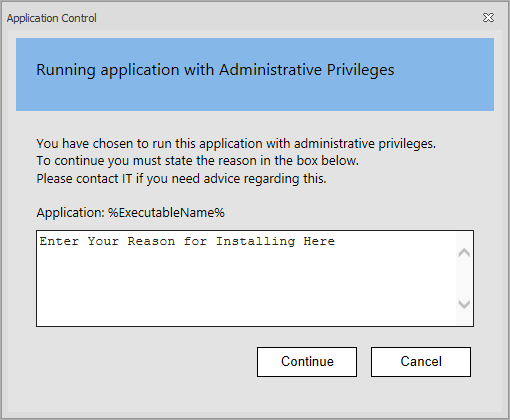
Provide a valid reason for installation and use of the application in the space provided and press “Continue”
The application will now be installed with administrative privileges.
Note
While off-campus, the option to “Run with Administrative Privileges (Audited)” may not be present. Please connect to FDU VPN, lock the machine by pressing “Window Key” + L and re-login. The feature should then be available. If this feature is not available while on-campus, please click the “Support” button above for further assistance.
close
macOS
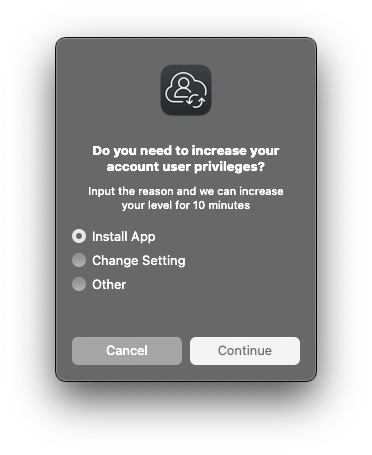
Click on “Jamf Connect” located on the top right menu bar app (where you log in to sync your password) and click “Request Admin Privileges“
Select the reason from the dialog box: Install App, Change Setting, or Other for the elevation, and click “Continue“
You will be notified when you are elevated and can begin installing a new application or making changes to your settings
A countdown will appear in your menu bar, showing how much time remains for your administrator access. Complete the installation before the countdown ends
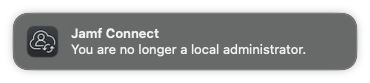
You will return to your normal permissions when the countdown reaches zero
Special-use elevations will still be handled through the existing workflow.
MediaSpace is a campus video distribution platform from Kaltura, similar to YouTube, where you can securely upload and share your videos anytime and anywhere with an internet connection. It supports multiple devices and provides powerful control and governance tools.
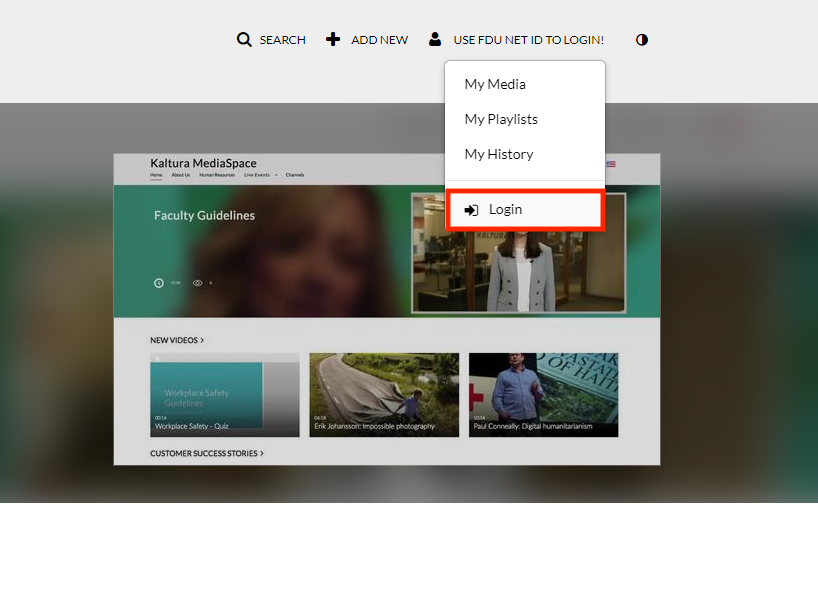
There are various ways that content can be locked down. It can be visible to only specific NetIDs, specific course members or to the general public.
Click on use FDU NetID to Login and enter your credentials
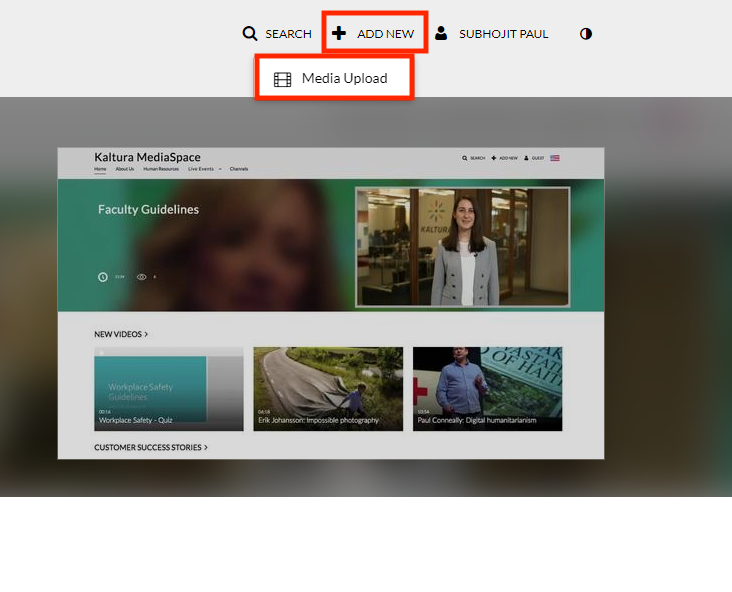
Adding Content to MediaSpace
In the upper right corner of the page, select the ‘Add New‘ drop-down list, and choose ‘Media Upload,’ to open the ‘Upload Media‘ page
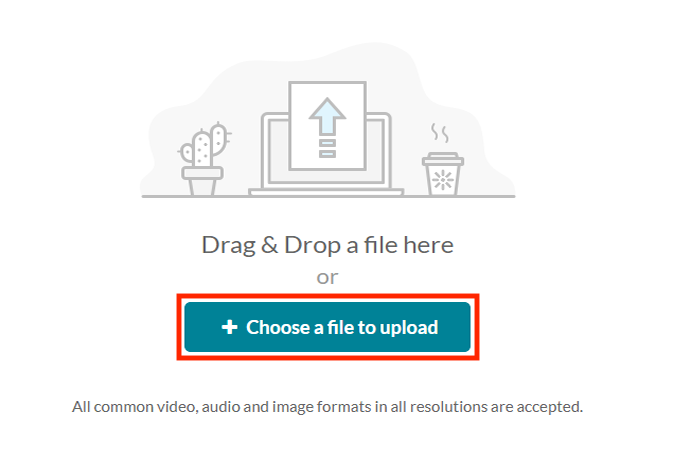
Click the ‘+ Choose a file to upload‘ button to search your computer for the media file that you would like to upload; select the file; and click the ‘Open‘ button to upload the file
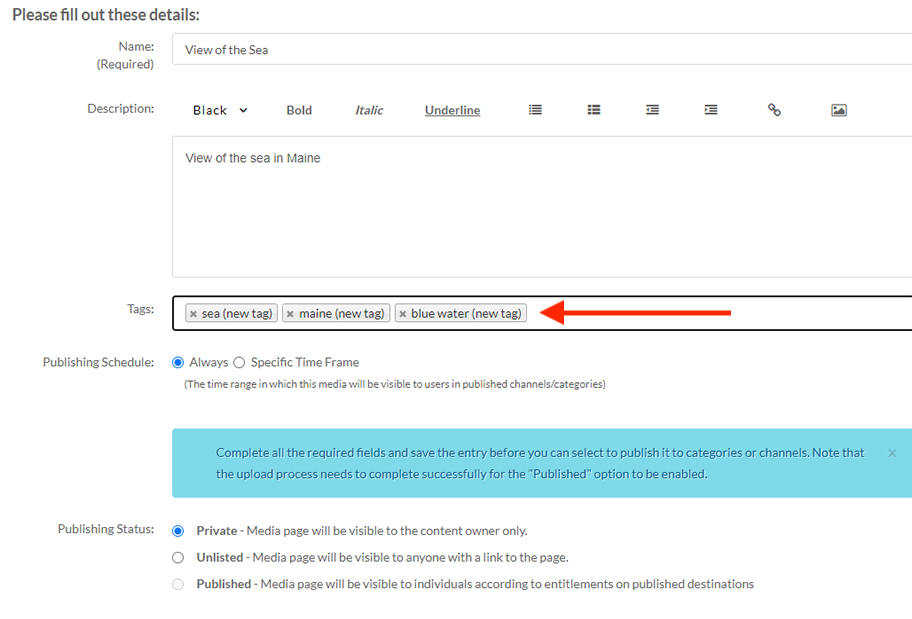
While the file is uploading, you can add the metadata in the following fields:
Name
The name of the media being uploaded.
This is a required field and is by default the filename of the media being uploaded.
Description
This is displayed below the media or on the player info pane.
This is a required field for publishing and/or adding the media to a playlist.
Tags
These are used to help describe your media and are used as keywords when searching for media.
Multiple tags can be separated by commas or new lines.
When you have finished editing details, click the ‘Save‘ button
Once the media has uploaded and you have given it at least a title and description, you will need to select one of three file sharing permission settings. This setting can be changed later, so pick the setting that best applies at the moment:
Private: Only you will be able to access the file.
Unlisted: Only those with a link to the file that you provide will be able to access it. Select this option if you want to share your video using a direct link to the video that you might share via email.
Published: Assign the file to a MediaSpace channel. It will be visible individuals that have viewing rights to that channel.
You may continue uploading more files by clicking the ‘+ Choose another file‘ button and repeating the steps above.
NOTE: At this point you may not be able to view your media and you may see the message: “Media is being processed” This is completely normal. Your media will continue to process even if you navigate away from MediaSpace.
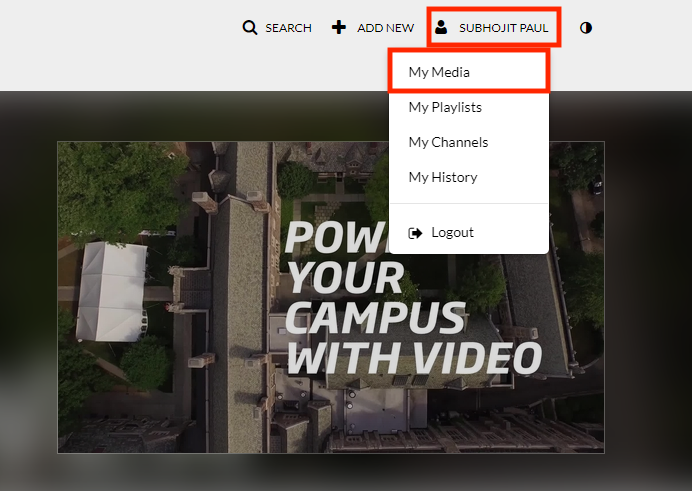
How To Access My Media
Click on your name in the upper right side of your screen and select My Media from the dropdown list. When your list comes up, choose which one you want to access
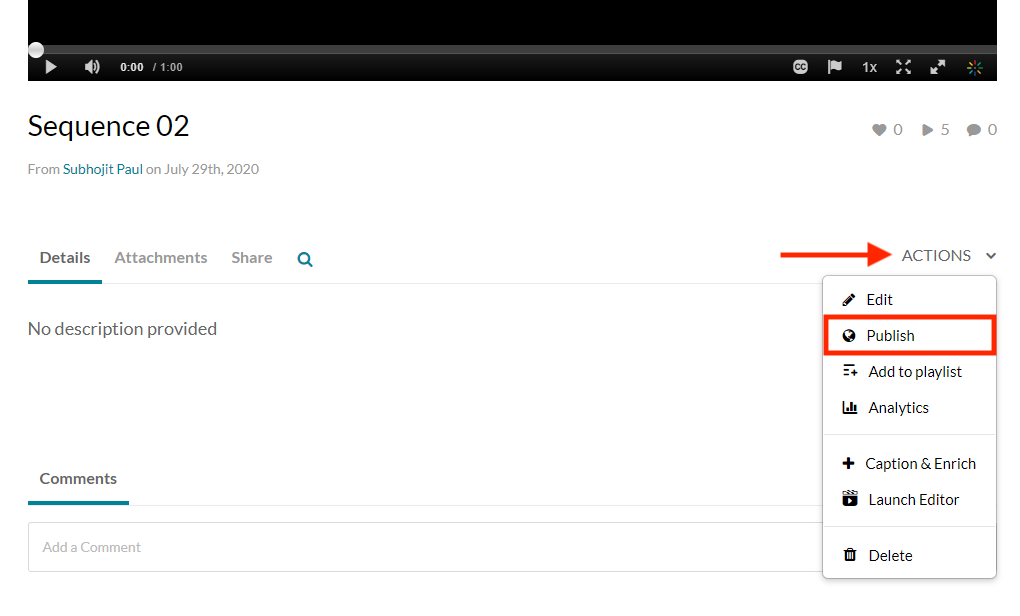
How To Share a Media
While in the “My Media” section, select the video that you want to share and click on the “Actions” button and click Publish
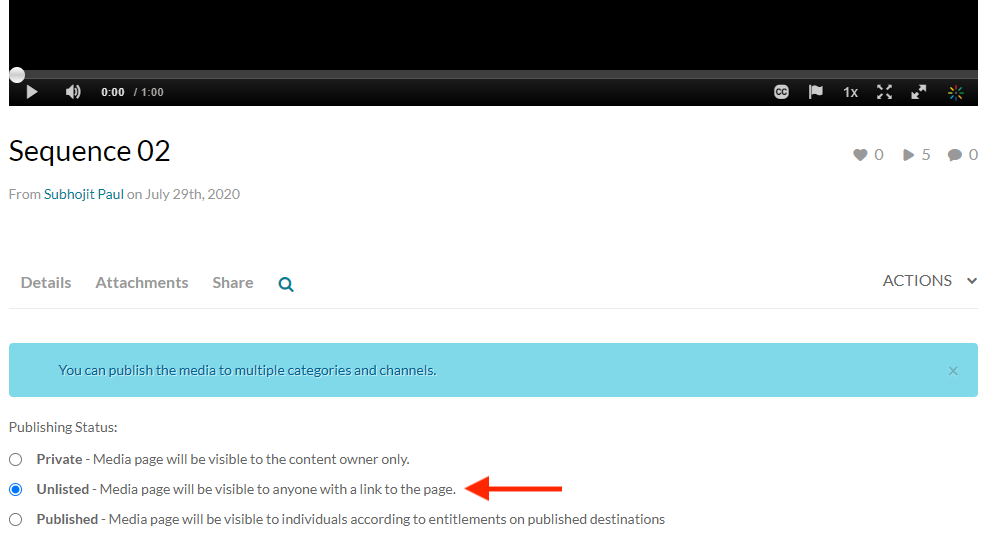
NOTE: Make sure your video is set to Unlisted. Any other choice will have some access restrictions associated with it.
Click on the “Save” button
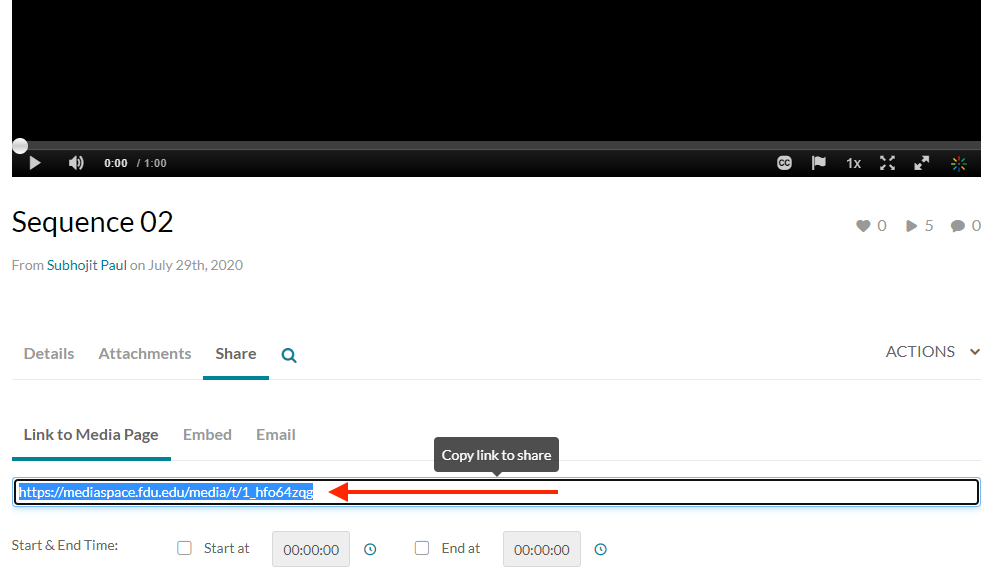
Click on your video to get to the video details and click the share option under the video. You can copy the link and send that to anyone you would like to share it with
How to Edit Closed Captioning
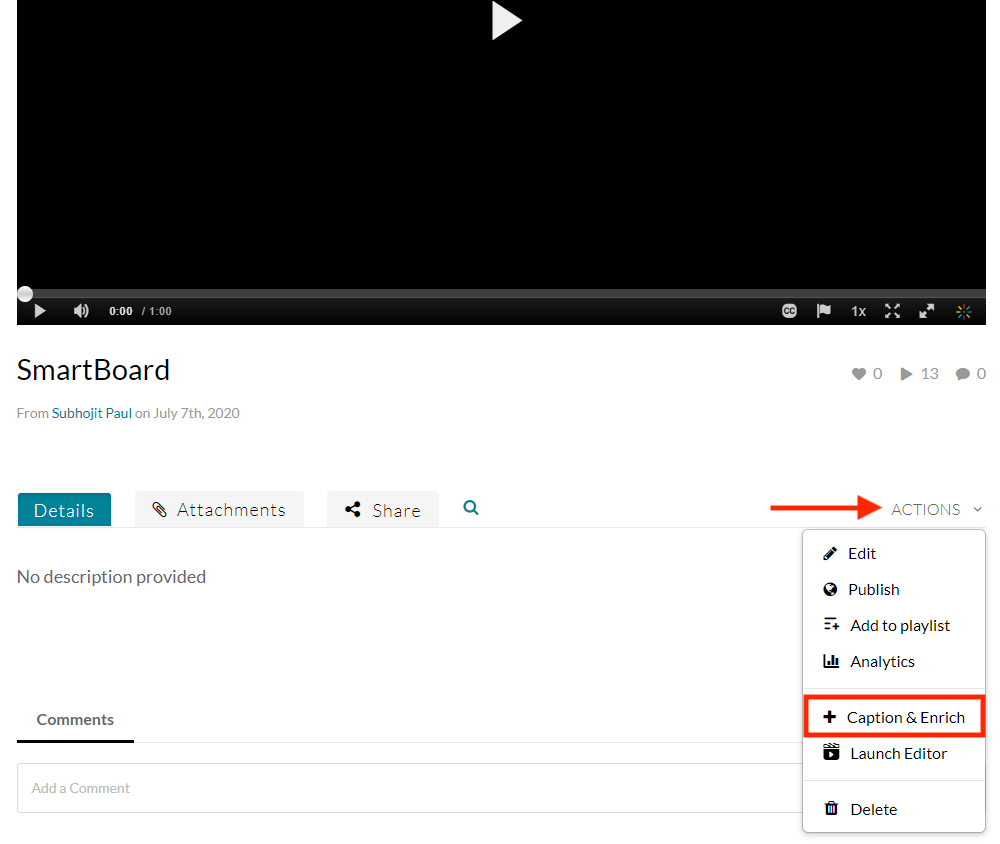
Open the video that you want to edit the captions
Click on Actions and select + Captions & Enrich. This will take you the captions request table
NOTE: You can only edit captions that have been completed.
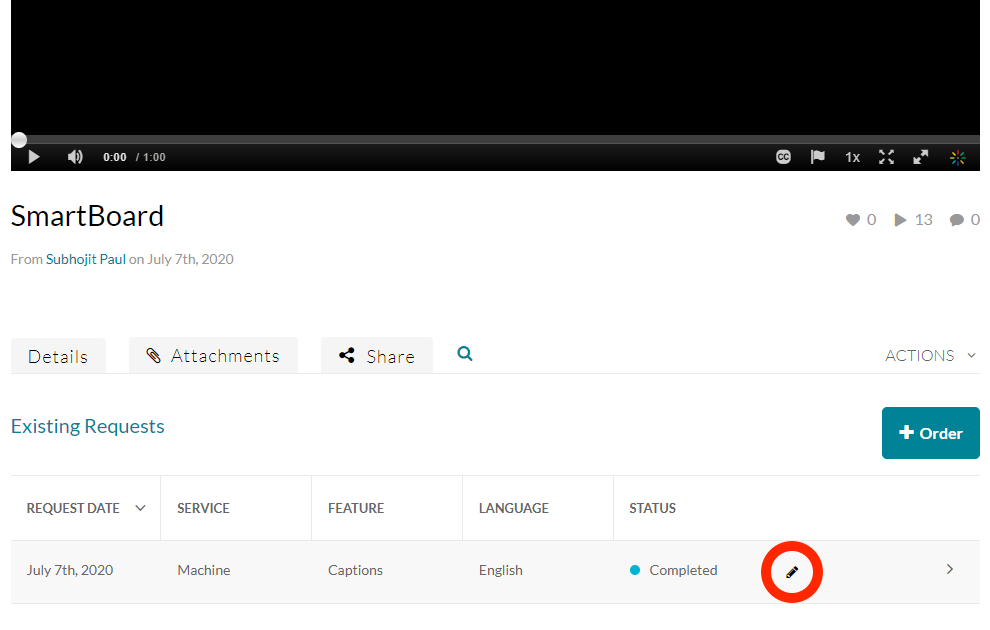
Click on the pencil edit icon to open the editor. The captions editor is open automatically alongside the captions that have been selected in the captions requests table
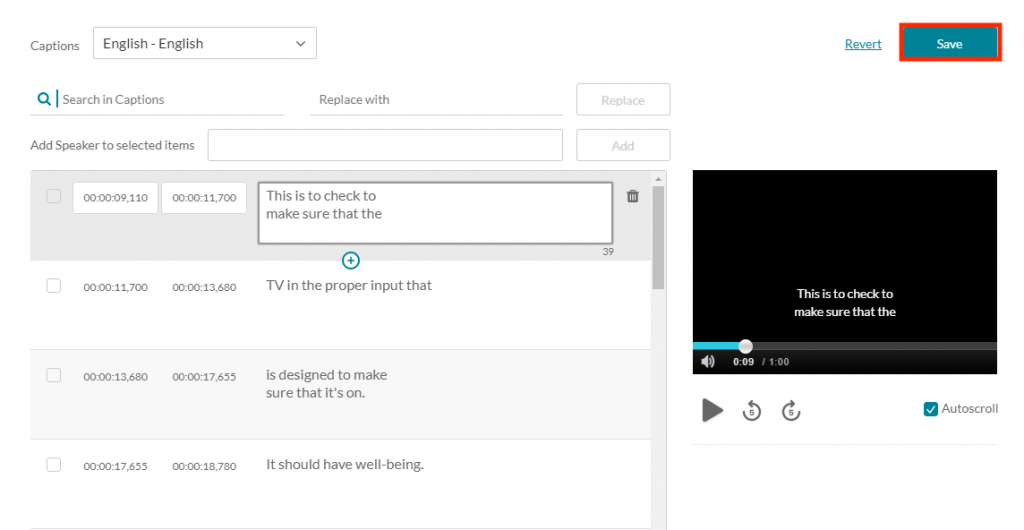
If you have multiple caption files, you can click on the “Captions” drop down menu and select which file you want to use
To edit caption text, click on the section you want to change and edit accordingly
If you are not sure where the text is that you want to change, you can enter that in the “Search Captions” box. That term will be highlighted in each caption line. You can also replace the terms that you search for with a new one by entering the new term in the “Replace with” box and clicking “Replace”.
When you have completed all of your editing, click on the “Save” button
If a student has granted you proxy access to Self-Service, you can create a proxy account and use it to view the information the student has shared with you.
Before you begin, have the Proxy User Invitation email and Invitation Code ready. You will register as a proxy, sign in, complete multifactor verification, and select the student’s profile.
Step 1: Start Proxy Registration
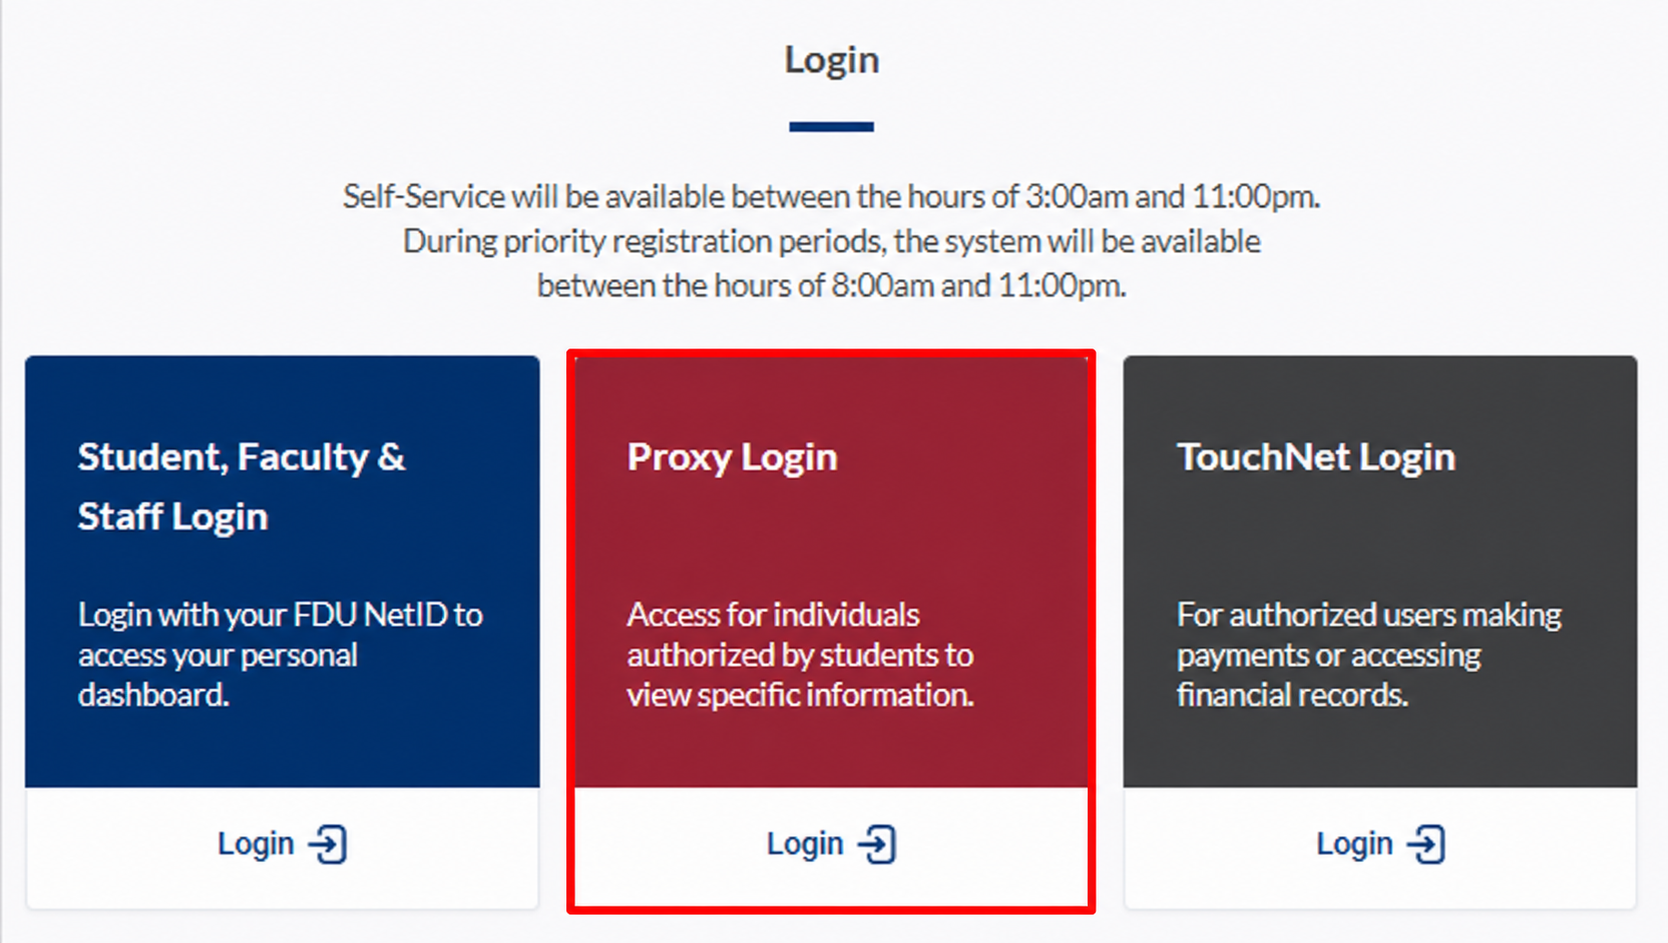
After you receive a Proxy User Invitation email, go to selfservice.fdu.edu and click “Proxy Login”
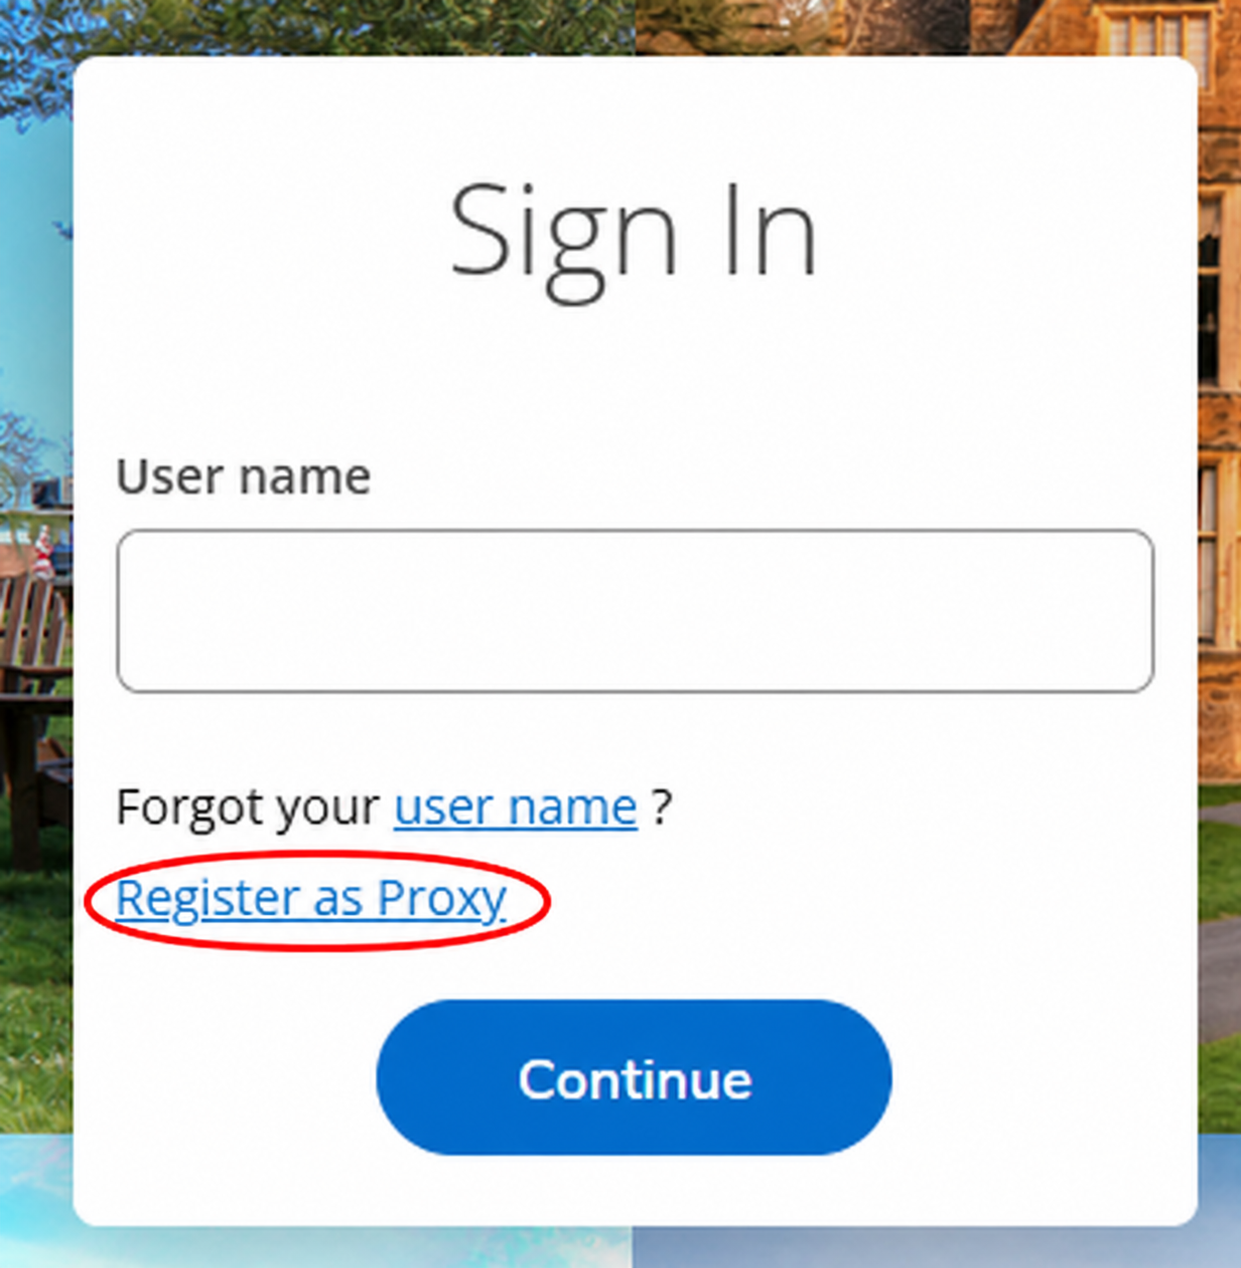
Step 2: Create Your Proxy Account
Click “Register as Proxy”
Note
If you already registered as a proxy and have an account, skip to Step 3: Sign In to Self-Service.
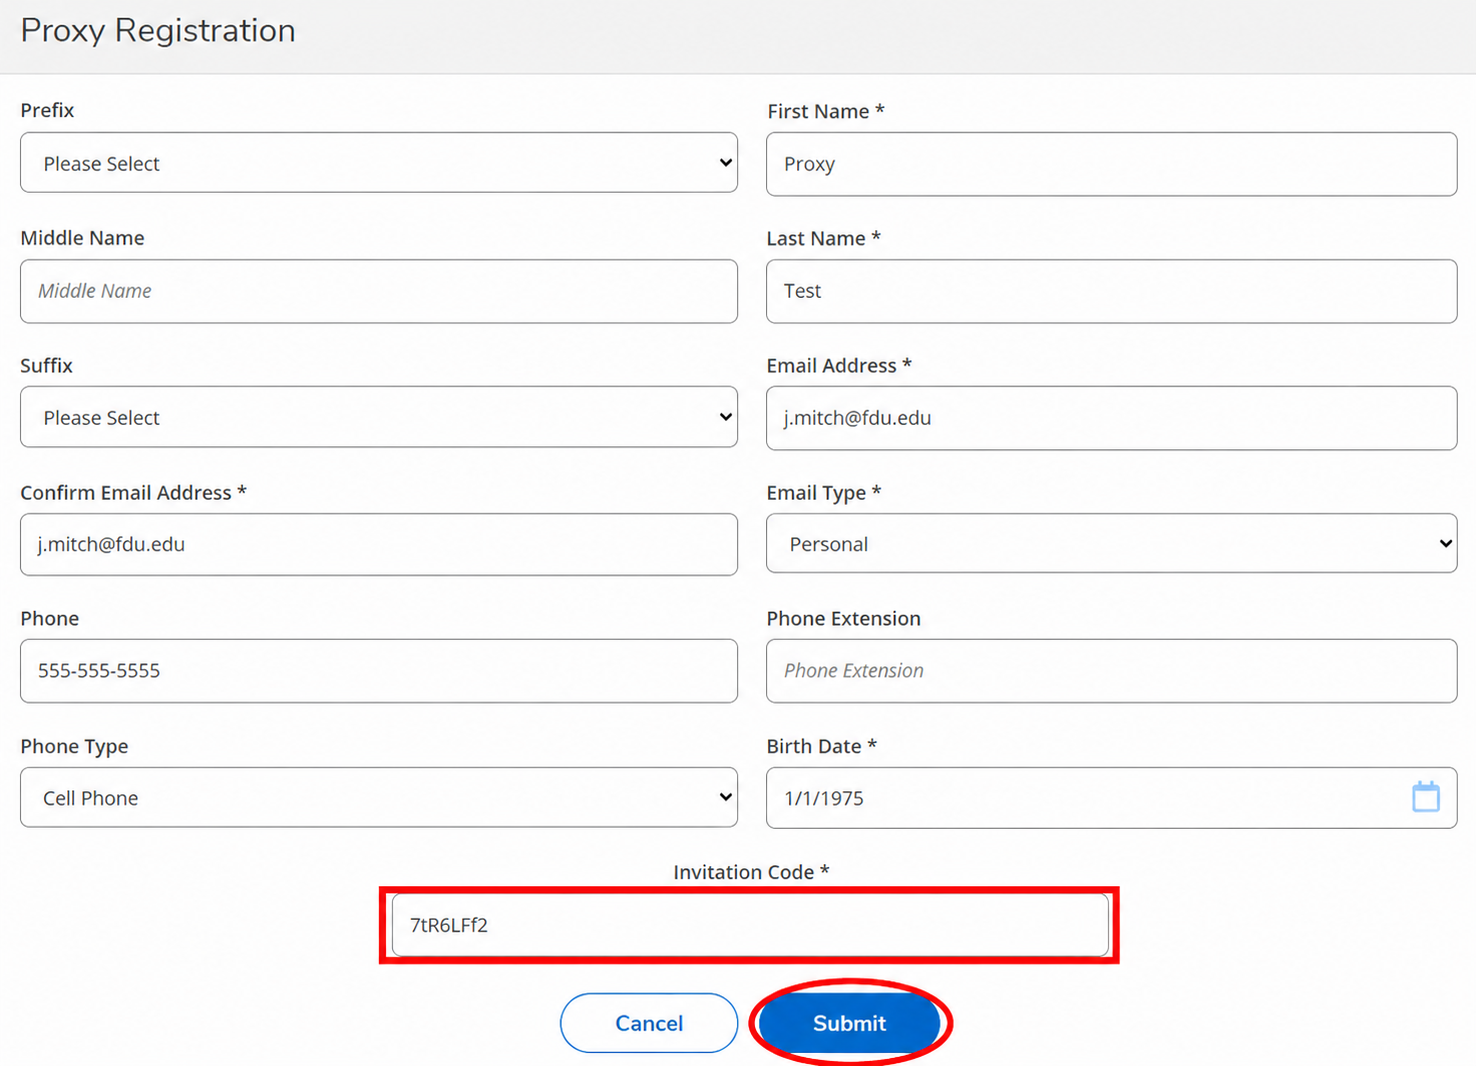
Fill in all required fields, including the Invitation Code from your email, then click “Submit”
When the registration confirmation appears, click “Okay” to return to the sign-in page.
Note
Check your email for your username and temporary password.
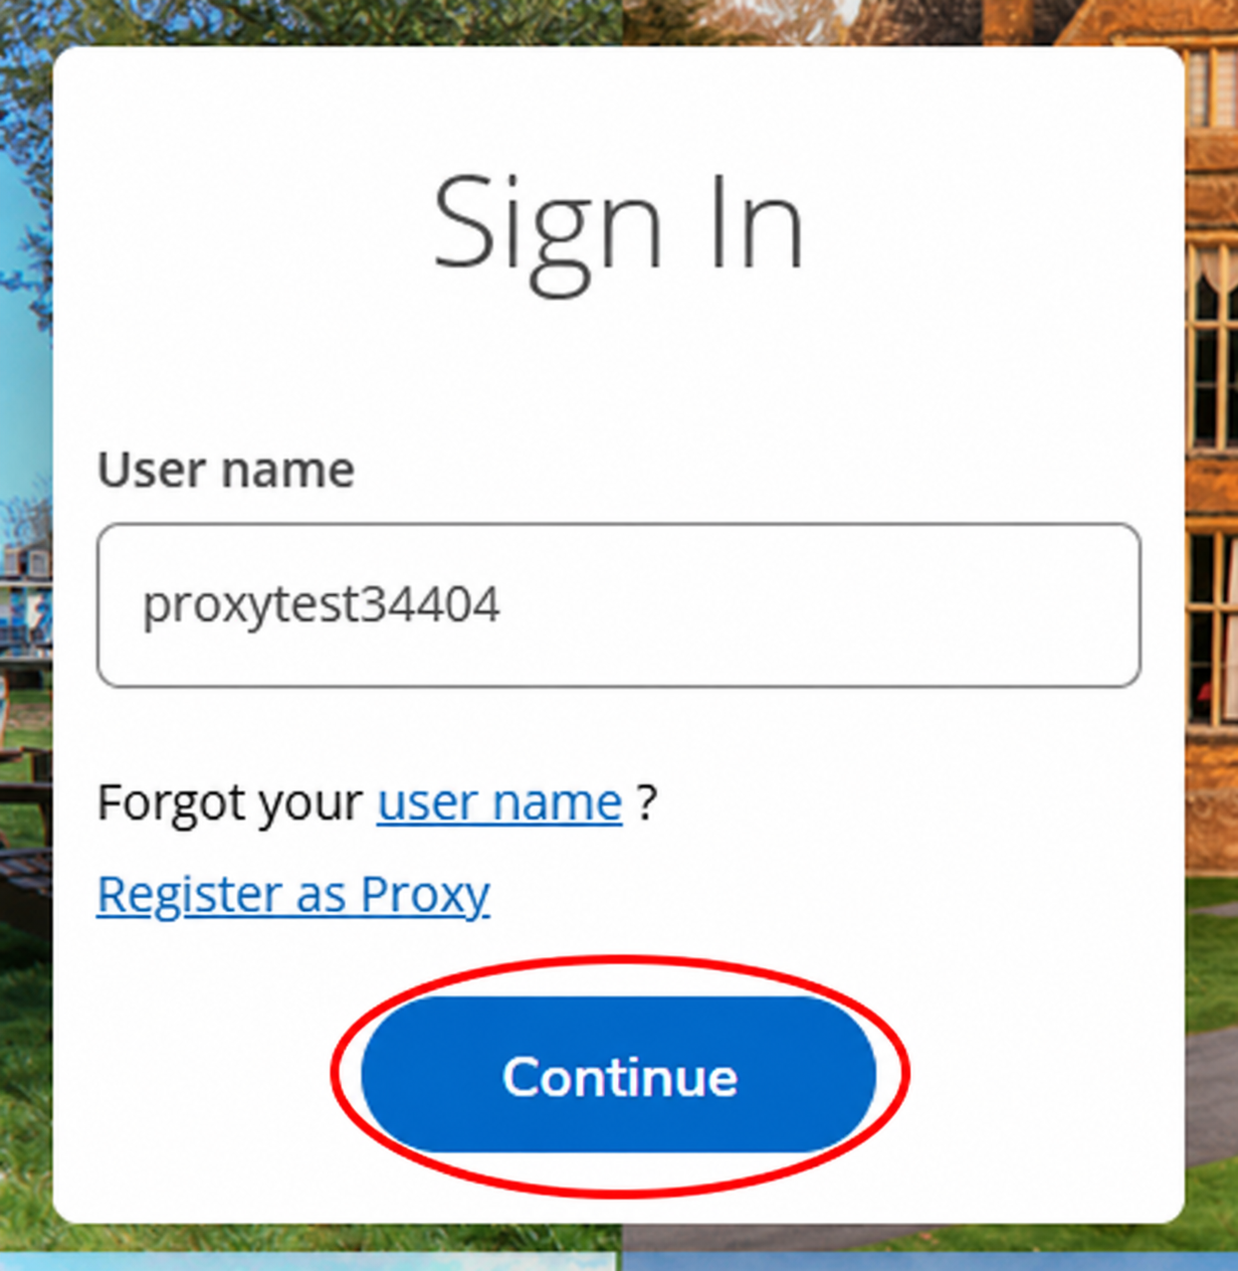
Step 3: Sign In to Self-Service
Type your username and click “Continue”
Tip
If you lost your username, click “Forgot your user name” and follow the prompts to retrieve it.
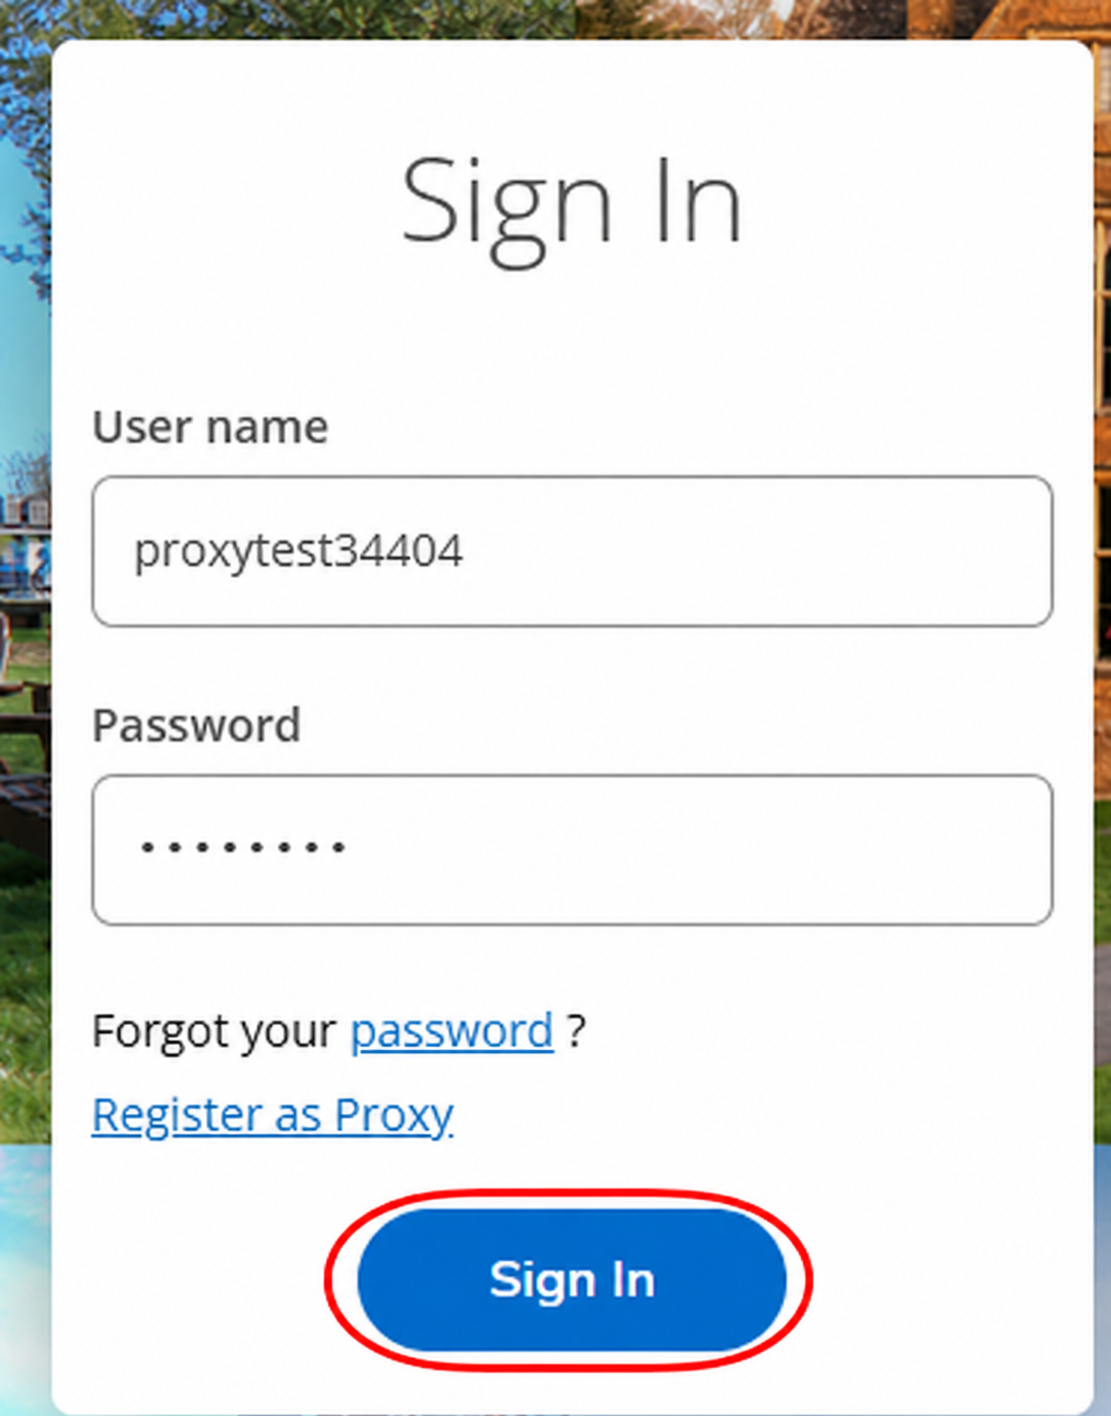
Type your password and click “Sign In”
Tip
If you do not know your password, click “Forgot your password” and follow the prompts to reset it.
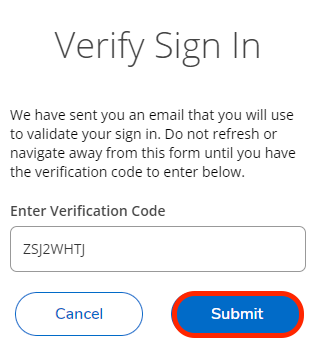
After you sign in, you will receive an email with a multifactor authentication code. Copy and paste the code into the sign-in page, then click “Submit”
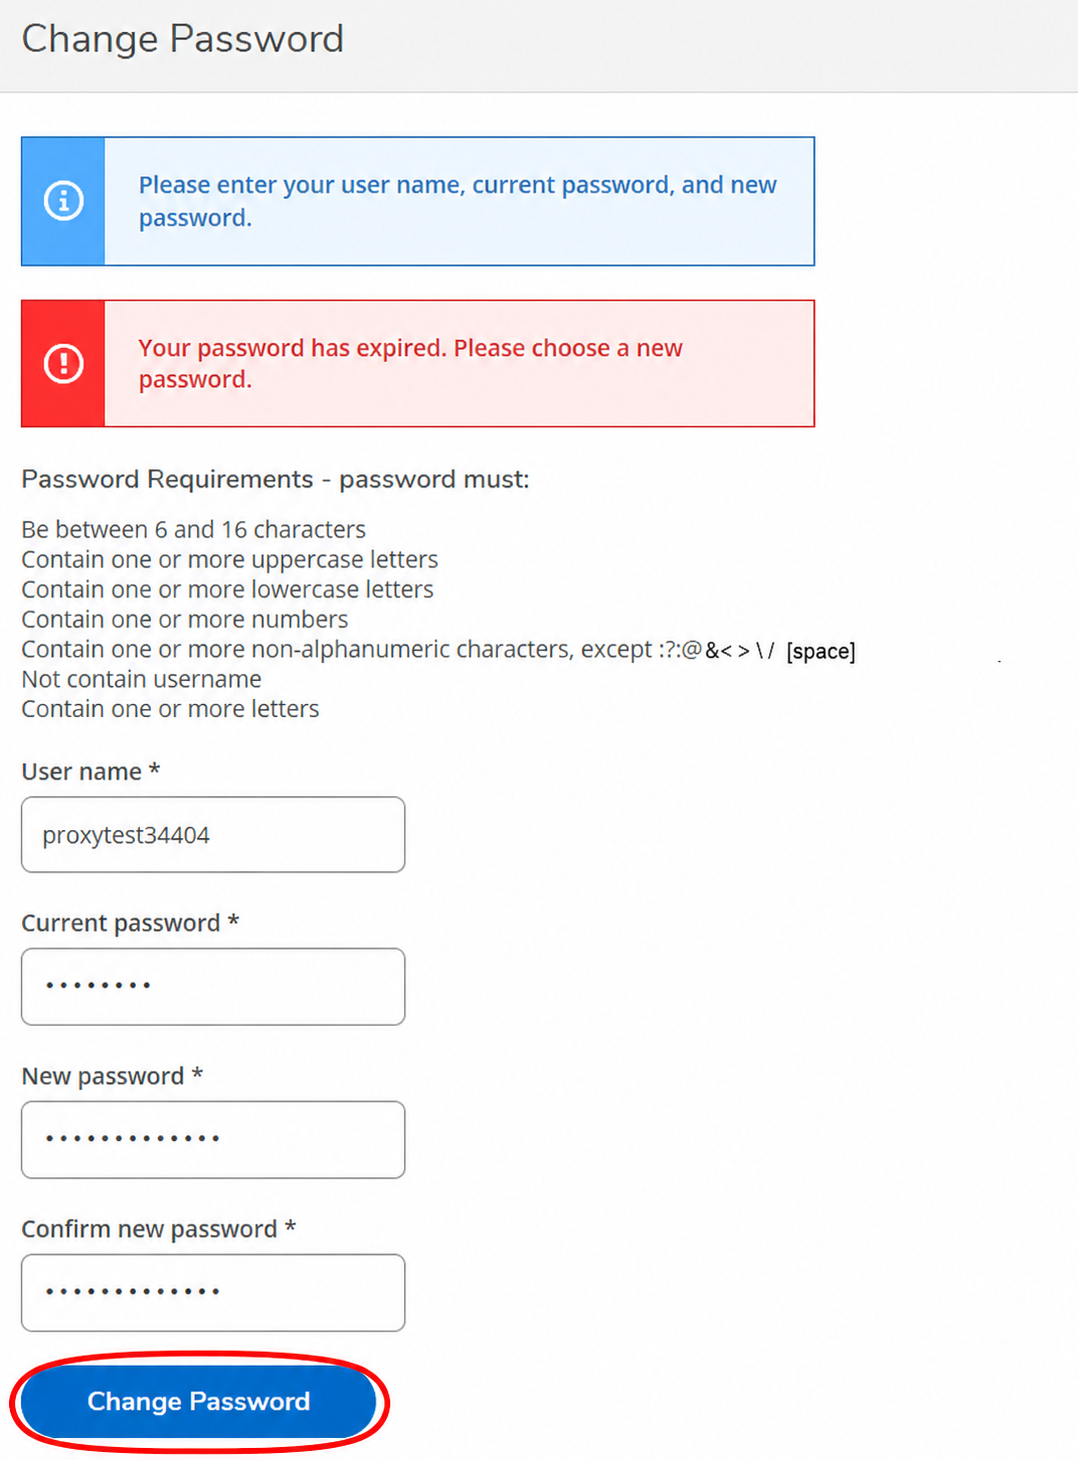
Note
If this is your first time signing in, complete the Change Password screen, then sign in again with your new password.
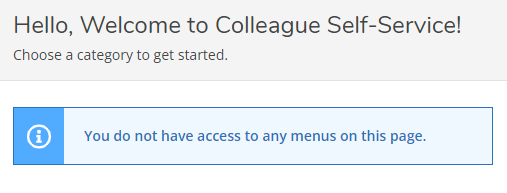
Step 4: View the Student’s Profile
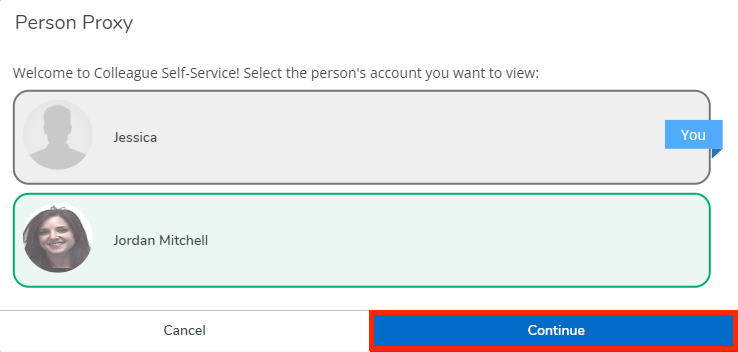
If you see the message “You do not have access to any menus on this page”, switch to the student’s profile
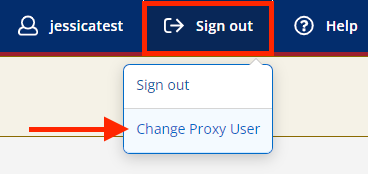
Click “Sign out” at the top of the page, then select “Change Proxy User”
Select the student’s profile, then click “Continue”
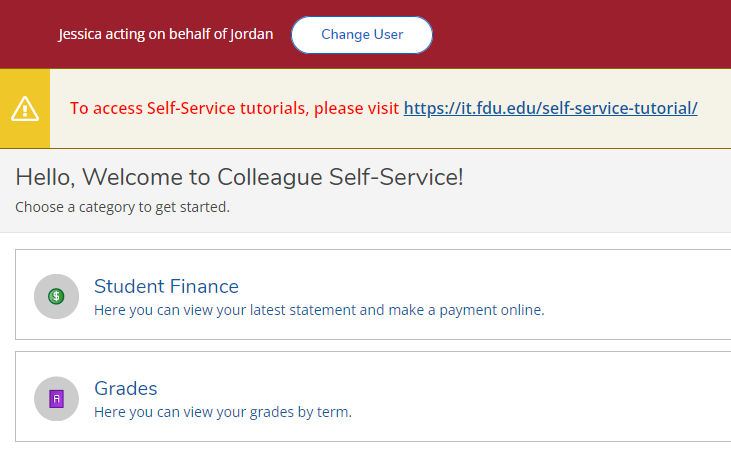
Once you are viewing the student’s profile, use the menus on the left or the tiles on the homepage to access the information they shared with you
Microsoft has implemented a new feature to its mail client called Clutter. Clutter acts as a filter that separates e-mails that it Deems low priority. The e-mails are placed in a folder and are out of sight, with no notifications visible to the user. The problem with Clutter is that it is a learning program that tries to guess what emails are important or low priority and might filter out emails that you need.
Disabling Clutter rules in Outlook
If you wish to disable clutter, log in to Office 365 using our portal office365.fdu.edu with your NetID credentials.
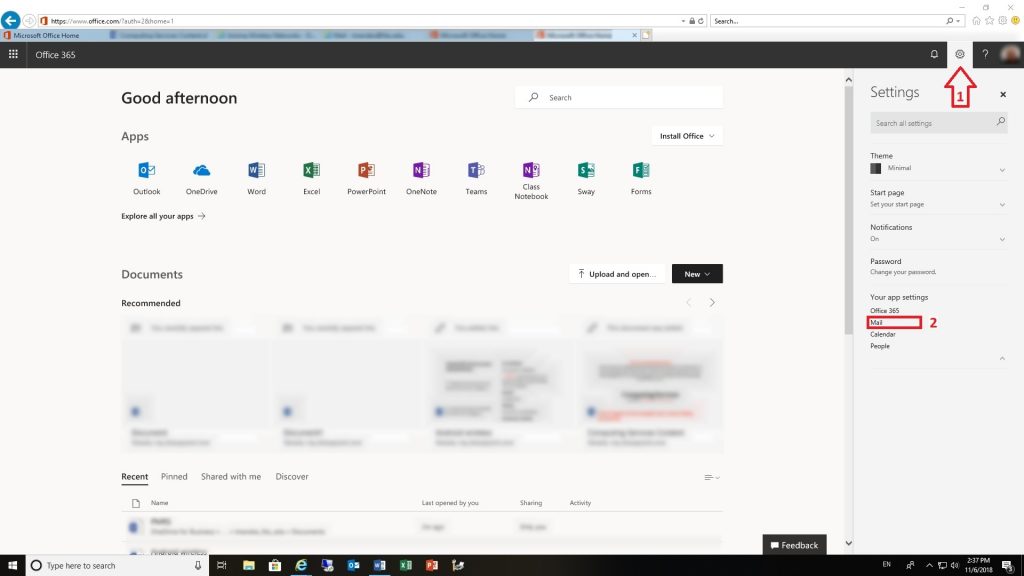
Look for the settings icon on the upper right corner of your window and click on it
Click on the “Mail” option under “Your app settings”
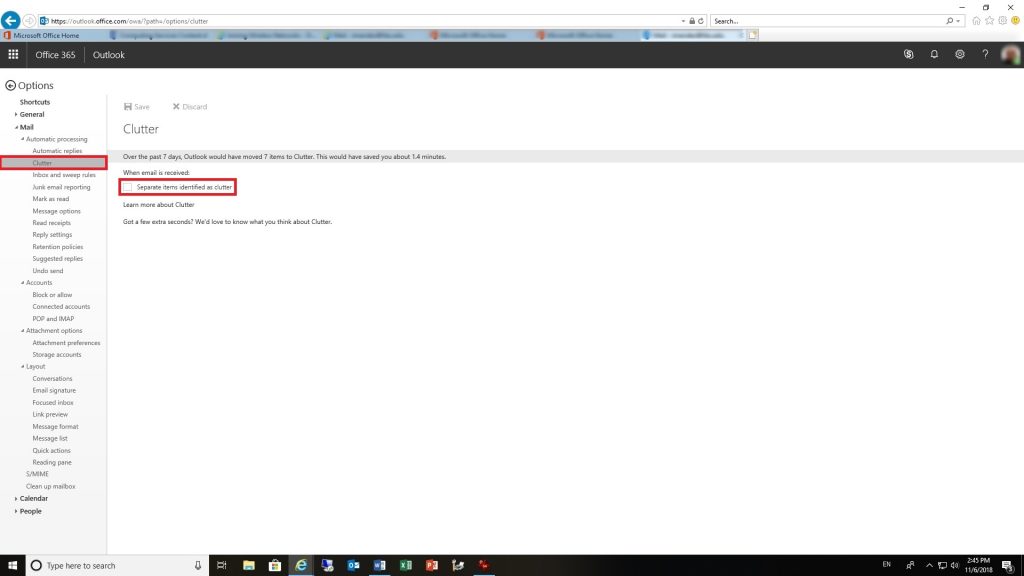
Drill down to “Mail > Automatic processing > Clutter”
A Distribution group (formerly known as mailing list) in Office 365 is a uniquely named email address that consists of multiple users and is managed by a designated owner. Distribution groups are intended to easily facilitate ongoing communications between a large and relatively fixed group of people.
There are a few important concepts to understand about distribution groups before we get started with group management:
Emails sent to a distribution group are distributed to all members of that distribution group.
OOnly users granted permission by the Distribution Group Owner can send emails to a particular distribution group. Permission to post (send emails) to a group is managed by USAN, and Group Owners should open a ticket with the SAMI Service Desk to change members that can post to the group.
A distribution group can be configured in such a way that emails sent to it can be held for approval and specific users can be made approvers (also known as moderators).
A distribution group has a unique email address attached to it. Users granted permission to send email to this email address can do so from any email client such as Outlook on the Web or Outlook installed in your computer, laptop, tablet or phone, Mozilla Thunderbird, Mac Mail and more.
You can request a distribution group by submitting the Distribution List/Shared Mailbox Request form located at FDU Forms Portal.
As a Distribution Group owner, you can change the group’s settings via the group’s management page on your Office 365 account (Outlook on the web).
As a Distribution Group owner, you can add or remove members (recipients) from your group via your group’s management page. This can be accomplished via Outlook on the web or by using the Outlook application installed on your machine.
Adding and Removing Distribution Group Users in Outlook for Windows
Open “Outlook” on your computer
Open “Address Book”
You can open Address Book in two different ways:
One way is to click the “Address Book” icon located at the top when “Home” tab is selected:
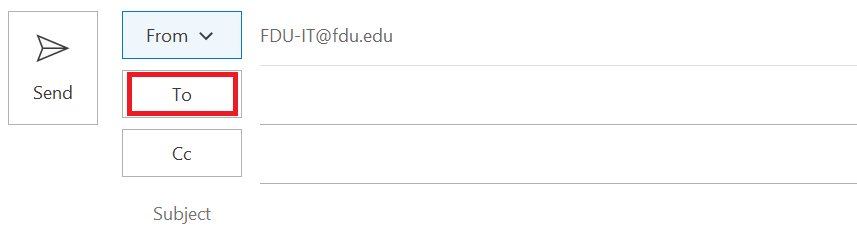
The second way is by composing/creating a new email and clicking the “To” button:
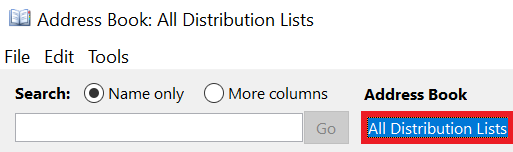
Select “All Distribution Lists” from the drop-down menu located under Address Book:
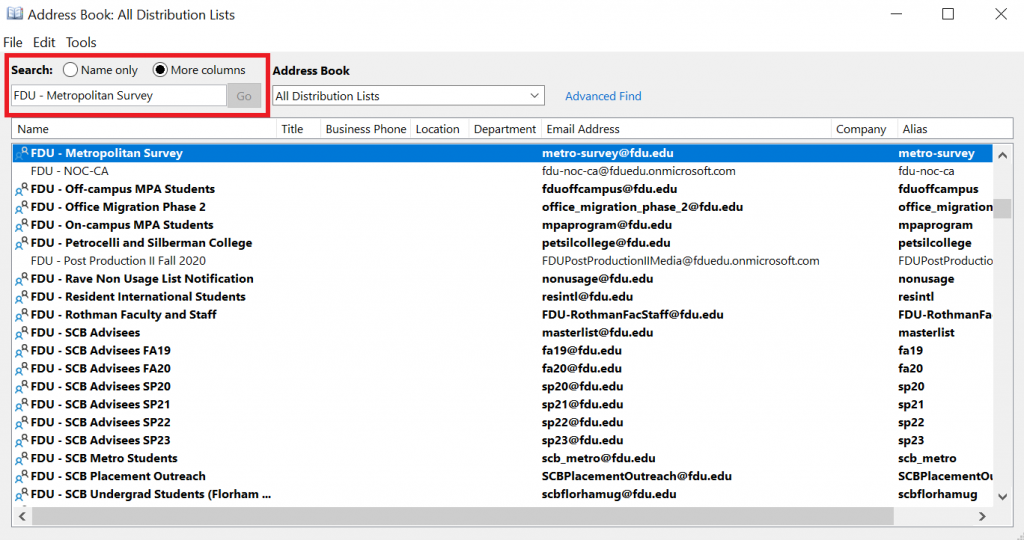
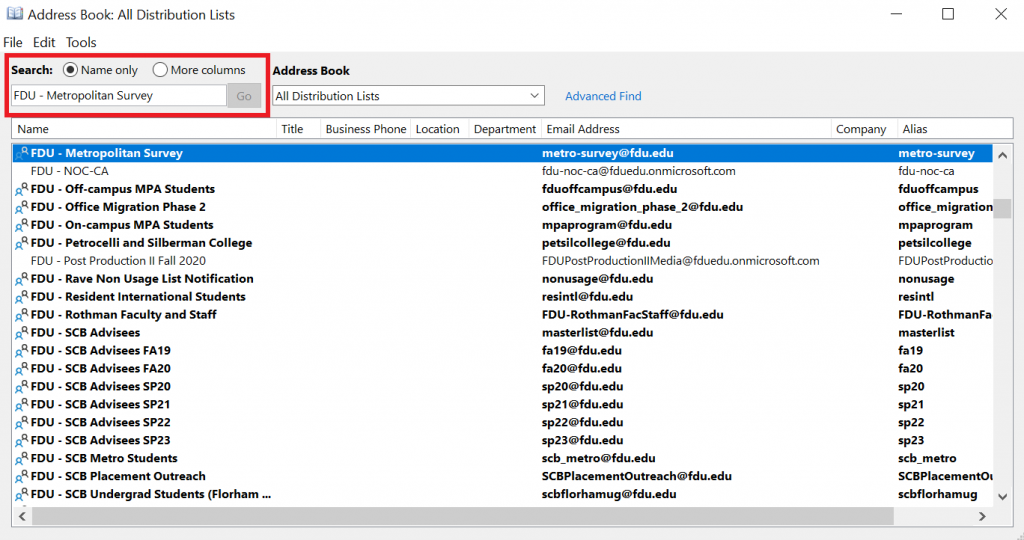
Select “More Columns” and enter the name or email address of your distribution group in the search field as shown in the first screen capture below. If you see your distribution group on the list, highlight it and double click it. If you do not find your list using “More Columns”, then it might be easier to find by using the “Name only”
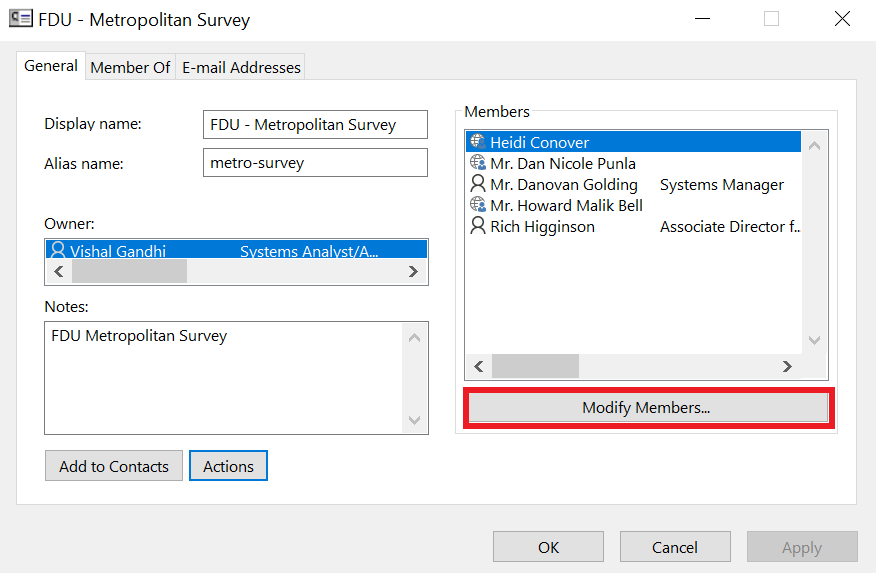
Click on “Modify Members…”
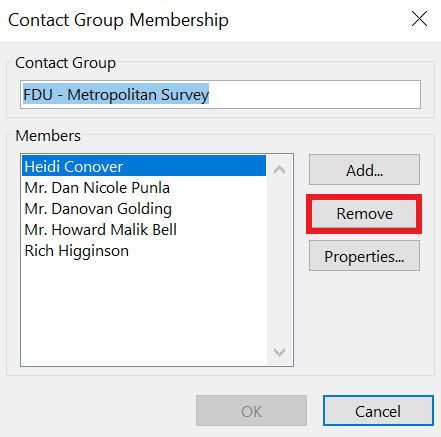
If you want to remove a member, then select the member from the members list, click “Remove” button and then click “OK”
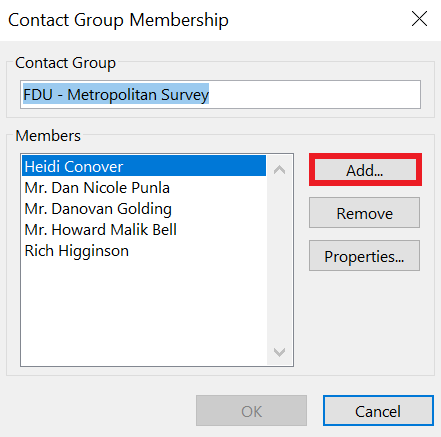
If you want to add a member, click “Add” button
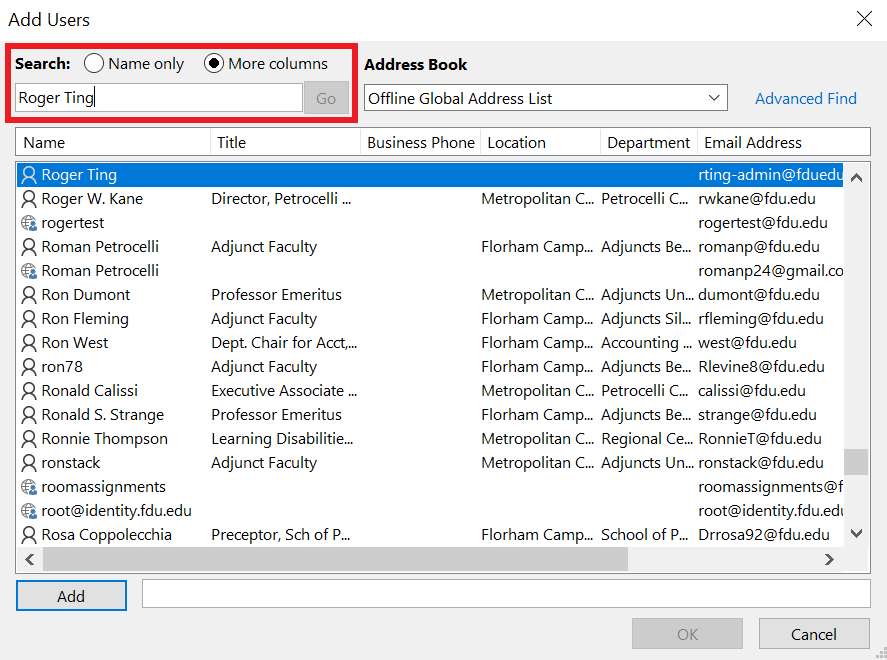
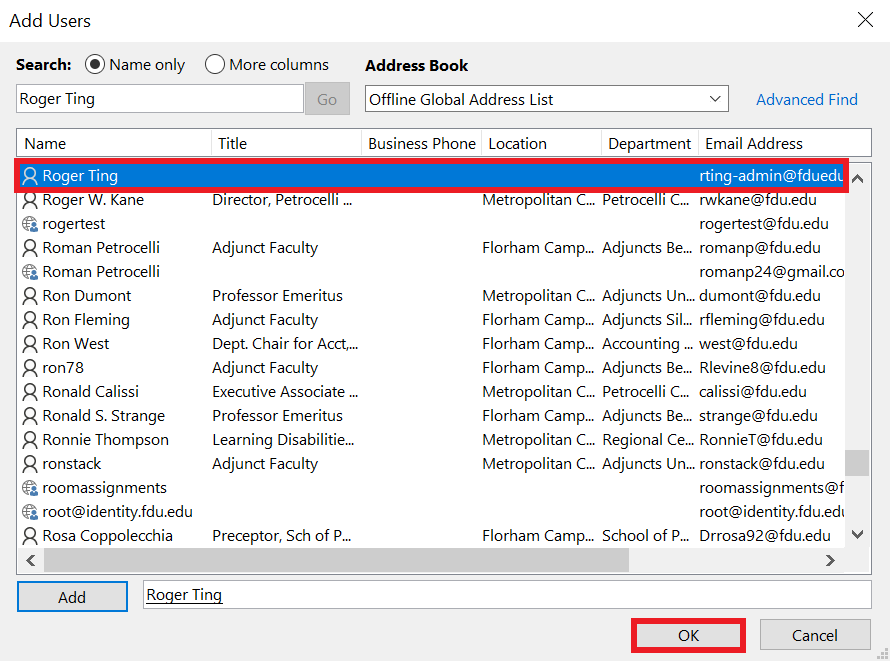
Select “More columns” and enter the new member’s name in the search field
You should see the user in the list. Select “Name only” to search again if you are unable to locate the user. Once you have found the user, highlight the record and click “OK”
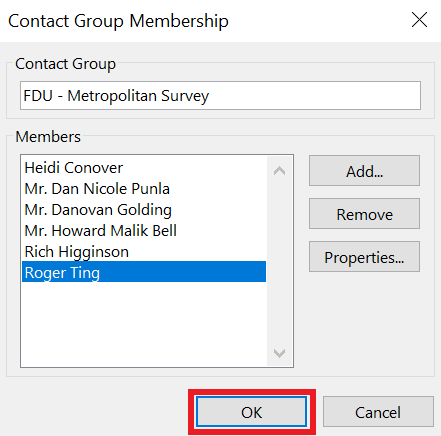
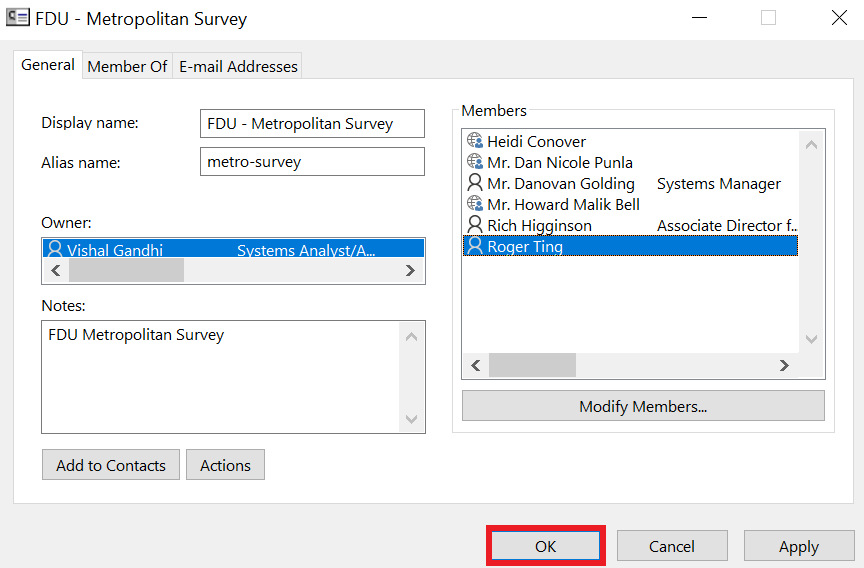
Verify that the new member is in the member’s list and click “OK”
Click “Apply” and then click “OK”
close
Adding and Removing Distribution Group Users in Outlook on the Web
Go to “fdu.edu” in the browser of your choice
Go to “Shortcuts” menu
Click “Office 365 and Email“
Sign-in with your NetID and password
Go to online Outlook app by clicking on the “Outlook” icon
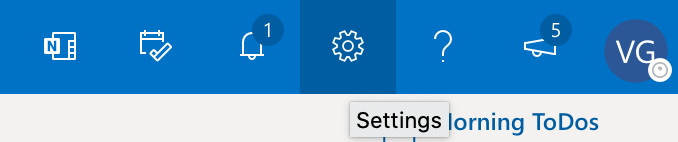
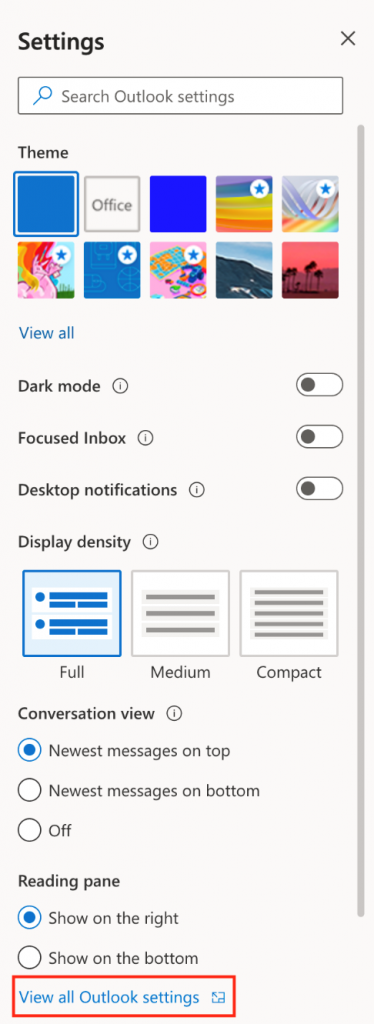
Go to Settings by clicking on the “Settings” icon
Click on “View all Outlook settings”
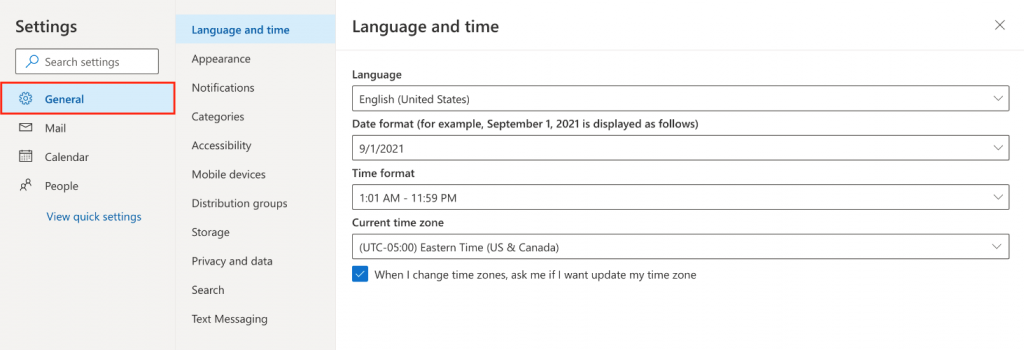
Click “General”
Click on “this portal“
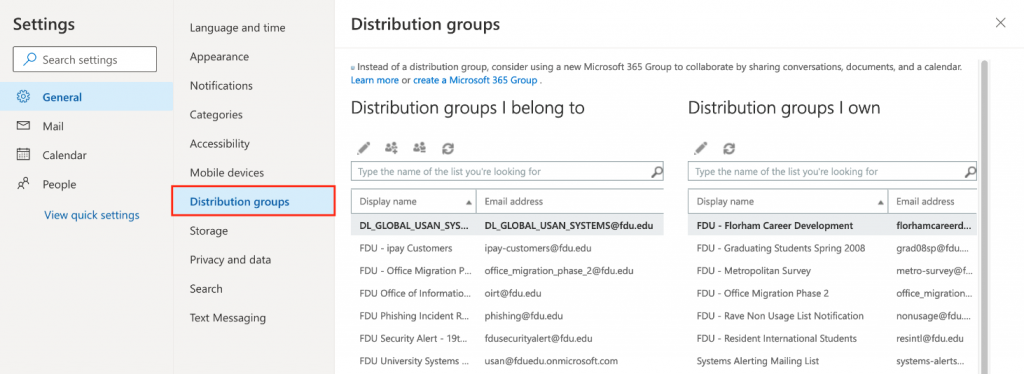
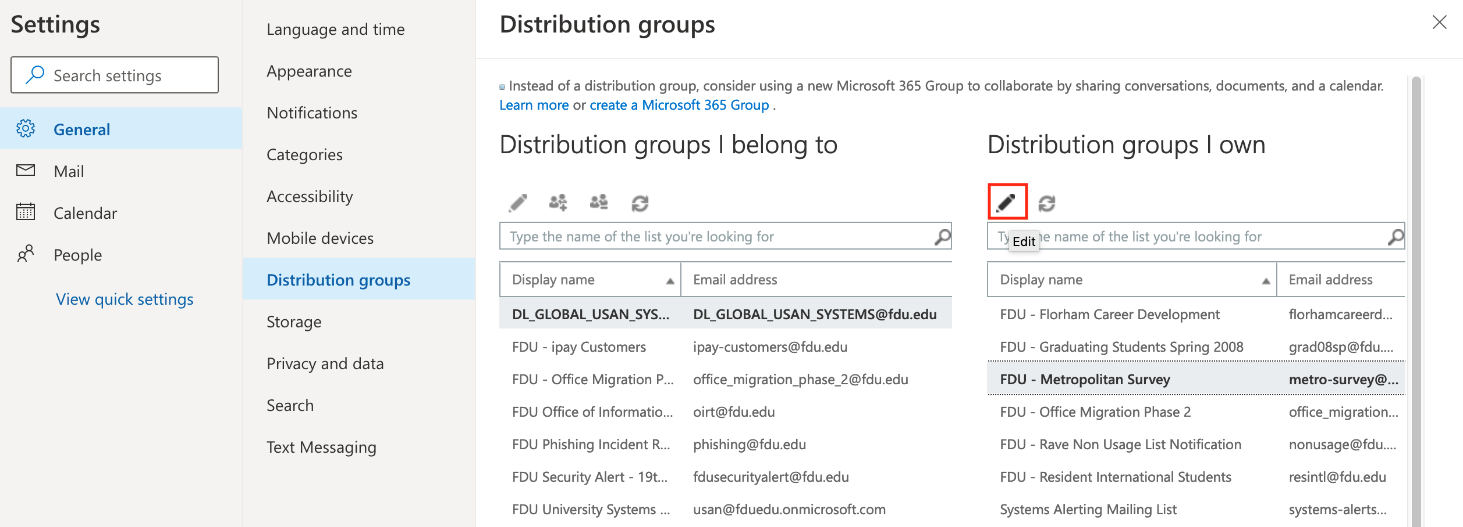
Click on “Distribution groups”
Here you see the list of distribution groups that you belong to and the list of distribution groups that you own.
How to open the Configuration page for a particular Distribution Group that you own in Outlook on the Web
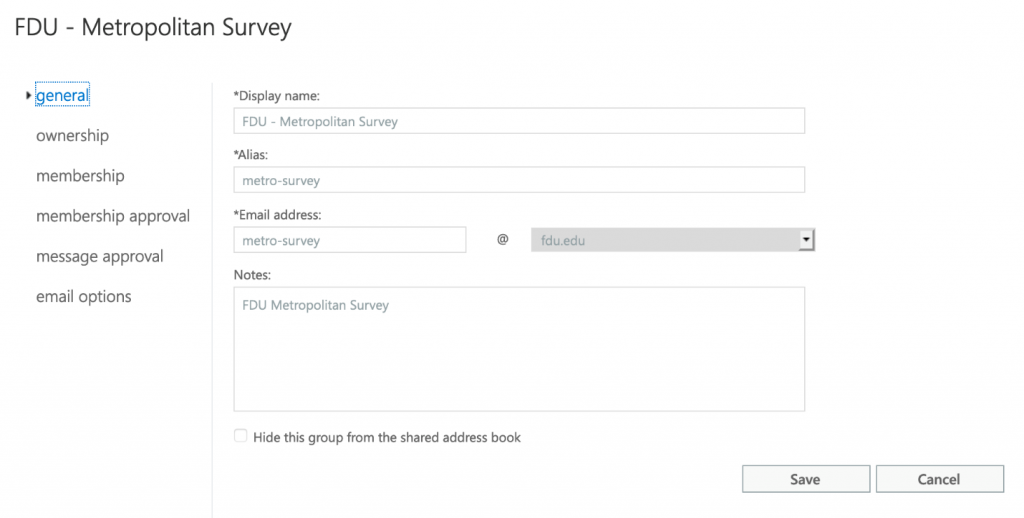
Select the distribution group that you would like to make changes to and then click “Edit” (Pencil Icon)
You should see the distribution group configuration page
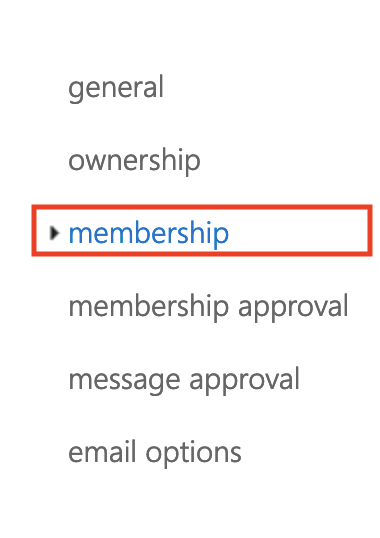
How to see the list of recipients (members) for this Distribution Group in Outlook on the Web
Click on “membership”
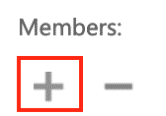
How to add recipients (members) to this Distribution Group in Outlook on the Web
Click on “+” icon (Plus Icon)
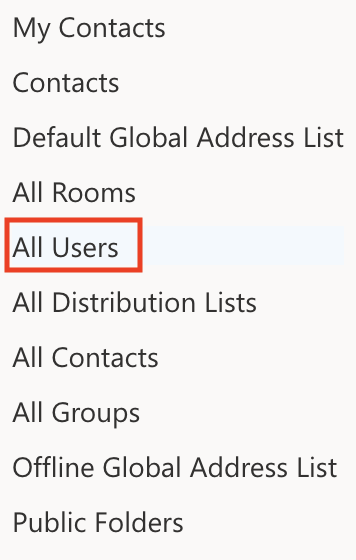
Click “All Users”
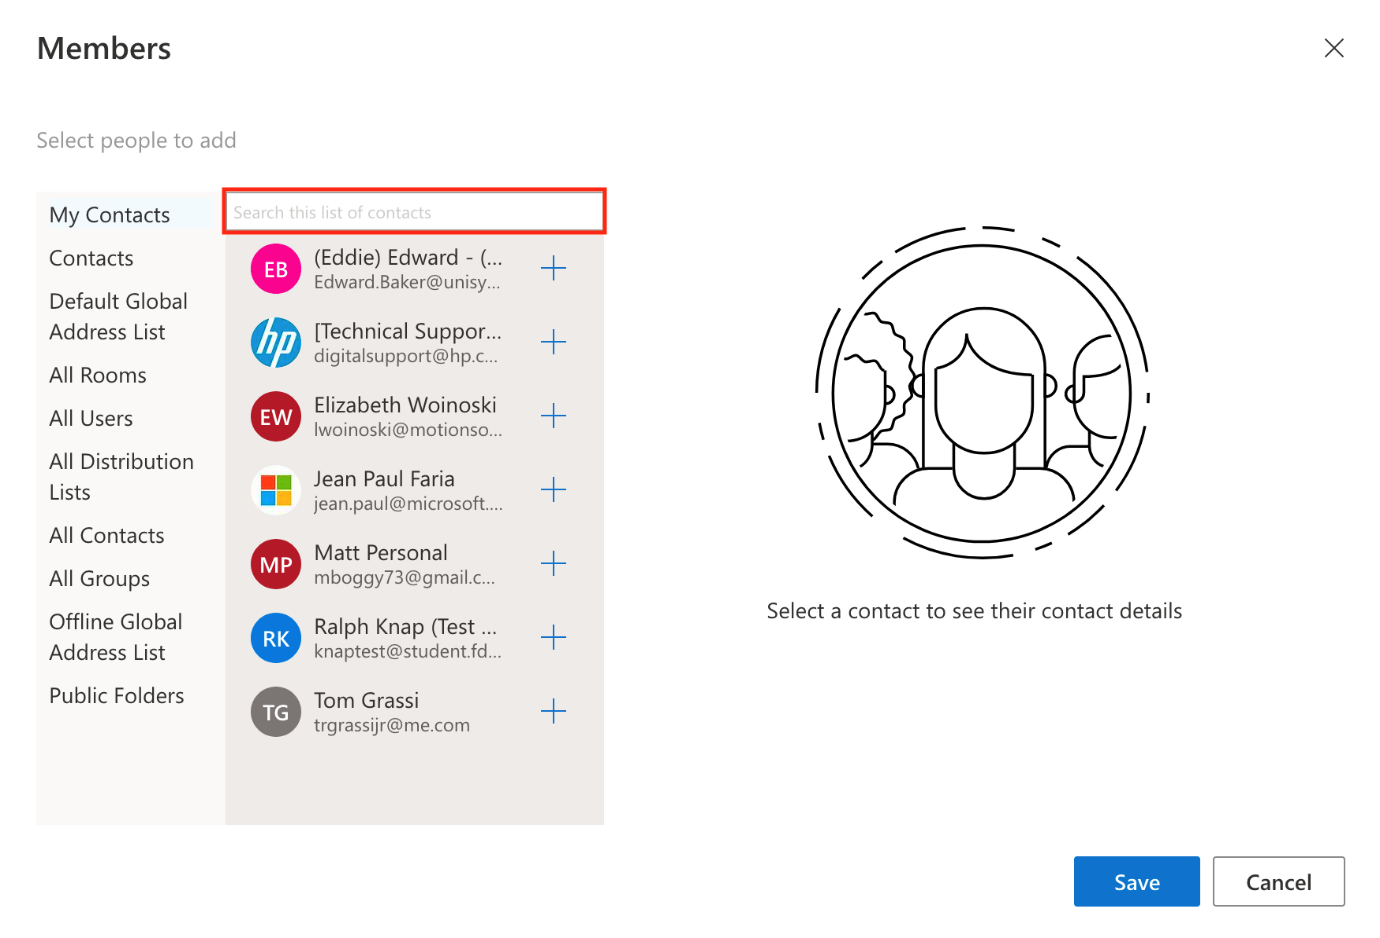
Please enter the name or NetID of the user that you would like to add to this distribution group in the search text box
Click “+” button beside the user that you would like to add from the search results (you can search and select more users if you would like)
Click “Save” when you are done
Remove recipients (members) from this Distribution Group in Outlook on the Web
Go to the membership list as shown in Step: 3 How to see the list of recipients (members) for this distribution group
Click on the recipient (member) that you would like to remove
Tip
Press “Control” button while selecting recipient if you would like to select multiple recipients from the list.
To select a range of adjacent recipients on the list, click the first recipient from that part. Now, press the “Shift” key and click last recipient in this part
Click “–” button at the top located below the “Members” title
Click “Save” when you are done
close
Enabling Distribution Group Moderation and Adding Group Moderators
Follow Step 1 & 2 in “Adding and Removing Distribution Group Users in Outlook on the Web”
Click “Message Approval”
Check (select) “Messages sent to this group have to be approved by a moderator”.
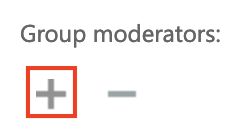
Click “+” button under “Group Moderators”
Note
By default, emails sent to the distribution group will be sent to the group owner for approval if you enable message approval and do not select any moderators.
Click “All Users“
Please enter the name or NetID of the user that you’d like to add to this distribution group in the search text box
Click “+” button beside the user that you’d like to add from the search results (you can search and select more users if you’d like)
Click “Save” when you’re done. You’ll be taken to “Message Approval” screen
You can add users’ emails from who do NOT require any approval by clicking “+” under “Senders who don’t require message approval” and following the same process as above
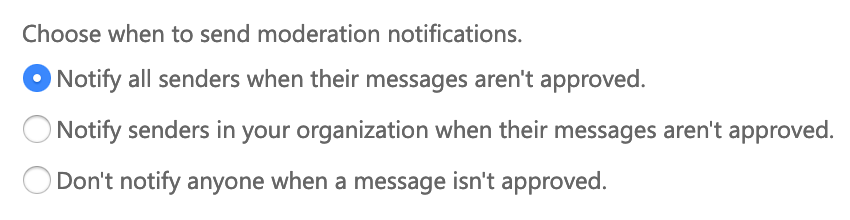
You can choose who should be notified when an email sent to this distribution group has been held for approval -or- you can choose to disable these notifications as shown:
Click “Save” again on “Message Approval” screen
Note
An email will NOT be held for approval from a group moderator who is allowed to send emails to the distribution group.
Unused Teams and Groups can accumulate and become a burden to resources over time. To prevent this from happening, Fairleigh Dickinson University has implemented an expiration policy for Teams and Groups. This article will explain the expiration policy and provide you with information regarding renewal.
What is the FDU expiration policy for Teams and Groups
Any Team or Group inactive for 365 days or more will expire
Team and Group owners will be notified 30 days, 15 days, and 1 day before the team’s expiration date. If the Team or Group is not renewed before expiration, it will be deleted.
Note
Expiration notices for groups used in Teams appear in the Teams Owners feed.
The expiration period of 365 days begins at the creation of the Team or Group, or the date it was last renewed
Note
When the policy goes into effect, all groups that have already passed the 365 days period will expire. Affected group owners will be notified to renew.
How to renew a Team or Group
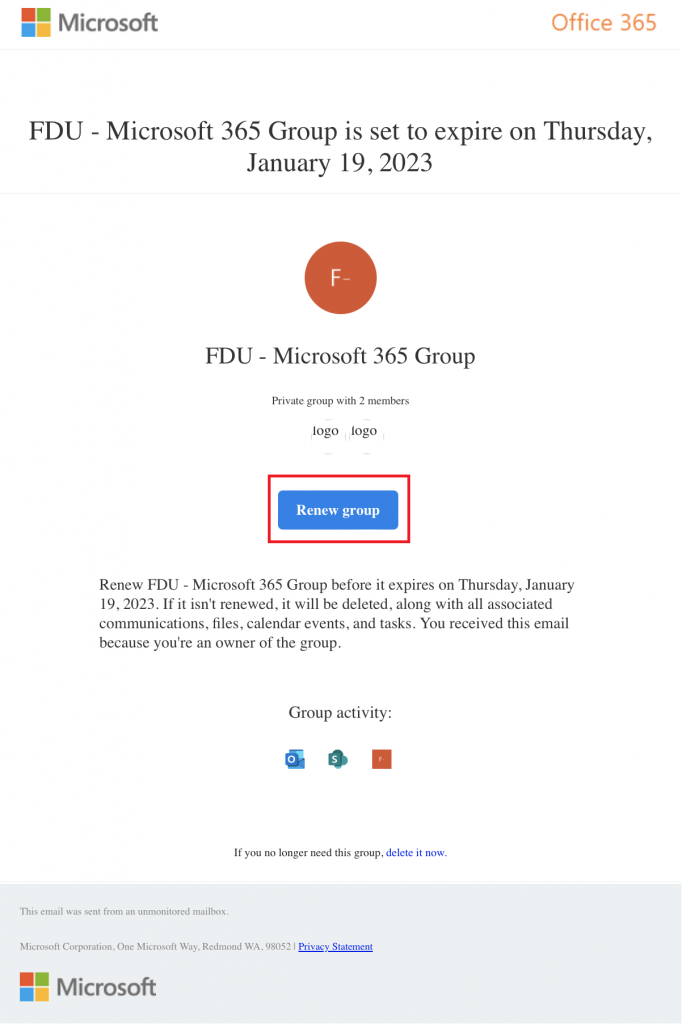
There are two methods to prevent the Microsoft 365 group from being deleted.
The group owner can manually renew the group by clicking the button in the warning message
A member of the group can perform a monitored user activity:
SharePoint: view, edit, download, move, share, or upload files (viewing a SharePoint page does not count as an action for automatic renewal)
Outlook: join or edit group, read or write group messages from the group, and like a message (Outlook on the web)
Teams: visit a teams channel
Yammer: view a post within a Yammer community or an interactive email in Outlook
Forms: view, create, or edit forms, or submit a response to a form
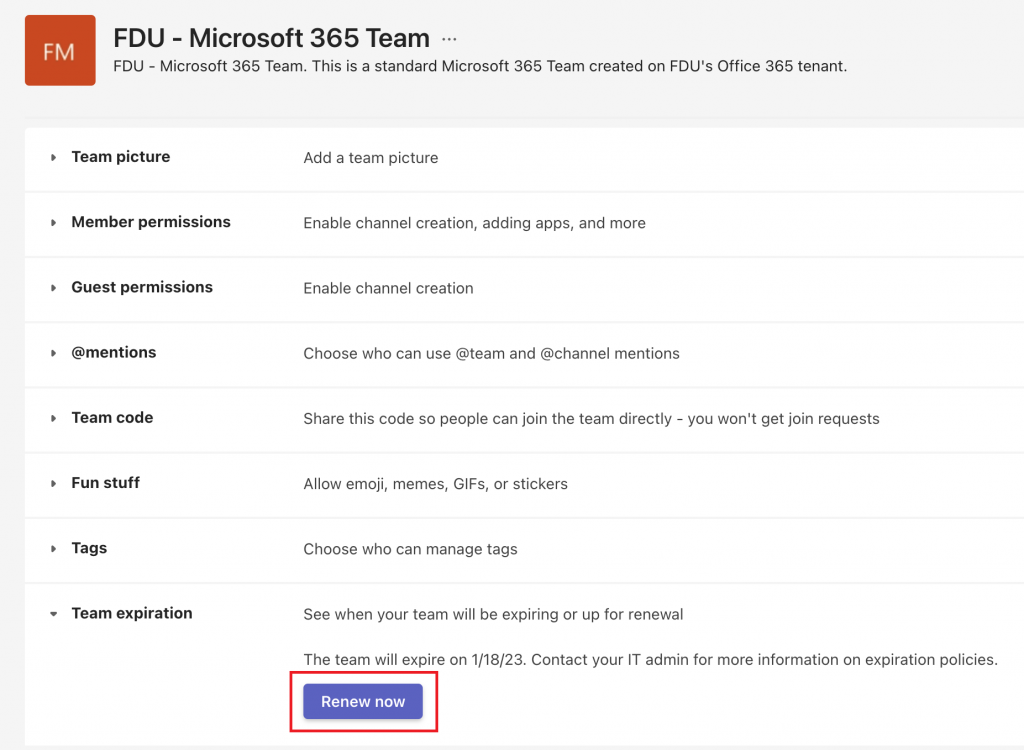
When the team owner receives the expiration notification, go to the Team’s group “Manage team” option and click on Renew now as shown below
Whenever the Microsoft 365 group is renewed by any of the methods mentioned, the group’s lifetime will be extended for another period of 365 days.
What are Microsoft 365 Groups
Microsoft 365 groups are created from a variety of tools including Outlook, SharePoint, Planner, and Teams. Microsoft 365 groups allow you to choose a set of people to collaborate with. You can use Microsoft 365 groups to communicate with others, share files, and apply permissions to shared resources.
Who are Group Owners
When a Microsoft 365 group is created, the person creating the group is designated as the owner. After adding members to the group, the primary owner can also promote other members to owner status. We suggest that when practical, Microsoft 365 groups have at least 2 owners. This can be important as only the group owner will receive the warning messages. In some cases, the group owner may have removed themselves from the group or left the university entirely. If you find yourself a member of a Microsoft 365 group without an owner, please contact support by creating a SAMI Support Request.
Groups without Owners
Ownerless or orphaned Groups may be deleted by USAN. USAN will notify Group members prior to deletion, but if they receive no response, the Group will be deleted. If USAN deletes a Group, all the records associated with the Group’s shared space will be deleted as well
Automatic Renewal
Groups that are actively in use are renewed automatically setting the days to zero. Any of the following actions will auto-renew a group:
SharePoint – view, edit, download, move, share, or upload files. (Viewing a SharePoint page does not count as an action for automatic renewal.)
Outlook – join the group, read or write group messages from the group, and like a message (Outlook on the web).
Teams – visiting the Teams channel.
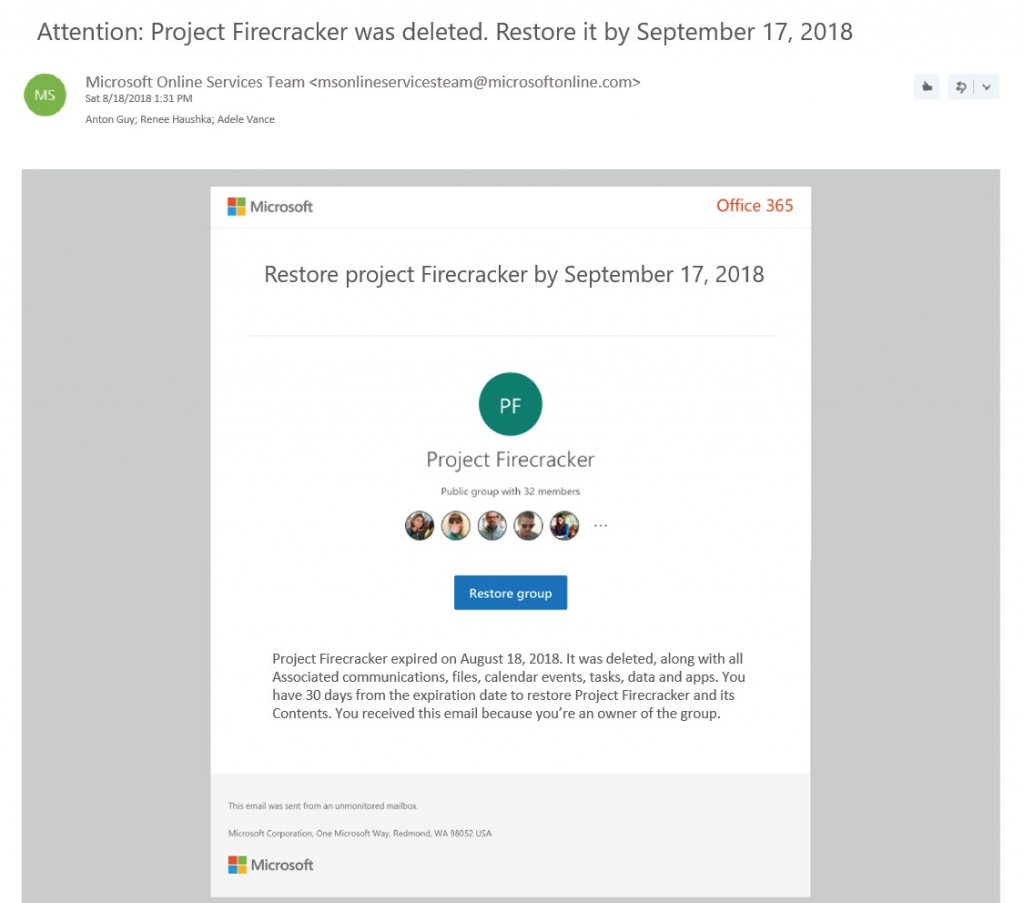
Recover Deleted Teams or Groups
When the 365 days limit hits, the Microsoft 365 group will expire and be put into a “Soft-deleted” state. Which means it can still be recovered for up to 30 days. To have the Microsoft 365 group recovered please contact support by creating a SAMI Support Request and include the Microsoft 365 group or Team name to be recovered.
Where to Get Help
For assistance with Microsoft 365 groups, please contact support by creating a SAMI Support Request. We can answer questions about the expiration policy, renewing groups, and updating group owners.
To access Forms, you will be directed to our SAMI Support Portal where you will be asked to log in using your NETID and authenticate using Duo. Once you click “Next,” you will be forwarded to samisupport.fdu.edu in a new window or tab.