The Report Message add-in works with Outlook to allow you to report suspicious messages to Microsoft and manage how your Microsoft 365 email account treats these messages.
Messages marked as junk by your Microsoft 365 email account are automatically moved to your Junk Email folder. However, spammers and phishing attempts are continually evolving. If you receive a junk email in your Inbox, you can use the Report Message add-in to send the message to Microsoft, helping improve spam filters. If you find an email in your Junk Email folder that is not spam, you can use the add-in to mark it as legitimate, move it to your Inbox, and report the false positive to help Microsoft enhance the filters.
What is Junk Email?
Junk email, often referred to as spam, consists of messages you do not want to receive. These emails may advertise unwanted products or contain content that is offensive. If you select the Junk option, a copy of the message may be sent to Microsoft to improve spam filters, and the message will be moved to your Junk Email folder.
What is Phishing?
Phishing is a tactic used to trick you into disclosing personal information, such as bank account numbers and passwords. Phishing messages often appear legitimate but contain deceptive links that lead to fake websites. If you select Phishing, a copy of the message may be sent to Microsoft to improve filters, and the message will be moved to your Junk Email folder.
For more information and tips on spotting phishing emails, please refer to the following support article:
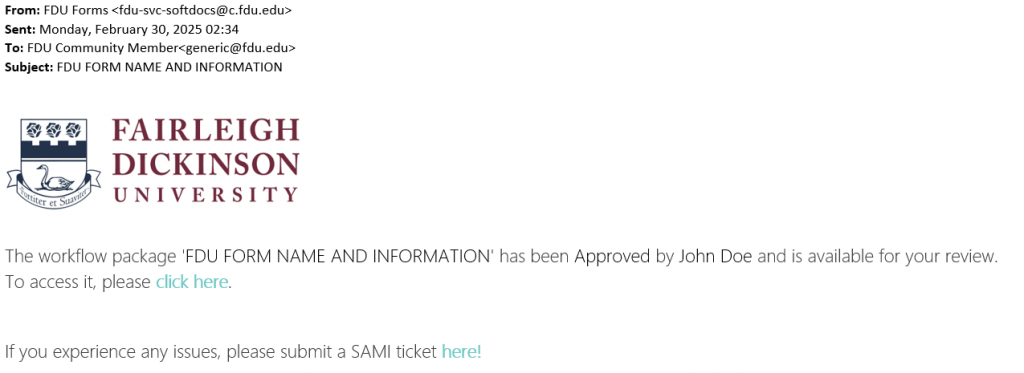
Microsoft has recently updated the process for reporting phishing or junk emails in Microsoft 365 Outlook and classic Outlook clients. With this update, a new Report Message button is now available in a dedicated tab within the Outlook client.


Reporting a Message as Phishing/Junk
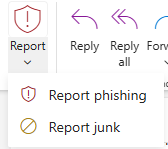
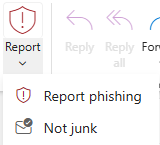
By default, the Report button is inactive (grayed out). To activate the button and report a message as phishing or junk, the email must first be highlighted.
To report a message as Phishing or Junk:
- Click on the email message you want to report
- Click the “Report” button
- Select either “Report phishing” or “Report junk” to properly submit the message
Note
Clicking Report Phishing will delete the email.
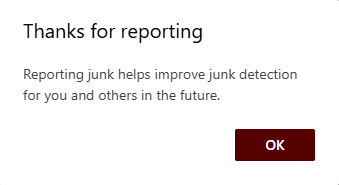
- Click “OK” on the confirmation window
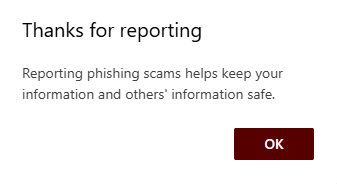
A secondary window will appear, explaining that regularly reporting junk emails helps improve junk email filtering in the future.
What is a Legitimate Email?
A legitimate email is one that comes from a sender you know, are expecting, or that has been mistakenly marked as junk. If this happens, you can use the Report button to mark the message as Not Junk. This will move the message from your Junk Email folder back to your Inbox.
Reporting Messages as Not Junk:
- Click on the “Junk Email” folder in Outlook
- Select the email message you want to report as “Not Junk“
- Click the “Report” button
- Select “Not Junk” to properly report the message
Tip
If a legitimate email has been mistakenly reported as phishing, please open a SAMI Support ticket by clicking the Get Support button below.