Explore our comprehensive IT resource library to discover a wealth of helpful information tailored to your needs. Utilize our filters to refine your search by role at FDU, department, or specific service for a more personalized experience.
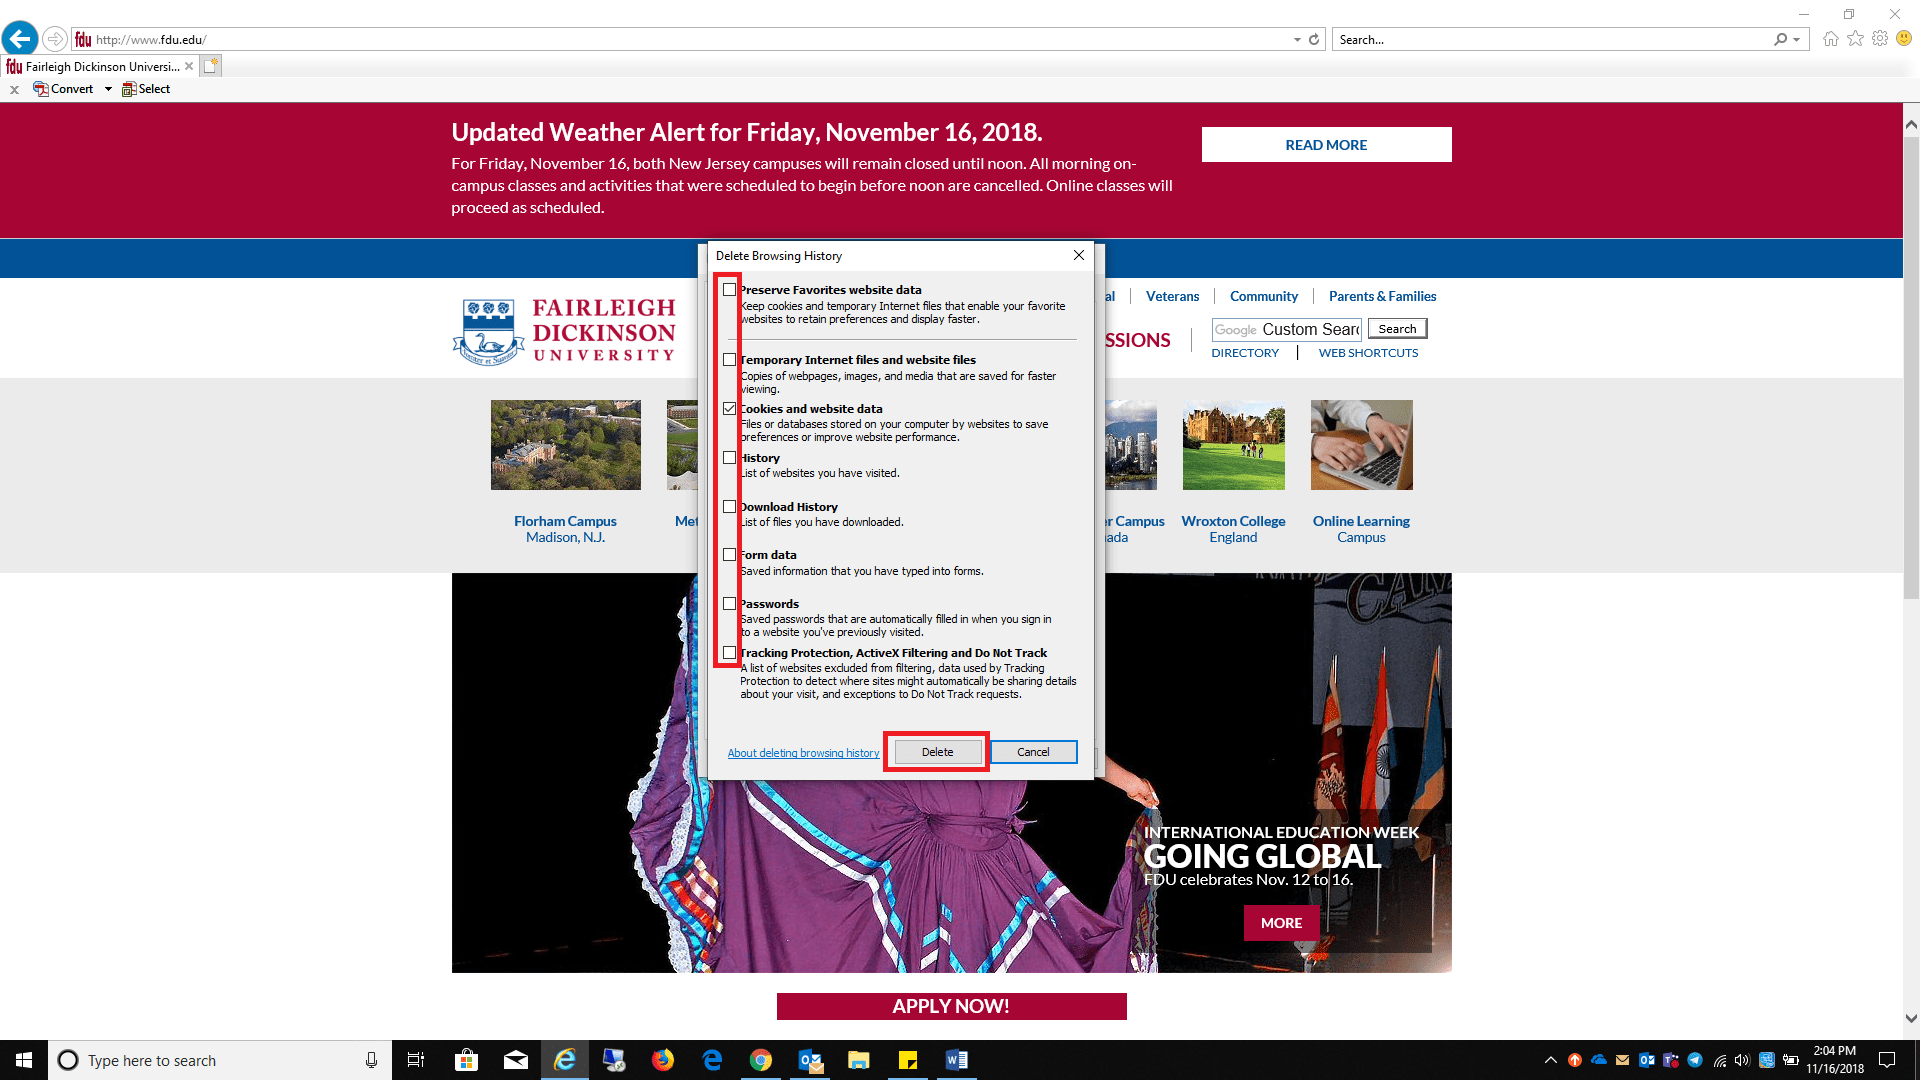
FDU-Secure uses current encryption standards to connect to the FDU wireless network via secure wireless traffic. This is an evolving technology and occasionally, one of the changes made by FDU IT requires us to issue a new certificate. When this occurs, you will need to accept the certificate using the process below.
Note
Your process may vary slightly based on the version of the Operating System that your device is using.
SAMI Support
If you have any questions or concerns, please visit SAMI Support, where you can request additional information or search our extensive IT knowledge base. While SAMISupport provides the quickest and easiest access for IT support, you can contact the SAMI Service Desk by phone (973)-443-8822 or email at samisupport@fdu.edu.
The computing and electronic communications facilities at Fairleigh Dickinson University support the instructional, research, and administrative activities of the University. Users of these facilities may have access to University resources, sensitive data, and external networks. Consequently, it is imperative for all users to behave in a responsible, ethical, and legal manner. This document presents specific guidelines for appropriate behavior and use of FDU computing resources.
SCOPE
These guidelines apply to all users of FDU computing resources. Users include all students, faculty, staff, visiting faculty, volunteers, guests of the administration, and external individuals or organizations.
Computing resources include, but are not limited to, desktop and laptop computers, file servers, smart phones, email and electronic communications, software, University-assigned email accounts, data storage, and networking equipment used to link these components together and to the Internet, whether owned, leased, or licensed by FDU. In addition, computing resources include use of the University network via a physical or wireless connection, regardless of the ownership of the computer or device connected to the network. Moreover, this policy applies to all usage of university computing resources, whether that usage occurs through a university owned device or personal device.
University property, including computing resources, are provided to you for University business. Although security protocols have been put in place to restrict access to computing resources to protect them against unauthorized access by external parties, it is important that all members of the University community take appropriate measures to safeguard these resources.
Users – and not the University — are responsible for the materials that users prepare, receive, or transmit through computing resources. Thus, as a condition of using the University’s computer system, all users represent that they are in compliance with applicable laws and University policies, including l federal, state, and international copyright and other intellectual property laws and laws regarding defamation.
ACCEPTABLE USE
Those who make use of the FDU computing resources are required to behave in a manner consistent with FDU’s codes of conduct. As a user of this network, you agree to the following usage guidelines:
You will not use an account that does not belong to you. You will use only the computers, computer accounts, and computer files for which you have authorization. You may not share accounts, files, or access to computer resources with any unauthorized person.
You are responsible for any computer account you have been given. You will set a password on the account that is in compliance with university password policies, and you may not share this password with any other person. If you discover that someone has made unauthorized use of your account, you should change your password immediately and immediately report the event to one of the individuals listed in Appendix 1.
You agree not to intentionally seek out information about, copy, or modify password files, other users’ files, or disks and tapes belonging to other people, unless specifically authorized by those persons, whether at FDU or other facilities.
You should not attempt to decrypt material to which you are not entitled or attempt to gain rights you have not been specifically granted by the owner. If you observe or discover a gap in system or network security, you agree to inform one of the individuals listed in Appendix 1 and not to exploit the gap.
You agree to refrain from any activity that interferes with a computer’s operating system or its logging and security systems, or that may cause such effects. Additionally, users are not authorized to remove any security software installed on FDU equipment by FDU Systems personnel.
You must be sensitive to the public nature of computing resources and agree not to transmit, post, or otherwise display material that is threatening, obscene, harassing, or defamatory. The use of University computing resources to libel, slander, or harass any other person is not allowed and could lead to University discipline as well as legal action by those who are the recipients of these actions.
You agree not to make copies of or distribute software the University owns or uses under license, unless the owner of the software or the owner of the license has specifically granted permission to copy. If in doubt as to whether you have permission to copy software, assume you don’t.
Messages, statements, and declarations sent as electronic mail or public postings should be treated as if they were tangible documents. From electronic identifiers used in the transmission of messages, addressees can see the University is the source of the message or its system is being used to transmit it, similar to how letterhead or return addresses on a tangible document would identify the University. Therefore, as a representative of the FDU community, you are expected to respect the University’s good name in your electronic dealings with those both within and outside the University. Moreover, in so far as employees make use of FDU computing resources to relay personal opinions, it is their obligation to make sure that no addressee can infer that their personal opinions are necessarily shared or authorized by the University, and they are obligated to clearly identify their opinions as their own and not those of the University.
You agree not to create, alter, or delete any electronic information contained in any system that is not your own work, unless specifically authorized by the owner of that information.
You agree not to create, send, or forward electronic chain mail letters. You agree not to attempt to alter or forge the “From” line or any other attribution of origin contained in electronic mail or postings. You agree not to use any of the University systems for sending what is commonly referred to as “SPAM” mail (unsolicited bulk email).
You may not use FDU computing resources as a means of obtaining unauthorized access to any other computing systems.
FDU’s data storage on University servers, hosted servers, third party storage, or hosted storage, is an FDU computing resource with costs attached and should be used with care and discretion. It is primarily meant for current class work, research and development projects, business files, and temporary storage of other files. Users are expected to keep their disk usage reasonably minimized, in keeping with their University role.
Network addresses such as TCP/IP addresses and machine addresses are assigned by University Systems and Networking staff and may not be altered or otherwise assigned without the explicit permission of the Associate Vice President of Systems and Networking (or other designee). In addition, no equipment may be attached to the network without the explicit permission of the Associate Vice President of Systems and Networking (or other designee). This applies to all staff as well as academic departments.
FDU’s computing resources are not to be used for the transmission of commercial or personal advertisements, solicitations, and promotions or for extended reproduction of political, ideological or commercial material originated by a person or organization. This includes but is not limited to the execution of revenue-generating advertising programs which pay users when the programs are run. The Associate Vice President of Systems and Networking (or other designee) may suspend this rule when it is in FDU’s best interest to permit such activity.
Users may not contract with external Internet services, service providers, or the like without the explicit written approval of the Associate Vice President of Systems (or designee) and Networking and compliance with Finance and Office of General Counsel policies.
Without the explicit written permission of the Associate Vice President of Systems and Networking (or designee) you agree not to run any of the following protocols or services:
Port scanners, network monitors or other types of utilities that probe any other computer, be they inside or outside FDU’s network.
Routing or network serving protocols such as RIP, IGRP, OOTP or DHCP on the network.
Daemons, processes or programs that accept incoming connections, as a server would.
Streaming media servers or any other server that broadcasts continuous data streams.
FDU’s computing resources, including equipment, network, services, and wiring may not be modified or extended beyond the areas of their intended use.
Network connections may not be used to provide network access to anyone outside the University community or for any purposes other than those that are in direct support of the academic mission of the University.
All computers connected to FDU’s network must run an operating system and configuration that is supported by its vendor with regard to security patches and updates, as well as antivirus software with current virus definitions. It is the user’s responsibility to keep their virus definitions up to date and to apply all critical operating system updates. More information is available at it.fdu.edu or submit questions through the SAMI Support portal or by emailing samisupport@fdu.edu.
Users may not alter the operating system or configuration of University owned computers without the explicit written authorization of the Associate Vice President of Systems and Networking (or designee).
PERSONAL USE
Computing resources are created to support the instructional, research, and administrative activities of the University, and are the property of the University. Personal use of the University’s computing resources, except for students enrolled at the University, should be incidental and kept to a minimum. Use of such resources by an employee for other than work-related matters should be reasonable and limited so that it does not prevent the employee from attending to and completing work effectively and efficiently, does not incur additional cost to the University, and does not preclude others with work-related needs from using the resources, including the shared campus and Internet bandwidth.
Department Heads and other administrators may enact additional restrictions to further limit employees’ personal use of University computing resources. These restrictions may include but are not limited to: limiting time spent reading or writing personal email or visiting web pages, and limitations on acceptable content due to the possible exposure of screens to other individuals. Human Resources must be consulted, in advance, about any proposed restrictions.
SECURITY
Users should use reasonable available methods to safeguard their data, including regular changes of passwords, and encrypting sensitive data. In the event that files have been corrupted as a result of intrusion, you should notify a system administrator immediately. Please note that FDU’s computing resources are not completely secure. It is possible that others will be able to access files by exploiting shortcomings in system security. For this and other reasons, FDU cannot assure confidentiality of files and other transmissions.
The Office of Information Resources and Technology (“OIRT”) and each of its departments attempt to provide reasonable security against damage to files stored on FDU’s computing resources by filtering all outgoing and incoming electronic mail for viruses and junk mail and making regular backups of systems.
In connection with the University’s migration to Office 365, the University adopted a policy of retaining copy of each fdu.edu email for three (3) years. This means, regardless of individual user action, the University will maintain a copy of all email traffic for a period of 3 years.
In the event of lost or damaged files, a reasonable attempt will be made to recover the information; however, the University and the University Information Technology staff cannot guarantee recovery of the data or loss of data due to media failure, floods, fires, etc.
OIRT and each of its departments will make reasonable attempts to provide error-free hardware and software on our computing resources, however, it is not possible to guarantee this, and information provided by staff members is not guaranteed to be correct.
PRIVACY
Users should exercise caution when storing any confidential information in electronic format, because the privacy of such information cannot be guaranteed. User(s) must be aware that any personal files, including e-mail, maintained on University computing resources are University property and are subject to University storage, retrieval, and review. Individuals using FDU computing resources should have no expectation that any information transmitted through or stored on FDU computing resources, whether the information is contained on a computer hard drive, computer disks, University or third party server or in any other manner, will be private. By using FDU computing resources, the user consents to the University’s (and its designees’, both internal and external) access to their electronic files, documents, and materials stored, transmitted, or otherwise accessible on those resources.
Examples of where the University might access a user’s electronic files include system backups, which access all files in a user’s account; software upgrades which may require editing startup files in a user’s account; diagnostic and trouble-shooting activities, which may, for example, require viewing the address headers of e-mail messages to determine the cause of problems; keystroke monitoring of sessions to determine inappropriate use of the computing facilities; searches in connection with a litigation, threatened litigation, governmental proceeding or investigation; investigation of a possible data breach; investigation of possible breach of University policy, rules, handbooks, or protocols; and other measures to safeguard the University’s systems and compliance with laws. These examples are not intended to limit the University’s right to access a user’s electronic files under circumstances deemed appropriate by the University. In such situation(s), University computer resources in the possession of a user, or otherwise assigned to an individual, may be accessed, reviewed, duplicated, stored, and forwarded by appropriate personnel without the user’s permission or knowledge.
Without limitation, because employees are granted access to and use of FDU computing resources to conduct University business, the University reserves the right to access electronic mail messages left on or transmitted through the University’s computing resources. Employees should not assume that such messages are private and confidential or that the University or its designated representatives will not have a need to access and review this information.
The Family Education Rights and Privacy Act (FERPA) binds all users who have access to student data and this policy is subject to FERPA requirements. In general, FERPA gives students more control over their educational records, and it prohibits educational institutions from disclosing “personally identifiable information in education records” without the written consent of the student (subject to specified exceptions). To find out specifically what information you may or may not give out and to whom, contact the office of the Vice President for Student Affairs.
POLICY VIOLATIONS
Policy violations should be reported immediately to any one of the individuals listed in Appendix 1.
Violations of this policy will be addressed as described in the Student, Faculty and/or Employee Handbooks, any relevant contracts, and, if applicable, State and Federal law or regulations. University students and employees who violate this Policy will be met with appropriate disciplinary action, up to and including dismissal, expulsion, or termination from the University. Third parties who violate this Policy may have their relationship with the University terminated and their access to campus restricted. In addition, a user’s system privileges can be suspended for a specified time period or revoked and/or a monetary fine may be imposed on those in violation to reimburse the University for the staff time and other costs of investigating and rectifying the violation.
The University reserves the right to suspend computing resource privileges while investigating a complaint or troubleshooting a system or network problem.
This policy is subject to revision. Comments and suggestions are welcome and should be sent to Stuart Alper, Associate Vice President of Systems and Networking, mailstop T-BH1-01, or stuper@fdu.edu.
It is the user’s responsibility to remain informed about the contents of this document.
CONTACTS
Stuart Alper Associate Vice President of Systems and Networking Mailstop T-BH1-01 (201)-692-2414 stuper@fdu.edu
Saul Kleinman Associate Vice President of Management Information Systems Mailstop T-BH2-03 (201)-692-2065 saul@fdu.edu
The easiest way to access your FDU email account on your mobile device is to install the Outlook app from either the App Store (Apple) or the Play Store (Android). We support and advise using this method due to the program’s robustness and integration of all Office365 features. Follow the steps below to install and set up the Outlook app on your phone.
Outlook App on Apple iOS and Android Mobile Devices
Use the links below to install the Outlook app onto your mobile device.
Launch the app and press on “Add Account” if on an Android device. It will then prompt you to input your FDU email address. On iOS, the app will launch and immediately ask you for your FDU email address. Once filled out press “Continue” on Android. On iOS press “Add Account”
Android
Android
iOS
You will be routed to the FDU Single Sign On Page, from here input your FDU email address and password and press “Sign In”
For security purposes, all applications which use FDU’s Single Sign On (NetID) require Duo two-factor authentication. After inputting your FDU NetID login information, Duo requires you to complete a method of second-factor authentication
Your FDU email account has now been added to your device successfully. Ensure the email account is listed on your Outlook application.
Any videos distributed on various platforms by FDU must comply with federal regulations concerning accessibility for individuals who are deaf or hard of hearing. It’s essential to ensure that our content is accessible to all members of our community, in line with these important guidelines.
To read the Americans with Disabilities Act rules and regulations, visit the link below:
All video projects produced by Multimedia Services must be closed captioned and transcribed. Captions appear onscreen simultaneously with the audio and video and follows the same timing. It exists within the video player. A transcript is the same word-for-word content as captions, but presented in a separate document, whether it is a text file, word processing document, PDF, or web page.
These instructions demonstrate adding an FDU email account to an Apple mobile device’s native Apple “Mail” app. Unfortunately, adding an FDU email account on an Android OS mobile device’s native “Mail” app is currently unsupported by FDU IT support. Information regarding adding an FDU email account to an Android OS mobile device via the Outlook App can be found below for Android OS mobile device users.
Note:
The easiest way to access your FDU email account on your mobile device is to install the Outlook app from either the App Store (Apple) or the Play Store (Android). FDU IT supports and advises using this method due to the program’s robustness and integration of all Microsoft 365 features. A link with instructions for the Outlook app on mobile devices can be found at the bottom of this page.
Setting up your FDU Email Account in the Mail app on iOS
Go to the “Settings” app
Tap “Mail”
Tap “Accounts”
Tap “Add Account” and then select or tap “Microsoft Exchange”
Enter your FDU email address and a description of your email account in the corresponding text boxes. Please note that the default description name for the account will be ‘Exchange’ if left unchanged. Tap “Next” to continue
Tap “Sign In”
Enter your FDU email address and password. Tap “Sign In” to continue
For security purposes, all applications which use FDU’s Single Sign-On require DuoTwo-Factor Authentication (2FA). After entering your FDU NetID login credentials, Duo requires you to complete a method of second-factor authentication
Choose the FDU NetID account information you want to synchronize or access on your iOS mobile device by toggling the choices on/off. Tap “Save” to continue
Your FDU email account has successfully been added to your iOS mobile device
close
Setting up your FDU Email Account on Android OS
Due to the multiple Android OS mobile device manufacturers (Samsung, Google, or LG) each having their own native ‘Mail’ app, email setup and features differ depending on the manufacturer of the Android OS devices. For this reason, it is best practice to use the Microsoft ‘Outlook’ app found in the Google Play Store. Follow the instructions below to set up Outlook on Android OS.
Revision Date: New Policy Effective Date: 11/1/2023
Section A – University Systems and Applications
I. Purpose
The purpose of this policy is to establish information security standards for individuals receiving credentials to Fairleigh Dickinson University (“FDU” or “University”) resources and how those resources are accessed.
II. Scope and Applicability
This policy applies to all university system resources. All Users are responsible for adhering to this policy.
III. Definitions
Capitalized terms shall have the meaning ascribed to them herein and shall have the same meaning when used in the singular or plural form or any appropriate tense.
Account: An established relationship between a User and a computer, network, or Information System which is assigned a credential such as a username and password.
System Administrative Account: An Account with elevated privileges intended to be used only when performing management tasks, such as installing updates and application software, managing user accounts, and modifying operating system and application settings.
Entitled Account: A user who has met the minimum requirement to be granted authorization to access electronic Fairleigh Dickinson University Resources.
Authorized User: A User who has been granted authorization to access electronic Fairleigh Dickinson University Resources and is current and active in their privileges.
Contractor or Vendor: A person or a company that undertakes a contract to provide materials or labor to perform a service.
Employee: University staff faculty and adjunct, including nonexempt, exempt, and overseas staff and collegiate faculty.
Multi-Factor Authentication (MFA): Authentication using two or more different factors to achieve authentication. Factors include something you know (e.g., PIN, password); something you have (e.g., cryptographic identification device, token); or something you are (e.g., biometric).
Privileged Account: An Account that is authorized to perform security-relevant functions that an ordinary Account is not authorized to perform.
Single Sign-On (SSO): An authentication process that allows an Authorized User to access multiple applications with one set of login credentials. SSO is a common procedure in enterprises, where a client accesses multiple resources connected to a local area network (LAN).
User: A member of the University community, including but not limited to Staff and Faculty, and other individuals performing services on behalf of University, including Contractors, volunteers and other individuals who may have a need to access, use or control University Data.
IV. Authentication
Any service, application or Information System, whether on-premise or in the cloud, that contains WISP protected information, especially PI or PHI; OR is accessed by a large group of employees (20 or more), must use Single Sign-on authentication.
If the service or application is being provisioned by a business unit, the unit must engage University Systems to work with the provider to enable SSO.
If SSO is not supported by the service or application, it will not be approved for use by the university.
See Section V for exceptions.
Multi-factor authentication (MFA) must be used to access University resources.
Passwords must be constructed in accordance with the minimum requirements as listed below:
Authorized User Account passwords must meet a minimum length of 8 characters.
Administrative and Privileged Account passwords must meet a minimum of 10 characters.
Passwords must contain a mix of alphanumeric characters. Passwords must not consist of all digits, all special characters, or all alphabetic characters.
Automated controls must ensure that passwords are changed at 90-day intervals for both general users and administrative-level accounts.
NetIDs associated with a password must be disabled for a period of time after 10 consecutive failed login attempts. A minimum of 30 minutes is required for the reset period.
Passwords must not be the same as the NetID.
Passwords must not be displayed on screens.
Users must not share passwords.
Initial passwords and password resets must be issued pre-expired forcing the user to change the password upon first use.
Password reuse must be limited by not allowing the last 10 passwords to be reused. In addition, the password must be at least 2 days old in order to be voluntarily changed.
Access will be disabled 90 days past the date that a password expired if not changed.
Access will be disabled after 30 days of creation if NetID is not claimed.
Expired passwords must be changed before any other system activity is allowed.
Server Password Protocol
If, at any time, a member of the Community is granted permission to install a server, and access to that server is restricted via Login, and if that process is granted SSO exception through section VII., that system can not hold passwords in clear text. That system must use an approved irreversible cryptographic transform to protect its users’ passwords.
VI. Enforcement
This policy will be enforced by technical controls wherever feasible; otherwise, this policy will be enforced by OIRT under the direction of the CIO. All members of FDU’s faculty and staff have a responsibility to promptly report any known instances of noncompliance to AVP of University Systems and Networking or the Director of Systems.
Failure to comply with this policy can result in disciplinary action. Any such discipline shall be in accordance with processes and procedures of Human Resources and subject to any protections afforded under the University’s agreement with “Office & Professional Employees International Union”, the “Faculty Handbook”, and similar documents. Third parties who violate this Policy may have their relationship with the University terminated and their access to campus restricted.
VII. Exceptions
Exceptions to this policy should be submitted to the AVP, USAN for review. Approval of the Chief Information Officer (CIO) or Data Security Incident Response Team (DSIRT) may be required.
Fairleigh Dickinson University (FDU) has adopted and standardized use of the Microsoft Office 365 Suite of products for University business. Some external entities, however, that conduct business with University employees utilize the Google Suite of products. This policy stipulates which Google applications will be made available to faculty and staff (not students) to enable collaboration with these external entities to conduct University business.
II. Purpose
Fairleigh Dickinson University (FDU) has adopted and standardized use of the Microsoft Office 365 Suite of products for University business. However, it is recognized that not all entities use Microsoft Office 365 as their platform and, from time to time, FDU faculty and staff may need the ability to collaborate with external entities that may be using the Google Suite of products. This policy stipulates which Google applications will be made available to faculty and staff to enable collaboration with these external entities.
Faculty and staff are reminded that in accordance with the University’s WISP policy, WISP protected data must not be stored or transmitted through any service, without the prior written authorization from the University Chief Information Security Officer.
As stated in the “Policy for Acceptable Use for Email”, Google Gmail is not available for use. All University business must be conducted through an FDU email account on Microsoft Office 365.
Faculty and staff may not use, or attempt to use, Google apps as a method of collaboration with students, faculty or staff. This FDU Policy on the Availability and use of Google Apps is expressly for the use with external entities only.
This Policy on the Availability and use of Google Apps applies only to use of Google applications by faculty and staff, and not FDU students.
Microsoft Office 365 is the only FDU supported platform for email and collaboration.
Google Apps are not supported by FDU IT personnel.
III. Scope
This policy applies to all FDU faculty and staff, wherever located throughout the world. Students will NOT have access to the fdu.edu Google Apps suite of products.
IV. Data Security Coordinator
The University has designated the Chief Information Security Officer, working together with the Data Security Information Response Team (DSIRT) and the USAN Director of Systems, to implement, supervise and maintain this Policy.
V.Internal Risks
To combat internal risks to the security, confidentiality, and integrity of any electronic, paper or other records, adherence to this Policy and the WISP will be strictly enforced.
VI.External Risks
To combat external internal risks to the security, confidentiality, and integrity of any electronic, paper or other records, adherence to this policy and the WISP will be strictly enforced.
VII. In Case of Questions
Questions regarding the availability of Google Apps can be directed to the SAMI Support Desk.
Note:
Please note that the UTAC is not able to provide application support on the Google suite of products.
Requests for exceptions to this Policy should be directed in writing to the Chief Information Security Officer via the SAMI Support Desk.
X. Appendix
X1.1 Google Apps Available to Faculty and Staff
Note
These applications may only be used in collaboration with outside entities who use Google applications as their sole source of collaboration and request the use of any one of these application for official FDU business use. Any other use of these applications by FDU faculty and staff is a violation of this Policy.
Services
Descriptions
Assignments
Assignments brings together the capabilities of Google Docs, Drive and Search into a tool for collecting and grading student work.
Calendar
Google Calendar is a web-based tool for personal scheduling and calendar sharing. It can be accessed through either a Web browser or through a third-party calendar client.
Classroom
Google Classroom enables teachers to create an online classroom area in which they can manage all the documents that their students need.
Drive and Docs
Google Docs is an online word processor that lets you create and format text documents and collaborate with other people in real time. Google Drive on the web lets you store, access, and edit your files anywhere — on the web, on your hard drive, or on the go.
Google Meet
Google Meet enables conversations with photos, emoji, group video calls for free. You can connect across computers, Android and Apple devices.
Google Vault
Vault is an information governance and eDiscovery tool for Google Workspace. With Vault, you can retain, hold, search, and export users’ Google Workspace data.
Groups for Business
Google Groups for Business is an extended service available for G Suite users that allows you and other members in your organization to access the main Google Groups interface located at groups.google.com.
Jamboard
Google Jamboard is an online, collaborative whiteboarding application that lets you create, edit, and collaborate with other people in real time. Google Jamboard applications can be accessed on the Web, Android, and iOS.
Keep
Google Keep is a note-taking service included as part of the free, web-based Google Docs Editors suite offered by Google
Tasks
Google Tasks is a simple to-do list—but with lists, subtasks, and mobile notifications, it has the basics you need to stay productive and keep track of the most important things you need to do.
Applied Digital Skills
Applied Digital Skills is a free, flexible video-based curriculum that prepares students for the growing number of jobs that require basic digital skills, such as email and spreadsheets.
Google Ad Manager
Google Ad Manager is an ad exchange platform introduced by Google on June 27, 2018. It combines the features of two former services from Google’s DoubleClick subsidiary, DoubleClick for Publishers and DoubleClick Ad Exchange.
Google Ads
Google Ads is Google’s online advertising program. Through Google Ads, you can create online ads to reach people exactly when they’re interested in the products and services that you offer
Google AdSense
Google AdSense is an advertising program launched by Google in 2003 that allows website publishers to display targeted text, video, or image advertisements on website pages.
Google Alerts
Google Alerts is a tool that allows you to track your chosen keywords and phrases so that you never miss another important conversation.
Google Analytics
Google Analytics generates detailed statistics about a website’s traffic and traffic sources and measures conversions and sales
Google Cloud Platform
Google Cloud Platform is a suite of public cloud computing services offered by Google. The platform includes a range of hosted services for compute, storage and application development that run on Google hardware.
Google Cloud Print
Google Cloud Print is a web service offered by Google. Users associate printers with their Google Account.
Google Data Studio
Data Studio is Google’s reporting solution for power users who want to go beyond the data and dashboards of Google Analytics.
Google Earth
Google Earth is the most photorealistic, digital version of our planet.
Google My Maps
Google My Maps is your way to keep track of the places that matter to you.
Google Payments
Google Pay (stylized as G Pay; formerly Pay with Google and Android Pay) is a digital wallet platform and online payment system developed by Google to power in-app and tap-to-pay purchases on mobile devices, enabling users to make payments with Android phones, tablets or watches.
Google Play
In Google Play, the app description is split into two fields: Short Description, a limited 80 characters preview field and. the Full Description field, giving you space for an up to 4000 characters long app description.
Google Play Console
Google App Store
Google Search Console
The Search Console lets you, as a webmaster, check on the status of the indexing Google does on your site, helping you to optimize your page visibility in Google search results. Get data, tools and diagnostics for a healthy, Google-friendly site.
Google Takeout
Google Takeout is a service that allows users of Google products, such as YouTube, Gmail, etc., to export their data to a downloadable ZIP file.
Managed Google Play
Managed Google Play Managed Google Play is a version of Google Play that’s optimized for enterprises.
Material Gallery
Material Gallery is a collaborative tool for uploading design work, getting feedback, and tracking revisions – quickly and efficiently.
Partner Dash
Partner Dash is a service that hosts several applications used by Google’s partners to manage their relationships with us. Some of these applications are invite-only, while others are publicly available to anyone logged in with a Google Account.
Scholar Profiles
The Google Scholar Profile search pane in Publish or Perish allows you to look up a Google Scholar profile and analyze the associated publication metrics.
Search And Assistant
Google Assistant is Google’s artificial intelligence-powered voice assistant, which grew out of Google Now.
B-ROLL is supplemental footage inserted as a cutaway under narration or interview that helps tell the story. It can be used to introduce a segment or to cover a speaker’s audio or video miscues.
Acquiring B-ROLL
Multimedia Services has a significant amount of B-ROLL, however, there are projects that are so specific that we will not have the exact material required. In these situations, the producer will need to schedule a day(s) to acquire the footage. In some cases, scenarios may need to be created. If B-ROLL needs to be recorded off campus, permits may be required.
Requesting Access to B-ROLL Previously Captured
We currently grant access to existing B-ROLL via direct request. Our B-ROLL catalog is currently hosted on Sony CI and can be shared with anyone in and outside of FDU upon request. For access to our B-ROLL, please email danielpando@fdu.edu.
Note
Multimedia Services is diligently organizing and labeling our extensive collection of B-ROLL footage in preparation for the launch of a new cloud-based video library, set to become available in Summer 2024. This initiative aims to enhance accessibility and search-ability, ensuring efficient use of our valuable video resources.
Zoom comes equipped with numerous security features to help control online classrooms, prevent disruptions, and support educators in teaching remotely. Below are best practices for securing your virtual classroom using Zoom.
Blackboard Ultra gives students a modern, streamlined way to access course materials, keep track of due dates, submit assignments, take assessments, review grades and feedback, and communicate with instructors and classmates. This guide brings together essential student tutorials to help you navigate Blackboard confidently and stay on top of your course work.
Getting Started & Navigation
Welcome to Blackboard
Get an introduction to Blackboard Ultra and the main tools you will use to access course materials, activities, and updates.
close
Customize Your Profile
Review and update the profile information and settings available through your Blackboard account.
close
Find Your Courses
Locate current, upcoming, and previous courses from the Courses page in Blackboard.
close
Navigate Inside a Course
Use the course navigation to find content, discussions, grades, messages, and other course-specific tools.
close
Activity Page
Review recent course activity, new content, grades, and upcoming work from the Activity page.
close
Calendar
Use the Blackboard calendar to review due dates and course events and stay organized across your courses.
close
Notification Settings
Choose how and when Blackboard notifies you about course announcements, due dates, grades, and other activity.
close
Check Your Browser
Use the browser checker and Blackboard Help resources to confirm that your browser is ready for course work.
close
Course Content & Tools
Types of Course Content
Learn how common Blackboard content types are presented so you can find files, learning modules, links, and activities.
close
Use the Content Editor
Use the Blackboard content editor to format text and add links or media when completing course activities.
close
Assignments & Assessments
Assignments Overview
Learn how to open assignments, review instructions and due dates, and understand submission status.
close
Submit an Assignment
Upload your work, review the attached files, and submit an assignment in Blackboard.
close
Review Assignment Feedback
Find instructor comments, grades, and other feedback after an assignment has been reviewed.
close
Assignments in SafeAssign
Learn how SafeAssign works within the Blackboard assignment submission process.
close
Prepare for an Assessment
Review assessment details and complete the recommended checks before beginning a Blackboard test.
close
Take and Submit a Test
Navigate test questions, enter your responses, and submit a completed assessment in Blackboard.
close
Review Test Feedback
Review your test results, submitted responses, scores, and instructor feedback when they are available.
close
Hotspot Questions
Learn how to answer hotspot questions by selecting the requested area within an image.
close
Grades & Progress
Check Grades
Use the Gradebook to review scores, submission status, and feedback across your course work.
close
How Am I Doing? Report
Use the How Am I Doing? report to understand your activity and progress within a course.
close
Grades in the Blackboard App
Find and review course grades from the Blackboard mobile app.
close
Discussions & Collaboration
Participate in Discussions
Open course discussions, create a response, and reply to classmates or your instructor.
close
Messages
Read and send course messages to communicate with instructors and classmates within Blackboard.
close
Journals
Create and manage journal entries for reflective or instructor-guided course activities.
close
Work in Groups
Use Blackboard group spaces and tools to collaborate with classmates on shared course work.
Blackboard Ultra gives instructors a modern, streamlined way to manage courses, communicate with students, deliver engaging content, and assess learning in one centralized platform. This guide brings together essential instructor resources—covering navigation, announcements, discussions, grading, assessments, course content, and student management—to help you work more efficiently and get the most out of Blackboard Ultra, whether you’re setting up a course for the first time or refining an existing one.
Navigation & Getting Started
How to Add a Zoom Meeting
close
Find Your Courses
Locate your course list immediately after logging in. You can view current, past, and upcoming courses from the “Courses” page in the global navigation menu.
Access global tools such as your Profile, Activity Stream, Calendar, Messages, and Grades from the main menu on the left side of the screen, outside of any specific course context.
This page (often the “Activity Stream”) highlights important updates such as new content, grades, and due dates, featuring institutional announcements at the top.
View your course exactly as students will see it before making it available. Use this feature to verify content visibility, layout, and the overall student-facing experience without publishing live changes.
close
Student Preview
Enter a temporary student account within your course to experience it as a student would. You can submit test submissions and review results to confirm that content and assessments behave as intended.
close
Notification Settings
Customize how and when you receive alerts about student activity, discussion posts, assignment submissions, and course updates. Proper configuration helps you stay informed without being overwhelmed by notifications.
close
Accessibility Overview
Learn how Blackboard Ultra supports an inclusive learning environment through built-in accessibility features, including screen reader compatibility, keyboard navigation, and tools for creating accessible course content.
close
Discussions & Communication
Create Discussions
Facilitate class-wide conversations to encourage peer interaction and critical thinking. You can set up graded or ungraded forums.
Set up private or shared student journals to support individual reflection, formative writing, and ongoing communication between you and each student throughout the course.
close
Feedback Recording
Record audio or video feedback directly within the gradebook to provide students with richer, more personal responses to their work—an effective alternative to written-only comments.
close
Attendance Tracking
Monitor and record student attendance directly within your course. You can manually update attendance records or configure automatic tracking tied to participation or login activity.
close
Grading & Assessments
Gradebook
Use the Gradebook to review student submissions, manage grades, track progress, and keep assessment information organized within your course.
close
Gradebook Navigation and Layout
Learn how to navigate the Blackboard Ultra Gradebook and understand the layout of its key areas, controls, and assessment views.
close
Gradebook Student Display and Name Options
Review the Gradebook display options that help instructors organize student information and choose how names and student details appear.
close
Gradebook Column Header and Assessment Details Panel
Explore the Gradebook column header and Assessment Details panel to manage assessment information and access related grading options.
close
Gradebook Filter
Use Gradebook filters to narrow the view and quickly focus on the students, assessments, or grading information you need.
close
Gradebook Grade Details Panel
Learn how to use the Grade Details panel to review individual grades, feedback, submission information, and related grading actions.
close
Gradebook Manual Grade Entry and Posting Grades
See how to enter grades manually and post them to students from the Blackboard Ultra Gradebook.
close
Gradebook Accommodations, Exceptions, and Exemptions
Learn how to apply accommodations, exceptions, and exemptions in the Gradebook when student circumstances require adjusted assessment handling.
close
Grading Assignments
Review assignment submissions, enter grades, and provide feedback so students can understand their performance and next steps.
close
Flexible Grading Tests
Use flexible grading tools to review test submissions efficiently, move between students and questions, and focus on the grading workflow that works best for the assessment.
close
How to Grade Discussions
Grade student discussion participation, review responses, and provide feedback from the discussion grading workflow.
close
Rubrics
Create and manage rubrics to define grading criteria, communicate expectations, and support more consistent evaluation of student work.
close
Grade Using Rubrics
Apply rubric criteria while grading submissions to provide structured feedback and align scores with the expectations shared with students.
close
Timed Assessments
Set time limits for tests and other assessments to manage availability, pacing, and completion expectations for students.
close
Display One Question at a Time
Configure tests to show one question at a time when you want students to move through an assessment in a more controlled sequence.
close
Content Management
Add Content
The primary action to build your course. You can create new items, upload files, or import content from other sources using the plus (+) sign in the Course Content area.
Create shortcuts within your course content that link students directly to other tools or materials (e.g., a link in Week 1 content that leads to a Test).
Build structured, step-by-step learning paths that guide students through course materials in a set sequence. Learning Modules support conditional release to help you control the pace of student progress.
close
Release Conditions
Set rules that control when content, assessments, or activities become accessible to students based on criteria such as specific dates, prior completions, or group membership.
close
Copy Content From Other Courses
Reuse materials by copying content items, folders, or entire banks from your previous courses into the current one.
FDU faculty can access these recorded Zoom training sessions to learn the essentials of teaching with Blackboard Ultra. The three-part series covers key areas of course setup and management, including Getting Started with Blackboard Ultra, creating and managing Assignments and Tests, and using the Gradebook to track student performance. These recordings are designed to help instructors become more comfortable navigating Blackboard Ultra and preparing their courses for students.
FDU’s Acceptable Use Policy prohibits running software that accepts incoming connections from other computers. Programs such as BitTorrent or other P2P file sharing hosting program all contain server components that allow others to connect to your computer and retrieve files off of your system. In addition to the legal implications of sharing copyrighted materials, file sharing software creates a security concern. Improper use of these programs could result in the compromise of your private files and may leave your system open to attacks from other computers.
To view FDU’s stance on this issue in its entirety, please view the document below.
Fairleigh Dickinson University’s implementation of Box.com is designed to enable secure, scalable, and collaborative file sharing and content management between members of the FDU community and parties external to the institution.
The platform offers:
Unlimited cloud storage for academic, administrative, and research content
Secure access and sharing with encryption and granular permission controls
Seamless collaboration with internal and external users via shared folders and links
Integration with tools such as Microsoft 365, Zoom, and Adobe Sign
Version control and file recovery, minimizing data loss and ensuring continuity
Mobile and remote access for flexible work from any device
Fairleigh Dickinson University has a limited number of licenses available for qualified faculty and staff to use Box.com. Qualified in this case is defined as FDU faculty and staff members who have an approved business need to share confidential information with parties external to the University.
To acquire a license for Box.com, a user must complete a request form located on samisupport.fdu.edu using the link below:
Once a license is provided and a folder built, the licensee has complete accountability of the data and any access provided to others. As with any sensitive information, the licensee is reminded to pay careful attention to following WISP guidelines and when in doubt, ask before sharing content.
Click “Continue” to proceed to the FDU network login
Complete the FDU Single Sign-On process
Creating Your Workspace
Learn how to create a new subfolder in your Box account, upload content, and share it with your colleagues.
Creating a New Subfolder
Click “New” in the upper-right corner
Click “Folder”
In the pop-up window, enter a name for your folder. You can also invite collaborators at this step. If you don’t invite anyone, the folder will remain private
Click “Create”
Uploading a File or Folder
In the All Files section, click “New” in the upper-right corner
Select “File Upload” or “Folder Upload”, depending on your needs
Choose the file(s) or folder to upload
Use Command (macOS) or Control (Windows) to select multiple files.
Note
Only one folder can be selected at a time.
Click “Open” or “Upload”
close
Sharing Content with Others
You can share Box content in two primary ways:
Inviting collaborators to files or folders
Sending shared links
Adding Collaborators
A collaborator is someone you invite into a file or folder. The shared item will appear in their All Files view.
Hover over the row of the file or folder you want to share
Click “Share” on the right to open the Share window
Under “Invite People”, click “Add names or email addresses” and enter the collaborator’s details
Use the “Invite as” drop-down to assign a role
Type a message in the “Message” field (this step is optional and has a character limit of 750)
Click “Send”
Sending a Shared Link
Shared links allow quick access to content for both internal and external users.
Hover over the file or folder you want to share
Click “Copy Shared Link” on the right. The Shared Link window will open
Choose one of the following access levels:
People with the link: Anyone with the link can access. Add password protection, expiration, or restrict downloads if needed
People in your company: Only Box users with your organization’s email domain can access
Invited people only: Only invited collaborators can access the content
Choose allowed actions for recipients:
Can edit: Edit, comment, annotate, and download
Can view and download: View and download only
Can view only: View within Box but cannot download or edit
Copy and paste the link into your preferred app (email, messaging, etc.)
close
Managing Collaborators
When allowing other to access a folder, here is breakdown of permission levels:
To manage existing collaborators:
Click the three dots to the right of the folder
Hover over “More Actions”, then click “Manage Collaborators”
Note
When inviting a collaborator outside of FDU, the invitee will receive an email notification with access details. Permissions may vary depending on folder settings and account restrictions.
Upon request, we are able to provide an initial quote for your video project, giving you an estimated cost. For a more accurate estimate, please provide as many details as possible about the project. To initiate your video project and request a quote, please email danielpando@fdu.edu.
Note
Quoted prices serves as an estimate and the final price may exceed the initially quoted amount, depending on the actual hours worked to complete the project.
Invoicing After Project Completion
Once a project is completed, an invoice will be generated that accurately reflects the predetermined cost associated with the production. An e-mail will be sent to the initial contractor of the production, and a GL account number will be requested to be added to the invoice and sent to Finance to complete the transfer.
Note
Prior to the processing of any budget transfers, it’s mandatory for the invoice to receive written approval from the either the supervisor in charge of the GL budget code, or the project leader. This step ensures proper authorization and accountability.
Approved accessories, such as a case, screen protector, charging cable and plug, will be provided with the purchase of a new phone.
Tip
The form can be used to request a replacement for these accessories. Additionally, the form can be used to request the addition of an international plan, process the return of a cellular device, or report a lost or stolen cellular device.
Fairleigh Dickinson University’s Cellular Policy can be reviewed below:
This article offers a detailed, step-by-step guide, on how to change your NETID password directly from your Mac using the Jamf Connect and how to synchronize this updated NETID password with your Mac’s user account password.
Changing and Syncing your NET ID Password on your Mac
Click on the “FDU shield icon” located in the top right of your screen’s menu bar
Select “Change Password at FDU Identity“
Sign in to the “FDU Identity Portal” that opens up
Scroll to “Change My Password” section and enter your old password and new password in the appropriate fields. Then click the “Change My Password” button
You will see the password successfully changed in the red bar when successful. Click “Done“
Enter your “FDU NetID” and “Password” in the corresponding fields. Click “Sign In”
Enter your old password in the “Local Password” prompt and click “Sync” to synchronize the new password with your Mac’s login password
Note
You will need to reauthenticate your Office 365 apps and FDU-Secure.
Synchronizing NETID Password with your Mac Password
If you changed your NETID password outside of your FDU Mac, you will be prompted automatically to sync your password to your Mac’s password the next time you are connected to the internet. You will first need to log in to the machine using your old password and then proceed with the synchronization following the steps below.
The following dialog box will appear once you are connected to the internet automatically. Enter your “FDU NetID” and “Password” and click “Sign In”
Enter your old password in the “Local Password” prompt and click the “Sync” button to synchronize the new password with your Mac’s login password
Note
You will need to re-authenticate to your Office 365 apps and FDU-Secure.
As a staff or faculty member, you can request a Headset for the new Cisco IP Unified Communications system.
Use the link below to access the “CDW Premium Page” for Fairleigh Dickinson University Voice Services.
This site will provide information, product offerings, and contract pricing regarding headsets that are compatible with Cisco 8000 Series phones (Models 8811 and 8851). Follow the steps as noted on the web page to select a suitable headset.
After you obtain a quote for the specified equipment, you will need to complete the purchase process as usual.
Below you can download the manuals for the FDU Unified Communications Phone Systems from Cisco. The manuals provide information on how to use and access the voicemail features.
For users utilizing Model 8845 Video Phones in conjunction with the Helios Door Entry system, please refer to the documentation for Model 8851 for information on basic features. The Video Phones enable users to see who is requesting entry when notified by the Helios System.
Initial Voice Mail Set-Up from Your Own Campus Extension
From your desk phone:
Press the message button on your phone instrument.
Enter your Mailbox ID, this is your 4 digit extension.
Enter the temporary PIN 13579 followed by the # sign.
Listen to the prompts to set-up your voicemail greeting.
Initial Voice Mail Set-Up from Off Campus
When off campus, you can setup your voicemail system by dialing your campus’ assigned voicemail number:
Florham Campus: (973)-443-8100
Metropolitan Campus: (201)-692-7600
Vancouver Campus: (604)-648-4485
Follow these instructions to log into and setup your voicemail:
Press 1 to access the voicemail system.
When prompted enter your ID, this is your 4 digit extension.
Enter the temporary PIN 13579 followed by the # sign.
Listen to the prompts to set-up your voicemail greeting.
Accessing Voicemail On Campus
Press the message button on your phone instrument.
Enter your Mailbox ID, this is your 4 digit extension.
Enter your 5 digit PIN followed by the # sign.
Accessing Voicemail Off Campus
You can access your voicemail when off campus by dialing your campus’ assigned voicemail phone number:
Florham Campus: (973)-443-8100
Metropolitan Campus: (201)-692-7600
Vancouver Campus: (604)-648-4485
Follow these instructions to log into your voicemail:
Press 1 to access the voicemail system.
When prompted enter your ID, this is your 4 digit extension.
Enter your 5 digit PIN followed by the # sign.
Accessing Your Voicemail from Another Extension
Dial the voicemail extension 8100, 7600 or 4485.
Press 1 to access the voicemail system.
When prompted enter your ID, this is your 4 digit extension.
Enter your 5 digit PIN followed by the # sign.
Changing Voicemail Messages & Passcodes
When you first set up your mailbox, you record a greeting, your name and select a passcode. The set-up options allows you to change these at any time. You should update your greeting(s) regularly to let callers know whether you’re in or out of the office. Your voicemail message should always be appropriate, so callers will feel confident in leaving messages. And, of course, boxes should be emptied daily, if not more frequently.
When the University or your department closes you should always redo your voicemail message making the caller aware that the University or your department is closed.
The voicemail system will prompt you as to how to make changes. When you are in doubt about what to do next, you can download the manuals for the new FDU Unified Communications Phone Systems from Cisco. The manuals provide information on how to use and access the voicemail features.
If you are NOT forwarding your office phone, you should create a new voice message similar to the messages below and establish a pattern and practice of checking your voicemail regularly.
Please update your outgoing message to reflect an appropriate out of office message.
Voicemail Forwarding Suggested Message
Below is a recommended Voicemail Message:
“You’ve reached the voicemail of [NAME, TITLE/DEPT]. I am out of the office today but will be checking my voicemail periodically. You can also reach me via email at [YOUR EMAIL]@fdu.edu. Thank you.”
Welcome to Fairleigh Dickinson University. As a new campus community member, one of your priorities will be gaining access to FDU NetID. With an FDU NetID, you can access various IT resources, including Microsoft 365. Depending on your role within the University, you will either be creating an account or claiming an account that has already been created for you. Please follow the steps below which applies to you.
New Student
For new FDU students, follow these instructions to claim your FDU NetID:
New Faculty, Staff Member Temporary Employee, or On-Campus Contractor
If you are a new Faculty, adjunct Faculty, Staff member, Temporary employee, or Contractor who works on campus and require a NetID, follow these instructions to claim your FDU NetID:
If you are entitled to an FDU NetID account and either do not fall under any of the categories above or attempted to claim their NetID and received a message that your NetID has not been created, follow these instructions to claim your FDU NetID:
The OIRT Computing Services department is responsible for supporting the technology solutions used within our classrooms and event spaces.
However, in many cases where we are called to resolve an issue, we find that the technology has been tampered with. This creates disruption for the faculty or staff member attempting to teach or present information.
Important
No wires or connections should be disconnected or moved by anyone other than IT staff.
Tips to Ensure a Smooth Presentation Experience
Do not make changes to technology setups without contacting SAMI Support.
Many support requests stem from unauthorized changes made by a previous presenter. When individuals troubleshoot on their own—such as swapping out cables or unplugging devices—it can impact subsequent users. Always contact the SAMI Support Desk for assistance.
Request additional equipment at least three business days in advance.
This includes (but is not limited to) Zoom carts, projectors/screens, PA systems, and microphones. Early requests give us time to source the necessary equipment and prevent surprises. If requested equipment is not compatible with your space, we can suggest alternatives.
Note
Do not remove equipment from another room. This may disrupt other planned presentations.
Let us know if you plan to use personal equipment
We can help ensure compatibility and suggest alternatives if needed.
Coordinate early for events requiring outside technology.
If your event involves third-party technology, contact OIRT Computing Services as early as possible. We can arrange a meeting between the requestor, vendor, and event participants to determine space and equipment suitability—ideally before committing to a venue or signing contracts.
Tip
This is especially important for large-scale events like end-of-year ceremonies, external rentals, or high-visibility gatherings.
Following these guidelines helps ensure that our shared spaces remain functional and ready for everyone.
For more detailed information, download on to our full Presentation Guide:
FDU has a number of technology enhanced classrooms that are capable of video/computer projection. To find out if your classroom is on this list please review the charts below for your campus:
Metropolitan Campus Technology Chart
Tip
Scroll left to right on the chart if viewing on a Mobile device or in Desktop preview mode. To view the full chart, rotate your Mobile device into landscape mode. On Desktop, press the full screen button (icon with expanding arrows inside of a circle) on the top right of the article header.
Building Name
Projector Enabled Rooms
DVD/VCR Combo Rooms
Speaker Enabled
HDMI Jack
Smartboard
Becton Hall
202
Yes
Yes
Laser
Becton Hall
205
Yes
Yes
Laser
Becton Hall
208
Yes
Yes
Laser
Becton Hall
302
Only DVD
Yes
Yes
Yes
Becton Hall
304
Only DVD
Yes
Yes
Yes
Becton Hall
305
Yes
Yes
Becton Hall
306
Yes
Yes
Becton Hall
402
Yes
Laser
Becton Hall
403/404 (LED Screen)
Yes
Yes
Yes
Yes
Becton Hall
405
Yes
Laser
Becton Hall
406
Yes
Laser
Becton Hall
407
Yes
Laser
Becton Hall
408
Yes
Laser
Becton Hall Conference Room
307
Dickinson Hall
1104
Yes
Yes
Laser
Dickinson Hall
1128
Yes
Yes
Yes
Dickinson Hall
1129
Yes
Yes
Yes
Dickinson Hall
1142
Yes
Yes
Laser
Dickinson Hall
1143
Yes
Yes
Yes
Dickinson Hall
1144
Yes
Yes
Laser
Dickinson Hall
1148
Yes
Dickinson Hall
1149
Yes
Yes
Yes
Dickinson Hall
1150
Yes
Yes
Yes
Dickinson Hall
1151
Yes
Yes
Laser
Dickinson Hall
1152 (LED Television)
Yes
Yes
Yes
Dickinson Hall
1153 (LED Televison)
Yes
Yes
Yes
Dickinson Hall
1165 (LED Televison)
Yes
Yes
Yes
Dickinson Hall
1170 (LED Television)
Yes
Yes
Yes
Dickinson Hall
2135
Yes
Yes
Laser
Dickinson Hall
2137
Yes
Yes
Yes
Dickinson Hall
2177
Yes
Yes
Laser
Dickinson Hall
2178
Yes
Yes
Laser
Yes
Dickinson Hall
2230
Yes
Yes
Laser
Dickinson Hall
2249
Yes
Yes
Yes
Dickinson Hall
2262
Individual DVD & VCR
Yes
Dickinson Hall
2263
Yes
Laser
Dickinson Hall
4468
Yes
Laser
Dickinson Hall
4469
Yes
Yes
Laser
Dickinson Hall
4473
Yes
Yes
Laser
Dickinson Hall
4475
Yes
Yes
Laser
Dickinson Hall
5504
Yes
Yes
Laser
Dickinson Hall
5506
Yes
Yes
Laser
Dickinson Hall
5509
Laser
Dickinson Hall
5520
Yes
Laser
Dickinson Hall
5523
Yes
Yes
Dickinson Hall
5529
Yes
Yes
Laser
Dickinson Hall
5534
Yes
Yes
Laser
Dickinson Hall – Conference Room
1191
Laser
Dickinson Hall – Conference Room
2245
Yes
Laser
Dickinson Hall – Continuing Education
1127
Yes
Yes
Laser
Dickinson Hall (Lab A)
2163
Yes
Laser
Dickinson Hall (Lab B)
2164
Yes
Laser
Giovatto Library
Writing Lab
Yes
Laser
Giovatto Library
WLB 3
Yes
Yes
Laser
Giovatto Library
WLB 4
Yes
Yes
Laser
Giovatto Library
Auditorium
Yes
Yes
Giovatto Library
WLB 1 (LED Screen)
Yes
Yes (TV Speakers)
Giovatto Library
WLB2 (LED Screen)
Yes
Yes (TV Speakers)
Multipurpose Room
Yes
Yes
Yes
Laser
Muscarelle
105
Yes
Yes
Laser
Muscarelle
202
Yes
Yes
Muscarelle
203
Yes
Yes
Laser
Muscarelle
204
Yes
Laser
Muscarelle
205
Yes
Yes
Yes
Muscarelle
206
Yes
Yes
Yes
Muscarelle
207L
Yes
Laser
Muscarelle
207R
Yes
Yes
Yes
Robison Annex
100
Yes
Yes
Laser
Robison Annex
101
Yes
Yes
Laser
Robison Annex
203
Yes
Yes
Yes
Robison Annex
204
Yes
Yes
Yes
Robison Annex
205
Yes
Yes
Laser
Robison Annex
300
Yes
Laser
Robison Annex
301
Yes
Yes
Robison Annex
303
Yes
Laser
Robison Annex
304
Yes
Yes
Laser
Robison Annex
305
Yes
Laser
Robison Hall
23B
Yes
Yes
Laser
Robison Hall
501
Robison Hall
503
Laser
Rutherford Room
Yes
Yes
Yes
Laser
University Hall Theatre
LED Screen
Yes
University Hall
Front Lab
Yes
Laser
University Hall
Back Lab
Yes
Laser
University Hall
Multimedia Lab
Yes
Yes
Laser
Williams Hall
Yes
Williams Hall
102
Yes
Yes
Laser
Williams Hall
107
Yes
Yes
Laser
Williams Hall
201
Yes
Laser
Williams Hall
202
Yes
Laser
Williams Hall
203
Yes
Laser
Williams Hall
206
Yes
Laser
Williams Hall
207
Yes
Yes
Wilson Auditorium
Yes
Yes
Yes
Laser
close
Florham Campus Technology Chart
Tip
Scroll left to right on the chart if viewing on a Mobile device or in Desktop preview mode. To view the full chart, rotate your Mobile device into landscape mode. On Desktop, press the full screen button (icon with expanding arrows inside of a circle) on the top right of the article header.
The FDU computer labs provide a safe and welcoming study space for our users. The computer labs provide access to technological resources such as: current specialty software applications for a variety of majors, access to online libraries for research, internet access, and print services. Our labs are also available to faculty for instruction in both technology-intensive and non-intensive majors. The computer labs are also used as a venue for various workshops and university programs. The lab hours are flexible to meet the needs of both resident students and commuter students. The lab operations also provide on-campus work opportunities for our students to develop their skills and offer customer service and technical support to our campus community.
FDU Computer Labs Provide:
A conducive learning space that enables students to develop the skills necessary for collaboration and teamwork.
Hands on experience with current hardware and software applications used for a variety of majors.
Students access to the same technology resources for the purposes of research, printing, and producing professional work.
Customer service and on-site technical support from our student staff.
Access and opportunities for students to develop their computer skills.
Interactive learning opportunities between faculty and students; theory and application in one setting under the supervision of faculty with the support of student staff.
Due to the increasing demand of the academic computer facilities, a general document detailing the policies for computer lab reservations has been outlined. The purpose of the computer lab reservation policy is to provide faculty, staff and students with equitable access to campus computing lab resources.
Most computer labs are used as classrooms, and they are available for open-access use when there are no classes in session.
Computing Services Instructional Labs
There are currently four Computing Services computer labs which can be used for classroom instruction on each campus.
Florham Campus (Dreyfuss Building):
D206
D207
D208
D209
Metropolitan Campus:
Dickinson Hall: DH2163, DH2164, DH2165
University Hall: UH Front Lab (UH22), UH Back Lab (UH28)
Multimedia Labs
There are three multimedia labs: two on the Florham Campus and one on the Metropolitan Campus.
Florham Campus:
D211 — Animation Lab (Dreyfuss Building)
ZEN110 — Graphic Design Lab (ZEN Building)
Metropolitan Campus:
Becton Hall Room 403 — Multimedia Lab (MML)
The multimedia labs are primarily used for courses offered by the FDU School of Arts.
Equipment
All labs used for classroom instruction and general use are equipped with a LaserJet printer and data projector.
The Animation Lab is equipped with 3D printers.
All multimedia labs are equipped with ZOOM capability to support hybrid instruction.
If you have any questions regarding the lab reservation policy, please contact Genesis Lopez at g.lopez@fdu.edu
Computing Services has multiple computer labs in our New Jersey Campuses for classroom instruction and student use.
*Lab hours may vary. Visit our Instagram > for the latest lab hours.
Computing Services Instagram QR Code
close
Florham Campus
Dreyfuss Building
Room
Mon
Tue
Wed
Thur
Fri
Sat
Sun
Dreyfuss Building
8AM- 11PM
8AM- 11PM
8AM- 11PM
8AM- 11PM
8AM- 5PM
10AM- 5PM
12PM- 9PM
Dreyfuss 212, 213
8AM- 11PM
8AM- 11PM
8AM- 11PM
8AM- 11PM
8AM- 5PM
10AM- 5PM
12PM- 9PM
Dreyfuss211
10PM- 1AM
10PM- 1AM
10PM- 1AM
10PM- 1AM
10PM- 1AM
12PM- 5PM
12PM- 5PM
Computer Labs
D206
D207
D208
D209
Laptop Work Stations (Monitors Only)
D212
D213
Animation Lab
D211
close
Zen Building
Room
Mon
Tue
Wed
Thur
Fri
Sat
Sun
Zen 110, 242
8AM- 8PM
8AM- 8PM
8AM- 8PM
8AM- 8PM
8AM- 8PM
10AM- 5PM
12PM- 5PM
Phone:
(973)-443-8689
close
Metropolitan Campus
Dickinson Hall – Hackensack
Room
Mon
Tue
Wed
Thur
Fri
Sat
Sun
Dickinson Hall
8AM- 11PM
8AM- 11PM
8AM- 11PM
8AM- 11PM
8AM- 5PM
CLOSED
CLOSED
Rooms:
Lab A (DH2163)
Lab B (DH2164)
Lab C (DH2165)
Phone:
(201)-692-7111
close
University Hall – Teaneck
Room
Mon
Tue
Wed
Thur
Fri
Sat
Sun
University Hall
8AM- 11PM
8AM- 11PM
8AM- 11PM
8AM- 11PM
8AM- 5PM
10AM- 6PM
2PM- 10PM
Rooms:
Front Lab (UH 22)
Back Lab (UH 28)
UH Side Lab*
Phone:
(201)-692-7112
*Temporarily Closed
The UHall Side lab is currently closed to Students and Faculty for the fall semester for internal use.
Dickinson Hall Lab C is always available to students during lab hours.
close
Student Union Building – Teaneck
Rooms:
Multipurpose Room 135
Phone:
(201)-692-2222
Tip
The Student Union Building Multipurpose Room will be locked at all times. To gain access to the Student Union Building computer lab, you will need to contact Public Safety at (201)-692-2222.
close
Note
Computer Lab hours of operation are subject to change based on utilization throughout the semester. Lab computers are available on a first-come-first-serve basis unless reserved for classes. Class reservations are posted at the lab entrances.
As technology evolves and new features are offered, there may be times when unwanted or unexpected things happen. This page is dedicated to providing some tips, tricks, and recommendations to circumvent these undesired circumstances.
Normalize Sound Levels – Windows
Microsoft Windows 10 automatically adjusts audio levels between different applications. This can affect the level of sounds from various applications depending on what program is currently being used. This feature can be turned off using the instructions below.
Instructions
From the Sound Icon in your task bar, single right-click
Click “Sounds“
Click “Communications” tab.
Select the “Do nothing” radial button
Click “Apply”
Click “OK”
close
Adjust Microphone Settings – Windows
To ensure clear and audible audio in virtual meeting applications, such as Zoom, please follow the instructions below.
Instructions
Right-click the Audioicon in the system tray portion of the task bar
Click “Sounds”
Click “Recording”
Note
Not all options may be visible.
Right Click on “Microphone Array” and select “Properties”
Click the “Advanced” and un-check “Enable Audio Enhancements”
Click “Apply”
Click “OK”
close
Adjust Power Options – Lenovo Laptops
Default power profiles in Windows 10 are configured to balance performance and battery life. To change these settings, please follow the steps below.
Instructions
Click on Start, and then click “Settings“
Click on “System“
Select “Power & Sleep“
To modify power settings while the laptop is plugged in or on battery power, modify the below options
Note:
Selecting higher times may result in shorter battery life
For additional power settings, such as the laptop lid and power button settings, click Additional power settings
Note
Depending on window size, this option may be located towards the bottom or on the right side of the screen.
Select either “Choose what the power buttons do” or “Choose what closing the lid does“
The options below will allow modifying the effects of pressing the power button and closing the lid
Note
Setting DO NOTHING when closing the lid can lead to drastically less battery life as well as overheating when the laptop is placed inside a bag or briefcase.
close
Restarting A Computer
Rebooting a device is highly encouraged as it will help keep the system running at peak performance. The benefits of a weekly reboot include:
Mitigate vulnerabilities to cyber-attacks by applying critical updates
Prevent performance degradation
Prevent application memory faults
Effectively apply system policies
To restart a device, follow the instruction below.
Tip
Make sure any open application is saved and closed before a restart is performed. This includes applications like Outlook, Word, Excel and any other applications that may be opend.
Instructions for Windows
Click the Start bottom on the bottom left hand side of the task bar
Click the “Power” button
Click “Restart”
Note
Clicking “Shutdown” will not always properly apply updates or produce the desired effect. Clicking “restart” is the recomended option.
close
Instructions for macOS
Click the “Apple” at the top left-hand side of your screen
Effective Date: 11/07/2023 Last Revision: 11/01/2013
Select employees of Fairleigh Dickinson University may be required to engage with confidential University data. The FDU Confidentiality Agreement and Security Policy defines your obligations under Federal and State guidelines to preserve the security and confidentiality of this information.
Confidentiality Agreement and Security Policy
Fairleigh Dickinson University regards the security and confidentiality of data and information to be of utmost importance. Each individual granted access to electronic and/or hard copy data holds a position of trust and must preserve the security and confidentiality of the information to which he/she is granted access to. Therefore, it is the intent of this policy to ensure that University data, in any format, is not divulged outside of Fairleigh Dickinson University without explicit approval to do so by an Associate Vice-President of the University or higher who has responsibility for the data in question. As such, the University requires all users of data to follow the procedures outlined below:
Policy on Confidential Information
Users of University data are required to abide by all applicable Federal and State guidelines and University policies regarding confidentiality of data, including the Family Education Rights and Privacy Act (“FERPA”) and, as applicable, The Health Insurance Portability and Accountability Act of 1996 (“HIPAA”). For more information, see: FDU’s General Confidentiality Policy, FERPA and HIPAA.
Confidential Information shall be defined as:
regarding student, faculty or staff: any personally-identifiable records, financial records (including social security and credit card numbers), health records; contracts, research data; alumni and donor records; personnel records other than an individual’s own personnel record;
regarding the University: University financial data; computer and system passwords, University issued PINS, University proprietary information/data; and
any other information for which access, use, or disclosure is not authorized by: 1) federal, state, or local law; or 2) University policy.
The individual receiving the Confidential Information shall have no obligation under this Policy with respect to Confidential Information which:
is or becomes publicly available without breach of this Policy by the recipient;
is rightfully received by the recipient without obligations of confidentiality; or
is developed by the recipient without breach of this Policy; provided, however, such Confidential Information shall not be disclosed until thirty (30) days after written notice of intent to disclose is given to the University officer who has responsibility for the data in question, along with the asserted grounds for disclosure;
is disclosed in accordance with any “whistle blower” action as provided in the U.S. False Claims Act, the New Jersey Conscientious Employee Protection Act (“NJCEPA”), or similar legislation. (Brief overview of the NJCEPA is available here.
Any individual with authorized access to the Confidential Information is given access solely for the business of the University and must not divulge the Confidential Information outside of the University except for University business requirements approved by the President of the University or the division head responsible for the data in question. Specifically, with respect to Confidential Information, individuals must:
Access Confidential Information solely in order to perform his/her job responsibilities.
Not seek personal benefit or permit others to benefit personally from any Confidential Information that has come to them throughout their work assignments.
Not make or permit unauthorized use of any Confidential Information in the University’s information system or other records.
Not enter, change, delete or add data to any information system or files outside of the scope of their job responsibilities.
Not include or cause to be included in any record or report, a false, inaccurate or misleading entry known to the user as such.
Not alter or delete or cause to be altered or deleted from any records, report or information system, a true and correct entry.
Not release Confidential Information other than what is required in completion of job responsibilities which is consistent with this Policy.
Not exhibit or divulge the contents of any record, file or information system to any person unless it is necessary for the completion of their job responsibilities.
It is the individual’s responsibility to immediately report, as outlined under “Information Security Breach and Violation Reporting” at the end of this Policy, if the individual has violated this Policy. Additionally, given the potential harm that the University may suffer with the release of any Confidential Information, all employees are strongly encouraged to report any suspected violation of this policy or any other action, which violates confidentiality of data, as outlined at the end of this policy.
Security Measures and Procedures
All users of University information systems, including Datatel, MS File shares and FDU Office 365 email accounts, are supplied with an individual user account to access the data or systems necessary for the completion of their job responsibilities. Users of the University information systems are required to follow the procedures outlined below:
All transactions, processed by a user ID and password, or PIN, are the responsibility of the person to whom the user ID was assigned. The user’s ID, password, and PIN must remain confidential and must not be shared with anyone.
Using someone else’s user ID, password or PIN is a violation of policy, no matter how it was obtained.
Your user ID, password or PIN provides access to information that has been granted specifically to you. To reduce the risk of shared passwords – remember not to post your password or PIN on or near your workstation or share your password or PIN with anyone.
It is your responsibility to change your password immediately if you believe someone else has obtained it.
NOTE: If you need your Password or PIN changed, please create a SAMI Support ticket via SAMISupport.fdu.edu. If you are unable to log into SAMI Support via your Net ID username and password, please use the public form.
Access to any student or employee information (in any format) is to be determined based on specific job requirements. The appropriate Department Chair, School Director, Department Director/Manager, Dean, Provost, and/or Vice President is responsible for ensuring that access is granted only to authorized individuals, based on their job responsibilities. Written authorization must be received by the Computer Center prior to granting system access.
You are prohibited from viewing or accessing additional information (in any format) unless you have been authorized to do so. Any access obtained without written authorization is considered unauthorized access.
In order to prevent unauthorized use, the user shall log off of all applications that provide access to confidential information, or lock their computer when leaving their workstation. This is especially important during breaks and lunch. Unless there is a specific business need, all workstations should be shut down at the end of the workday.
NOTE: If you require assistance in establishing your workstation password, please access the screensaver documentation or contact SAMI Support Desk.
If you have any reason to believe your password or PIN has been compromised or revealed inadvertently, you should change your password and immediately notify one of the individuals as outlined under “Information Security Breach and Violation Reporting” at the end of this policy.
NOTE: All University’s computer system will periodically prompt you to change your password.
Upon termination or transfer of an employee, Human Resources will notify University Systems and Security, who in turn will notify the appropriate areas in the Computer Center.
Generally, students, temporary employees and consultants should not have access to the University record system. Written approval by the Department Chair, School Director, Department Director/Manager, Dean, Provost, and/or Vice President in charge of the respective area is required if it is determined that access is required. The student, temporary employee or consultant is to be held to the same standards as all University employees, and must be made aware of their responsibilities to protect student and employee privacy rights and data integrity. Written authorization must be received by the Computer Center prior to granting system access.
You agree to properly secure and dispose of any outputs or files you create in a manner that fully protects the Confidential Information.
Additionally, I understand that if granted access to process transactions via Datatel data entry screens, any information I enter or change will be effective immediately. Accordingly, I understand that I am responsible for any changes made using my ID.
I understand that my access to University data is for the sole purpose of carrying out my job responsibilities and Confidential Information is not to be divulged outside of The University, except as previously stated. Breach of confidentiality, including aiding, abetting, or acting in conspiracy with any other person to violate any part of this policy, may result in sanctions, civil or criminal prosecution and penalties, employment and/or University disciplinary action, and could lead to dismissal, suspension or revocation of all access privileges. I understand that misuse of University data and any violation of this policy or the FERPA, HIPAA or GLB policies are grounds for disciplinary action, up to and including dismissal. This Agreement shall not abridge nor supersede any rights afforded faculty members under the Faculty Handbook.
Information Security Breach and/or Policy Violation Reporting
If you suspect an Information Security Data Breach or a violation of this policy, report such an event to your department chair or staff supervisor and send an immediate email to violation@fdu.edu. If you do not have immediate access to email, contact the SAMI Support Desk; do not provide details but request a ticket be opened with University Systems & Security due to an information security data breach or policy violation requesting an immediate callback. When practical, also send an email to violation@fdu.edu.
This article is intended for students, staff, and faculty who wish to connect their non-PC, IoT, gaming, or streaming devices to the FDU-Wireless network. Devices that require registration include gaming consoles (such as Xbox, PlayStation, Switch) and streaming devices (like Amazon Fire Stick, Apple TV, and Roku).
Note
FDU-Wireless is only for non-PC, IoT, gaming, or streaming devices that do not support WPA2 Enterprise authentication or features a web browser.
Registering a Non-PC Device for use on FDU-Wireless Network
Use the link and directions below to register and manage wireless network access for your non-PC devices.
Sign in into FDU MyDevices portal using the link below using your FDU NetID. Make sure to check “I agree to the terms and conditions” button before clicking “Sign On“
Enter your device type and your device’s MAC Address into the corresponding text boxes. An optional description may be entered for your device as well. Your device’s MAC Address must be entered to register the device and continue. Refer to your devices manufacture for instructions on how to obtain the devices MAC Address. When finished, select “Submit“
Tip
Some devices have their MAC Address labeled alongside it’s Serial number.
Your device should now be listed on MyDevices Portal and allowed to connect to the FDU-Wireless network. It may be necessary to select the FDU-Wireless network on your device or restart your device before successfully connecting to the wireless network
Note
Once your device is added, the status will always remain as Pending. However you will be able to connect the device to FDU-Wireless regardless of this status.
Make the appropriate connections to the back of the all-in-one.
Plug in the power cable to the power port on the back of the all-in-one.
A physical network connection is only required if you do not want to or can not use wireless.
Both the keyboard and mouse can be plugged into any USB port.
Turn the PC on and sign in as normal.
Connecting to Wi-fi (Skip if Using a Physical Network Cable)
Click on the network icon on the bottom-right hand of the Start bar near the system clock.
A list of available networks will populate. Select your home wireless network.
Select your network and click “Connect“.
Enter the network key for your wireless router. This can sometimes be located on the side or bottom of your router and/or modem. Click “Next“.
Connecting to VPN from Home
Click on the arrow on the bottom right hand of the Startbar near the system clock and right-click on the “Cisco VPN Access” icon. On the pop-up menu, click “Connect“.
If this is the first time connecting to VPN service please enter the text below as shown into the VPN field and click “Connect“.
Enter your full NetID information and click “Ok“.
Once a successful connection is made a prompt will appear and the icon for the Cisco VPN Access in the system try will appear with a lock.
Visitors can get online in just three quick steps using a browser-based portal with a single click to accept the guest policy on New Jersey Campuses.
The FDU-Guest network provides fast, on-campus public internet access for users who do not require access to internal FDU resources.
How to Connect to FDU-Guest WiFi
Navigate to your devices WiFi settings and select the SSID Network: “FDU-Guest”
A Captive Portal will open automatically
Note
If your web browser is already open, it will be redirected automatically to the Captive Portal.
On the Captive Portal page, review and accept the User Acceptable Policy to complete your connection
Once the policy is accepted, your device will be connected to the FDU-Guest network.
Network Access Limitations
Note
The FDU-Guest network provides public internet access only. It does not allow access to FDU internal systems, file servers, or other restricted university resources.
For access to FDU network resources, use our secure connection methods or contact SAMI Support for assistance.
FDU-Secure uses current encryption standards to connect to the FDU network via secure wireless traffic. As a result, FDU-Secure is the preferred method of accessing the on-campus Wireless network if you are Faculty, Student, or Staff member. To connect to the FDU-Secure Wireless Network, you will need an FDU NETID (username@fdu.edu or username@student.fdu.edu).
Below are the necessary steps to connect to the FDU-Secure Wireless Network, specified for various device types:
Windows
Select the “Internet Symbol” located at the right-hand side of the “task bar”
Select “FDU-Secure” from the pop-up menu
Enter “FDU Net ID and Password” and press “OK”
When prompted with “Continue connecting?” press “Connect”
close
macOS
Select the “Wi-Fi Symbol” located at the right-hand side of the “menu bar”
Select “FDU-Secure” from the drop-down menu
Enter “FDU Net ID and Password” and press “OK”
When prompted with “Verify Certificate” press “Continue”
close
iOS
Select the “Wi-Fi” tab located in the “Settings” app
Select “FDU-Secure” from the list of available networks
Enter “FDU Net ID and Password” and press “Join”
When prompted with “Certificate” press “Trust”
close
Android
Select the “Connections” tab located in the “Settings” app
Press “Wi-Fi”
Select “FDU-Secure” from the list of available networks
Enter “FDU Net ID and Password”
Press “CA certificate” then press “Use System Certificates” drop the drop down menu
Input “fdu.edu” in the domain field and press “Connect”
The following guides provide an overview of connecting to Fairleigh Dickinson University’s wireless network. Whether you’re a guest, staff, or student, using FDU-owned or personal devices, these articles provide essential steps for secure and efficient connectivity across various equipment, including non-PC and mobile devices.
Connect to FDU-Secure Wi-Fi
Follow these steps to connect to the FDU-Secure wireless network, which adheres to the latest encryption standards.
Fairleigh Dickinson University vigorously enforces United States copyright law. When utilizing the FDU Local Area Network or FDU provided Internet Access, you are required to adhere to all existing US copyright laws.
Multimedia Services operates as a cost recovery center, ensuring our pricing remains competitive and significantly lower than external video production studios, without compromising on production value.
Our pricing structure is straightforward: video production services are offered at a flat rate of $150.00 per hour, making high-quality production accessible and affordable.
Post Production
When it comes to post-production, our rates are equally transparent, set at a flat rate of $50.00 per hour. The total time required for editing a project can vary, but on average, it ranges between 20 to 30 hours, depending on the complexity of the project, its duration, and the number of revisions needed during the preview stages.
ADA Captioning
In line with ensuring all online distributed videos are ADA compliant, our services include closed captioning and transcription. While platforms like YouTube automatically generate captions, they might not always be perfectly accurate. For videos requiring 100% accuracy in transcription, or for content hosted on platforms other than YouTube, we offer professional transcription services at an additional cost to meet all accessibility standards.
CrashPlan Backup will send users an email alert notifying them of any incomplete backups of their devices.
The CrashPlan Backup email alert will be sent from “CrashPlan <noreply@crashplan.com>”
The Subject line of the email will be labeled with: “[External]Critical: [Name of Device] not backed up“
Backup Alert
You will receive an alert when your computer hasn’t backed up to CrashPlan for 5 calendar days. The email will look like the example below:
CrashPlan Backup Alert Email Notification
What to do if you get a backup alert
After receiving a CrashPlan Backup alert email, you should locate the device the email specifies in need of backup. The CrashPlan Backup device name will be listed in the Subject: line and Computer Name: line of the CrashPlan backup alert email.
For Windows Devices
To locate the name of a CrashPlan Backup device:
Click the CrashPlan Backup icon in the Windows System Tray, also referred to as the notification area.
CrashPlan Backup icon
Click “Run Backup now“
Tip
The Windows System Tray or notification area is usually located on the bottom right of the Windows taskbar, next to the displayed digital clock.
Ensure the CrashPlan backup application displays the same name as the CrashPlan Backup alert email you received.
close
For macOS Devices
After locating the correct specified device stated in the CrashPlan backup alert email, force a backup of the device by performing the following:
Click the “CrashPlan Backup” System Tray or macOS menu bar Icon
CrashPlan Backup Icon
Click “Run Backup now“
Note
The backup may take some time to complete. This depends on the length of time since CrashPlan Backup’s last completed backup and the amount of new data that needs to be backed up.
CrashPlan is a backup agent that will back up all data on a university device under the primary owner’s profile. The backup sets can be used for restoring data to a machine, whether it has been reformatted, replaced, or compromised. This document will outline the steps needed to install, activate, and restore data to a new or existing device.
CrashPlan is required on all University provided desktops and laptops to backup all University Business data to prevent data loss.
Who Can use CrashPlan?
CrashPlan is presently licensed for full-time faculty and full-time staff only. The University mandates CrashPlan for proper data security practices. If a user has personal data that they wish to exclude from being backed up, a folder labeled “Personal Documents” can be found and utilized in your “Documents” folder. This folder and its contents will be ignored by CrashPlan when your system is being backed up.
Personal Documents folder locations:
Windows PC
C:\users\username\Documents\Personal Documents\
macOS
/users/username/documents/Personal Documents/
Tip
If the Personal Documents folder does not exist in your Documents folder, you can manually create it and the folder will be automatically ignored by CrashPlan.
Is My Data Secure?
CrashPlan uses AES-256 encryption is used when storing your backups and can only be accessed by theCrashPlan account owner and administrators.
What is Backed Up?
All data found in a user profile will be backed up by CrashPlan.
Location of User Profile:
Windows PC
C:\users\UserName\
macOS
/users/username/
Warning
Any data not stored in the user profile will NOT be backed up by CrashPlan. It is highly encouraged to store university business data within your user profile.
To install CrashPlanon your Windows PC, please follow the instructions below.
Note
CrashPlan is being automatically deployed to all systems owned by Faileigh Dickinson University.
Before Installing CrashPlan, you must be logged in as the owner of the machine using your NetID Credentials.
Open FDU Self Service Portal for Software on your University PC
Click on CrashPlan Backupand then click “Install” on the right-hand side
Note
It could take several minutes for the client to make the first connection and start the first backup.
The entire process will take approximately 5-7 minutes, depending on your internet speed. Once CrashPlanis installed, your account is automatically provisioned in the CrashPlansystem, and your backup will begin shortly.
To install CrashPlan on your macOS device, please follow the instructions below.
Note
CrashPlan is being automatically deployed to all systems owned by Faileigh Dickinson University.
Locate the FDU Self Service Portal in your applications folder or locating the icon on your dock
Locate CrashPlan Backup and click “Enroll”
After the package installs, you will be prompted to enter your FDU email address and then click “OK“
Note
It could take several minutes for the client to make the first connection and start the first backup.
The entire process will take approximately 5-7 minutes, depending on your internet speed. Once CrashPlan is installed, your account is automatically provisioned in the CrashPlan system, and your backup will begin shortly.
This process is used when someone will be assigned a second device and wishes to have it backed up or if the CrashPlan needs to be re-installed on the same device. Because an account already exists, it cannot be provisioned automatically. It must be manually setup either to replace an existing device or create a new backup set on the second computer.
Note
In order to proceed, CrashPlan must be installed prior to continuing, please refer back to the Install instructions for your operating system from the CrashPlan User Guide. A link is found at the bottom of this page.
Tip
A backup set is CrashPlan’s way of describing the backup configuration and what files are being backed up.
Click on the CrashPlan app in the system tray (PC) or Menu bar (macOS) and then click “Setup Device”
If prompted, log in to the FDU NetID Portal and proceed through the FDU single sign-on process
Click “Replace Existing”
Click “Start” to continue with the replace existing device process
Select the device from the list you are replacing and click “Continue”
Click “Select Files” on the following window
Select and Choose which files you wish to replace by placing a checkmark next to each. When finished, click “Restore Files”
The next window will allow you to select how you wish to restore your files. Make your selections and click “Go”
The next window will display download progress for the restore process. You can continue forward by clicking “Continue” at the bottom
The next window Downloads the Files to your device. When the transfer is completed, click “Next”
Tip
You can close this window and continue working or you can click transfer more files and repeat the steps for additional files. This will extend the time it needs to restore.
If you are unsure if you have CrashPlan installed and backing up your system, this quick guide will help give you some comfort.
Click on theCrashPlan icon from the system tray on Windows and the menu bar on macOS
CrashPlan Icon
The Progress will be displayed like in the Figure below
Note
Depending on your backup size, this could take anywhere from a few minutes to a few days. CrashPlan will continue to run and backup in the background. After the first successful backup, incremental backups will occur.
CrashPlan allows you to manage your backup sets. If you want to review your backup set or request assistance, please contact the SAMI Service Desk to initiate a support request.
Accidentally deleted or unable to find a file? CrashPlan can help. Please follow the following guidelines in restoring lost or previous versions of files.
Click the CrashPlan System Tray or macOS menu bar Icon
CrashPlan Icon
Left-click on the gear symbol and left-click on “Open CrashPlan….”
If prompted, log in to the FDU Single sign-on Portal and proceed through the FDU DUO Multifactor authentication procedures
Click “Restore Files”
Select the device you wish to restore from
Note
If you have more than one backup device, please select the device from where you want to restore the file from.
You can select a date range from when you wish to restore from on the right-hand side
Navigate to the folder(s) and/or file(s) you wish to restore and place a check next to each one
Click “Restore Files”
Select how CrashPlan will restore your files. Click “Go” when finished
Note
Above are the recommended options for restoring files, this will help you find them more easily.
The time it takes to restore your files will depend on how much data is being restored, available system resources, and available bandwidth.
Using CrashPlan you can create backup sets that will back up your data to additional devices utilizing a schedule. This is useful to have immediate access to critical files in the event of data loss.
This guide is only needed if you wish to have a local backup of your data.
Note
If you schedule multiple backup sets to run at specific times and the backup sets go to the same destination, ensure that these times do not overlap. This ensures good backup performance.
Click the CrashPlan System Tray or macOS menu bar Icon
CrashPlan Icon
Left-click on the gear symbol and left-click on “Open CrashPlan….”
If prompted, log in to the FDU Single Sign-on Portal and proceed through the FDU DUO Multi-factor authentication procedures
From the CrashPlan console window, click the “Dropdown Arrow” symbol next to your device name to drop down a menu, then click “Add Backup Set…”
The next window will be the Add Backup Set configuration window.
Note
The “Add Set” button will be un-clickable until it is completely configured.
Click “Rename” to label your backup set
Changing Selected Files, click “Change”, and select the files and folders you wish to backup to a local destination
When finished click “Save“
Click “Change” to set your destination for your backup
Select your destination by clicking “Add Local Destination (usually an external hard drive) and click “Save“
Click “Add Set” to finalize the setup and start backing up to a local location
Your new back upset is finished and will begin backing up as configured.
CrashPlan will send users an email alert notifying of any incomplete backups of their devices.
The CrashPlan email alert will be sent from CrashPlan for Enterprise <noreply@crashplan.com>
The Subject line of the email will be labeled with: Critical: [Name of Device] not backed up
Backup Alert
You will receive an alert when your computer hasn’t backed up to CrashPlan for 5 calendar days. The email will look like the example below:
CrashPlan Backup Alert Email Notification
What to do if you get a backup alert
After receiving a CrashPlan backup alert email, you should locate the device the email specifies in need of backup. The CrashPlan device name will be listed in the Subject: line and Computer Name: line of the CrashPlan backup alert email. To locate the name of a CrashPlan device, left-click the CrashPlan “C” symbol icon in the Windows System Tray, also referred to as the notification area.
Tip
The Windows System Tray or notification area is usually located on the bottom right of the Windows taskbar, next to the displayed digital clock.
For macOS users left-click CrashPlan symbol icon on the macOS icon menu bar. The CrashPlan device name will be displayed in the console. Ensure the CrashPlan application displays the same name as the CrashPlan backup alert email you received.
CrashPlan Symbol Icon
CrashPlan Device Name
After locating the correct specified device stated in the CrashPlan backup alert email, force a backup of the device by performing the following:
Left-click the “CrashPlan” System Tray or macOS menu bar Icon
CrashPlan Icon
Left-click “Run backup now“
Note
The backup may take some time to complete. This depends on the length of time since CrashPlan’s last complete backup and the amount of new data needed to be backed up.
Whether you’re working at home or the office, OneDrive makes it easy to create new documents and share your files. You can even collaborate with others on a document.
In the following external article, you’ll learn how to create documents and folders. It will go over how to share your files with different groups of people, as well as the various collaboration tools available in Office 365.
Generative Artificial Intelligence (GenAI) is a technology capable of generating new text, images, video, and other data by analyzing and modeling existing datasets. This policy ensures that all members of the FDU Community understand that entering information into publicly available GenAI applications may contribute that data to the application’s training models, potentially making it accessible beyond the university and exposing confidential information.
Additionally, this policy defines the responsible use and data security requirements for GenAI by University faculty, staff, and students. These requirements supplement existing data security policies established by OIRT. Accordingly, diligence must be maintained to protect the confidentiality, integrity, and availability of Administrative Data and Education Records that may be accessed, processed, or generated through GenAI applications.
Confidential, Restricted, or Official Use Only Information must not be entered into any publicly available or commercial GenAI application unless an approved agreement is in place with the Chief Information Security Officer (CISO) or the Chief Information Officer (CIO). This agreement must include appropriate data security requirements in compliance with university policies.
WISP protect information shall not be entered into any private GenAI application without prior approval from the Chief Information Security Officer (CISO) or the Chief Information Officer (CIO). Additionally, if the application is not owned and administered by Fairleigh Dickinson University, an approved use agreement must be executed with the application provider and must include appropriate data security requirements in compliance with university policies.
Each GenAI application handling Confidential, Restricted, or Official Use Only Information must have an Acceptable Use Policy (AUP) defining its terms of use, data collection policies, and user responsibilities. Faculty may include the AUP in course syllabi if GenAI is permitted for use in the course.
Output from a GenAI application must be reviewed by the submitter of the request for confidentiality, integrity, accuracy, fairness, regulatory compliance, and academic attribution with unintended bias before publication or ingestion into another University system in accordance with current FDU Information Security policies located on IT.FDU.EDU.
Confidential, Restricted, or Official Use Only Information must not be retained within GenAI systems after processing, particularly in products and services not hosted by FDU. If the GenAI system allows data deletion, the data must be securely removed once processing is complete unless retention is legally or regulatory required. If deletion is not feasible due to system limitations, alternative measures must be implemented to ensure data confidentiality, such as anonymization or eliminating sensitive data before inputting it into the system.
A disclaimer must clearly indicate when GenAI is used to generate data or influence decision-making. This ensures transparency regarding the nature and origin of the information provided.
In the event of a suspected or confirmed data security incident involving a GenAI system, users must immediately report the incident to the Data Security Incident Response Team (DSIRT) by creating a SAMI Support ticket. If you are unable to log into SAMI Support via your Net ID username and password, use the public form.
Appendix I
Key AI Definitions
Submitter—End user (student, faculty member, staff) inputting a query or prompt into an AI tool or product
Generate— the process of creating new content such as text, images, audio, video, or other forms of data based on patterns and information learned from existing datasets
Generator–A system, tool, or mechanism that creates new content
Ingestion— the process of inputting, integrating, and processing data into a system
Appendix II
DATA SECURITY INCIDENT RESPONSE TEAM (ROLES AND RESPONSIBILITIES)
The Data Security Incident Response Team membership includes the Chief Operating Officer, the Chief Information Officer, the Chief Information Security Officer, the Chief Academic Officer, the University General Counsel and the University Risk Manager. Each member of the Data Security Incident Response Team (DSIRT) has responsibilities related to the security of all the organization’s sensitive information. The DSIRT members listed below have specific responsibilities regarding the reporting and handling of data security incidents. Note that one person may serve in multiple roles.
Senior Vice President and Chief Financial Officer: Frank Barra Office: 201-692-2237; Email: fbarra@fdu.edu
Chief Information Officer (CIO): Neal Sturm Office: 201-692-8689; Email: sturm@fdu.edu
Chief Information Security Officer (CISO): Kimberley Dawn Dunkerley Office: 201-692-7672; Email: ddunkerley@fdu.edu
Privacy Officer: Kimberley Dawn Dunkerley Office: 201-692-7672; Email: ddunkerley@fdu.edu
Senior Vice President and University Provost: Benjamin Rifkin Office: 201-692-7093; Email: brifkin@fdu.edu
Office of the General Counsel: Steve Nelson Office: 201-692-2466; Email: snelson@fdu.edu
University Risk Manager: Gail Lemaire Office: 201-692-7083; Email: lemaire@fdu.edu
Vancouver Campus Executive: Wilfred Zebre Office: 604-648-4462; Email: wilfred_zerbe@fdu.edu
Associate Vice President for MIS: Saul Kleinman Office: 201-692-2065; Email: saul@fdu.edu
Click on the three dots and select Settings.Select Advanced to show the advanced settings. Select Content settings.Select Cookies.Click the garbage can icon to delete the cookies.
Click on the three lines and select OptionsSelect the Privacy & Security tab and click Manage Data found under Cookies and Site Data.Select fdu.edu and select Remove Selected, select Save Changes when finished.
Click on the Settings “Gear” located on the top right of the browser, select Internet OptionsDelete in the Browser History sectionUncheck all boxes listed, except Cookies and website data, click Delete when finished
In an effort to maintain the reputation, security, continuity, and technical oversight of university assets considered part of our overall catalog of services, the Office of Information and Resource Technology is issuing a new policy concerning domain names affiliated with Fairleigh Dickinson University. Affiliation with FDU is determined by OIRT in conjunction with the Offices of General Counsel and Communications and Marketing.
II. POLICY
All domain registrations that have an affiliation with the University must be registered through OIRT. An affiliation is defined as a domain that identifies the University as part of its naming nomenclature and houses content specific to the University or any function, whether administrative, academic, or student related to the University. To request a new domain, please complete the following:
You may also try emailing your questions to domainregistrar@fdu.edu.
In addition to the domain registration, ongoing certification renewals and any backend technical configurations will be managed by OIRT. All costs associated with the domain will be charged back to the department.
Any department that today independently manages/operates a University domain as defined above or has obtained a domain with any affiliation with FDU must notify OIRT of the existence of that domain so ownership can be moved over to OIRT management. Please contact OIRT by sending all available information to domainregister@fdu.edu. A member of OIRT will work with the department to move the ownership over properly. All content of any domain, as well as plug-ins or any other functionality of the domain, will be reviewed by OIRT but are the responsibility of the individual departments.
III. IN CASE OF QUESTIONS
All questions relating to the Domain Registration Policy can be addressed to the VP & CIO of Fairleigh Dickinson University.
To access Forms, you will be directed to our SAMI Support Portal where you will be asked to log in using your NETID and authenticate using Duo. Once you click “Next,” you will be forwarded to samisupport.fdu.edu in a new window or tab.





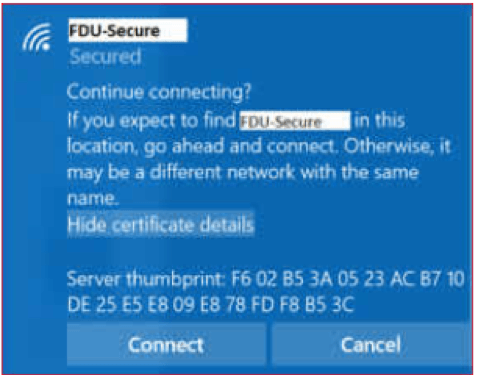
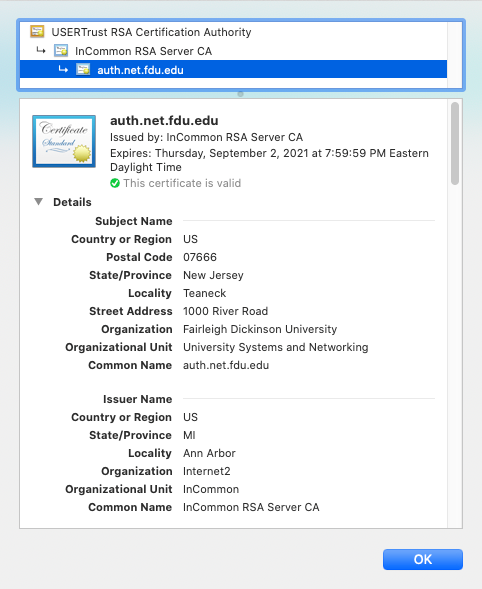
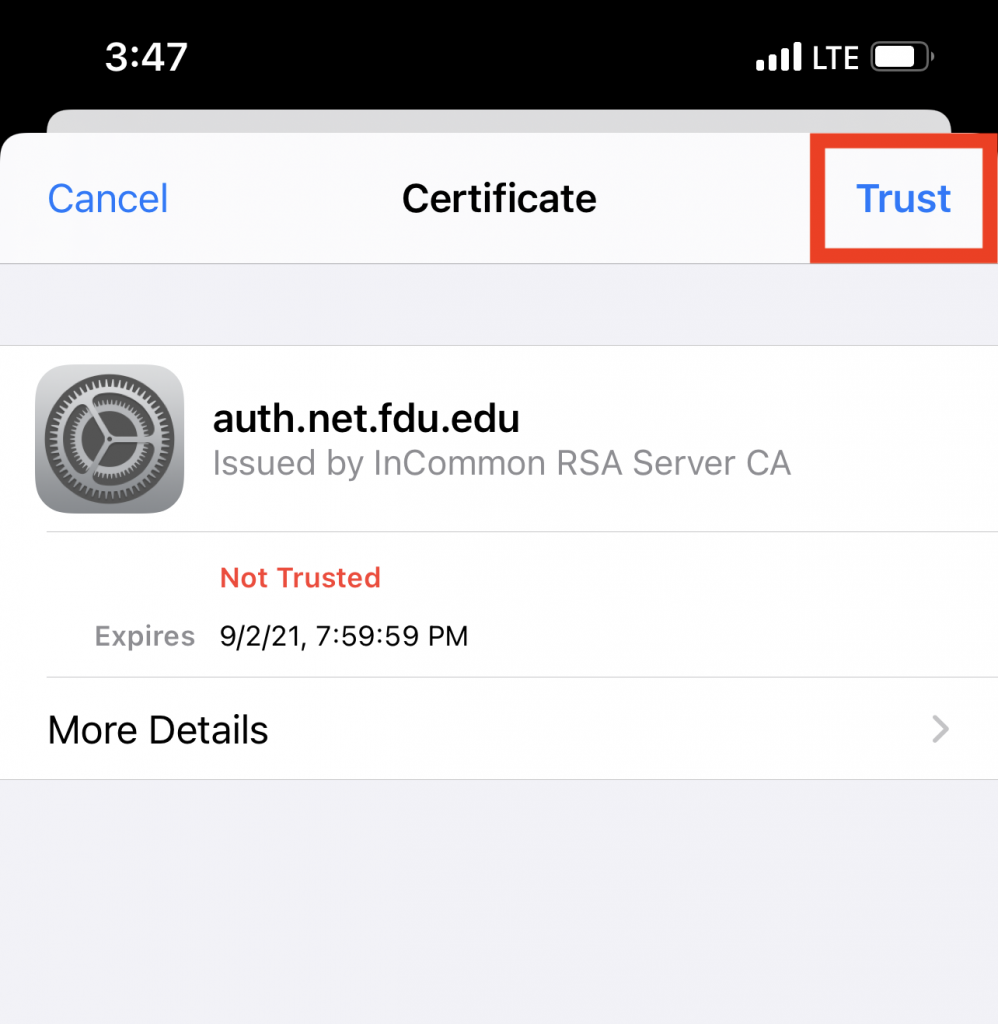
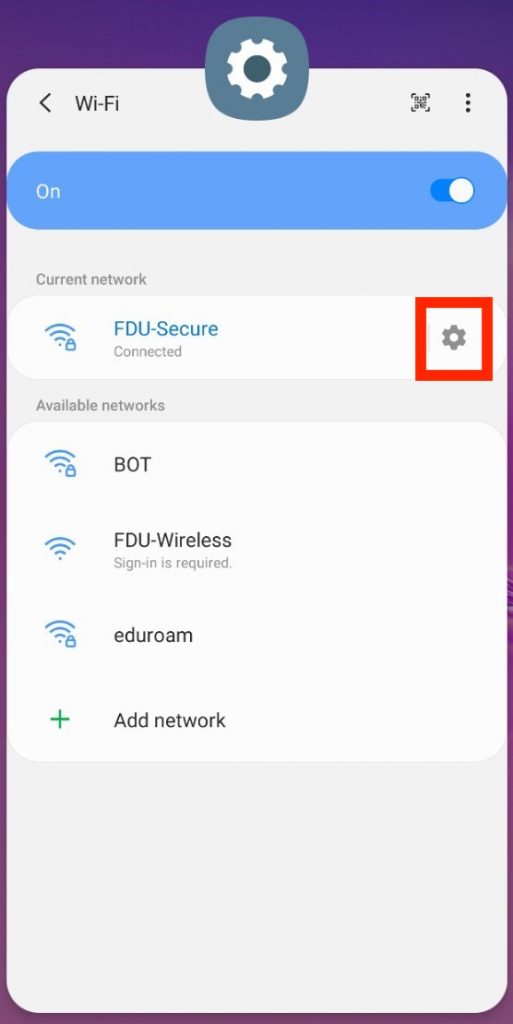
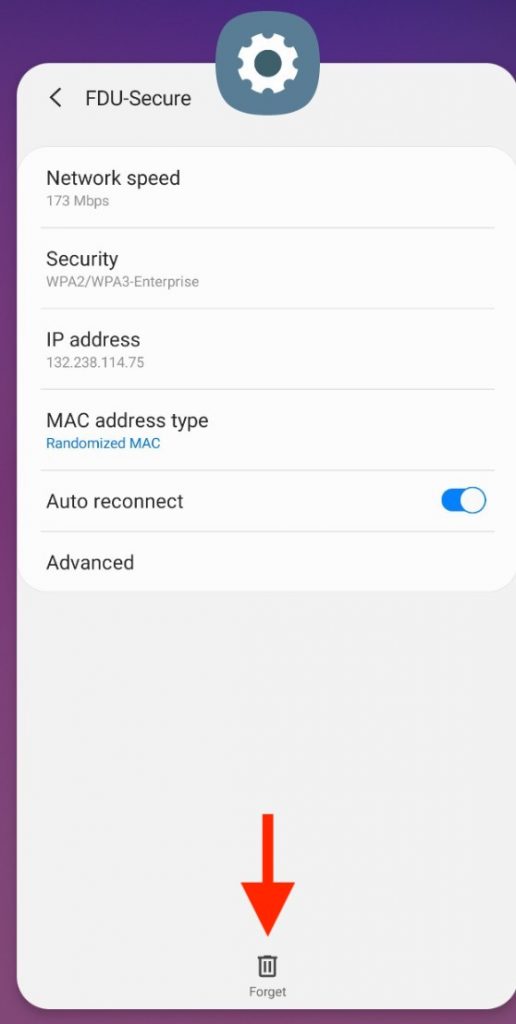
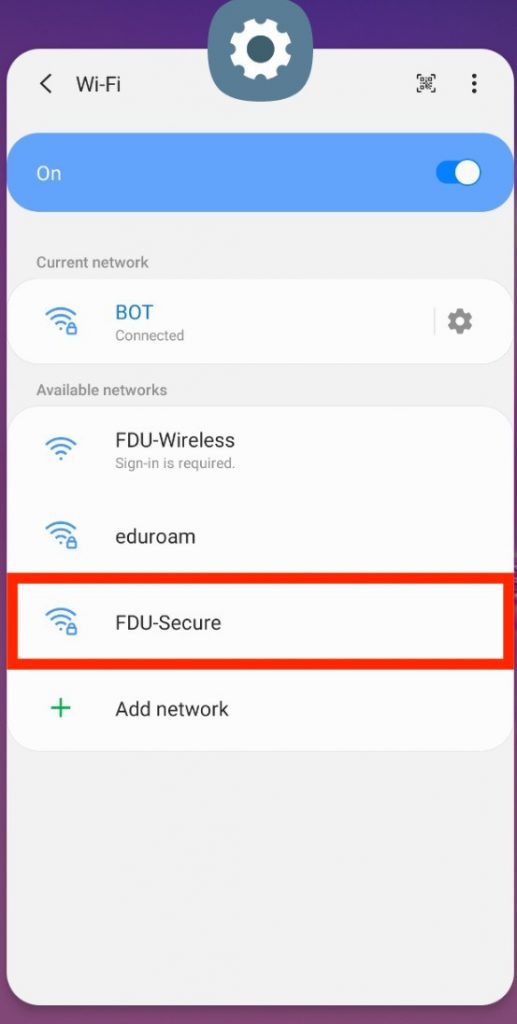
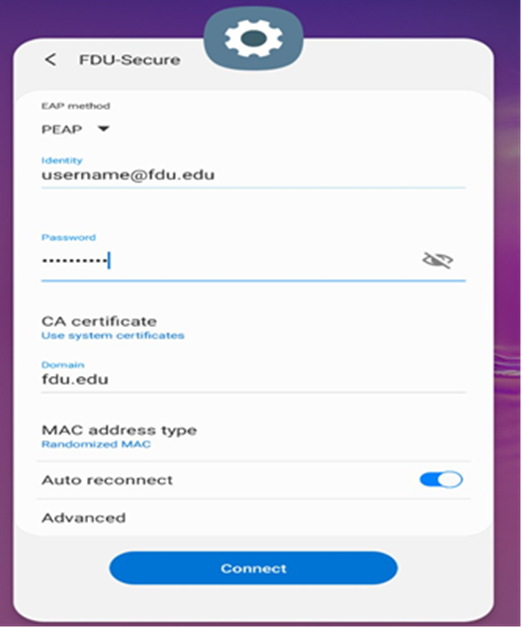
 Feedback
 Copy Link

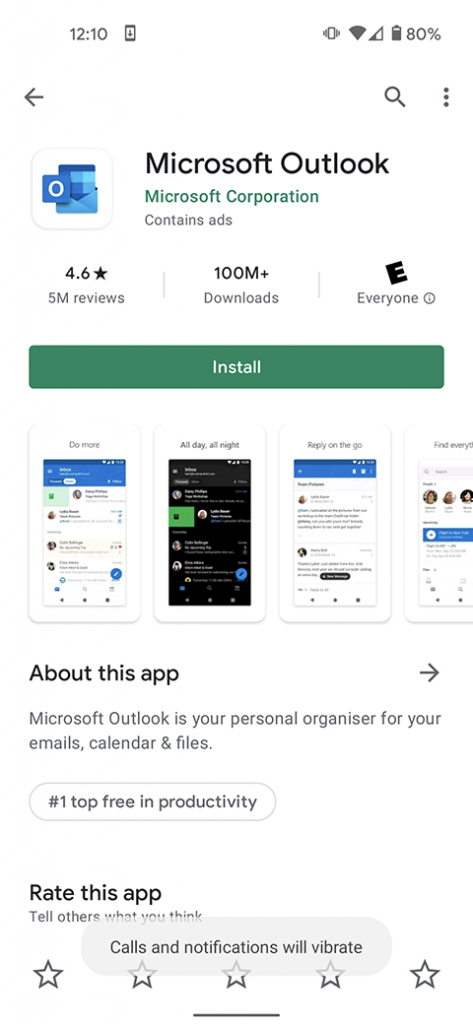
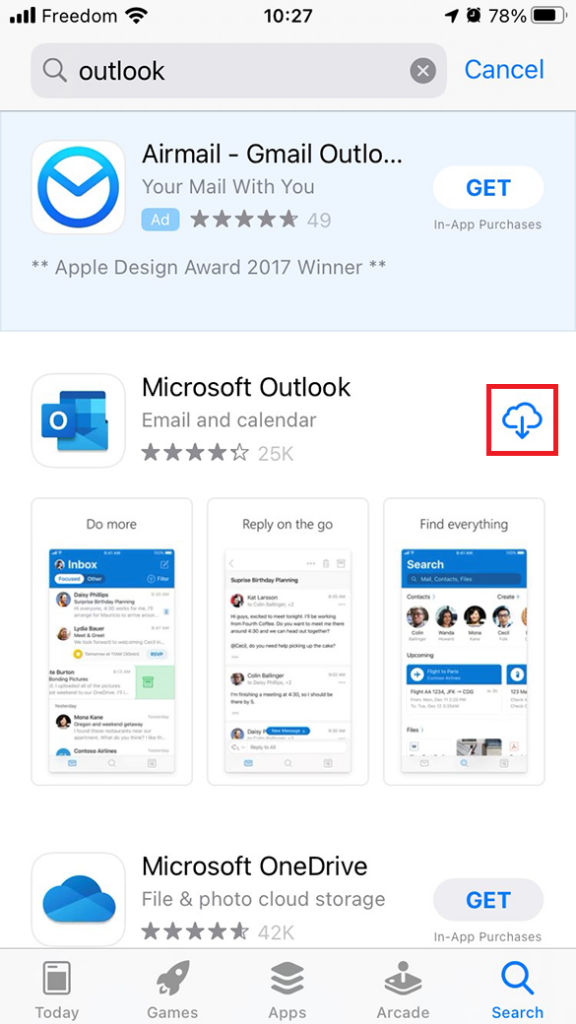
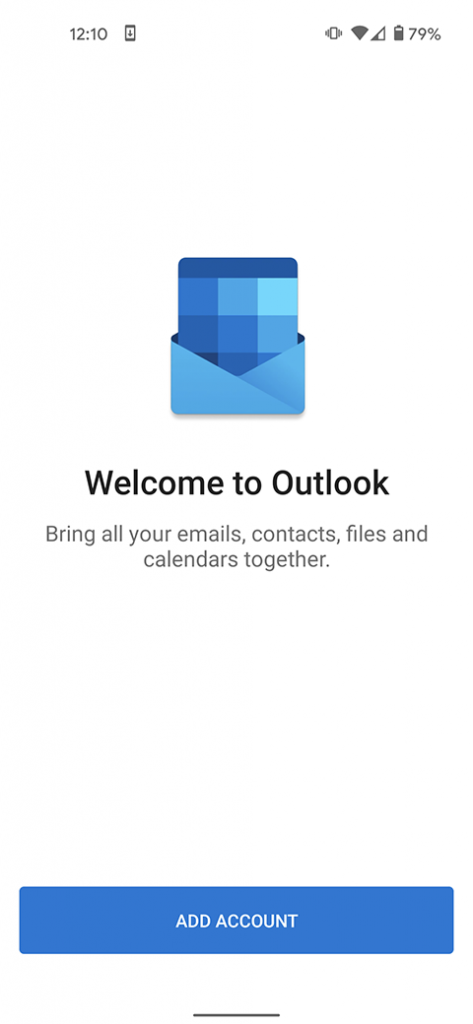
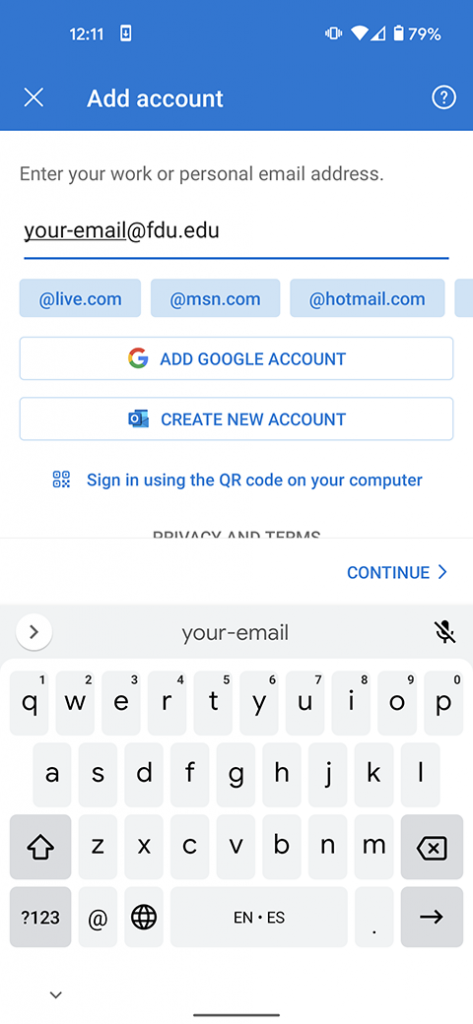
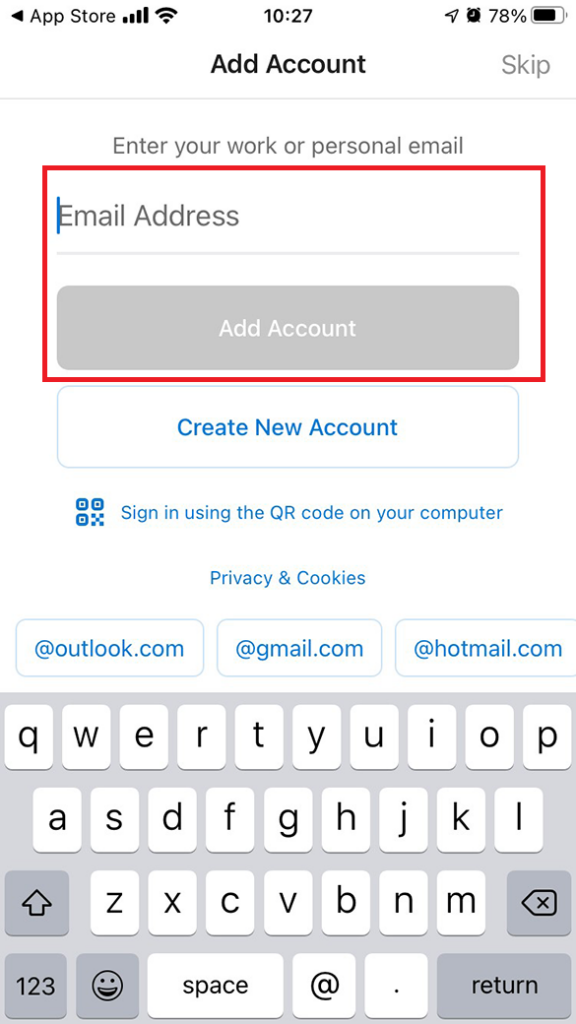
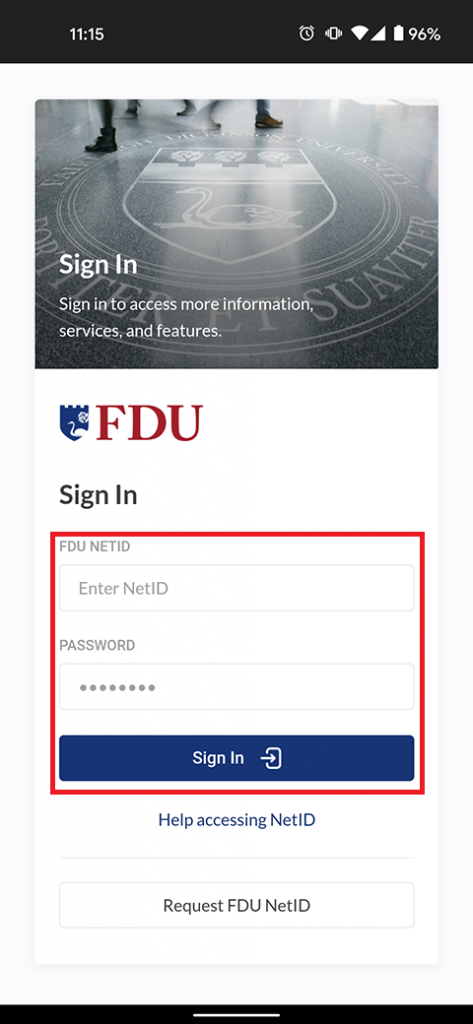
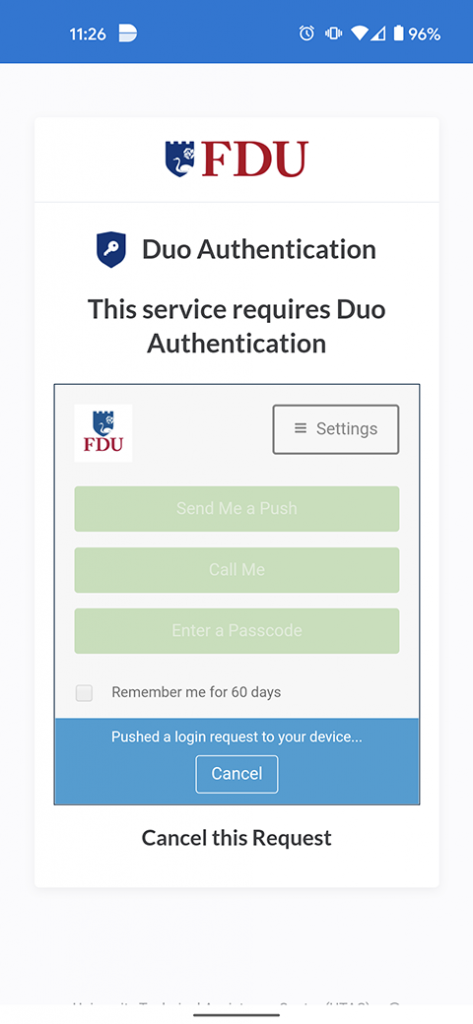
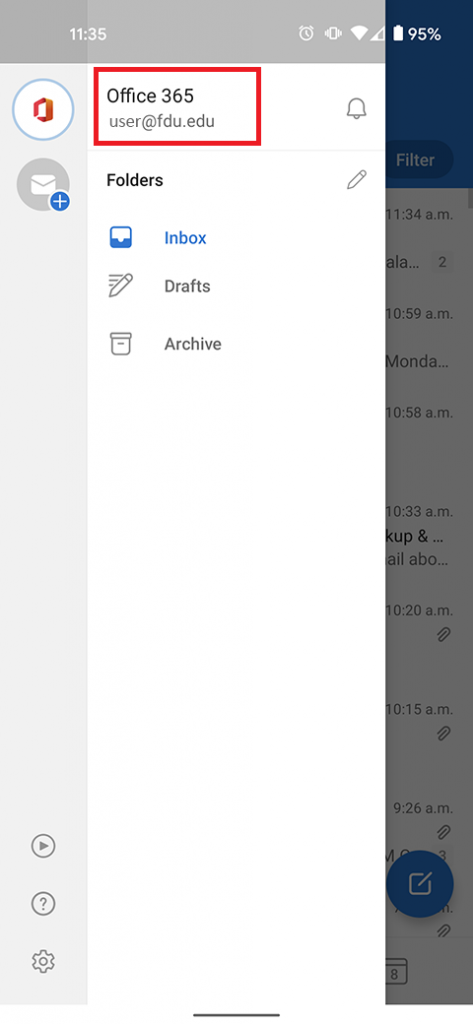
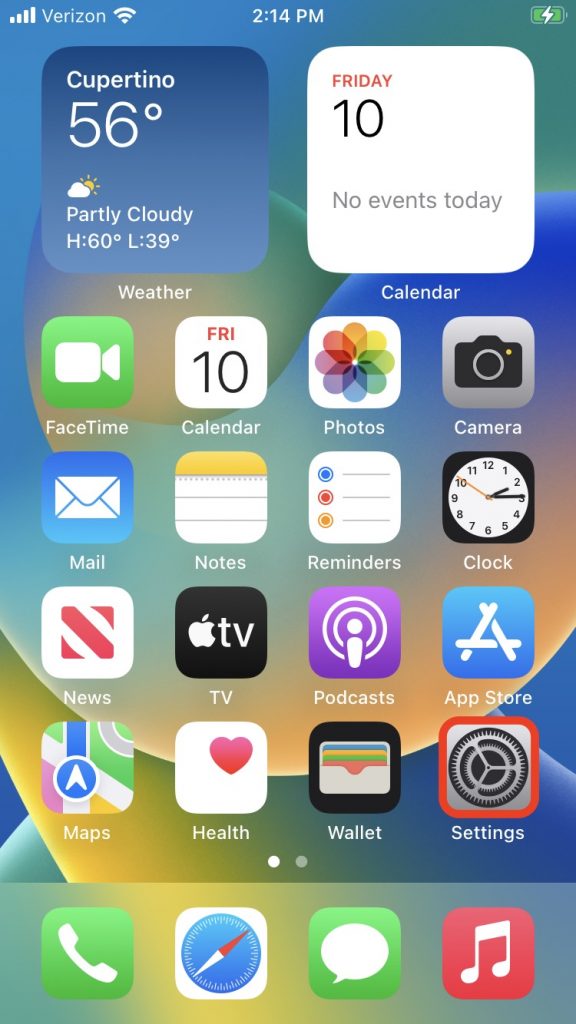
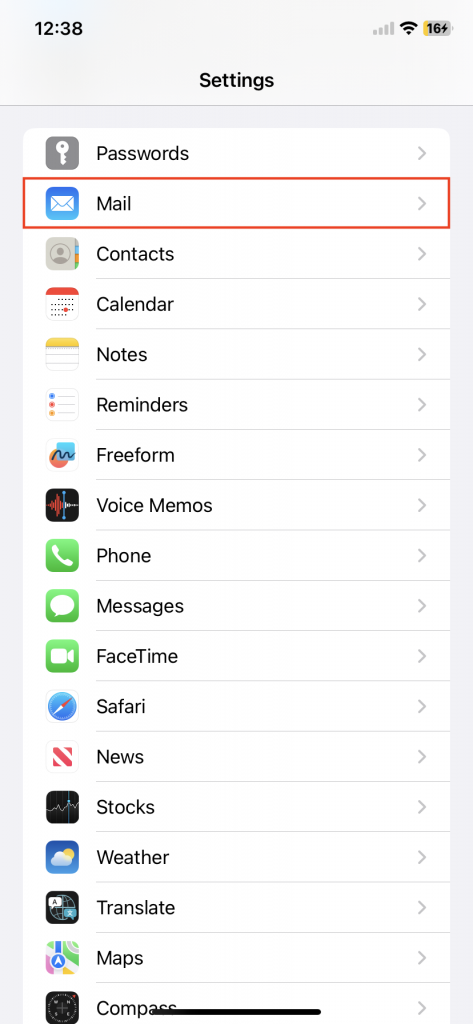
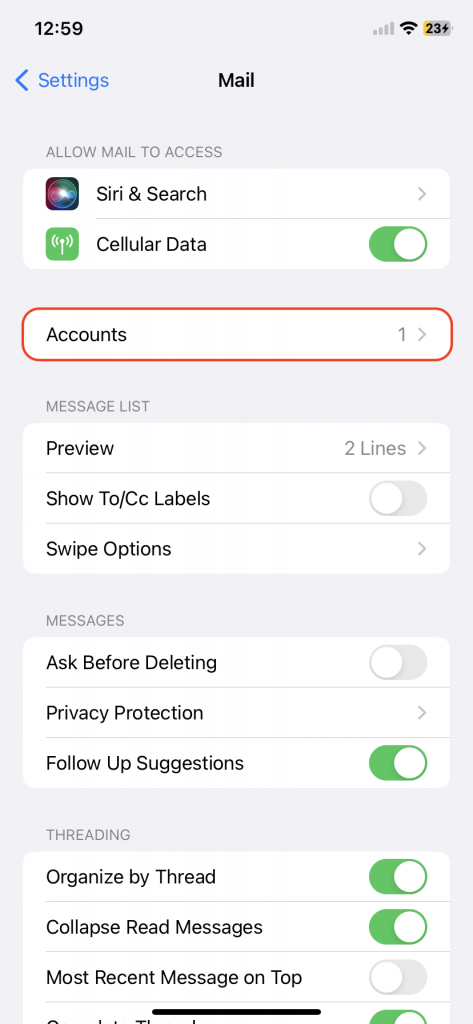
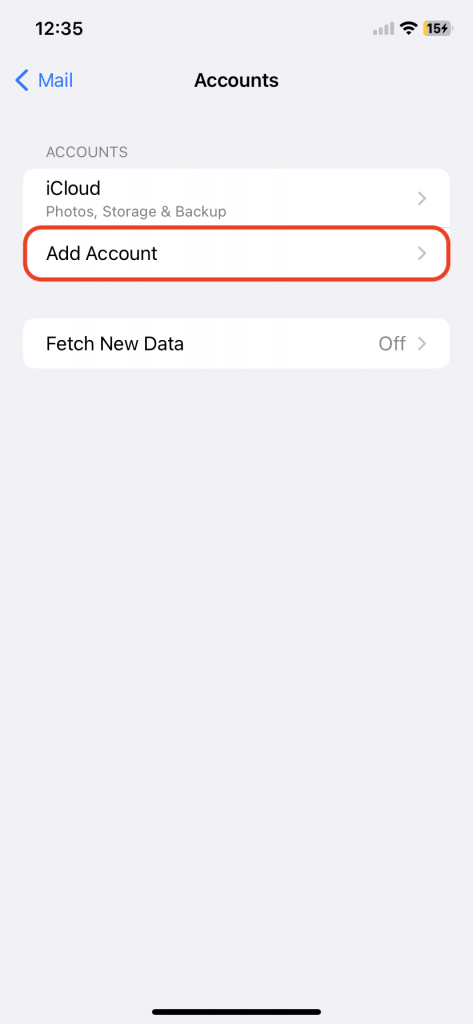
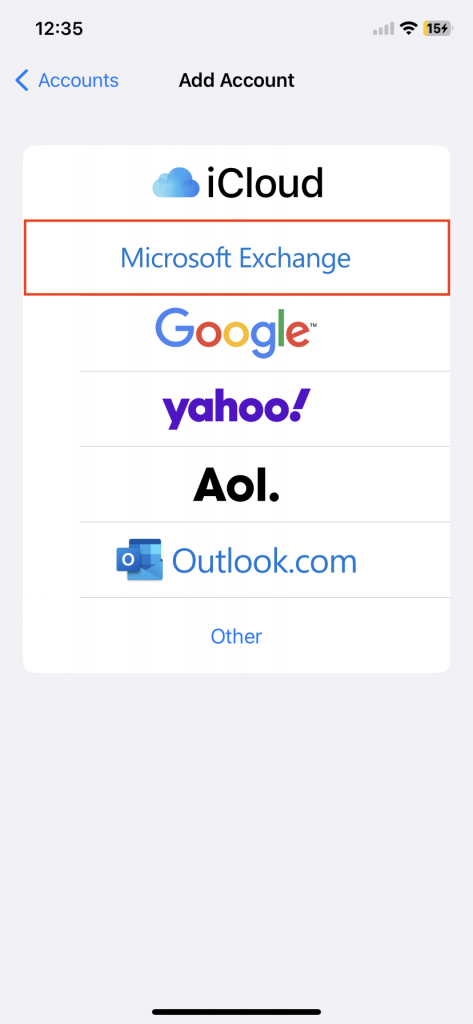
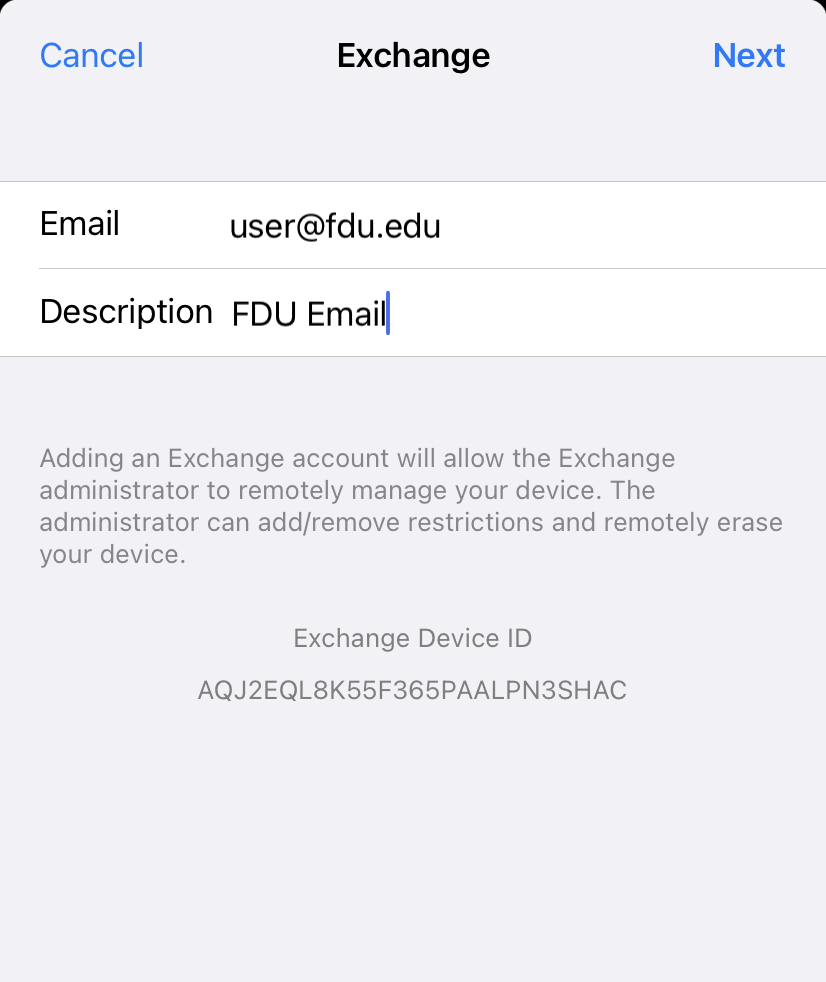
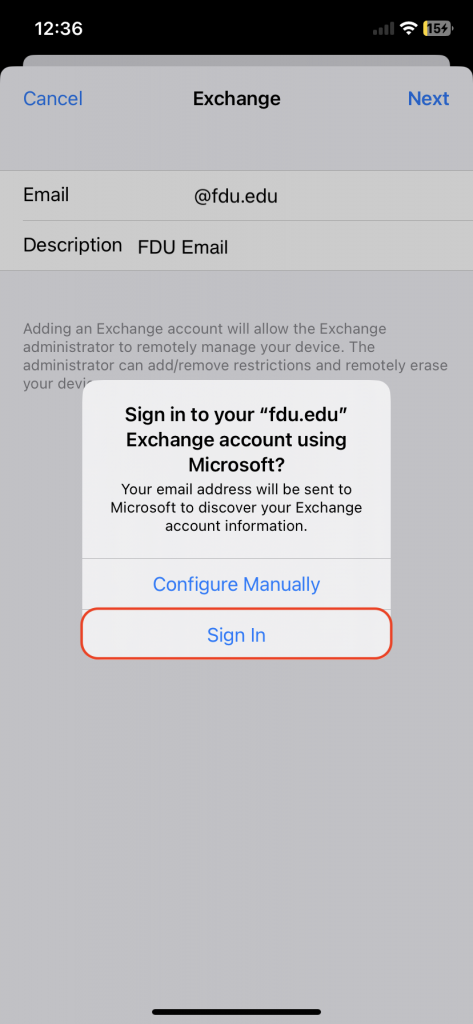
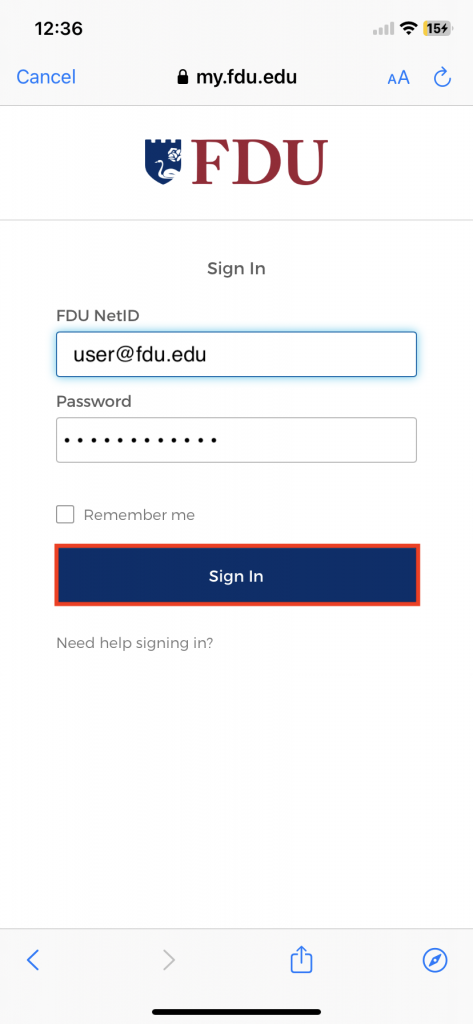
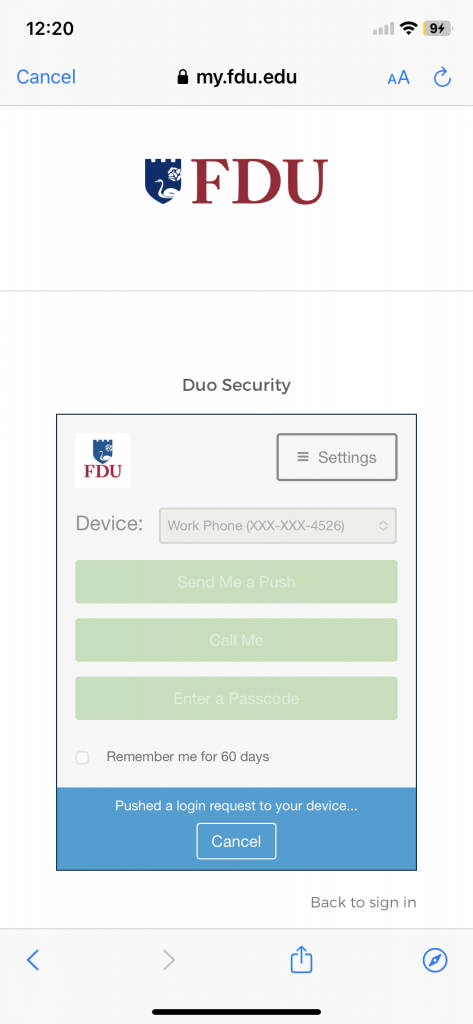
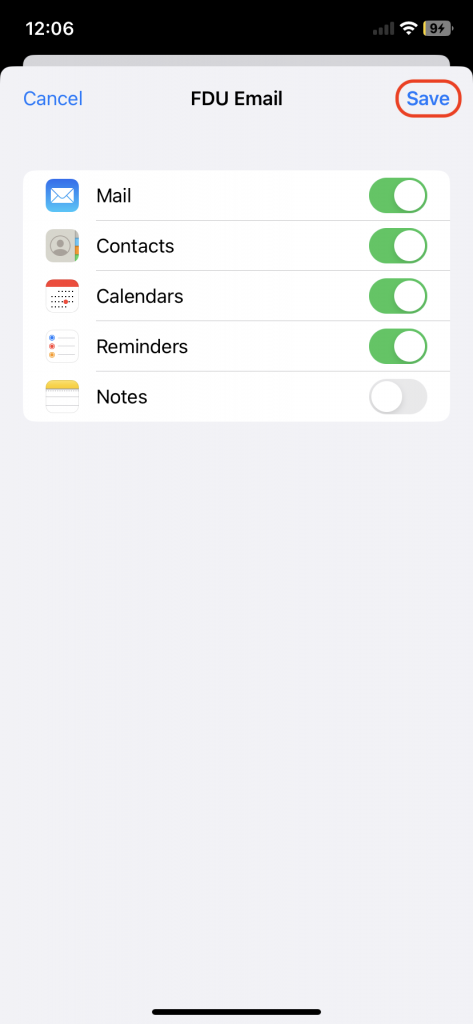
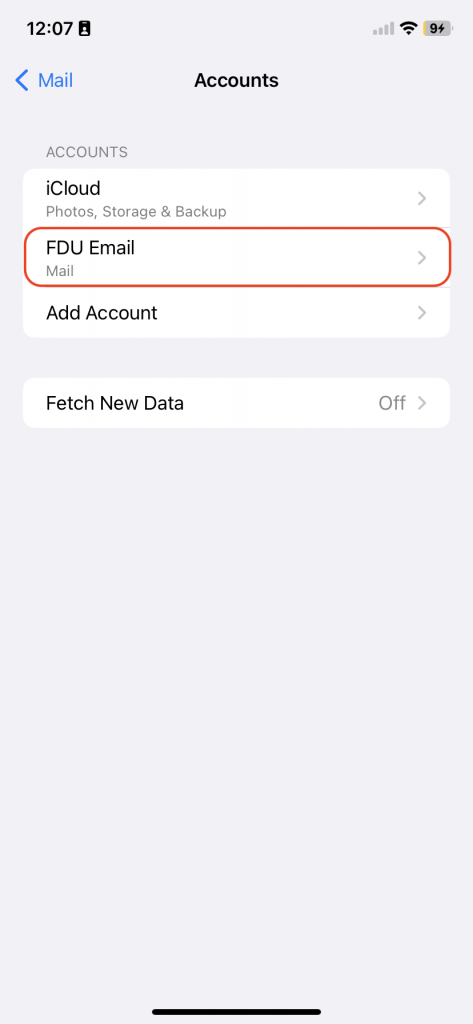
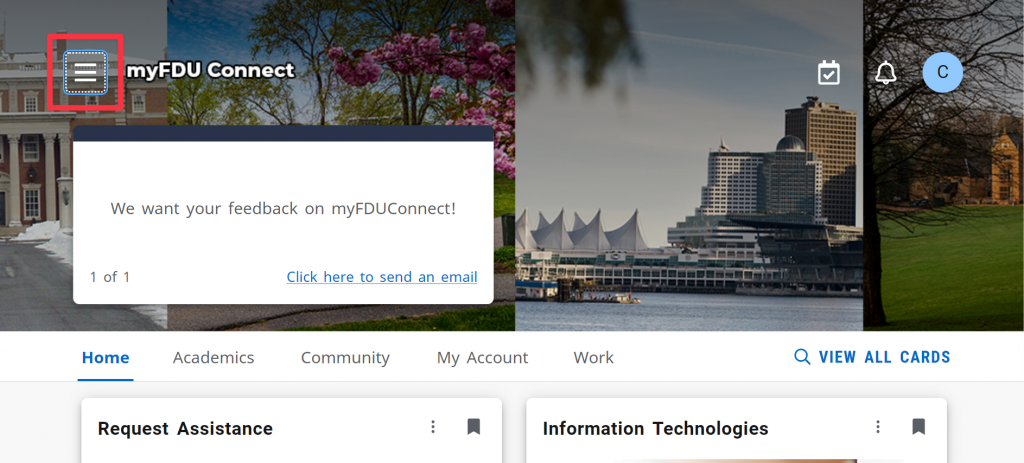
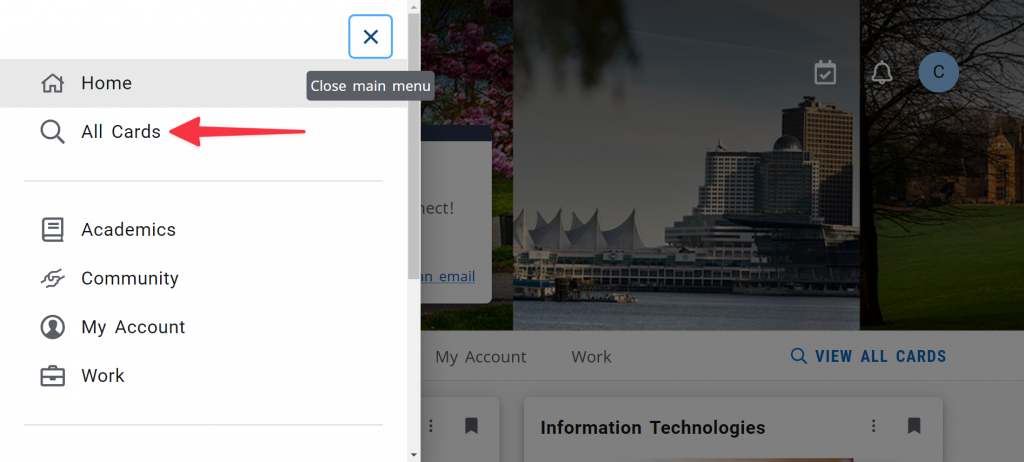
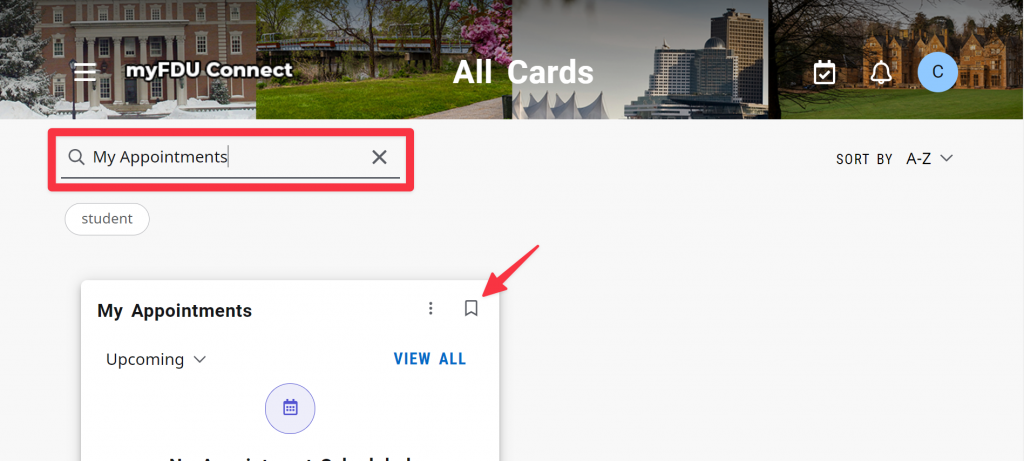
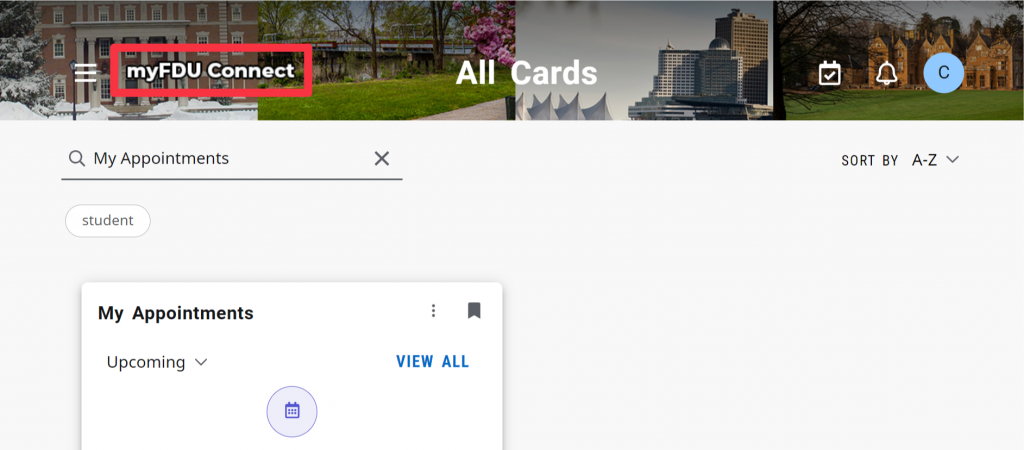
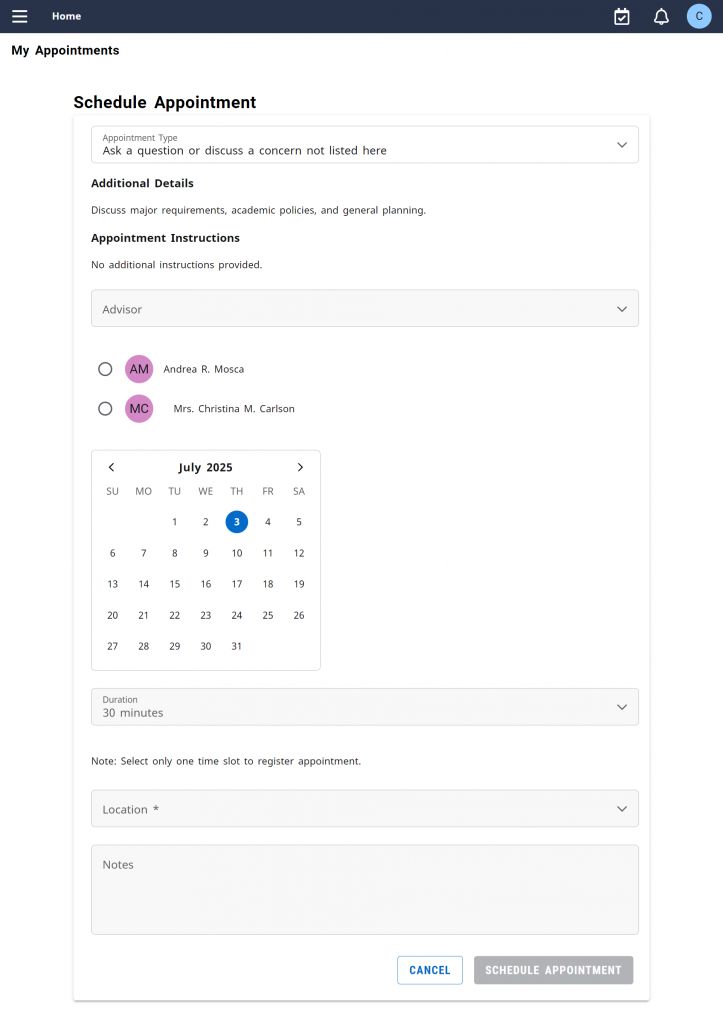

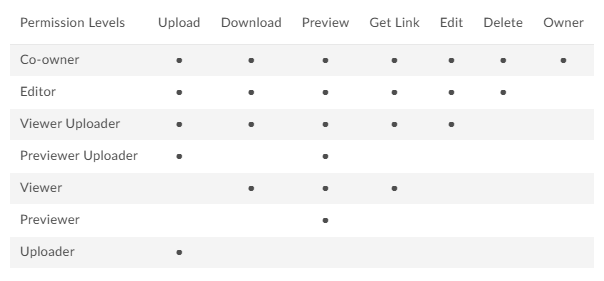

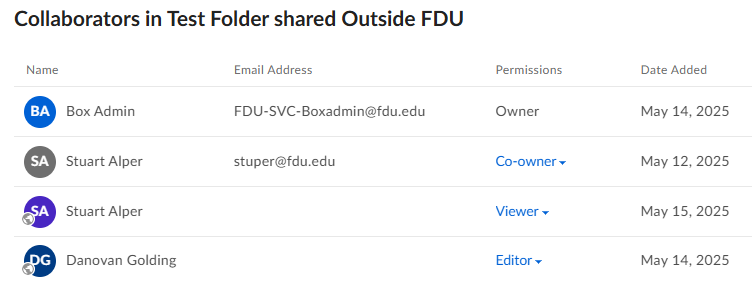

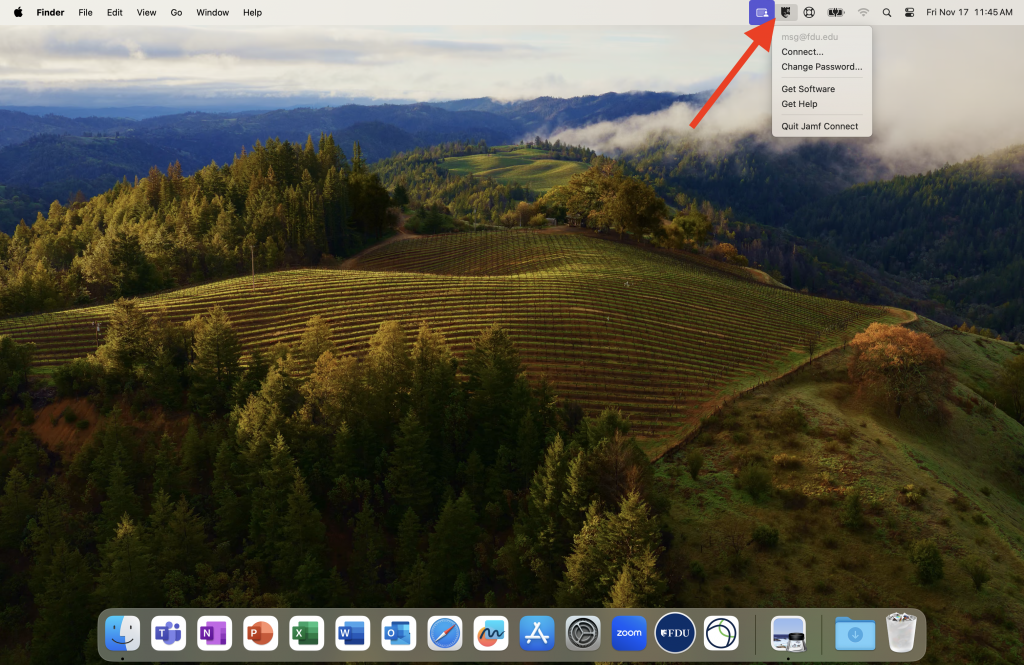
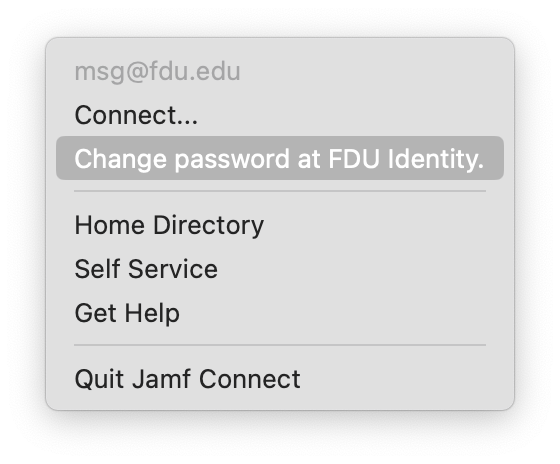
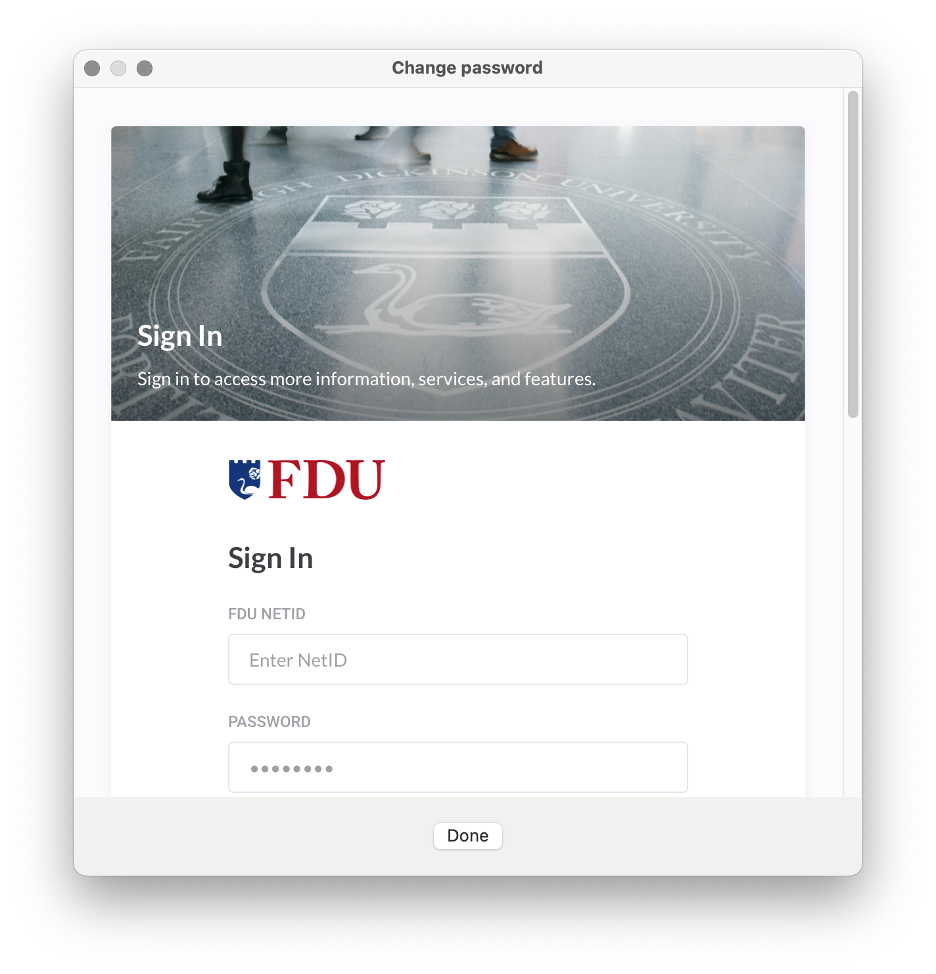
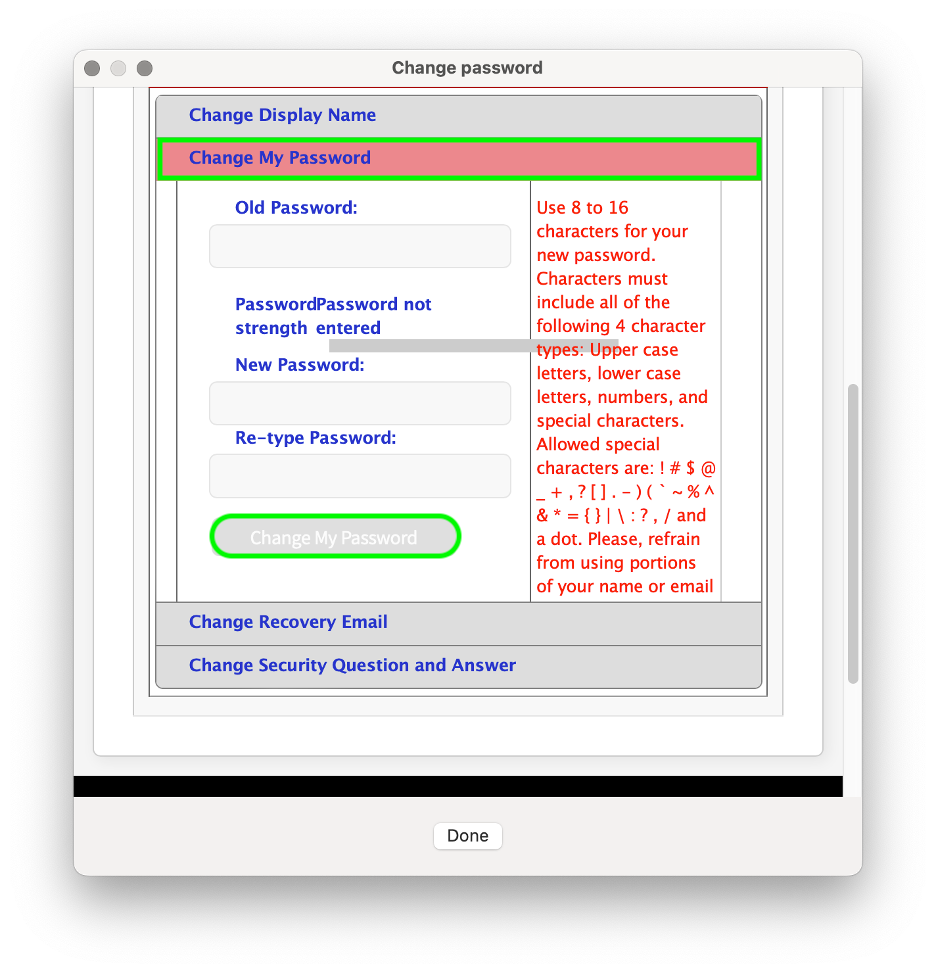
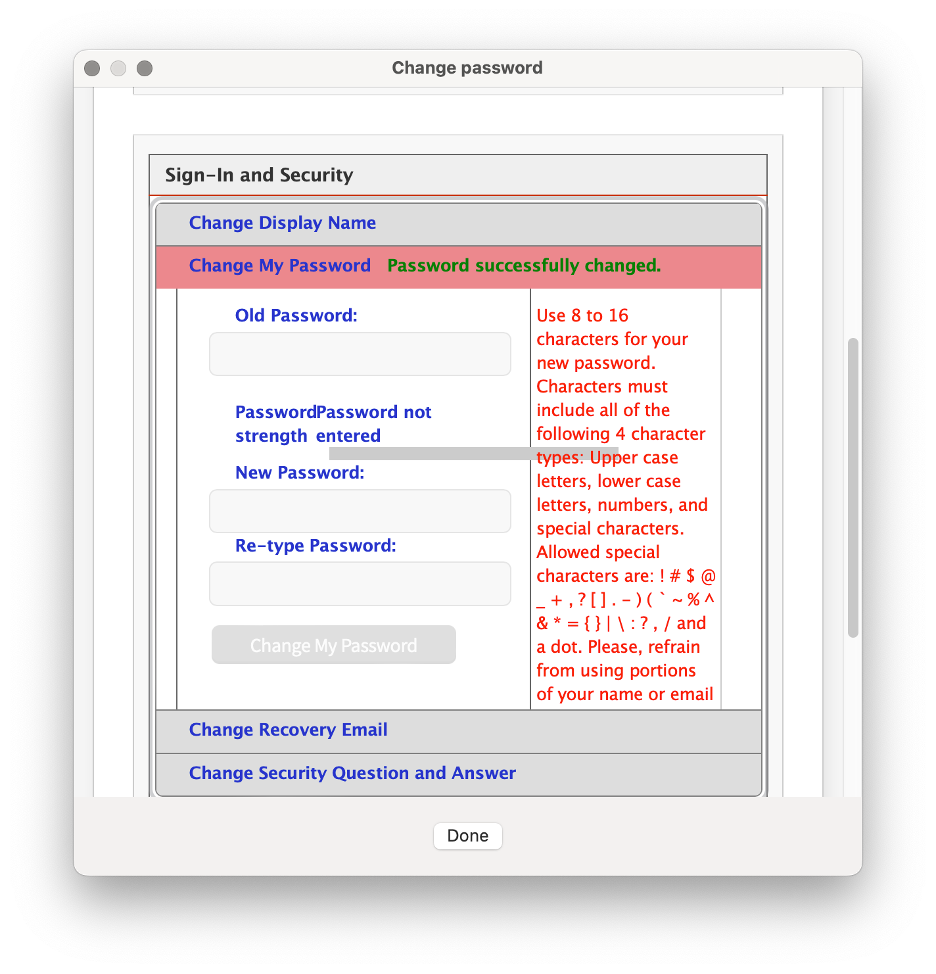
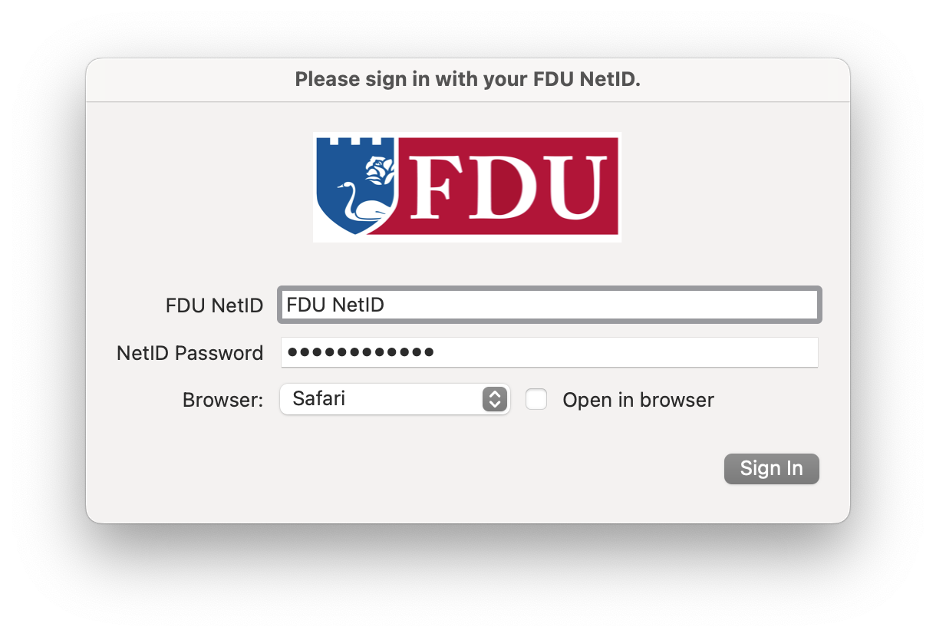
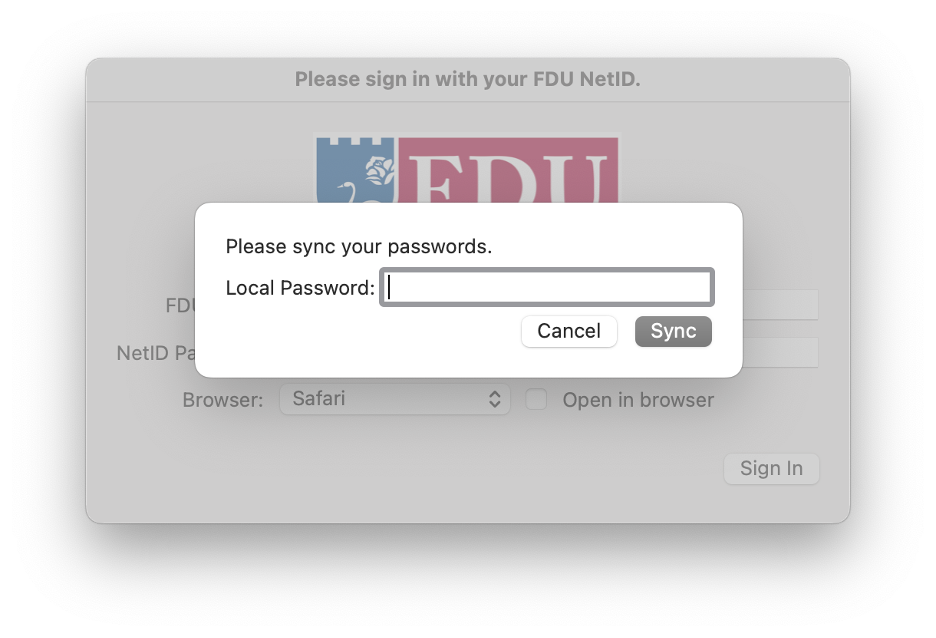
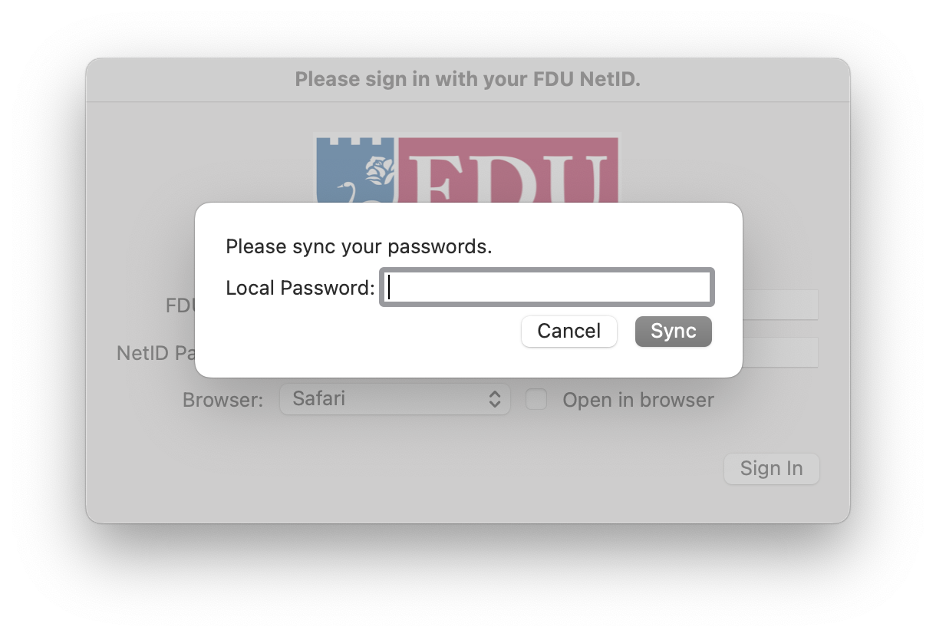
 on your phone instrument.

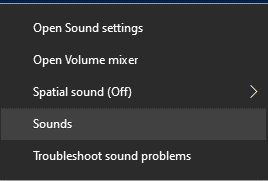

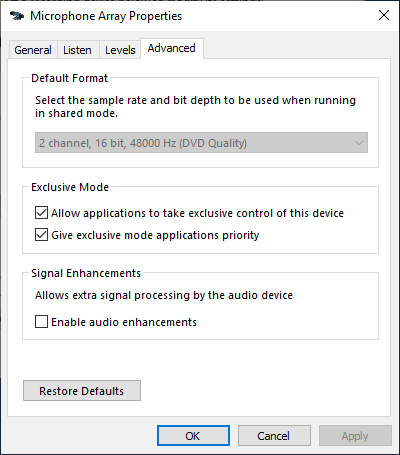
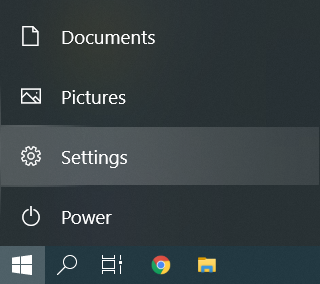
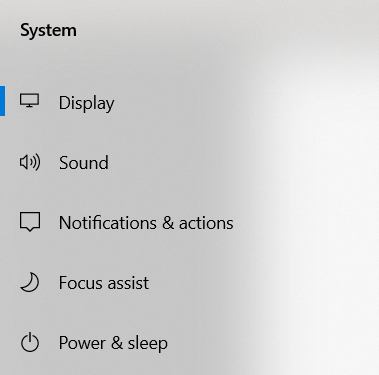
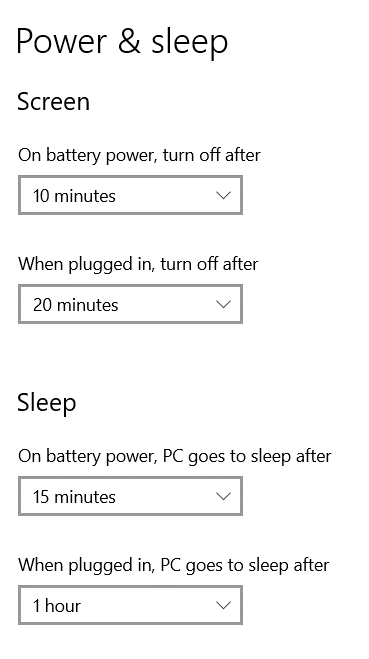
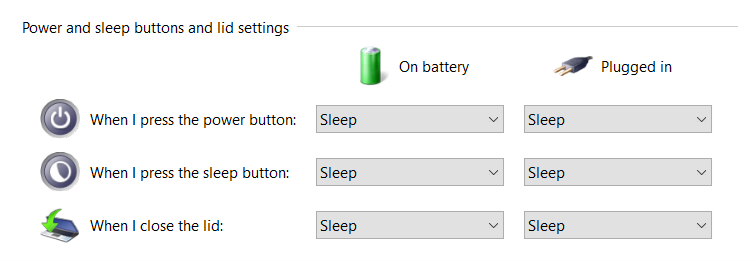
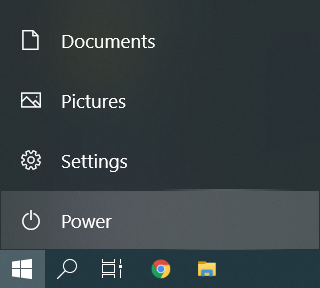
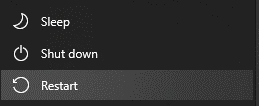

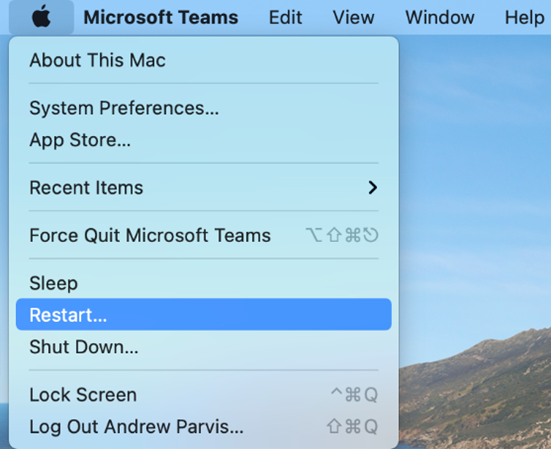
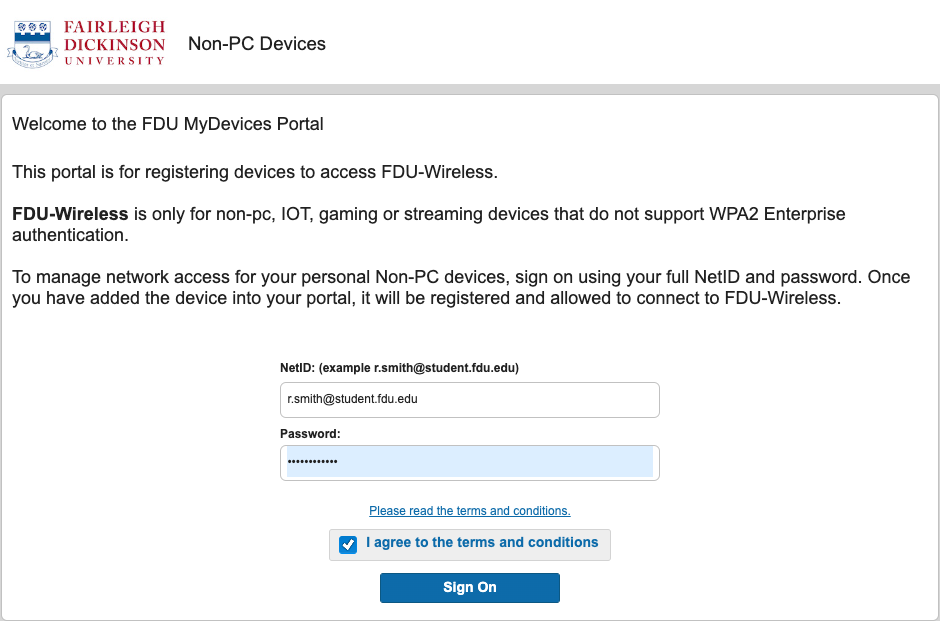
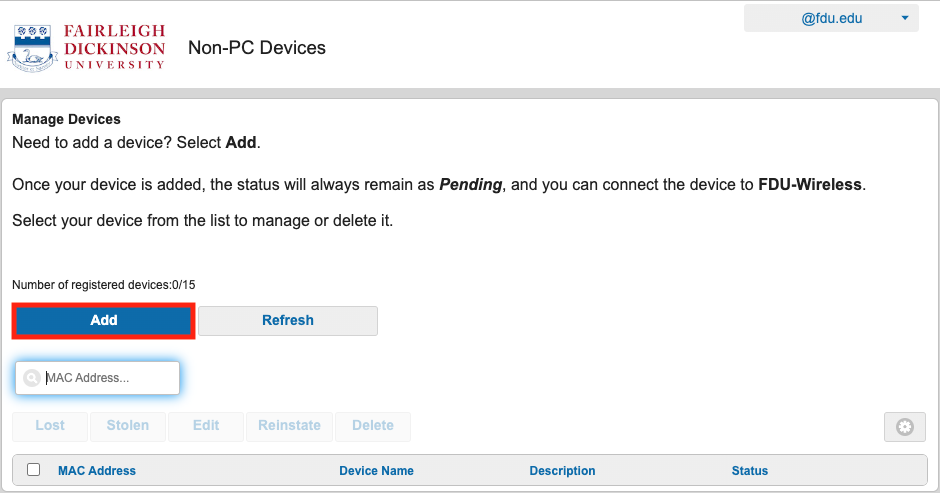
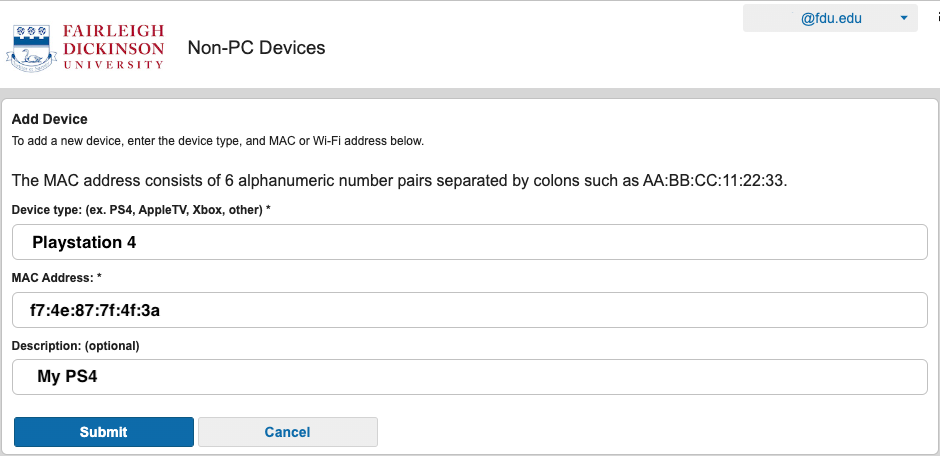
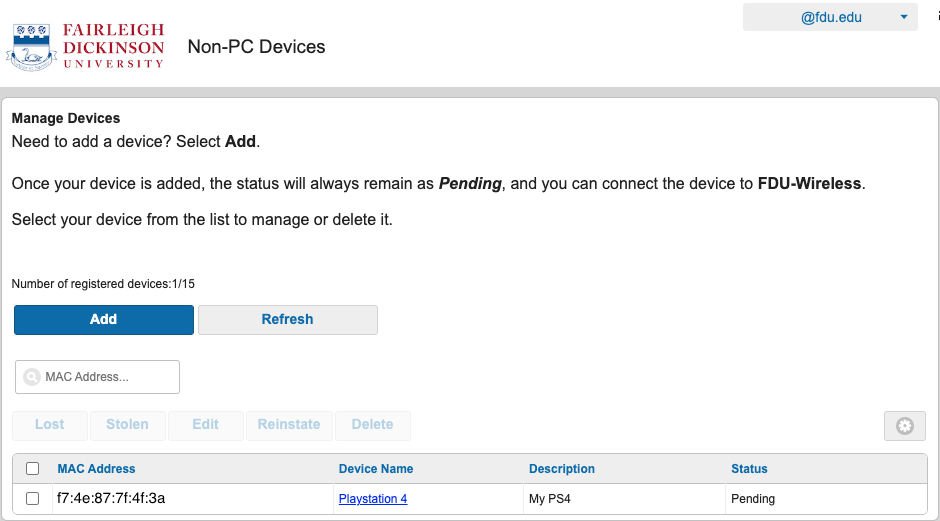
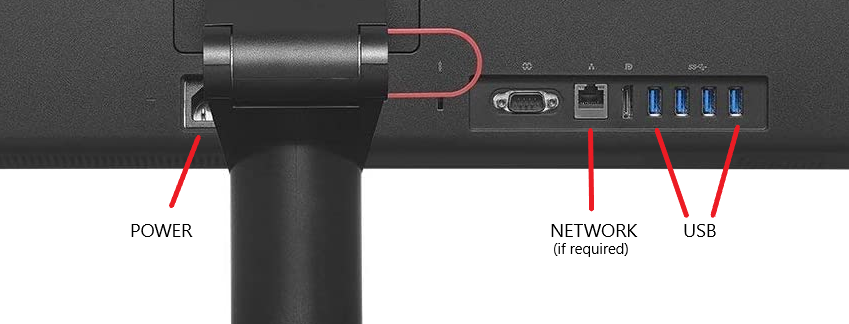

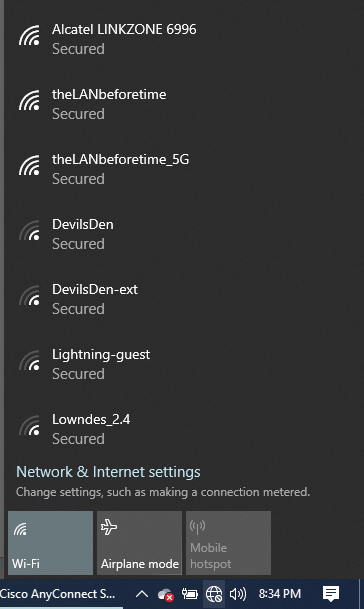
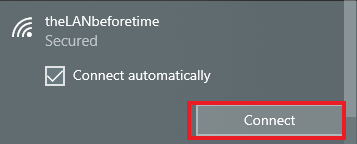
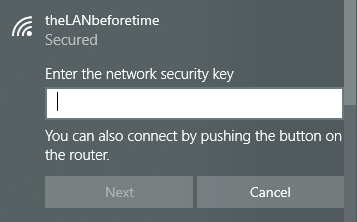
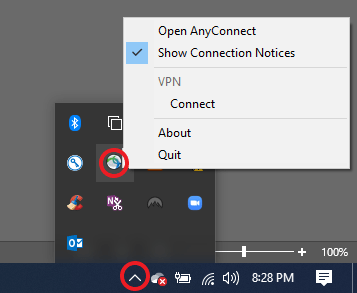
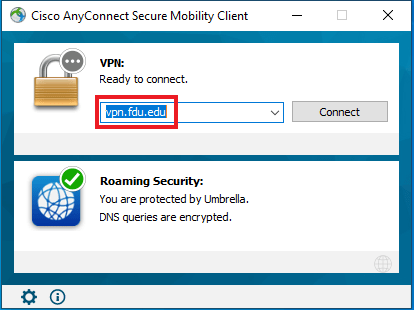
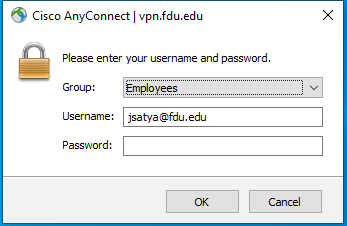
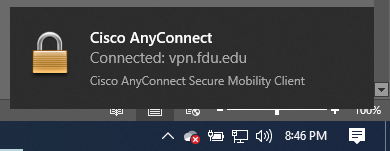
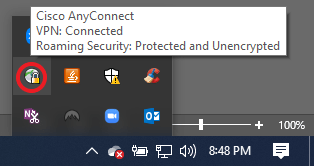

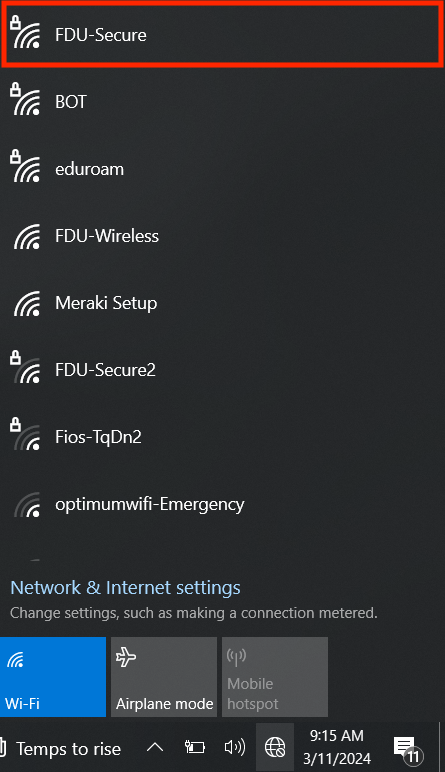
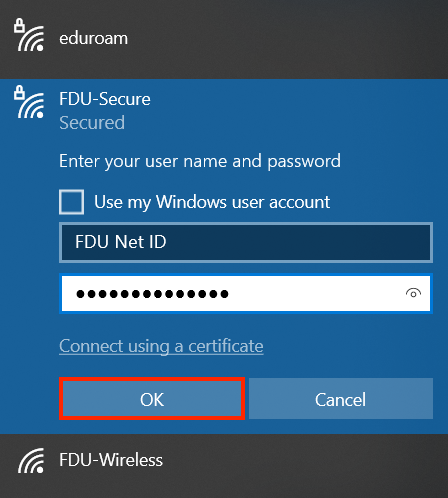
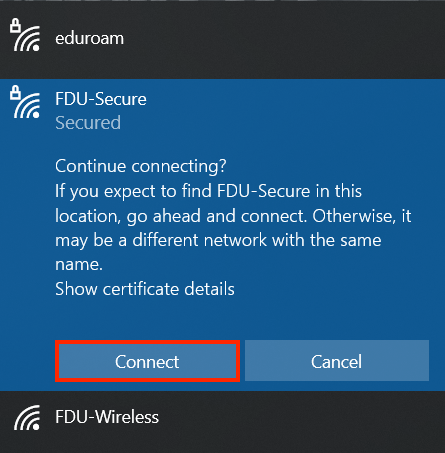

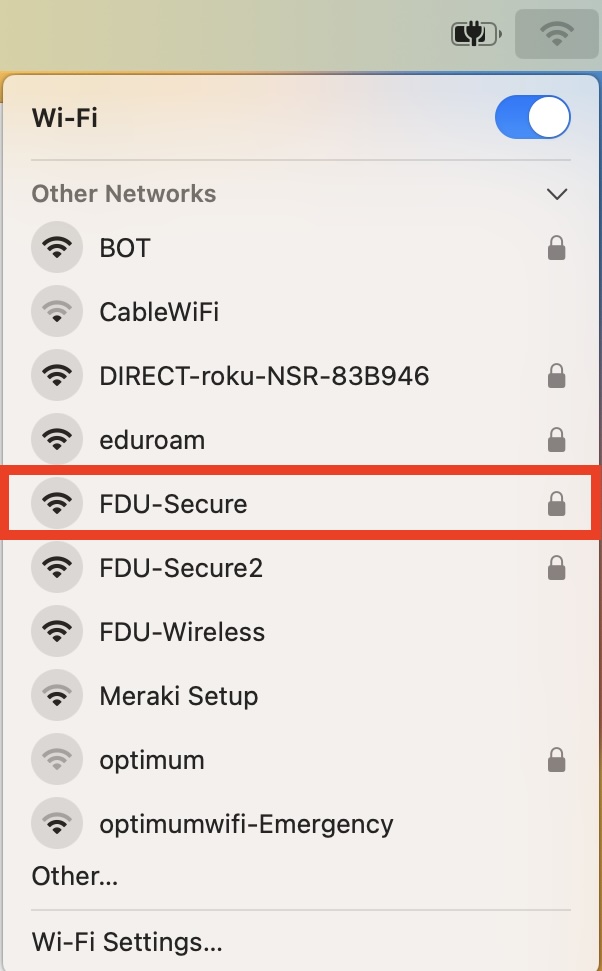
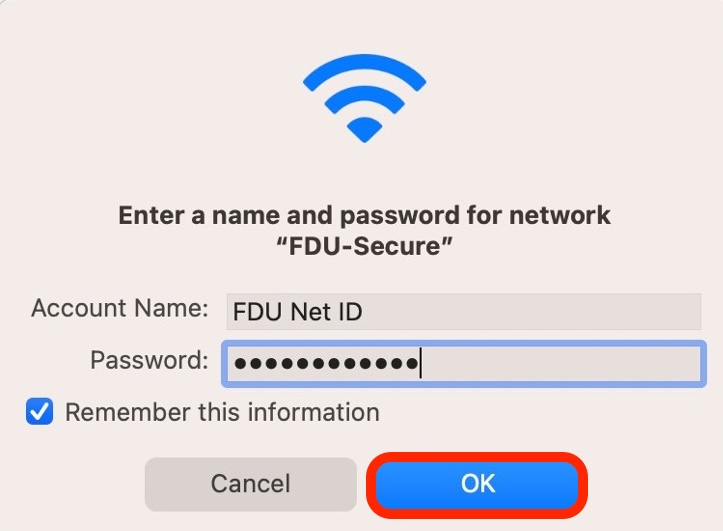
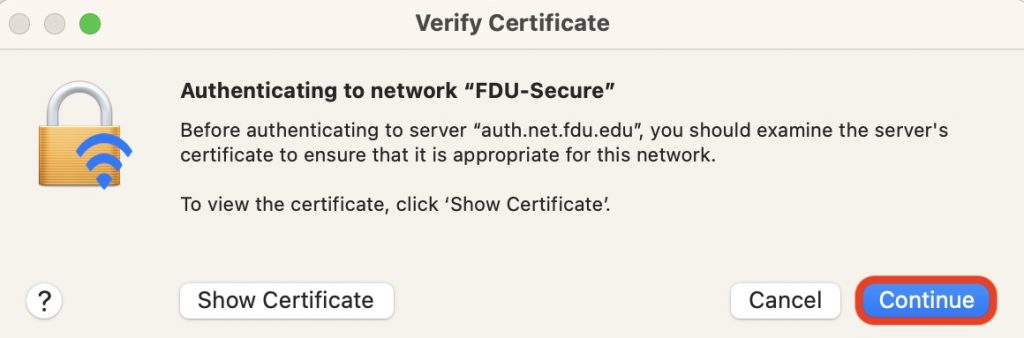
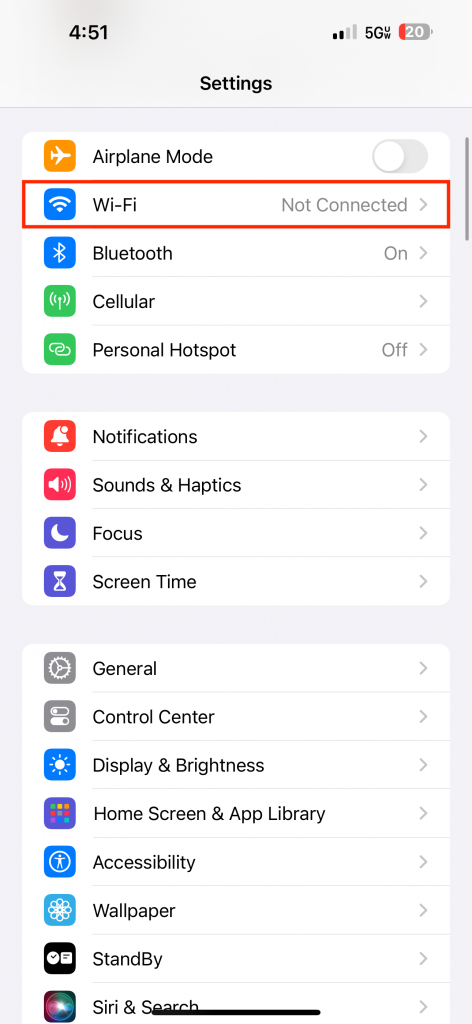
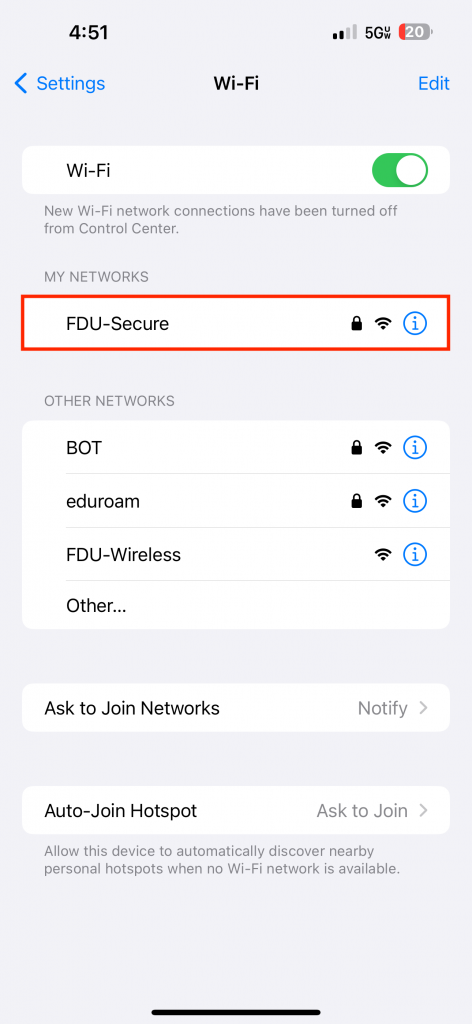
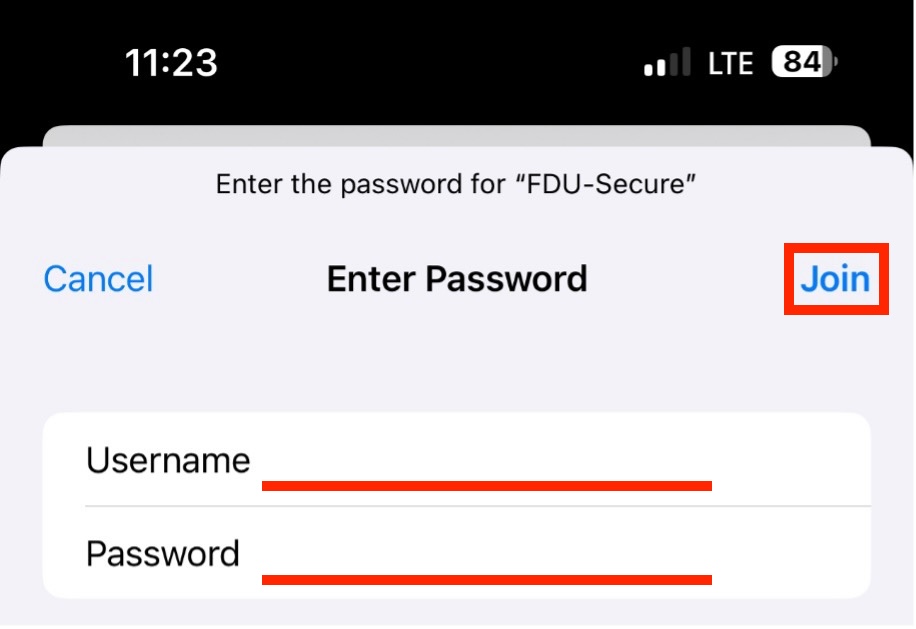
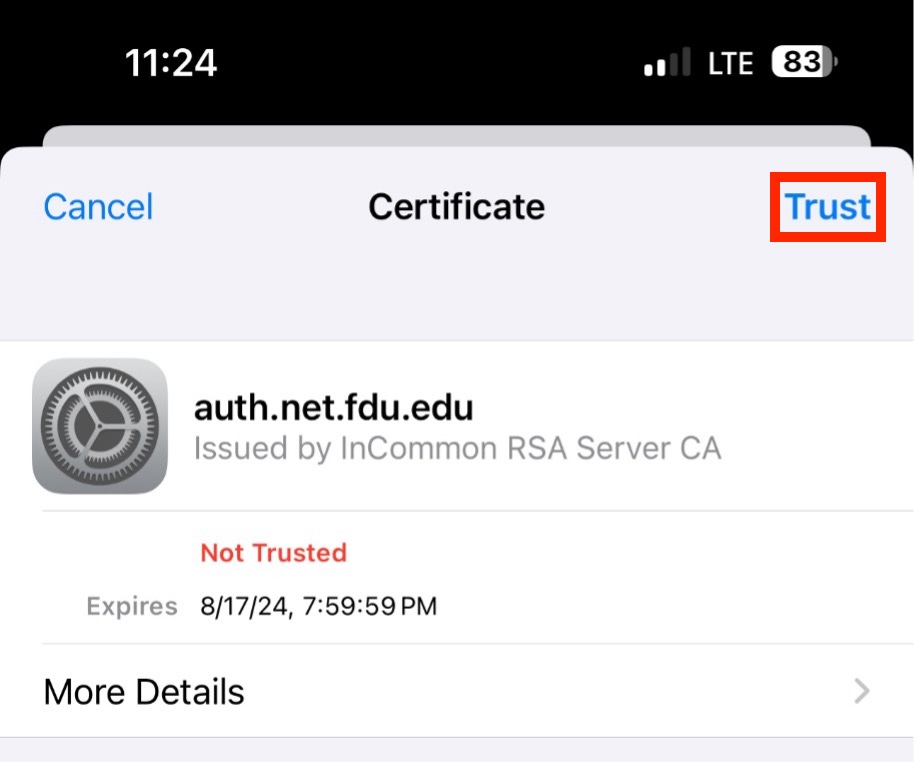
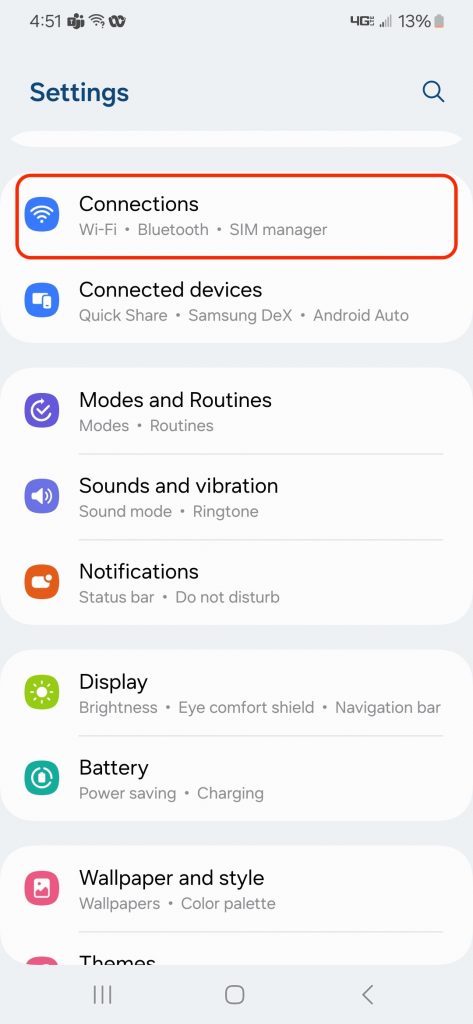
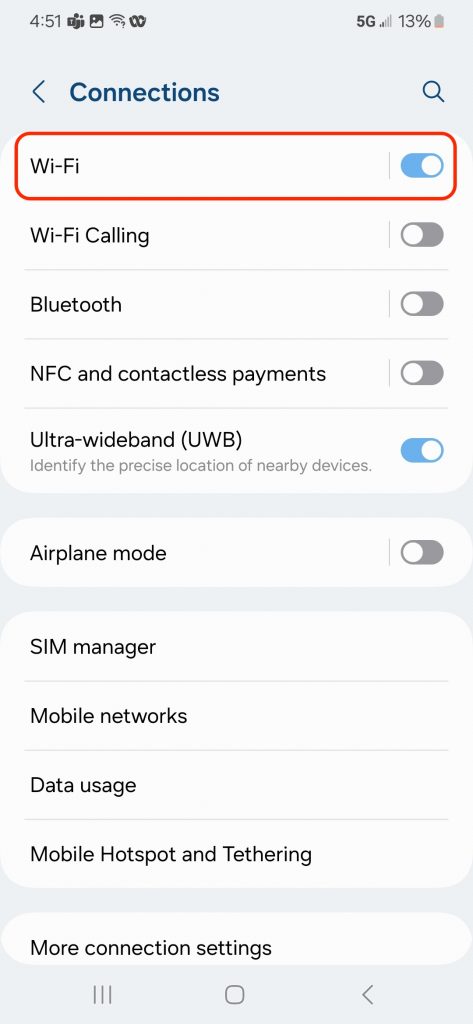
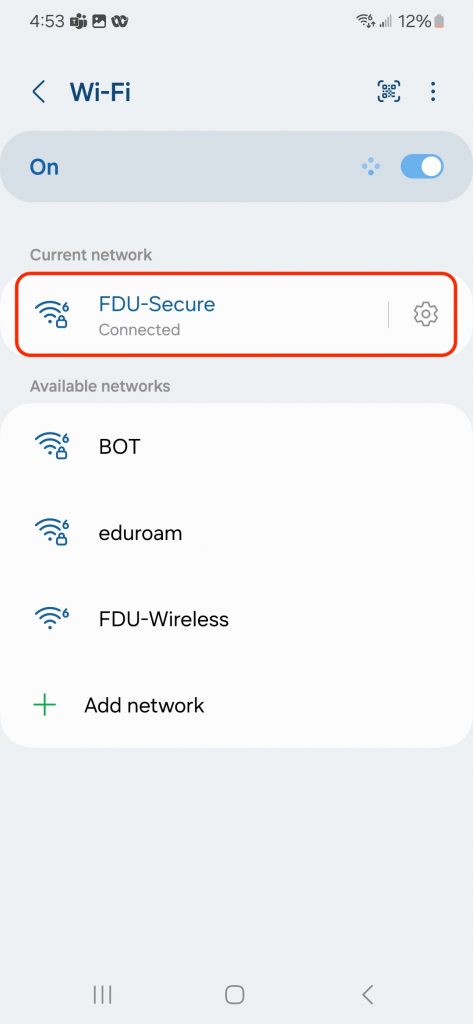
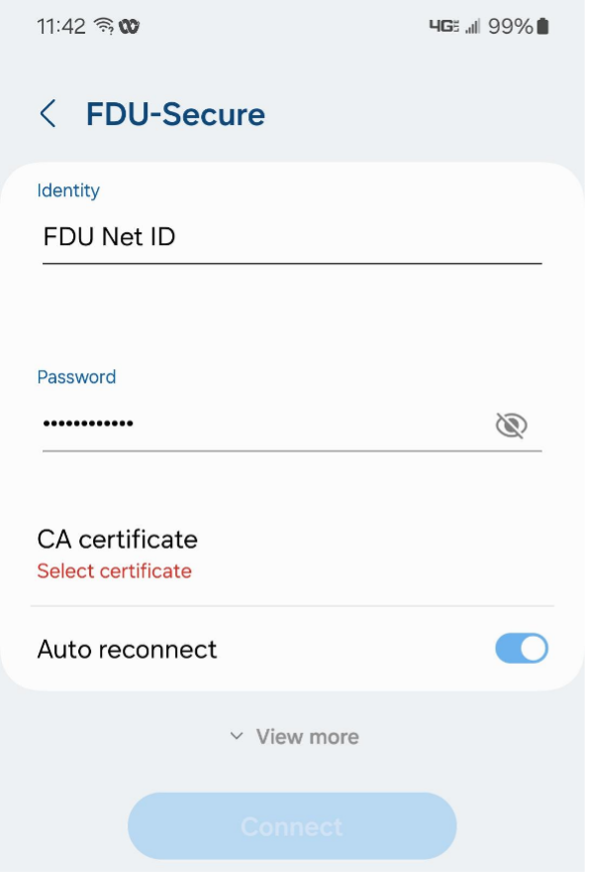
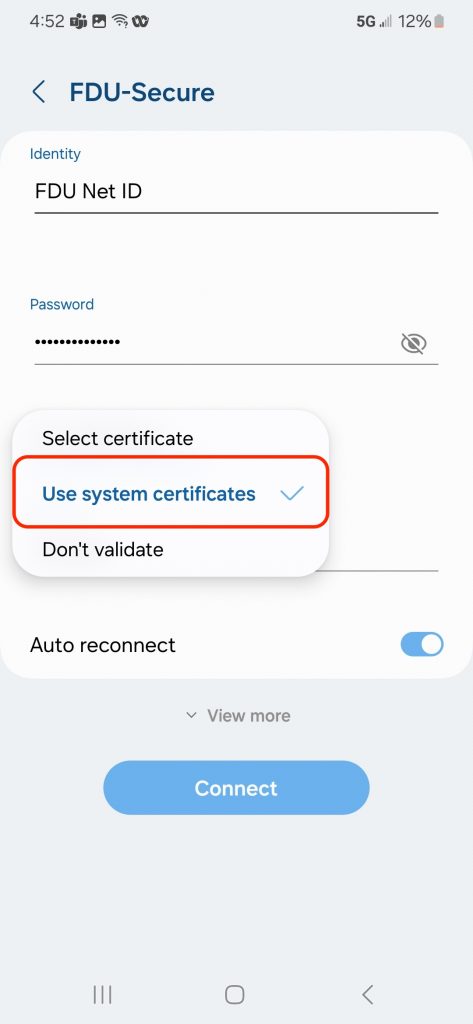
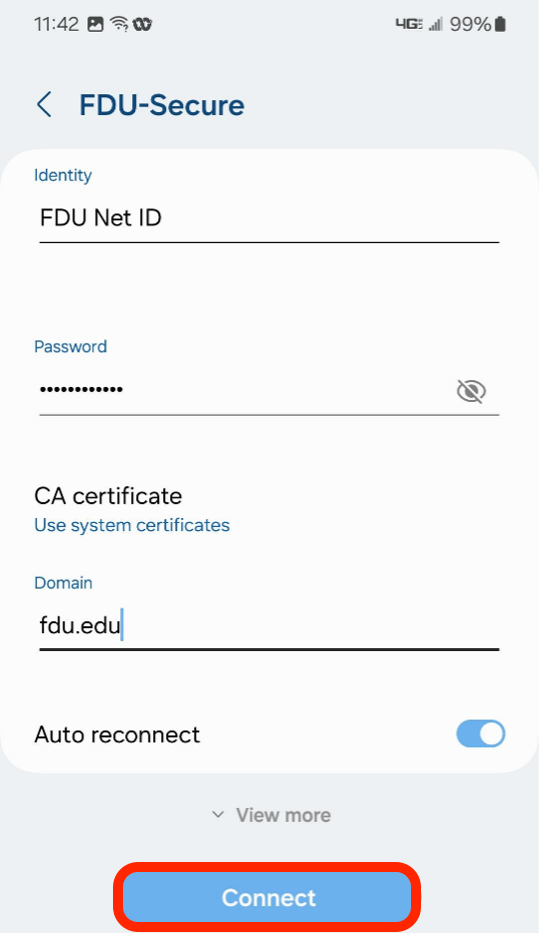
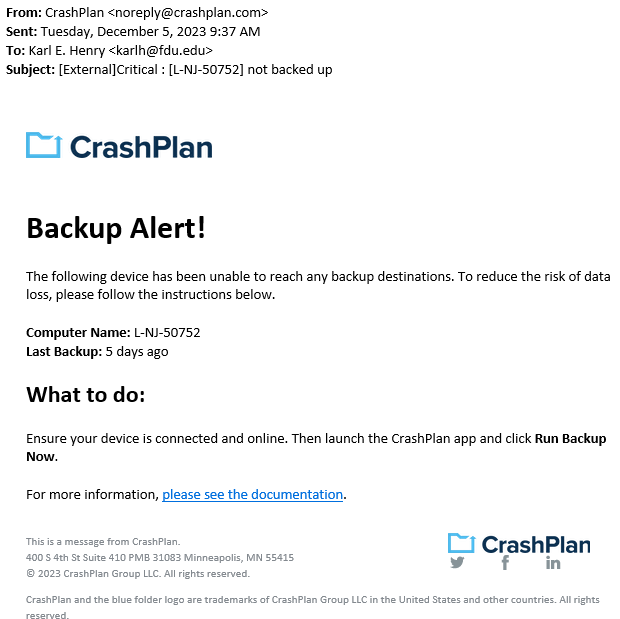

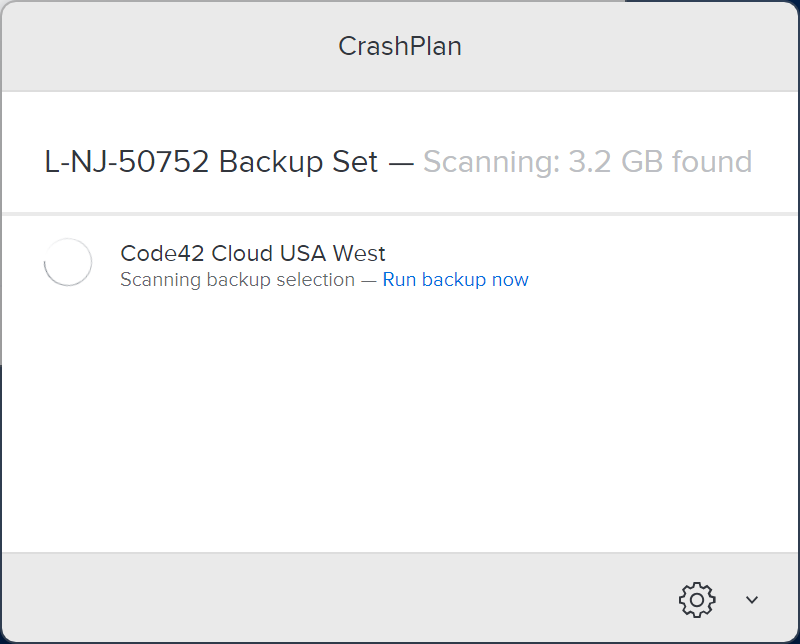

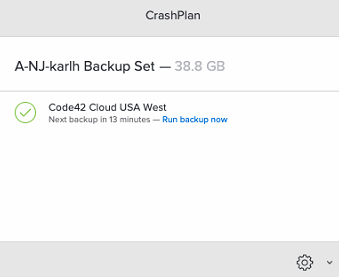


 Warning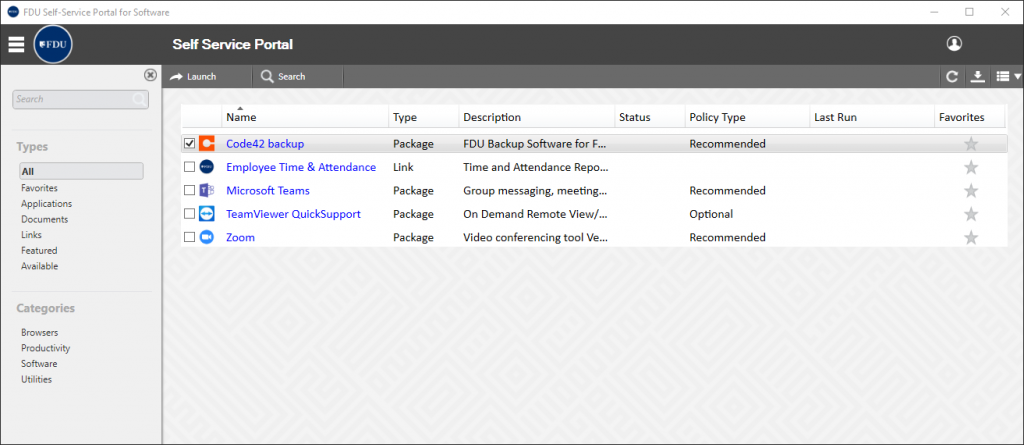
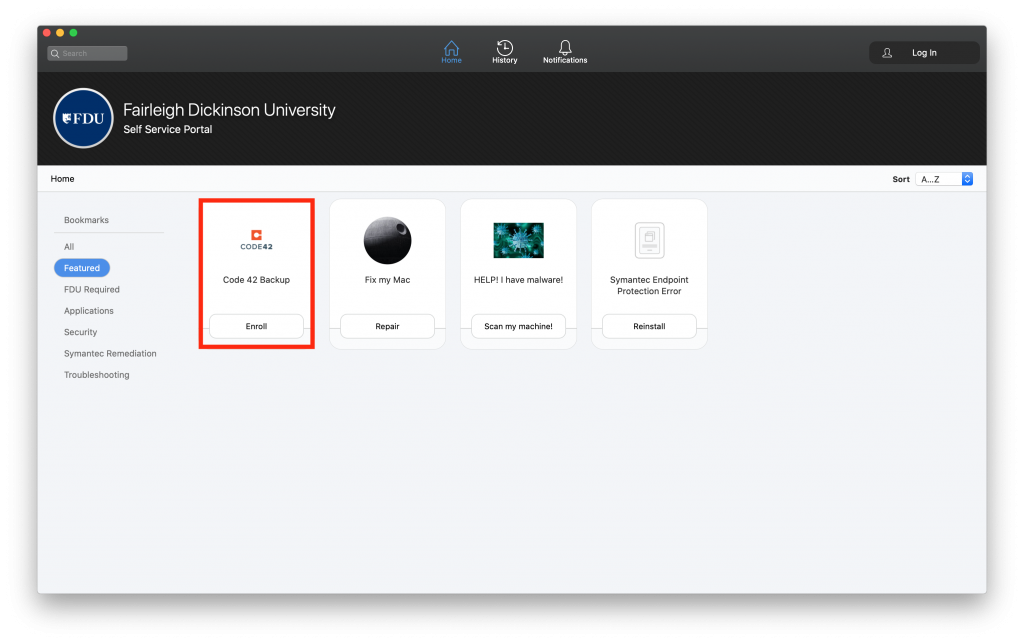
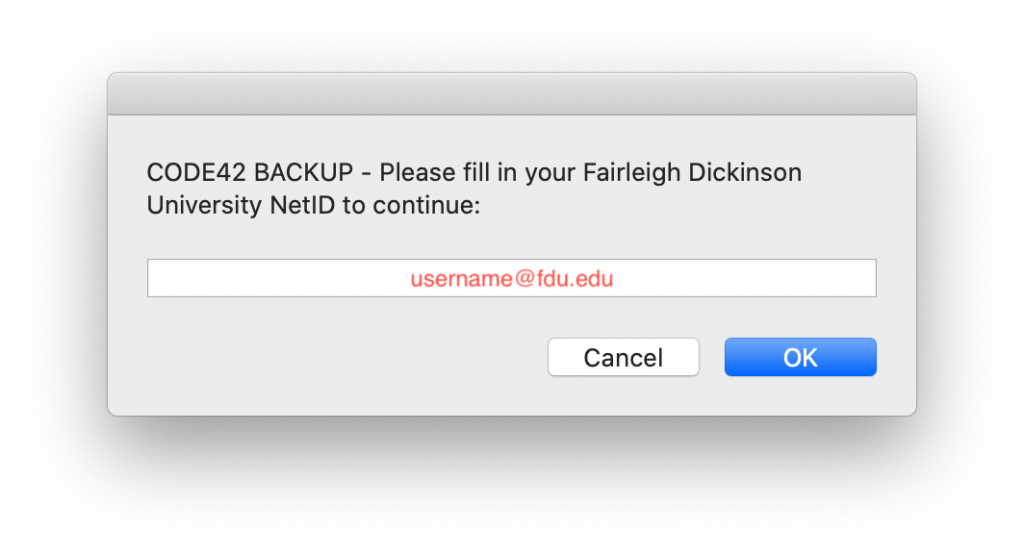
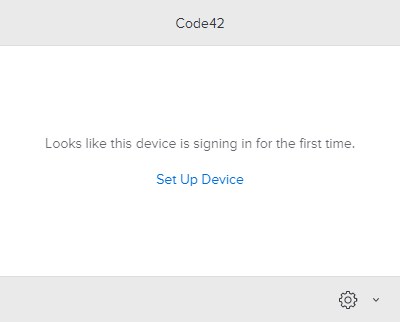
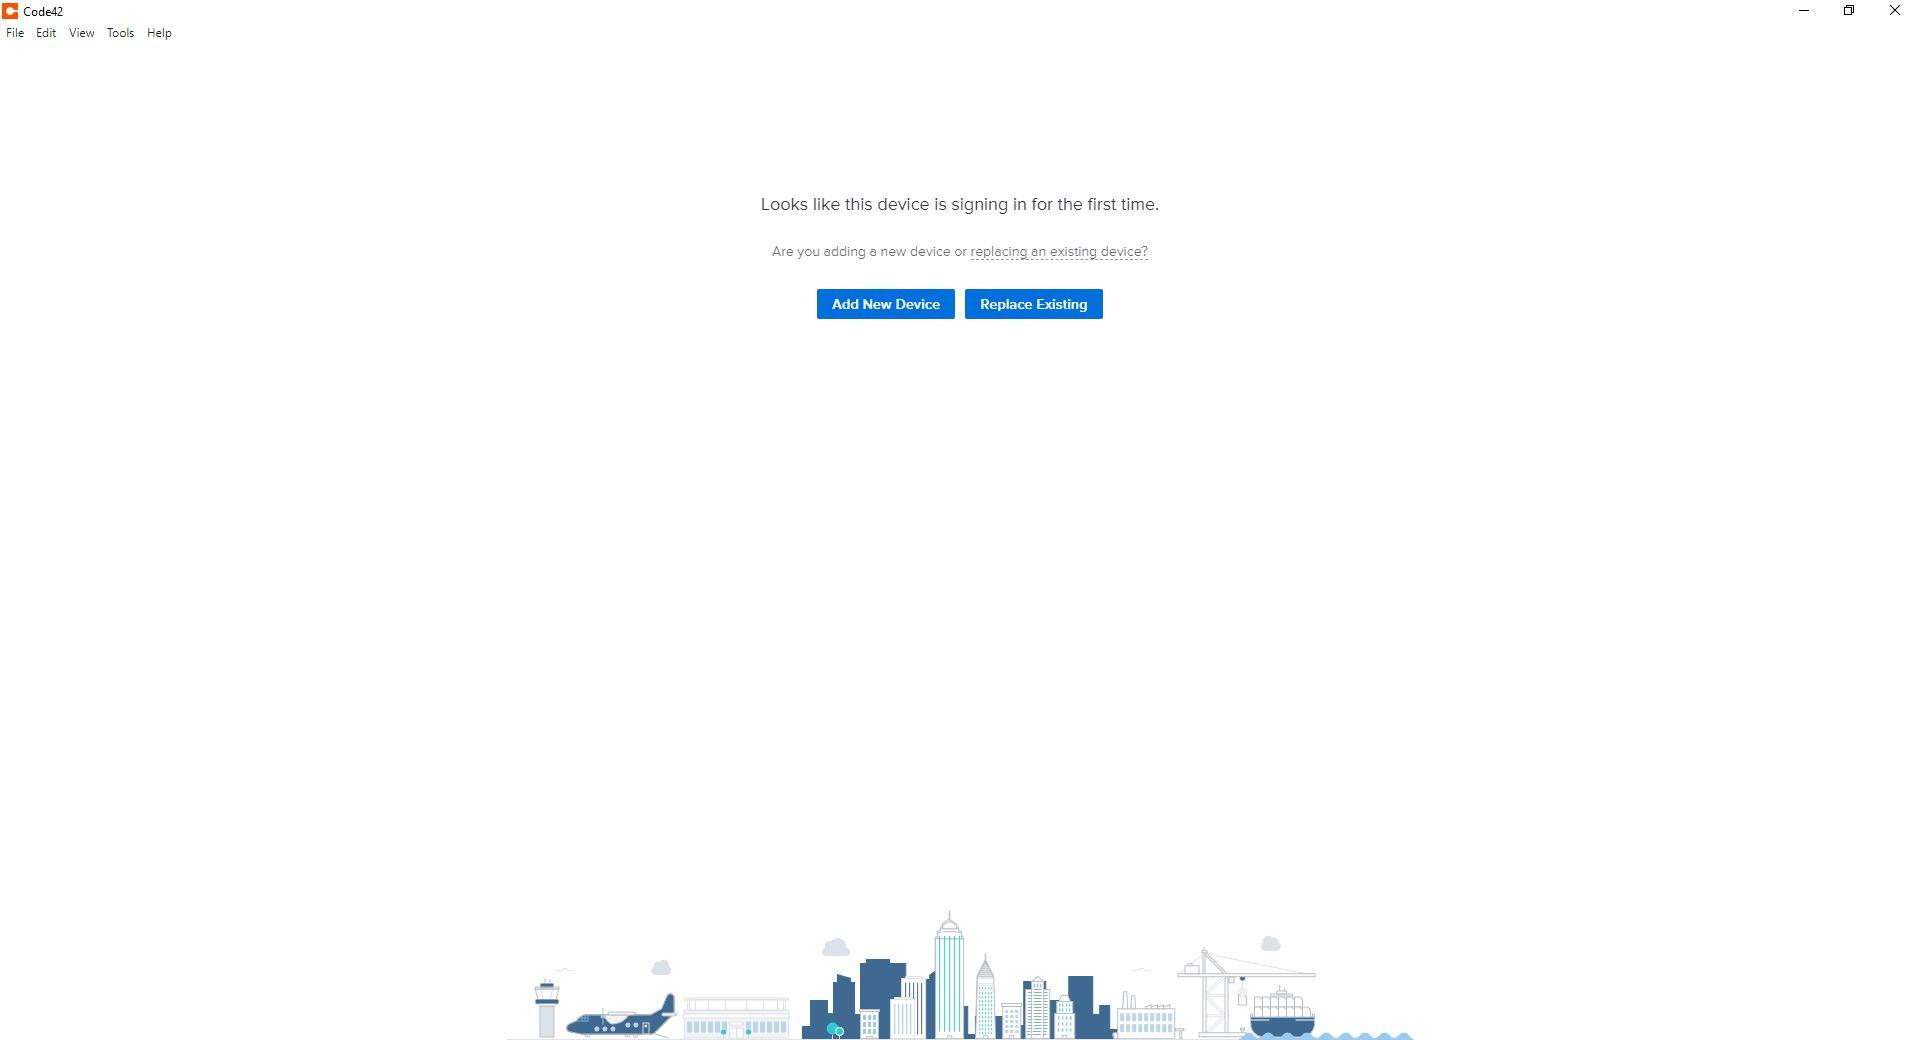
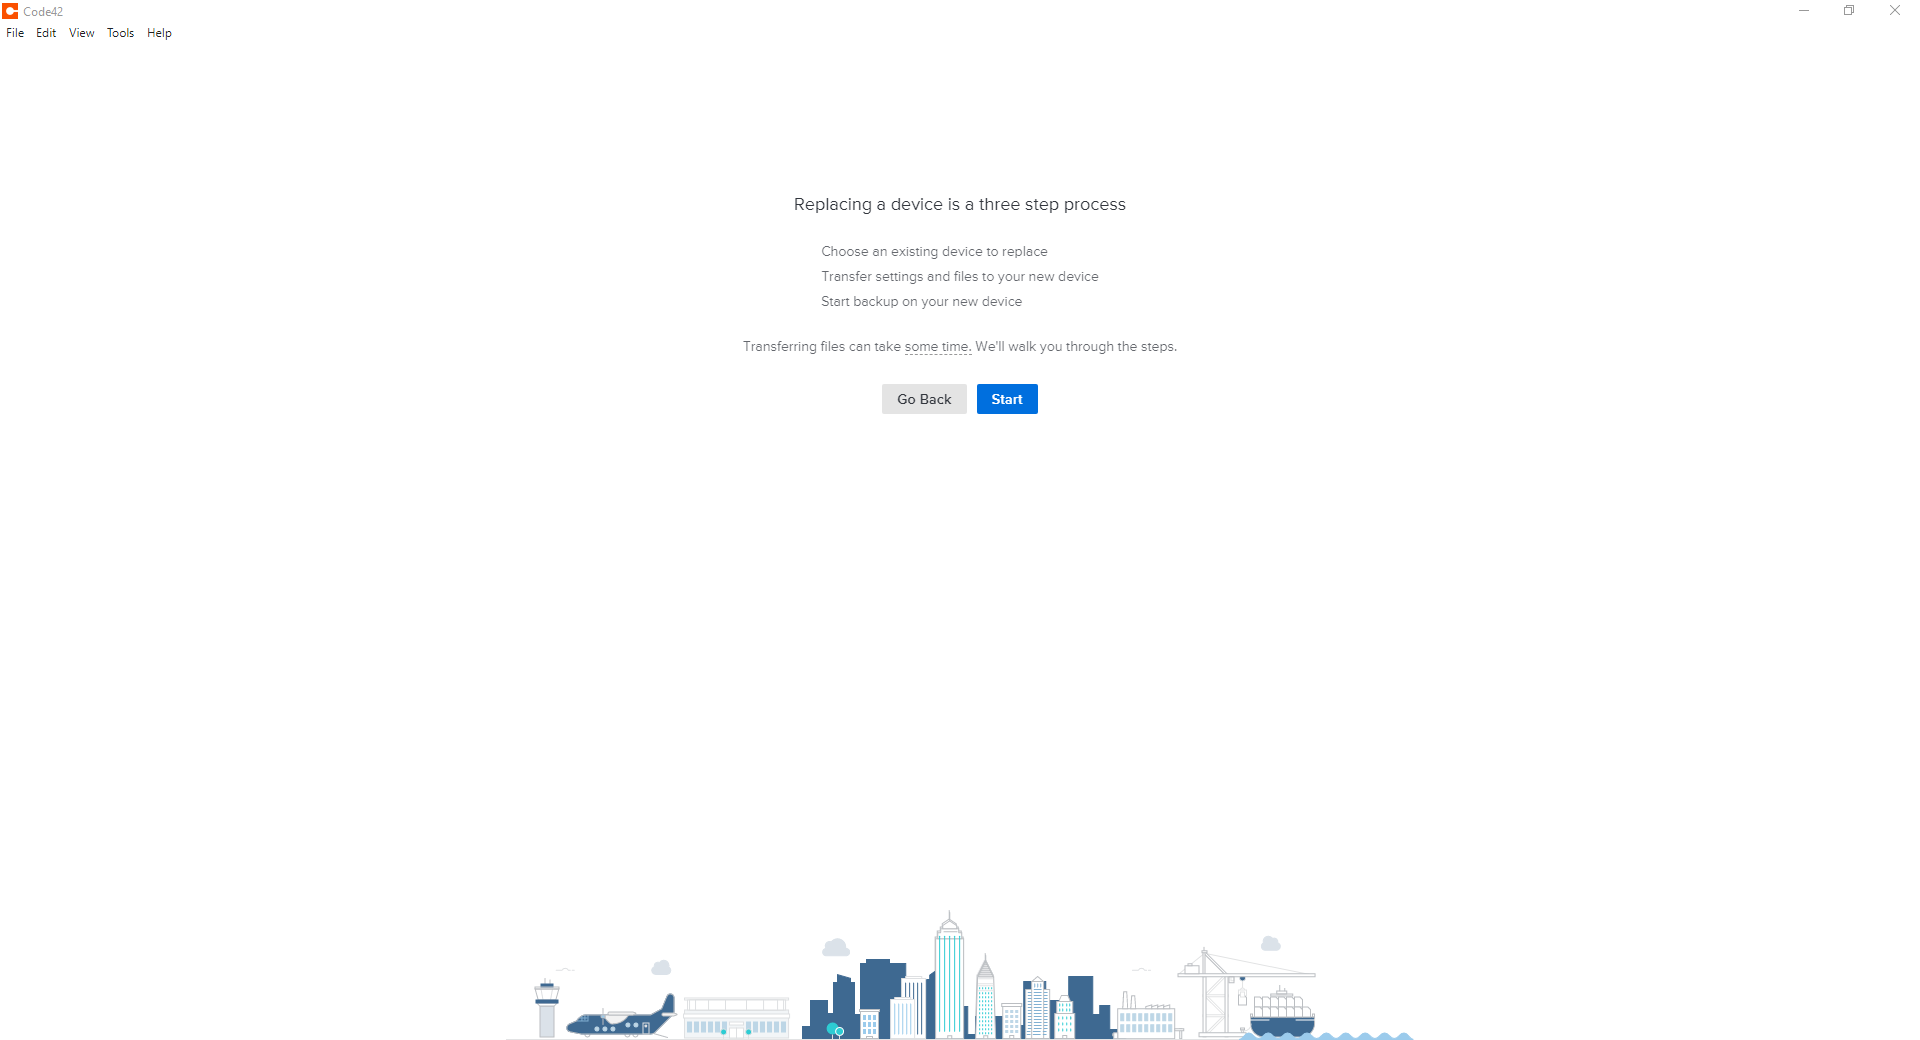
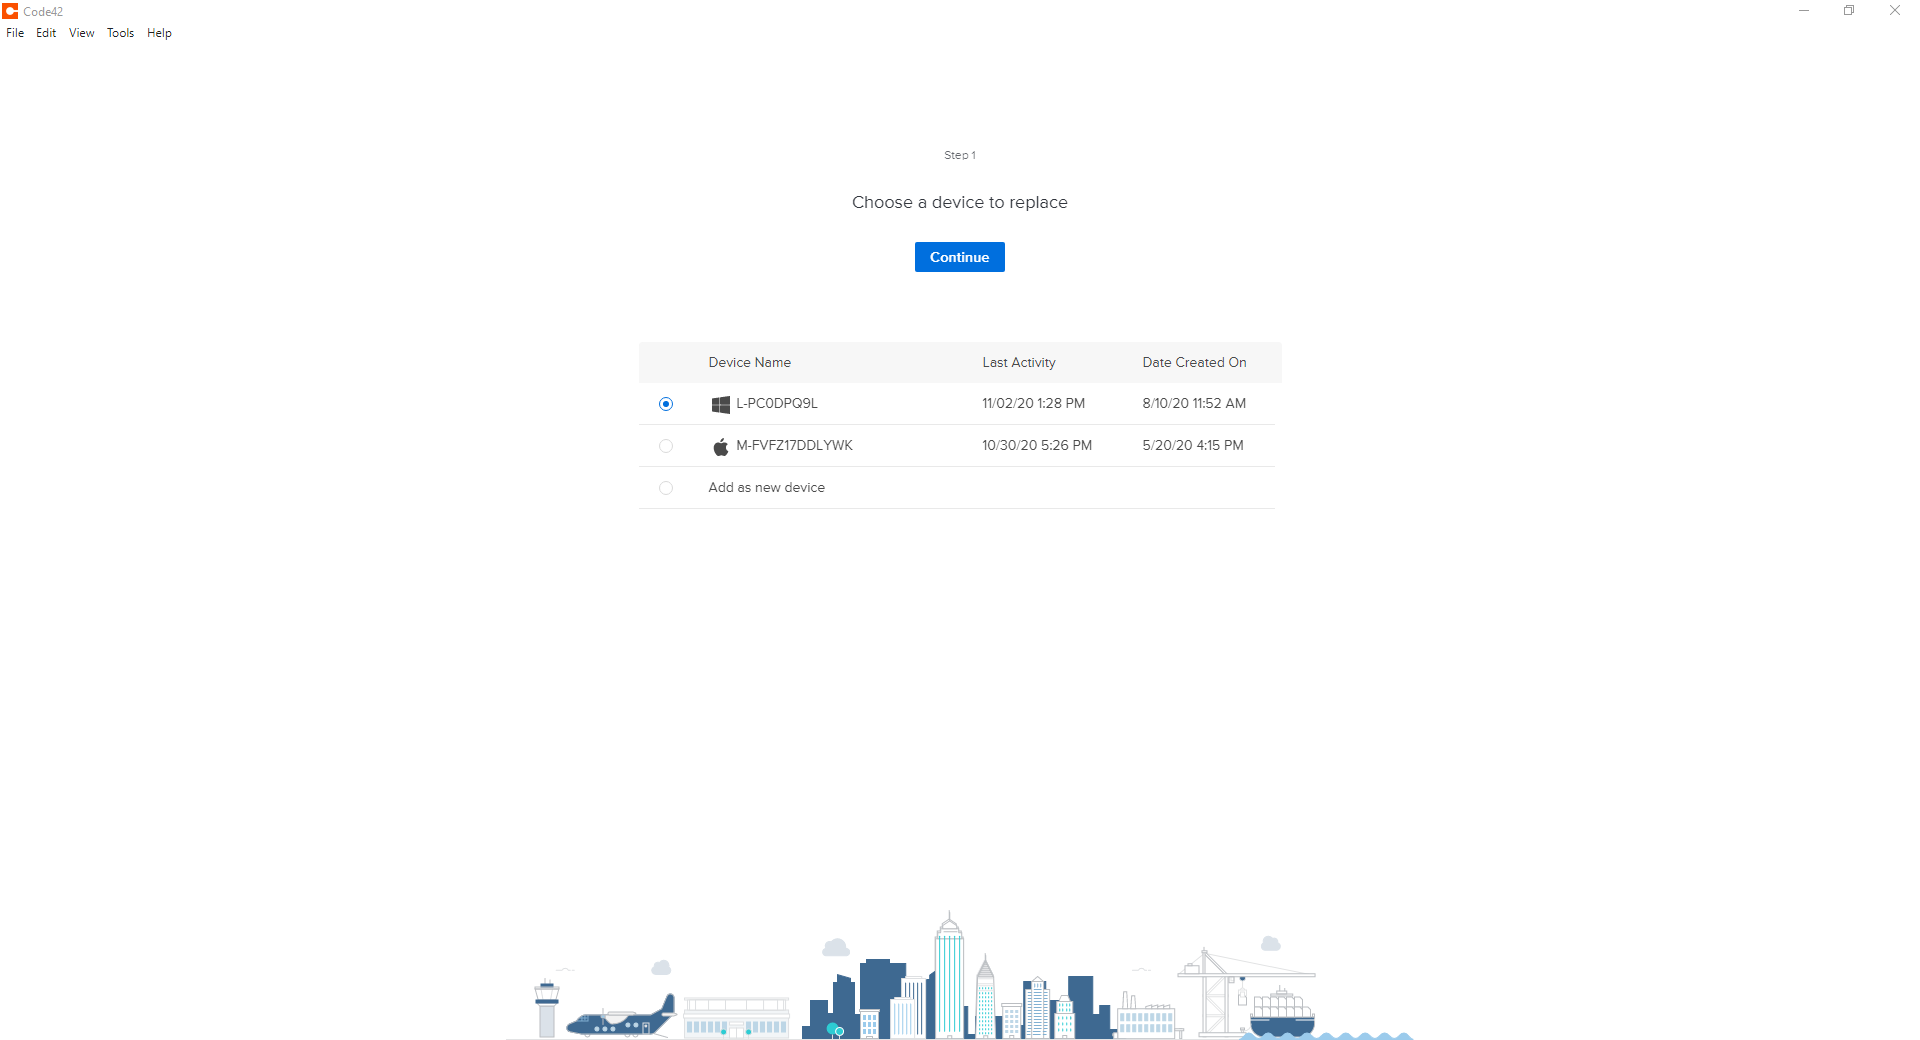
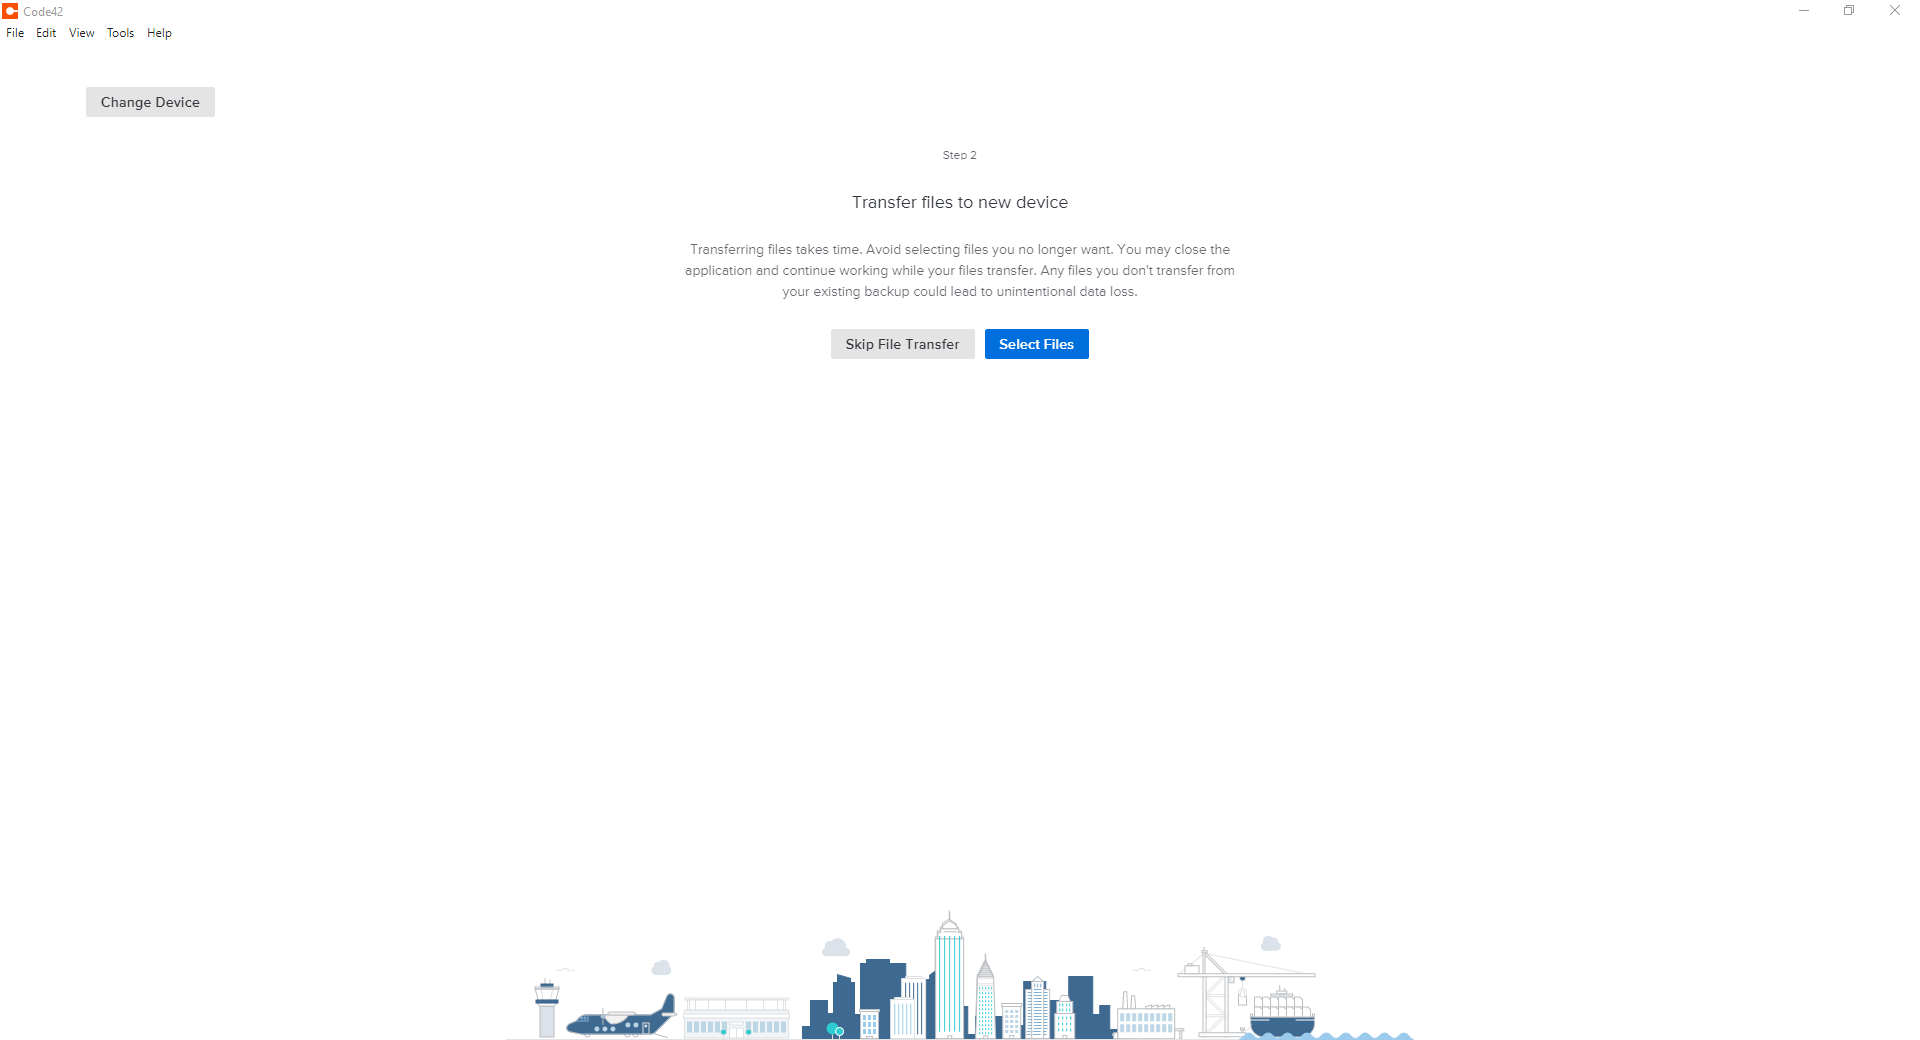
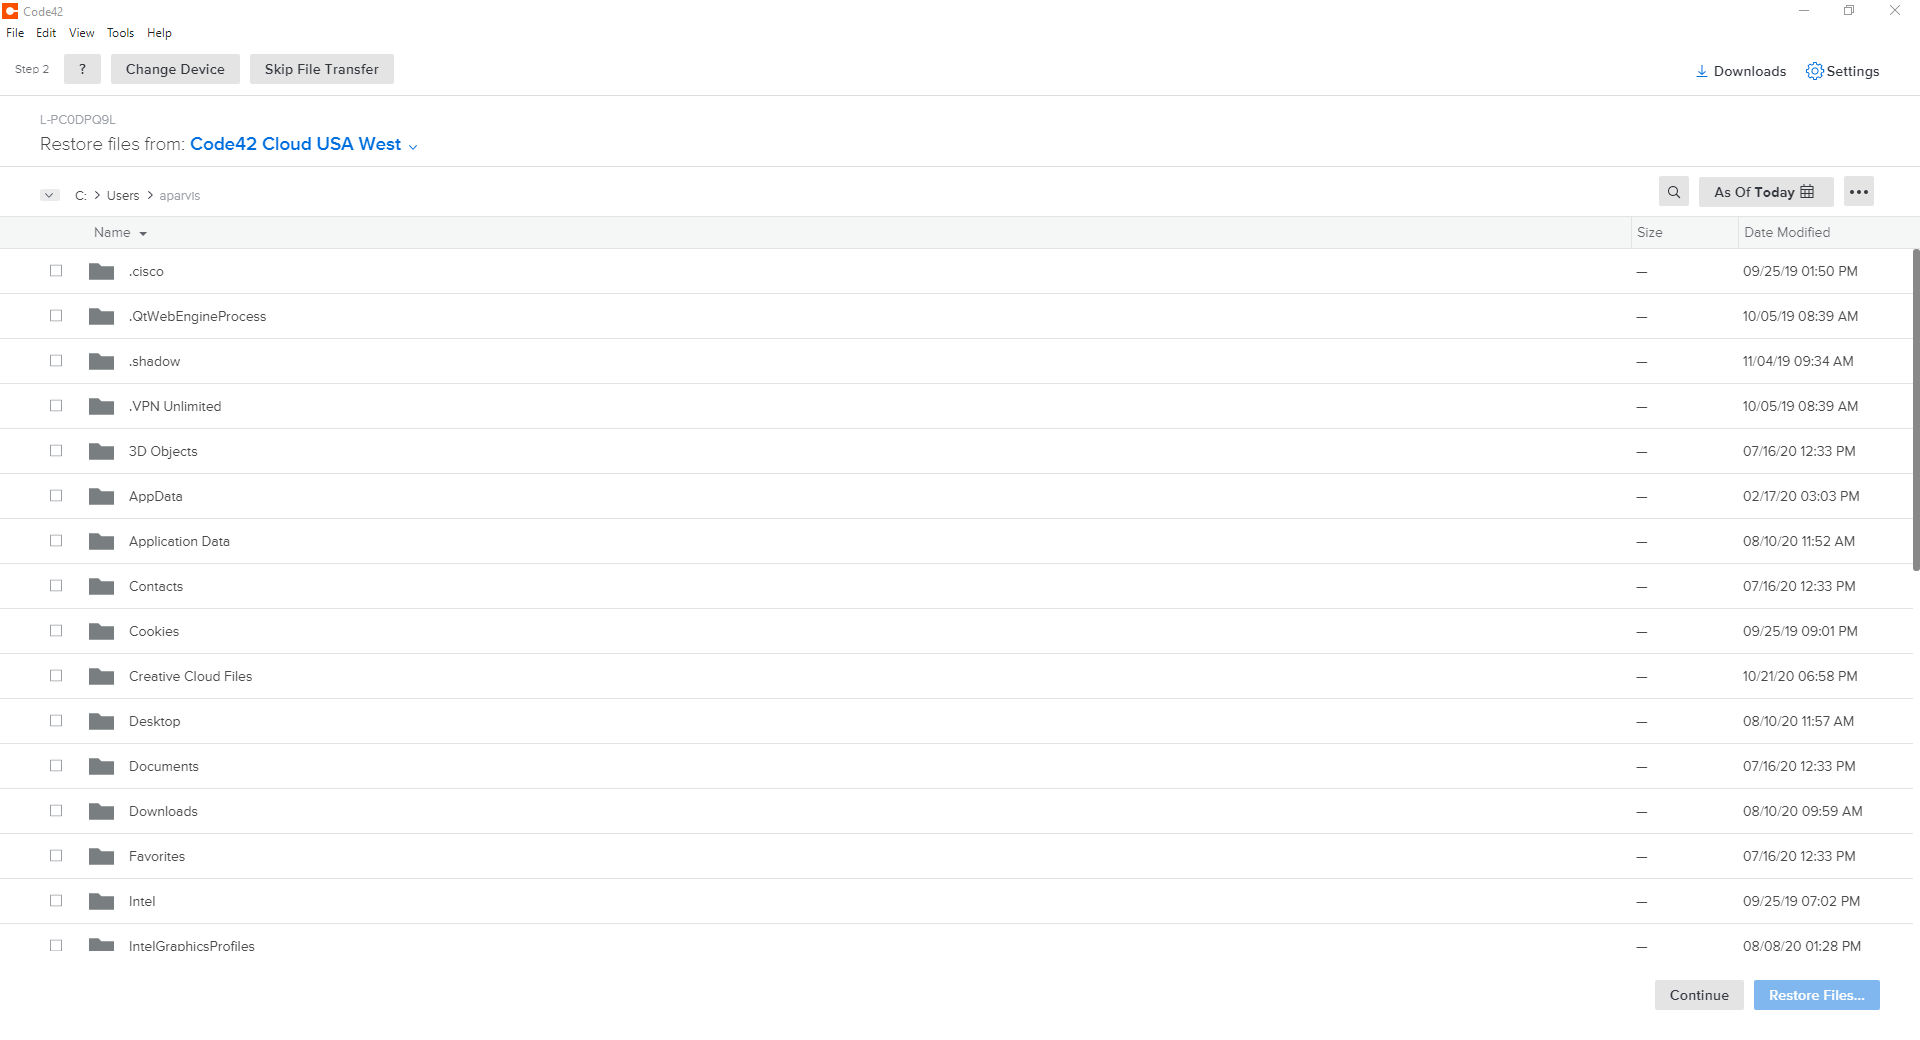
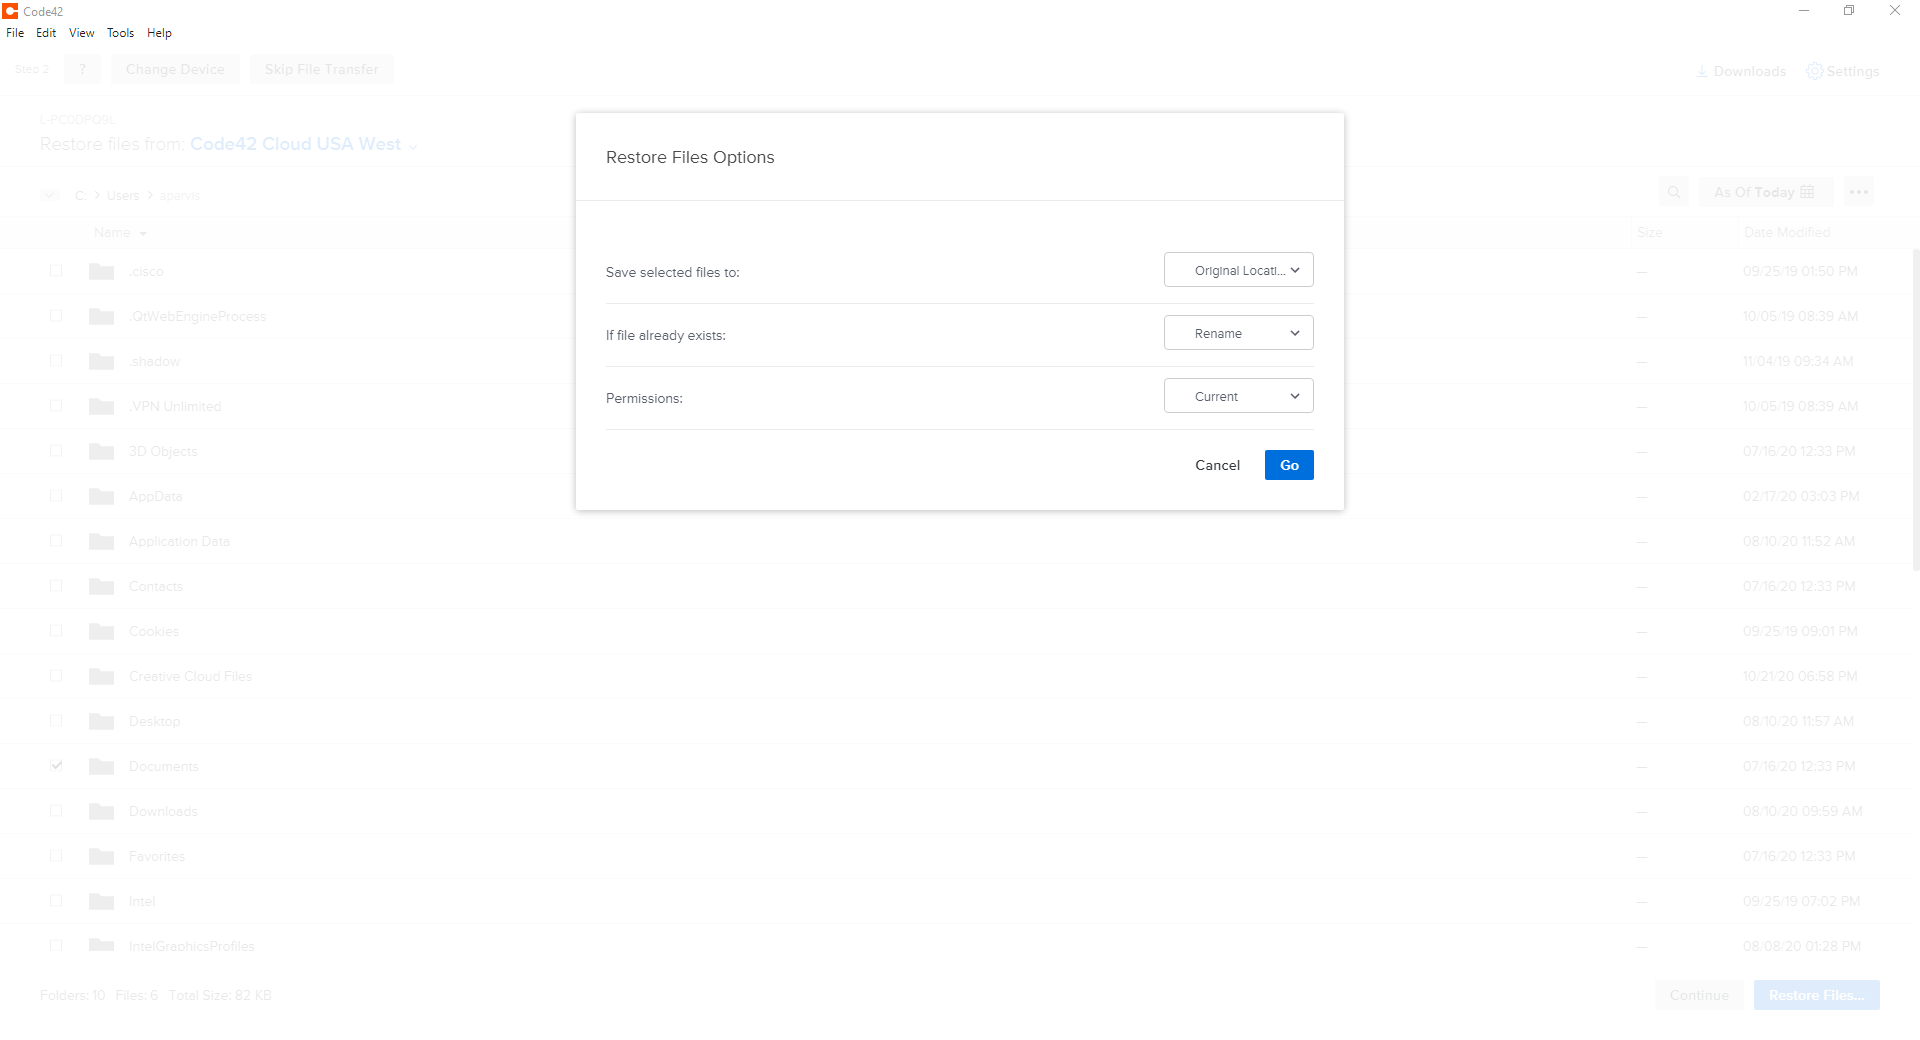
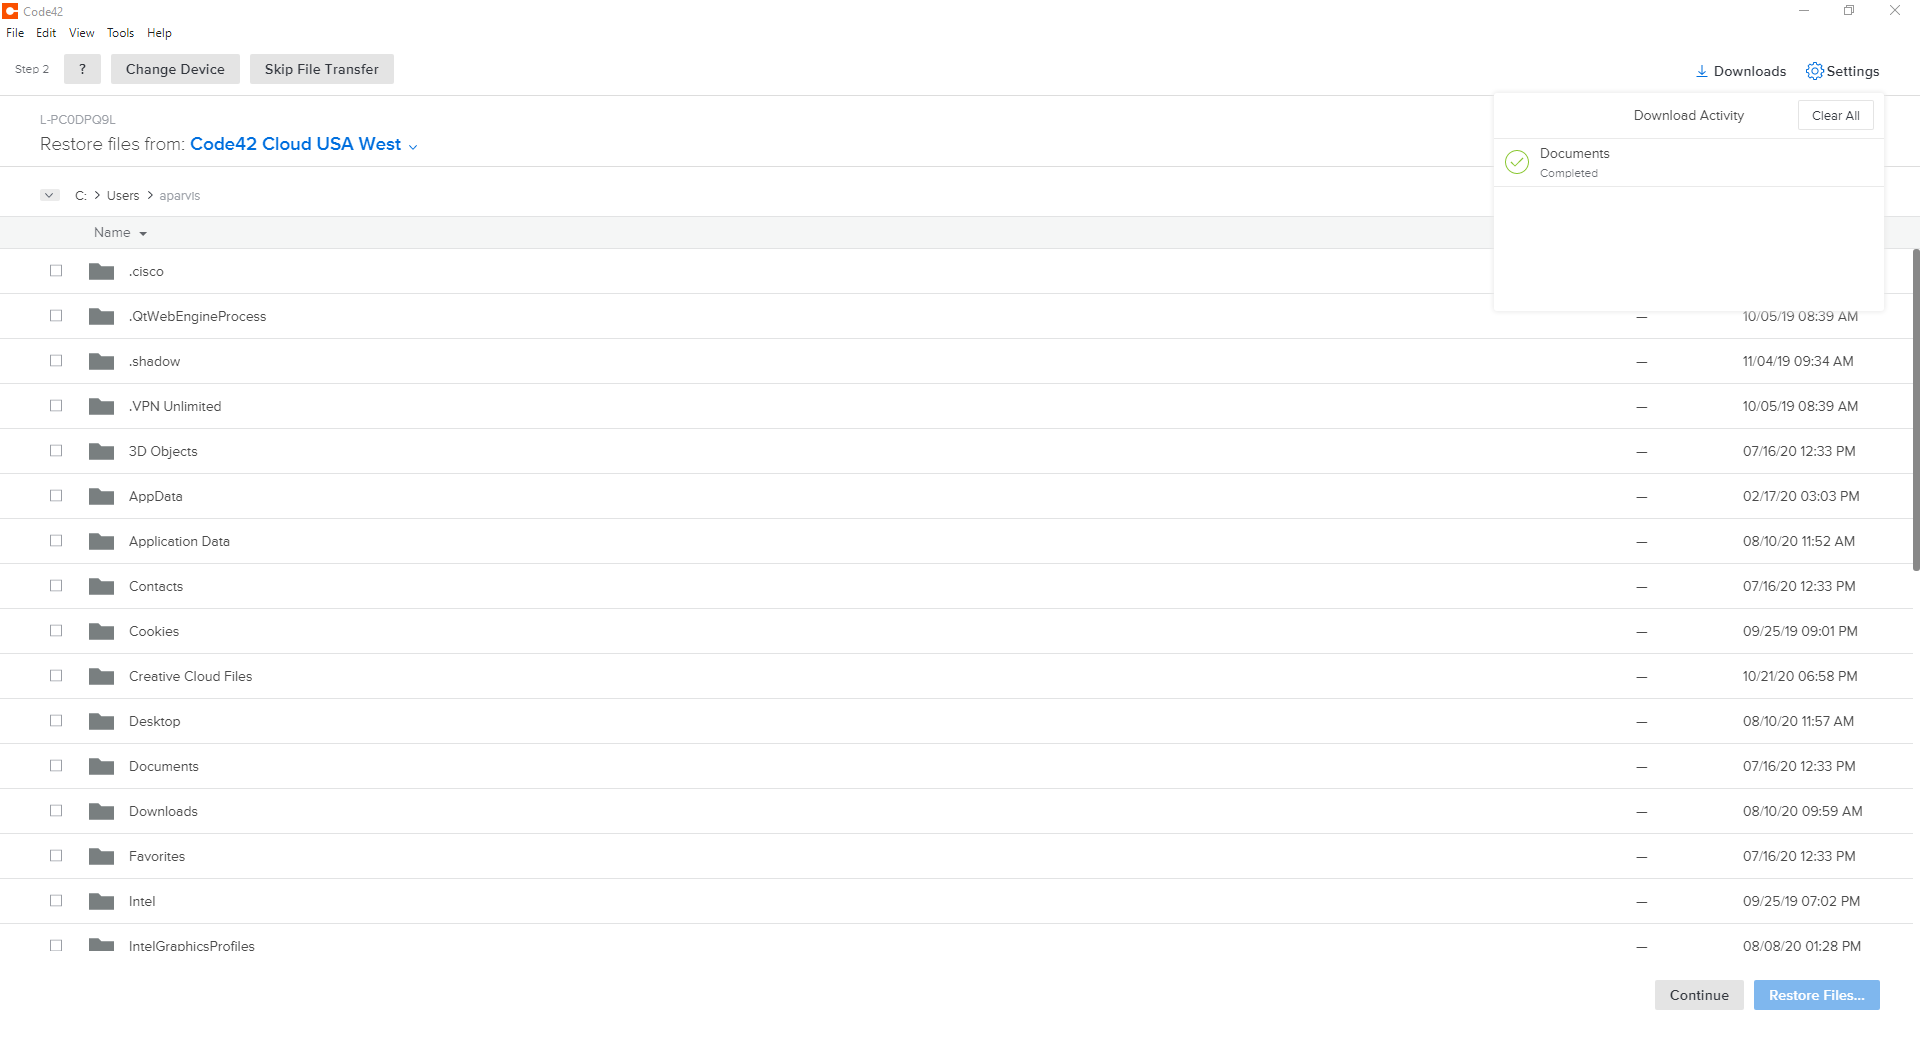

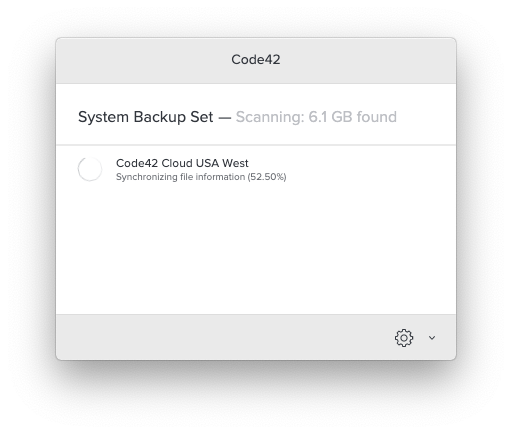
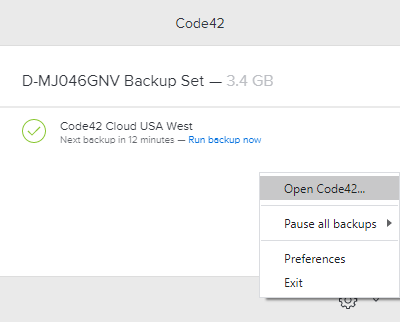
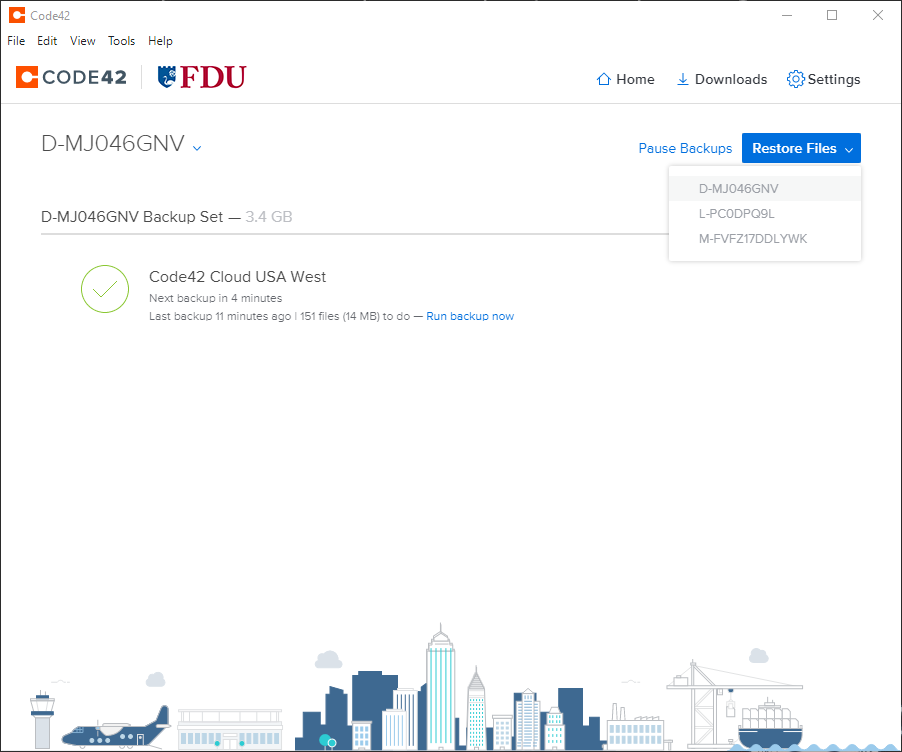
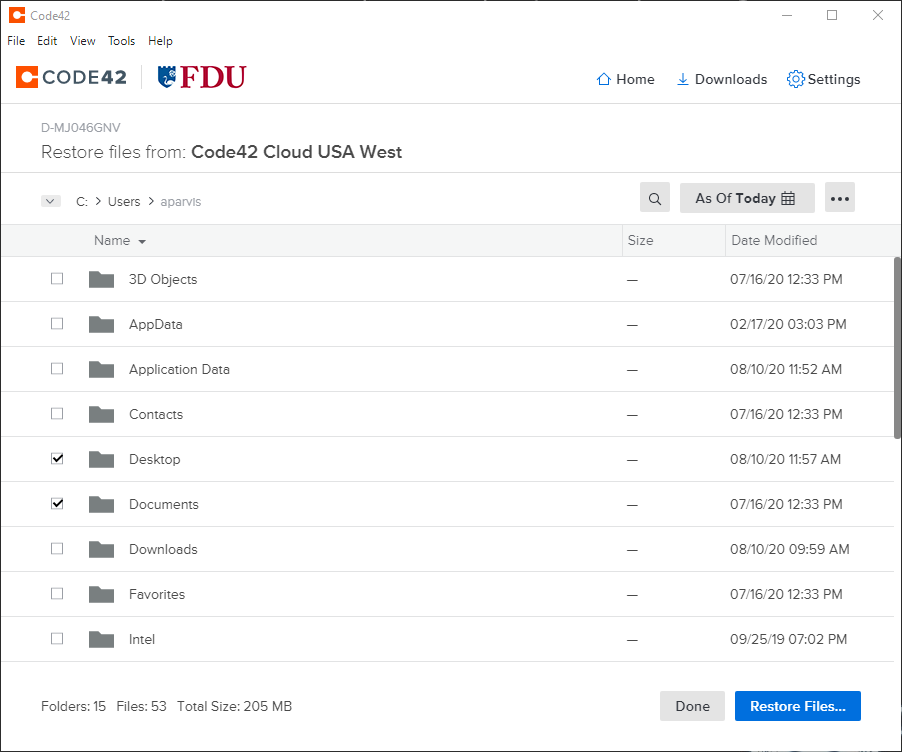
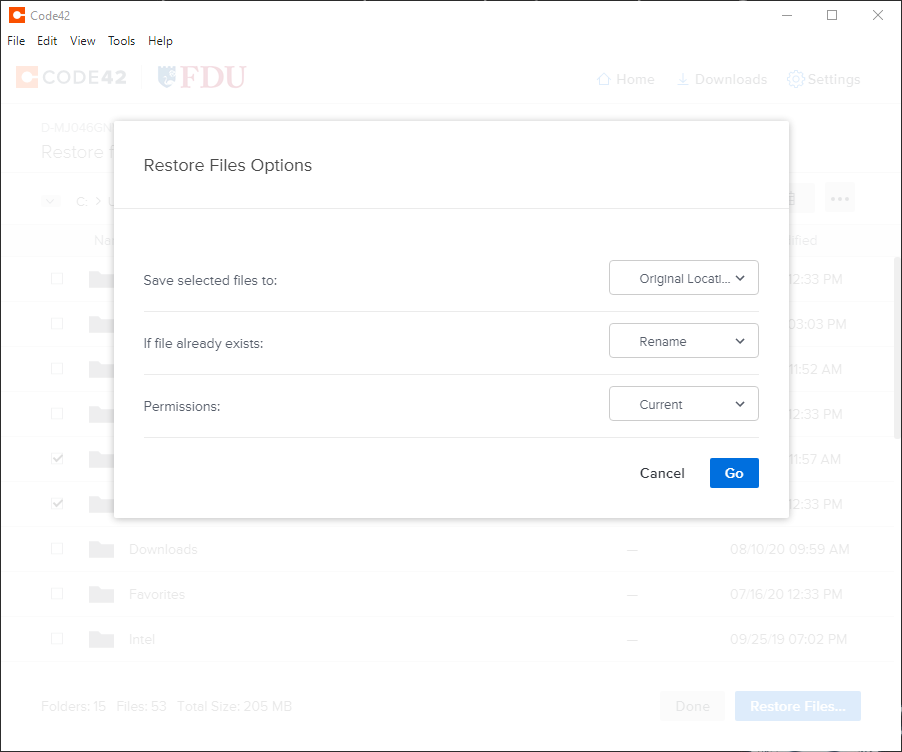
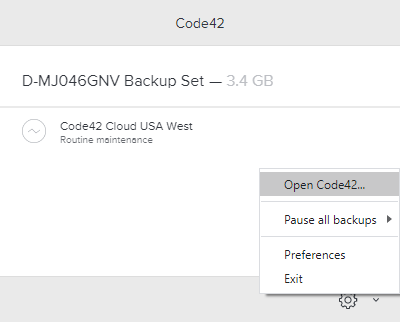
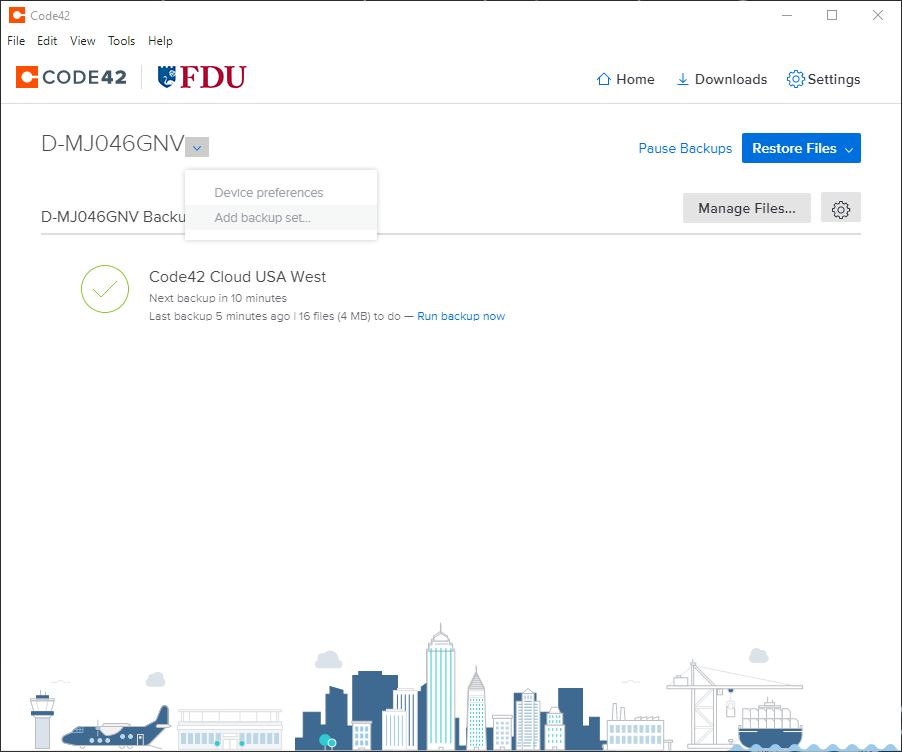
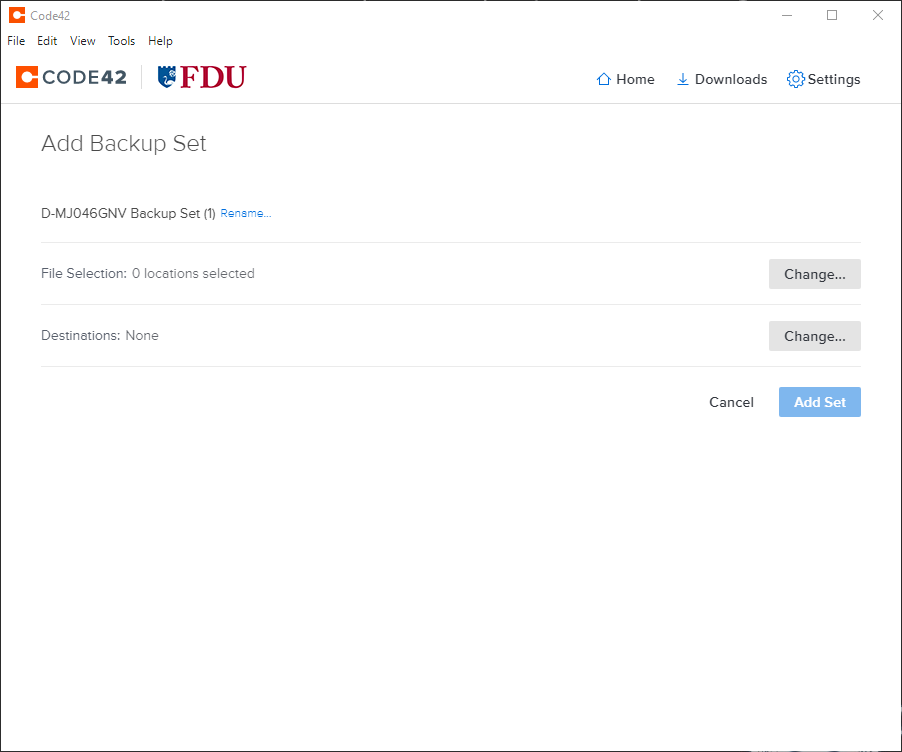
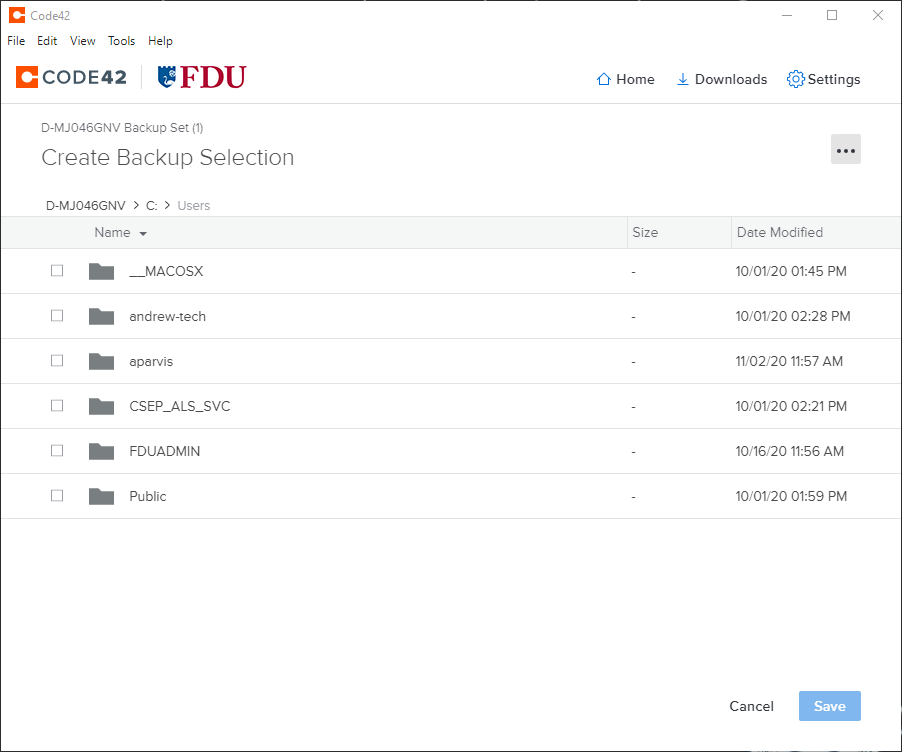
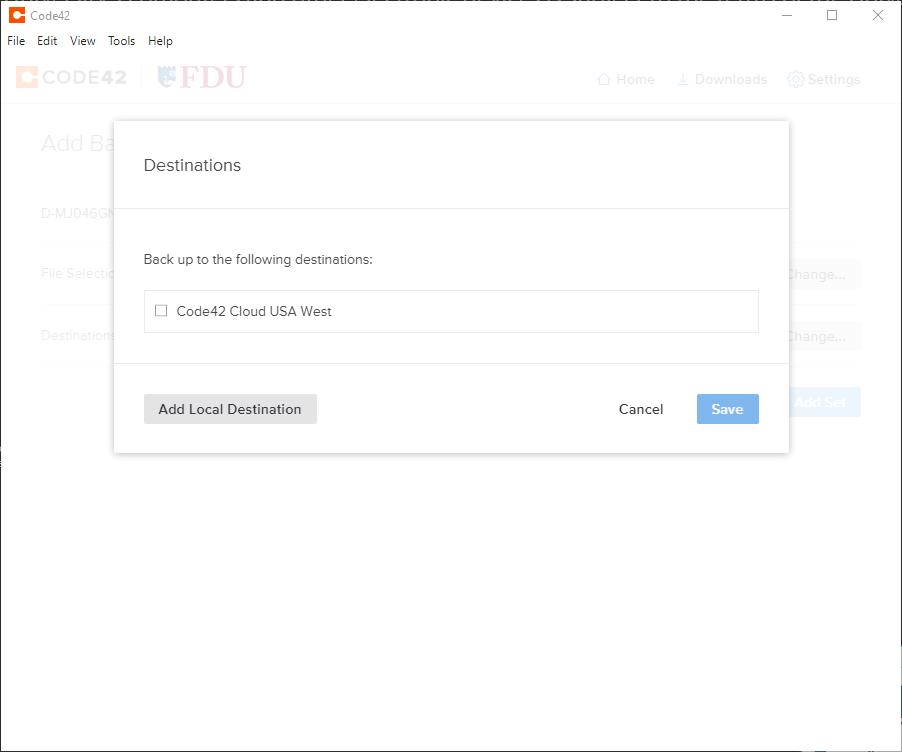
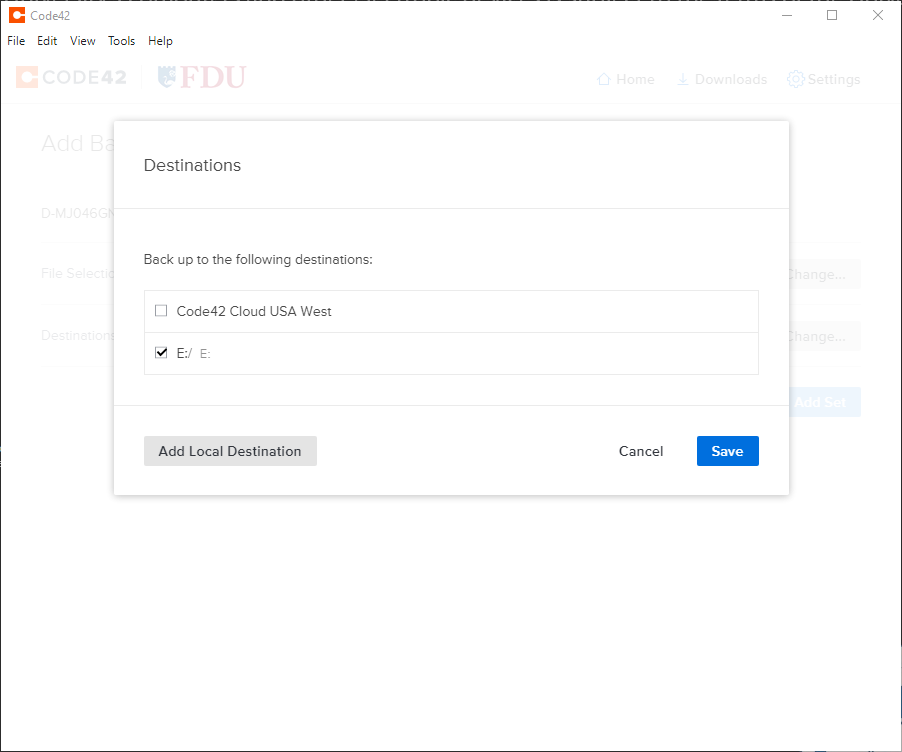
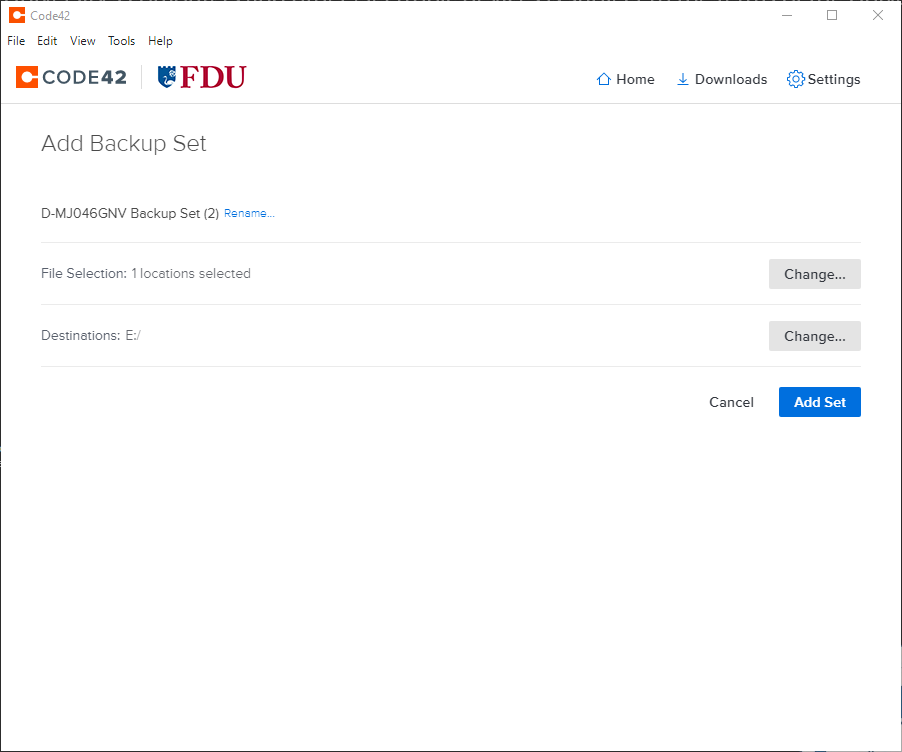
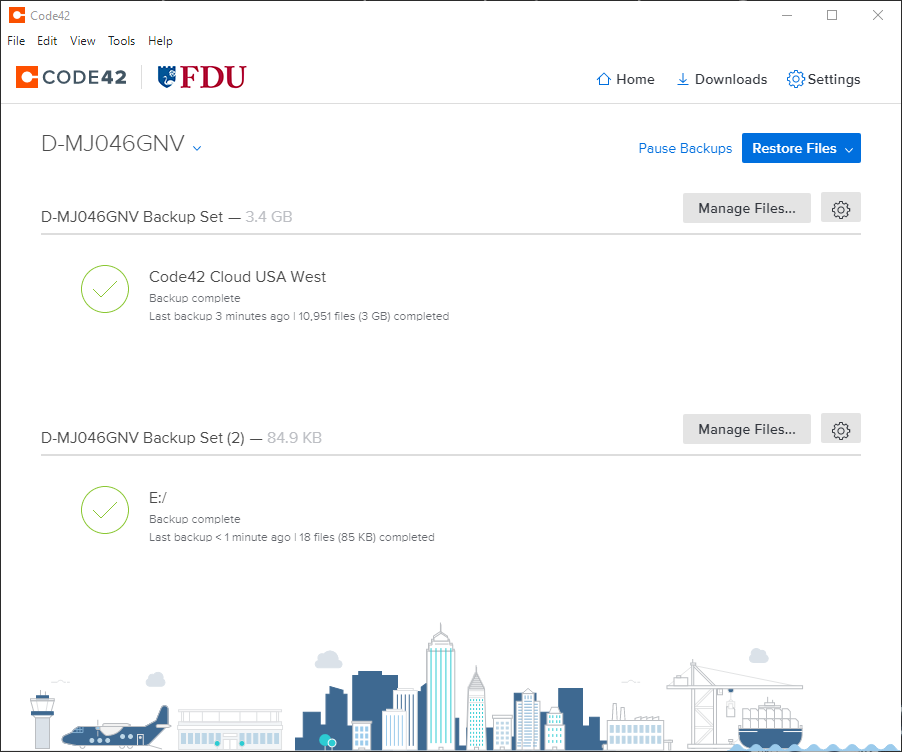
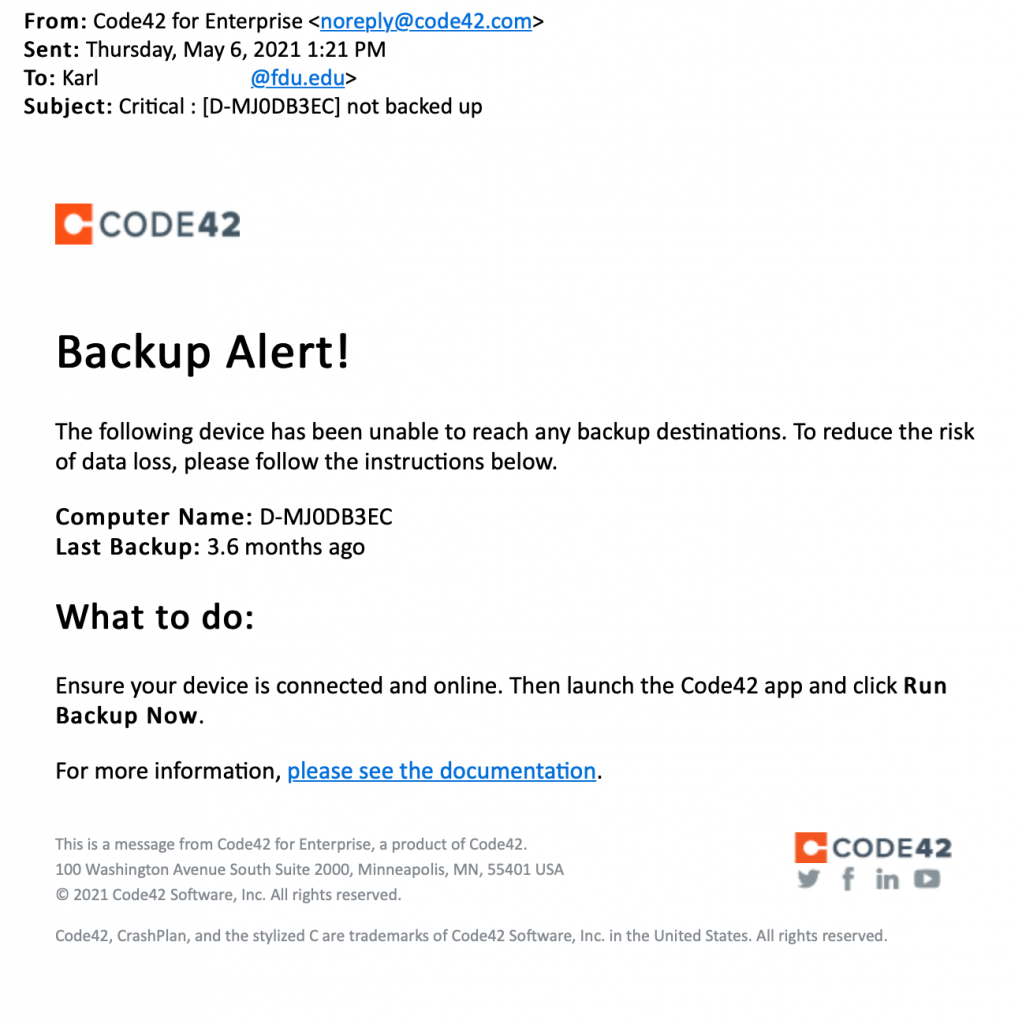
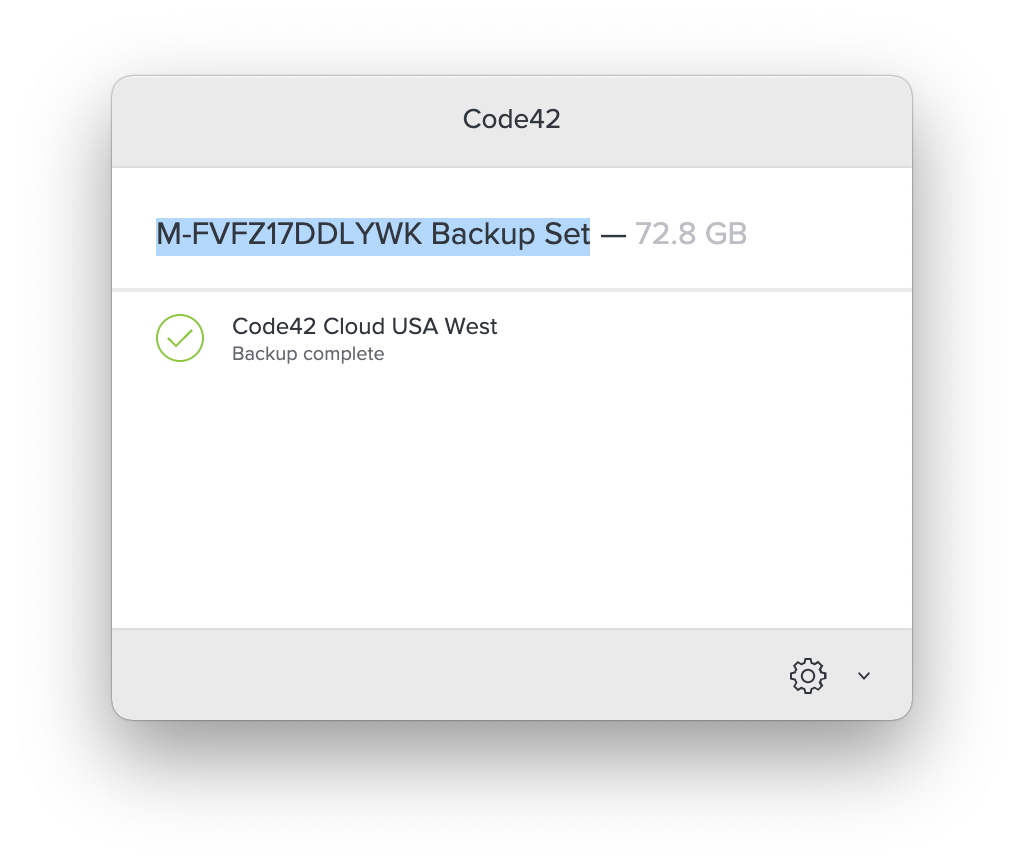
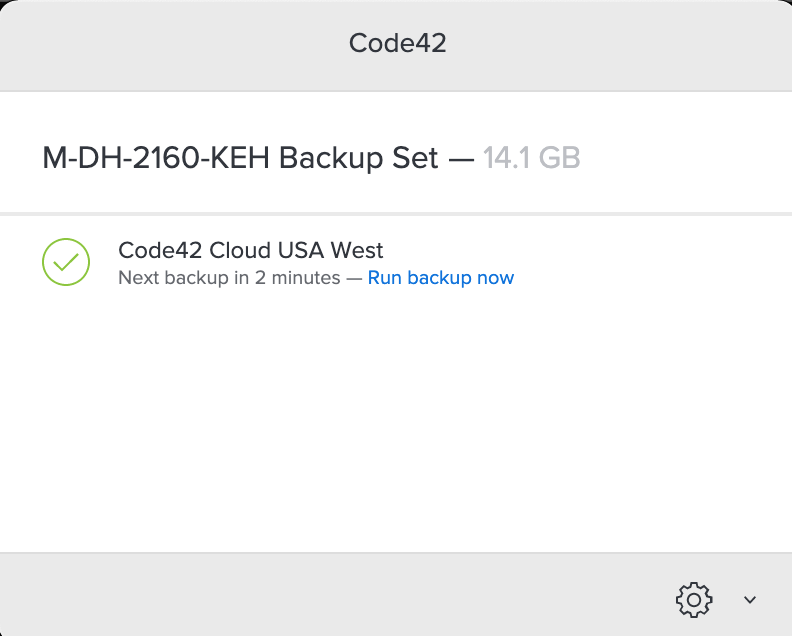

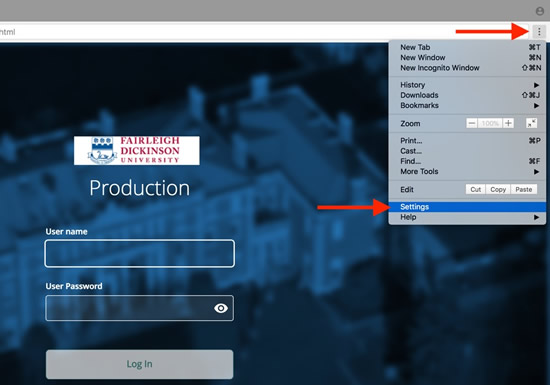 Select Advanced to show the advanced settings. Select Content settings.
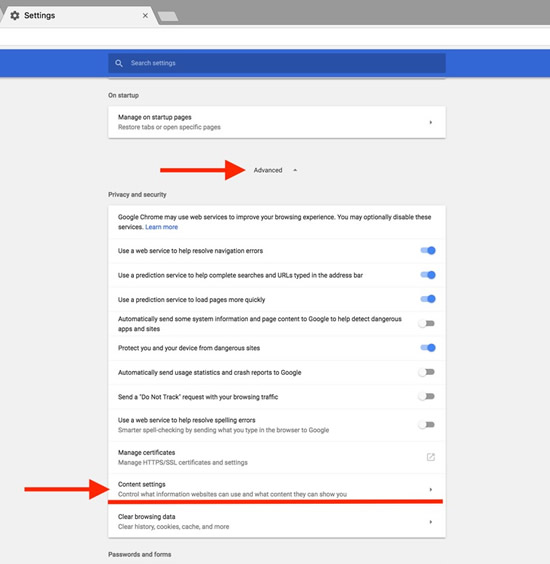 Select Cookies.
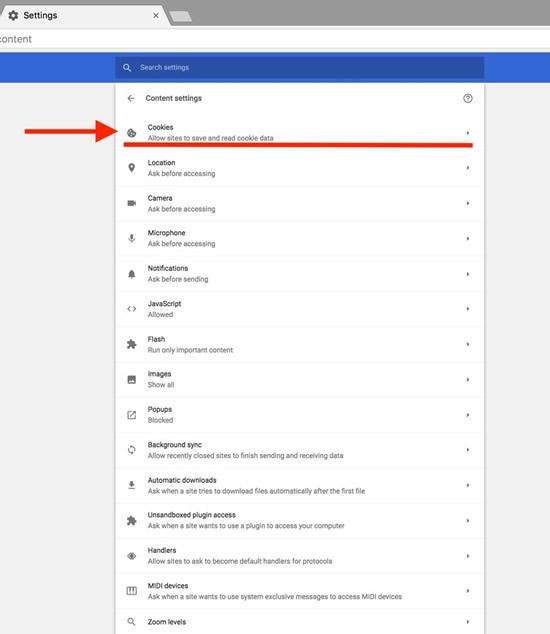 Click the garbage can icon to delete the cookies.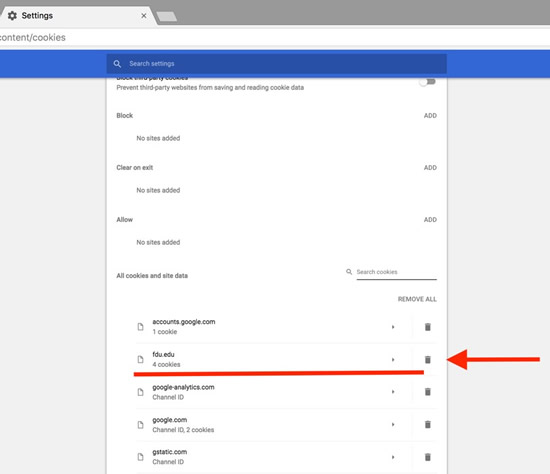
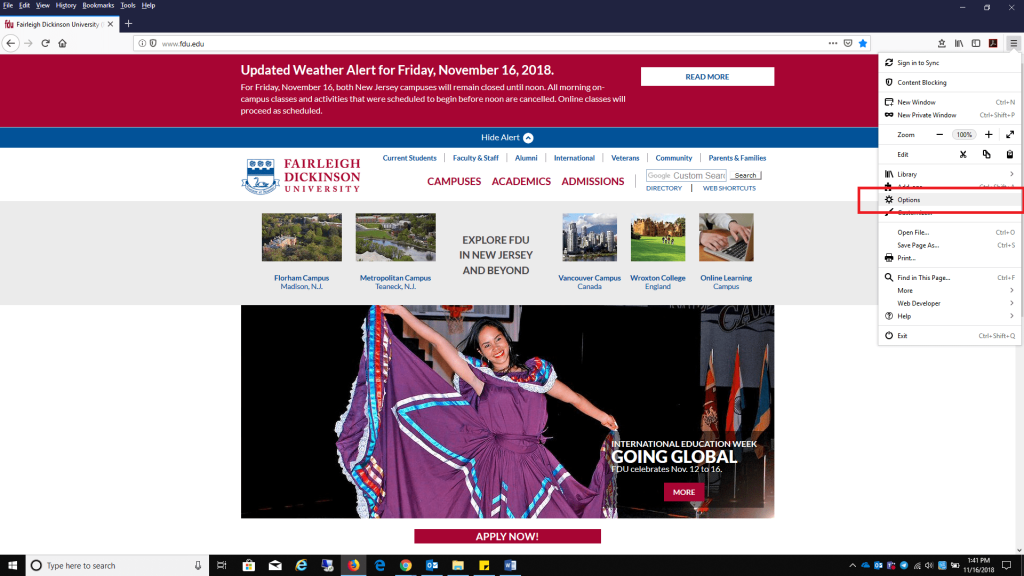 Select the Privacy & Security tab and click Manage Data found under Cookies and Site Data.
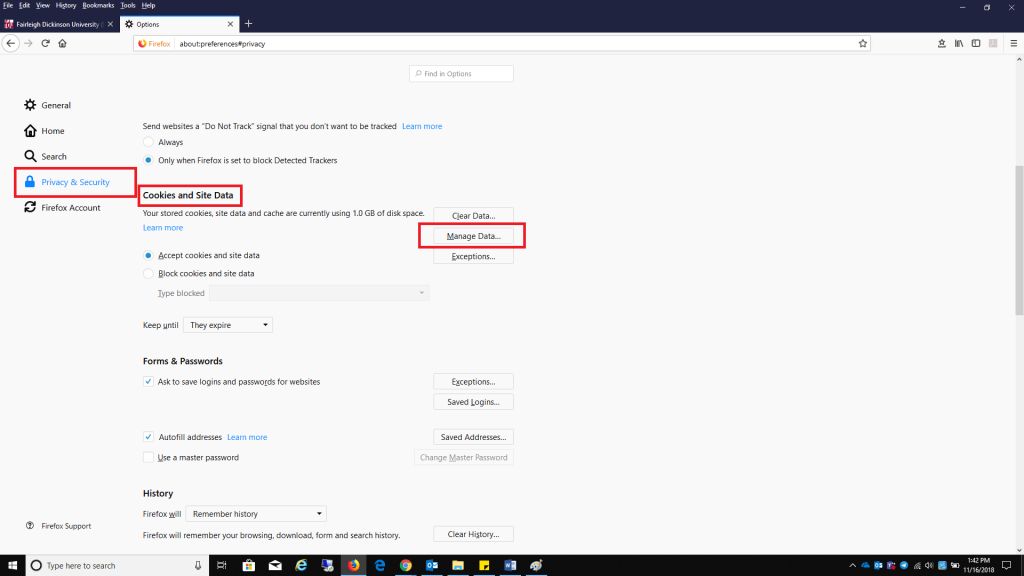 Select fdu.edu and select Remove Selected, select Save Changes when finished.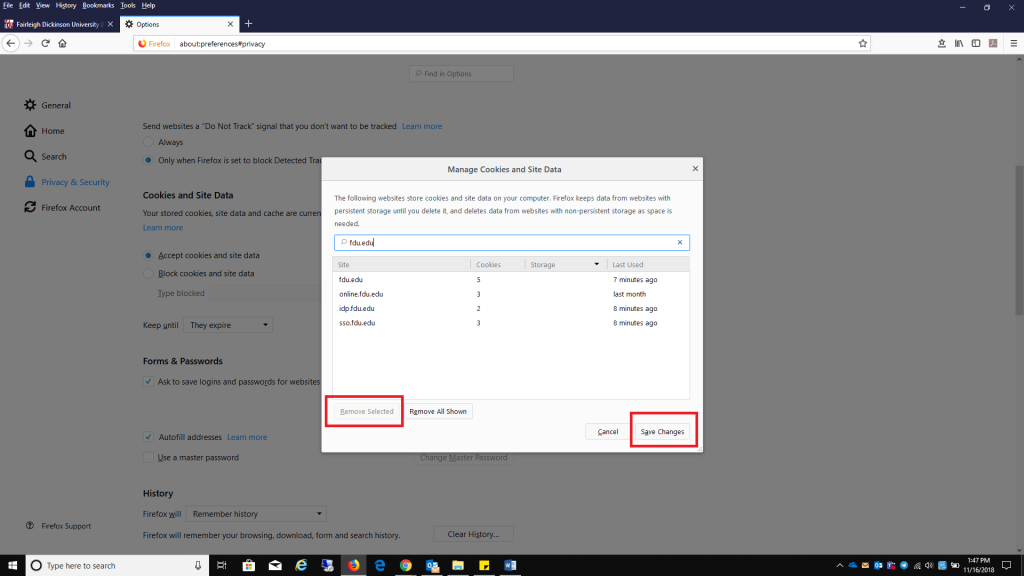
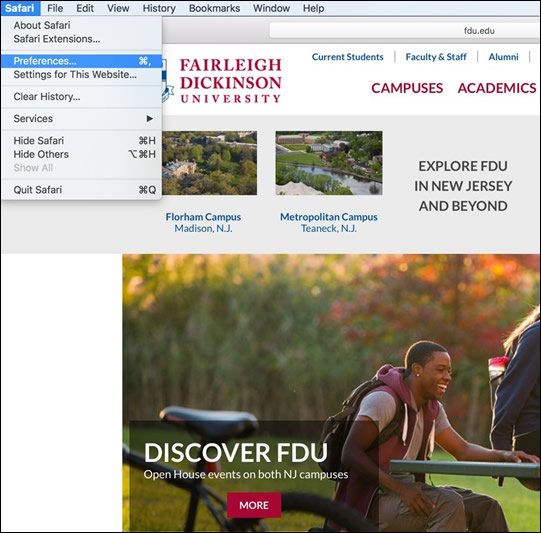 Select Manage Website Data
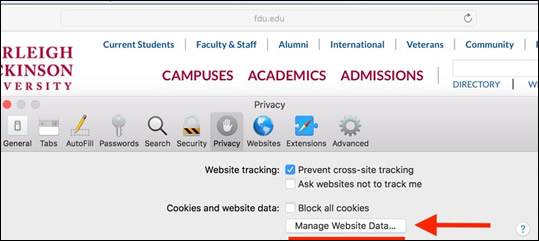 Select fdu.edu and click Remove.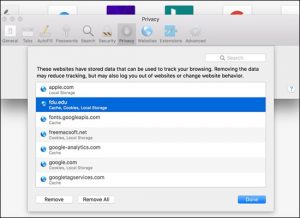
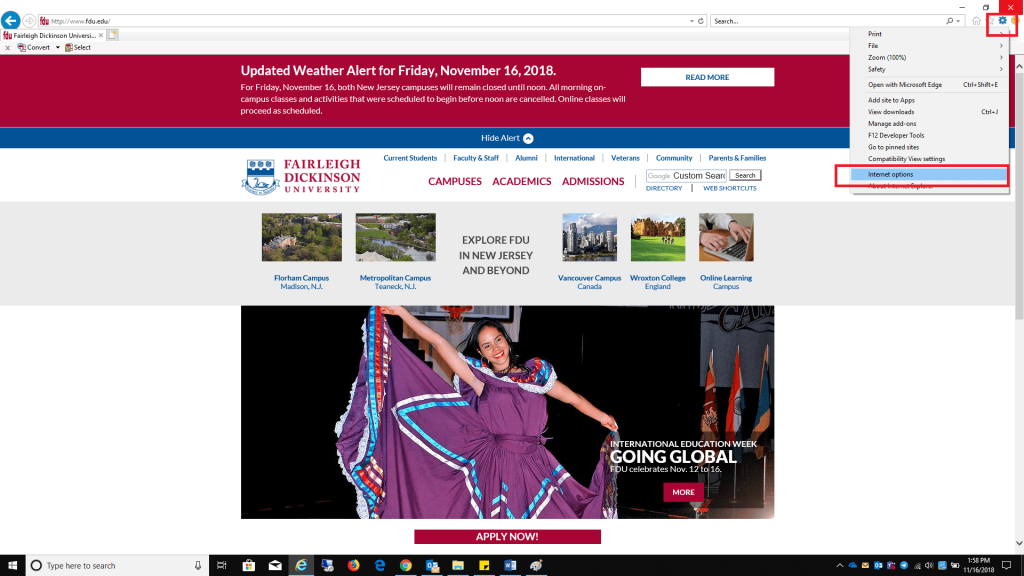 Delete in the Browser History section
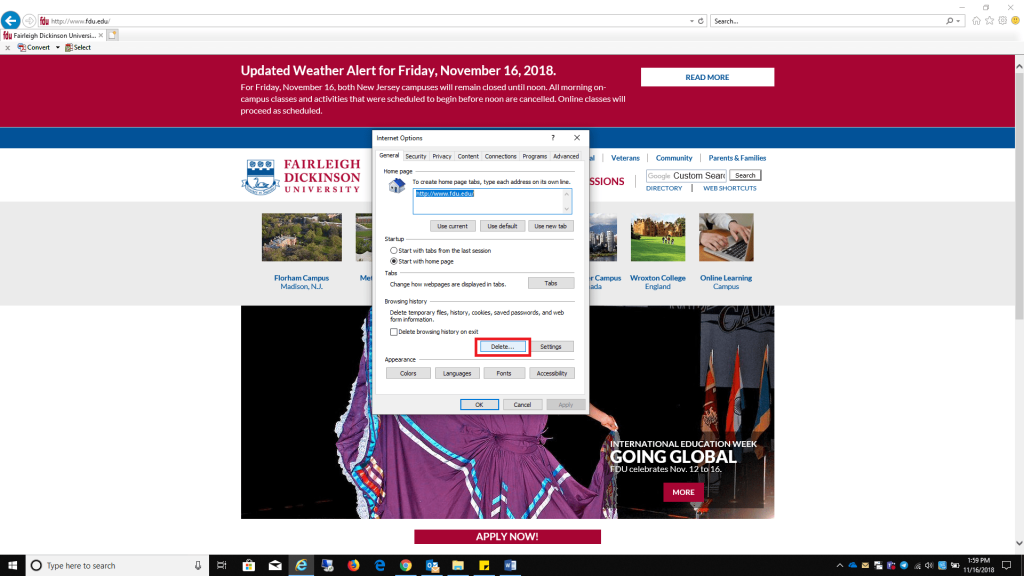 Uncheck all boxes listed, except Cookies and website data, click Delete when finished