Original Effective Date: 02/17/2013
Revised Date: 04/20/2023
The computing and electronic communications facilities at Fairleigh Dickinson University support the instructional, research, and administrative activities of the University. Users of these facilities may have access to University resources, sensitive data, and external networks. Consequently, it is imperative for all users to behave in a responsible, ethical, and legal manner. This document presents specific guidelines for appropriate behavior and use of FDU computing resources.
SCOPE
These guidelines apply to all users of FDU computing resources. Users include all students, faculty, staff, visiting faculty, volunteers, guests of the administration, and external individuals or organizations.
Computing resources include, but are not limited to, desktop and laptop computers, file servers, smart phones, email and electronic communications, software, University-assigned email accounts, data storage, and networking equipment used to link these components together and to the Internet, whether owned, leased, or licensed by FDU. In addition, computing resources include use of the University network via a physical or wireless connection, regardless of the ownership of the computer or device connected to the network. Moreover, this policy applies to all usage of university computing resources, whether that usage occurs through a university owned device or personal device.
University property, including computing resources, are provided to you for University business. Although security protocols have been put in place to restrict access to computing resources to protect them against unauthorized access by external parties, it is important that all members of the University community take appropriate measures to safeguard these resources.
Users – and not the University — are responsible for the materials that users prepare, receive, or transmit through computing resources. Thus, as a condition of using the University’s computer system, all users represent that they are in compliance with applicable laws and University policies, including l federal, state, and international copyright and other intellectual property laws and laws regarding defamation.
ACCEPTABLE USE
Those who make use of the FDU computing resources are required to behave in a manner consistent with FDU’s codes of conduct. As a user of this network, you agree to the following usage guidelines:
- You will not use an account that does not belong to you. You will use only the computers, computer accounts, and computer files for which you have authorization. You may not share accounts, files, or access to computer resources with any unauthorized person.
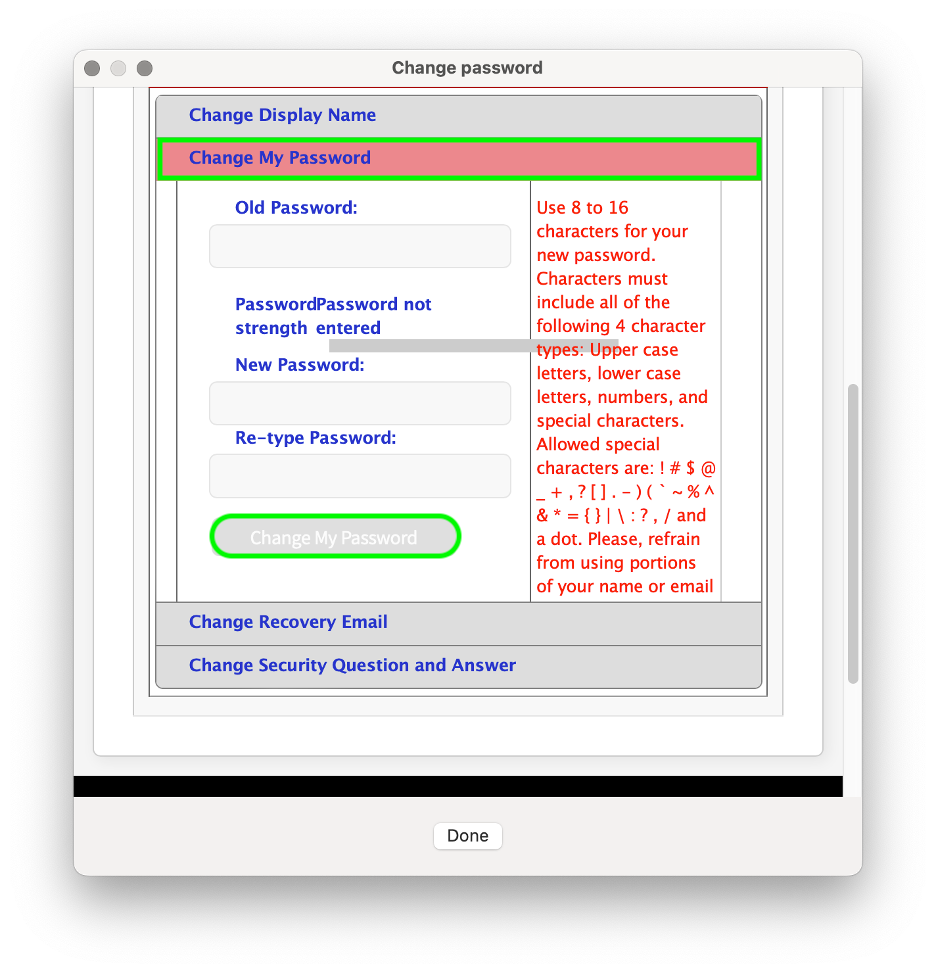
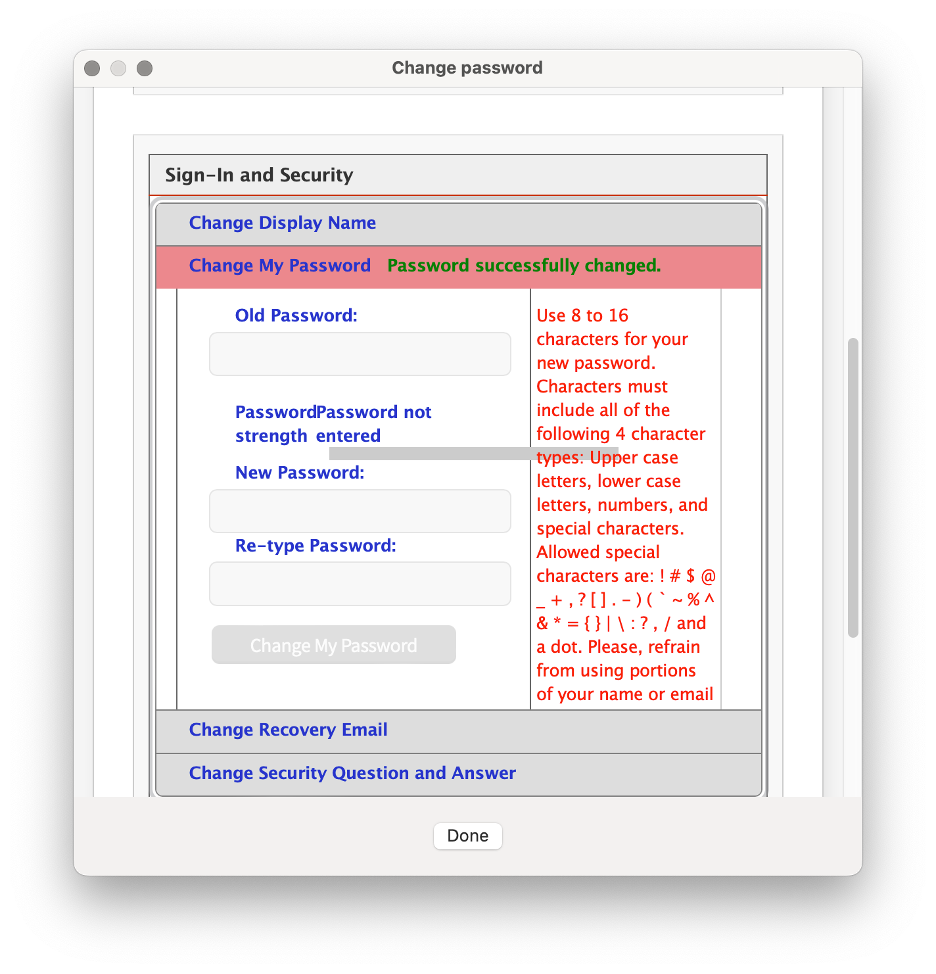
- You are responsible for any computer account you have been given. You will set a password on the account that is in compliance with university password policies, and you may not share this password with any other person. If you discover that someone has made unauthorized use of your account, you should change your password immediately and immediately report the event to one of the individuals listed in Appendix 1.
- You agree not to intentionally seek out information about, copy, or modify password files, other users’ files, or disks and tapes belonging to other people, unless specifically authorized by those persons, whether at FDU or other facilities.
- You should not attempt to decrypt material to which you are not entitled or attempt to gain rights you have not been specifically granted by the owner. If you observe or discover a gap in system or network security, you agree to inform one of the individuals listed in Appendix 1 and not to exploit the gap.
- You agree to refrain from any activity that interferes with a computer’s operating system or its logging and security systems, or that may cause such effects. Additionally, users are not authorized to remove any security software installed on FDU equipment by FDU Systems personnel.
- You must be sensitive to the public nature of computing resources and agree not to transmit, post, or otherwise display material that is threatening, obscene, harassing, or defamatory. The use of University computing resources to libel, slander, or harass any other person is not allowed and could lead to University discipline as well as legal action by those who are the recipients of these actions.
- You agree not to make copies of or distribute software the University owns or uses under license, unless the owner of the software or the owner of the license has specifically granted permission to copy. If in doubt as to whether you have permission to copy software, assume you don’t.
- Messages, statements, and declarations sent as electronic mail or public postings should be treated as if they were tangible documents. From electronic identifiers used in the transmission of messages, addressees can see the University is the source of the message or its system is being used to transmit it, similar to how letterhead or return addresses on a tangible document would identify the University. Therefore, as a representative of the FDU community, you are expected to respect the University’s good name in your electronic dealings with those both within and outside the University. Moreover, in so far as employees make use of FDU computing resources to relay personal opinions, it is their obligation to make sure that no addressee can infer that their personal opinions are necessarily shared or authorized by the University, and they are obligated to clearly identify their opinions as their own and not those of the University.
- You agree not to create, alter, or delete any electronic information contained in any system that is not your own work, unless specifically authorized by the owner of that information.
- You agree not to create, send, or forward electronic chain mail letters. You agree not to attempt to alter or forge the “From” line or any other attribution of origin contained in electronic mail or postings. You agree not to use any of the University systems for sending what is commonly referred to as “SPAM” mail (unsolicited bulk email).
- You may not use FDU computing resources as a means of obtaining unauthorized access to any other computing systems.
- FDU’s data storage on University servers, hosted servers, third party storage, or hosted storage, is an FDU computing resource with costs attached and should be used with care and discretion. It is primarily meant for current class work, research and development projects, business files, and temporary storage of other files. Users are expected to keep their disk usage reasonably minimized, in keeping with their University role.
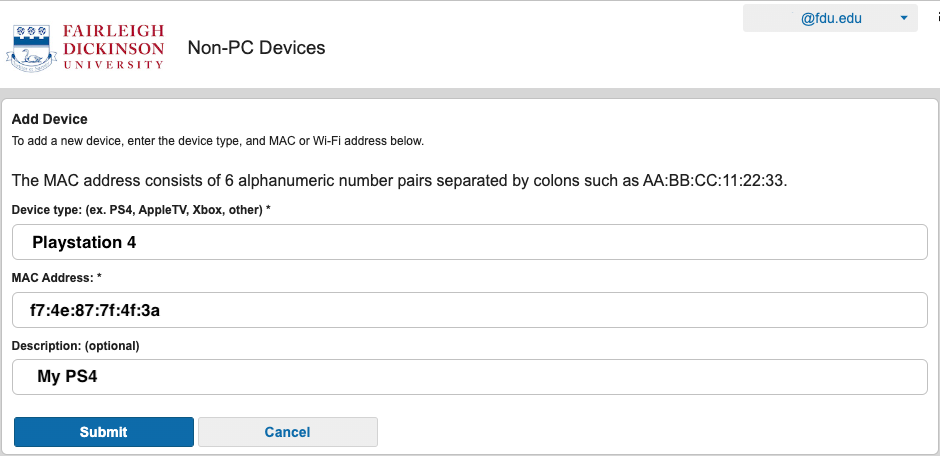
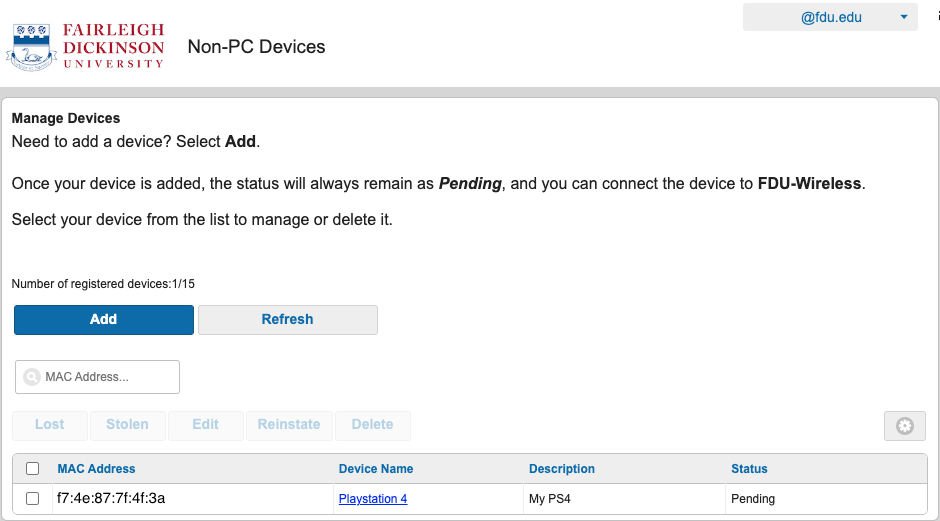
- Network addresses such as TCP/IP addresses and machine addresses are assigned by University Systems and Networking staff and may not be altered or otherwise assigned without the explicit permission of the Associate Vice President of Systems and Networking (or other designee). In addition, no equipment may be attached to the network without the explicit permission of the Associate Vice President of Systems and Networking (or other designee). This applies to all staff as well as academic departments.
- FDU’s computing resources are not to be used for the transmission of commercial or personal advertisements, solicitations, and promotions or for extended reproduction of political, ideological or commercial material originated by a person or organization. This includes but is not limited to the execution of revenue-generating advertising programs which pay users when the programs are run. The Associate Vice President of Systems and Networking (or other designee) may suspend this rule when it is in FDU’s best interest to permit such activity.
- Users may not contract with external Internet services, service providers, or the like without the explicit written approval of the Associate Vice President of Systems (or designee) and Networking and compliance with Finance and Office of General Counsel policies.
- Without the explicit written permission of the Associate Vice President of Systems and Networking (or designee) you agree not to run any of the following protocols or services:
- Port scanners, network monitors or other types of utilities that probe any other computer, be they inside or outside FDU’s network.
- Routing or network serving protocols such as RIP, IGRP, OOTP or DHCP on the network.
- Daemons, processes or programs that accept incoming connections, as a server would.
- Streaming media servers or any other server that broadcasts continuous data streams.
- FDU’s computing resources, including equipment, network, services, and wiring may not be modified or extended beyond the areas of their intended use.
- Network connections may not be used to provide network access to anyone outside the University community or for any purposes other than those that are in direct support of the academic mission of the University.
- All computers connected to FDU’s network must run an operating system and configuration that is supported by its vendor with regard to security patches and updates, as well as antivirus software with current virus definitions. It is the user’s responsibility to keep their virus definitions up to date and to apply all critical operating system updates. More information is available at https://it.fdu.edu or submit questions through the SAMI Support portal or by emailing fdutac@fdu.edu.
- Users may not alter the operating system or configuration of University owned computers without the explicit written authorization of the Associate Vice President of Systems and Networking (or designee).
PERSONAL USE
Computing resources are created to support the instructional, research, and administrative activities of the University, and are the property of the University. Personal use of the University’s computing resources, except for students enrolled at the University, should be incidental and kept to a minimum. Use of such resources by an employee for other than work-related matters should be reasonable and limited so that it does not prevent the employee from attending to and completing work effectively and efficiently, does not incur additional cost to the University, and does not preclude others with work-related needs from using the resources, including the shared campus and Internet bandwidth.
Department Heads and other administrators may enact additional restrictions to further limit employees’ personal use of University computing resources. These restrictions may include but are not limited to: limiting time spent reading or writing personal email or visiting web pages, and limitations on acceptable content due to the possible exposure of screens to other individuals. Human Resources must be consulted, in advance, about any proposed restrictions.
SECURITY
Users should use reasonable available methods to safeguard their data, including regular changes of passwords, and encrypting sensitive data. In the event that files have been corrupted as a result of intrusion, you should notify a system administrator immediately. Please note that FDU’s computing resources are not completely secure. It is possible that others will be able to access files by exploiting shortcomings in system security. For this and other reasons, FDU cannot assure confidentiality of files and other transmissions.
The Office of Information Resources and Technology (“OIRT”) and each of its departments attempt to provide reasonable security against damage to files stored on FDU’s computing resources by filtering all outgoing and incoming electronic mail for viruses and junk mail and making regular backups of systems.
In connection with the University’s migration to Office 365, the University adopted a policy of retaining copy of each fdu.edu email for three (3) years. This means, regardless of individual user action, the University will maintain a copy of all email traffic for a period of 3 years.
In the event of lost or damaged files, a reasonable attempt will be made to recover the information; however, the University and the University Information Technology staff cannot guarantee recovery of the data or loss of data due to media failure, floods, fires, etc.
OIRT and each of its departments will make reasonable attempts to provide error-free hardware and software on our computing resources, however, it is not possible to guarantee this, and information provided by staff members is not guaranteed to be correct.
PRIVACY
Users should exercise caution when storing any confidential information in electronic format, because the privacy of such information cannot be guaranteed. User(s) must be aware that any personal files, including e-mail, maintained on University computing resources are University property and are subject to University storage, retrieval, and review. Individuals using FDU computing resources should have no expectation that any information transmitted through or stored on FDU computing resources, whether the information is contained on a computer hard drive, computer disks, University or third party server or in any other manner, will be private. By using FDU computing resources, the user consents to the University’s (and its designees’, both internal and external) access to their electronic files, documents, and materials stored, transmitted, or otherwise accessible on those resources.
Examples of where the University might access a user’s electronic files include system backups, which access all files in a user’s account; software upgrades which may require editing startup files in a user’s account; diagnostic and trouble-shooting activities, which may, for example, require viewing the address headers of e-mail messages to determine the cause of problems; keystroke monitoring of sessions to determine inappropriate use of the computing facilities; searches in connection with a litigation, threatened litigation, governmental proceeding or investigation; investigation of a possible data breach; investigation of possible breach of University policy, rules, handbooks, or protocols; and other measures to safeguard the University’s systems and compliance with laws. These examples are not intended to limit the University’s right to access a user’s electronic files under circumstances deemed appropriate by the University. In such situation(s), University computer resources in the possession of a user, or otherwise assigned to an individual, may be accessed, reviewed, duplicated, stored, and forwarded by appropriate personnel without the user’s permission or knowledge.
Without limitation, because employees are granted access to and use of FDU computing resources to conduct University business, the University reserves the right to access electronic mail messages left on or transmitted through the University’s computing resources. Employees should not assume that such messages are private and confidential or that the University or its designated representatives will not have a need to access and review this information.
The Family Education Rights and Privacy Act (FERPA) binds all users who have access to student data and this policy is subject to FERPA requirements. In general, FERPA gives students more control over their educational records, and it prohibits educational institutions from disclosing “personally identifiable information in education records” without the written consent of the student (subject to specified exceptions). To find out specifically what information you may or may not give out and to whom, contact the office of the Vice President for Student Affairs.
POLICY VIOLATIONS
Policy violations should be reported immediately to any one of the individuals listed in Appendix 1.
Violations of this policy will be addressed as described in the Student, Faculty and/or Employee Handbooks, any relevant contracts, and, if applicable, State and Federal law or regulations. University students and employees who violate this Policy will be met with appropriate disciplinary action, up to and including dismissal, expulsion, or termination from the University. Third parties who violate this Policy may have their relationship with the University terminated and their access to campus restricted. In addition, a user’s system privileges can be suspended for a specified time period or revoked and/or a monetary fine may be imposed on those in violation to reimburse the University for the staff time and other costs of investigating and rectifying the violation.
The University reserves the right to suspend computing resource privileges while investigating a complaint or troubleshooting a system or network problem.
This policy is subject to revision. Comments and suggestions are welcome and should be sent to Stuart Alper, Associate Vice President of Systems and Networking, mailstop T-BH1-01, or stuper@fdu.edu.
It is the user’s responsibility to remain informed about the contents of this document.
CONTACTS
Stuart Alper
Associate Vice President of Systems and Networking
Mailstop T-BH1-01
(201)-692-2414
stuper@fdu.edu
Saul Kleinman
Associate Vice President of Management Information Systems
Mailstop T-BH2-03
(201)-692-2065
saul@fdu.edu


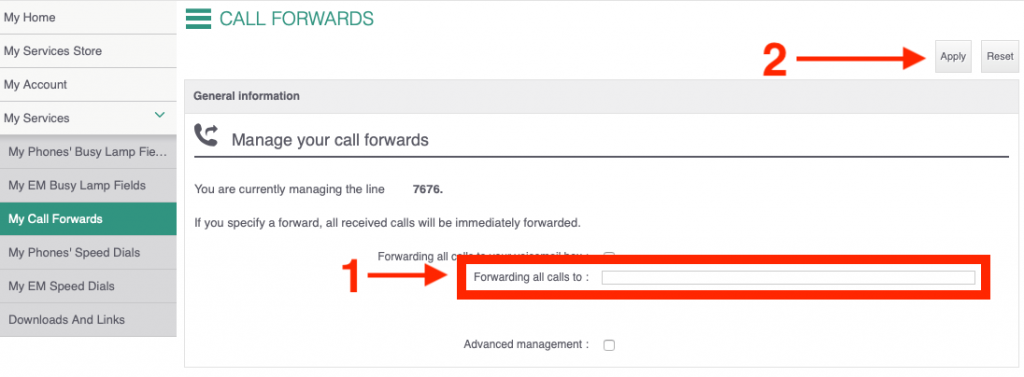
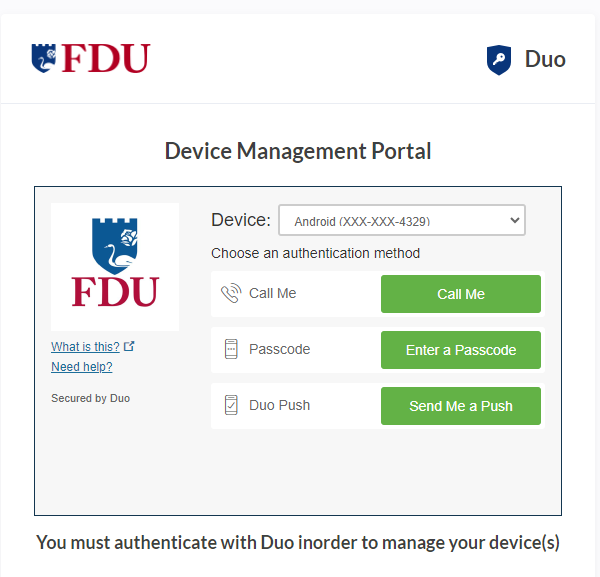
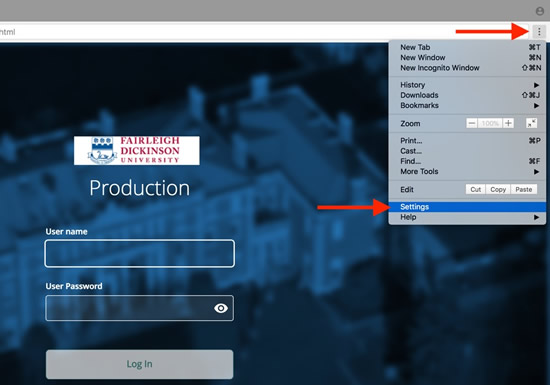
 on your phone instrument.


 Select Advanced to show the advanced settings. Select Content settings.
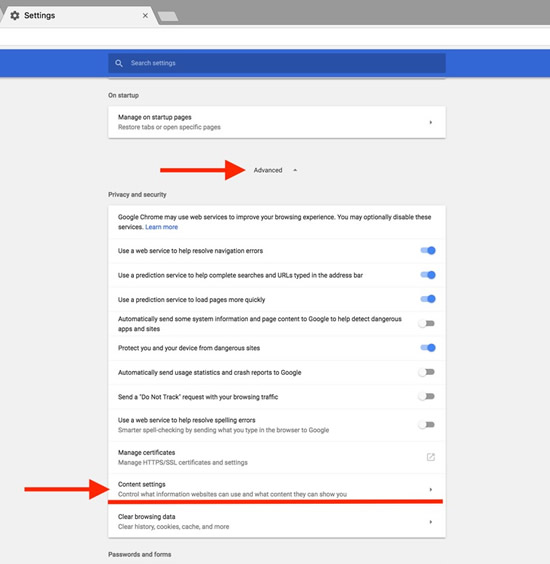 Select Cookies.
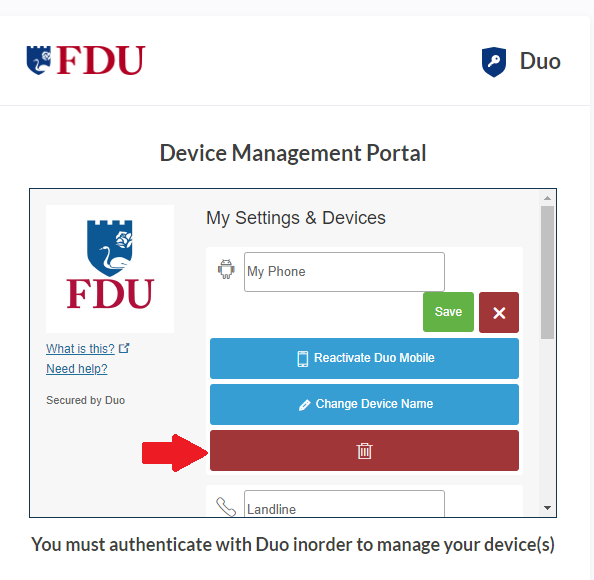
 Click the garbage can icon to delete the cookies.
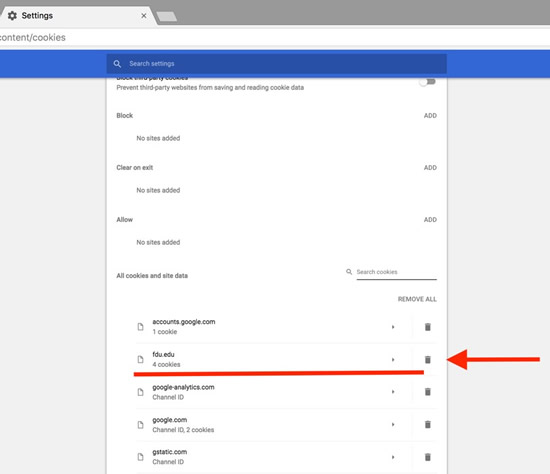
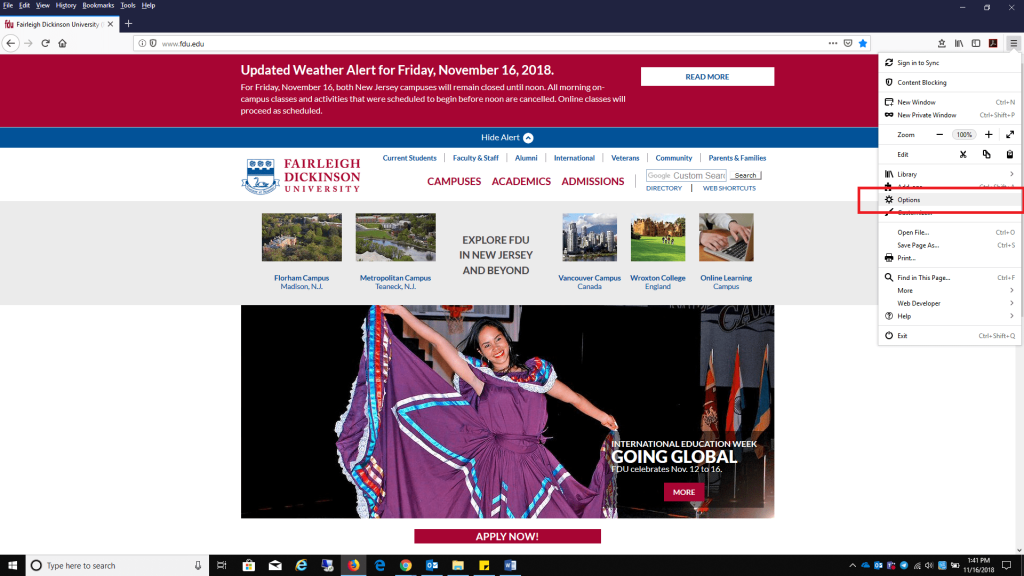 Select the Privacy & Security tab and click Manage Data found under Cookies and Site Data.
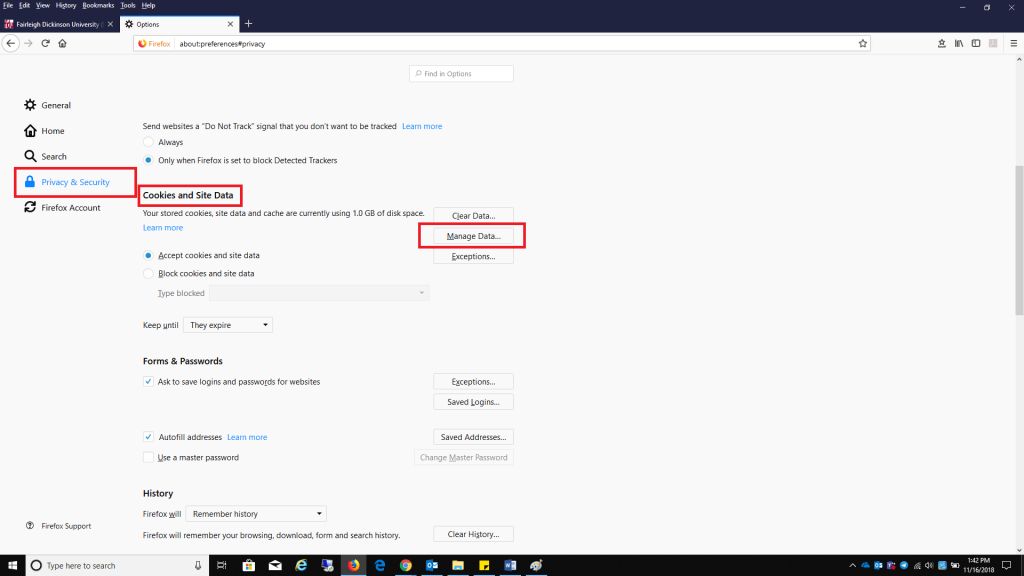 Select fdu.edu and select Remove Selected, select Save Changes when finished.
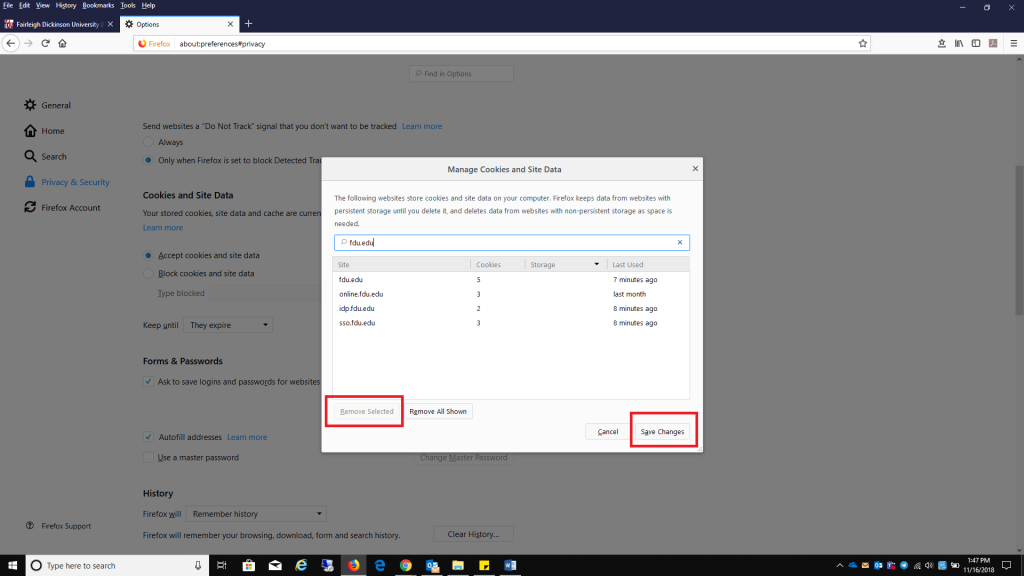
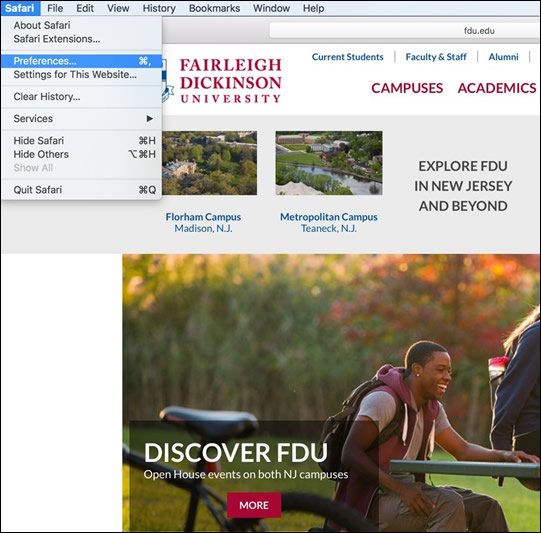 Select Manage Website Data
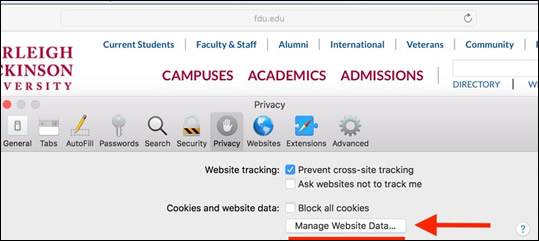 Select fdu.edu and click Remove.
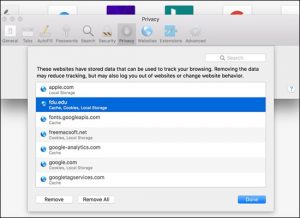
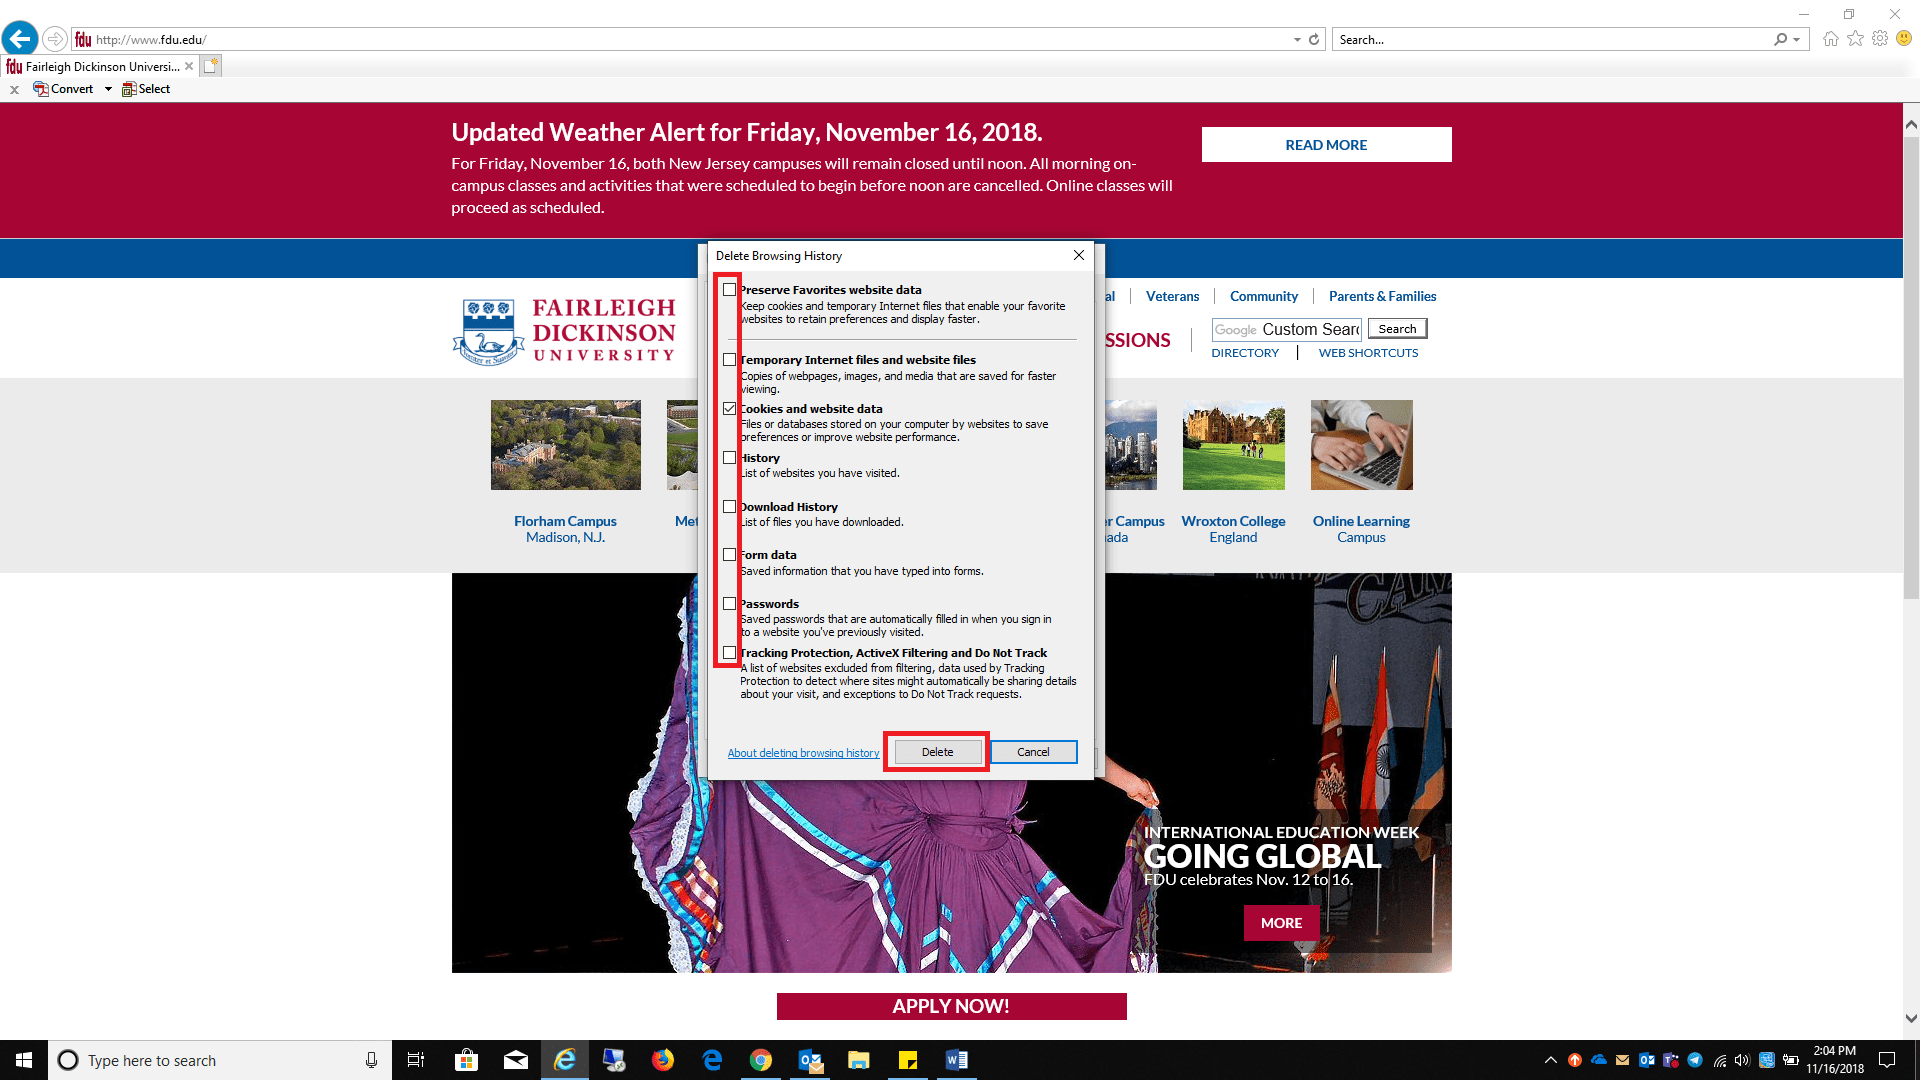
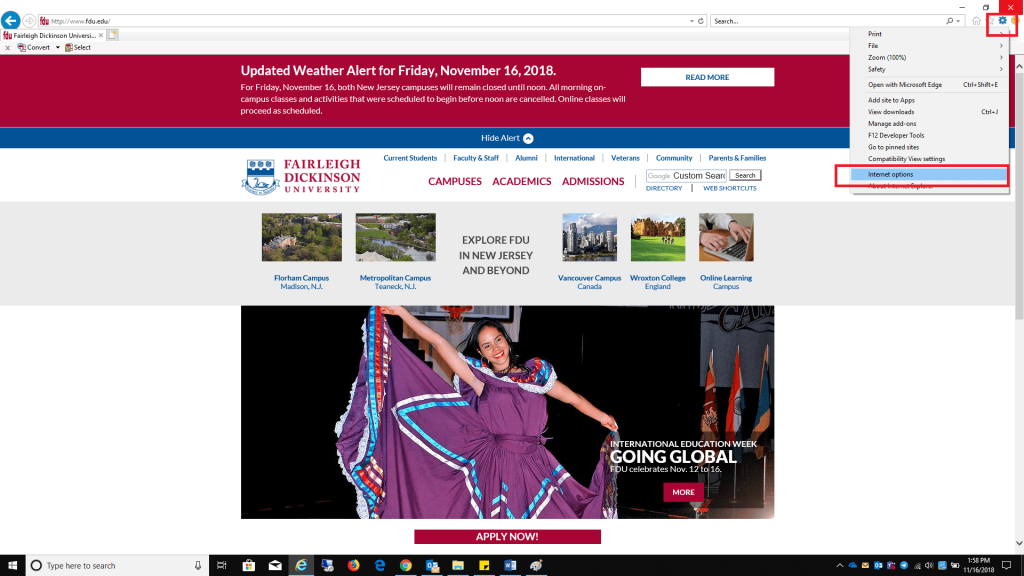 Delete in the Browser History section
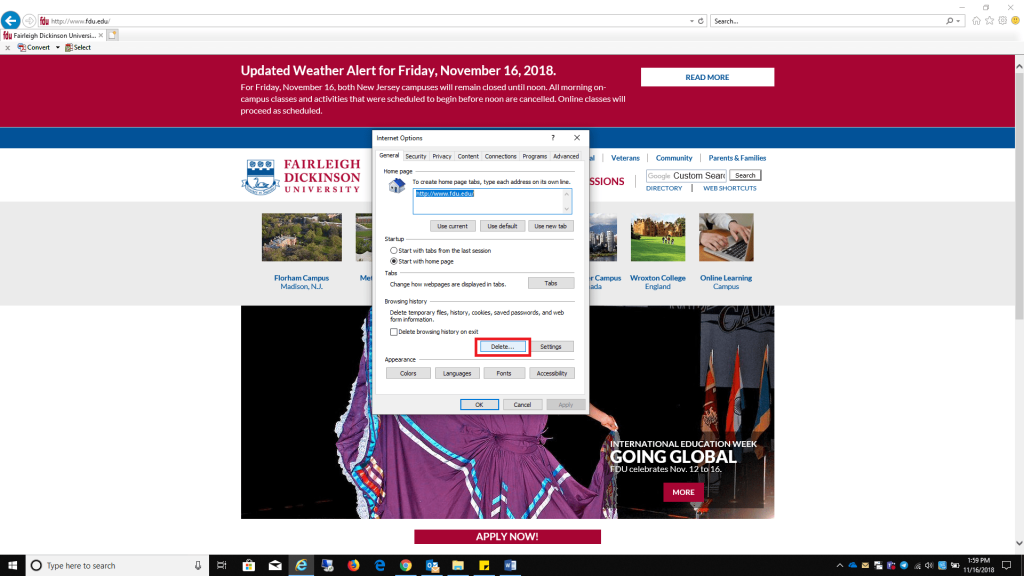 Uncheck all boxes listed, except Cookies and website data, click Delete when finished